

Page 1

docomo PRIME series
F-03A
ISSUE DATE:
NAME:
PHONE NUMBER:
MAIL ADDRESS:
INSTRUCTION MANUAL
‘09.1
Easy Search/Contents/Precautions
Before Using the Handset
Voice/Videophone Calls/PushTalk
Phonebook
Sound/Screen/Light Settings
Security Settings
Mail
i-mode/i-motion/i-Channel/i-concier
Full Browser
Camera
1Seg
Music
i-αppli/i-Widget
Osaifu-Keitai/ToruCa
Map/GPS Function
Data Management
Convenient Functions
Character Entry
Network Services
Overseas Use
PC Connection
Appendix/Troubleshooting
Index/Quick Manual
Page 2
DOCOMO W-CDMA, GSM/GPRS System
Thank you for purchasing "docomo PRIME series F-03A" mobile terminal.
Before and during use of your FOMA terminal, be sure to thoroughly read this
manual and instruction manuals that come with other optional devices to ensure
you are able to correctly use you FOMA terminal. For more detailed information,
contact "General Inquiries" using the phone number on the back of this manual.
F-03A is your capable partner. Please treat it with care and enjoy using it for years.
Before using your FOMA terminal
・
Because your FOMA terminal uses wireless transmission, it may not function in
locations where it is difficult for radio waves to penetrate, such as tunnels,
underground passages and some buildings, in areas where radio waves are
weak, or out of service area. Even when you are high up in a tall building or
condominium and nothing blocks your view outside, your FOMA terminal may
not be able to receive or transmit signals. Also, communication may be
interrupted even when the signal meter on your FOMA terminal indicates there
are strong radio waves and you are not moving (traveling).
・
Use your FOMA terminal in a way that does not disturb others in public spaces,
crowded locations or quiet places.
・
Because your FOMA terminal uses radio waves to communicate, it is possible
that a third party may attempt to tap your calls. However, the W-CDMA, GSM/
GPRS system automatically applies a confidential communication function to all
calls, so even if a third party could somehow tap a call, they only hear noise.
・
Your FOMA terminal encodes voice communication as digital data. When you
are operating your FOMA terminal while moving to a location subject to weaker
radio wave conditions, the transmitted digital data may not be correctly
decoded and as a result the decoded voice may differ somewhat from the actual
voice.
・
Maintain a separate record of the data (Phonebook, Schedule, Notepad,
Recorded messages, Voice memos, Movie memo, etc.) you registered in your
FOMA terminal. Note that DOCOMO assumes no responsibility for any loss of
saved contents of data resulting from malfunction, repair, changing of the
model or other handling of FOMA terminal.
・
You are recommended to save important data to microSD card. Using DOCOMO
keitai datalink, you can transfer and save phonebook, mail, schedule and other
data to a PC.
・
The user hereby agrees that the user shall be solely responsible for the result of
the use of SSL.
Neither DOCOMO nor the cer tifier as listed herein makes any representation and
warranty as for the security in the use of SSL. If the data should be erased,
DOCOMO assumes no responsibility for the loss of any data.
Certifier : VeriSign Japan K.K., Cybertrust Japan Co., Ltd., GlobalSign K.K., RSA
Security Japan Ltd., SECOM Trust Systems Co., Ltd., Comodo CA Ltd.
・
This FOMA terminal supports FOMA Plus-Area and FOMA HIGH-SPEED Area.
・
FOMA terminal can be used only via the FOMA network provided by DOCOMO
and DOCOMO's roaming area.
Before using this manual
This FOMA terminal supports Kisekae Tool (→P94). When changing the design of
the menu screen using Kisekae Tool, the structure of some menus may be changed
according to the usage frequency depending on the menu type. Also, the number
assigned to menu item (item number) may not be applicable to some menu items.
Latest information about this manual can be downloaded from NTT DOCOMO
website.
・
User's Manual Download
http://www.nttdocomo.co.jp/english/support/manual/index.html
*
The URL and contents are subject to change without prior notice.
Page 3

Viewing/Searching this manual
This manual provides the methods below for necessary function's easy search.
Searching from Easy Search
Search for frequently used or convenient functions by plain words.
Searching from Menu list
Search from menu displayed on the display of F-03A.
Searching from thumb indices
Search from the index on the front cover.
Searching from Contents
Search from Contents categorized into chapters by functions.
Searching by main functions
Search from featured functions or new functions of F-03A.
Searching from the Index
Search from the function name, item keyword or service name.
Using the Quick Manual
You can cut out Quick Manual from this manual and carry it with you
anywhere.
Also refer to described "Quick Manual (Overseas Use)" when using
FOMA terminal overseas.
e
P4
e
P382
e
Front cover
*
See P2-3 for examples.
e
P6
e
P8
e
P446
e
P456
・
In this "Manual for F-03A", "F-03A" mobile terminal is usually referred to
as "FOMA terminal". Please be forewarned.
・
This manual explains functions performed with a microSD card. A
microSD card is required separately.
microSD card
・
The images or illustration used in this manual are examples. They may
differ from the actual displays.
・
The icons and screens that appear on the display have been initialized
to the default settings selected from the combinations prepared in
FOMA terminal depending on FOMA terminal color.
This manual mainly gives descriptions assuming that Kisekae Tool is
set to "White".
・
In this manual, "i-αppli compatible with Osaifu-Keitai which supports IC
card function" is referred to as "Osaifu-Keitai compatible i-
・
The description of "authenticate" indicates the operating procedure for
entering the terminal security code (4-8 digits).
・
Unauthorized copying of parts of or this entire manual is prohibited.
・
The contents of this manual are subject to change without prior notice.
→
→
P292
P94
α
ppli".
→
P102
1
Page 4
Viewing/Searching this manual
............................................................................
Public mode (Drive mode)
63
.............................................................................
Public mode (Power OFF)
63
Recording the other party's voice or image ..............
Answer machine
64
dd
Phonebook(UIM) new entry
de
PushTalk phonebook
df
Received calls
dg
Redial
dh
Ans.Machine&Voice memo
dha
Answer machine FFO
dhb
Recorded messages
dhc
Record voice memo
Before Using the Handset
Voice/Videophone Calls/PushTalk
Phonebook
Sound/Screen/Light Settings
Security Settings
Mail
i-mode/i-motion/i-Channel/i-concier
Full Browser
Camera
1Seg
When you cannot answer the call
Putting the call on hold when you cannot answer it immediately
..........................................................................................
Respond and Hold
62
74
71
54
54
46
64
330
Voice/Videophone Calls/PushTalk
................................. 52
................................. 52
................................. 54
ll ............................. 61
When you can/could not answer a voice/videophone call
Putting a call on hold when you cannot answer immediately
..........................................................................................
Respond and Hold 62
Using public mode ......................................................................................... 62
Recording voice/video messages when you cannot answer the call
............................................................................................
Answer machine 64
Playing/Deleting record messages/voice memos ...................................... 64
Videophone call settings
Using Chara-den ............................................................................................ 65
Setting image during a videophone call ..................................................... 65
Changing videophone settings ................................................. Operation 67
Setting for switching a voice/videophone call during a call
...............................................................................
Notify switchable mode 67
Setting actions for incoming calls during packet communication
......................................................................................
DataSession arv. act 67
Using videophone call by interfacing to external device
...............................................................................................
External device 68
PushTalk
Methods to search pages are described, taking "Answer machine" for example.
Searching from Easy Search
Functions frequently used and convenient
functions are categorized by their purposes
and with simple words.
Searching from Menu list
Functions can be searched from the words
displayed on the FOMA terminal screen.
Searching from thumb indices
Functions can be searched by using indices
in the order of the front cover, chapter top
2
page and function description page.
The chapter top page also gives the list of
detailed contents.
Page 5
64
Voice/Videophone Calls/PushTalk
Answer machine
Recording voice/video messages when you
cannot answer the call
When Answer machine is activated, a greeting message is played and the caller can
record message when you cannot answer the call.
・
You can record up to 4 voice and videophone calls in total, ap proximately 30
seconds for each call.
・
When using 2in1, messages of up to 4 incoming calls to Numbers A and B can be
recorded to Answer machine in total. Display differs depending on mode.
・
This function is unavailable for PushTalk.
◆
Activating Answer machine
1
m
[Phonebook & Logs]
81e1or2
When "ON" is set, appears on the stand-by display.
■
When there is an incoming call with Answer machine active
1
A call is received
When the response time set in Greeting msg resp time elapses, the greeting
INFORMATION
・
Even during the greeting message or recording to Answer machine, a call can be
answered by pressing
n
. For a videophone call, press Ito send your image, or
a
to
send the substitute image. In this case, message before the call was answered
is not recorded.
・
Answer machine does not operate when FOMA terminal is out of service area or turned
OFF. Use Voice Mail service.
・
When 4 messages are recorded, appears on stand-by display and Answer machine
2
The other party's message is recorded
・
A beep announces the other party at the start and the end. And when
approximately 25 seconds elapsed since the start, 2 short beeps are heard to
warn that the end is approaching.
3
When the recording is completed, the call is terminate
d
Responding with Quick answer machine <Quick answer
machi
ne>
Even when Answer machine is not active, you can activate it only once by
pressing
Z
for 1 second or
more while receiving a call. This operation does not set Answer
machine to active.
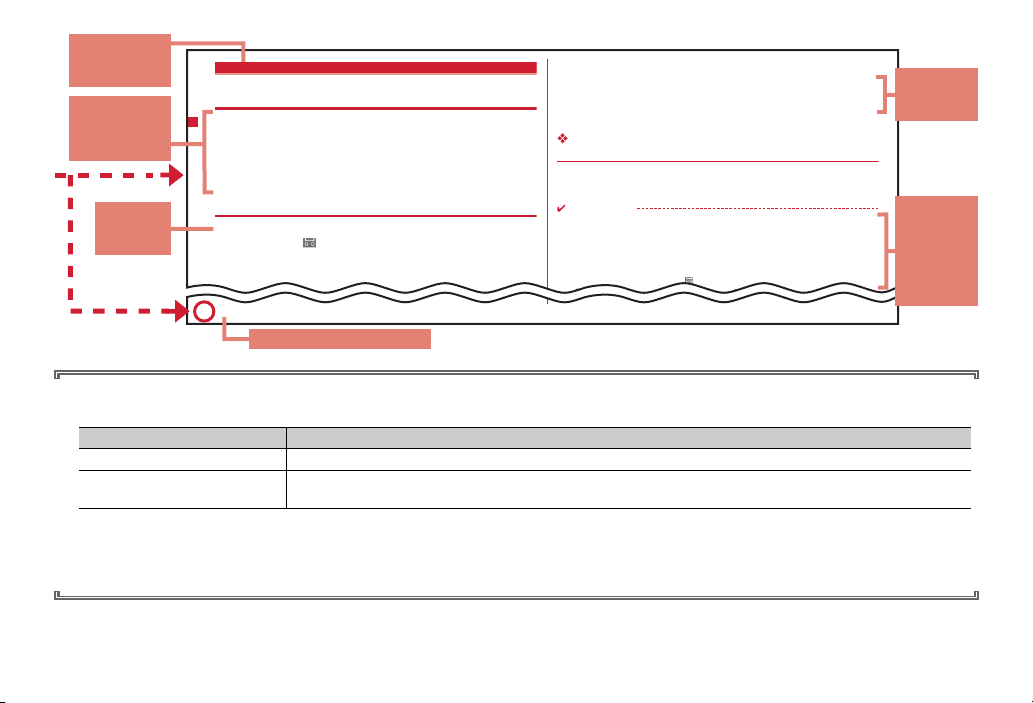
Function name
This name is
listed in Index.
Outline and
supplementary
description of
the function
Supplementary
description of
the operation
Typical
operating
procedure
Index related to thumb index
・
In this manual, operation by pressing keys is represented by graphic symbols.→P22 "Part names and functions"
・
The representations and meanings of operating procedures are as shown below.
Representation example Meaning
m
(1 sec. or more)
m
[Settings & NW services]
572e1-3
・
In this manual, to select an item by placing the cursor with
an operation to enter characters in the entry field, the final step of pressing
・
This manual uses the default settings to describe operations. If the settings are changed, the displays or operations of FOMA terminal may differ from the
ones described in this manual. For the default settings, see Menu List.
Press m for 1 second or more.
On the stand-by display, m, move the cursor to [Settings & NW services] and press g. Successively, press
572
* The page shown here represents an example. Images may differ from actual page in this manual.
, then press any of 1-3.
udlr
(Multi-cursor key) and pressing g (Enter key) is referred to as "select". Regarding
g
[OK] is omitted.
→
P382
Detailed
description
and
convenient
information
about the
function
3
Page 6
Easy Search
Functions which you want to know can be searched for using friendly words.
Muting keypad sound ......................................................
Convenient functions for calls
Showing/Hiding your phone number ..................
Putting the call on hold ..............................................................
Changing the volume of the other party's voice ............
Switching from voice call to videophone call
......................................................................
Caller ID notification
On hold
Listen volume
Switching to videophone call
When you cannot answer the call
Putting the call on hold when you cannot answer it immediately
..........................................................................................
Notifying the caller that you have to refrain from talking
............................................................................
.............................................................................
Recording the other party's voice or image ..............
Respond and Hold
Public mode (Drive mode)
Public mode (Power OFF)
Answer machine
Changing sound, lighting color and vibration
Setting different ring tone etc. for incoming calls from specific parties
..............................................................................................
Changing ring alert ..................................................................
Changing loudness of ring tone .....................................
Making vibration when there is an incoming call
........................................................................................
Easy Search/Contents/Precautions
4
Alert by contact
Ring alert
Adjust volume
Vibrate alert/effect
Setting silent mode ..............................................................
Changing the color of keypad light ...................................
48
Changing color such as light ..................................................
53
53
54
Meanings of icons on display ......................................
Switching the menu display ...............
Changing stand-by display ..........................................
Displaying a calendar on stand-by display ..........
62
Changing font size ....................................................................
63
63
Hiding contents of phonebook .....................................
64
Locking FOMA remotely in case of misplacement etc.
.............................................................................................
Rejecting calls with no caller IDs .............................
Rejecting calls from parties not saved in phonebook
75
...........................................................................................
83
Saving data such as phonebook in case of data loss
................................................................................
84
85
Changing displays
Selecting functions from menu
Safety and security
Keypad sound
Silent mode
Keypad light
Light alert
Viewing display
Stand-by display
Info/calendar layout
Font size
Secret attribute
Omakase Lock*1105
Anonymous caller
Unregistered caller
Data Security Service*2118
86
87
92
98
26
30
88
89
98
79
116
118
Page 7
Making full use of mail
Sending Deco-mail ..................................................................
Sending images and/or melodies .......................................
Automatically sorting mails ...............................................
Making full use of camera
Saving shot still images to microSD card .................................
Changing image size .............
Viewing shot still images ............................................
Still image settings/Recording settings
Making full use of 1Seg
Watching 1Seg ..................................................................
Recording 1Seg ..............................................................
Reserving watching/recording 1Seg
................................................................
Changing settings of images and sounds .........................
*1
A charged service.
*2
A charged service requiring subscription.
●
For procedures to search for other functions, see "Viewing/Searching this manual".→P1
●
Quick Manual introduces you procedures for using convenient functions.→P456
Watching/Recording reservation
Deco-mail
Attachment
Sort method
Save to
Displaying image
Activate 1Seg
1Seg recording
User setting
125
Reading QR and/or bar code .........................................
Listening to music ............................................................
130
Using GPS function ...........................................................
144
Using microSD card ..........................................................
Sending or receiving data via infrared communication
189
Using alarm clock .................................................................
193
Using calculator ......................................................................
280
Using a mobile phone overseas .......................
Updating software .......................................................
Keeping security software updated .........................
206
212
213
216
Other convenient functions
...............................................................................
Bar code reader
MUSIC Player
GPS function
microSD card
Infrared communication
Alarm clock
Calculator
International Roaming
Software update
Scanning function
199
222
266
292
305
319
332
366
424
428
Easy Search/Contents/Precautions
5
Page 8

Contents
■
Before using your FOMA terminal
............................................... Inside front cover
■
Viewing/Searching this manual ..................... 1
■
Easy Search ....................................................... 4
■
Main functions of F-03A ...................................8
■
Precautions (ALWAYS FOLLOW THESE
DIRECTIONS) .................................................. 10
■
Handling precautions ..................................... 17
■
Accessories and main options ...................... 20
Before Using the Handset ...... 21
Part names and functions Available styles
Viewing display Selecting menu Touch panel
Motion sensor Using UIM (FOMA card)
Attaching/Removing battery pack Charging
battery Battery level Power ON/OFF Select
language Date & time Caller ID notification
User information etc.
Voice/Videophone Calls/
PushTalk................................. 51
Making a call Redial/Received calls Chakumoji 186/184 Tone signal (DTMF) Call option
WORLD CALL Receiving a call Any key
answer Slide and answer Close settings
Respond and Hold Public mode Recorded
messages Using Chara-den Videophone
settings Notify of switchable mode Making/
Receiving a PushTalk call PushTalk
phonebook PushTalk alert etc.
Phonebook ............................. 73
Phonebook new entry Alert by contact Group
settings Search/Edit/Delete phonebook
Secret attribute Quick dial etc.
Sound/Screen/Light Settings
................................................ 81
Ring alerts & Sounds Adjust volume Vibrate
alert/effect Silent mode Timed theme Standby display Call image Mail image Power
saving mode Select startup menu Display
Machi-chara Kisekae Tool Light alert Clock
display format etc.
Security Settings.................. 101
Security code Terminal security code change
PIN code All lock Omakase Lock Self mode
Personal data lock Keypad dial lock Privacy
mode Operation lock Auto keypad lock
Accept/Reject call Data Security Service Reset
Delete all data Initializing remotely Remote
customization etc.
Mail .......................................123
Creating/Sending i-mode mail Deco-mail
Decome-Anime Attachment Saving i-mode
mail Quick mail Receiving i-mode mail Check
new message Operating Inbox/Outbox Mail
settings MessageR/F Area Mail Creating/
Sending SMS etc.
i-mode/i-motion/i-Channel/i-
concier ..................................157
Site display Change i-mode password Go to
location Bookmark Screen memo
Downloading from site Uploading to site imode settings Operating certificate i-motion
i-Channel i-Channel ticker i-concier etc.
Full Browser..........................179
Displaying web pages designed for PC Setting
Full Browser etc.
Camera..................................185
Still camera Movie camera Sound recorder
Advanced settings Setting for shooting Bar
code reader etc.
Easy Search/Contents/Precautions
6
Page 9

1Seg ......................................203
Setting channels 1Seg watching Program
α
ppli Data broadcasting TVlink Multi
guide iwindow Recording Reserving Remote
controller with microphone etc.
Music ....................................217
Setting program Operating Music&Video
Channel Saving music data Playing/
Managing music data BGM play Remote
controller with microphone etc.
i-αppli/i-Widget......................231
Downloading Starting i-αppli i-αppli call i-
α
ppli To i-αppli stand-by display Managing i-
α
ppli i-Widget etc.
Osaifu-Keitai/ToruCa.............255
iC transfer service Starting Osaifu-Keitai
compatible iToruCa etc.
α
ppli IC card lock Receiving
Map/GPS Function ................265
Position location GPS compatible i-αppli
Location request Notify location Loc. history
Loc. history Map setting Setting GPS etc.
Data Management ................ 279
Displaying/Editing image Playing/Editing
movies/i-motion Displaying Machi-chara
Displaying Chara-den Playing melody
microSD card Managing data Infrared
communication/iC transmission Displaying
PDF Displaying Word, Excel, PowerPoint files
Displaying recorded data of 1Seg etc.
Convenient Functions .......... 315
Multiaccess Multitask Quick search Auto
power ON/OFF Countdown timer Alarm clock
Scheduler Shortcut icons Custom menu
Slide and edit Search key shortcut Fake call
Voice memo/Movie memo Call duration/Call
cost Calculator Notepad Dictionaries
Pedometer Earphone/Microphone with switch
Bluetooth
function etc.
Character Entry .................... 345
5-touch input method Save phrase Copying/
Cutting characters KUTEN code input Save
word Password manager DL dictionary 2touch input Text input method etc.
Network Services ................. 355
Voice Mail Service Call Waiting Call
Forwarding Service Nuisance Call Blocking
Service Caller ID Request Service Dual
Network Service English guidance Service
numbers Arrival call act Remote control
Multi Number 2in1 OFFICEED Additional
service etc.
Overseas use......................... 365
Overview of international roaming service
(WORLD WING) Services available Preparing
and checking for overseas use Making/
Receiving a call Network search mode PLMN
setting 3G/GSM setting Area service status
Roaming guidance Bar calls at roaming
Network services etc.
PC Connection...................... 375
Data communication DOCOMO keitai datalink
etc.
Appendix/Troubleshooting ...381
Menu list Combination of Multiaccess/
Multitask functions Services available
Introduction of options and related devices
Error messages Warranty and After-Sales
Service Software update Scanning function
SAR certification information Intellectual
Property Right etc.
Index/Quick Manual .............. 445
Index Quick Manual Quick Manual (Overseas
Use)
Easy Search/Contents/Precautions
7
Page 10

Main functions of F-03A
i-concier
i-concier is a service to use FOMA terminal conveniently in which a character
on the stand-by display (Machi-chara) notifies you of useful information like
"Concierge" and you can download schedules/i-schedule from a site.
With i-concier, downloaded schedule or ToruCa is automatically updated with
the latest information, and address information etc. of stores and companies
are automatically added to the phonebook.
→
P176
i-αppli call
i-αppli call is a function allows a third party or content providers to prompt
predetermined iapplications to play a versus game etc.
α
ppli to be activated and it is used for activating other party's
→
P247
i-Widget
i-Widget is a function that allows you to easily access frequently-used contents
(widget applications) such as calculator, clock, a TV program guide and stock
price information. You can also check the latest information at a glance by
activating i-Widget screen.
→
P251
1Seg
You can watch "1Seg", a terrestrial digital TV broadcast for mobile devices.
You can also shoot still images and record video while watching 1Seg.
Dubbing+10 (
→
P295) is supported for recording video.→P204
International Roaming
While staying overseas, you can use the same FOMA terminal, phone number
and mail address as those used in Japan (3G/GSM Areas are supported).
P366
And, Japanese-English/Japanese-Chinese version of "
(Speech Translation for F)", an application that interprets your Japanese into
English or Chinese and your English or Chinese into Japanese, is preinstalled.
→
P238
Easy Search/Contents/Precautions
8
しゃべって翻訳
for F
Slide mobile phone with touch panel of 3.2 inch large screen
On the vertical display with FOMA terminal closed, you can use Touch selector
on the screen instead of using keypad to operate so that you can usefully use
the large screen of slide open type. For Full Browser or 1Seg that is suitable for
the horizontal display, you can touch the dedicated menu or slide the screen
to operate (Direct touch).
→
P25, 33
Motion sensor
For 1Seg, Full Browser, PDF data, etc., close FOMA terminal and tilt it
counterclockwise by 90 degrees to switch to the horizontal display (Auto
rotation). The vertical/horizontal display or the display size of JPEG image can
be automatically switched according to the orientation of the terminal, and you
can also tilt the terminal to scroll the screen for Full Browser.
→
P38
Super clear-voice 2 and Voice slowing
Super clear-voice 2 is a function that detects ambient noise, optimizes the
other party's voice by vocal range to make the voice be heard clearly, and
automatically turns up the talking volume if your voice is small. "Voice
slowing" adjusts the speed of the other party's voice to improve the voice
→
P53
clarity.
Machi-chara
You can display a character which moves around on the stand-by display etc.
You can also download Machi-chara.
→
→
P94, 166, 290
Page 11
Operation lock and Auto keypad lock
You can lock touch operations or keypad operations by pressing the dedicated
lock keys and prevent unintended operations of FOMA terminal. When FOMA
terminal is opened, the lock is canceled temporarily, but you can also set to
lock again when FOMA terminal is closed. And, FOMA terminal is equipped
with various lock functions such as the touch operation lock to lock only the
touch operation during a call and Auto keypad lock with Immobile sensor to
lock the touch operation and keypad operation when no operations are
performed for the specified time.
→
P113
High-performance camera
FOMA terminal is equipped with an approx. 520 pixels (effective pixels)
camera which have the functions such as the face detection function to
distinguish human faces, the correcting contrast function, high sensitivity
shooting mode, etc. Just touch the screen to focus when you use Direct touch.
Also, the still images are saved according to the orientation of the camera
when they are shot.
→
P186
Quick search
On the stand-by display or while performing a function, search functions of imode, Full Browser, Map, dictionaries, phonebook or mail can be used by
pressing the search key.
→
P317
Shortcut icons
Only by selecting the icon pasted on the stand-by display for function, file or
mail being created, you can start the target operation quickly. And, icon on the
stand-by display can be changed freely.
→
P325
Rainbow key light
You can change the keypad light color to 7 colors.→P92
Pedometer
FOMA terminal can be used as a pedometer, and walking distance, consumed
calories or quantity of burnt fat can be calculated.
Also, Pedometer widget application is installed so that you can easily check the
number of steps or consumed calories measured with the pedometer by using
→
i-Widget.
P243
→
P334
Bluetooth
A wireless connection can be established between FOMA terminal and a
Bluetooth device. You can talk with handsfree or play 1Seg sound or music
while keeping FOMA terminal in a bag etc.
→
P337
Other functions
・
Videophone call→P52
・
Chaku-moji→P56
・
Kisekae Tool→P94
・
Security Settings→P102
・
i-mode mail/Deco-mail/Deco-mail pictogram→P124
・
Chaku-uta full
clip
・
i-αppli/Mega i-αppli/Chokkan Game→P232
・
Osaifu-Keitai/ToruCa→P256
・
Map/GPS Function→P266
・
Network services→P356
・
High-speed communication compatibility→P376
*1
"Chaku-uta full" is registered trademark of Sony Music Entertainment (Japan) Inc.
*2
A charged service requiring subscription.
→
P218
*1
/Uta-hodai/Music&Video Channel*2/MUSIC Player/Video
Easy Search/Contents/Precautions
9
Page 12
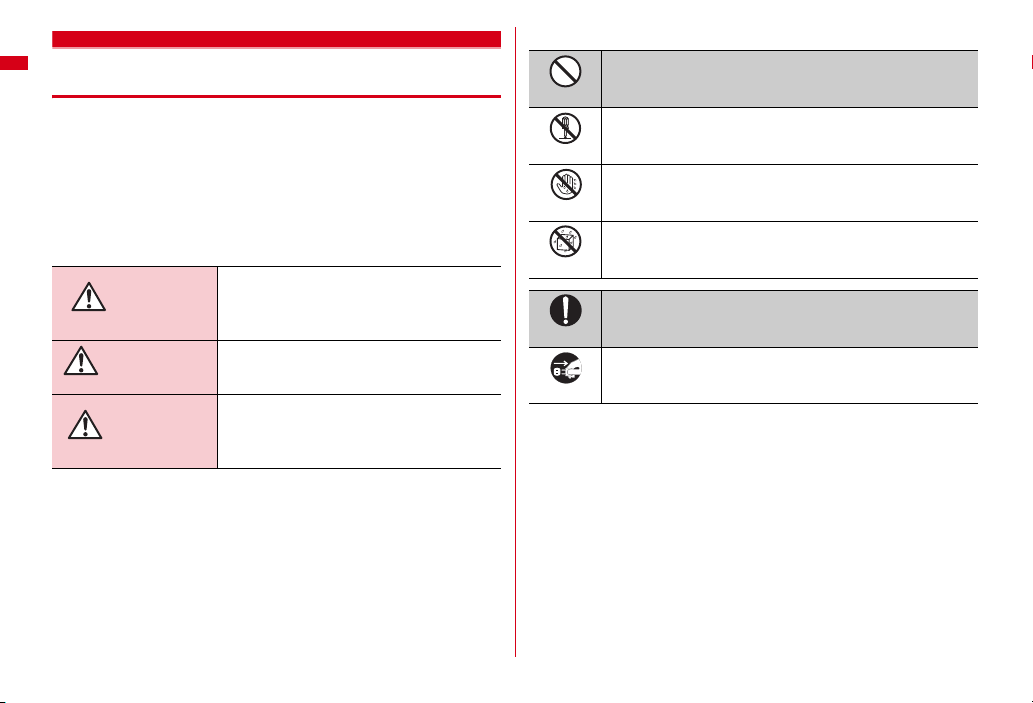
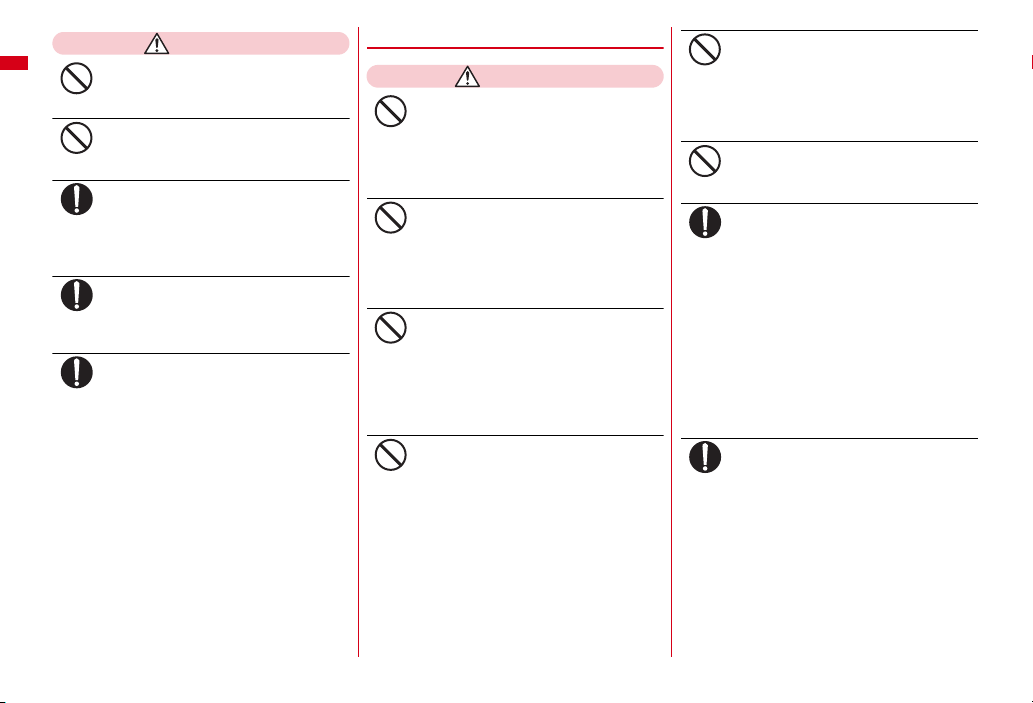
Precautions (ALWAYS FOLLOW THESE DIRECTIONS)
・
Before using your FOMA terminal, or when necessary, read the
precautions below to ensure safe use and handling. After reading
this manual, keep it carefully.
・
These precautions are intended to protect you and others around
you. Read and follow them carefully to avoid injury, damage to the
product or damage to property.
・
The signs below differentiate between the levels of danger that
can occur if the product is not used within the specified guidelines.
This sign denotes that death or serious
DANGER
WARNING
CAUTION
injury may directly result from
improper use.
This sign denotes that death or serious
injury may result from improper use.
This sign denotes that bodily injury or
damage to property may result from
improper use.
・
The symbols below show specific directions.
Don't
No disassembly
No wet hands
No liquids
Unplug
■
Precautions contain the description below.
Handling FOMA terminal, battery pack, adapter (including battery charger)
and UIM (common)........................................................................................ 11
Handling FOMA terminal .................................................................................. 12
Handling battery pack........................................................................................ 14
Handling optional devices (AC Adapter/DC Adapter/Desktop Holder/In-Car
Holder) ............................................................................................................ 15
Handling UIM ..................................................................................................... 16
Handling mobile phones near electronic medical equipment ....................... 16
This symbol denotes that the action is prohibited.
This symbol denotes that disassembling the phone or its
components is not allowed.
This symbol denotes that using the phone or its components
with wet hands is not allowed.
This symbol denotes that using the phone or its components
in a bathroom or other highly humid area is not allowed.
This symbol denotes that an instruction must be obeyed at all
times.
Do
This symbol denotes that the equipment should be
unplugged.
Easy Search/Contents/Precautions
10
Page 13
◆
Handling FOMA terminal, battery
pack, adapter (including battery
charger) and UIM (common)
DANGER
Do not use, store, or leave the
equipment in hot areas such as near
Don't
flames or in areas under strong direct
sunlight such as inside a vehicle.
May cause the equipment to be deformed or
malfunction, and battery pack to leak, heat,
burst or ignite, and the capability or life to be
reduced or shortened. Overheating on parts
of the case may cause burns or injuries.
Do not disassemble or remodel the
equipment. Do not solder items onto
No disassembly
the equipment.
May cause fire, injuries, electric shock, or
malfunction. It may also cause the battery
pack to leak, heat, burst or ignite.
Do not let the equipment get wet.
Contact with water or other liquids can cause
No liquids
heating, electric shock, fire, malfunctions or
injuries. Take care of the place for use and
treatment of the equipment.
Use the battery pack and adapter
(including battery charger) specified
Do
by NTT DOCOMO for your FOMA
terminal.
Use of equipment not specified by DOCOMO
can cause FOMA terminal, battery pack and
other parts to leak, heat, burst, catch fire or
malfunction.
Battery Pack F10
Desktop Holder F29
FOMA AC Adapter 01/02
FOMA DC Adapter 01/02
FOMA Dry Battery Adapter 01
FOMA USB Cable with Charge Function 01/
02
FOMA Portable Charging Adapter 01
FOMA AC Adapter 01 for Global use
*
Contact a sales outlet such as DOCOMO Shop for
information on other compatible products.
WARNING
Do not put the battery pack, FOMA
terminal, adapter (including battery
Don't
charger) or UIM in microwave ovens or
other heating appliances or highpressure containers.
May cause the battery pack to leak, heat,
burst or ignite, FOMA terminal, adapter
(including battery charger) or UIM to heat,
smoke, ignite, or damage circuits.
Do not throw the equipment or give
hard shock to it.
Don't
May cause the battery pack to leak, heat,
burst or ignite, and the equipment to
malfunction or catch fire.
Keep conductive materials (metal
pieces, pencil lead, etc.) from coming
Don't
in contact with the charging jack or
external connection jack. Do not put
those materials inside the terminal.
May be subject to electrical short and could
cause fire or malfunction.
Turn FOMA terminal OFF before
entering a place such as a gas station
Do
where flammable gases are generated.
Do not charge the battery. The gas
may catch fire.
When using Osaifu-Keitai in a place as a gas
station, turn OFF the terminal before using it.
(When IC card lock is activated, deactivate it
before turning OFF the terminal.)
If the equipment starts giving off a
strange smell, overheats, becomes
Do
discolored or deformed during use,
charging or in storage, immediately
perform the following operations.
1. Remove the power plug from the wall
outlet or cigarette lighter socket.
2. Turn FOMA terminal OFF.
3. Remove the battery pack from FOMA
terminal.
May cause the equipment to heat, burst or
ignite or the battery pack to leak if you keep
using the equipment.
Easy Search/Contents/Precautions
11
Page 14
CAUTION
Do not leave the equipment on
unstable or sloping surfaces.
Don't
May cause malfunction or injuries.
Do not store the equipment in
extremely humid, dusty or hot areas.
Don't
May cause malfunction.
Children using the equipment should
be instructed in proper operation by an
Do
adult. Do not allow them to use the
equipment without adult supervision.
May cause injuries.
Store the equipment out of reach of
small children.
Do
May be accidentally swallowed or cause
injuries.
Be careful especially when using
FOMA terminal connected to the
Do
adapter (including battery charger)
continuously for a long time.
If you execute i-αppli, use videophone call or
watch 1Seg while charging the battery pack,
FOMA terminal, battery pack and adapter
(including battery charger) may become hot.
Directly touching a hot part for a long time,
you may have redness, itching or rash on
your skin, or it may result in lowtemperature burns depending on your
constitution and/or health condition.
◆
Handling FOMA terminal
WARNING
Do not direct the infrared data port
toward your eye and transmit signals.
Don't
May affect your eyes. Faulty operation could
result from directing the infrared data port
toward other infrared equipment and
transmitting signals.
Do not turn on the light by getting the
lighting part closer to other person's
Don't
eyes.
May impair eyesight. And may cause
accidents like injury etc., by dazzling or
astounding other people.
Do not put FOMA terminal in the place
such as the dashboard near the air-
Don't
bag, where the influence of air-bag
explosion is expected.
When the air-bag explodes, FOMA terminal
may hit yourself or others and could cause
injury, equipment malfunction or damage.
When you use electronic medical
equipment, do not keep the terminal in
Don't
your chest pocket or inside pocket.
Using your FOMA terminal near medical
electronic equipment could cause
equipment failure.
Do not put foreign objects such as
liquid like water, metal pieces or
Don't
burnable things into UIM or microSD
card slot.
May cause fire, electric shock or
malfunction.
Do not turn on the light aiming directly
at the driver of the car etc.
Don't
May disturb driving and cause an accident.
Turn FOMA terminal OFF in areas
where use is prohibited, such as in
Do
airplanes and hospitals.
May cause electronic equipment or
electronic medical equipment to fail or
malfunction. If the function which
automatically turns the power ON is set,
cancel the setting before turning the power
OFF.
When using the phone in a medical facility,
be sure to observe the regulations of the
facility. If you do prohibited act such as using
the phone in an airplane, you may be
punished according to law.
When you talk by setting handsfree,
always keep FOMA terminal away
Do
from your ear.
And, when connecting the earphone/
microphone to FOMA terminal and
play a game or music, adjust the
volume moderately.
Too loud volume may cause a hearing loss.
And, if you cannot hear the sound around
you clearly, it may cause an accident.
Easy Search/Contents/Precautions
12
Page 15
If you have weak heart, be careful
when setting the Vibrate alert
Do
(vibration) or alert volume setting.
Could affect heart function.
If it starts thunder while using the
terminal outdoors, turn the power
Do
OFF immediately, and move to a safe
location.
May be subject to lightning strike and could
cause electric shock.
Turn FOMA terminal OFF near highprecision electronic control equipment
Do
or electronic equipment using lowpower signals.
May cause the equipment to fail or
malfunction.
*
Examples of electronic equipment to avoid.
Hearing aids, implanted pacemakers or
defibrillators, other electronic medical equipment,
fire alarms, automatic doors and other automatic
control equipment.
Users wearing implanted pacemakers or
defibrillators or other electronic medical
equipment should check with the manufacturer or
sales outlet about the effect of radio frequencies
on the equipment.
When the display or camera lens is
accidentally broken, be careful of
Do
broken glass or exposed internal parts
of FOMA terminal.
Surfaces of display and camera lens are
made of plastic panels and they are
structured for the glass not to scatter,
however, if you mistakenly touch broken or
exposed parts, you may be injured.
CAUTION
Do not swing FOMA terminal by its
strap.
Don't
May cause the terminal damage or failure, or
injury to yourself or others.
When using the motion tracking or
motion sensor, check the safety
Don't
around you, hold FOMA terminal
firmly, and do not shake it
unnecessarily.
The motion tracking and motion sensor are
functions to operate by tilting or shaking
FOMA terminal. There is a risk that FOMA
terminal hits people or objects around you
by shaking it too much, causing a serious
accident or damage.
If you put a metal strap or the like to
FOMA terminal, be careful not to let
Don't
the strap hit people or objects around
you when performing motion tracking
or using motion sensor.
Accidents such as injury, malfunction or
damage may result.
Do not place magnetic disks or cards
with magnetic stripes near FOMA
Don't
terminal or place inside and fold the
terminal.
Data stored on media such as cash cards,
credit cards, telephone cards and floppy
disks may be erased if the storage medium is
placed near the phone.
Do not bring magnetized objects close
to FOMA terminal.
Don't
Bringing strong magnetism close may cause
a malfunction.
If the display part is accidentally
broken and liquid crystal leaks out, do
Don't
not put the liquid in your mouth,
inhale, or make contact with your skin.
If the liquid gets into your eyes or
mouth, rinse it with clean water and
see a doctor immediately.
And, if the liquid adheres to skin or
clothing, use alcohol etc. to wipe it off,
then wash with soap.
May cause loss of sight or skin problems.
Do not bring the speaker close to your
ear when the ring alert is sounding or
Don't
you are playing a melody with FOMA
terminal.
May cause hearing loss.
In rare cases, using the phone in some
vehicle models can cause the vehicle's
Do
electronic equipment to malfunction
or fail.
In this case, do not use the phone because it
may hamper safe driving.
Easy Search/Contents/Precautions
13
Page 16
Mobile phones can give some users
skin problems such as itching, allergic
Do
reactions or rashes. If you develop skin
problems, stop using the phone
immediately, and see a doctor.
FOMA terminal contains metal in the
parts below.
Place of use Material Surface finishing
Charging jack Copper Gold plating
Slide module Stainless None
Widget key ABS Electrolytic
Screw Stainless Zinc plating
plating
When opening or closing FOMA
terminal, take care not to have your
Do
fingers or strap caught by the terminal.
May cause injuries or damages.
When watching 1Seg, take a certain
distance from the display in a fully
Do
bright place.
May cause your eyesight to be impaired.
◆
Handling battery pack
■
Check that the battery type matches the
type displayed on the battery pack label.
Display Battery type
Li-ion 00 Li-ion battery
DANGER
Do not connect a wire or other metal
objects to the jack. And, do not carry or
Don't
store FOMA terminal with objects like
a metal necklace.
May cause the battery pack to leak, heat,
burst or ignite.
Do not try to force the battery pack
onto FOMA terminal if you are having
Don't
trouble installing it. Always install it
after checking that it is correctly
oriented.
May cause the battery pack to leak, heat,
burst or ignite.
Do not throw the battery pack into the
fire.
Don't
May cause the battery pack to leak, heat,
burst or ignite.
Do not nail the battery pack, hit with a
hammer or step on it.
Don't
May cause the battery pack to leak, heat,
burst or ignite.
If the battery pack's fluid contacts
eyes, immediately flush the eyes with
Do
clean water and see a doctor right
away. Do not rub the eyes.
May cause loss of sight.
WARNING
If the battery pack seems to have
abnormalities such as deformation or
Don't
scratches due to an external impact or
falling, stop using it immediately.
May cause the battery pack to leak, heat,
burst or ignite, and the equipment to
malfunction or catch fire.
If the battery pack does not have a full
charge after being charged for the
Do
specified time, stop charging it.
May cause the battery pack to leak, heat,
burst or ignite.
If the battery pack leaks or gives off a
strange smell, immediately remove it
Do
from the vicinity of open flames.
The vapors from leaking battery pack fluid
may ignite or explode.
Be careful not to let your pet bite the
battery pack.
Do
May cause the battery pack to leak, heat,
burst or ignite, and the equipment to
malfunction or catch fire.
Easy Search/Contents/Precautions
14
Page 17

CAUTION
Do not discard old battery packs
together with other garbage.
Don't
May cause igniting or environmental
destruction. Tape the terminals of old
battery packs to insulate them, and then
bring them into a sales outlet such as
DOCOMO Shop. If your local municipality
has a battery recycling program, dispose of
them as provided for.
Do not charge a wet battery pack.
May cause heat generation, ignition or
Don't
rupture of the battery pack.
If the battery pack's fluid contacts skin
or clothes, immediately flush the
Do
contacted area thoroughly with clean
water.
May hurt the skin.
◆
Handling optional devices (AC
Adapter/DC Adapter/Desktop
Holder/In-Car Holder)
WARNING
Do not use the adapter (including
battery charger) cord or power cord if
Don't
it gets damaged.
May cause electric shock, heat or fire.
Do not use the AC adapter or desktop
holder in a bathroom or other highly
Don't
humid area.
May cause electric shock.
Always use the DC adapter with a
negative-ground vehicle. Do not plug it
Don't
into a positive-ground vehicle.
May cause fire.
When it starts to thunder, do not touch
FOMA terminal and adapter (including
Don't
battery charger).
May be subject to lightning strike and could
cause electric shock.
Do not short the charging jack while it
is connected to the outlet or cigarette
Don't
lighter socket. Do not touch the
charging jack with a part of your body
such as your hand or finger.
May cause fire, malfunction, electric shock
or injuries.
Place battery charger and desktop
holder in a stable location while
Don't
charging. Do not cover or wrap battery
charger and desktop holder with a
cloth, blanket, etc.
May cause FOMA terminal to be removed or
the optional devices to be heated, resulting
in fire or troubles.
Do not place heavy objects on the
adapter (including battery charger)
Don't
cord or power cord.
May cause electric shock or fire.
Do not touch the adapter (including
battery charger) cord or outlet with
No wet hands
wet hands.
May cause electric shock.
Only use with the specified power
source and voltage.
Do
If incorrect voltage is used, this may cause
fire or failure. When using FOMA terminal
overseas, use AC Adapter for global use.
AC adapter : AC100V
DC adapter : 12 or 24V DC (specific for
negative ground vehicle)
AC adapter for global use : Between 100V
and 240V AC (Connect to the AC outlet for
internal household use)
If the DC adapter's fuse blows, replace
it only with the specified fuse.
Do
Using other fuses may cause fire or
equipment failure. For the specified fuse, see
the instructions that come with the DC
adapter.
Wipe off any dust that accumulates on
the power plug.
Do
May cause fire.
When you connect the AC adapter to
an outlet, make sure not to touch with
Do
metal such as metal straps and firmly
connect to the outlet.
May cause electric shock, electrical short or
fire.
Easy Search/Contents/Precautions
15
Page 18
When you disconnect the adapter
(including battery charger) from the
Do
outlet or cigarette lighter socket, do
not pull the adapter (including battery
charger) cord or power cord with
excessive force; instead hold the plug
to disconnect.
Pulling the cord could damage it, possibly
leading to electric shock or fire.
Always remove the power plug from
the outlet when not using the adapter
Unplug
for an extended period.
May cause electric shock, fire or
malfunction.
Immediately remove the power plug
from the outlet or cigarette lighter
Unplug
socket if water or other fluids get into
the adapter.
May cause electric shock, smoke or fire.
Always remove the power plug from
the cigarette lighter socket when
Unplug
cleaning the equipment.
May cause electric shock.
◆
Handling UIM
CAUTION
Be careful of the cut surface when
removing UIM (ICs).
Do
May hurt hands or fingers.
Easy Search/Contents/Precautions
16
◆
Handling mobile phones near
electronic medical equipment
■
These precautions are based on the
guidelines produced at the
Electromagnetic Compatibility
Conference Japan, regarding the
protection of electronic medical
equipment from radio waves emitted by
mobile phone units.
WARNING
Obey the following rules inside
medical facilities.
Do
・
Do not bring FOMA terminal into
operating rooms (ORs), intensive care
units (ICUs) or coronary care units (CCUs).
・
Turn FOMA terminal OFF in hospital
wards.
・
Turn FOMA terminal OFF in hospital
lobbies and corridors if electronic medical
equipment could be nearby.
・
If the medical facility has specified zones
where use or possession of mobile
devices is prohibited, obey those
instructions.
・
If the function to automatically turn ON
the power is set, cancel the setting before
turning the power OFF.
Turn FOMA terminal OFF in crowded
trains or other public places where
Do
pacemaker or defibrillator wearers
could be nearby.
FOMA terminal's signals may affect the
operation of implanted pacemakers or
defibrillators, and other devices.
Wearers of implanted pacemakers or
defibrillators must carry and use
Do
FOMA terminal at least 22 cm away
from the implanted device.
FOMA terminal's signals may affect the
operation of implanted pacemakers or
defibrillators, and other devices.
When electronic medical equipment
other than implanted pacemakers or
Do
defibrillators are in use outside of
medical facilities (such as in home care
settings), check with the device
manufacturer to determine how the
device is affected by electrical signals.
FOMA terminal's signals may affect the
performance of electronic medical
equipment.
Page 19

Handling precautions
◆
General
・
Do not get FOMA terminal etc. wet
- FOMA terminal, battery back, adapter (including battery charger) and UIM are not waterproof. Do not use them in extremely humid places such as a bath, and do not expose them to
rain. When you carry the terminal close to your body, dampness from sweat may cause internal
corrosion and malfunction. Malfunctions deemed to have been caused by water are not
covered by the warranty, and repairs may not be possible. Since these conditions are outside
the scope of the warranty, a repair, if at all possible, is charged.
・
Clean FOMA terminal with a dry soft cloth (such as a cloth for eyeglasses).
- The display of FOMA terminal may have been applied special coating to improve clearness of
the color LCD. When cleaning FOMA terminal, rubbing it roughly with a dry cloth can scratch
the display. Take care when handling the unit, and clean it with a dry soft cloth (such as a cloth
for eyeglasses). Drops of water or dirt left on the display can cause stains or remove the
coating.
- If FOMA terminal is wiped with alcohol, paint thinner, benzine or detergent, the printing may
disappear or color may fade.
・
Clean the jack occasionally with a dry cotton swab.
- If the jack is dirty, the contact may become poor and the power may shut OFF. A dirty jack
can result in poor charging, so clean it with a dry cloth or cotton swab.
・
Do not place FOMA terminal near an air-conditioner outlet.
- The rapid change in temperature may cause condensation, causing internal corrosion and
malfunction.
・
When using, be careful not to subject excessive force to FOMA terminal or the
battery.
- If FOMA terminal is crammed into a brimming bag or placed in a pocket and sat on, display,
internal PCBs or battery pack may be damaged or malfunction. And, if external devices are
plugged into the external connection jack (earphone/microphone jack), the breakage of the
connector or malfunction may result.
・
Carefully read the separate instructions that come with FOMA terminal, adapter
(including battery charger) and desktop holder.
・
Do not rub or scrape the display with a metal piece etc.
- It may scratch the display, causing malfunction or damage.
・
Do not press the surface of the touch panel strongly or operate it with sharp
objects such as a nail, a ballpoint pen and a pin.
- It may damage the touch panel.
◆
FOMA terminal
・
Avoid extreme temperature.
- Use FOMA terminal where the ambient temperature ranges between 5 and 35℃ and humidity
ranges between 45 and 85%.
・
FOMA terminal may affect land-line phones, TVs or radios in use nearby, so use
it as far as possible from these appliances.
・
Maintain a separate record of the data you saved in your FOMA terminal.
- If the data is deleted, DOCOMO assumes no responsibility for the loss of any data.
・
Do not drop FOMA terminal or subject it to shocks.
- May cause malfunction or damage.
・
Do not plug external devices into the external connection jack (earphone/
microphone jack) at a slant, or do not pull it forcibly while it is plugged.
- May cause malfunction or damage.
・
Do not fold FOMA terminal with the strap held inside.
- May cause malfunction or damage.
・
It is normal for FOMA terminal to become warm during use or charging. Continue
to use it.
・
Do not leave FOMA terminal with the camera in areas under strong direct
sunlight.
- May cause discoloring or burn-in of materials.
・
FOMA terminal should normally be used with the external connection jack cap
and the memory card slot cover closed.
- Dust and/or water brought into FOMA terminal cause troubles.
・
Do not use FOMA terminal with the back cover removed.
- It may cause the battery to come off, or may cause a malfunction or damage.
・
Do not attach labels or stickers on the exposed rear side of the FOMA terminal
display.
- Labels or stickers may get stuck when FOMA terminal is opened/closed causing malfunction
or damage.
・
While microSD card is being accessed, do not take the card out and do not turn
off FOMA terminal.
- It may cause data loss or malfunction.
Easy Search/Contents/Precautions
17
Page 20

◆
Battery pack
・
The battery pack is a consumable part.
- Replace the battery pack if FOMA terminal has extremely short operation time on a full
charge, though it may vary by operating conditions. Purchase a new battery pack of the
specified type.
・
Charge the battery in an area within the proper ambient temperature range (5-35
℃
).
・
Always charge before using it for the first time or after extended disuse.
・
The operation time provided by the battery pack varies by the operating
environment and battery pack's deterioration.
・
The battery pack may swell out as it comes to near the end of its lifetime
depending on the usage conditions, but it is not a problem.
・
Be careful especially about the following points when preserving or leaving the
battery pack for a long time.
- Keeping under the state of the full charge (right after charging ends)
- Keeping under the state of the empty charge (too exhausted to turn on FOMA terminal)
They may cause the battery pack performance to be degraded or its lifetime to be
shortened.
For necessary battery level to keep for a long time, the display of battery icon is a
state of approximately 2 cells.
◆
Adapter (including battery charger)
・
Charge the battery in an area within the proper ambient temperature range (5-35
℃
).
・
Do not charge the battery in the areas below.
- In areas of excessive humidity, dust or vibrations
- Near land-line phones or TVs/radios
・
It is normal for the adapter (including battery charger) to become warm while
charging. Continue to use it.
・
When using the DC adapter for charging, keep the vehicle engine running.
- The vehicle's battery could become flat.
・
When using an outlet with a mechanism preventing unplugging, follow the
handling instructions for that outlet.
・
Do not give strong shock. Do not deform the charging jack.
- May cause malfunction.
◆
UIM
・
Do not use excessive force to install/remove UIM.
・
It is normal for UIM to become warm during use. Continue to use it.
・
Note that DOCOMO assumes no responsibility for malfunctions occurring as the
result of inserting and using a UIM with another IC card reader/writer.
・
Always keep UIM ICs clean.
・
Clean UIM with a soft, dry cloth (such as a cloth for eyeglasses).
・
Maintain a separate record of the data you saved in UIM.
- If the data is deleted, DOCOMO assumes no responsibility for the loss of any data.
・
To preserve the environment, bring the old UIM to a sales outlet such as
DOCOMO Shop.
・
Avoid extreme temperature.
・
Take care not to scratch, touch accidentally or short IC.
- May cause data loss or malfunction.
・
Do not drop UIM or subject it to shocks.
- May cause malfunction.
・
Do not bend UIM or place heavy objects on it.
- May cause malfunction.
・
Do not install UIM into FOMA terminal with a label or sticker put on UIM.
- May cause malfunction.
Easy Search/Contents/Precautions
18
Page 21
◆
Bluetooth devices
・
This FOMA terminal is equipped with the security features, that are compliant
with Bluetooth standards for communication via Bluetooth. However, depending
on the settings, there may not be enough security. Be aware of security risks
when using Bluetooth.
・
DOCOMO assumes no responsibility for any information which may be leaked
during communication via Bluetooth.
・
With this FOMA handset, you can use a Bluetooth headset, handsfree, audio, dialup connection and object push device. An audio/video remote control may be
available with an audio device (for Bluetooth compatible devices).
・
Frequency bands
Frequency bands used by FOMA terminal Bluetooth function are as below.
abdc
2.4FH1
a
2.4 : Radio equipment that uses the 2400 MHz band.
b
FH : The modulation is the FH-SS method.
c
1 : The expected interference distance is 10 m or shorter.
d
and the bandwidth used by mobile object identification devices cannot be
avoided.
Cautions on using Bluetooth devices
In the bandwidth used by this handset, in addition to home electric appliances
such as a microwave oven and industrial /scientific/medical devices, in-plant radio
stations used to identify mobile objects used in production lines of a factory that
require a license, specified low power radio stations, or amateur radio stations
that do not require a license (hereafter "other radio stations") can be in operation.
1. Before using this terminal, check whether other radio stations are in operation
in your neighborhood.
2. If radio wave interference occurs between the terminal and "other radio
stations", use the terminal in a different location or "Turn the power OFF" to
avoid the radio wave interference.
3. For more detailed information, contact "General Inquiries" using the phone
number on the back of this manual.
: All bandwidths between 2400 MHz and 2483.5 MHz are used,
◆
FeliCa reader/writer
・
FeliCa reader/writer function of FOMA terminal uses weak waves requiring no
licenses for radio stations.
・
It uses 13.56 MHz frequency band. When using other reader/writers in your
surroundings, keep FOMA terminal away sufficiently from them. Before using the
FeliCa reader/writer, confirm that there are no radio stations using the same
frequency band nearby.
◆
CAUTION
・
Do not use a remodeled FOMA terminal. Using a remodeled terminal violates the
Radio Law.
FOMA terminal is certified according to technical standard conformance of
specified wireless equipment based on the Radio Law, and as a proof of it, the
"Technical Compliance Mark " is depicted on the engraved sticker of FOMA
terminal.
If you remodel FOMA terminal by removing its screws, your certification of
technical standard conformance becomes invalid.
Do not use FOMA terminal with its certification of technical standard
conformance invalid as it violates the Radio Law.
・
Be careful when you use FOMA terminal while driving a car etc.
Using a mobile phone while driving is subject to penal regulations.
If you inevitably receive a call, tell the caller that you will "call back" by handsfree,
then park in a safe place and call back.
・
Use the Bluetooth function only in Japan.
The Bluetooth function of the FOMA terminal is compliant with wireless
standards and is authorized for use only in Japan.
If you use this function overseas, you may be punished.
・
Use FeliCa reader/writer function only in Japan.
FeliCa reader/writer function of FOMA terminal conforms to Japanese radio
standards.
If you use this function overseas, you may be punished.
Easy Search/Contents/Precautions
19
Page 22
Accessories and main options
<Basic package>
F-03A
(including Back Cover F35 and the written warranty)
Battery Pack F10
CD-ROM for F-03A
* The PDF version of "Manual for PC Connection" and
"Kuten Code List" are contained in the CD-ROM.
Easy Search/Contents/Precautions
20
Instruction manual
Manual
* Quick Manual is appended
on P456.
<Optional accessories>
FOMA AC Adapter 01/02
(including written warranty and
operation manual)
Desktop Holder F29
(including operation manual)
Other optional accessories
→P411
Page 23

Before Using the Handset
Part names and functions ................................................................................................................................................... 22
Available FOMA terminal usage styles ............................................................................................................................. 25
Viewing display ................................................................................................................................................................... 26
Selecting functions from menu .......................................................................................................................................... 30
Selecting functions using touch operation ................................................................................................. Touch panel 33
Using motion sensor ........................................................................................................................................................... 38
Using UIM (FOMA card) ...................................................................................................................................................... 39
Attaching/Removing battery pack .................................................................................................................................... 42
Charging ............................................................................................................................................................................... 43
Checking battery level .............................................................................................................. Remaining battery level 46
Turning power ON/OFF ........................................................................................................................... Power ON/OFF 46
Changing screen display to English ...................................................................................................... Select language 47
Setting date and time ................................................................................................................................... Date & time 48
Notifying the other party of your phone number ......................................................................... Caller ID notification 48
Checking your own phone number ..................................................................................................... User information 49
21
Page 24
Part names and functions
a
b
c
d
a
b
c
d
e
f
e
f
g
g
h
i
j
k
o
p
l
q
h
i
j
k
l
m
n
<Using Earphone>
Connect an optional external connection jack
compatible earphone.
When using an earphone that is non-compliant to
external connection jack, connect an optional plug
adapter to use it.
Example of connecting Flat-plug Earphone/
Microphone with Switch (optional)
Connecting plug of Flat-plug
Earphone/Microphone with
Switch
Flat-plug earphone jack
Plug for the terminal
r
External connection jack
m
n
o
p
Before Using the Handset
22
Page 25
<Functions of parts>
a
Light sensor
Sense the ambient luminance (automatic
adjustment of the brightness of the display).
*
Blocking the light sensor may disable correct adjustment
of the brightness.
b
Light
Turn on or blink when receiving a call, mail/i-concier
information, calling, obtaining ToruCa, accessing IC
card, GPS positioning (Position location, Notify
location and Location request), shooting an image,
recording a movie, operating Musi c&Video Channel
player or MUSIC Player, sounding tone of Alarm
clock (Snooze), Schedule reminder or Countdown
timer, and transmitting iC, or operate according to
the settings of Indicator light or Light alert.
c
Display (touch panel)→P26, 33
d
Microphone
Send your voice from here.
*
Do not cover the microphone during a call or sound
recording.
e
1Seg antenna→P205
*
The terminal has a built-in 1Seg antenna. For better signal
reception, do not cover the antenna with your hand.
*
When watching 1Seg with FOMA terminal held sideways,
it is recommended that the side opposite of the antenna is
held as shown below.
The antenna
f
In-camera
Shoot your own image, or send your image via
videophone.
g
Earpiece
Hear other party's voice from here.
h
FOMA Built-in antenna
*
The terminal has a built-in FOMA antenna. For better
voice quality, do not cover the antenna with your hand.
i
Out camera
Shoot still images or movies, send images over a
videophone call.
j
Light/Shooting indication light→P66, 194, 328
Camera light for videophone calls, still image
shooting, movie recording, simple light, or it turns
on or blinks for still image shooting or movie
recording.
k
Mark→P256, 305
Installation of IC card
*
You can use Osaifu-Keitai by placing mark over IC
card reader or send/receive data by iC transmission. The
IC card cannot be detached.
l
Back cover
m
Speaker
Hear ring alert or voice of the caller using the
speakerphone etc. from here.
n
Infrared data port→P305, 308
Infrared communication, Infrared remote control.
o
Strap opening
p
External connection jack
An integrated connection jack for charging or
connecting earphone etc.
*
Available to connect an optional AC adapter, DC adapter,
FOMA USB Cable with Charge Function, Earphone Plug
Adapter for External connector terminal etc.
q
Charging jack
r
microSD card slot→P293
<Functions of keys>
The functions available by pressing keys are as
below.
●
: Press ■ : Press for 1 second or more
a m
MENU key
●
Display menus, perform the operation shown at
the upper left of the guide area.
b I
i-mode/i-αppli/▲ (scroll)/Character
●
Display i-mode Menu.
●
Scroll upward the mail screen or site/website
display by pages.
●
Perform the operation shown in the lower-left
corner of the guide area, switch character entry
modes.
■
Display i-αppli folder list.
c c
ch/α/Clear key
●
Display i-Channel list, switch i-αppli stand-by
display and i-
●
Delete characters or return to previous screen.
■
Start/Cancel Self mode.
d n
●
Make/Receive a voice call, return to the previous
character while entering characters.
●
Switching the speakerphone function, start/
cancel auto-focus.
■
Make a voice call using the speakerphone
function.
■
Restore the character string to its previous state.
e
Keypads
1-9
●
Enter phone numbers (1-9) or characters, select
menu/items.
■
Perform the function registered in Custom menu.
0
●
Enter phone number (0) or characters, select
menu/items.
■
Use Auto switch of Int'l call assist when making
international calls.
α
ppli activation.
Start a voice call/ /Speakerphone/AF key
Before Using the Handset
23
Page 26

f **/A/a/Line feed/Public mode (Drive mode)
key
●
Enter "*", "゛", "゜", etc., switch upper/lower
case.
●
Line feed while entering characters, select menu/
items.
●
Switch display/hide of guide area when shooting
a still image.
●
Switch horizontal and vertical displays while
playing movie/i-motion or Music&Video Channel.
■
Start/Cancel Public mode (Drive mode).
g
Multi-cursor key
g
Enter key
●
Perform the operation, activate Focus mode.
■
Start i-αppli registered for one-key shortcut.
u
Schedule/↑ key
●
Display Scheduler.
●
Adjust volume, move the cursor upward.
■
Display alarm list
d
Phonebook/↓ key
●
Display phonebook.
●
Adjust volume, move the cursor downward.
■
Add to the phonebook.
l
Received calls/← (previous) key
●
Display Received calls, switch displays, move the
cursor leftward.
■
Start/Cancel privacy mode when "Activate/
Deactivate" of Activation option is set to "Hold Lcursor key".
r
Redial/ →(next) key
●
Display Redial, switch displays, move the cursor
rightward.
■
Start/Cancel IC card lock.
*
May be described as
jhk
.
h C
Camera key
●
Start still image shooting, perform the operation
shown at the upper right of the guide area.
■
Start movie recording.
i a
Mail/▼ (scroll) key
●
Display mail menu, perform the operation shown
at the lower right of the guide area.
●
Scroll downward the mail screen or site/website
display by pages.
●
Press 2 times : Check new message
■
Display mail creation screen
j f
Power/End key
●
Terminate on-hold, calling/operating function,
display/hide calendar layout.
■
Press for 2 seconds or more : Turn power ON/
OFF.
k #
#/Macro shooting/Silent mode key
●
Enter "#", "、", "。", "?", "!", "・", select menu/
items.
●
Turn Macro mode on or off while using the
camera.
■
Start/Cancel Silent mode.
l z
Lock key
●
Switch views of the lower guide area when T ouch
selector is active.
●
Activate the Touch panel lock when displaying
the standby display with FOMA terminal closed.
→
P113
■
Start/Cancel Operation lock, or cancel Auto
keypad lock.
■
Cancel/Restart Touch lock during a call or a
PushTalk call with FOMA terminal closed.
m T
i-Widget/TV key
●
Start/Exit i-Widget
■
Watch 1Seg or switch Multi windows.
n U
Search key
●
Enter the target word, place or name and search.
→
P317
■
Start/Cancel Silent mode
*
The setting of Search key shortcut is the operation in the
default state.
o s
Multitask key
●
Perform another function while talking or
operating (Multiaccess/Multitask).
p Z
PushTalk/Camera key
●
PushTalk operations
●
Start/End/Save shooting when a camera is active,
or save a still image during 1Seg watching, when
FOMA terminal is closed.
●
Stop ring alert, alarm sound or vibrator.
■
Activate still image shooting
■
Activate the quick answer machine while
receiving a call, activate/stop voice memo or
movie memo during a call.
■
Start/Stop video recording during 1Seg watching
when FOMA terminal is closed.
→
P115
*
Before Using the Handset
24
Page 27
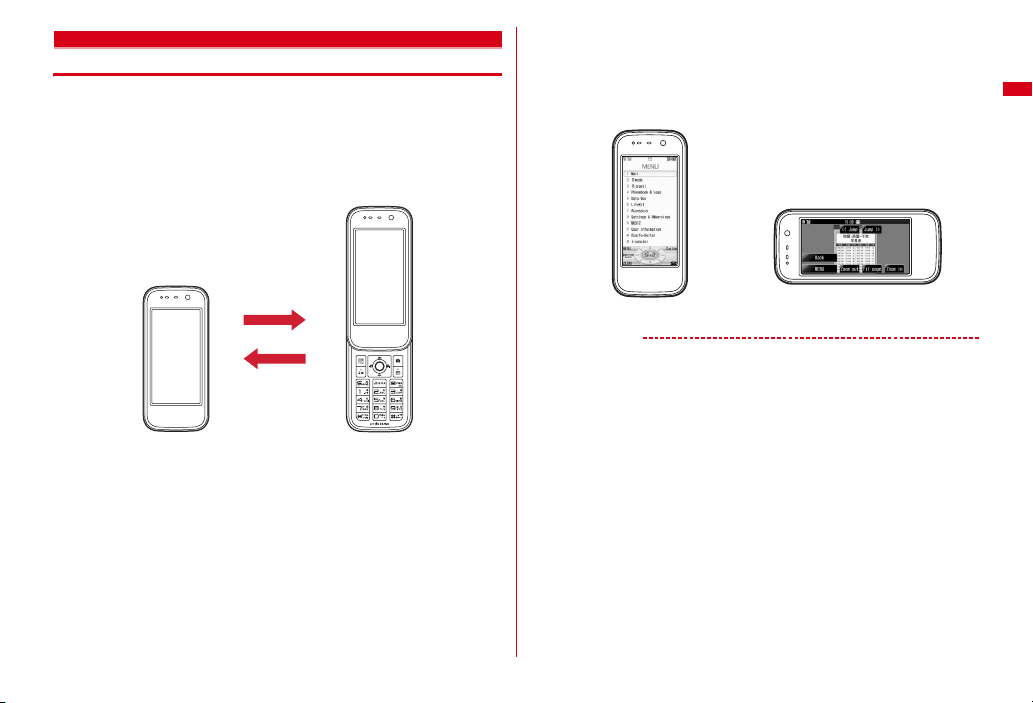
Available FOMA terminal usage styles
Touch selector or Direct touch allows you to operate even with FOMA terminal
closed.
・
This manual gives descriptions assuming that FOMA terminal is open unless
otherwise noted.
■
Closed/Open
To open FOMA terminal, slide the part with the display upward. To close, slide in
the opposite direction.
■
Menu operations with FOMA terminal closed
・
Even when FOMA terminal is closed, you can perform the menu operations using
Touch selector.
・
For the functions that support the horizontal display, you can operate by Direct
touch with FOMA terminal closed and tilted counterclockwise by 90 degrees.
P36
→
P35
→
Open
Close
Closed :
You can use touch operations to perform various operations instead of
using keys.
Open :
This is a basic operation state that allows you to use keys. All functions are
available in this state.
・
When Slide and edit is set to "ON", the edit screen for mail, Schedule, or Notepad
can be displayed with FOMA terminal open.
・
When Slide and answer is set to "ON", you can answer a voice call by opening
FOMA terminal.
→
P61
Opened stateClosed state
→
P327
Touch selector (Vertical display) Direct touch (Horizontal display)
✔
INFORMATION
・
Do not apply excessive force when you open/close FOMA terminal. It may cause
malfunction or damage to the keys and display.
・
Do not close FOMA terminal with the strap held inside. It may cause malfunction or
damage.
・
Do not attach labels or stickers on the rear side of the display or the key side. It may
cause malfunction, damage, etc.
・
When carrying with FOMA terminal closed, activate Operation lock or Auto keypad lock
to prevent inadvertent operations on the touch panel.
・
When opening/folding FOMA terminal, avoid touching the touch panel with your
fingers to prevent inadvertent operations.
・
Do not place the terminal with the display side down on a desk. It may scratch the
display surface.
・
When carrying this terminal in a bag, do not allow a hard object to hit the display. It
may scratch the display, causing malfunction or damage.
Before Using the Handset
25
Page 28
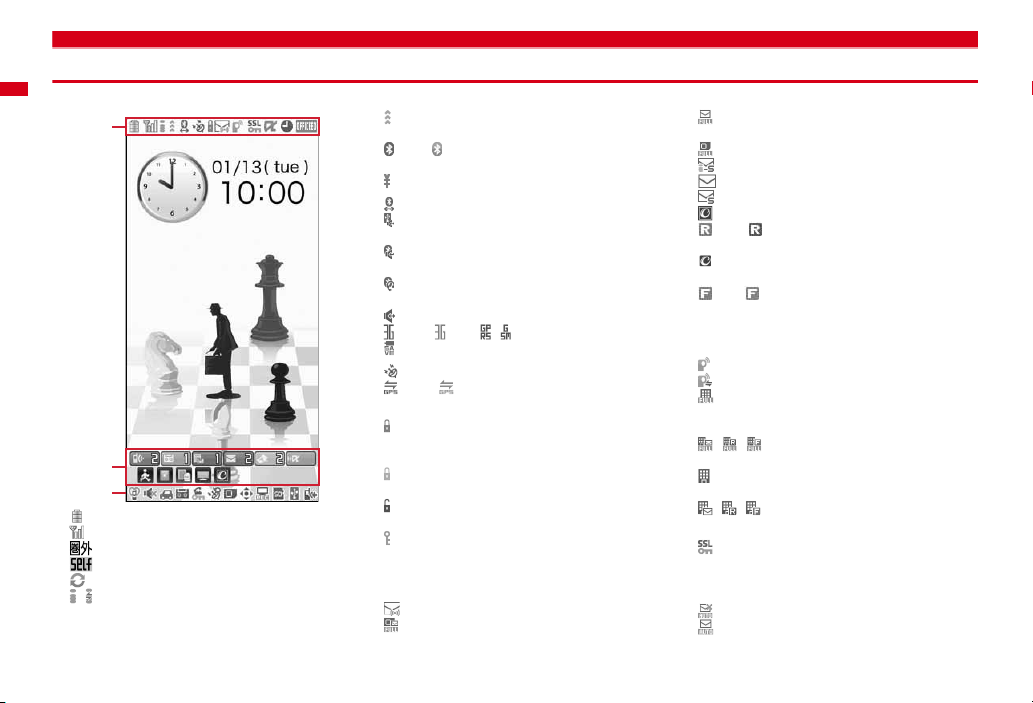
Viewing display
The current state can be checked by the icon appearing on the screen.
a-m
n
o-z
a
: Battery icon→P46
b
: Antenna icon→P46
: Out of service area
: Self mode ON
: Data transfer mode ON
c
/ : In i-mode (during i-mode connection)/(during
packet communication)
Before Using the Handset
26
→
P46
→
P106
*1
→
P112, 293, 305, 340
→
P158
d
: Infrared communication in operation→P305
Infrared remote control in operation
(blue)/ (gray) : Bluetooth power ON/Power
saving mode activated
: The total calls cost exceeds the limit
*2
e
: Bluetooth connection established→P339
: Communication using handsfree-compatible
device in progress
: Communication using a Bluetooth handsfree
device in progress
: Communication using a Bluetooth headset in
progress
→
: Speakerphone function in use
(blue)/ (red)/ / : Network in use
: Power saving mode activated
*2
f
GPS/Out of permission period
*2
g
(Red) : Operation lock activated (Authentication
ON/OFF is set to "ON") or Auto keypad lock
activated
(Yellow) : Operation lock activated (Authentication
ON/OFF is set to "OFF")
(gray) : Operation lock or Auto keypad lock is
temporarily cancelled
: A phonebook entry or schedule has secret
attribute
*2
h
Unread Area Mail, mail, i-concier information or
MessageR/F state
full on UIM
P340
: Positioning with GPS→P266
(blue)/ (gray) : Location request setting with
→
P115
→
P79, 324
: Unread Area Mail
: Unread i-mode mail and SMS storage space is
→
P340
→
P60
→
P340
→
P53
→
P93
→
P274
→
P115
→
P132, 149, 151, 154, 177
→
P308
→
→
P332
P368
: Unread i-mode mail and SMS storage space is
full
: SMS storage space is full on UIM
: Unread i-mode mail and SMS exist
: Unread i-mode mail exists
: Unread SMS exists
: Arrival i-concier information exists
(red)/ (blue) : Unread MessageR storage
space is full or unread MessageR exists
: Unread mail and unread i-concier information
exist
(red)/ (green) : Unread MessageF storage
space is full or unread MessageF exists
*2
i
PushTalk state or storage state in i-mode Center
P68, 132, 149
: During PushTalk session
: Downloading phonebook page on the network
: i-mode mail and MessageR/F storage are full or
one of these spaces is full and unreceived mails
exist in Data Center
/ / : i-mode mail or MessageR/F storage
space is full in Data Center
: Unreceived i-mode mail and MessageR/F exist
in Data Center
/ / : Unreceived i-mode mail, MessageR or
MessageF exists in Data Center
*2
j
: Displaying SSL page/Executing SSL session
with i-
α
ppli or using i-αppli downloaded from SSL
page
→
P159
Displaying an SSL/TLS page
: Mail failed to Auto-send exists
: Auto-send mail exists
→
P180
→
P131
→
P131
→
Page 29
: Music&Video Channel program obtaining
reservation exists
ki-α
ppli/i-αppliDX/i-αppli call state→P233, 248, 249
: During i (gray) : i (orange) : istand-by display
: i-
α
ppliDX is running
(gray) : i (orange) : i-
α
ppliDX stand-by display
: i-
α
ppli call received while i-αppli is running
(gray) : i-
α
ppli stand-by display
(orange) : i-
being started from i-
α
ppli call received while i-αppliDX is running
: i (gray) : i-
α
ppliDX stand-by display
(orange) : i-
being started from i-
: i-
α
ppli call received
*1
When data transfer mode is activated, the terminal is in the same state as out of service area and Multitask becomes unavailable.
*2
The current highest-priority item is displayed. These icons are listed in descending order of the priority from the top.
*3
Time appears on a screen other than the stand-by display.
✔
INFORMATION
・
Depending on the displayed function, an icon may be displayed at a different position, or some or all icons may not be displayed.
→
P219
α
ppli operation
α
ppli stand-by display ON
α
ppli is being started from the i-αppli
α
ppliDX stand-by display ON
α
ppli is being started from the i-
α
ppli call received while displaying i-
α
ppli call received while i-αppli is
α
ppli stand-by display
α
ppli call received while displaying i-
α
ppli call received while i-αppli is
α
ppliDX stand-by display
*3
l
: Alarm clock ON→P319
: 1Seg watching/recordi ng reservation, schedule
reminder ON
: Schedule reminder or 1Seg watching/recording
reservation and alarm clock are simultaneously
ON
*3
m
n
: Shortcut icons
o
: Silent mode ON→P87
: Personalized silent mode ON
p
: Call alert volume is Silent→P84
: Vibrator for voice call ON
: Call alert volume is Silent and vibrator for voice
call ON
q
: In Public mode (Drive mode)→P62
r
/ : Answer machine ON/recorded messages
full
s
: Keypad dial lock ON→P107
*2
t
/ / : Location request of GPS success/
failure/end as unanswered
: Personal data lock ON
/ : Music&Video Channel obtaining failure/
success
/ : 1Seg recording reservation completed/
failed
→
P213, 321
→
P213, 319, 321
: Inside OFFICEED area→P363
: Arrival information→P33
→
P325
→
→
P85
→
P64
→
P273
→
P106
→
P219
→
P215
P85
→
P87
*2
u
: Reading UIM→P39, 46
(key is yellow) : IC card lock ON
: Individual IC card lock
v
/ : Displaying available multi-cursor key in
Focus mode
: Remote customization ON
w
: Performing 1Seg recording reservation/1Seg
recording (only watching stopped)
: i-
x
State of USB mode settings and microSD card
P293, 300
: microSD card installed during Communication
mode
(blue)/ (gray) : microSD card installed or not
during microSD mode
(blue)/ (gray) : microSD card installed or not
during MTP mode
*2
y
: Connected to external device using USB cable
P68, 300
: Pedometer ON
*2
z
: Software update notice→P425
: Software update pre-specified
: Update notification icon
/ : Auto-update of the latest pattern definition
failed/succeeded
→
P33
α
ppli Auto start failed→P247
→
P335
→
P428
→
P258
→
P258
→
P121
→
→
P426
→
P425
P212, 215
→
→
Before Using the Handset
27
Page 30
◆
Task area
The icon indicating the function (task) in progress appears in the task area. During
Multiaccess or Multitasks, the icons show which functions are running.
Task ar ea
❖
Icons indicated on the task area
: Voice call
: Received calls
: Redial
: Answer machine/Voice memo
: Videophone call
: Videophone using an external device
: Call (switching)
: Call (disconnecting)
: PushTalk
: FOMA terminal phonebook
: Contact setting of Privacy mode
: Kisekae Tool
: Still camera
: Movie camera
: Bar code reader
: i-mode
: i-mode Bookmark/Go to location/Browser history/Screen memo/two-touch site
: i-concier
: Mail/MessageR/F
: Area Mail
: Receiving i-mode mail
: Inquiring for i-mode mail/SMS
/ : Sent msg log/Received msg log
: Receiving SMS
α
ppli
: i-
: ToruCa
: Position location of GPS
: Location request of GPS
Before Using the Handset
28
: Notify location of GPS
: Location history (GPS)
: Full Browser
: 1Seg
: My Picture
: Movie/i-motion
: Chara-den
: Melody
(blue)/ (gray) : Accessing microSD card/Standing by for accessing
: Activating Music&Video Channel
: Music&Video Channel program obtaining
: MUSIC Player
: Sound recorder
: My Document (PDF data)
: Other (Word, Excel, PowerPoint file)
: Adjusting volume by Multitask
: Countdown timer
: Alarm clock
: Scheduler/Schedule reminder ringing (including activation notification of
1Seg)
: Fake call
: User information
: Calculator
: Pedometer
: Search engine
: Notepad
: Dictionaries
: Bluetooth function
/ : Packet transmission or communication/Sending or receiving packets in
progress via Bluetooth function
: 64K data communication via Bluetooth function
: Accessing Data Center
: Displaying synchronization log
: Network services set
/ : Calling or communicating packets via USB/Sending or receiving packets
via USB
: 64K data communication
: Accessing external data
/ : Updating software/Software update notified
Page 31

: Updating pattern definition/Displaying version
/ (gray) : Each function set or on hold
◆
Guide area
Operations that can be performed by pressing m, I, g, C and a are
displayed in the guide area. Displayed operations vary by the screen.
Display locations and keys correspond as shown in the figure.
Guide area
・
on the guide area corresponds to multi-cursor keys k (It may be different
depending on the function you are using or how the site or website is made).
◆
List screen
a
b
Items with numbers or symbols displayed can also be selected even by pressing
the corresponding key (
of symbols displayed can be selected by moving the cursor to the item and
pressing
g
keys below allows you to select the item.
c
position. Press
the page, the next page appears, when
page, the previous page appears.
Press
cannot be switched.
◆
i-Widget screen
. Pressing the key corresponding to the item number or pressing the
indicates that there are items that can be selected above and below the cursor
indicates that there are items that can be selected over the multiple pages.
h
to change the page. Some screens such as an icon selection screen
1-9, 0, *, #
j
to move the cursor. When d is pressed on the last item of
u
is pressed on the first item of the
). Items without numbers
b
c
a
When a list extends to multiple pages, the currently displayed page number and
the total number of pages appear.
・
While i-Widget is running, operations that correspond to m, I, g, C, a
and
k
are displayed on the screen as in the guide area. Displayed operations
differ depending on screens.
・
Using i-Widget→P252
e.g. : i-Widget screen
Before Using the Handset
29
Page 32

Selecting functions from menu
◆
Menu screen and switching method
❖
Menu screen
The menu screen below is available.
Kisekae menu :
In addition to menus compatible with movies, "
that is easy to view with large font and "Simple Menu" are available. A Kisekae
menu matched with the color of FOMA terminal is set by default.
・
Some Kisekae menu changes the menu structure according to usage frequency.
In the Kisekae Tool stored by default, "
"Preinstalled" folder supports this function.
・
Some Kisekae menu does not support English display when setting Select
language to "English".
Basic menu :
・
Menu icons or background design can be changed by customizing Kisekae Tool
or menu.
・
The font size of the menu changes synchronized with Kisekae Tool.
Custom menu :
A menu that you can change the design using Kisekae tool.
A basic menu that the menu structure and menu numbers are fixed.
→
P94, 96
A menu that menu items can be freely registered.→P326
拡大メニュー
ダイレクトメニュー
(enlarged menu)"
(Direct menu)" in the
❖
To switch the menu screen temporarily
In each menu screen, you can temporarily switch to a different menu screen by the
operations below. You can also set which menu to display when pressing
the stand-by display.
*1
Cannot be switched when Kisekae menu or Shortcut menu is set as Select startup menu.
*2
Cannot be switched when Basic menu is set as Select startup menu.
✔
INFORMATION
・
Some types of Kisekae menus change the menu structure according to usage
frequency. Also, the number assigned to menu item (item number) may not be applied.
◆
Selecting a function
Press m in stand-by and select and perform the functions from the menu
displayed.
There are 2 ways. One method involves using the keypad corresponding to the
menu items (Shortcut operation). In the other method, the multi-cursor key is used
to select from among the menu items.
・
If any function is restricted by lock functions or no UIM is installed, icon
appears or the font color changes indicating that the function is disabled. Note
that the display does not change for Kisekae menu. When a function is selected,
the reason that the function cannot be performed etc. is displayed.
・
Function description about the menu item at the cursor position may appear for
some types or levels of the menu. The current setting may also displayed in some
menu items.
→
P94
1
C*
2
I
C*
m
on
Custom menuKisekae menuBasic menu
Before Using the Handset
30
Page 33

❖
Selecting menu items by keypad (Shortcut operations)
When numbers (item number) are assigned to menu items, a menu item can be
selected by pressing the corresponding keypad (
・
Press the item number displayed with the preferred menu item.
・
Item numbers differ when "Simple Menu" is set by Kisekae Tool.
・
Item number of the menu→P382
<Example> Selecting "Calculator"
m74
1
1-9, 0, *, #
m
7
4
❖
Selecting menu items by multi-cursor key
<Example> Selecting "Calculator"
).
me
1
2
❖
After selecting a menu item, you can return to the stand-by display or previous
menu by pressing the keys below.
f
c
Move the cursor to "Accessory"
・
If you press k to move the cursor, the color and/or design of the cursor
position change. Moving by
Kisekae menu
h
Move the cursor to "Calculator"
To return to stand-by display or previous menu
: Return to the stand-by display.
: Return to the previous menu. Depending on the menu, you can return to the
previous menu also by pressing
l
eg
Cursor
position
Basic menu
is unavailable for some menus.
eg
.
Before Using the Handset
31
Page 34

◆
Selecting method of submenu
When "MENU" is displayed at upper-left of the guide area, various operations can
be performed with submenus.
<Example> Selecting the redial submenu
On the redial list screen, mePress a keypad for the submenu item
1
number
m
There are menu
items in lower
level
・
You can also select an item by moving the cursor to and pressing g or r.
・
Item numbers of the submenu with the same functions may vary by the
operating screen.
・
Pressing m or c closes the submenu.
◆
Operating procedure of each item
■
Selection of an item
When numbers or is displayed, press the corresponding keys. You can also
select an item by moving the cursor with
cursor, the item at the cursor may be framed or change in color.
・
Depending on the function, you can check vibration pattern of the vibrator, color
or lighting pattern of light alert, the color scheme of screen settings or brightness
of the display by moving the cursor to an item.
k
and press g. When moving the
■
Pulldown menu operation
Move the cursor to the item to set and press g, and then press the keypads
corresponding to the item number.
Pulldown menu
・
You can also select an item by moving the cursor to it and pressing g.
■
Check box operation
Press the keypads corresponding to the item number.
・
You can also select an item by moving the cursor to it and pressing g.
・
Pressing keypad for the item number or pressing g after placing the cursor, the
check box switches (Select) and (Cancel).
・
For some functions, you can select or cancel all items by pressing m.
■
Confirmation screen operation
If a confirmation screen for performing functions appears while deleting, setting
data, etc., move the cursor to "Yes" or "No" and press
・
For some functions, items other than "Yes" or "No" may appear.
g
.
Before Using the Handset
32
Page 35

◆
Displaying information quickly <Focus mode>
When g is pressed on the stand-by display with arrival information icon or iconcier information displayed, or with Info/calendar layout or Shortcut icons set,
the display is changed to Focus mode that allows you to quickly display the related
information.
・
Focus mode is not available when FOMA terminal is closed.
・
i-concier information→P177
・
Shortcut icons→P325
・
When i-concier information is displayed with Info/calendar layout set, the cursor
cannot be moved to Info/calendar layout.
ge
Move the cursor to an icon
1
g
・
A screen matched for the selected icon appears.
(Missed calls) : Received call list appears. With 2in1 in Dual mode,
appears when there is a missed call only to Number B and
appears when there are missed calls to both Number A and B.
(Recorded messages) : The recorded message list appears.
(Voice messages in Voice Mail service) : A confirmation screen for
playing message appears. With 2in1 in Dual mode, appears when
there is a message only to Number B and appears when there are
messages to both Number A and B.
(Unread messages) : The folder list of Inbox appears.
(Unread ToruCa) : The ToruCa list of the folder containing the latest
unread ToruCa appears.
(i-
α
ppli call) : i-αppli call log appears.
eg
An icon at the cursor position is
surrounded with a red frame.
The direction is indicated that it
can be moved to by using
multi-cursor key.
・
You can perform the same operations when following icons appear.
- : Connect to external device using USB cable
- / : Software update advance notice/notification
- / : Auto-update of latest pattern definition success/failure
- / / : Location request success/failure/end as unanswered
- / : Music&Video Channel program obtaining success/failure
- / : 1Seg recording reservation completion/failure
- : Performing 1Seg recording reservation/1Seg recording (only watching stopped)
- : Pedometer
Canceling Focus mode : c or
✔
INFORMATION
・
When moving the cursor to the icon for arrival information and press c for 1 second
or more, the icon disappears temporarily. For a voice message icon of Voice Mail
service, a confirmation screen appears asking you to delete the display. Select "Yes" to
delete the display. It reappears when the number of items is changed by accumulating
new information or viewing existing information.
・
In Focus mode, you cannot display the menu by pressing m.
f
Touch panel
Selecting functions using touch operation
With FOMA terminal closed, Touch selector or Direct touch allows you to use the
display as a touch panel for performing operations.
Before Using the Handset
33
Page 36

◆
Touch operation
・
You can operate the touch panel by touching the display with your finger. The
effective area of the touch panel is the entire display ( part), however, the
effective area varies depending on the operation or function to perform.
*
Available all operation
of the Touch selector
When using Touch selector When using Direct touch
*
For displaying Stand-by Menu, touch operation is effective on the entire display.
・
Types of touch operations are as described below.
Touch :
Touch the display lightly and release the finger.
Double-touch :
available in Touch selector.
Slide :
using Touch selector, move your finger to rotate the selector clockwise or
counterclockwise.
Slide quickly :
left. Not available in Touch selector.
Before Using the Handset
34
Touch the display lightly twice and release the finger. Not
Keep touching the display, move your finger up, down, right or left. When
Touch the display slightly and flick your finger up, down, right or
Repeat area ( part)
・
When sliding your finger into the repeat area using Direct touch, you can perform
the operation continuously until you release your finger. This is available for
scrolling the displayed data in Full Browser, My Document (PDF files) and Other
(Word, Excel and PowerPoint files), and for rewinding/forwarding a movie/imotion.
・
Direct touch operations may not be available except for touching MENU items or
selected items. Touch operation on some parts of the screen may not be available
depending on the function in use.
❖
Notes for the touch panel
・
The touch panel is designed so that it is touched softly with a finger. Try not to
press something sharp at one end, like a nail, a pin, or the end of a sharp pencil.
・
In the following cases, the touch panel may not be activated even when touching
it. It also may cause malfunction.
- Touching the touch panel with a glove on
- Touching the touch panel with the tip of your nail
- Pressing the touch panel too strongly with a finger
- Touching the touch panel with a protecting sheet or seal on it
e.g. Touch
e.g. Slide
Page 37

◆
Operating menu using Touch selector
Touch selector allows you to select a function by touching a guide or selector on the
display even when FOMA terminal is closed.
・
Touch selector activates only when FOMA terminal is closed (except when i-αppli,
i-Widget, or i-concier is running). It also activates when Stand-by Menu is used
with FOMA terminal closed.
❖
Guide area and menu operation using Touch selector
When Touch selector is active, the guide area appears at the bottom of the display.
Operations that can be performed by pr essing
are displayed in the guide area. Each t ime you press
c
(or n) and f switches to the guide area that supports I and a.
m
*
c
(n)
*
Indicates that pressing z switches guide area display.
・
Touching a guide menu item in the guide area perf orms the same operation as by
pressing the corresponding key. Touching a menu item or option not in the guide
area does not perform the operation. Operation to press a key for 1 second or
more is not supported.
・
Touching a menu item or option not in the guide area does not perform the
operation. Appearing the background of Touch selector in blue indicates that
unavailable area is touched.
❖
Operating the selector
The wheel-shaped area in the middle of the guide area is called a selector. The
selector changes the appearance depending on the touch operation to be
performed.
■
Touch operation for up, down, right and left
Touch the top, bottom, right or left of the selector to perform the same operation as
k
key.
using
g
C
f
m, C, g, c
z
, the guide area that supports
z
Ia
(or n) or f
u
lr
d
■
Rotating operation
Sliding your finger to rotate the selector clockwise or counterclockwise performs
the same operation as using
the selector until you release your finger from the display even if you operate apart
from the selector.
・
Rotating the selector clockwise* moves the cursor down or right, and rotating it
counterclockwise
*
When Turn direction of Touch selector setting is set to "Counterclockwise", the rotating
operation is performed in the opposite direction.
❖
Setting touch selector operations 〈Touch selector setting
m
[Settings & NW services]
1
Touch selector :
・
Even if this is set to "OFF", you can perform operations other than rotating.
Turn direction :
j
or h. During the rotation, you can keep rotating
*
moves the cursor up or left.
Moving direction of the
cursor position
79e
Set whether to enable rotating operations of the selector.
Set the direction of rotating operation using Touch selector.
Set required items
eC
〉
Before Using the Handset
35
Page 38

❖
Selecting items from Stand-by Menu
With FOMA terminal closed, you can use Stand-by Menu on the stand-by display.
・
When opening FOMA terminal with Stand-by Menu displayed, you can use
Stand-by Menu using keypad operation.
Touch the screen while the stand-by display is open with FOMA
1
terminal closed
Stand-by Menu appears, and Touch selector activates.
Select a menu item using Touch selector
2
・
A screen applied for the selected menu item appears.
- Phonebook : Phonebook list
- Received calls : Received call list
- Redial : Redial list
- Camera : Still image shooting screen
- Activate 1seg : 1Seg watching
- Full Browser : Full Browser (Connection to Home)
- Missed call/Recorded msgs/Voice Mail/Mail/ToruCa/iwhen there is arrival information. Screen corresponding to the information appears.
P33
Exiting Stand-by Menu : Touch [ ] or [ ] using the touch selector
・
Touch selector also ends.
Before Using the Handset
36
α
ppli call : You can select them
◆
Direct touch operations
While using the following functions, you can use touch operation on the horizontal
display by closing FOMA terminal and turning it counterclockwise by 90 degrees.
While shooting still images, recording movies or displaying images in My Picture,
you can display them on the horizontal display only by closing FOMA terminal.
- While shooting still images or recording movies
- While watching 1Seg or playing 1Seg video
- While displaying Full Browser screen
- While displaying images in My Picture
- While playing movie/i-motion
- While displaying PDF data or data in Other (Word, Excel or PowerPoint files)
・ T
or Z is available for some functions.
・
While Direct touch is being used, the screen switches to the vertical display when
another function such as an incoming call, Alarm clock or Schedule reminder is
activated. Also, rotating FOMA terminal by 90 degrees clockwise also switches
the screen back to the vertical display.
❖
Basic operations
■
Guide menu/Operation menu/Submenu
Guide menu SubmenuOperation menu
・
Common guide menu items are as below.
[Back] : Return to the previous screen
[MENU] : Display submenu
→
[Close] : Close submenu (also close by touching area other than guide menu or
submenu)
・
Common submenu items are as below.
[Help] : Display touch operation guide (only if double-touch, slide and slide
quickly are available other than from guide menu or submenu)
[Exit] : End the function
・
When touching the menu with on submenu, the menu in the lower level is
displayed.
Page 39

・
Menu items other than common menus differ depending on functions.→P37
■
Switch displaying/hiding menu
You can display/hide guide menu or operation menu by pressing T while shooting
still images or recording movies, or by touching the display (except menus) while
using other functions. If no operation is performed for approximately 10 seconds
after the menu appears, the menu disappears automatically.
■
Operations to exit functions
To exit a function, touch [MENU] on the guide menu and [Exit] on the submenu.
When a confirmation screen for exiting appears, touch [Yes].
・
Touching [Back] on the guide menu also exits the function.
■
Operations available on a confirmation screen
When a confirmation screen for performing the function appears, touch an item on
the conformation screen (such as "Yes").
・
Touch [Close] in guide menu to close the confirmation screen.
■
Channel switch (while watching 1Seg)/volume adjustment (while watching
1Seg, playing video, playing movie/i-motion)
・
When sliding right or left on the screen, the channel switch panels appear. Touch
or to switch channels.
・
When sliding up or down on the screen or touching [Volume] on operation menu,
the volume adjustment panel appears. The sound volume can be changed with
sliding up or down on the panel when the volume adjustment panel appears.
・
Display disappears when you touch other than the panels or there is no operation
for 3 seconds since the panel is displayed.
Channel switch screen Adjust volume screen
❖
Touch operations available from each function
■
Still camera/Movie camera
Menu operations→P188, 191, 198
■
Activate 1Seg
Menu operations→P208, 212
■
Full Browser
・
On operation menu, [Reload], [ ] (Previous page) and [ ] (Next page) are
available.
・
The operations below are available in addition to menu.
- Scroll : Slide (or slide quickly) on the display
- Zoom Out/Zoom in (Zoom) : Double-touch on the display
- Display linked pages (mail address not supported) : Touch link item
・
While obtaining data, [Cancel all windows], [Cancel this window] are available on
submenu.
・
When Motion sensor is set to "ON", you can scroll the screen by tilting FOMA
terminal forward, backward, right or left with holding down
・
To select a link item, directly touch the item.
Selection of link item
■
Displaying images in My Picture
・
While displaying image, the operations below are available.
- Zoom out/Same magnification/Zoom in : For a JPEG image larger than the screen, doubletouch on the display and touch [Zoom Out]/[QCIF]/[Zoom in] (touch once to zoom in or
out by 20%) while displaying the image
- Scroll : Slide on the display
- Display the previous or next screen : Slide quickly right or left on the display, touch
[Previous]/[Next]
・
When Motion sensor is set to "ON", the length/width of the display or the display
size is switched according to the orientation of FOMA terminal.
Z.→
P39
→
P38
Before Using the Handset
37
Page 40

■
Playing movie/i-motion
・
On operation menu, [PAUSE], [PlAY] and [VOLUME] are available.
・
[STOP] and [Vertical play] are available on the submenu.
・
While playing, the operations below are available in addition to menu.
- Switch wide/full-screen : Double-touch on the display
- Rewind/Fast forward play : Slide right or left on the display (during pause, slide to rewind/fast
forward the movie by 5 minutes)
・
Double-touch or sliding operation is available only when guide menu or
operation menu is not displayed.
■
1Seg video playing
・
From operation menu, [ ]/[ ] (rewind/fast forward), [ ] (pause), [ ] (play),
[<<Search]/[>>Search] (back/forward by 1 frame during pause), [Subtitles],
[ViewSW] and [Volume] are available.
・
On submenu, [Stop playing], [Skip FF 30 sec], [Skip REW 15 sec], [Start
beginning], [Previous video] and [Next video] are available.
・
Press Z to pause/play a video.
■
Displaying My Document (PDF data)/Other data
・
From operation menu, [Zoom Out], [ Fit page], [Zoom In] and [<< Jump]/[Jump >>]
(move by 10% of the whole page) are available.
・
On submenu, [Fit page], [Fit width], [First page], [Last page], [Rotate-right] and
[Vertical view] are available.
・
While displaying My Document (PDF data), [Actual size] is available on submenu.
・
While displaying Other data, [Mobile mode] and [PC mode] are available on
submenu.
・
The operations below are available in addition to menu.
- Scroll : Slide on the display
- Zoom in : Double-touch on the display
Using motion sensor
Motion sensor allows you to perform various operations by moving FOMA
terminal.
■
Auto rotation
While watching 1Seg, playing 1Seg video, displaying Full Browser screen, playing
movie/i-motion or displaying PDF data or Other data (Word, Excel and PowerPoint
file), closing and rotating FOMA terminal by 90 degrees counterclockwise switches
to the horizontal display. Rotating the terminal by 90 degrees clockwise on the
horizontal display restores to the vertical display.
・
While displaying JPEG images, the screen automatically switches to the vertical/
horizontal display or the display size according to the orientation of FOMA
terminal.
■
Flash graphics change
When setting Flash graphics compatible with motion sensor to stand-by display,
image changes by moving FOMA terminal with the terminal opened.
■
Changing vertical/horizontal position or orientation of an image
automatically when shooting a still image
The orientation of still image to be saved changes automatically according to the
orientation of FOMA terminal.
→
P195
Before Using the Handset
38
Page 41

■
Scrolling Full Browser screen by tilting the terminal
While holding down Z on Full Browser screen, tilt FOMA terminal to scroll the
browser screen up, down, right or left. The more you tilt the terminal, the faster the
scrolling speed becomes. For example, tilt the terminal forward to scroll down and
backward to scroll up.
・
The pointer does not move even after the screen scrolls.
■
Stopping alarm by double-tapping FOMA terminal
Double-tapping (tapping twice) the FOMA terminal while sounding Alarm clock,
schedule alarm or Countdown timer with FOMA terminal closed stops sounding.
Alarm clock stops or starts snooze.
・
Note that Touch selector may operate when Operation lock or Auto keypad lock
is not activated.
✔
INFORMATION
・
While walking or in the place with much vibration, scrolling Full Browser screen by
titling FOMA terminal may not work correctly. Also, do not walk while watching a
screen because it is dangerous.
◆
Enabling Motion sensor <Motion sensor>
m
[Settings & NW services]
1
Motion sensor :
・
When "OFF" is changed to "ON", a confirmation screen for Auto rotation
setting appears. Pressi ng "Individual setting" enables setting Aut o rotation by
each function. Press "Set all ON" or "Set all OFF" to set all items to "ON" or
"OFF" at once.
Auto rotation :
Motion sensor is active. Press
the function at the cursor position.
Set whether to enable Motion sensor.
Set whether to enable Auto rotation by each functions when
78e
m
to view the description of Auto rotation of
Set required items
eC
Using UIM (FOMA card)
UIM (FOMA card) is a card for storing user information such as phone numbers.
・
If UIM is installed incorrectly or if there is a problem with UIM, you cannot make/
receive a call or send/receive a mail.
・
For details on handling UIM, refer to the UIM manual.
◆
Installing/Removing
・
After turning the power OFF, fold FOMA terminal and hold it with your hand.
・
Take care not to touch or scratch the IC part.
・
Attaching/Removing back cover and battery pack→P42
■
Installing
a
Pull the tab and pull out the tray until it clicks.
b
Hold UIM with the IC side up, align the beveled corner with the t ray and push into
the tray until it stops.
Tab
Tray
■
Removing
a
Perform a of installing operation.
b
Take out UIM.
✔
INFORMATION
・
Note that forcible installing or removing UIM, or installing battery pack with the tray
inserted at a slant may break UIM or the tray.
・
If the tray is removed, press it straight along the guide rail inside the UIM slot with UIM
left detached.
UIM
IC
Corner cut
Before Using the Handset
39
Page 42

◆
Security code
Two security codes, "PIN code" and "PIN2 code", are set for UIM.
・
You can change the security codes yourself.→P104
◆
UIM operation restriction
FOMA terminal is provided with UIM operation restriction for protecting your data/
files or data/files copyrighted by a third party.
・
When files or data are downloaded from websites or data attached to mails are
obtained to your FOMA terminal with UIM equipped, UIM operation restriction is
automatically set to these data or files.
・
The data types subject to UIM operation restriction are as follows.
- Videophone call message, Movie memo, Screen memo
- i-mode mail attachment files (except ToruCa), images inserted to Deco-mail or signature,
Decome-Anime template, MessageR/F, Deco-mail template containing data subject to UIM
operation restriction
-i-
α
ppli (including i-αppli stand-by display), ToruCa (Details) image
- Images (including GIF animations, Flash graphics and images downloaded from Data Center),
i-motion, data compatible with contents transfer, melodies, PDF data, Chara-den, Word/Excel/
PowerPoint files, Machi-chara
- Kisekae Tool, Chaku-uta
*
"Chaku-uta" is a registered trademark of Sony Music Entertainment (Japan) Inc.
・
Data or files with UIM operation restriction set cannot be transferred over infrared
communication/iC transmission or copied/moved to microSD card.
・
With UIM replaced or no UIM installed, data or files with UIM operation restrict ion
set cannot be displayed or played. For ino functions except deletion are available.
/Chaku-uta full, Music&Video Channel programs
α
ppli with UIM operation restriction set,
✔
INFORMATION
・
When data subject to UIM operation restriction is set as stand-by display, incoming/
outgoing image, ring alert, etc., replacing UIM with another one or using FOMA
terminal without UIM installed causes the sound and image settings to be reset to the
default state. In this case, sound or image actually generated or displayed may be
different from those set. If UIM used when downloading the data is installed, UIM
operation restriction of the data is canceled and the original settings are restored (when
data is used for Set random image on stand-by display, settings may be canceled).
・
UIM operation restriction is not set to data obtained via infrared communication, iC
transmission, microSD card or DOCOMO keitai datalink or still images/movies taken
with the built-in camera.
・
The settings below are saved to UIM.
- My phone number
- SMS settings (except "SMS report request")
- DOCOMO Cert/User certificate of Manage certificate
- Select language, UIM, PLMN setting
Before Using the Handset
40
Page 43

◆
Settings when replacing UIM
If replacing the currently installed UIM with another UIM, the settings below are
changed.
My phone number , Select language,
SMS settings (except "SMS report
request"), "DOCOMO Cert"/"User
certificate" of Manage certificate, PIN
code and PIN2 code of UIM, PIN1 code
ON/OFF, PLMN setting
i-Channel setting, Reset call cost,
i-Widget roaming set
Access setting of Full Browser Set to "No" regardless of the setting before
Cookie set/delete of Full Browser Set to "Invalid" regardless of the setting before
Set program of Music&Video Channel The setting before replacement is canceled.
Setting Changed contents
Changed to the contents saved in the inserted
UIM.
Restored to the default settings.
replacement.
replacement. Cookie information is retained,
but if setting to "Valid" or "Valid(notify)" again,
a confirmation screen for deleting Cookie
information appears.
Set the program again if necessary.
◆
UIM types
When using UIM (blue) in FOMA terminal, note that it differs in the items listed
below from UIM (green/white).
Number of savable digits of phone
numbers in UIM phonebook
User certificate download to use
FirstPass
WORLD WING service
Service Numbers
Item UIM (blue) UIM (green/white) Page
Up to 20 digits Up to 26 digits P74
Unavailable Available P172
Unavailable Available P366
Unavailable Available P359
WORLD WING
WORLD WING is DOCOMO's FOMA international roaming service that allows you
to make/receive calls with the same phone number overseas with UIM (green/
white) and a terminal compatible with the service.
*
If you subscribed to FOMA service on or after September 1, 2005, separate subscription is
not required to use WORLD WING. Note that, if you declined to use WORLD WING at
subscription to FOMA service or canceled it, you need subscription.
*
If you subscribed to FOMA service on or before August 31, 2005, but not to WORLD WING,
separate subscription is required to use WORLD WING.
*
There are some charging plans unavailable.
*
If UIM (green/white) is misplaced or stolen overseas, immediately contact DOCOMO and
request for suspension of usage. Please see "General Inquiries" on the back of this manual for
contact information. Be careful that you are charged also for calls and/or communications, if
any, occurring after misplacement or stealage.
Before Using the Handset
41
Page 44

Attaching/Removing battery pack
・
After turning power OFF, fold FOMA terminal and hold it in your hand.
・
Removing battery pack may cause reservati on of Software update to be canceled.
When the date and time are set with Auto time adjust set to "OFF" in Date & time,
removing battery pack may delete date and time.
■
Attaching
a
Slide the back cover approximately 3 mm in the direction of the arrow and
remove the cover while holding FOMA terminal securely not to slide with your
hand and pressing the cover with the thumb of the other hand.
Press here with your thumb
c
Place the 4 tabs of back cover to the notches, press back cover in the direction of
a
to avoid forming any clearance between FOMA terminal and back cover, and
slide it in the direction of
b
to install.
Back cover
a
b
Back cover
b
With the label side of the battery pack upward, align convex parts of the battery
pack with concave parts of FOMA terminal and slide the battery pack in the
direction of
Before Using the Handset
42
a
, then press the battery pack in the direction of b to set it in.
Convex part
Battery pack
Concave part
■
Removing
a
Perform a of installing operation.
b
Pinch the tab of battery pack and pick it up in the direction of the arrow to
remove.
Tab
✔
INFORMATION
・
Attaching battery pack forcibly into FOMA terminal may damage FOMA terminal jack.
・
FOMA terminal or back cover may be damaged if you install or remove battery pack by
a method except the procedures above or if you press too hard.
Page 45

❖
For better battery pack performance
・
Do not charge the battery for an extended period (several days) with FOMA
terminal turned ON.
After charging has completed with FOMA terminal turned ON, the power is
supplied to the terminal from the battery pack. If FOMA terminal is left in that state
for a long time, the battery pack may run out causing the low battery alert to
sound after using only a short period of time. In this case, remove FOMA terminal
from the AC adapter, desktop holder or DC adapter and then reconnect it and
charge the battery again.
・
To promote environmental conservation, return your used battery pack to NTT
DOCOMO sales outlets, our corporate agencies or the shops that collect used
battery in your community.
Charging
The battery pack does not have a full charge at time of purchase. Use AC/DC
adapter for FOMA terminal to charge the battery before using FOMA terminal.
・
To get the maximum performance from F-03A, use battery pack F10.
❖
Charging times (approximate)
The times below are the times for charging an empty battery pack with F-03A's
power switched OFF. Charging with the terminal ON or under low temperature
requires longer time.
AC adapter
DC adapter
Approx. 150 min.
Approx. 150 min.
❖
Operation time on full charge (approximate)
The times below vary by the charging method and operating environment.
Continuous stand-by
time
Continuous call time FOMA/3G
1Seg watching time
・
Continuous stand-by time indicates the approximate time that the phone can
receive radio waves normally with F-03A closed.
・
Continuous call time indicates the approximate time that the phone can send or
receive radio waves normally.
・
1Seg watching time indicates the approximate watching time with receiving radio
waves normally and using Stereo Earphone Set 01 (optional).
・
Call, communication or stand-by time may be reduced to about half, or 1Seg
watching time may be reduced due to battery pack charging condition, function
settings, operating environment such as ambient temperature, radio wave
conditions in the area of use (the radio waves are weak or absent), etc.
・
Call, communication or stand-by time is reduced by performing i-mode
communication. Also, even with no voice calls or i-mode communications made,
continuous call and continuous stand-by times are reduced by making PushTalk
sessions, creating i-mode mail, activating downloaded istand-by display, performing data communication or multiaccess, using camera,
playing movie/i-motion, obtaining or playing Music&Video Channel program,
playing music with MUSIC Player, activating or recording of 1Seg, connecting via
Bluetooth or doing other operations.
FOMA/3G
Stationary (Auto) : Approx. 620 H
Moving (Auto) : Approx. 340 H
Moving (3G static) : Approx. 360 H
GSM
Stationary (Auto) : Approx. 310 H
Voice call : Approx. 230 min.
Videophone call : Approx. 120 min.
GSM
Approx. 220 min.
Approx. 310 min.
(1Seg ECO mode : Approx. 360 min.)
α
ppli, using i-αppli
Before Using the Handset
43
Page 46

❖
Battery pack life
・
The battery pack is a consumable part. Each time it is charged, time available with
each charging reduces.
・
When a time available with each charging is reduced to about a half from that of
a new battery, replacement of the battery is recommended because it is near the
end of life. The battery pack may swell out as it comes to near the end of its
lifetime depending on the usage conditions, but it is not a problem.
・
The battery pack's life may be reduced by using i-αppli or videophone or
watching 1Seg while charging.
❖
Battery charge
・
For details, refer to the operation manuals for FOMA AC Adapter 01/02 (optional),
FOMA AC Adapter 01 for Global use (optional) or FOMA DC Adapter 01/02
(optional).
・
FOMA AC Adapter 01 is applicable only to 100V AC. Though FOMA AC Adapter
02 and FOMA AC Adapter 01 for Global use is applicable to 100-240V AC.
・
AC Adaptor has a plug dedicated to 100V AC (for domestic use). When using the
AC adapter in the range of AC 100V and 240V ove rseas, a conversion plug adapter
applicable to the country you are staying is required. Do not charge the battery
using a transformer for overseas travel.
✔
INFORMATION
・
Some i-αppli remains operating even when FOMA terminal is closed, consuming
power. In this case, the call, communication or stand-by time may be reduced.
・
During a call or communications, charging may not finish. Charging may not complete
if you start battery charging while watching/recording 1Seg, playing movie/i-motion,
obtaining Music&Video Channel program, activating Music&Video Channel player or
MUSIC Player, running i-αppli. In this case, it is recommended to end the operation,
and then charge the battery.
・
Charging may not be completed depending on the settings of Display & Key light or in
some charging methods, for example, charging FOMA terminal in a open state with
"Always on" set to Normal use in Display light time of Display & Key light. To complete
charging, it is recommended that charging be done with FOMA terminal closed.
・
If you use the videophone or make packet communication or 64K data communication
while charging, internal temperature of FOMA terminal may increase and the charging
may not finish normally. In this case, wait until the temperature drops and try again.
❖
Charging using AC adapter or Desktop holder
Read the respective instruction manual when using the optional FOMA AC adapter,
DC adapter or Desktop Holder.
・
The battery pack cannot be charged without FOMA terminal. When charging the
battery pack, install it to FOMA terminal.
■
Using desktop holder and AC adapter in combination for charging
a
Insert the AC adapter to the desktop holder, with the arrow on the AC adapter's
connector upward.
b
Unfold the AC adapter's power plug and insert it into a 100V AC outlet.
c
With FOMA terminal closed, align the charging terminal of FOMA terminal with
the charging jack of the desktop holder, and press the terminal in the direction
of the arrow until it clicks.
d
After charging is completed, hold the desktop holder and remove FOMA
terminal.
Power plug
Light
Desktop holder Charging jack
AC adapter
Release button
Connector
100V AC
outlet
Insert at the back side
Before Using the Handset
44
Page 47

■
Charging the battery using AC adapter only
a
Open jack cap (a) of FOMA terminal, hold the connector horizontally with the
arrow side upward and insert it to the jack. (
b
Unfold the power plug and insert it into a 100V AC outlet.
c
When charging is over, pu ll out the power plug from the outlet, and pull out from
FOMA terminal horizontally while pressing the release buttons on both sides of
the connector.
Light
Connector
Release
button
❖
Charging in a car
By using FOMA DC Adapter 01/02 (optional), charging is available in a car.
・
For details, refer to the operation manual of DC adapter.
・
When FOMA terminal is not used or you are leaving the car, disconnect the
cigarette lighter plug of the DC adapter from the cigarette lighter socket and
disconnect the DC adapter connector from FOMA terminal.
・
The fuse (2A) of the DC adapter is a consumable part. Contact your nearest
automotive supply store for a replacement.
External
connection
jack
b
Jack cap
)
Power plug
AC adapter
100V AC
outlet
✔
INFORMATION
・
Insertion or removal of the AC and DC adapter connectors should be done slowly and
carefully so that they are not given excessive force. When disconnecting the connector,
pull it straight while pressing the release button. Applying an excessive force to
disconnect the connector may give damage to it.
❖
Operations and precautions for charging
When charging starts, a charge start alert sounds, the light turns on and the battery
icon on the display blinks. When charging is over, a ch arge completion alert sounds,
the light turns off and the battery icon stops blinking.
・
When starting the battery charging, the light turns on in red. In some
environments, the light may not light immediately when charging starts; this is
normal and not a malfunction. However, if the light does not turn on after a while,
disconnect FOMA terminal from the AC adapter, desktop holder or DC adapter
then connect it again to start charging. Contact the sales outlet such as DOCOMO
Shop if the light does not turn on for a while after charging starts.
・
If you receive a mail or shoot with the camera while charging, the light turns on
temporarily in a different color, but it turns on in red after a while.
When the light blinks while charging except for these reasons
"Troubleshooting"
・
When installing the fully charged battery pack to FOMA terminal and connecting
it to the AC adapter, desktop holder or DC adapter, the light may turn on for a
moment and turn off. This is normal and not a malfunction.
・
During a call, communication or PushTalk session, in Silent mode or Public mode
or with Charge alert "OFF", the charge alert does not sound at start or completion
of charge.
・
If the battery icon is set with Kisekae Tool in other than "Preinstalled" folder, the
battery icon set by default blinks.
→
P413
Before Using the Handset
45
Page 48

Remaining battery level
Checking battery level
A battery icon appearing on the top of the display shows an approximate
remaining battery level.
(Battery level 3) : Ample charge.
(Battery level 2) : Low charge.
(Battery level 1) : Very low. Charge the battery.
・
The battery icon set by default varies by the color of FOMA terminal.
❖
When battery is almost exhausted
A message indicating low battery appe ars. Pressing any one of g, c, f keys
with FOMA terminal opened deletes the message temporarily. After a period of
time, a battery alarm sounds from the speaker and all icons on the top of the disp lay
start blinking. The power is turned off after approximately 1 minute. While these
operations stop when charging starts, press
alarm.
・
During a call, the message remains displayed and the battery alarm keeps
sounding from the earpiece. After approximately 20 seconds, the call ends, the
battery alarm sounds from the speaker and all icons on the top of the display
blink.
◆
Checking battery level by sound and display <Battery
level>
m
[Settings & NW services]
1
The battery level is displayed and the keypad sound (→P86) is emitted
according to the level. After a while, the screen returns to the menu list.
Battery level 3 : Three pips sound.
Battery level 2 : Two pips sound.
Battery level 1 : One pip sounds.
f
to immediately stop the battery
765
Power ON/OFF
Turning power ON/OFF
❖
Turning power ON
f
(2 sec. or more)
1
The wake-up screen appears and the stand-by display appears. appears at
the bottom of the display while reading UIM.
・
An antenna icon appearing at the top of the display shows the approximate
received signal level.
Antenna icon
Stand-by display
Icon
Received
signal level
・
The battery icon set by default varies by the color of FOMA terminal.
❖
Turning power OFF
f
(2 sec. or more)
1
Strong Weak
Out of service area or where
radio waves do not reach
Before Using the Handset
46
Page 49

◆
Operations to perform after turning the power ON at the
first time
When turning the power ON for the first time, operate in the order of "
の設定
(enlarged menu setting)"→"Initial setting". The settings made can be
changed later.
・
When initialization is finished, a confirmation screen of software update function
appears. Press
❖
Enlarged menu setting
"Yes" or "No" on the confirmation screen
1
・
❖
Default setting
・
Always set Password and Request permit/deny. When C or c, f is
pressed before setting terminal security code or Request permit/deny, a
confirmation screen appears asking you to exit. If you exit by selecting "Yes", this
confirmation screen reappears when the power is turned ON the next time.
・
On the stand-by display, initial setting screen is also displayed by pressing m
[Settings & NW services]
Set required items on Initial setting screen
1
Date & time :
Password :
Keypad sound :
Text size :
Request permit/deny :
g
to display the stand-by screen.
When selecting "Yes", "
If you cancel the confirmation screen by pressing
confirmation screen reappears when the power is turned ON the next time.
拡大メニュー
769
(enlarged menu)" of Kisekae Tool is set.
.
c
eC
Set the date and time.→P48
Change the terminal security code after performing authentication.
→
P103
location information. To permit the location request in a specified period, set
the permission period in Request permit/deny.
Set a confirmation sound emitted when a key is pressed.→P86
Set size of characters for phonebook, mail, etc.→P98
After performing authentication, set if you provide
→
P274
拡大メニュー
or f, the
❖
Checking Welcome mail
"
オススメ
(Early warning "Area Mail" information)", "Welcome
(Decome-Anime)" mail messages are saved by default. appears on the standby display, and the light (blinking) indicates that there is unread mail.
1
✔
・
・
BEST (Recommendation)", "
緊急速報「エリアメール」のご案内
デコメアニメ
geg
The next procedures→P137 Step 2 and the following steps in "Displaying mail
in inbox/outbox/unsent mailbox"
INFORMATION
When UIM is replaced, authentication is required after turning ON FOMA terminal.
When authentication has succeeded, the stand-by display appears. If an incorrect
terminal security code is entered 5 times consecutively, the power is turned off (the
power can be turned on again).
If no operation is performed with something displayed on the screen, the display light
is turned off automatically according to the settings in Light time-out or Power saving
mode. It also applies while making a call. The display light turns on again if there is any
operation or incoming call.
Select language
Changing screen display to English
You can select language from Japanese or English (Select language).
m [設定
1
263e1
✔
INFORMATION
・
This setting is also saved to UIM.
・
Even if setting to "English", the displayed menu is not switched to English in some
Kisekae Tool. Note that, when Kisekae Tool in "Preinstalled" folder is set, a menu
dedicated to "English" is displayed.
・
Even if changing this setting, the title of Shortcut icon is not changed from the language
set when the shortcut icon was pasted.
/NW
サービス
(Settings & NW services)]
or 2
Before Using the Handset
47
Page 50

Date & time
Setting date and time
You can set so that the time or time difference is automatically corrected or directly
enter the date and time. With automatic correction set, the time is corrected when
receiving the time information from DOCOMO's network in Japan or the time
difference correction information from the telecommunications carrier used
overseas.
m
[Settings & NW services]
1
items
eC
Auto time adjust :
・
When "ON", Offset can be set.
・
When "OFF", set the date and time. Time zone and Summer time may also be
set.
Offset :
When "+", the displayed time is always set forward the specified period
of time from the corrected time. When "-", the displayed time is always set
back the specified period of time from the corrected time.
Date :
The date can be entered up between January 1, 2000 and December 31,
2050.
Time :
Enter the time in the 24-hour format.
Time zone :
without changing the date and time settings.
・
Time difference from the pr eviously set time zone is calculated and displayed.
・
Set "GMT+09:00" in Japan.
Summer time :
specified time.
✔
INFORMATION
<When setting Auto time adjust to "ON">
・
Time or time difference is corrected when FOMA terminal is turned ON. If not corrected
for a while after turning FOMA terminal ON, once turn FOMA terminal OFF and then
turn it ON again. Note that, when no UIM is installed or in some radio wave conditions,
time is not corrected even if FOMA terminal is once turned OFF and turned ON again.
・
When time difference is corrected, a message indicating it appears.
・
After time or time difference is corrected overseas, the time displayed for call histories
and sent mails is local time.
・
Time difference is not corrected in some networks overseas.
・
The corrected time or time difference may have an error of several seconds.
Set whether time is corrected automatically.
When moving to a place with time difference, set the time zone
When "ON", the displayed time is set forward one hour from the
721e
Set required
<When the correction has never been performed and date and time are displayed with "-
-" or "?">
・
Flash graphics, Machi-chara, etc. that use clock or date/time are not displayed correctly.
Also, functions requiring date/time information such as Auto start, Reserve,
downloading or playing data with Replay Restriction, operating a user certificate, etc.,
cannot be activated.
・
Date and time of each data are not recorded and displayed as "----/--/--" or "---------------". A segmental number furthermore (number to segmentalize) may be appended.
<When setting date/time with Auto time adjust set to "OFF">
・
When the date/time are deleted because of removing of the battery pack or leaving the
battery for a long time after the battery exhausted, set the date/time again after
charging the battery.
Caller ID notification
Notifying the other party of your phone number
You can set FOMA terminal to display your number (Caller ID) on the other party's
terminal when making a voice call, videophone call or PushTalk call.
・
For details, refer to "Mobile Phone User's Guide [Network Services]".
・
Caller ID is your important information. Carefully consider whether you want to
include caller ID information when making a call.
・
The caller ID is displayed only when the phone of the other party is a digital
mobile phone etc. enabled to display the caller ID.
・
Setting operations for this function is disabled from a location out of service area.
m
[Settings & NW services]
1
・
Press m [Settings & NW services]
check the current settings.
❖
Priority of Caller ID notification
There are multiple methods to notify your phone number to the other party. If you
set or perform these methods simultaneously, the caller ID operations are
performed with the priorities below. The displayed setting and actual Notify/Not
notify may differ.
a
When setting a caller ID notification method in Call option for dialing→P57
b
When "186" or "184" is prefixed to phone number to dial→P57
c
Caller ID settings of phonebook (for PushTalk, dialing 1 party)→P78
d
Activate/Deactivate of Caller ID notification
8411e1
8412
and select "Yes" to
or
2
Before Using the Handset
48
Page 51

✔
INFORMATION
・
If an announcement of requesting caller ID is heard when making a call, make a call
again after setting your caller ID to be notified.
User information
Checking your own phone number
You can check your phone number (My phone number), Name, Mail address, etc.
m
[User information]
1
Checking during a call etc. :
✔
INFORMATION
・
For details of how to check i-mode mail address, see "Mobile Phone User's Guide [imode] FOMA version".
・
When 2in1 is in Dual mode, you can press a to switch User information between
Number A and B.
・
With 2in1 ON, if replacing UIM (2in1 subscriber→2in1 subscriber), set 2in1 to OFF then
set it to ON again to obtain the correct Number B, or obtain Number B from User
information.→P329
Also, if replacing UIM (2in1 subscriber→2in1 non-subscriber), set 2in1 to OFF to update
to the correct user information.→P361
s0
Before Using the Handset
49
Page 52

Page 53

Voice/Videophone Calls/PushTalk
Making a call/videophone call
Videophone calls ............................................................................................ 52
Making a call/videophone call ...................................................................... 52
Switching a voice/videophone call during a call ........................................ 54
Making a call using redial/received calls ............... Redial/Received calls 54
Using Chaku-moji ..................................................................... Chaku-moji 56
Setting caller ID to send/not to send for each call ...................... 186/184 57
Sending tone signals (DTMF) ....................................................................... 57
Making a call under set conditions .......................................... Call option 57
Making international calls .................................................... WORLD CALL 58
Registering prefix .................................................................. Prefix dialing 59
Setting Sub address ............................................................... Sub address 59
Reducing surrounding noise to make voice clear .......... Noise reduction 60
Talking hands-free while driving .................................. In-Car Hands-Free 60
Receiving a call/videophone call
Receiving a call/videophone call .................................................................. 60
When the other party switches voice/videophone call ............................. 61
Pressing a dial key to answer call ................................... Any key answer 61
Answering a call by opening FOMA terminal .............. Slide and answer 61
Setting operations when FOMA terminal is closed ......... Close settings 61
Setting the priority screen for an incoming call during another call
......................................................................................
Priority comm mode 62
When you can/could not answer a voice/videophone call
Putting a call on hold when you cannot answer immediately
..........................................................................................
Using public mode ......................................................................................... 62
Recording voice/video messages when you cannot answer the call
............................................................................................
Playing/Deleting record messages/voice memos ...................................... 64
Respond and Hold 62
Answer machine 64
Videophone call settings
Using Chara-den ............................................................................................ 65
Setting image during a videophone call ..................................................... 65
Changing videophone settings ................................................. Operation 67
Setting for switching a voice/videophone call
...............................................................................
Setting actions for incoming calls during packet communication
......................................................................................
Using videophone call by interfacing to external device
...............................................................................................
Notify switchable mode 67
DataSession arv. act 67
External device 68
PushTalk
PushTalk ......................................................................................................... 68
Making a PushTalk call .................................................................................. 69
Receiving a PushTalk call .............................................................................. 70
Using PushTalk phonebook entries ............................................................. 71
Setting operations for PushTalk .................................................................. 72
51
Page 54

Making a call/videophone call
Videophone calls
Videophone function is available between terminals that support DOCOMO
videophone.
・
Videophone calls are only available at 64 kbps.
・
DOCOMO videophone specifications conform to "3G-324M*2, an international
standard prepared by 3GPP
specifications cannot be established.
*1
3GPP (3rd Generation Partnership Project)… is an area standardization organization
established to develop standard technology specifications for third generation mobile
communications system (IMT-2000).
*2
3G-324M…An international standard for 3rd generation mobile videophone
◆
Reading screen during a videophone call
Main screen
Sub screen
・
Icon definitions
- : Zooming
: Sending camera image : Sending Camera-Off images
: Using Chara-den
: Sending still image : On hold : Respond and Hold
: Recording message : Recording movie memo
/ : Action mode (Full motion/Semi-motion)
/ / / : Scene mode (Standard/Backlight/Monotone/Sepia)
: Light ON
/ : Sending image quality (Prefer motion speed/Prefer image quality)
: Sending/Receiving audio : Sending/Receiving video
: Sending/Receiving audio/video
- : Adjusting Listen volume
: Macro shooting ON
Voice/Videophone Calls/PushTalk
52
*1
". The connection with the videophones of different
Setting status icons
Call duration
: Videophone call switch available
Making a call/videophone call
・
Unblocking Touch lock→P115
Enter a phone number (up to 80 digits)
1
・
Always enter area code even when calling from the same city.
c
: Delete 1 digit
Select a call type
2
Making a voice call :
Making a videophone call :
Your own image is displayed while the videophone call is connected.
・
The charging begins when "Connected to videophone." appears on the
screen.
When ending the call,
3
✔
INFORMATION
<For both voice and videophone calls>
・
With 2in1 in Dual mode, the caller ID selection screen is displayed. Select "Number A"
or "Number B".
・
If an announcement requesting caller ID is heard, make a call again after setting your
caller ID to be notified.
<Voice call>
・
You can make a call by entering a phone number after pressing n. In this case, a call
is made approximately 5 seconds after the phone number is entered.
<Videophone call>
・
The charges are based on the rate for digital communication not for voice calls even
when substitute image is sent instead of the camera image.
・
If videophone call was not connected, a message appears indicating the reason and
stand-by display reappears. Displayed messages may not reflect the state of the other
party correctly depending on the type of terminal and/or usage of the network service
by the other party. Main messages are as follows.
-
Busy. :
The line of the other party is busy (may appear during packet communication on some types
of the other party's terminal)
-
Set Caller ID to ON :
-
Redial using voice call :
destination does not support videophone calls
-
Busy with packet transmission. :
n
C
f
Caller ID is not sent (such as when connecting to visualnet)
The other party is set for Call Forwarding Service but forwarding
The other party is performing packet transmission
Page 55

-
Make call from i-mode web page :
provided by IP (Information Provider)
-
Upper limit exceeded. Connection failed. :
function (Type Limit or Family Wide Limit) is exceeded
・
If a videophone call accompanied with Chaku-moji is made when Auto redial as voice
in Operation is set to "ON", Chaku-moji accompanies when redialing.
・
Any videophone call from FOMA terminal to emergency call (110, 119 or 118) with Auto
redial as voice in Operation set to "ON" is automatically switched to a voice call.
◆
On hold
・
The caller is charged for time spent on hold.
During a call,
1
The call is put on hold, light blinks in green, and a melody is played. For a
videophone call, the videophone on-hold image is displayed on the phone of
the other party and yourself.
・
To clear voice call on hold, press g or n.
・
To clear videophone call on hold, perform any of the operations below.
g
I
a
・
While on hold, FOMA terminal vibrates every 3 minutes, up to 5 times.
However, it does not vibrate in Public mode (Drive mode) or while Vibrate
alert in Personalized silent mode is set to "OFF".
◆
Using speakerphone function
Enter a phone number
1
appears at the top of the display.
・
For operating from phonebook, Redial, Received calls, Recorded messages or
Voice memos, press
・
Press C for 1 second or more to use speakerphone while Speakerphone in
Operation is set to "OFF".
・
While making a call, ringing or talking on the phone, you can switch the
speakerphone function ON/OFF each time you press
g
: Redisplay the image sent before the call is put on hold
/ n : Camera image is sent
: Substitute image is sent
You are not making videophone call after connecting to site
Upper limit of a charging plan with a limiting
en
(1 sec. or more) or
n
(1sec. or more) or I.
C
n
.
✔
INFORMATION
・
If you switch to speakerphone, the volume may suddenly increase. Use it with FOMA
terminal away from your ears.
・
Talk to FOMA terminal within approximately 50 cm. If a call is hard to hear from the
speaker due to loud noise around you or the other party, turn the speakerphone
function OFF.
・
This function can be used in Silent mode.
◆
Adjusting Listen volume during a call
・
This setting applies to Listen volume in Adjust volume.
During a call,
1
◆
Using Voice clear/Voice slowing
❖
Switching Voice clear ON/OFF
This function detects ambient noise and optimizes the other party's voice during a
voice call by limited vocal range to make the voice be heard clearl y. And, the volume
is automatically increased also when your or other party's voice is small.
・
This function does not operate while using speaker phone function or in overseas
GSM/GPRS network.
・
The settings are retained after a call.
・
This function is not for adjusting Listen volume. Change the volume of the other
party's voice with Listen volume.
During a voice call,
1
When setting to "ON", appears. When this does not operate with
ON, it is displayed in gray.
❖
Switching Voice slowing ON/OFF
During a voice call, adjust the other party's voice to be heard slowly by using the
silence at intervals, to make it easier to be heard. When the other party speaks
without intervals, the voice is heard at the normal speed.
・
If you set Voice slowing t o ON, the quality of the other party's voice, music or time
tone may change. In this case, set Voice slowing to OFF.
・
This function does not operate in overseas GSM/GPRS network.
・
The settings are canceled after a call.
j
m7
Voice/Videophone Calls/PushTalk
53
Page 56

During a call,
1
When setting to "ON", appears. When this does not operate with
ON, it is displayed in gray.
a
Switching a voice/videophone call during a call
・
Switchable only from the caller.
・
This function is available among the models which support switching voice call
and videophone call.
・
To switch the call, the other party needs to set Notify switchable mode to ON.
P67
<Example> Switching to videophone call during a voice call
During a voice call, Ie"Yes"
1
・
During call switching, a message indicating to switch the call is played.
・
When switched to videophone call, speakerphone is activated.
Switching to voice call during a videophone call : During a videophone call,
m1e
・
Speakerphone is deactivated when the call is switched to voice call.
✔
INFORMATION
・
It takes approximately 5 seconds to switch. It may take longer depending on radio wave
conditions.
・
Voice calls and videophone calls are charged individually depending on their
respective times. The time for switching calls is not counted in the call duration thus
not charged.
・
Under some radio wave conditions, switching calls is unavailable, resulting in
disconnection of the call.
・
During voice call using Call Waiting, switching to videophone call is unavailable.
・
When packet communications are made during a voice call, packet communications
are disconnected before switching to a videophone call.
・
While the other party is performing packet communication, switching to a videophone
call is unavailable.
・
Settings such as camera image sending etc., made during a videophone call are
canceled each time you switch voice call and videophone call.→P65
"Yes"
Redial/Received calls
Making a call using redial/received calls
This function allows you to record call log (Redial) and received calls including
PushTalk calls.
・
Up to 30 items are recorded in each of Red ial and Received calls. When exceeding
the savable number, record is overwritten chronologically.
・
When using 2in1, up to 30 items are recorded for Numbers A and B, respectively;
a total of 60 items each can be recorded for Redial and Received calls.
・
When calls are made to the same phone number, the latest call is recorded in
Redial as "Unspecified", "Notify" or "Not notify" of Caller ID.
→
r
(Redial) or l (Received calls)eMove the cursor to a party
1
・
Select the party to display details screen. Select making/receiving of Pus hTalk
call to display all the members, and press
details screen.
<Example> Redial screen
・
Icon definitions are as shown below.
call
communications
(PushTalk Plus)
Redial list screen Redial details screen
/ : Making/Receiving of voice call/international voice call
/ : Making/Receiving of videophone call/international videophone
*1
/ : Receiving of 64K data communications/international 64K data
/ : Making/Receiving of PushTalk call to 1 person/multiple persons
/ : Making/Receiving of PushTalk call to 1 person/multiple persons
/ : Missed call/Unchecked missed call
/ : Recorded message/Unchecked recorded message
: Received call with Chaku-moji
/ : Missed call with Chaku-moji/ Unchecked missed call
→
P68
g
and select a member to display
*1
*2
Voice/Videophone Calls/PushTalk
54
Page 57

/ : Recorded message with Chaku-moji/Unchecked recorded
*2
message
/ : Calling of show/hide of Caller ID set in Call option or Caller ID settings
of phonebook
: Making/Receiving call while staying overseas (except GMT+09:00)
: Making/Receiving a call from/to Number B (with 2in1 in Dual mode)
: Ringing time of missed call (Not displayed for receiving of PushTalk)
*1
If you directly enter "010" or dial from "010" saved in phonebook, the international
call icon and "+" do not appear.
*2
If recorded message is deleted, this icon changes to missed call icon.
*3
May not appear when the call making/receiving date and time is not recorded etc.
n
or
2
✔
INFORMATION
<Redial/Received calls common>
・
If voice and videophone calls are switched during the call, the type (voice/videophone)
at the time of making/receiving the call is recorded.
・
For international call, "+" appears before phone number. It is not displayed when
dialing with "010" prefixed.
・
If you press h during a voice call, Redial/Received calls appear.
・
When an image is saved to phonebook, details screen is displayed according to View
preference.
<Redial>
・
When you subscribe to Multi Number, name of a call dialed by specifying Multi
Number from submenu is displayed on details screen.
・
When PushTalk group call is made, the group name appears.
・
When a PushTalk call is made to multiple members, the information of the first member
appears on the list screen.
<Received calls>
・
When caller ID of the other party is not shown, the reason for hiding caller ID appears.
・
When you subscribe to Multi Number, name of Multi Number used for incoming call
appears on details screen.
・
Calls received from callers using dial-in services in an office etc. may display different
numbers from the caller's dial-in number (Dial-in service allows you to have multiple
incoming phone numbers for one telephone line).
・
Received Chaku-moji is recorded in received calls.
I
・
Pressing g on the details screen makes a call in the same way as the call
type of the selected redial/received calls.
・
Press
m1
・
With 2in1 in Dual mode, a call is made from the number specified for
incoming/outgoing calls.
to make a call specifying conditions.→P57
*3
・
To display all received call logs including missed calls within the delay time set in Ring
alert delay, press
call list, press
・
To display the number of unchecked missed calls, press
❖
Using Redial/Received calls
・
Using PushTalk→P69
Check the location of the other party : Move the cursor to the other
party
Accessed to "imakodokantan search" using a phone number as the target.
・
For details about imakodokantan search, refer to NTT DOCOMO website.
・
If PushTalk call is made/received to/from multiple members, move the cursor to a
party in the details screen.
Adding to phonebook : Move the cursor to the other party
2e1
Phonebook new entry→P74
・
Select a phonebook entry to update the entry.
Creating i-mode mail : Move the cursor to the destination party
Creating SMS : Move the cursor to the destination partyea (1 sec. or more)
Switching Redial/Received calls :
Displaying Sent msg log/Received msg log :
✔
INFORMATION
・
When using 2in1, you cannot create i-mode mail or SMS from Redial/Received calls for
Number B.
❖
Switching details screen display <View preference>
On details screen,
1
❖
When you missed calls <Missed calls>
(The digit indicates the number of missed calls) appears on the stand-by
display. The incoming calls are recorded as missed calls in Received calls.
・
When a missed call from an unknown phone number exists, the ring time enables
you to check whether it is a malicious ("One-ring phone scam" etc.) call for the
sole purpose of recording the phone number in the received call list.
m91
m92
em4e
or
2
on Received calls list. To return to original Received
.
"Yes"
m7
m0
em5e1
C
m9e1-3
Voice/Videophone Calls/PushTalk
on Received call list.
ea
or
55
Page 58

◆
Deleting Redial/Received calls
・
For a PushTalk call, a selected member cannot be deleted.
r
(Redial) or l(Received calls)eMove the cursor to an
1
entry
em6e1-3e
・
To delete 1 item, move the cursor to the redial/recieved calls.
・
To delete selected items, select themeC. To delete all items,
authentication is required.
Chaku-moji
"Yes"
Using Chaku-moji
When making a voice or videophone call, a message can be sent in a ring time to
inform the receiver of the purpose and urgency of the call.
・
For details of Chaku-moji or supported models, refer to NTT DOCOMO website or
"Mobile Phone User's Guide [Network Services]".
・
The sender is charged for communication fee, but the receiver is not.
・
This function is unavailable for PushTalk.
Chaku-moji
◆
Editing or Setting Message
m
[Settings & NW services]
1
Operate Chaku-moji
2
Adding message :
characters)
・
Up to 10 items can be saved.
・
Select the existing Chaku-moji to edit it. In this case, a confirmation screen for
adding appears.
・
To quote Chaku-moji from Sent messages, press
moji.
・
To delete 1 item, move the cursor to a message and press
all items, press
eC
1e
m3
83
"<New message>"eEnter Chaku-moji (up to 10
m1
and select Chaku-
m2
and select "Yes".
. To delete
Setting display for incoming message <Message display settings> :
2e1-4
・
If "Hide all" is set, no Chaku-moji is received.
◆
Making a call accompanied by message
Chaku-moji appears on the incoming call screen of the other party.
・
Up to 10 sent Chaku-moji are saved to Sent messages. When exceeding the
savable number, record is overwritten chronologically.
・
When using 2in1, up to 10 sent Chaku-moji are saved to Sent messages for
Numbers A and B, respectively; a total of 20 sent Chaku-moji are saved. Display
differs depending on mode.
Enter a phone number
1
characters)
When the other party receives the message, "Transmission:success" appears
on the calling screen and message transmission is charged.
・
✔
INFORMATION
・
Message cannot be sent if the terminal of the other party is not compatible with this
function, when Message display settings is set to "Hide all", or while the terminal is
overseas. In these cases, "Transmission:failure" appears and no message transmission
fee is charged. Also, if the terminal of other party is not turned on, is out of service area,
in public mode (drive mode) or if Greeting msg resp time is set to "0 Sec.", a message
cannot be sent and the transmission result is not displayed.
・
Chaku-moji is sent even within the delay time in Ring alert delay set on the terminal of
the other party, and transmission is charged.
・
Depending on radio wave conditions, the transmission result may not appear even
when Chaku-moji arrives to the terminal of the other party, and transmission is
charged.
・
Chaku-moji cannot be sent/received overseas.
・
With 2in1 in Dual mode, appears in Sent messages of Number B.
eCem
You can also select from saved or Sent messages.
em31e
or
I
Enter Chaku-moji (up to 10
Voice/Videophone Calls/PushTalk
56
Page 59

186/184
Setting caller ID to send/not to send for each call
・
Caller ID is your important information. Carefully consider whether you want to
include caller ID information when making a call.
・
This function is unavailable for PushTalk.
・
Priority of the method to notify a caller ID→P48
Notifying your caller ID :
Not notifying your caller ID :
✔
INFORMATION
・
In case of international call, caller ID may not be notified depending on connecting
phone companies even when "186" is prefixed.
・
When making a call by prefixing "186" or "184", the phone number prefixed with that
number is recorded in the redial list.
186e
184e
Enter a phone number
Enter a phone number
en
en
or
or
C
C
Sending tone signals (DTMF)
・
Pause and timed pause are effective only for voice calls.
❖
Sending pause "P"
This function allows you to operate Voice mail at home, to reserve tickets or to
check the balance of a bank account, etc.
Enter a phone number
1
number
en
When pressing g after the call is connected, the digits after the pause ("P") are
sent.
❖
Sending timed pause "T"
Timed pause ("T") is used to dial outside line number followed by an extension.
When timed pause ("T") is entered between the phone and extension numbers, the
extension number is dialed with a pause of the predetermined seconds after the
phone number is dialed.
Enter a phone number
1
number
en
・
Timed pauses ("T") can be entered in succession.
e*
(1 sec. or more)eEnter a
e#
(1 sec. or more)eEnter an extension
・
Each timed pause ("T") is followed by an interval of approximately 1 second.
❖
Sending tone signals (DTMF) during a videophone call
During a call,
1
The number you pressed is displayed and the tone signal is transmitted.
c
・
While sending camera image or Camera off image, tone signals can be sent
only by pressing numeric keys without pressing
・
A still image being sent is canceled.
・
During Chara-den call, actions by pressing numeric keys are not available.
✔
INFORMATION
・
Tone signals may not be received depending on the receiving device.
・
You cannot make a call to another party, putting the current call on hold, by entering a
pause ("P") or timed pause ("T").
Call option
m0e
: Cancel sending
Enter a number
m0
.
Making a call under set conditions
You can set calling conditions each time you make a call or PushTalk call.
・
Only Caller ID can be set for a PushTalk call.
・
Priority of the method to notfy a caller ID→P48
Enter a phone number
1
Chaku-moji :
Multi-No/Own number :
Call type of Multi Number
・
Own number is displayed when 2in1 is in Dual mode or B mode. Select
"Number A" or "Number B" when in Dual mode
Call type :
Caller ID :
・
When "Unspecified" is set, it operates according to Activate/Deactivate
setting.
Prefix :
Int'l call :
Int'l prefix :
call
Country code :
Creating/selecting Chaku-moji→P56
Select call type
Set Notify/Not notify caller ID
Select Prefix to be added at the beginning
Set Int'l call→P59
Select international prefix number when making an international
em2e
Select a number from which a call is dialed
→
P360
Select country code to dial for international call
Set required items
→
P360
Voice/Videophone Calls/PushTalk
57
Page 60

m
or
2
✔
・
・
n
・
If "V.phone" is selected for Call type, Chara-den to display during a call can be
set by pressing
・
When operating from the received message/sent message details screen, or
when using Phone To (AV Phone To) function, a confirmation screen for
calling may appear. When "No, use original" is selected, a call is made with
the settings other than Chaku-moji and Call type canceled.
INFORMATION
"SMS" of Call type can be selected in cases like using SMS To function.
Even when sending/receiving a call with Caller ID notification set, Caller ID may not be
notified or incorrect Caller ID may be displayed depending on telecommunications
carriers used. In this case, you cannot make a call from Received calls.
WORLD CALL
I
.
Making international calls
・
Overseas use→P366
・
"WORLD CALL" is the international call service available from DOCOMO mobile
phones.
・
You can call approximately 240 countries and regions in the world.
・
"WORLD CALL" charges are added to the FOMA service charges every month.
・
No subscription charges apply. No monthly fee is required.
*
You are subscribed to "WORLD CALL" at the time of subscription to the FOMA service
(Unless you request not to subscribe to it).
・
There are some charging plans unavailable.
・
Contact the numbers for General Inquiries on the back of this manual for details
of "WORLD CALL".
*
To use international call services except the DOCOMO service, contact the carrier for
details.
"International videophone" calls to parties using specific overseas 3G mobile
phone terminals can be made by dialing as described below and placing a call in
the videophone mode.
・
For countries and overseas telecommunications carriers available, refer to
DOCOMO's "International service web page".
・
The image of the other part y displayed on FOMA terminal may be distorted or
connection may not be established depending on the other party's terminal
connected through the i nternational videophone line.
010e
1
phone number
・
Omit "0" in area code (city code) starting with "0". The leading "0" is required
for certain countries including Italy (land-line phones).
・
The above phone number can be saved in FOMA terminal phonebook.
・
You can also call by 009130e010eCountry codeeArea code (City
e
code)
❖
Making international call entering "+"
Entered "+" is converted to the international prefix number "009130010 (WORLD
CALL)".
・
When a call is made by entering Japanese country code "81" succeeding "+",
international prefix number is not converted.
0
(1 sec. or more)eCountry codeeArea code (City code)eEnter
1
a phone number
・
Press 0 for 1 second or more to enter "+".
・
Omit "0" in area code (city code) starting with "0". The leading "0" is required
for certain countries including Italy (land-line phones).
❖
Making international call by selecting international prefix
Country codeeArea code (City code)eEnter a
en
phone number
ene
"Yes"
number and country code
You can select international prefix number or country code registered in Int'l call
assist.
Area code (City code)eEnter a phone number
1
Int'l call field
int'l prefix number
code
・
When "No, use original" is selected, a call is made with the settings other than
Chaku-moji and Call type canceled.
em
e2e
or
ne
Select Int'l prefix fieldeSelect the name of
e
Select Country code fieldeSelect Country
"Yes"
em2e
Select
Voice/Videophone Calls/PushTalk
58
Page 61

◆
Setting Int'l call assist
❖
Setting Auto switch
You can set whether entered "+" is automatically converted to international prefix
number. Also, you can set whether country code is added for a call made from
overseas.
m
[Settings & NW services]
1
items
eC
Country code :
・
These settings are useful when making a call overseas.
Int'l prefix :
❖
Editing country code <Country code setting>
Up to 22 country codes that are required for making international calls can be save d.
m
1
Select a country code
2
Setting auto conversion : Move the cursor to country code
is added to the selected number.
Deleting : Move the cursor to a country code
Set required items
3
Country name :
Country code :
❖
Setting Auto assist setting
You can save up to 3 items to be prefixed to a phone number when making
international calls.
m
1
"<Not recorded>"
2
Setting auto conversion : Move the cursor to Int'l prefix No.
is added to the selected name.
Deleting : Move the cursor to Int'l prefix number
Set required items
3
Name :
Select "ON" then country code
Select "ON" and select Intn'l prefix number
[Settings & NW services]
eC
Enter up to 8 two-byte (16 one-byte) characters
Enter up to 5 digits
[Settings & NW services]
eC
Enter up to 8 two-byte (16 one-byte) characters
931e
932
em3e
933
em3e
Set required
eC
"Yes"
eC
"Yes"
Int'l prefix No. :
Prefix dialing
Enter up to 10 digits
Registering prefix
You can set a number (prefix) such as an international prefix number to be prefixed
to a phone number.
・
Up to 3 items can be set.
・
Making a call with registered prefix→P57
m
[Settings & NW services]
1
the entry field (up to 10 digits)
・
If you register a number (prefix) including a pause ("P") or timed pause ("T"),
you cannot add the prefix when making a call.
Sub address
562e
eC
Enter the number in
Setting Sub address
You can set whether you can call a specific phone or communication device by
specifying a sub address.
・
A sub address is a number used to call a specific device out of multiple telephone
sets and/or communication devices assigned the same phone number (e.g. when
multiple devices with sub addresses are connected to an ISDN line). It is also us ed
to select contents in a graphics download service "V live".
m
[Settings & NW services]
1
◆
Making a call specifying a sub-address
Enter a phone number
1
✔
INFORMATION
・
If "*" is entered after the pause ("P") or timed pause ("T") is entered, it is not recognized
as the separator of sub address and is sent as tone signals containing "*" even if Sub
address is "ON".
563e1
e*e
Enter a sub address
or
2
en
or
C
Voice/Videophone Calls/PushTalk
59
Page 62

Noise reduction
Reducing surrounding noise to make voice clear
・
It is recommended that this function be used set to "ON" normally.
m
[Settings & NW services]
1
In-Car Hands-Free
571e1
or
2
Talking hands-free while driving
When FOMA terminal is connected to a handsfree- compatible device such as In-Car
Hands-Free Kit 01 (optional) or car navigation system, voice calls can be made or
received using the handsfree-compatible device.
・
For operations of handsfree devices, refer to the operation manual for the
respective devices. FOMA In-Car Hands-Free Cable 01 ( optional) is required to use
In-Car Hands-Free Kit 01 (optional).
✔
INFORMATION
・
When a handsfree device is set to sound, the ring alert for incoming calls sounds from
a handsfree device regardless of settings of Silent mode or ring alert setting on FOMA
terminal.
・
When a handsfree device is set to sound, a call continues even when FOMA terminal is
closed, regardless of settings in Close settings.
・
When Answer machine is set, incoming operation is made according to the settings of
Answer machine.
Receiving a call/videophone call
Receiving a call/videophone call
・
Unblocking Touch lock→P115
A call is received
1
A ring alert sounds and the light turns on or blinks.
j
: Adjust the ring alert volume Z : Stop the ring tone or vibration
Display while receiving a call
When caller ID is sent, the phone number appears, and when phone number is
saved in phonebook, saved name appears.
・
When caller ID is not sent, the reason for hiding caller ID appears.
-
User Unset :
Payphone :
-
-
Unavailable :
Operations from submenu while receiving a call
・
The following operations can be performed.
-
Reject call :
-
Voice mail :
-
Call forwarding :
Select call reception type
2
Receiving a voice call :
Receiving videophone calls : n or
Your own image is displayed while the videophone call is connected.
・
Press a instead of n or I to receive a videophone call using the
substitute image.
When ending the call,
3
When the caller selected not to send caller ID
When the call was made from payphone etc.
call from overseas or land-line phone via forwarding services (caller ID may be sent
depending on the carrier)
The call was made when sending the caller ID was not available; e.g. a
Disconnect without receiving a call
Connect voice call to Voice Mail service center
Forward a call to the specified phone number
n
f
I
→
P74
Voice/Videophone Calls/PushTalk
60
Page 63

✔
INFORMATION
・
If you subscribe to Voice Mail service, Call Waiting or Call Forwarding Service, and set
Arrival call act or PushTalk arv. act to "Answer", you hear beeps (the call waiting ring
tone) when receiving another incoming voice call during voice call or PushTalk call. If
you activate Voice Mail, Call Waiting or Call Forwarding Service, the service starts.
・
When Chaku-moji is received, Chaku-moji appears on the incoming screen. Chaku-moji
disappears when you answer the call.→P56
・
When a forwarded call from FOMA terminal arrives, name appears as a normal
incoming call. However, a phone number or a name may not appear depending on
forwarder.
・
When sub address is notified, "*" and the sub address is displayed at the end of the
caller ID.
・
For an international call, a plus sign "+" appears at the beginning of the caller ID.
Slide and answer
Answering a call by opening FOMA terminal
・
This function is available only when receiving a voice call.
m
[Settings & NW services]
1
・
When "ON" is set, you can answer a call by opening FOMA terminal even
when the call is on hold, the greeting message is played, or a message is
recorded.
・
It is available for an incoming call during a call or a held call. When you
subscribe to Call Waiting service, you can answer an incoming call after
placing the current call on hold. If you do not subscribe to Call Waiting
service, the incoming call continues arriving.
564e1
or 2
When the other party switches voice/videophone call
・
Switchable only from the caller.
・
To accept switching, you need to set Notify switchable mode to ON in advance.
P67
Receiving a request for switching during videophone call
1
・
During call switching, a message indicating to switch the call is played.
・
When the request to switch to a videophone call is received, a confirmation
message for sending the camera image appears. When "Yes" is selected, the
camera image is sent to the other party, and when "No" is selected, Default
image specified in Substitute image of Videophone image is sent.
Any key answer
Pressing a dial key to answer call
You can set whether you answer a call by pressing 0-9, g, *, # in
addition to
・
1
n
Any key answer is available for voice calls and PushTalk calls. However, it is
unavailable for an incoming call during another call.
m
.
[Settings & NW services]
53e1
or
2
Close settings
Setting operations when FOMA terminal is closed
→
・
This function does not operate during 64K data communication, packet
communication.
m
[Settings & NW services]
1
✔
INFORMATION
・
In the cases below, the call continues even if FOMA terminal is closed.
- When Flat-plug Earphone/Microphone with Switch (optional) is connected.
- When a device that is connected to handsfree is set to sound
- When message is being recorded by Answer machine.
・
When a call is placed"On-hold", On-hold is deactivated when FOMA terminal is opened
again.
・
Operations during voice call :
572e1-3
m6
Voice/Videophone Calls/PushTalk
61
Page 64

Priority comm mode
Setting the priority screen for an incoming call during another call
You can select the voice call or packet communication screen to be given priority
when data is received via packet communication from a connected PC during a
voice call or when a voice call is received during i-mode communication.
・
A screen change caused by this function does not suspend the call or packet
communication.
・
When i-mode mail or MessageR/F is received during voice call, voice call screen
appears by priority.
・
When a voice call is received while accessing data broadcasting site, Call alert
image appears by priority.
m
[Settings & NW services]
1
・
When this is set to "No Set Up", the incoming screen for the newest call
appears. However, voice call screen appears when packet transmission is
received during voice call.
・
When "Packet" is set, packet communication screen appears during voice call,
and i-mode screen appears during i-mode session. You can switch to the call
screen by pressing
When you can/could not answer a voic e/videophone call
Respond and Hold
→
P209 "Time shift function"
561e1-3
s
from Switch Task menu.
Putting a call on hold when you cannot answer immediately
・
The caller is charged for time spent in Respond hold.
While receiving a call,
1
The call is put on hold, and the other party hears a status message. For
videophone call, response hold image for videophone is displayed to you and
the other party.
When you are ready to answer the call, n or
2
・
Press a to send the substitute image for a videophone call.
・
If f is pressed or the caller hangs up while on hold, the call ends.
f
I
◆
Setting Status message
・
You can record a status message up to approximately 10 seconds in your own
voice.
m
[Settings & NW services]
1
tone field
・
"Record" in Edit message fieldeRecord the greeting message after
2
the beep
・
・
・
・
e2
Press 1 and C to restore the standard guidance.
eC
A message appears, and recording starts. After approximately 10 seconds,
the end tone sounds.
Press g to stop recording halfway.
When a recorded status message is deleted, the preinstalled message is
reset.
Select "Play" to check a status message.
1181e
Select On-hold
Using public mode
Public mode is an automatic answering service putting emphasis on manners in a
highly public place. When a call is recieved with Public mode activated, a status
message or a message indicating that you cannot answer the call is played, and the
call is disconnected.
・
With Public mode (Drive mode) activated, a status message indicating that you
are driving or in a place requiring suppression of calling (in a train, bus, movie
theater, etc.) is played.
・
With Public mode (Power OFF) activated, a status message indicating that you are
in a place where the terminal must be turned off (in a hospital, on an airplane,
near priority seats in a train) is played.
■
Incoming operations while using network services in Public mode (Drive
mode/Power OFF)
・
Voice Mail Service*1, Call Forwarding Service*1, and Caller ID Request Service*2
take precedence over Public mode.
*1
For voice call with ring time set to other than "0 second", a service starts after the status
message for Public mode is played.
*2
When caller ID is sent, Public mode activates.
Voice/Videophone Calls/PushTalk
62
Page 65

・
When a call is sent from a caller whose calls are set to be rejected in Nuisance Call
Blocking Service, Public mode does not activate.
◆
Using public mode (Drive mode)
・
Public mode can be set or canceled only in stand-by. You cannot set this option
out of service area.
・
Even in Public mode, calls can be made normally.
・
Public mode precedes even in Silent mode or Answer machine.
・
Making an emergency call (110, 119 or 118) in Public mode cancels Public mode.
*
(1 sec. or more)
1
Public mode is set and appears on the stand-by display.
Canceling : * (1 sec. or more)
■
When public mode (Drive mode) is activated
Your FOMA terminal does not perform receiving actions, and (the number of
incoming calls) appears on stand-by display and the call is recorded as a missed
call.
・
When a call is received, an announcement "The perso n you are calling is currently
driving or in an area where cellphone should not be used. Please try again later."
is played.
・
The sound below does not ring. Also, vibrator and/or light are not activated.
- Ring alert of phone/PushTalk/mail/i-concier
- Sound of countdown timer, alarm clock, schedule reminder
α
ppli sounds, i-Widget sound effect
-i-
- Call cost limit alert (even when Alert is set to "ON", no messages appear)
- Sounds for starting/completing battery charge, battery alarm, GPS positioning
・
When usage setting by services is "Check every time", no location information is
sent even if Location request of GPS is issued.
・
i-Channel ticker does not appear.
◆
Using public mode (Power OFF)
*25251en
1
Public mode (Power OFF) is set (No change on the stand-by display).
Canceling :
Checking the settings :
■
When public mode (Power OFF) is activated
・
When a call is received in Public mode (Power OFF), a status message indicating
"The person you are calling is currently in an area where use is prohibited. Please
try again later" is played.
・
The settings continue until Public mode (Power OFF) is canceled by dialing "
25250". The settings are not canceled by simply turning the power ON.
・
The Public mode (Power OFF) announcement is played also when you are out of
service area or in a place where radio waves do not reach.
✔
INFORMATION
・
When videophone call is received, Public mode status message image is displayed on
the caller's terminal.
・
When PushTalk call is received, message indicating that the call was not connected
appears on the caller's terminal. When a PushTalk call is made to multiple participants,
"Driving" or "PublicMode" is displayed on participants' screens.
*25250en
*25259en
*
Voice/Videophone Calls/PushTalk
63
Page 66

Answer machine
Recording voice/video messages when you cannot answer the call
When Answer machine is activated, a greeting message is played and the caller can
record message when you cannot answer the call.
・
You can record up to 4 voice and videophone calls in total, approximately 30
seconds for each call.
・
When using 2in1, messages of up to 4 incoming calls to Numbers A and B can be
recorded to Answer machine in total. Display differs depending on mode.
・
This function is unavailable for PushTalk.
◆
Activating Answer machine
m
[Phonebook & Logs]
1
When "ON" is set, appears on the stand-by display.
■
When there is an incoming call with Answer machine active
A call is received
1
When the response time set in Greeting msg resp time elapses, the greeting
message is played according to setting of Set gr eeting message.
The other party's message is recorded
2
・
A beep announces the other party at the start and the end. And when
approximately 25 seconds elapsed since the start, 2 short beeps are heard to
warn that the end is approaching.
When the recording is completed, the call is terminated
3
❖
Responding with Quick answer machine <Quick answer
machine>
Even when Answer machine is not active, you can activate it only once by pressing
Z
for 1 second or more while receiving a call. This operation does not set Answer
machine to active.
81e1
or
2
✔
INFORMATION
・
Even during the greeting message or recording to Answer machine, a call can be
answered by pressing n. For a videophone call, press I to send your image, or
a
to send the substitute image. In this case, message before the call was answered
is not recorded.
・
Answer machine does not operate when FOMA terminal is out of service area or turned
OFF. Use Voice Mail service.
・
When 4 messages are recorded, appears on stand-by display and Answer machine
or Quick answer machine does not operate. Delete unnecessary recorded messages. If
you activated Voice Mail or Call Forwarding Service, the services operate.
・
In Personalized silent mode, "Answer machine" setting for Personalized silent mode is
applied.
◆
Setting the time before the greeting message starts
<Greeting msg resp time>
m
[Phonebook & Logs]
1
◆
Setting the greeting message
・
You can record a greeting message up to approximately 10 seconds in your own
voice.
m
[Phonebook & Logs]
1
field
e2
・
Press 1 and C to restore the preinstalled greeting message.
"Record" in Edit message fieldeRecord the greeting message after
2
the beep
eC
Supplementary description of recording message→P62 Step 2 in "Setting
status message"
813e
814e
Enter time
Select Greeting message
Playing/Deleting record messages/voice memos
◆
Playing recorded message/voice memo
m
[Phonebook & Logs]
1
(Voice memos)
82
(Record messages) or 4
Voice/Videophone Calls/PushTalk
64
Page 67

<Example> Recorded messages screen
・
Icon definitions are as follows.
/ : Recorded message/Played recorded message
/ : Recorded message of videophone call/Played recorded message
/No icon : Voice memo while talking/Voice memo in stand-by
: Making/Receiving call from/to Number B (with 2in1 in Dual mode)
: While staying overseas (except GMT+09:00)
: Recorded message of international call or voice memo while talking
*
May not appear when receiving or recording date/time is not recorded etc.
Select the recorded message/voice memo
2
・
While playing, elapsed playing time appears in the bottom of the screen.
・
While playing, the operations below are available.
j
: Adjust volume g : Stop
n
: Switch the speakerphone function ON/OFF
・
Videophone call message is always pla yed with speakerphone activated. You
cannot turn off the speakerphone.
・
When videophone call message is played in Silent mode, a sound playing
confirmation screen appears. Select "No" to play the message wi thout sound.
Making calls : Move the cursor to message/memo
・
To make a call specifying conditions, press
Adding to phonebook : Move the cursor to message/memo
5e1
Phonebook new entry→P74
・
Select a phonebook entry to update the entry.
Select whether to delete
3
✔
INFORMATION
・
When recording voice memo in stand-by, "Voice memos" is displayed.
or
2
*
en
m3.→
or
I
P57
eme4
◆
Deleting recorded message/voice memo
m
[Phonebook & Logs]
1
(Voice memos)
memo
・
To delete 1 item, move the cursor to the message/memo.
・
Authentication is required to delete all items.
Videophone call settings
e
em2e1
82
Move the cursor to message/
or
2e
Using Chara-den
You can change the character sent during a videophone call.
・
Displaying Chara-den→P290
or
During a call,
1
den
・
The operations below are available during a videophone call.
1-9, #
a
m411e
: List actions
Chara-den
: Action 0 : Stop the action
Setting image during a videophone call
・
The following cannot be set as still image or substitute image to send.
- A still image larger than 176×144
- Animation, created animation
- A still image except in JPEG or GIF format
(Record messages) or 4
"Yes"
Select a foldereSelect Chara-
Voice/Videophone Calls/PushTalk
65
Page 68

- Images that inhibited to output from FOMA terminal →P303 "File restriction" in "List of
display items and changeability"
◆
Setting image to send
Perform necessary operations during a call
1
Switching your own image and substitute image :
・
When Chara-den is set as the substitute image, Chara-den may not appear
and the default image may be sent.
Switching in-camera/out-cameras*1 :
・
Even when the camera is switched, the shooting mode and the setting for
image brightness/Adjust flicker are retained.
Turning on/off the light*2 : a (1 sec. or more)
・
Light may temporarily be turned off by setting operations etc. during a call.
Switching display magnification <Zoom>*1 :
・
Each time you press r, the zoom scale switches in the following order, and
each time you press
when the camera is switched.
In-camera : Standard
Out-camera : Standard→2×→
Applying special effects to image <Scene mode/effect>*1 :
4
You can shoot a subject against the light, or in monochrome or sepia mode.
Adjusting brightness of image
Adjusting flicker
The flicker may be reduced by selecting the settings that match the power
supply frequency of your area.
・
It also applies to the flicker adjustment settings of Camera and Bar code
reader.
Sending Camera-Off image :
A substitute image selected in Substitute image in Videophone image is sent.
・
When Chara-den is set as substitute image, Default image is sent.
Sending a still image :
・
Press g to cancel.
Switching to macro shooting*2 :
You can adjust the focus when sending images of very close objects
approximately 7-10 cm away.
・
Perform the same operation to cancel macro shooting.
l
, it switches in the reverse order. Zoom is cancelled
→
2
×
*1, 3
:
m32e1-3
m43e
a
4×→
6×→
*1, 3
:
m31e1-5
m42
Select a foldereSelect a still image
m6
h
8×→
I
10×→
12×→
16
×
m2e1
Setting quality of sending/receiving images :
3
・
When "Prefer motion spd" is selected, motion becomes smoother in a lowerdefinition image. When "Prefer img qual" is selected, motion becomes slower
in a higher-definition image.
・
When Receive image is changed, it applies to the image quality sent from the
other party.
*1
Can be set only while sending camera image.
*2
Available only for out-camera.
*3
The settings are retained after a call.
◆
Setting display during a call
・
The settings are retained after a call.
Perform necessary operations during a call
1
Switching the main screen and the sub screen :
Changing the main screen size : C (1 sec. or more)
・
Each time you press, the display size switches in the order of Large
Standard→Small→Large.
Setting display :
-
Setting items→P67 "Changing videophone settings"
◆
Setting substitute or on-hold image <Image setting>
m
[Settings & NW services]
1
required items
Image :
List images :
Chara-den" (only for Substitute image)
✔
INFORMATION
・
If Chara-den set for the substitute image is deleted, the substitute image is reset to the
default Chara-den. If the still image or Default Chara-den is deleted, the substitute
image is reset to Default image.
・
If the still image set as Answer machine image, Response hold image, On-hold image
or Movie memo image is deleted, the substitute image is reset to Default.
m9e
Set required items
eC
Set image type
Select when Image is other than "Default image" or "Default
m8e1
C
eC
615e1-5e
or
2e1
-
→
Set
Voice/Videophone Calls/PushTalk
66
Page 69

Operation
Changing videophone settings
You can set actions to be performed when videophone call fails, or set the screen
to appear during a videophone call.
・
Auto redial as voice is provided to ensure access to the other party. When this is
set to "ON", the number is re-dialed as voice call if a call cannot be answered
because the other party's terminal does not support videophone, or the other
party is using the mova service via Dual Network Service. However, this option
may not work properly if you dialed ISDN-sync 64K access point, ISDN
videophone incompatible with 3G-324M (as of December, 2008), or a wrong
number, etc. Note that you may be charged for these calls.
m
[Settings & NW services]
1
items
eC
Auto redial as voice :
videophone attempt
Display setting :
Sub screen :
・
This setting is available when Display setting is "Both sides".
Screen size :
Visual preference :
Display light :
Brightness of Display & Key light
Speakerphone :
✔
INFORMATION
・
During a voice call or 64K data communication, no videophone calls can be made even
if Auto redial as voice is set to "ON". However, during packet communication connected
to a PC, dialed videophone call is re-dialed as voice call.
・
If you redial voice calls with Auto redial as voice set to "ON", the voice call rate is
applied instead of digital communication rate.
Set whether to redial as voice call for unsuccessful
Set the screen
Set Sub screen
Set the main screen view size
Set the incoming image quality of the other party
When "Terminal settings" is selected, this option depends on
Set whether to use speakerphone when connected
613e
Set required
Notify switchable mode
Setting for switching a voice/videophone call
You can notify the network that your terminal is available for switching voice and
videophone calls.
・
This option is not available during a call.
・
You cannot set this option out of service area. Operate FOMA terminal in
locations with better radio wave conditions.
・
Notify switchable mode is ON by default.
m
[Settings & NW services]
1
1
or
2e
2
・
Press 3 and select "Yes" to check the current settings.
DataSession arv. act
"Yes"
617
Setting actions for incoming calls during packet communication
You can set how to react to an incoming videophone call received during i-mode,
data broadcasting site display or downloading Music&Video Channel program.
m
[Settings & NW services]
1
・
When "V.phone priority" is selected, displaying the incoming call screen has
precedence, and packet communication is disconnected when a videophone
call is answered. After videophone call is terminated, i-mode screen
reappears and download of Music&Video Channel program resumes. While
accessing data broadcasting site, Time shift of 1Seg is activated.
・
When "Packet DL priority" is set, an incoming call is disconnected without
incoming call screen being displayed, and the call is recorded in Received
calls.
・
When "Voice mail" or "Call forwarding" is selected, the service starts.
✔
INFORMATION
・
If you do not subscribe to Voice Mail or Call Forwarding service, actions for "Packet DL
priority" are performed even with "V.phone answerphone" or "Call forwarding" set.
・
If Voice Mail or Call Forwarding Service is activated and the ring time is set to "0 sec.",
each service starts. The call is not recorded in Received calls.
614e1-4
Voice/Videophone Calls/PushTalk
67
Page 70

External device
Using videophone call by interfacing to external device
Videophone calls can be sent/received through external devices by connecting
FOMA terminal to external devices such as PC using USB Cable.
If you want to use this function, prepare an approved external device or a PC, that
videophone application is installed in, and devices (commercial) such as an
earphone/microphone and USB-compatible Web camera.
・
Refer to the instructions manual of external devices for hardware requirements,
setting or operating instructions of videophone applications.
*
You can use "DOCOMO Videophone Software" as an application supporting this function.
This software can be downloaded from DOCOMO Videophone Software website (for details
such as the usage environment of a PC, refer to the support website).
http://videophonesoft.nttdocomo.co.jp/
m
[Settings & NW services]
1
✔
INFORMATION
・
Videophone calls cannot be made through an external device during a voice call.
・
If you subscribe to Call Waiting Service, an incoming videophone call from an external
device during voice call is recorded as a missed call. An incoming voice call,
videophone call or 64K data communication during videophone call from external
device is recorded as a missed call.
PushTalk
616e1
or
2
PushTalk
This is a service that you can communicate with multiple parties (up to 5 parties
including yourself). Press PushTalk key (
press
Z
(to speak), PushTalk communication fee is charged.
・
For details of PushTalk or Supported models, refer to NTT DOCOMO website or
"Mobile Phone User's Guide [Network Services]".
・
Unblocking Touch lock→P115
Voice/Videophone Calls/PushTalk
68
Z
) to take turns for talking. Each time you
❖
PushTalk Plus
A service allowing you to make a PushTalk communication with 20 parties including
yourself. You can use PushTalk more conveniently by using common phonebook
on the network or confirming the state of the members. You must subscribe to
PushTalk Plus to use this service.
*
For details of operating procedure, refer to the guidebook which you can get when subscribing
to the service.
◆
Reading PushTalk screen
a
b
c
d
a
Speaker field
No icon : Floor is open.
Phone number/name/"Anonymous"/ (When the speaker cannot be identified)
: A member takes the floor.
"Myself" : You are speaking.
b
Group icon, Group name
Display only on the screen of the caller of the group call.
c
Participants
Phone number/name/"Anonymous"
d
Participants status (among 3 or more parties)
:
Calling
*1
:
Answered the call and participating
*2
:
No response/Communication ended
:
In Public mode (Drive mode)
*3
:
turned OFF
mode preferred")
ID notification set)
In Public mode (Power OFF) the terminal is out of service area or
*3
:
The terminal is out of service area or turned OFF
:
During a call or communication
:
In i-mode communication (when i-mode arv. act:PT is set to "i-
:
Starting Caller ID Request Service (when making a call with Caller
Page 71

:
PushTalk incompatible model
:
*1
*2
*3
Calling by the unavailable number
Displayed in one by one communication.
Displayed when making a call by other than the number of DOCOMO.
Displayed with Receive avoidance set in use of 2in1.
Making a PushTalk call
・
It operates according to Activate/Deactivate or Caller ID settings of phonebook.
・
Priority of the method to notify a caller ID→P48
Enter a phone number
1
Using phonebook : deSearch phonebookeMove the cursor to a member
Z
2
When the receiver answers the call, a connecting tone sounds and
communication starts.
・
To make a call using the speakerphone function regardless of Silent mode or
P-Talk speakerphone setting, press
・
Caller ID notification can be set for each call.→P57
Talk over a PushTalk call
3
n
: Switch the speakerphone function ON/OFF
j
: Adjust Listen volume (apply to Listen volume of Adjust volume)
・
With FOMA terminal closed, the speaker is used for answering regardless of
settings of Silent mode or P-Talk speakerphone.
Speaking :
a
Check for the blank of the speaker field, and hold down Z.
When the floor is taken, the taking floor sound is heard and "Myself" is
displayed in the speaker field.
・
While other party is speaking, pressing Z sounds the floor taking failure
tone, and you are not given the floor.
・
For the speaker, the charging of PushTalk communication fee begins
when the taking floor sound is heard.
b
Speak with Z held down.
・
Each time, Time to keep the floor is limited. When the limit is about to
expire, the floor release notice sound beeps and the floor is released.
c
After finish speaking, release Z.
The releasing floor sound is heard.
Z
for 1 second or more.
When ending the session,
4
・
If there are three or more in the party, a connecting tone sounds to other
participants and "Disconnected" is displayed on the screen.
✔
INFORMATION
・
You cannot make emergency calls (110, 119 and 118) using PushTalk.
・
For Quick dial, PushTalk call is made to a phone number if saved in PushTalk
phonebook, or to the first phone number of the phonebook entry if not saved in
PushTalk phonebook.
・
When a PushTalk call is made to multiple participants and all participants are displayed
as "Disconnected" or "No PT Func", PushTalk connection is unavailable.
・
All participants' phone numbers are notified and displayed on all participants'
terminals if the caller notifies its phone number. "Anonymous" is applied to all
participants if the caller does not notify its phone number.
・
When making a PushTalk call with no Caller ID to the party with Caller ID Request
Service set, "Turn on Caller ID Notification." is displayed and a call is disconnected.
When a PushTalk call is made to multiple participants, "ID Request" is displayed.
・
If you make PushTalk call in i-mode communication, i-mode connection ends.
・
When using 2in1, Number B is not available for PushTalk.
・
When using 2in1, no call can be made from phonebook to members set as "B" in
Ph.book 2in1 setting.
・
When no participant takes the floor for a given length of time during a communication,
the communication ends.
❖
Using Redial/Received calls
he
Perform necessary operation
1
Making PushTalk calls : Move the cursor to a member
・
PushTalk call is simultaneously made to multiple members when they are
→
specified.
Making a PushTalk call to the selected member from a group call : Select a
group call
Saving to FOMA terminal phonebook : Move the cursor to a
member
Phonebook new entry→P74
・
To update a phonebook entry, select the entry.
・
After adding, PushTalk phonebook registration confirmation screen appears.
Adding to PushTalk phonebook : Move the cursor to a
member
・
Only members saved in FOMA terminal phonebook can be added.
P71
eCe
em5e1
em53e
f
Select members not to calleZ or
or
2e
Set required items
"Yes"
Voice/Videophone Calls/PushTalk
eZ
I
eC
69
Page 72

Adding members as a group : Move the cursor to a group
call
em54e
・
Only members saved in PushTalk phonebook can be added.
✔
INFORMATION
・
You can re-join the call by making a call from Redial/Received calls as long as other
members are still on PushTalk session, even if you did not answer a group call or hang
up half way through. Note that, if the call has been terminated, a new call is made.
◆
Adding a member during PushTalk call
Only the caller can add members.
・
You can add up to 4 members to be called in total. When there are already 4
members called, you can again call a member not participating, but cannot add
new members.
During a session CeSelect a method for addingeMove the
1
cursor to a member
・
Members can be added from PushTalk phonebook, FOMA terminal
phonebook and Redial/Received calls. To add a member by entering the
phone number, select "Direct input", enter phone number and press
✔
INFORMATION
・
You can take/release the floor even during the selection of additional members.
・
Even the user of a model that does not support member addition can participate and
be displayed on other members' terminals. However, for models that do not support
member addition, additional members do not appear on the screen and the connecting
tone does not sound.
・
Additional members are not recorded in Redial/Received calls.
Enter group name
eI
eC
I
Receiving a PushTalk call
・
PushTalk call cannot be put on hold.
Receive a PushTalk call
1
Ring alert sounds and light turns on or blinks. The participant list appears and
j
Z
2
A connecting tone sounds and communication starts.
・
・
Talk over a PushTalk call
3
.
Operating procedure→P69 Step 3 in "Making a PushTalk call"
When ending the session,
4
✔
INFORMATION
・
The phone number set to call rejection for Specified caller, Unregistered caller, etc.
cannot be received. Note that, when a PushTalk call is received to multiple participants,
"Disconnected" is displayed for all participants.
is displayed for the caller.
: Adjust alert volume
or
n
When f is pressed or the call is not answered within the ring time, the call
is disconnected.
With FOMA terminal closed, the speaker is used for answering regardless of
settings of Silent mode or P-Talk speakerphone.
f
Voice/Videophone Calls/PushTalk
70
Page 73

Using PushTalk phonebook entries
◆
Adding entries to PushTalk phonebook
・
Up to 1,000 items can be added. (This number may be reduced depending on the
added contents.)
・
When using 2in1, no phone numbers of phonebook entries set to "B" in Ph.book
2in1 setting can be added to PushTalk phonebook.
Zeae
1
・
Search the phonebookeSelect a membere"Yes"
2
❖
Adding entries from FOMA terminal phonebook
de
1
member
❖
Adding entries to group
・
Up to 30 groups can be saved.
・
Up to 19 members can be saved per group. However, a call can only be made to
up to 4 members simultaneously.
ZeC
1
・
ae
2
characters)
Editing group name : Move the cursor to group
Select the group
3
"View phonebook"
When selecting "Direct input", it is also saved in FOMA terminal phonebook.
→
P74
Search phonebookeMove the cursor to a
em33e
To add to existing group, go to Step 3.
Enter a group name (up to 10 two-byte (20 one-byte)
eC
name
eC
eae
"Yes"
Select a member
em3e
eC
Edit group
◆
Deleting PushTalk phonebook entries
・
Even if group or group member is deleted, group or group member is not deleted
from PushTalk phonebook or FOMA terminal phonebook.
Ze
Move the cursor to a member
1
A deletion confirmation screen from FOMA terminal phonebook appears.
Deleting a group :
Deleting a member from a group :
to a member
◆
Dialing from PushTalk phonebook
・
You can select up to 4 members to make a call.
<Example> Making a call from member list
Z
1
Select a member
2
・
To display only members to dial, press
Making a call from group : CeSelect groupeSelect members not to dial
・
After selecting a group, go to Step 3 to make a group call.
Z
or
I
3
When at least 1 member answers the call, a connecting tone sounds and
communication starts.
・
Press
The next procedure
call"
✔
INFORMATION
・
You can use PushTalk Plus after connecting to network by pressing
member list.→P68
ZeCe
em3e
Name saved in FOMA
terminal phonebook
m4
to set Caller ID notification by each dialing.→P57
→
P69 Step 3 and subsequent steps in "Making a PushTalk
em3e
Move the cursor to a group
ZeCe
"Yes"
Select a groupeMove the cursor
Member list
m1
.
"Yes"
em2e
m6
"Yes"
on the
Voice/Videophone Calls/PushTalk
71
Page 74

Setting operations for PushTalk
◆
Setting duration of ring tone <PushTalk ring time>
・
If the call is not answered within the ring time, the call is recorded as a missed call.
・
This option cannot be set when PushTalk auto answer is set to "ON".
m
[Settings & NW services]
1
time
eC
◆
Setting PushTalk auto answer
・
When this is set to "ON", the connecting tone beeps and a PushTalk call is
automatically answered. In this case, the speaker is used for the call regardless of
the setting of P-Talk speakerphone.
・
PushTalk auto answer is unavailable in Silent mode.
m
[Settings & NW services]
1
◆
Setting actions for incoming calls <PushTalk arv. act>
・
This setting is available only when receiving a voice call.
m
[Settings & NW services]
1
・
The incoming call screen appears when "Answer" is specified. PushTalk call
is disconnected by pressing
displaying the incoming call screen.
・
When "Voice mail" or "Call forwarding" is selected, the service starts.
✔
INFORMATION
・
Regardless of settings, calls are recorded as Received calls. However, when Voice Mail
or Call Forwarding Service is activated and the ring time is set to "0 sec.", each service
starts and calls are not recorded in Received calls.
・
If you do not subscribe to Voice Mail or Call Forwarding service, actions for "Answer"
are performed even with "Voice mail" or "Call forwarding" set.
・
Operations during PushTalk call :
622e
Enter ring
623e1
624e1-4
n
to answer a voice call or f to keep
m3
or
2
◆
Setting operations for closing FOMA terminal <Setting
when folded>
m
[Settings & NW services]
1
・
When "Continue talking" is set, the communication continues with FOMA
terminal opened.
✔
INFORMATION
・
When Flat-plug Earphone/Microphone with Switch (optional) or In-Car Hands-Free Kit
01 (optional) is connected, PushTalk session continues with FOMA terminal closed
regardless of this setting.
・
Operations during PushTalk call :
◆
Setting i-mode arv. act:PT
You can set how to react to an incoming PushTalk call received during i-mode, data
broadcasting site display or downloading Music&Video Channel program.
m
[Settings & NW services]
1
・
When "PushTalk preferred" is set, the current call is disconnected and the
incoming call screen appears. The previous screen reappears after the
PushTalk call ends. Obtaining Music&Video Channel program resumes.
While accessing data broadcasting site, Time shift of 1Seg is activated.
・
When "i-mode preferred" is set, the PushTalk call is not received and not
recorded in Received calls.
◆
Using speakerphone <P-Talk speakerphone>
・
Speakerphone is available for making/receiving calls with FOMA terminal open.
m
[Settings & NW services]
1
✔
INFORMATION
・
When Silent mode is activated, a voice comes from the earpiece.
・
When Flat-plug Earphone/Microphone with Switch (optional) or In-Car Hands-Free Kit
01 (optional) is connected, the connected device is used for calls. Use Z to speak.
625e1-3
m2
626e1
627e1
or
or
2
2
Voice/Videophone Calls/PushTalk
72
Page 75

Phonebook
Phonebook available for the FOMA terminal .................................................................................................................... 74
Adding to phonebook .................................................................................................................. Phonebook new entry 74
Setting receiving actions for each phonebook entry .......................................................................... Alert by contact 75
Setting group .............................................................................................................................................. Group setting 76
Making a call from phonebook ......................................................................................................... Phonebook search 76
Editing phonebook entries ..................................................................................................................... Edit phonebook 78
Copying phonebook entries ............................................................................................................................................... 79
Deleting phonebook entries .............................................................................................................. Delete phonebook 79
Making phonebook entries secret ......................................................................................................... Secret attribute 79
Checking number of phonebook entries ..................................................................................................... No. of items 80
Making a call with a few key operations ........................................................................................................ Quick dial 80
73
Page 76

Phonebook available for the FOMA terminal
F-03A supports FOMA terminal phonebook and UIM phonebook.
・
In addition to this, there is PushTalk phonebook dedicated to PushTalk.→P71
Item FOMA terminal phonebook UIM phonebook
The number of entries Up to 1,000 entries
Phonebook No. No.000 - 999
Name 16 two-byte (32 one-byte)
Reading 32 one-byte characters 12 two-byte (25 one-byte)
Image, Movie
Entry items
Group
Phone number 5 numbers per item, up to
Phone number icon
Mail address 5 addresses per item, up to
Mail address icon
Other items
*1
The number of savable items may be decreased depending on saved data.
*2
Up to 10 characters can be entered when one- and two-byte characters are both used or one-byte
katakana is included.
*3
Up to 12 characters can be entered when both one- and two-byte characters are used.
*4
Items that can be set are Birthday, Note, PostalCode/Address, Location info, Company name, Job
title and URL.
i-concier information (note, address, URL) is automatically updated (when subscribed to iconcier).
・
Phonebook saved in your UIM is available even when the UIM is installed to
another FOMA terminal.
・
FOMA terminal phonebook can be stored in Data Center. Stored phonebook can
be updated/restored to FOMA terminal by connecting to Data Center.
Phonebook
74
characters
30 groups in addition to "
ループなし
3,005 numbers in total in
phonebook
3,005 addresses in total in
phonebook
*4
○
(No group)"
*1
○
*1
○
○
○
: Supported × : Not supported
*1
Up to 50 entries
10 two-byte (21 one-byte)
characters
characters
グ
10 groups in addition to "
プなし
1 number per item
1 address per item
×
*2
*3
×
(No group)"
×
×
×
・
FOMA terminal phonebook list and UIM phonebook list can be switched with C.
◆
Displaying name
■
Voice call/Videophone call
Name and phone number saved in the phonebook are displayed on the screen
while dialing/receiving, calling or voice call talking.
■
i-mode mail/SMS
Name and phone number saved in the phonebook are displayed on the Inbox/
Outbox/Unsent messages list screens and mail details screen.
When a mail is received from a sender with mail address that completely matches
with that saved in the phonebook including the domain name succeeding @, the
name saved in the phonebook appears. However, for a sender with i-mode terminal,
the name saved in the phonebook appears even when the domain name
(@docomo.ne.jp) is omitted in the mail address and saved in the phonebook. If the
mail address is "mobile phone number@docomo.ne.jp", add it to the phonebook
グルー
omitting "@docomo.ne.jp".
✔
INFORMATION
・
With 2in1 in A mode, a name of phonebook set to "B" in Ph.book 2in1 setting and with
2in1 in B mode, the name set to "A" in Ph.book 2in1 setting are not displayed.
・
When different names with the same phone number/mail address are saved in FOMA
terminal phonebook, the name saved earlier is displayed.
・
When different names with the same phone number/mail address are separately saved
in FOMA terminal and UIM phonebooks, the name saved in FOMA terminal phonebook
is displayed.
・
Saved names are also displayed in other functions using phonebook.
Phonebook new entry
Adding to phonebook
You can add to FOMA terminal phonebook or UIM phonebook.
・
Note that, when changing the models at a sales outlet such as DOCOMO shop,
data saved in FOMA terminal may not be copied to a new model terminal due to
its specifications.
・
Priority of Call image→P90, 91
・
Savable number→P74
d
(1 sec. or more)
1
→
P118
Adding to UIM phonebook : m [Phonebook & Logs]
4
Page 77

Enter a name
2
Set required items
3
Phonebook number :
・
When the phonebook number overlaps with an existing number, a
confirmation screen for overwriting appears. Not to overwrite, select "New
entry" and enter the other number.
・
Zeroes before single- or double-digit phonebook numbers can be omitted.
Reading :
Reading of the entered name is entered.
・
Even if you correct the name, the reading does not reflect the change.
Select/Shoot image :
receiving/making a call or checking the phonebook.
Setting image :
Reading folders and lists of images→P280
・
If a still image that vertical to horizontal size (or vice versa) is larger than
960
×
480 dots is selected, the image shrinking confirmation screen
appears. Also, created animation does not operate.
Shooting and setting a still image :
・
The still image is shot only in the size of QCIF (176×144).
Setting movie/i-motion :
Reading folders and lists of movie/i-motion→P284
・
Movie/i-motion of only image can be set.→P287
・
This function is not available when dialing.
Recording and setting a movie :
・
Sounds are not recorded.→P191
Returning to the initial screen :
Group : "グループなし
・
For FOMA terminal phonebook, press a to add a group.→P76
Phone number :
・
When entering 1 item, an item for additional entry is displayed.
・
Pause ("P"), Timed pause ("T"), "+", "#" and sub-address delimiter ("*") can
be saved. Timed pause ("T") cannot be saved in UIM phonebook.
・
If a phone number prefixed with "186" or "184" is added in phonebook, SMS
cannot be sent even when the number is selected as the address.
Mail address :
・
When entering 1 item, an item for additional entry is displayed.
Secret code
Birthday :
Note :
Up to 100 two-byte (200 one-byte) characters can be entered.
eC
The smallest phonebook number available is assigned.
Set an image or movie/i-motion that is displayed when
1e
Select a foldereSelect an image
2e
Shoot a still image
3e
Select a foldereSelect a movie/i-motion
4e
Record a movie
5
(No group)" is set.
Up to 26 digits can be entered.→P41
Up to 50 one-byte characters can be entered.
→
P78
Set Set birthday to "ON" and enter the birthday.
eg
eg
PostalCode/Address :
(200 one-byte) characters for an address can be entered.
Location info :
location history.
Company name :
Job title :
Up to 50 two-byte (100 one-byte) characters can be entered.
URL :
Up to 256 one-byte characters can be entered.
Up to 7 digits for a postal code and up to 100 two-byte
Add location information from the current location and/or
→
P267
Up to 50 two-byte (100 one-byte) characters can be entered.
Alert by contact
Setting receiving actions for each phonebook entry
You can set receiving actions for each phone number or mail address in FOMA
terminal phonebook.
・
"Terminal setting" is displayed for all items that are set to "
group)", and "Group setting" is displayed for the items that are set to a certain
group ("Terminal setting" is displayed only for Substitute image).
・
Priority of a receiving action→P84, 85, 91, 98
de
Search the phonebookeMove the cursor to a phonebook
1
entry
em32e
h
: Switching Call/Mail screens.
/
Ring alert :
alerts & Sounds.
・
Only when setting Ring alert of the detail information to "Available", movies/
i-motion and Music can be set as ring alert.
Setting Music
/
Vibrate alert/effect.
/
Light alert.
・
When "Sync melody" is set, Light color operates in "Rainbow".
/
Light alert.
Substitute image (Call alert only) :
operates according to Substitute image in Videophone image.
→
Vibrate alert :
Light alert :
Light color :
Set required items
When set to "Terminal setting", it operates according to Ring
P83
When set to "Terminal setting", it operates according to
When set to "Terminal setting", it operates according to
When set to "Terminal setting", it operates according to
When set to "Terminal setting", it
eC
グループなし
Phonebook
(No
75
Page 78

Group setting
Setting group
・
You cannot change a group name or set calling/receiving actions to "
(No group)". When deleting the group, only the entries in the group are deleted.
し
・
For UIM phonebook, only renaming group name is available.
m
[Phonebook & Logs]
1
Perform necessary operation
2
Adding :
m2e
characters)
Deleting : Move the cursor to a group
The group and the phonebook entries in the group are deleted. The identical
phonebook entries in PushTalk phonebook are also deleted.
・
It is deleted even when secret attribute is set in Privacy mode (when Call &
Logs is "Hide set contact").
Changing a group name : Move the cursor to a group
group name (up to 10 two-byte (20 one-byte) characters)
・
For UIM phonebook, move the cursor to the group and press
10 characters can be entered when one- and two-byte characters are both
used or one-byte katakana is included in the group name.
Setting calling/receiving actions : Move the cursor to the group
e
Setting Call image→P75 Step 3 in "Adding to phonebook"
Setting other items
Changing the order : Move the cursor to the group
eC
Set required items
12
Enter a group name (up to 10 two-byte (20 one-byte)
em3e
eC
→
P75 "Setting receiving actions for each phonebook entry"
Authenticatee"Yes"
em4e
eme6
eC
m2
グループな
em5
or
Enter a
. Up to
7
Phonebook search
Making a call from phonebook
You can call up the phonebook entry from FOMA terminal phonebook or UIM
phonebook for the party to call.
・
When searching phonebook, the previously used phonebook (FOMA terminal
phonebook or UIM phonebook) is searched.
・
In Privacy mode (when Call & Logs is "Hide set contact"), the phonebook entries
or groups with secret attribute cannot be searched. The same applies to Quick
dial, Quick mail, Headset quick-dial and Search message.
de
Search the phonebook
1
Icons set in Ph.book
2in1 setting
・
With 2in1 in Dual mode, the icons below appear.
・
When i-concier information is registered, appears.
Move the cursor to the party
2
・
To make a call specifying conditions by pressing
・
When 2in1 is in Dual mode, Number B is used to make a call to a party set to
"B" in Ph.book 2in1 setting, and Number A is used for other parties.
❖
Using phonebook entries
Creating an i-mode mail : Move the cursor to a party
Creating SMS : Move the cursor to a partyea (1 sec. or more)
・
When only the phone number for the party is saved, pressing a can also create
SMS.
Attaching a phonebook entry to i-mode mail : Move the cursor to a
party
Searching a sent/received mail : Move the cursor to a party
or
2
Phonebook list (Show all names)
: Phonebook entries in A mode : Phonebook entries in B mode
: Phonebook entries in both A and B modes
en
or
I
m11.→
ea
em13
em16e1
P57
Phonebook
76
Page 79

・
For UIM phonebook, move the cursor to the party and press
press
1
Displaying a site : Move the cursor to a party
・
Press I on the site connection confirmation screen to display using Full
Browser.
Displaying a map from an address : Move the cursor to a party
・
GPS compatible i-αppli set in Select Map in Map setting starts.
Using Location info : Move the cursor to a party
The next procedure→P267 "■Location information usage menu"
Checking location of a party : Move the cursor to a party
The phone number is targeted and you are connected to "imadocokantan search".
・
For details of imadocokantan search, refer to NTT DOCOMO website.
◆
・
When there are multiple pages in the phonebook list, you can switch pages
with
1
2
or 2.
em15e
em01
Searching by specified method
h
. When Show all names is selected, you can change by the line.
m
[Phonebook & Logs]
Specify the search method
Show all names :
・
Each time you enter 1 character in reading, the phone number with the
closest reading is searched (Name search).
Group search :
・
Entries in the same group are displayed in the order of the reading (Japanese
syllabary order
Symbols→No reading).
・
When one of the keypads of 0-9 is pressed, the line assigned to each
keypad is displayed.
・
Entries are displayed in the order of alphabets→numbers→symbols by
pressing
Search by freq* :
Displayed in the order of number of calls or number of mails.
・
Counted up to 9,999 times. To reset the counting, move the cursor to a party,
press
・
PushTalk is not counted.
Ph book No. search* :
・
Zeroes before single- or double-digit phonebook numbers can be omitted.
1eh
2e
→
#
or *.
3e1
m93
1
to select the line to show
Select a group
Alphabets→Numbers→Reading starting with blanks
→
P396
or
2
and select "Yes".
4e
Enter phonebook number
m15
"Yes"
em17
em02e
eC
, and
"Yes"
→
・
You can display the phonebook list in phonebook number order by pressing
C
with no entry.
Number search :
Search the phone numbers containing the entered numbers, and phonebook
data list of FOMA terminal phonebook is displayed in the order of the
phonebook number, and the phonebook data list of UIM phonebook is
displayed in the order of reading.
・
You can display the phonebook data list in the order of phonebook number
or reading by pressing
Secrecy search* :
The phonebook entries with secret attribute are displayed in the order of
phonebook number.
*
Unavailable for UIM phonebook.
❖
Searching by Rocket search
Search from the characters assigned to keypads 0-9.
<Example> Searching for "
2 (か
1
The phonebook list of the Show all names is displayed.
◆
Setting preferred search method <Default search
5e
6
(ka) line)
Enter part of a phone number
C
with no entry.
携帯花子
"(Keitai Hanako)
ed
eC
setting>
Set the search method displayed when pressing d on the stand-by display.
m
[Phonebook & Logs]
1
method
em
・
Check mark appears after the specified search method.
✔
INFORMATION
・
Even when Search by freq or Ph book No. search is set by priority, if the UIM
phonebook is searched last time, the UIM phonebook list is displayed based on Show
all names.
1e
Move the cursor to the search
Phonebook
77
Page 80

◆
Checking phonebook details
de
Search the phonebookeSelect a phonebook entry
1
d e
a
b
c
FOMA terminal phonebook details screen (Phone number)
a
Phonebook No.
b
Name and reading
c
Group icon, Group name
d
Icons set in Ph.book 2in1 setting (with 2in1 in Dual mode)
: Phonebook entries in A mode : Phonebook entries in B mode
: Phonebook entries in both A and B modes
e
Setting conditions of Accept/Reject call, Caller ID Settings and Secret code
f
Setting condition of Alert by contact (call/mail)
/ : Ring alert
/ : Vibrate alert
/ : Ring alert and Vibrate alert
/ : Light alert
/ : Light color
/ : Light alert and Light color
: Substitute image (call only)
g
Image (displayed according to the settings of View preference)
h
Saved icon, Icon type
j
: Display the previous/next phonebook entry.
h
: Display the set items.
Viewing history information : On the phone number or mail address details
screen,
C
・
The cumulative number and the date and time of last call appear. Cumulative
information of calls and mail messages can be reset at once by pressing
and selecting "Yes".
Check User information :
Name, reading, group name and the first phone number/mail address are
displayed in full.
.
m91
f
g
h
C
◆
Switching details screen display <View preference>
・
View preference of phonebook, Redial, Received calls, Mail logs and User
information apply to each of them.
de
Search the phonebookeSelect a phonebook
1
entry
em94e1-3
・
When operating from UIM phonebook, press
Edit phonebook
m93
Editing phonebook entries
・
The identical phonebook entries in PushTalk phonebook are also edited/deleted.
de
Search the phonebookeMove the cursor to a phonebook
1
entry
Perform necessary operations
2
Editing contents :
Set required items→P75 Step 2-3 in "Adding to phonebook"
・
When operating from UIM phonebook, press
Changing the phone number order :
number to be set as the first one
Changing the mail address order :
to be set as the first one
Switching phonebook numbers :
entry to switch the phonebook number
Setting Caller ID notification to each phone number <Caller ID settings> :
m352e
・
When "No setting" is set, it operates according to Activate/Deactivate.
Setting secret code to mail address <Secret code> :
m354e
secret code
・
To cancel, delete all the secret codes entered and press g.
・
A secret code you set is displayed on this screen only.
・
You cannot send a mail to the party whose address is saved as "mobile phone
number + secret code@docomo.ne.jp".
m31e
Set required items
m341e
m342e
m343e
AuthenticateeSelect a phone number
AuthenticateeSelect a mail addresseEnter 4-digit
eC
m3
.
Select a mail address
Select a phonebook
Select a phone
and 1-3.
e1-3
Phonebook
78
Page 81

✔
INFORMATION
・
In UIM phonebook, a phone number containing "*" may not be overwritten.
・
When multiple phone numbers or mail addresses are saved and the phone number or
mail address in the first entry is deleted, the second or subsequent entry moves
forward.
Copying phonebook entries
・
FOMA terminal phonebook can also be copied to microSD card.→P295
◆
Copying between FOMA terminal phonebook and UIM
phonebook
・
When there is the same group in the copying destination, it is copied to the group.
・
When copying from FOMA terminal phonebook to UIM phonebook, a part that
exceeds savable character number and timed pause ("T") of phone number are
deleted.
・
Icons of phone number and mail address are replaced.
de
Search the phonebook
1
entry
eC
・
When copying from UIM phonebook to FOMA terminal phonebook, press
m7
to select a phonebook entry, and press C.
◆
Copying each data
・
The last copied item is recorded until the power is turned OFF, and it can be
pasted to anywhere any number of times.
de
Search the phonebookeMove the cursor to a phonebook
1
entry to copy
・
The first phone number and mail address are copied.
・
When copying the second or subsequent item, display the phone number or
mail address on the details screen, press
・
When operating from UIM phonebook, press
em6e1-8
em71e
m6
m6
Select a phonebook
and press 2 or 3.
and 1-3.
Display the character entry screen to pasteePaste the characters
2
Pasting method of characters→P351
Delete phonebook
Deleting phonebook entries
・
When deleting all, all of the created groups are deleted.
・
The identical phonebook entries in PushTalk phonebook are also deleted.
・
For entries in UIM phonebook, "All contacts" cannot be performed.
de
Search the phonebookeMove the cursor to a phonebook
1
entry
em4e1
・
Authentication is required to delete all items.
・
When operating from UIM phonebook, press
Secret attribute
or
2e
"Yes"
m4
and select "Yes".
Making phonebook entries secret
In Privacy mode (when Call & Logs is "Hide set contact"), the phonebook entries or
groups with secret attribute are not displayed.
・
This setting also applies to PushTalk phonebook.
・
Setting for UIM phonebook is unavailable.
・
If you change secrecy, a confirmation screen appears for performing Apply secret
attribute when ending the phonebook and returning to the stand-by display.
・
Operation setting of Privacy mode→P108
◆
Setting secret attribute to phonebook entry
de
Search the phonebookeMove the cursor to a phonebook
1
entry
em351
・
When secret attribute is set, blinks.
・
The same operations are also required for canceling.
Phonebook
79
Page 82

◆
Setting secret attribute to group
・
Secret attribute is not set to each phonebook entry in the group.
・
Secret attribute cannot be set for "
m
[Phonebook & Logs]
1
group
em8
・
When secret attribute is set, blinks.
・
The same operations are also required for canceling.
No. of items
グループなし
12e
(No group)".
Move the cursor to the
Checking number of phonebook entries
・
In Privacy mode (when Call & Logs is "Hide set contact"), the number of
phonebook entries with secret attribute is not displayed.
de
Search the phonebook
1
Quick dial
em92
Making a call with a few key operations
You can make calls or PushTalk calls by a simple operation to parties with
phonebook numbers 0-99 in FOMA terminal's phonebook.
・
The phone number saved first is used for calling.
<Example> Making a voice call to the phone number saved as phonebook number
1
2
Enter phonebook number (2)
・
To make a PushTalk call, press Z.
en
or
C
Phonebook
80
Page 83

Sound/Screen/Light Settings
Setting operations for incoming calls and mail/messages ....................... 82
Sounds settings
Changing sounds of ring alert, alarm sound, etc. . Ring alerts & Sounds 83
Setting volume of ring alert, alarm sound, etc. ................ Adjust volume 84
Setting Stereo/3D sound or Surround ..................... Stereo sound effect 85
Informing you of incoming calls and alarms by vibration
.........................................................................................
Changing ring tone .................................................................. Melody Call 85
Setting System sound ................................................................................... 86
Setting confirmation tone for charging ................................. Charge alert 86
Setting Call session ....................................................................................... 86
Muting ring tone from the FOMA terminal ........................... Silent mode 87
Vibrate alert/effect 85
Displays/Lights settings
Switching stand-by display, Silent mode, etc. by lifestyles
...................................................................................................
Changing stand-by display ............................................. Stand-by display 88
Changing image for outgoing voice/videophone call
......................................................................................
Changing image for incoming voice/videophone call
.......................................................................................
Decorating titles to display for incoming/outgoing calls or while talking
.........................................................................................
Setting Contact image display from phonebook at incoming/outgoing call
.................................................................................................
Timed theme 88
Outgoing call image 90
Incoming call image 91
Identification mark 92
Contact image 92
Changing displays for incoming/outgoing messages and retrieving
.......................................................................................................
Setting display and key lighting ................................ Display & Key light 92
Saving battery consumption ..................................... Power saving mode 93
Changing display colors ....................................................... Color scheme 93
Changing startup menu ............................................ Select startup menu 94
Setting Machi-chara .................................................. Display Machi-chara 94
Using Kisekae Tool ........................................................................................ 94
Customizing the menu .................................................................................. 96
Customizing FOMA terminal screen ...................................... Style theme 97
Changing battery/antenna icon .................... Battery icon/Antenna icon 97
Indicating arrival information such as missed calls and unread mails with lighting
..................................................................................................
Setting the lighting patterns and colors used for an incoming call/mail or while
talking ...................................................................................... Light alert 98
Changing font style ..................................................................... Font style 98
Changing font size ........................................................................ Font size 98
Setting clock display ................................................ Clock display format 99
Mail image 92
Indicator light 97
81
Page 84

Setting operations for incoming calls and mail/ messages
・
This setting also applies to Call ring alert, Mail/Msg ring alert, Incoming call/
Videophone receiving in Call image, Vibrate alert/effect and Light alert.
・
Music or movie/i-motion that can be set as Ring alert, movie/i-motion that can be
set as Show image
◆
Call alert/Videophone alert
m
[Settings & NW services]
1
required items
Ring alert :
・
When selecting any of "Melody", "Movie ringtone" or "Music (→P83)", select
the ring alert. When setting a movie/i-motion with sound and image for
"Movie ringtone", Show image is "Sync ring alert".
Show image :
・
When "Select image" is selected, select an image from List images field.
When "i-motion" is selected, select movie/i-motion from the movie list.
Vibrate alert :
・
Even if setting to "Sync melody", some melodies are not synchronized.
Light alert :
・
When "Sync melody" is set, the light blinks in multiple colors. Light color
cannot be set. And, some melodies are not synchronized.
◆
PushTalk alert
m
[Settings & NW services]
1
items
Ring alert :
・
When selecting any of "Melody", "Movie ringtone" or "Music (→P83)", select
the ring alert. For "Movie ringtone", movie/i-motion containing only sound
can be set.
Vibrate alert/Light alert :
→
P228, 287
e5
eC
Set the ring alert.
Set an incoming call image.
Set the operation pattern of vibrator.
Set a lighting pattern and color of the light.
621e
eC
Set the ring alert.
Setting items→P82 "Call alert/Videophone alert"
or
6e12e
Set required
Set
◆
Mail alert
a011e
1
Ring alert :
・
Light alert/Vibrate alert :
Ring time (sec) :
◆
MessageR alert/MessageF alert
a01e2
1
Setting items→P82 "Mail alert"
✔
INFORMATION
・
Setting created animation for Show image in Call/Videophone alert displays the first
image.
・
In the following cases, Ring alert/Show image of Call/Videophone alert are restored to
the default setting. Note that the setting can be changed.
- When movie/i-motion or music containing only sounds is set as Ring alert with Flash graphics or
movie/i-motion containing only images set as Show image
- When Ring alert is changed from movie/i-motion containing sounds and images to melody, movie/
i-motion containing only sounds, or music
- When Flash graphics or movie/i-motion containing only images is set as Show image with movie/imotion or music containing only sounds or music set as Ring alert
- When Show image is changed from "Sync ring alert" to other than "Sync ring alert"
Set the ring alert.
When selecting any of "Melody", "Movie ringtone" or "Music (→P83)", select
the ring alert.
vibrator within the range of 1-30 seconds.
Set required items
Setting items→P82 "Call alert/Videophone alert"
Set the duration of sounding of ring alert or operation of
or
3e
eC
Set required items
eC
Sound/Screen/Light Settings
82
Page 85

Sounds settings
Ring alerts & Sounds
Changing sounds of ring alert, alarm sound, etc.
・
When movie/i-motion is set as ring alert, a movie and/or sound is played when
receiving a call or mail (Movie ringtone).
・
This setting also applies to alert settings of voice/videophone calls, PushTalk,
mail, MessageR/F.
・
Music or movie/i-motion that can be set as ring alert→P228, 287
・
Melodies for ring alert stored by default→P394
◆
Call ring alert
m
[Settings & NW services]
1
required items
・
When selecting any of "Melody", "Movie ringtone" or "Music (→P83)", select
the ring alert.
◆
Mail/Msg ring alert
m
[Settings & NW services]
1
required items
・
When selecting any of "Melody", "Movie ringtone" or "Music (→P83)", select
the ring alert.
・
Set Ring time (sec) in the range of 1-30 seconds.
◆
i-concier ring alert
m
[Settings & NW services]
1
items
・
When selecting any of "Melody", "Movie ringtone" or "Music (→P83)", select
the ring alert.
・
Set Ring time (sec) in the range of 1-30 seconds.
eC
eC
eC
111e1-3e
112e1-3e
113e
Set required
Set
Set
◆
GPS alert
・
This setting also applies to Position settings, Notification setting and Positioning
alert for Request setting.
m
[Settings & NW services]
1
Ring alert field
・
When "Melody" is selected, select ring alert.
◆
Alarm sound
You can set Alarm clock sound and Schedule reminder.
m
[Settings & NW services]
1
1
2
・
When selecting any of "Melody", "i-motion" or "Music (→P83)", select alarm
clock sound or alarm sound. When movie/i-motion containing sound and
image is set for "i-motion", the image of the movie/i-motion is displayed.
❖
Setting music
You can select "Full song ring tone" to set whole music data as a ring alert or "Point
ring tone" to set a part of it.
<Example> Setting Full song ring tone
Select "Music" at each settingeSelect a folder
1
Select music to set
2
・
When music in microSD card is selected, a confirmation screen appears.
Select "Yes" to move the music to the terminal and set to a ring alert.
or
e1
2e
Set required items
114e1-4e
or
2eC
115
eC
Select
Sound/Screen/Light Settings
83
Page 86

Setting Point ring tone : Move the cursor to music
・
When Chaku-uta full in microSD card available to nonmember is selected, a
confirmation screen for cutting out the part to set as the ring alert and saving
it in the i-motion folder appears. Select "Yes", enter a di splay name and press
C
. The cut out music is saved to "i-mode" folder of i-motion as i-motion
compatible with contents transfer.
When exceeding the savable number/area
❖
Ring alert priority
When setting ring alerts for multiple functions, they sound in order of the priority
below.
a
Alert by contact of FOMA terminal phonebook
b
Alert/image by group of FOMA terminal phonebook
c
Call ring alert/V.phone ring alert/Mail ring alert, Call alert (Incoming call)/
Videophone alert (Videophone receiving)/Mail alert, Incoming calls melody
setting in Multi Number, Ring alert for No.B in 2in1 setting
・
When the other party does not notify the caller ID, the ring alert of voice call
operates according to Anonymous caller. Ring alert for videophone call operates
according to V.phone ring alert/Videophone alert/Ring alert for No.B in 2in1
setting.
✔
INFORMATION
・
In the following cases, the incoming image is used as the standard image in the settings
of Call/V.phone ring alert. Note that the image can be changed.
- When movie/i-motion or music containing only sounds is set as ring alert with Flash graphics or
movie/i-motion containing only images set as an incoming call image
- When ring alert is changed from movie/i-motion containing sounds and images to melody, movie/imotion containing only sounds, or music
・
When movie/i-motion is set to ring alert, it may operate according to the default setting
if there is an incoming call when activating camera.
Sound/Screen/Light Settings
84
eae
Select the item
→
P305
Adjust volume
Setting volume of ring alert, alarm sound, etc.
m
[Settings & NW services]
1
・
When Alert/Call volume is selected, additionally select 1 or 2.
・
When Alarm volume is selected, additionally select 1-3.
・
"Silent" and "Steptone" cannot be set for Listen volume. "Steptone"cannot be
set for i-
α
ppli effect sound, ToruCa receive alert, Operation sound, Melody
effect sound or 1Seg alarm sound.
Alert/Call volume :
videophone call and PushTalk call.
・
Alarm volume of Call cost limit operates according to the setting of Call alert
volume, and the volume of play sound for Recorded messages or Voice
memos and sound effect for pasting stamp or text to an image operates
according to the setting of Listen volume.
・
Changing Listen volume during a call→P53
Mail/Msg alert vol. :
GPS alert volume :
location, Location request).
i-concier ring alert :
Alarm volume :
setting" from the Set sound screen), 1Seg alarm (when 1Seg volume is set to
"Phone setting") and schedule reminder.
・
The volume of Countdown timer applies to Alarm clock sound, and the alarm
volume of 1Seg watching reservation applies to Schedule reminder.
i-αppli effect sound :
ToruCa receive alert :
ToruCa has completed. This setting also applies to Receive alert volume of
ToruCa alert.
Operation sound :
selector sound.
・
When "Silent" is set, the confirmation sound is not emitted when reading a
code.
Melody effect sound :
attached to mail or MessageR/F). This setting also applies to the volume of
Settings of Melody.
keg
2
Set alert volume or listen volume for a voice call,
Set alert volume for mail and MessageR/F.
Set volume of GPS alert sound (Position location, Notify
Set volume when receiving information.
Set volume for alarm clock (when Volume is set to "Phone
Set volume of the sound emitted from i-αppli.
Set the volume of the alert activated when receiving
Set the volume for Keypad sound, Slide sound and Touch
Set the volume for playing melody (including melody
12e1-9
Page 87

・
If setting Call alert volume to "Silent", appears on the stand-by display.
appears when a vibrator for Call vibrate alert is also set.
Stereo sound effect
Setting Stereo/3D sound or Surround
・
It is effective when using Flat-plug Earphone/Microphone with Switch (optional)
etc.
・
This setting also applies to Surround of Settings for movie/i-motion and MUSIC
Player, and Stereo/3D sound of Settings for Melody.
m
[Settings & NW services]
1
2
✔
INFORMATION
・
The 3D sound function is a function to create sound that seems to have 3-dimensional
spread or move spatially. Using the 3D sound function, you can enjoy realistic i-αppli
games, ring tone, i-motion, etc.
・
There are differences in how the 3D sound effect is felt among individuals.
Vibrate alert/effect
16e1-3e1
or
Informing you of incoming calls and alarms by vibration
・
The vibrator for receiving 64K data communication operates according to the
setting of incoming voice call.
・
This setting also applies to alert settings of voice/videophone calls, PushTalk,
mail, MessageR/F, Positioning alert of GPS and Vibrate effect of i-
・
If FOMA terminal is on the desk etc. when the vibrator operates, it may fall off
because of the vibration.
<Example> Setting vibrator for incoming voice, videophone and PushTalk calls
m
[Settings & NW services]
1
1e1-3
2
Setting vibrator when receiving mail and MessageR/F :
Setting vibrator for GPS positioning :
Setting vibrator when receiving i-concier :
Setting vibrator when Alarm clock or the schedule reminder sounds :
5e1
or
2
13
3e1-4
4
α
ppli settings.
2e1-3
Setting vibrator when using i-αppli :
・
Omit Step 3.
1-5
3
・
If you move the cursor to "Pattern A", "Pattern B" or "Pattern C", it vibrates in
the pattern at the cursor position.
・
When setting to "Sync melody", the vibrator operates along with the melody
set for ring alert etc. Note that some melodies are not synchronized.
・
If the vibrator for incoming calls is set, appears on the stand-by display if
the Call alert volume is more then "Level 1". appears when Call alert
volume is set to "Silent".
❖
Vibrate alert priority
When setting vibrator for receiving in multiple functions, it operates in order of the
priority below.
a
Alert by contact of FOMA terminal phonebook
b
Alert/image by group of FOMA terminal phonebook
c
Vibrate alert/effect/Call alert/Videophone alert/Mail alert
✔
INFORMATION
・
It does not vibrate when receiving a call/mail during a call.
・
Even with "OFF", the vibrator may operate when Flash graphics operate.
Melody Call
6e1
or
2
Changing ring tone
This is a service to let the caller to FOMA terminal hear melody instead of ring alert.
・
A communication fee is free for connecting to the setting site. Note that packet
communication fees are charged for connecting to IP site, i-mode menu site or
Free Melody Corner.
・
Melody Call is valid only when a voice call is received.
m
[Settings & NW services]
1
The melody call site is connected.
・
For details, refer to "Mobile Phone User's Guide [Network Services]".
119e
Sound/Screen/Light Settings
"Yes"
85
Page 88

Setting System sound
Keypad sound :
panel.
・
When the sound of Battery level and End alert of Data exchange settings are set
to "ON", sounds are emitted according to these settings.
・
When setting to "OFF", the confirmation sound is not emitted when reading a
code.
・
Even when "ON" is set, the sound is not emitted while running i-αppli.
・
With "Sol-fa" set, when you touch the touch panel, "Key sound 2" sounds.
Slide sound :
Shutter sound :
・
This setting also applies to Shutter sound of Image settings.
Movie camera sound :
recording a sound with Sound recorder).
・
This setting also applies to Shutter sound of Recording settings.
Touch selector sound :
with Touch selector setting set to "ON".
m
1
Perform necessary operation
2
Setting Keypad sound :
Setting Slide sound :
Setting Shutter sound :
Setting Movie camera sound :
Setting Touch selector sound :
Sound/Screen/Light Settings
86
Set a sound to be emitted when pressing keys or touching the touch
Set a sound to be emitted when opening/closing FOMA terminal.
Set a shutter sound when shooting a still image.
Set a shutter sound when recording a movie (including
Set a sound to be emitted when operating Touch selector
[Settings & NW services]
2e1-4
116
1e1-5
3e1-5
4e1-5
5e1-6
Charge alert
Setting confirmation tone for charging
You can set if you activate the battery charging sound at the start and end of
charging.
m
[Settings & NW services]
1
✔
INFORMATION
・
Even when "ON" is set, the charge alert does not sound in the cases below.
- In Silent mode, Public mode (Drive mode), during a voice/videophone call, PushTalk session, 64K
data communication, i-mode communication, packet communication
117e1
or
2
Setting Call session
On-hold tone :
Quality alarm :
・
The call may be interrupted without sounding the alarm depending on the call
conditions or radio wave conditions.
Reconnect alarm :
・
While the call is interrupted, the other party hears no sound.
・
The time required for reconnection differs depending on the call conditions or
radio wave conditions. It normally takes 10 seconds at most.
・
You are charged for the time used for reconnection (up to 10 seconds).
・
The call may be interrupted without sounding the alarm depending on the call
conditions or radio wave conditions.
Low Battery alert :
exhausted.
・
When the battery becomes low during a call, the alert is emitted from the earpiece
even with "OFF" set.
m
1
Perform necessary operation
2
Setting On-hold tone :
Setting Quality alarm :
・
Setting Reconnect alarm :
・
Set On-hold tone.
Set alarm sound when the call is about to be interrupted.
Set alarm for reconnecting interrupted call.
Set if you activate the alarm when the battery is about to be
[Settings & NW services]
2e1-3
3e1-3
Operation during a voice call :
Operation during a voice call :
118
m5
4e1-3
m4
Page 89

・
Operation during a PushTalk session :
Setting Low battery alert :
Silent mode
5e1
m1
or
2
Muting ring tone from the FOMA terminal
You can set FOMA terminal not to emit a sound by enabling the vibrator for
incoming calls or muting the keypad sound.
◆
Starting/Canceling Silent mode
#
(1 sec. or more)
1
Silent mode is started/canceled. When started, (in General silent mode) or
(in Personalized silent mode) appears on the stand-by display.
・
When Search key shortcut is in default state, Silent mode can also be started/
canceled by pressing
❖
When General silent mode is activated
This function cancels the sound emitted from FOMA terminal such as ring alert,
Keypad sound, Touch selector sound, Slide sound, alarm, buzzer or the sound for
reading a code, and an incoming call is notified with vibrator (vibration). Also,
microphone is sensitized, and you can call in a small voice.
・
In the cases below, the operation of vibrate alert is "Pattern A".
- When receiving voice call, videophone call, PushTalk call, mail, during 64K data
communication or when receiving i-concier
- While positioning with melody set to GPS alert
- When the time specified in Countdown timer elapses
- When the date and time specified in schedule come
・
The vibrator operation for receiving Area Mail of emergency earthquake flash
report is "Sync melody".
・
When the time specified in Alarm clock comes, vibrate operates according to the
setting of Alarm clock.
・
Melody is not played automatically even when sent/received mail or MessageR/F
is displayed with "Auto play" set for Attachment auto-play.
・
When playing Melody, Music&Video Channel program or Music, a confirmation
screen for playing appears. Select "Yes" to play.
・
When playing movie/i-motion with sound or program recorded from 1Seg, a
confirmation screen for playing a sound appears. Select "No" to play movie only.
U
for 1 second or more.
・
When activating 1Seg, a sound emission confirmation screen appears. Select
"Yes" to adjust the volume. Select "No" not to emit a sound. Note that a sound is
emitted if 1Seg activation is set to "Auto start" in Set notify alarm of watching
reservation.
✔
INFORMATION
・
Shutter sound is emitted even in Silent mode.
・
The alarm sound of Call cost limit is emitted in General silent mode. In Personalized
silent mode, it operates according to the settings of "Call alert volume" of Personalized
silent mode.
◆
Silent mode
<Example> Setting Personalized silent mode
m
[Settings & NW services]
1
2
2
Setting General silent mode :
・
Omit Step 3.
Set required items
3
・
When Vibrate alert is set to "ON", it operates according to Vibrate alert/effect.
Items set to "OFF" in Vibrate alert/effect vibrate in "Pattern A".
・
When Vibrate alert is set to "Contact setting", it operates according to Vibrate
alert/effect.
・
Regardless of the setting of Vibrate alert, when receiving Area Mail of
emergency earthquake flash report, the vibrator operates in "Sync melody".
・
You can set the alert volume for voice, videophone and PushTalk calls in Call
alert volume.
・
Even if "Silent" is set to Mail alert volume, if any other setting item is set to
emit sound, the buzzer alarm sounds when rece iving Area Mail of emergency
earthquake flash report.
・
When Alarm sound, Schedule reminder or i-αppli sound is set to "ON", the
sound is emitted according to each setting.
・
When setting Alarm sound to "ON", the Countdown timer sound is also
emitted.
・
For Answer machine, it operates according to this setting regardless of the
setting of Answer machine.
eC
14
1
Sound/Screen/Light Settings
87
Page 90

Displays/Lights settings
Timed theme
Switching stand-by display, Silent mode, etc. by lifestyles
This function allows you to change the stand-by display or activate Silent or
Privacy mode at the specified time. Timed theme can be added up to 18 items.
m
[Settings & NW services]
1
Select a titleeSet required items
2
Time :
Enter the time to switch the theme in the 24-hour format.
Repeat :
Set repetitive operation.
・
When "Day of week" is selected, select "Day/Week", select a day of the week
and press
C
Title :
Style theme :
・
When "Change" is selected, select a style theme.
Silent mode :
・
When "ON" is set, Silent mode set from Silent mode starts.
Privacy mode :
・
When "ON" is set, Privacy mode set from Privacy mode setting starts.
Setting/Canceling : Move the cursor to the title
・
is displayed at the left of the title for Timed theme set to ON.
✔
INFORMATION
・
When Style theme is set to "Change", the image or movie/i-motion set to the stand-by
display is canceled at the specified time. Note that Show ticker of i-Channel is not
canceled.
・
When i-αppli stand-by display is set, this function is unavailable.
・
If multiple items are set and the operating time for them are the same, the item on the
top of the list of Timed theme operates.
・
When Repeat is set to "Day of week", the setting remains even after the specified day.
To change the setting, register multiple time themes.
・
When Timed theme and alarm are set to start at the same time, Timed theme starts
after the alarm operates.
・
This function does not operate if FOMA terminal is turned OFF, All lock or Omakase
Lock is ON or other function is operating at the specified time. If you turn FOMA
terminal ON, cancel the lock or display the stand-by display, Timed theme that passed
the specified time operates in order.
.
Up to 10 two-byte (20 one-byte) characters can be entered.
Set if you change style theme.
Set if you start/cancel Silent mode.
Set if you start Privacy mode.
33
eC
em
Stand-by display
Changing stand-by display
・
For some images, movie/i-motion or i-αppli, stand-by display settings are
disabled if UIM used for downloading them is not installed (UIM operation
restriction).
◆
Setting image or movie/i-motion to stand-by display
・
Movie/i-motion that can be set for stand-by display→P287
m
[Settings & NW services]
1
Select any of 1, 3,
2
・
When you select "Same as Kisekae Tool", no more operation is required.
Switching still images in a folder to display <Set random image> :
required items
・
Go to Step 4.
・
Set Change image: to "Every 30 mins" to change images at minutes 00 and 30
every hour. Set it to "Every 60 mins"to change images at minutes 00 every
hour. Set it to "EverySlideOpened" to change images each time FOMA
terminal is opened.
Select a foldereSelect an image or movie/i-motion
3
"Yes"
4
・
In some sizes of images or movie/i-motion, select "Yes (Same size)" or "Yes
(Large size)". Select "Yes (Large size)" to enlarge them to fit the screen size.
・
If i-αppli stand-by display has been set, a conf irmation screen appears asking
if you terminate the istand-by display is canceled.
・
Show ticker of i-Channel ticker in i-Channel and Information display is set to
"No" and "Not display", respectively. When movie/i-motion is canceled with
i-
α
ppli stand-by display not set, Show ticker is set to "Yes", and Information
display restores the previous setting.
eC
α
211
5
ppli stand-by display. When selecting "Yes", the i-αppli
2e
Set
Sound/Screen/Light Settings
88
Page 91

❖
Playing movie/i-motion or animation set to the stand-by
display
・
The operations below are available for movie/i-motion.
f
/Opening FOMA terminal : Play
c
/ f /Closing FOMA terminal : Stop
j
: Adjust volume
・
The operations below are available for GIF animation, created animation or Flash
graphics.
Opening FOMA terminal/Returning to the stand-by display with FOMA terminal
opened/Turning power ON : Play
f
: Pause/Play
・
It is not played during All lock etc.
✔
INFORMATION
・
While playing movie/i-motion set for the stand-by display, pressing j does not
display Scheduler or phonebook. Stop playing to operate.
・
When the stand-by display is displayed, Flash graphics and/or GIF animation plays for
a predetermined period of time and stops. If a clock is stopped when Flash graphics
with clock function is specified, you can restart it by playing Flash graphics.
・
By some Machi-chara on stand-by display, playing speed of Flash graphics is reduced.
・
When setting GIF animation to be enlarged, the display may be distorted.
・
When setting Flash graphics in "Preinstalled" folder of My Picture, displayed images
may change according to time or season. Also, some images change by tilting or
shaking FOMA terminal with it opened.
・
When setting "
My Picture with Pedometer settings set to "Use", you can check the number of steps on
the stand-by display. Also, some images change according to the number of steps.
・
When there is no image to be displayed since the folder selected in Set random image
is deleted, still images in the folder are moved or deleted or animation is created, the
default setting is restored. Note that, right after the still image displayed on the standby display is moved or animation is created, the image is temporarily displayed until
the next image appears.
◆
Setting i-αppli stand-by display
・
Only i-αppli compatible with the i-αppli stand-by display can be set.
・
The i-αppli stand-by display precedes other stand-by display settings.
・
Operating i-αppli stand-by display→P249
m
1
Select i-αpplie"Yes"
2
ウォーキング×フラワー
[Settings & NW services]
(Walking×Flower)" in "Preinstalled" folder of
2114
or is displayed when the i-αppli stand-by display is set.
・
Show ticker of i-Channel ticker in i-Channel and Information display is set to
"No" and "Not display", respectively. When icanceled with movie/i-motion not set, Show ticker is set to "Yes", and
Information display restores the previous setting.
◆
Info/calendar layout
You can divide the stand-by display to several and make settings to display arrival
information such as unread mail or missed call, schedule, calendar, list of notes or
contents of a note in individual areas.
・
When an image is set to the stand-by display, the set information is displayed
over the image. It is not displayed if movie/i-motion or iset to the stand-by display.
m
[Settings & NW services]
1
1
2
Canceling :
・
h
3
1, 3, 5
4
・
Setting arrival information :
・
・
・
・
Setting Calendar :
・
Setting Note content :
Ce
5
2
No more operation is required.
to switch patternseSelect an area
Press m and select "Yes" to cancel all area settings.
"When selecting " Unread messages", reception date/time and titles of
unread mails appear.
When selecting " MessageR"/" MessageF", reception date/time and titles
of MessageR/F appear.
When selecting " Missed call", reception date/time and the phone number
of the caller (or name if saved in phonebook) appear.
When selecting " Recorded messages", recording date/time and the phone
number of the caller (or name if saved in phonebook) appear.
The number of months that calendar can be displayed varies by the area size.
And, if the area is small, calendar cannot be set.
4e1-4
6e
"Yes"
215
2e
Select a note
α
ppli stand-by display is
Select information
Sound/Screen/Light Settings
α
ppli stand-by display is
eC
89
Page 92

❖
Checking information on the stand-by display
g
1
・
When no information is shown, press f to display an area and press g.
Move the cursor with
2
✔
INFORMATION
・
Each time you press f on the stand-by display, information is displayed/hidden in
turn.
・
When animation or created animation is set to the stand-by display, after the playing is
stopped or paused, press f to display information.
・
While information is displayed, the area set in Info/calendar layout cannot be selected.
❖
Displayed contents of various information
・
Since the numbers of information entries and lines displayed differ by the area
size, some part of the information may not be displayed.
・
For each information entry, the time is displayed for the current day and the date
is displayed for others.
・
In Personal data lock, only the setting of Missed calls for New arrival can be
changed. Schedule, List of notes or Note cannot be selected.
■
New arrival
The information is displayed from the latest one. Select an area to check the top
information.
: Unread mail / : MessageR/F : Missed call : Recorded message
■
Schedule
Icon, Start time, contents/program name appear in the order of the date and time of
schedule or watching reservation/recording reservation of 1Seg that start date/time
have not come yet. If an area is selected, the schedule or watching reservation/
recording reservation of the first item can be checked.
・
appears on the schedule that has different Start date and time and End date
and time.
・
If the schedule with All day set to ON is the current day, "AllDay" is displayed.
・
Schedules in i-schedule are not displayed.
■
Calendar
The calendar for 1 month/2 months/4 months/6 months are displayed. Select an
area to display the Calendar of Scheduler.
keg
・
The current day is displayed in yell ow, days off and holidays in red and Saturdays
in blue. The color changes by Days off, Day off of week and Holiday settings of
Scheduler.
・
When a schedule or 1Seg watching reservation/recording reservation is set, a red
mark appears on the upper-right side of the date.
■
List of notes
The list of notes saved in Notepad is displayed. Select an area to display the list of
notes.
■
Note
The beginning of a note set in Notepad is displayed. Select an area to display the
details of a note.
Outgoing call image
Changing image for outgoing voice/videophone call
m
[Settings & NW services]
1
3e
Select Display image field
・
When "Select image" is selected, select List image field to select an image.
・
When created animation is set, the first image is displayed.
❖
Outgoing call image priority
When setting outgoing images in multiple functions, they are displayed in order of
the priority below.
a
Image saved in FOMA terminal phonebook
b
Alert/image by group of FOMA terminal phonebook
c
Outgoing call/Videophone dialing (V.phone dialing img.)
*
Effective when Contact image is set to "ON".
232e1
e1-3eC
*
or
Sound/Screen/Light Settings
90
Page 93

Incoming call image
Changing image for incoming voice/videophone call
・
This setting also applies to Call alert of Call & Answer or Videophone alert of
Videophone.
・
Movie/i-motion that can be set for Show image→P287
m
[Settings & NW services]
1
4e
Select Show image field
・
When "Select image" is selected, select an image from List images field.
When "i-motion" is selected, select movie/i-motion from the movie list.
・
When movie/i-motion containing sound and images is set for Call ring alert
or V.phone ring alert, "Sync ring alert" is set.
✔
INFORMATION
・
When created animation is set, the first image is displayed.
・
In the following cases, ring alert is restored to the default setting. Note that the melody
can be changed.
- When Flash graphics or movie/i-motion containing only images is set as Show image with movie/imotion or music containing only sounds or music set as Ring alert
- When Show image is changed from "Sync ring alert" to other than "Sync ring alert"
232e2
e1-5eC
or
❖
Incoming call image priority
When setting incoming images in multiple functions, they are displayed in order of
the priority below.
a
Image saved in FOMA terminal phonebook
b
Alert/Image by group of FOMA terminal phonebook
c
Call ring alert*2/V.phone ring alert*2/Call alert (Incoming call)/Videophone alert
(Videophone receiving)/Incoming calls melody setting for Multi Number/Ring
alert for No.B in 2in1 setting
*1
Effective when Contact image is set to "ON".
*2
Effective when setting to "Movie ringtone" and movie/i-motion containing a sound and
image.
・
When the other party does not notify the caller ID, the incoming image of voice
call operates according to Anonymous caller. An incoming image for videophone
call operates according to the settings of Videophone alert.
・
When setting movie/i-motion (including the case of setting to "Terminal setting"
and setting movie/i-motion for Incoming call) for the ring alert of Alert by contact
of FOMA terminal phonebook, the image or movie/i-motion set in phonebook
does not appear, and the movie/i-motion set for the ring alert appears. Note that,
when setting movie/i-motion containing only sound for the ring alert of Alert by
contact etc., it operates as below.
- When setting a still image to phonebook, the still image is displayed.
- When Flash graphics or movie/i-motion is set to phonebook, the image of the phonebook does
not appear, but the image set for Alert/Image by group or Call alert appears.
・
When setting ring alert to "Terminal setting" in Alert/image by group of
phonebook and setting movie/i-motion in Call alert etc., the image or movie/imotion set in phonebook by group does not appear, and the movie/i-motion set
for Ring alert appears. Note that, when setting movie/i-motion containing only
sound in Call alert etc., it operates as below.
- When a still image is set for Alert/Image by group, the still image appears.
- When Flash graphics or movie/i-motion is set for Alert/Image by group, the image set for Call
alert etc. appears.
*2
*1
Sound/Screen/Light Settings
91
Page 94

Identification mark
Decorating titles to display for incoming/ outgoing calls or while talking
・
This setting also applies to Number A of Identification mark of 2in1.
・
Identification symbol is not displayed when using Multi Number.
m
[Settings & NW services]
1
items
eC
・
When setting Identify No. to "ON", Mark can be set.
Contact image
513e
Set required
Setting Contact image display from phonebook at incoming/outgoing call
You can set if you display images etc. saved in FOMA terminal phonebook for
incoming/outgoing voice/videophone calls.
・
The image saved in phonebook is displayed when the caller notifies the phone
number.
m
[Settings & NW services]
1
Mail image
2325e1
or
2
Changing displays for incoming/outgoing messages and retrieving
You can set images to appear when sending mails, receiving mails (including
MessageR/F) or received mails, or checking new messages.
m
[Settings & NW services]
1
required items
・
When "Select image" is selected, select Image list field to select an image.
・
When "i-motion" is set in Image message alert, select a movie/i-motion from
the movie list. "Sync ring alert" can be selected when movie/i-motion
containing sounds and images is set for Mail ring alert.
Movie/i-motion that can be set
eC
233e1-4e
→
P287
Set
Display & Key light
Setting display and key lighting
◆
Display light time
You can set the lighting time to turn on the light on the display.
・
This setting also applies to i-mode settings, Display light time of i-αppli settings,
Image settings, Recording settings and Settings for i-motion. Also, i-motion
setting also applies to Display light time of Music&Video Channel.
m
[Settings & NW services]
1
1
or 2 (for Normal use, 1-7)
2
・
When setting to "Terminal setting", the light turns on according to the lighting
time set in Normal use.
・
When "Always on" is set, the light always turns on with brightness set in
Brightness. Note that, when an AC/DC adapter is connecte d, the light turns on
in "Brightness 5" regardless of the settings in Brightness.
・
When "Software" is set for i-αppli, the light turns on according to the i-αppli
settings. The light does not turn off for i-
◆
Light time-out
You can set the duration to show display.
・
This setting is unavailable for the function to which Display light time is set to
"Always on".
・
Display remains shown while receiving a call or mail, making a videophone call,
operating camera, watching 1Seg, playing 1Seg video, alarm is sounding, etc.
Display disappears when specified time elapses after those operations.
・
Display light turns on by operating keypads or receiving calls/mails when nothing
is displayed on the display.
m
[Settings & NW services]
1
241e1-7
α
ppli set to Always on.
242e1-7
Sound/Screen/Light Settings
92
Page 95

◆
Brightness
m
[Settings & NW services]
1
・
When setting to "Auto adjust", the brightness of the display lights is
automatically adjusted according to the ambient light. In a well-lighted area,
Keypad light does not turn on.
◆
Keypad light
m
[Settings & NW services]
1
items
eC
Keypad light :
FOMA terminal or pressing a key.
Light color :
each time you press a key. When setting to "Rainbow (Slide)", the light color
changes each time FOMA terminal is opened.
Call/Mail light alert :
Light alert for incoming calls or mail. When "OFF" is set, the light turns on in
Keypad light color.
・
When "ON" is set, if Light pattern of Light alert is "Sync melody" or Light color
of Light alert is "Rainbow", it operates in "Rainbow (Key press)". When Light
pattern of Light alert is set to "OFF", the light turns on in Keypad light color.
Power saving mode
When setting to "ON", Keypad light turns on when opening
When setting to "Rainbow (Key press)", the light color changes
When "ON" is set, it operates according to the setting of
243e1-6
244e
Set required
Saving battery consumption
◆
Saving mode ON/OFF
m
[Settings & NW services]
1
281
◆
Saving mode options
m
[Settings & NW services]
1
❖
When power saving mode is set
・
When setting to Standard saving, it operates as below.
- Keypad light of Display & Key light, Indicator light, Call session light of Light alert, Position
location and Notifying location of GPS light alert, IC card light, Slide open/close are set to
"OFF".
- "0 sec" is set for Normal use of Display light time in Display & Key light, "Terminal setting"
is set for others, "15 sec" is set for Light time-out, and "Brightness 1" is set for Brightness.
- 1Seg ECO mode is set to ON
・
When setting to Full saving, it operates with the operation of Standard saving as
below.
- Motion sensor and Immobile sensor of Auto keypad lock are set to "OFF".
- "Not use" is set to Pedometer settings
✔
INFORMATION
・
In the following cases, power saving mode is set to OFF and Power saving mode is
restored to default.
- When an item set in Power saving mode is separately changed
- When Kisekae Tool that applies brightness other than "Brightness 1" is set
- When Style theme is set or Timed theme for which Style theme is set to "Change" operates
Color scheme
282e1
or
2
Changing display colors
m
[Settings & NW services]
1
scheme
231e
Select the color
Sound/Screen/Light Settings
93
Page 96

Select startup menu
Changing startup menu
Set the menu displayed when pressing m on the stand-by display.
m
[Settings & NW services]
1
Display Machi-chara
221e1-3
Setting Machi-chara
You can display a character on the stand-by display, menu screen, etc.
m
[Settings & NW services]
1
・
When Display is set to "ON", you can select Machi-chara.
✔
INFORMATION
・
Machi-chara does not appear when movie/i-motion or i-αppli is set for the stand-by
display.
・
Machi-chara may appear when there is no communication and no keypad operations
for 30 seconds or more while displaying a site.
・
Some Machi-chara change its actions according to time, arrival information, call
duration, etc.
27e
Set required items
eC
Using Kisekae Tool
Use of Kisekae Tool allows to collectively set stand-by display image, menu icons,
incoming/outgoing call images, ring alerts, etc.
・
Kisekae Tool in "Preinstalled" folder cannot be moved or deleted. Also, the file
name cannot be changed.
・
Using Kisekae Tool, the items below can be set (combinations of items that can
be set vary by Kisekae Tool).
- Stand-by display, Kisekae menu*1, Basic menu, Basic menu (Background), Mail menu BG,
i-mode menu BG, Battery icon, Antenna icon, Outgoing call image, Call alert image,
Videophone call image, Videophone alert image, Outgoing msg img., Mail alert image, Image
msg alert, Message retrieving
alert, MessageR ring alert, MessageF ring alert, Alarm clock sound, i-concier ring alert, Color
theme, Font, Brightness, Keypad light color, Clock style, Time format, Clock layout, Date
format
*1
Some Kisekae Tool does not support English display when setting Select language to
"English". Also, operation by pressing
different actions from ordinary ones or short-cut operations may be unavailable.
*2
Set the image to display when setting Check new message/SMS.
・
Some types of Kisekae menus change the menu structure according to usage
frequency. Also, the number assigned to menu item (item number) may not be
applied.
・
With 2in1 ON, no Kisekae Tool items are set on the stand-by display in Dual and
B modes, and for Call/V.phone/Mail ring alert of Number B.
*2
, Call ring alert, V.phone ring alert, P-Talk ring alert, Mail ring
I
or a on the stand-by display may cause
Sound/Screen/Light Settings
94
Page 97

◆
Changing Kisekae Tool
m
[Data Box]
1
i-mode :
Preinstalled :
My folder :
・
Appears if a folder is added.→P300
Search by i-mode :
Select a foldereMove the cursor to Kisekae Tool
2
The display name of the file at the cursor position and an icon indicating details
are shown.
a
a
Originated
: i-mode
/ : i-mode (compatible with Standard font)/(compatible with Large
font)
/ : Preinstalled (compatible with St andard font)/(compatible with Large
font)
: Searching Kisekae Tool on i-mode site
b
File types
: Set
: Previously used setting whose items are valid because the current
Kisekae Tool does not have the items
(the back card is gray) : Not set
(upper half is gray) : Partially saved
: i-
c
File restriction
: File restricted
・
For thumbnail screen, the display name of the Kisekae Tool at the cursor
position appears at the top of the display, and the file size appear at the
bottom of the display. Also, when thumbnail display is unavailable, it is
displayed as below.
(the back card is pink) : No preview image
7
Kisekae Tool downloaded from sites
Preinstalled Kisekae Tool
Kisekae Tool moved from other folders
Searching Kisekae Tool on i-mode site→P166
b
c
I
a
Thumbnails screen List screen
→
P166
α
ppli unavailable due to UIM operation restriction.
α
ppli unavailable due to UIM operation restriction.
: i(upper half is gray) : Partially downloaded
Resetting :
・
・
Checking memory :
Ce
3
Data of Kisekae Tool is collectively set.
・
b
c
・
Viewing/Changing detail information :
Detail information→P302
Canceling setting :
・
Moving/Restoring :
Moving/Restoring→P301
Deleting :
Deleting→P304
Sorting :
Sorting→P304
Setting list screen operations :
・
m6e
Selecting "Reset all" resets Kisekae Tool settings to the default state.
Selecting "Reset menu" resets settings of Kisekae menu, Basic menu, Basic
menu BG, Mail menu BG and i-mode menu BG to the default state.
Authenticatee"Reset all" or "Reset menu"
m4e
Move the cursor to a data type
"Yes"
When a large font setting is included in Kisekae Tool, a confirmation screen
for changing the font of mail, phonebook, call logs, etc. appears. And, when
changing to a Kisekae Tool not containing large font while setting in a large
font, a confirmation screen for changing the font of mail, phonebook, call
logs, etc. appears. Follow the instruction of this screen and set.
Move the cursor to Kisekae Tool partially downloadedePress one of g,
C, a
, then a confirmation screen for downloading the remaining data
appears. Select "Yes" to start downloading. When downloading is
unavailable, Kisekae Tool partially saved may be deleted.
To cancel selected items, select themeC.
Set to "Yes" for thumbnail display.
m3e1-3e
m4e1
m5e1-3
m6e
Set required items
m2e1
"Yes"
or
2e1-3
eC
m7e1
or
2
or
2
Sound/Screen/Light Settings
95
Page 98

❖
Using Special mode
If you set Special mode, "
automatically set to Kisekae Tool.
meCem13e
1
name field
・
The items below are set.
- Stand-by display, Kisekae menu, Battery icon, Antenna icon, Outgoing call img., Call
alert image, V.phone call image, V.phone alert image, Outgoing msg img., Mail alert
image, Image msg alert, Message retrieving, Color theme, Clock style, Time format,
Clock layout, Date format
・
If you perform the same operations as the setting procedure, "
(Sweets)" is deleted from "Preinstalled" folder, and the set items are restored
to the default state.
・
"
リーフロボット(スペシャル)
"Preinstalled" folder of Machi-chara. If you delete "
ル)
(Leaf robot (Special))", it never appears even if you set Special mode
again. Download it from "
website.
・
For information on Special mode, refer to "
応援団
(@ F mobile phone supporters)" website.→P304
◆
Checking Kisekae Tool content
m
[Data Box]
1
Move the cursor to Kisekae Tool
2
・
For the item currently set, a red check mark is added on the icon on the left of
item name.
・
For some items, the icon indicating file format appears on the right of item
name. Icon definitions
: Image in JPEG format : Image in GIF format : SWF (Flash
graphics)
: Kisekae menu : Movie in MP4 format : Melody in MFi format
: Melody in SMF format
Displaying an image : Select Kisekae Tool
Displaying images or setting for each item : Move the cursor to Kisekae
Tool
eae
Sound/Screen/Light Settings
96
eC
→
P304
Select an item
スイーツ
7e
(Sweets)" is added to "Preinstalled" folder, and
Enter "
スイーツ
(Sweets)" in the group
(Leaf robot (Special))" is also added in
@Fケータイ応援団
リーフロボット(スペシャ
(@ F mobile phone supporters)"
裏技紹介
(Tricks)" of "@F
Select a folder
ea
スイーツ
ケータイ
✔
INFORMATION
・
Select language cannot be set when using "Simple Menu".
・
For items set to "Kisekae Tool" in each setting screen, when selecting other than
"Kisekae Tool", a confirmation screen for canceling Kisekae Tool appears. If you select
"Yes", only corresponding items are canceled. To restore the setting of Kisekae Tool,
set Kisekae Tool again.
・
When Kisekae Tool contains data that cannot be displayed or played, only that data is
not set.
Customizing the menu
◆
Customizing menu items for Kisekae menu
・
This operation is available when Kisekae Tool that can change or replace menu
items is downloaded and set.
・
When Special mode is set, you can replace menu items.
❖
Changing menu item
me
1
❖
1
◆
1
2
3
Move the cursor to a menu item
to a function to register
・
You can select till second level.
eC
Replacing menu items
me
Move the cursor to a menu item
destination item to replace
Changing icon and background of Basic menu
meI
・
When the display menu is Basic menu, you do not need to press I.
m2
Select a functioneSelect a foldereSelect an image
Menu icons of other functions can be set successively in the same way.
Canceling 1 item : Move the cursor to an icon
Canceling all items :
m2e
"Yes"
em2e
em3e
em1e
Move the cursor
Select the
"Yes"
Page 99

ae
4
5
✔
・
・
・
◆
1
2
Select a foldereSelect an image
Background is set.
Canceling background :
Ce
"Yes"
・
When the display menu is Basic menu, you do not need to select "Yes".
INFORMATION
Created animations, Flash graphics or images in "Item" folder cannot be selected. If a
GIF animation is selected, first image is displayed.
Depending on the image size to set, the icon is displayed by 192×192, and the
background image is enlarged/shrunk to 480×704.
The icon and background of Basic menu cannot be changed while using Kisekae Tool
including "Basic menu", "Basic menu (Background)" or during Personal data lock.
m4e
"Yes"
Resetting menu
m
[Settings & NW services]
・
Authentication is required for Menu design.
・
Select Operation histor y to delete the information about how many times and
when you used the menu. Select Menu design to restore the menu (including
Custom menu) to default state.
"Yes"
Style theme
223e1
or
2
Customizing FOMA terminal screen
You can create 3 typ es of original coordinates by changing the screen designs such
as stand-by display, menu, clock, battery icon or antenna icon.
・
When Style theme is set, Brightness of Display & Key light, i-mode of Font size,
Mail view, Text input, Font style, power saving mode and Subtitle size of User
setting of 1Seg are restored to default settings. Also, when Normal use of Display
light time in Display & Key light is set to "0 sec", the previous setting is restored.
m
[Settings & NW services]
1
1-3e
2
Title :
Menu design :
Color scheme :
Set required items
Up to 10 two-byte (20 one-byte) characters can be entered.
Select a preinstalled Kisekae Tool.
Select the display color scheme.
32
eC
Stand-by image :
a still image, GIF animation, created animation or Flash graphics.
Clock display format/Time format/Clock layout/Day :
clock on the stand-by display, clock design to be displayed, time format, clock
layout, and display type of the day of the week.
Items of Clock display format
Battery icon :
Antenna icon :
Keypad light color :
Battery icon/Antenna icon
Select an image to be displayed on the stand-by display from
Select if you display a
→
Select the battery icon type.
Select the antenna icon type.
Select the color of Keypad light.
P99 "Setting clock display"
Changing battery/antenna icon
m
[Settings & NW services]
1
6
(In Special mode, 1-7)
Indicator light
21e3
or
4e1
Indicating arrival information such as missed calls and unread mails with lighting
You can set whether to blink the light for a missed call, unread mail (including
SMS) or arrival information.
・
The light blinks in the l ight color for incoming calls and mail/message s at intervals
of approximately 6 seconds.
m
[Settings & NW services]
1
✔
INFORMATION
・
For the multiple arrival information, the light blinks in order of the following priority.
a
Missed call bUnread mail (including SMS) cArrival information
・
When approximately 6 hours elapse since the last information was received or you
delete (the number indicates the number of items) from the stand-by
display, the light stops blinking.
2352e1
Sound/Screen/Light Settings
or
2
-
97
Page 100

Light alert
Setting the lighting patterns and colors used for an incoming call/mail or while talking
・
This setting also applies to Light alert of Call alert, Videophone alert, PushTalk
alert, Mail alert, MessageR/F alert, Li ght alert and Light color of ToruCa alert, Light
alert of Positioning alert in GPS.
・
Brightness and color of light→P416
m
[Settings & NW services]
1
items
eC
・
When Light pattern is set to "Sync melody", the light blinks in multiple colors.
Light color cannot be set. And, some melodies are not synchronized.
・
When setting Light pattern of Light alert to "Sync melody" and Indicator light
to "ON", Light color for arrival information operates according to Light color
set for Call or Mail.
・
To set light for receiving ToruCa, Call session light, IC card light, Slide open/
close, set Light to "ON" and select a light color.
・
For GPS light alert, Light pattern cannot be set to "Sync melody". Also, "OFF"
cannot be set for Loc. request-accept or Loc. request-verify.
❖
Light alert priority
When Light pattern and Light color of Light alert is set for multiple functions, light
turns on in order of the priority below.
a
Alert by contact of FOMA terminal phonebook
b
Alert/image by group of FOMA terminal phonebook
c
Light alert/Call alert/Videophone alert/Mail alert
Sound/Screen/Light Settings
98
25e1-5e
Set required
Font style
Changing font style
You can change the font type to used for i-mode site, Full Browser, character entry
screen, etc.
・
In addition to "
downloaded.
・
This setting does not apply to some functions such as camera, i-αppli or i-motion.
m
1
Alphameric field
Select Hiragana/Katakana fieldeSelect a font
2
Deleting downloaded f onts : Select Hiragana/Katakana fieldeMove the cursor
・
C
3
Font size
プリティー桃
[Settings & NW services]
" stored by default, you can use other kana fonts
262e
Select Kanji/
e1-3
eme
to a font
Preinstalled fonts or fonts currently used cannot be deleted.
"Yes"
Changing font size
<Example> When setting with All listed
m
[Settings & NW services]
1
1-6e
2
・
When i-mode view is set, the font size used for displaying i-mode site or
screen memo is changed.
・
When Text input is set, the font size used for creating a mail or Full-screen
entry is changed.
・
When P.book/Log/Accessory is set, the font size etc. for phonebook, Received
calls, Redial, notepad, alarm clock list screen and dictionaries are changed.
✔
INFORMATION
・
When the font size that cannot be set for i-mode view, Full Browser, Mail view or Font
size:Ph.book/Logs is selected in All listed setting, the closest size is set.
・
For some font sizes selected in All listed, a confirmation screen for changing the font
size for menu appears. When selecting "Yes", Kisekae Tool applicable to the selected
font size can be selected.
・
The font size can also be changed from the mail details screen.→P148
Select a font size
261
 Loading...