

Page 1

Supernova™ One
Installation manual
Page 2
2/8
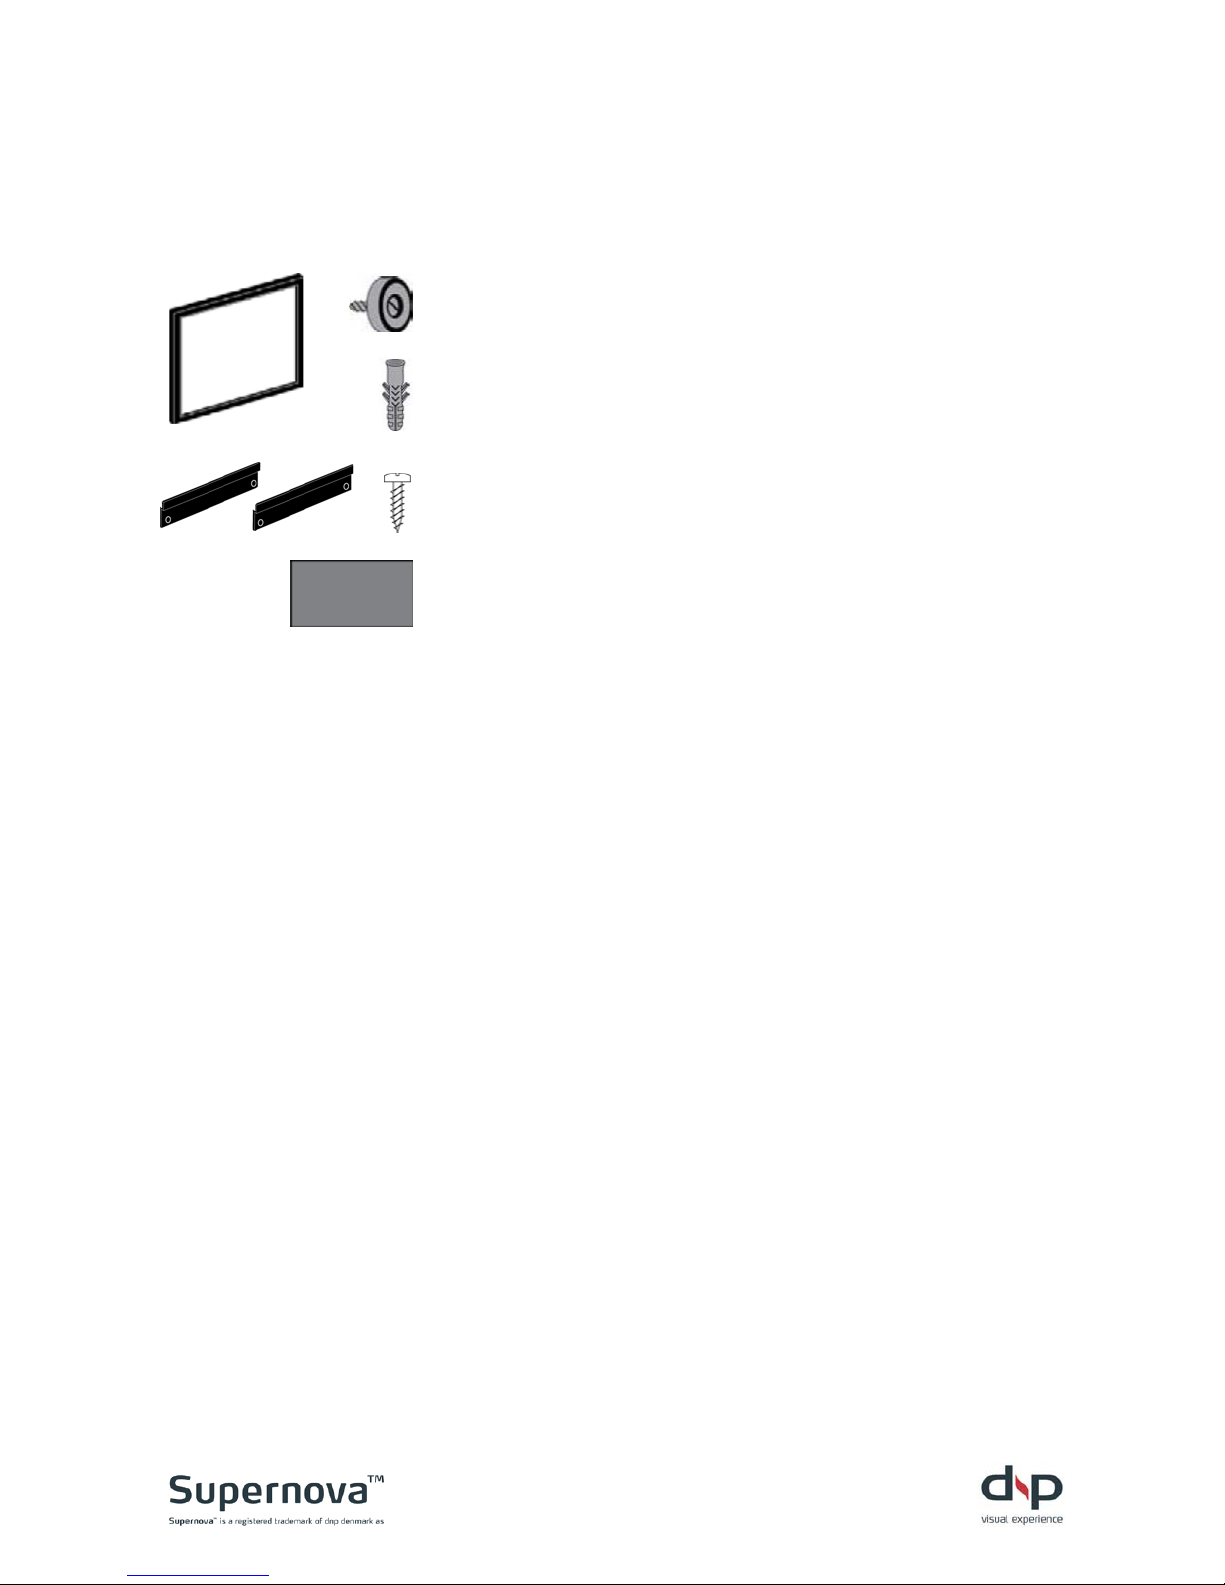
Box contents
2 x magnets
1 x screen
6 x wallplugs
6 x screws
2 x brackets
2 x backplates
Check box for:
1 x screen
2 x brackets
2 x magnets Ø 25 mm
6 x wallplugs
(2 for magnets, 4 for brackets)
6 x screws
(2 for magnets, 4 for brackets)
2 x backplates
Page 3
3/8
1. Position the projector
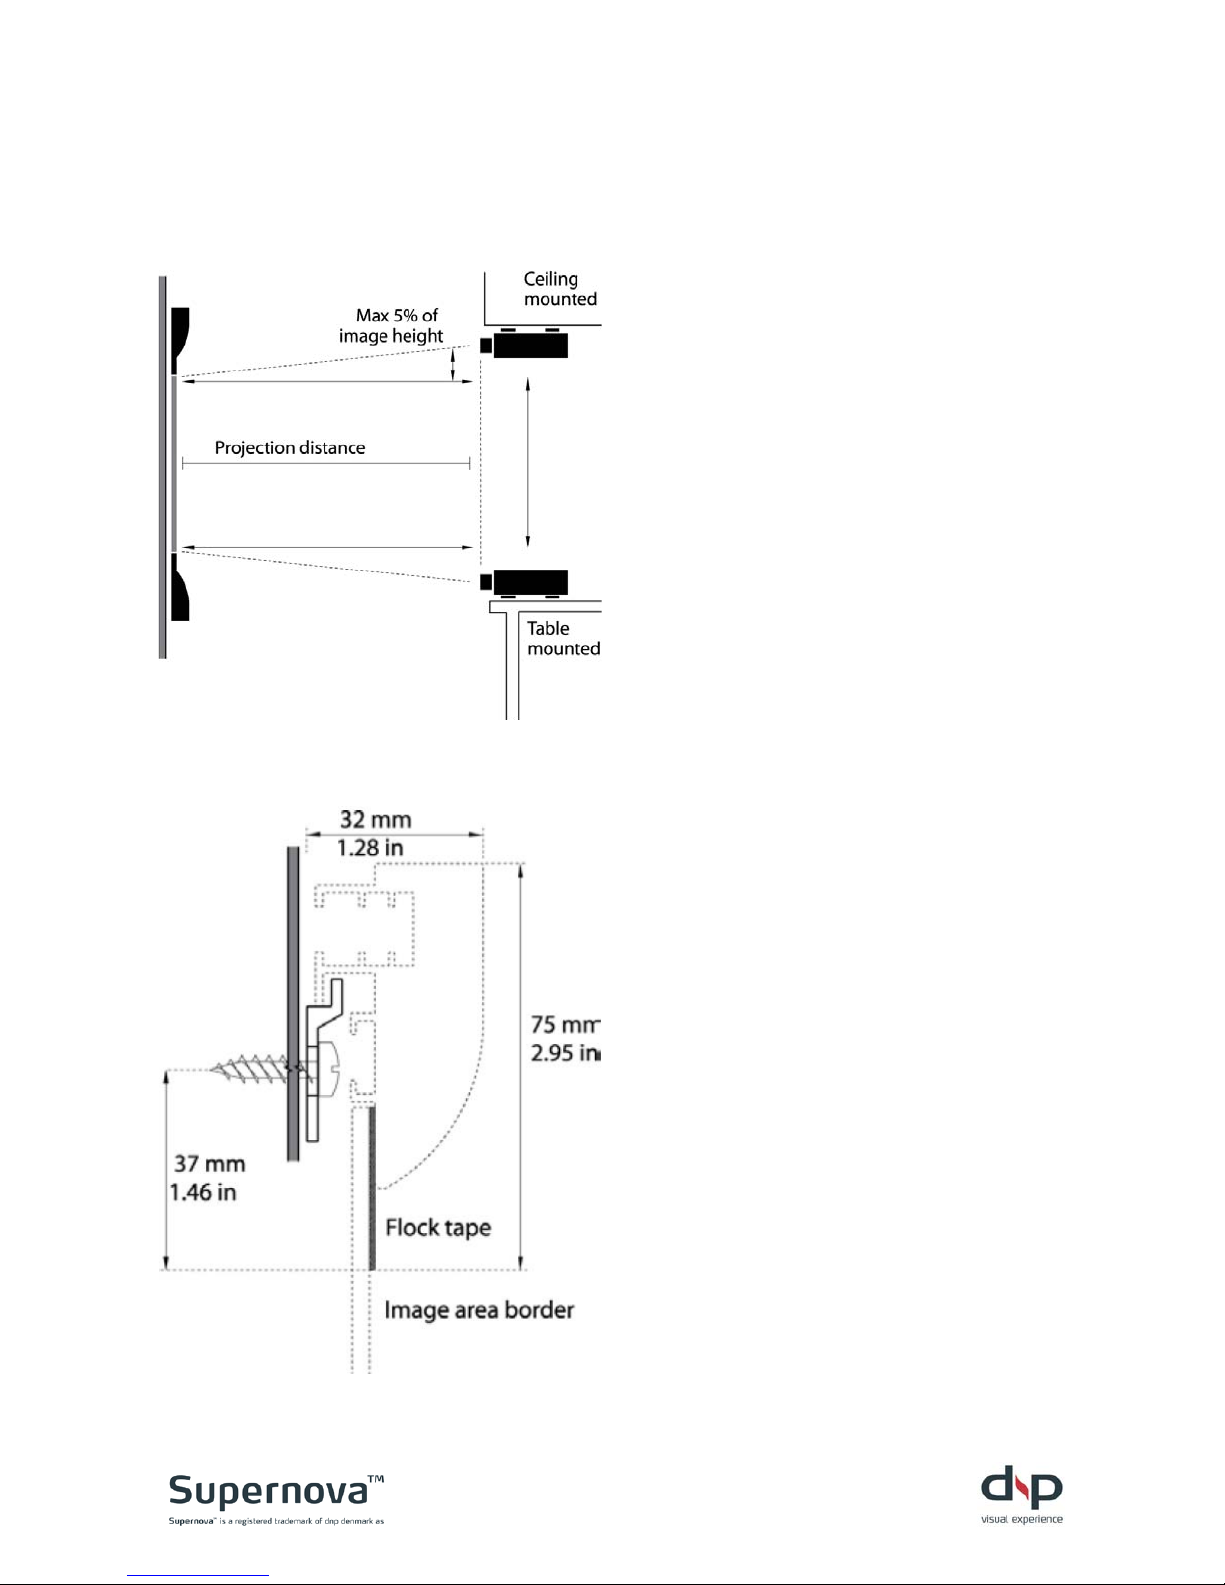
For the shortest optimal projection
distance, see “minimum projection
distance” in the Supernova One
datasheet. It is possible to use a
longer projection distance, but make
sure that the projector can project
the required image size onto the
screen. In case of a mismatch,
contact your projector reseller.
The projector can be positioned
freely on a vertical centreline,
perpendicular to the screen, up to
5% above (ceiling mounted) or up to
5% below the image area (table
mounted).
2. Position brackets
Place the screws 37 mm (1.46 in)
above the desired image area's top
border. Position the brackets
approx. 150 mm (5.91 in) from the
outer edge of the frame.
The brackets must be aligned both
horizontally and vertically. If the
wall is uneven, you can, for
example, apply a few washers
behind the brackets to enable
alignment. Use attachment screws
and wall plugs that are appropriate
for the wall material.
Page 4
4/8
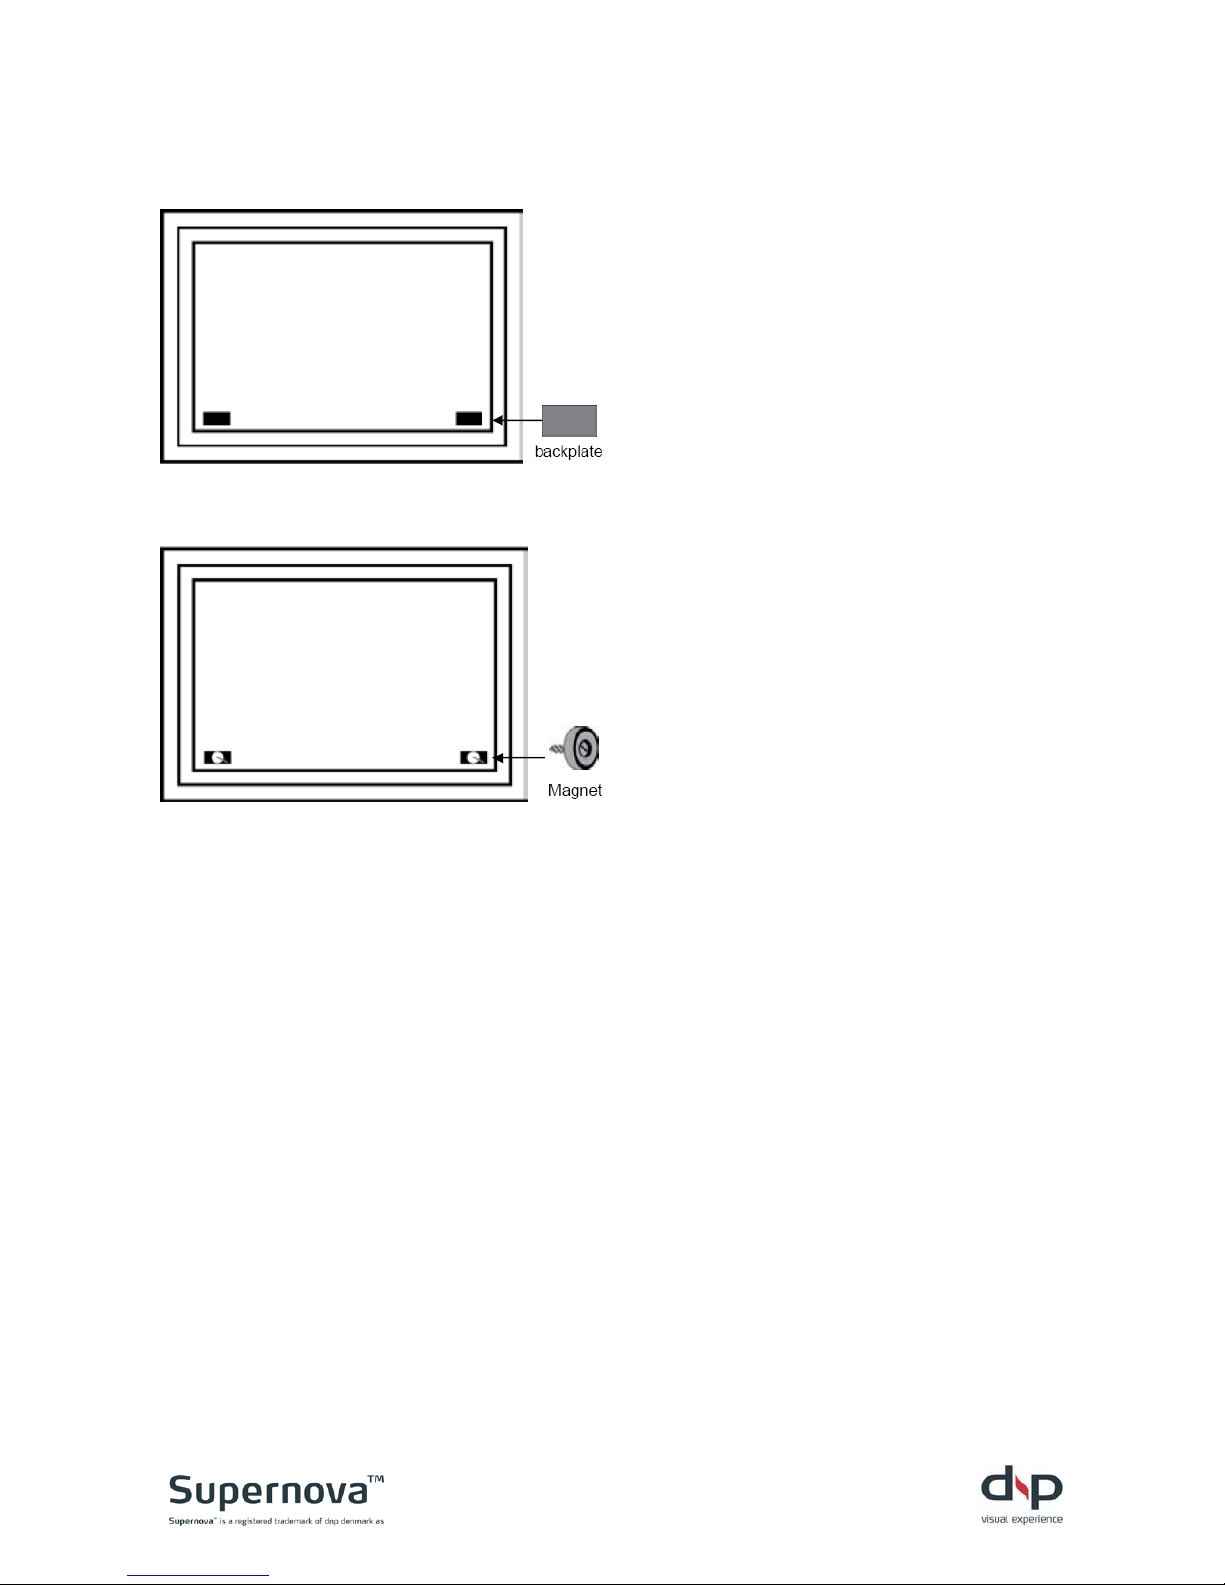
3. Mount the backplates
The backplates ensure that the
screen is fixed firmly to the wall.
Remove the covering from the tape
and glue the two plates into position
in each lower corner of the screen’s
back side. If the wall is uneven, you
may have to find a more suitable
position than the lower corners.
4. Place the magnets
Put a screw into each of the
magnets and attach them to the
centre of each of the two backplates
by using magnetic force (screw tips
should face away from the screen).
Page 5
5/8
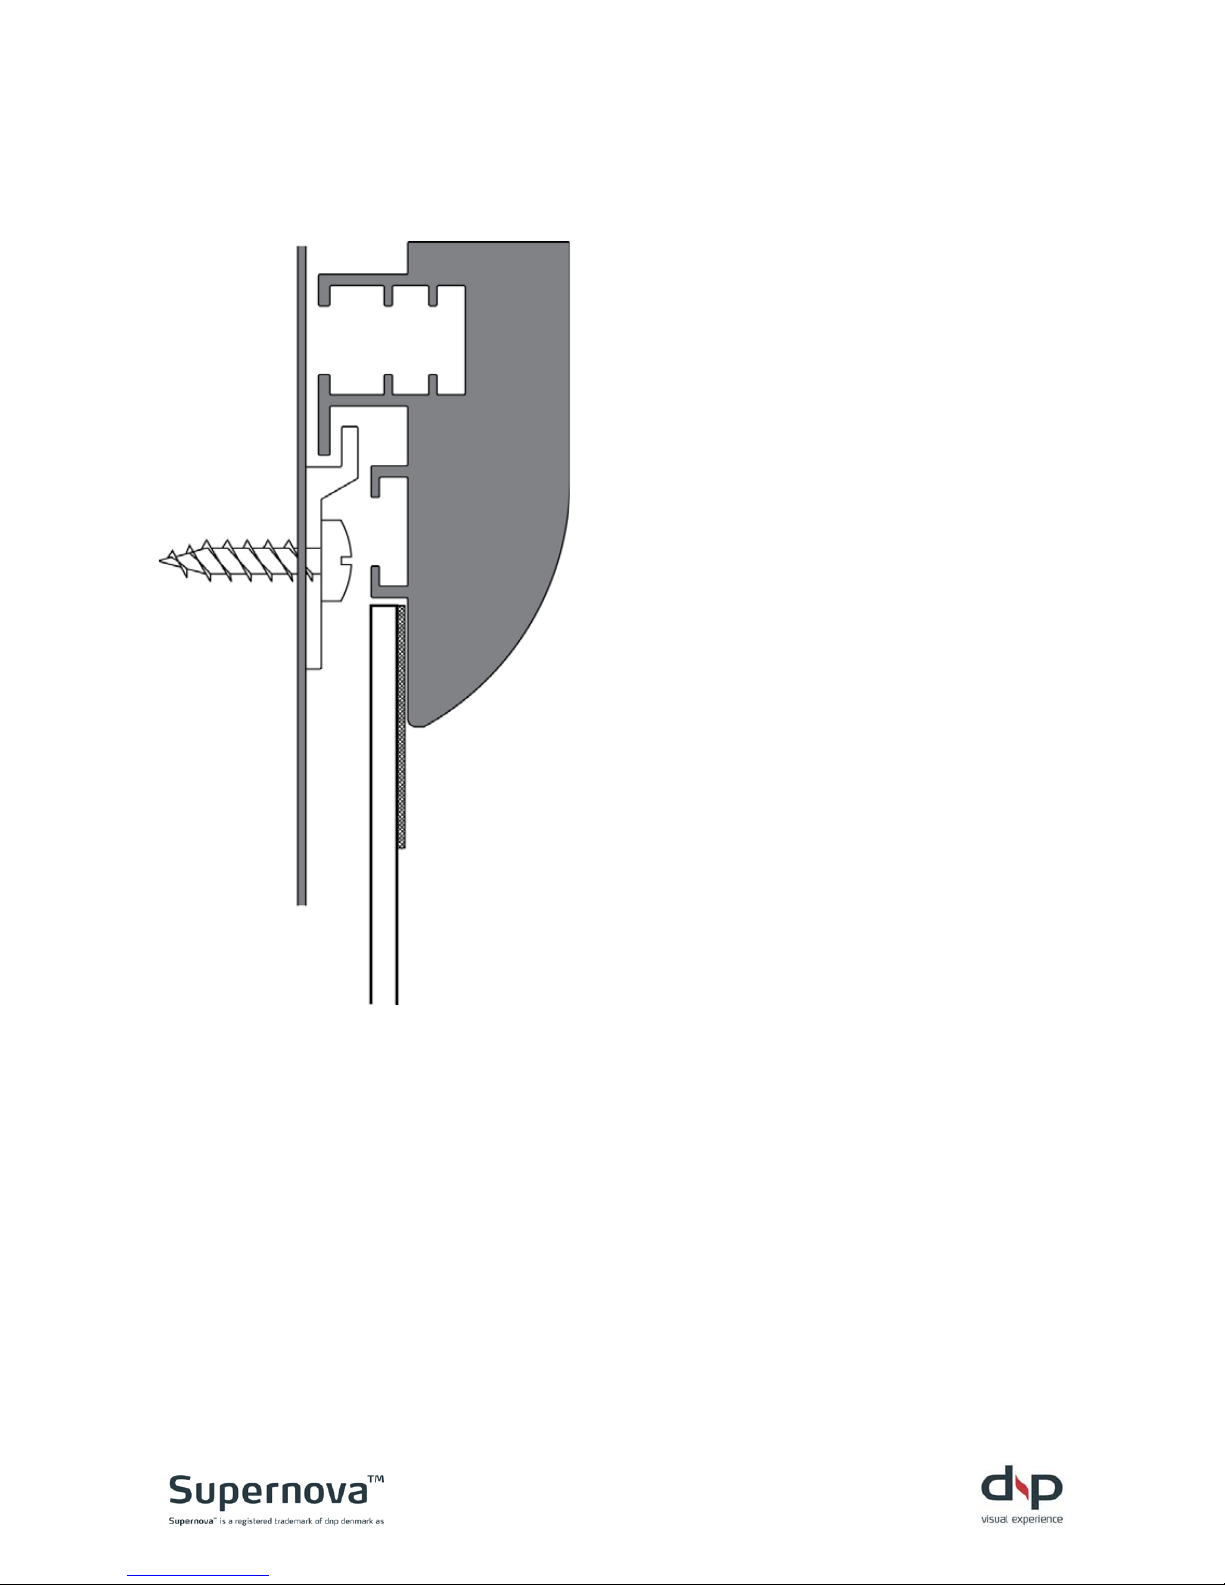
5. Mount the screen
Lift the screen up against the wall,
slightly higher than the brackets.
Then let it slide down on the
brackets until they are firmly in
position. Only tilt the screen slightly
during this operation, as it can
loosen the brackets.
Now press the lower part of the
screen lightly into the wall, so that
the screws on the magnets leave a
mark on the wall. Remove the
screen, drill a hole where the marks
were made and mount the magnets
in the wall using wall plugs and
screws.
Remount the screen following the
previous procedure. If there is no
contact between the screen and the
magnets, remove the screen again
and slightly unscrew the magnets.
The optimal horizontal position of
the frame can be reached by sliding
the frame horizontally on the
brackets.
Page 6

6/8
Warranty
Limited warranty – valid only in the United States
dnp denmark warrants this product against defects in material and
workmanship for the time and periods as set forth below. Pursuant to this
Limited Warranty, dnp denmark will, at its option, (i) repair the product using
new or refurbished parts or (ii) replace the product with a refurbished product.
In the event of a defect, these are our exclusive remedies. For purposes of this
Limited Warranty, “refurbished” means a product or part that has been
returned to its original specifications.
Labour & Parts: For a period of one (1) year from the original date of
purchase of the product, dnp denmark will, at its option, repair or replace with
new or refurbished products or parts, any product or parts determined to be
defective.
Instructions: To obtain warranty service, you must deliver the product,
freight prepaid, in either its original packaging or packaging affording an equal
degree of protection to the dnp denmark authorized dealer or reseller. A dated
purchase receipt is required.
Repair / Replacement Warranty: This Limited Warranty shall apply to any
repair, replacement part or replacement product for the remainder of the
original Limited Warranty period or for ninety (90) days, whichever is longer.
Any parts or products replaced under this Limited Warranty will become the
property of dnp denmark.
This Limited Warranty only covers product issues caused by defects in material
or workmanship during ordinary consumer use; it does not cover product
issues caused by any other reason, including but not limited to product issues
due to commercial use, acts of God, misuse, limitations of technology, or
modification of or to any part of the dnp denmark product.
This Limited Warranty does not cover dnp denmark products sold as is or with
all faults. This Limited Warranty is invalid if the factory-applied serial number
has been altered or removed from the product.
Limitation on Damages: dnp denmark shall not be liable for any incidental or
consequential damages for breach of any express or implied warranty on this
product.
Page 7

7/8
Duration of Implied Warranties: Except to the extent prohibited by
applicable law, any implied warranty of merchantability or fitness for a
particular purpose on this product is limited to the duration of this warranty.
Some states do not allow the exclusion or limitation of incidental or
consequential damages, or allow limitations on how long an implied warranty
lasts, so the above limitations or exclusions may not apply to you. This Limited
Warranty gives you specific legal rights, and you may also have other rights
which vary from state to state.
Page 8

8/8
The contents of this manual are courtesy of dnp denmark as. Text and photos may
not be copied or reproduced without approval from dnp denmark
> dnp denmark as
Skruegangen 2
DK-2690 Karlslunde
Denmark
> Phone +45 4616 5100
Fax +45 4616 5200
www.dnp.dk
[email protected]
Rev. 1.2
 Loading...