

Page 1
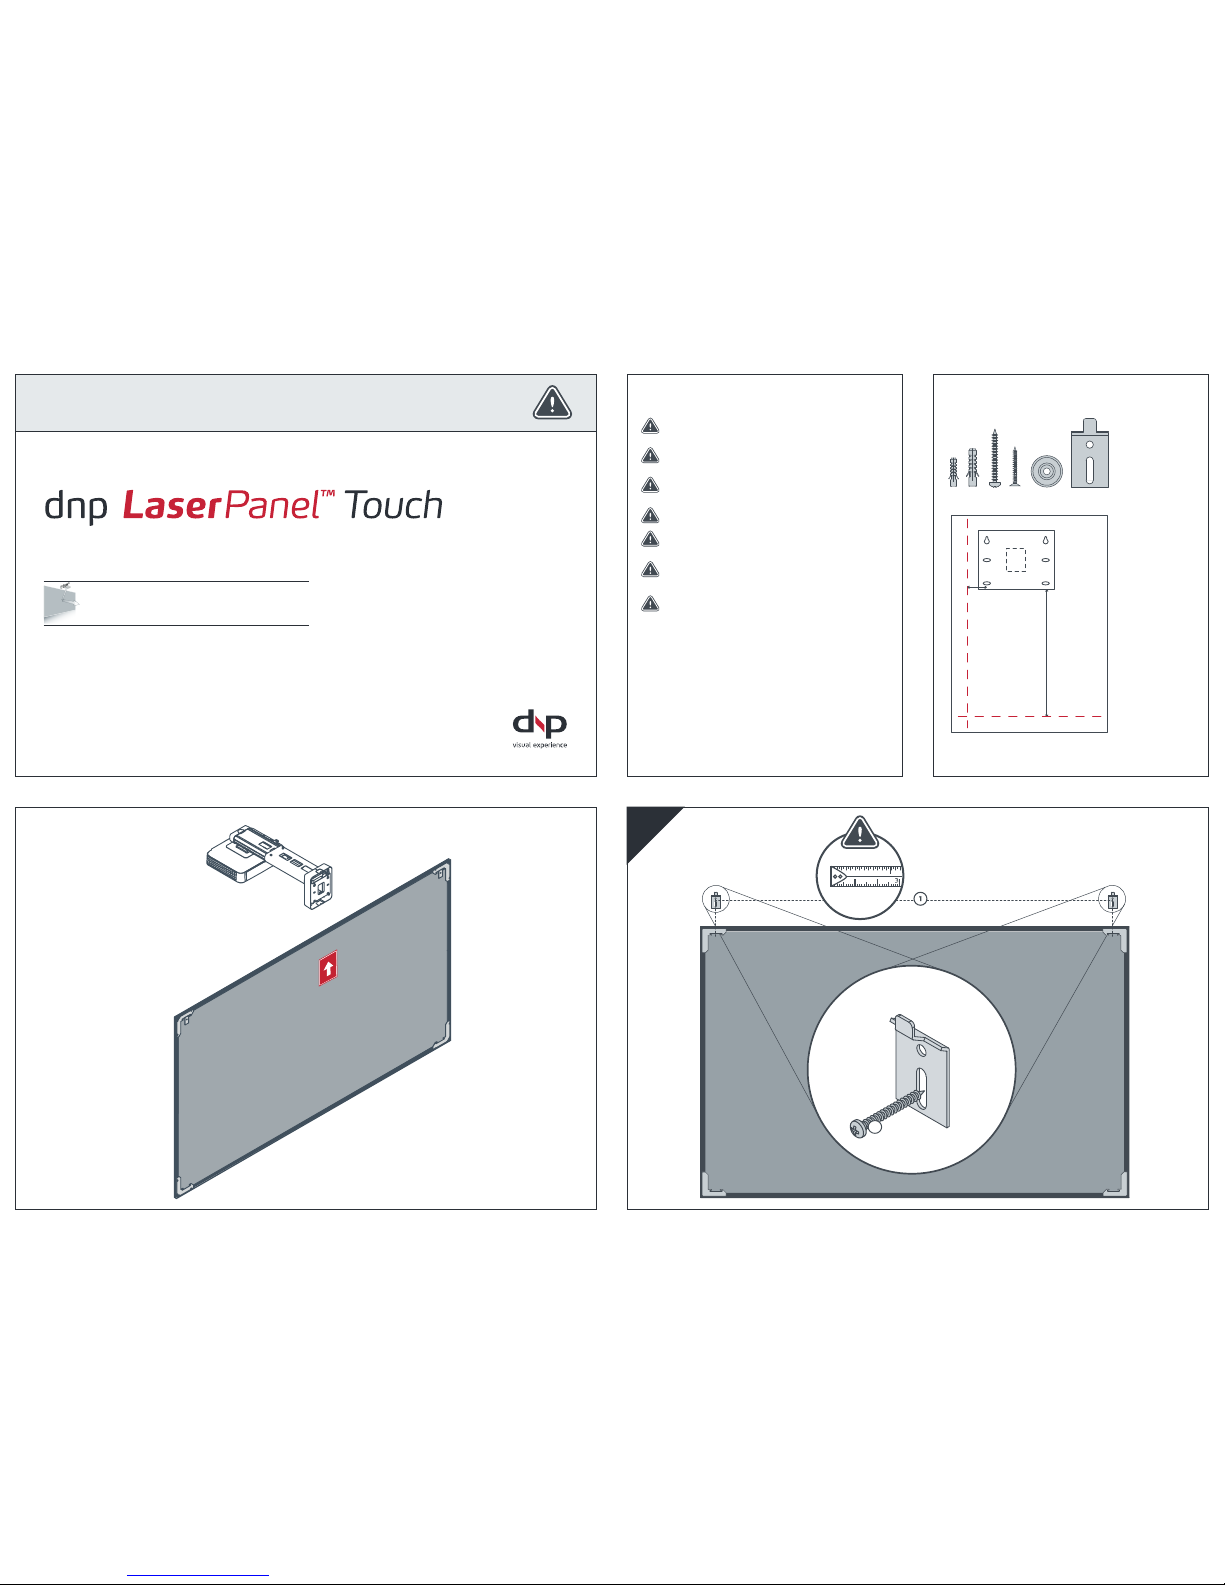
Installation guide
Please read these instructions carefully before assembling
> dnp denmark as
Skruegangen 2
DK-2690 Karlslunde
Denmark
> Phone +45 4616 5100
Fax +45 4616 5200
www.dnp-screens.com
[email protected]
January 2016 - rev. 2 - dnp
1 2
3
1
2086 mm [82,1 in]
2
Center of screen
Top of frame
235 mm [9,2 in]
30 mm [1,2 in]
Drilling template
projector mount
4x4x2x
2x
1x
What is in the box?
01
2x
Projector position?
Face arrow towards projector.
dnp optical at screen
Attention!
Ensure good wall atness for optimal result. An uneven wall
can lead to screen bowing and geometry distortions.
Follow all assembly instructions. Incorrect assembly can lead
to screen damage and invalidate the dnp warranty.
Use suitable materials and methods for the wall in question.
dnp denmark is not responsible for improper mounting.
Optional! The included rawlplugs are for concrete- or brick
wall installation only.
Be two persons to install screen.
Keep sharp objects away from the screen as they
can scratch the surface and thereby damage the
optical properties
Be careful of sharp corner edges when screen is installed.
Keep away from children
2x
Page 2
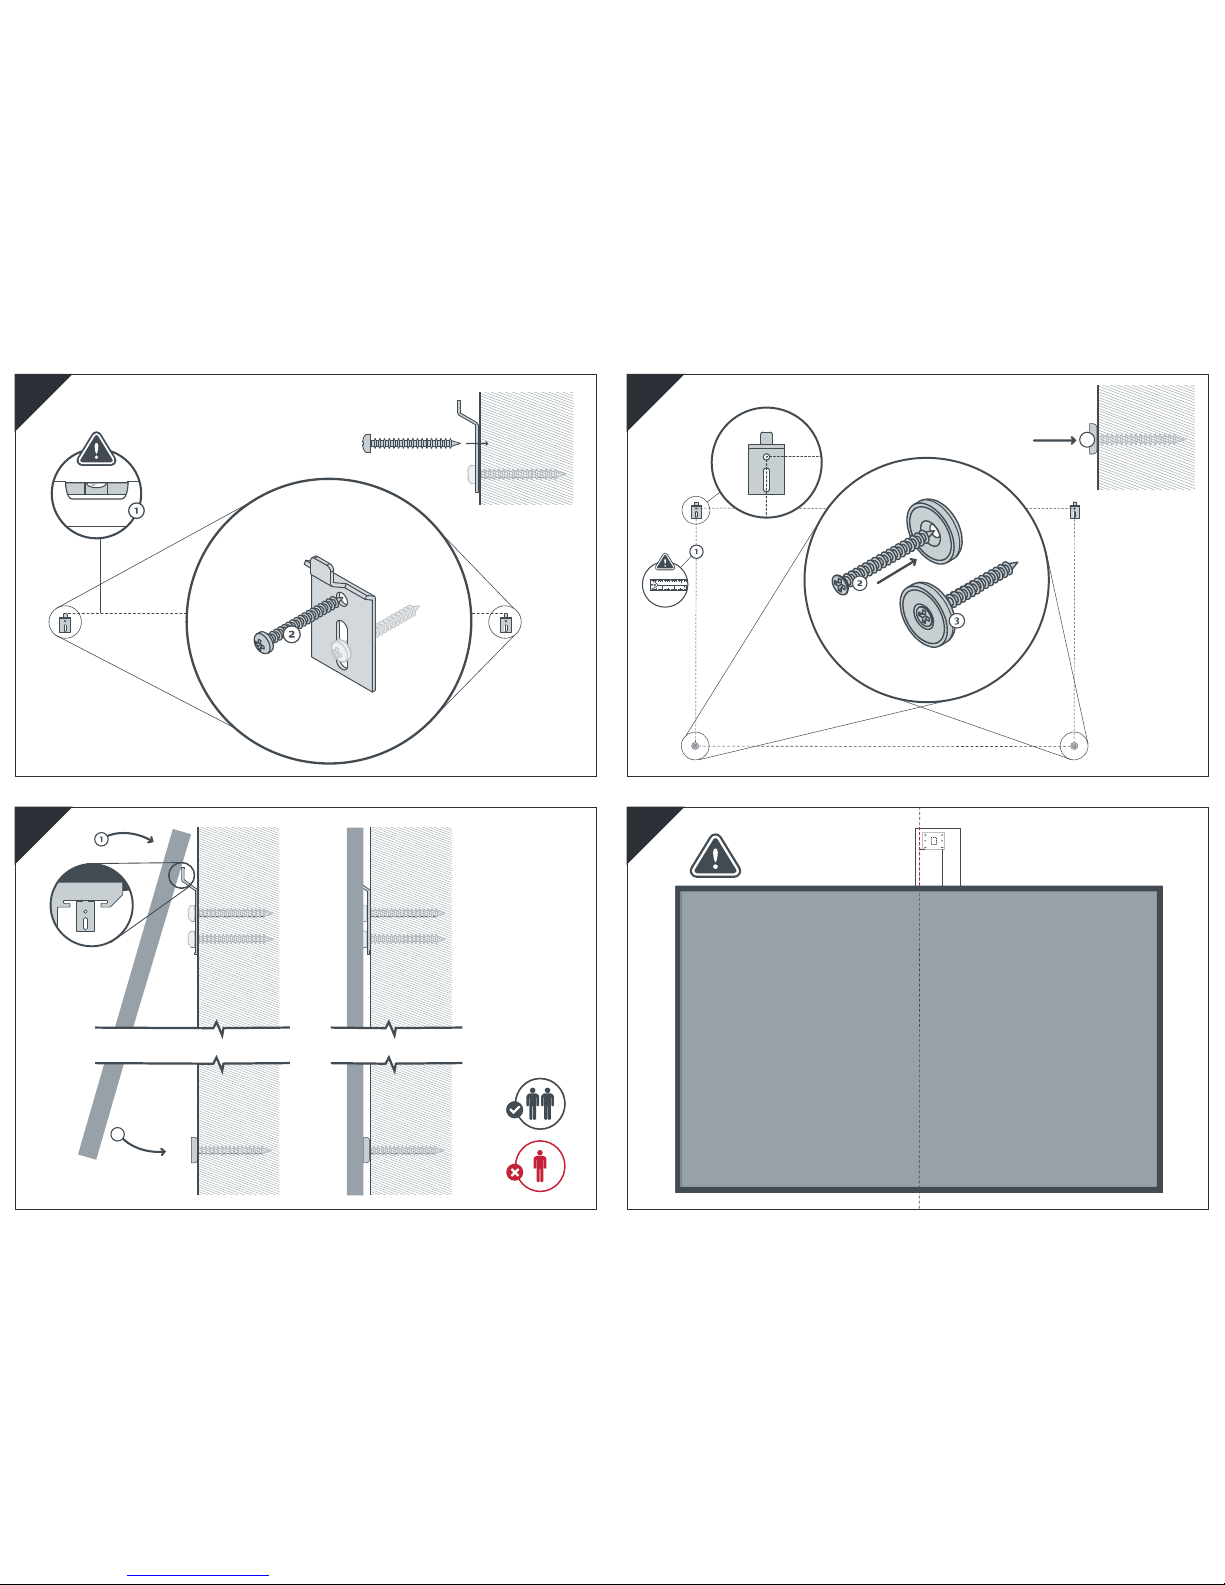
1216 mm [47,9 in]
2086 mm [82,1 in]
1 2
3
1
03
4
2
04
02
Center of screen
Top of frame
235 mm [9,2 in]
30 mm [1,2 in]
Drilling template
projector mount
Center of screen
Remove screen
before drilling
05
 Loading...