

Page 1
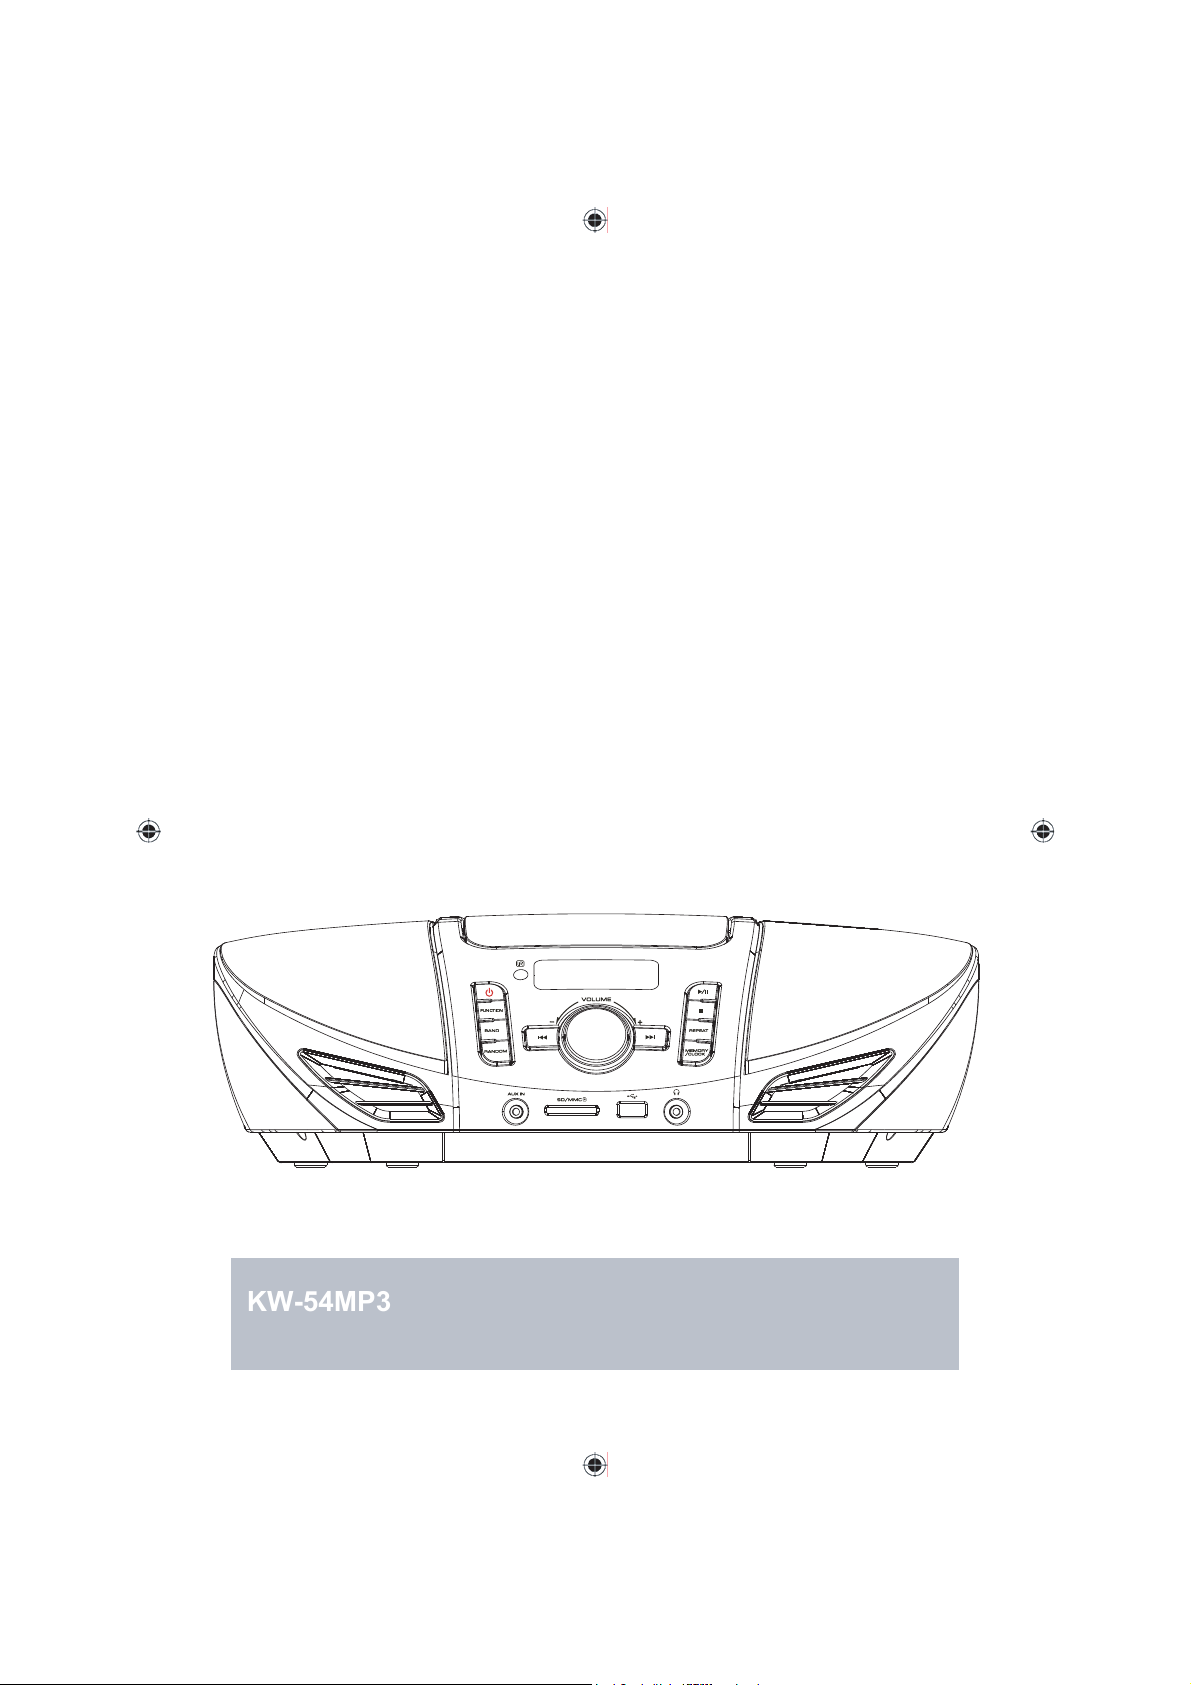
Bruksanvisning
KW-54MP3
Mikroljudspelare för flera ljudkällor
Page 2

Page 3

Innehåll
Säkerhet……………………………………..............3
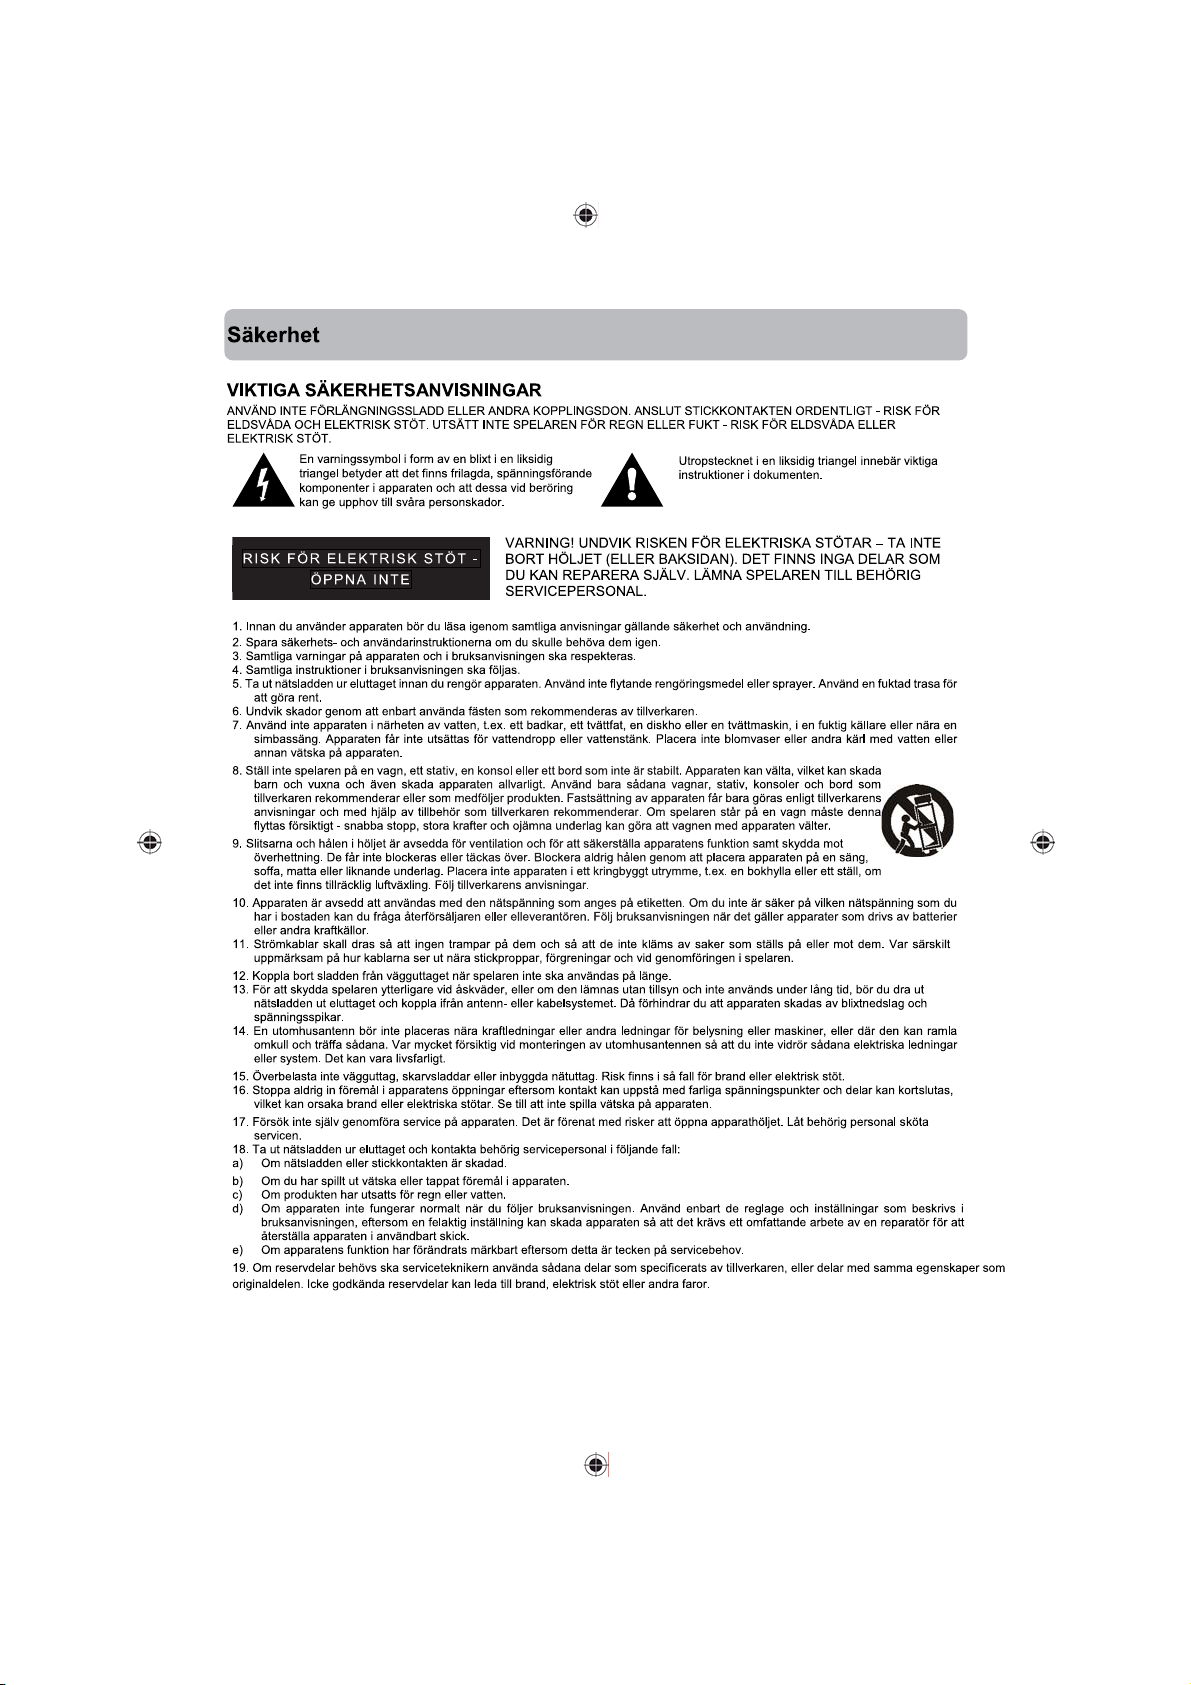
VIKTIGA SÄKERHETSANVISNINGAR………...3
Huvudenheten………………………….……..…….5
Skydda dina möbler……………………………....5
Skydda spelaren……………………………….....5
Grundinställning……..……….………………........6
Reglage…………….………………………..……....7
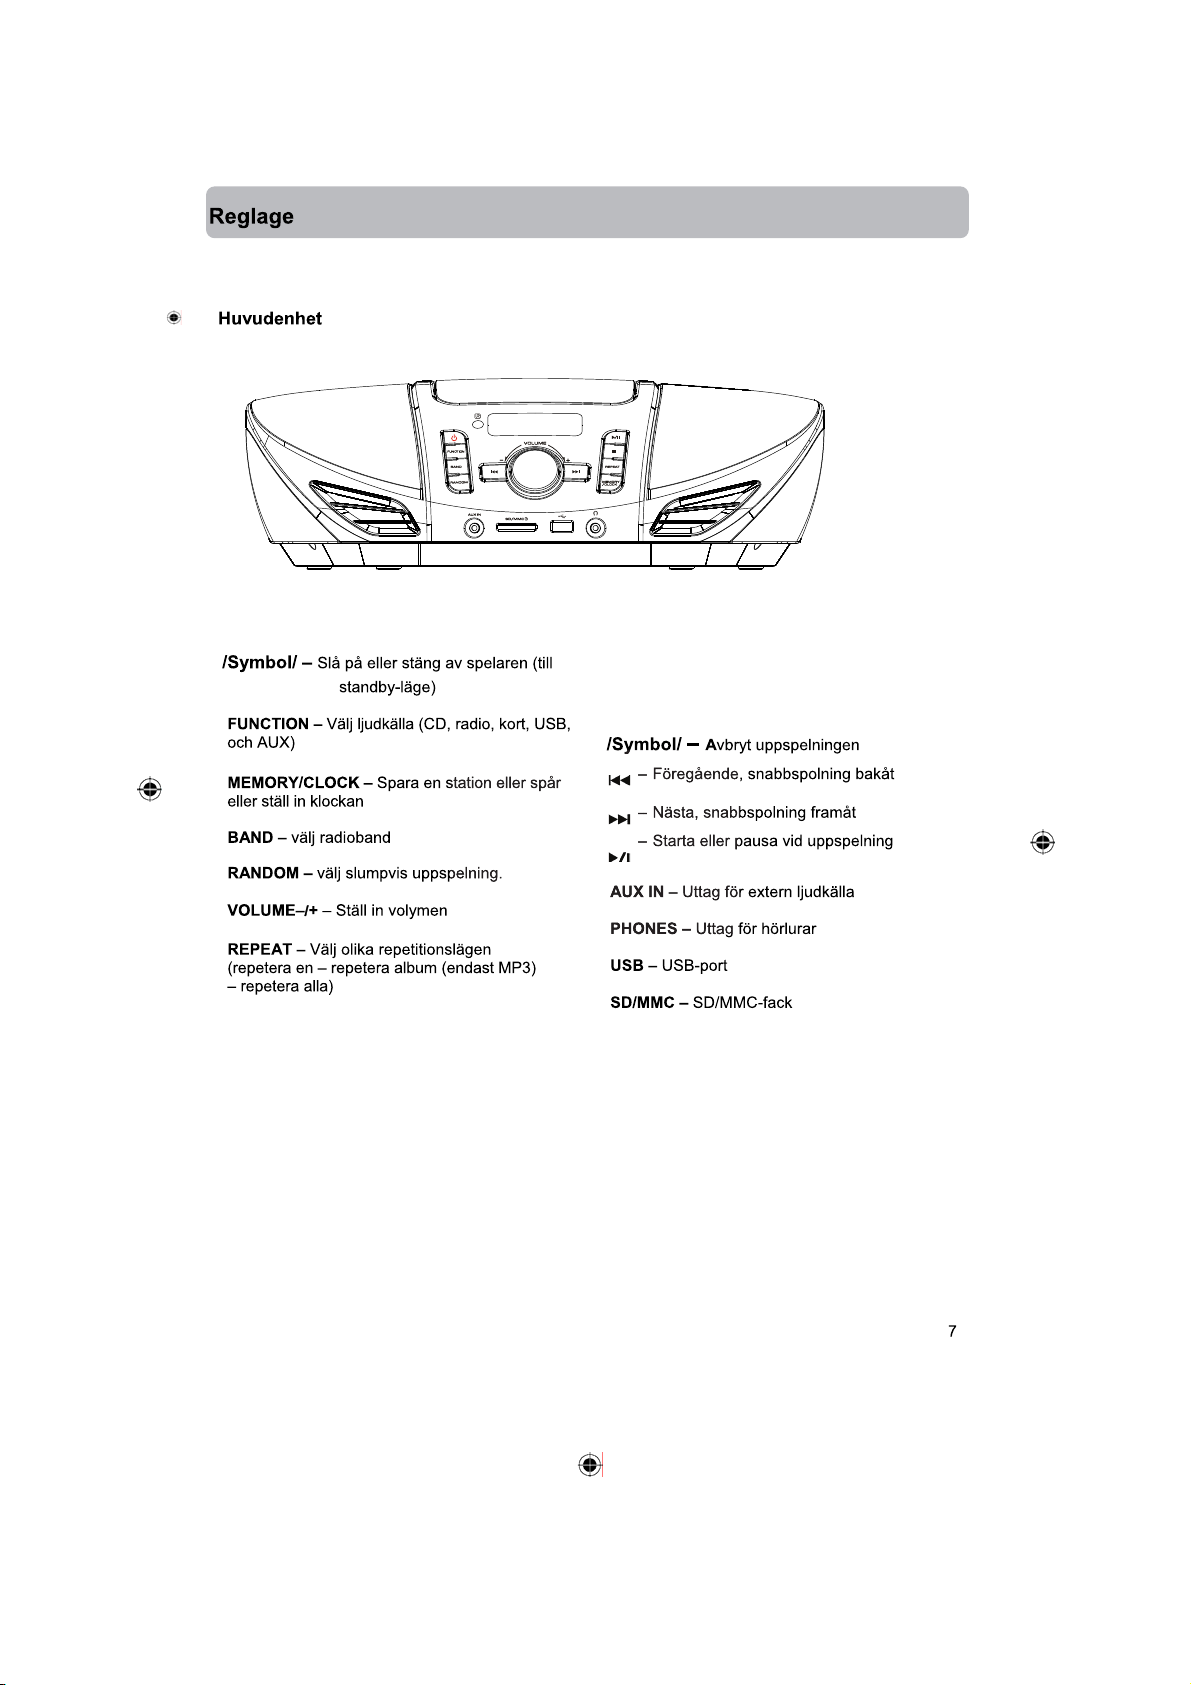
Huvudenhet………………………….……..……..7
Fjärrkontroll………………………................……8
Slå på eller stäng av spelaren…………………..9
Ställa in ljudet……………………………………..9
Klocka, timer och insomningsfunktion………...9
Klocka…………………………………………......9
Timer……………………………………………..10
Insomningsfunktion……………………………..11
Spela CD-skiva……………………………………12
Kompatibla skivtyper…………………………...12
Kompatibla ljudformat………………………….12
CD-uppspelning………………………………...12
Radio………………………………………………..14
Antenn……………………………………………..14
USB och SD/MMC…………………………………..15
Kompatibla minneslagringsenheter……………..15
Uppspelning av USB, SD/MMC………………....15
Extern ingång (aux)………………………………...16
Felsökning……………………………………………17
Allmänt………….………………………..………...17
Uppspelning av skiva…………………….............17
Radio………………………………………………..17
USB och
SD/MMC……………………………………………17
Skötsel…………………………………………..........18
Var rädd om skivorna……………………………. 18
Var rädd om spelaren……………………………. 18
Var försiktig………………………………………...18
Tekniska specifikationer…………………………...19
Page 4
Page 5
Säkerhet
20. När en servicetekniker har utfört servicearbete eller reparation på apparaten ska en säkerhetskontroll göras, för att säkerställa att
apparaten fungerar korrekt.
21. Placera apparaten på tillräckligt avstånd från värmekällor som t.ex. element, spisar och andra apparater (t.ex. förstärkare) som
alstrar värme.
22. Var försiktig! Ändringar som inte uttryckligen godkänts av ansvarig part kan upphäva användarens behörighet att utnyttja enheten.
Efter ändringar utan skriftligt medgivande får spelaren inte användas.
23. För hög volym i öronsnäckor eller hörlurar kan orsaka hörselskador.
24. Utsätt inte batterierna för hög värme, exempelvis solsken, öppen eld eller liknande.
25. VARNING! Använd endast tillbehör som är godkända av tillverkaren (exempelvis medföljande adapter eller batteri).
26. Undvik risken för brand eller stötar genom att skydda apparat och kablar från regn och fukt. Apparaten får inte utsättas för
vattendropp eller vattenstänk. Placera inte blomvaser eller andra kärl med vatten eller annan vätska på apparaten.
27. VARNING! Utsätt inte batterierna för hög värme, exempelvis solsken, öppen eld eller liknande.
28. VARNING! Stickkontakten används för att koppla ur produkten och måste därför vara lättåtkomlig.
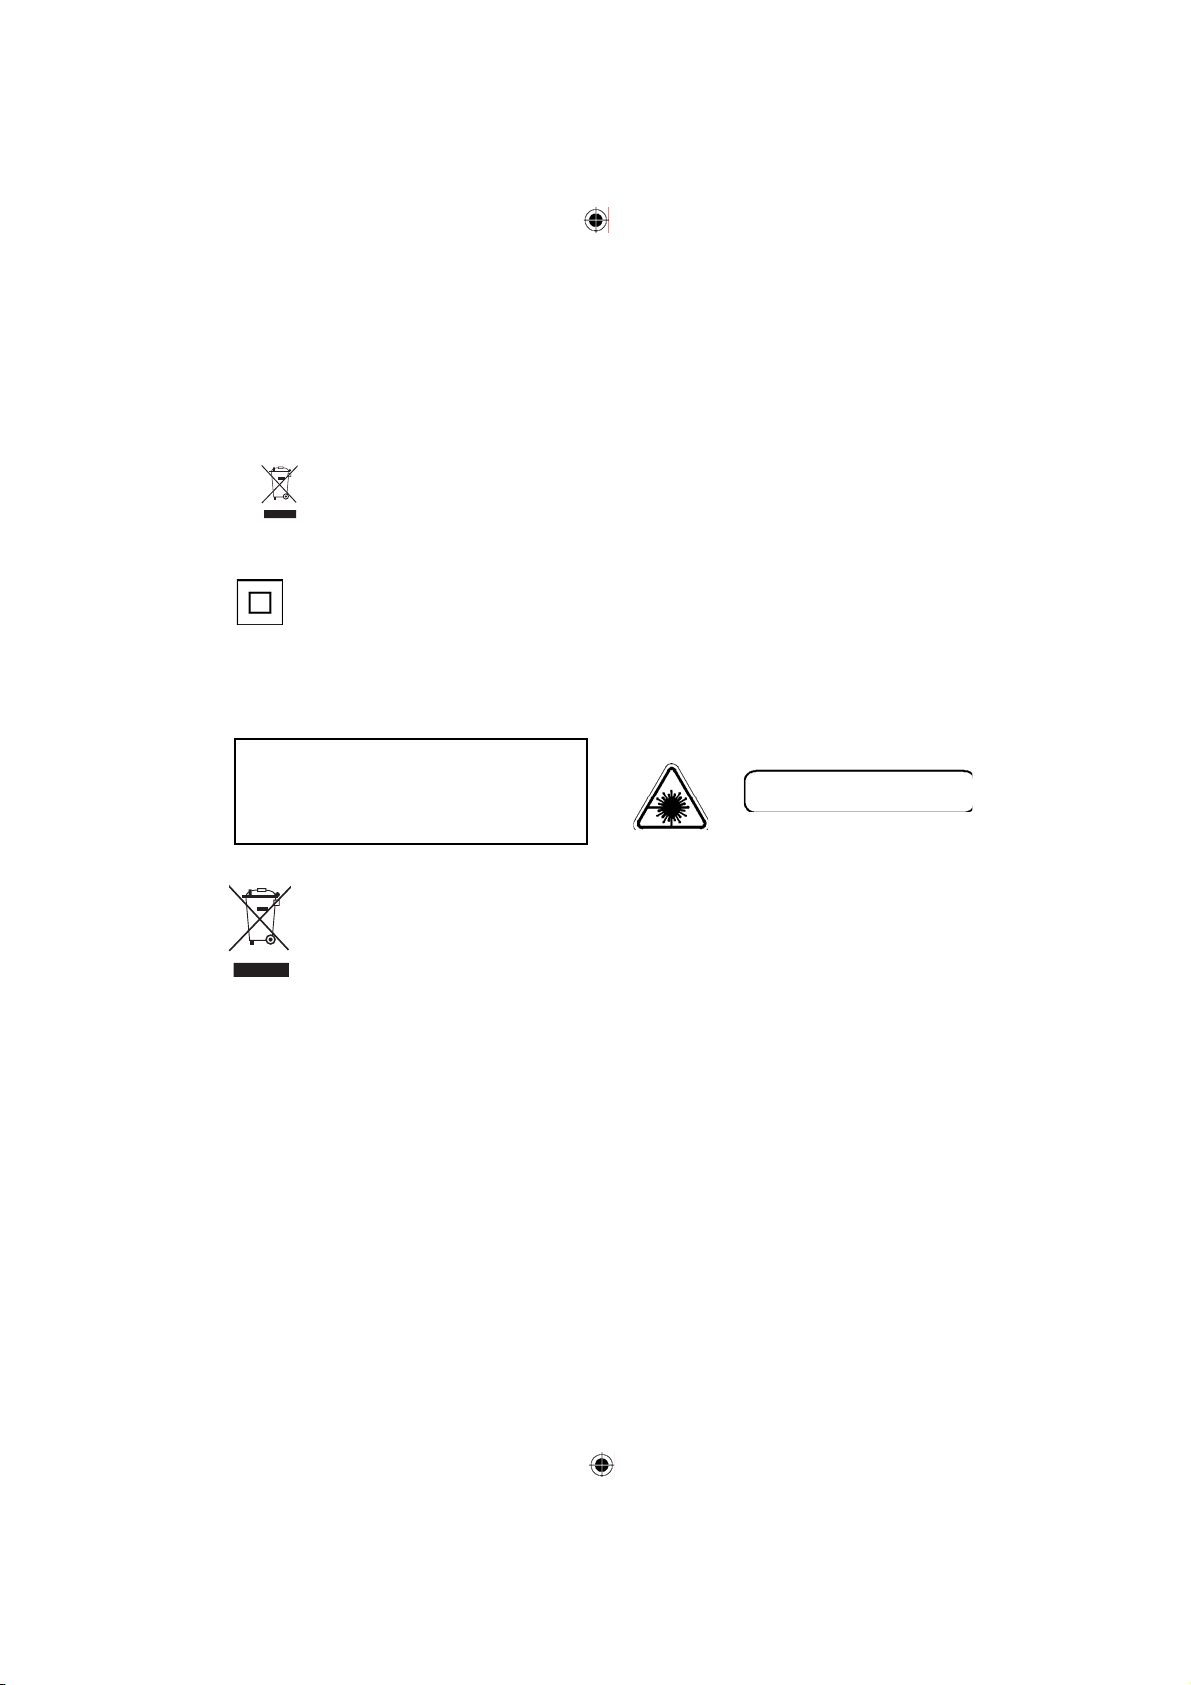
29. Produkten ska avfallssorteras enligt gällande regler. Märket anger att produkten inte får kastas bland hushållsavfall inom EU.
Produken ska lämnas till återvinning för att förebygga negativ påverkan för människor och miljö. Använd avfallssystem för
återvinning och återanvändning eller kontakta din återförsäljare som kan hjälpa dig.
Dubbelisolerad produkt av klass II. Spelaren får inte kopplas till jord.
VARNING STRÅLNINGSRISK
Dessa skyltar upplyser om att enheten innehåller en laserkomponent. Genom att lyfta på CD-spelarens lock och sätta
spärrlåsen ur funktion utsätts användaren för strålning från laserstrålen. Titta inte in i strålen vid användning.
VARNING!
OSYNLIG LASERSTRÅLNING NÄR PRODUKTEN
ÖPPNAS OCH SPÄRRARNA INTE FUNGERAR
ELLER HAR TAGITS BORT. UNDVIK ATT
EXPONERA DIG FÖR STRÅLEN
LASERPRODUKT KLASS 1
Elektriska och elektroniska produkter skall inte kastas bland hushållsavfall. Be återförsäljaren som du
köpte spelaren av om instruktioner för avfallshantering.
Lämna batterier och förpackningsmaterial till återvinning.
4
Page 6

Packa upp spelaren
Lyft försiktigt ut spelaren ur kartongen och ta bort
allt emballage. Kontrollera att följande delar finns:
• Huvudenhet (1)
• Fj ärrkontroll (1)
• Bruksanvisning
Kontakta din återförsäljare omgående om
någon del skulle saknas.
Behåll gärna emballaget om du skulle behöva
lämna in spelare n för reparation. Detta är enda
sättet att skydda den från transportskador. Om du
gör dig av m ed emballaget, ska delarna
avfallssorteras enligt gällan de bestämmelser. Vi
bryr oss om miljön.
Ta bort eventuella informationsetiketter på
spelarens framsida. Ta inte bort etiketter som
sitter på huvudenhetens eller högtalarnas
undersida.
Skydda spelaren
Säkerhet
• Kontrollera att spelarens spänning stämmer med
vägguttaget.
• Håll alltid i stickkontakten när du kopplar bort den
från vägguttaget. Dra aldrig i sladden.
• När stickkon takten är ansluten till vägguttaget
matas spelaren även om den är avstängd.
• Dra ut stickkontakten om det skulle komma in
vätska eller föremål i spelaren. Använd inte
spelaren innan den har kontrollerats av en behörig
person.
• Öppna in te höljet. Du kan skada ögonen e ftersom
det finns laserstrålning i spelaren. Service får endast
utföras av behörig servicepersonal.
Placering
• Ställ spelaren på en plats med god ventilation för
att undvika överhettning.
• Ställ aldrig spelaren i direkt solsken eller nära en
värmekälla.
• Skydda pickupen genom att inte ställa spelaren där
det är dammigt. Om det kommer damm på
pickupen kan du använda en rengöringsskiva för att
rengöra den. Läs instruktionerna för den
rengöringsskiva du har köpt.
Kondens
• Om apparaten plötsligt flyttas från en kall till en varm
plats.
• Om spelaren används där det är fuktigt.
• När det uppstår kondens fungerar inte spelaren. Ta
ut skivan och lämna spelaren på i ungefär en timme
så att vattnet förångas och spelaren fungerar normalt
igen.
Rengöring
• Använd en mjuk trasa med lite milt
rengöringsmedel o ch to rka h öljet o ch reg lagen.
Använd aldrig sandpapper , sku rpulver eller
lösningsmedel som alkohol eller bensin.
5
Page 7
Grundinställning
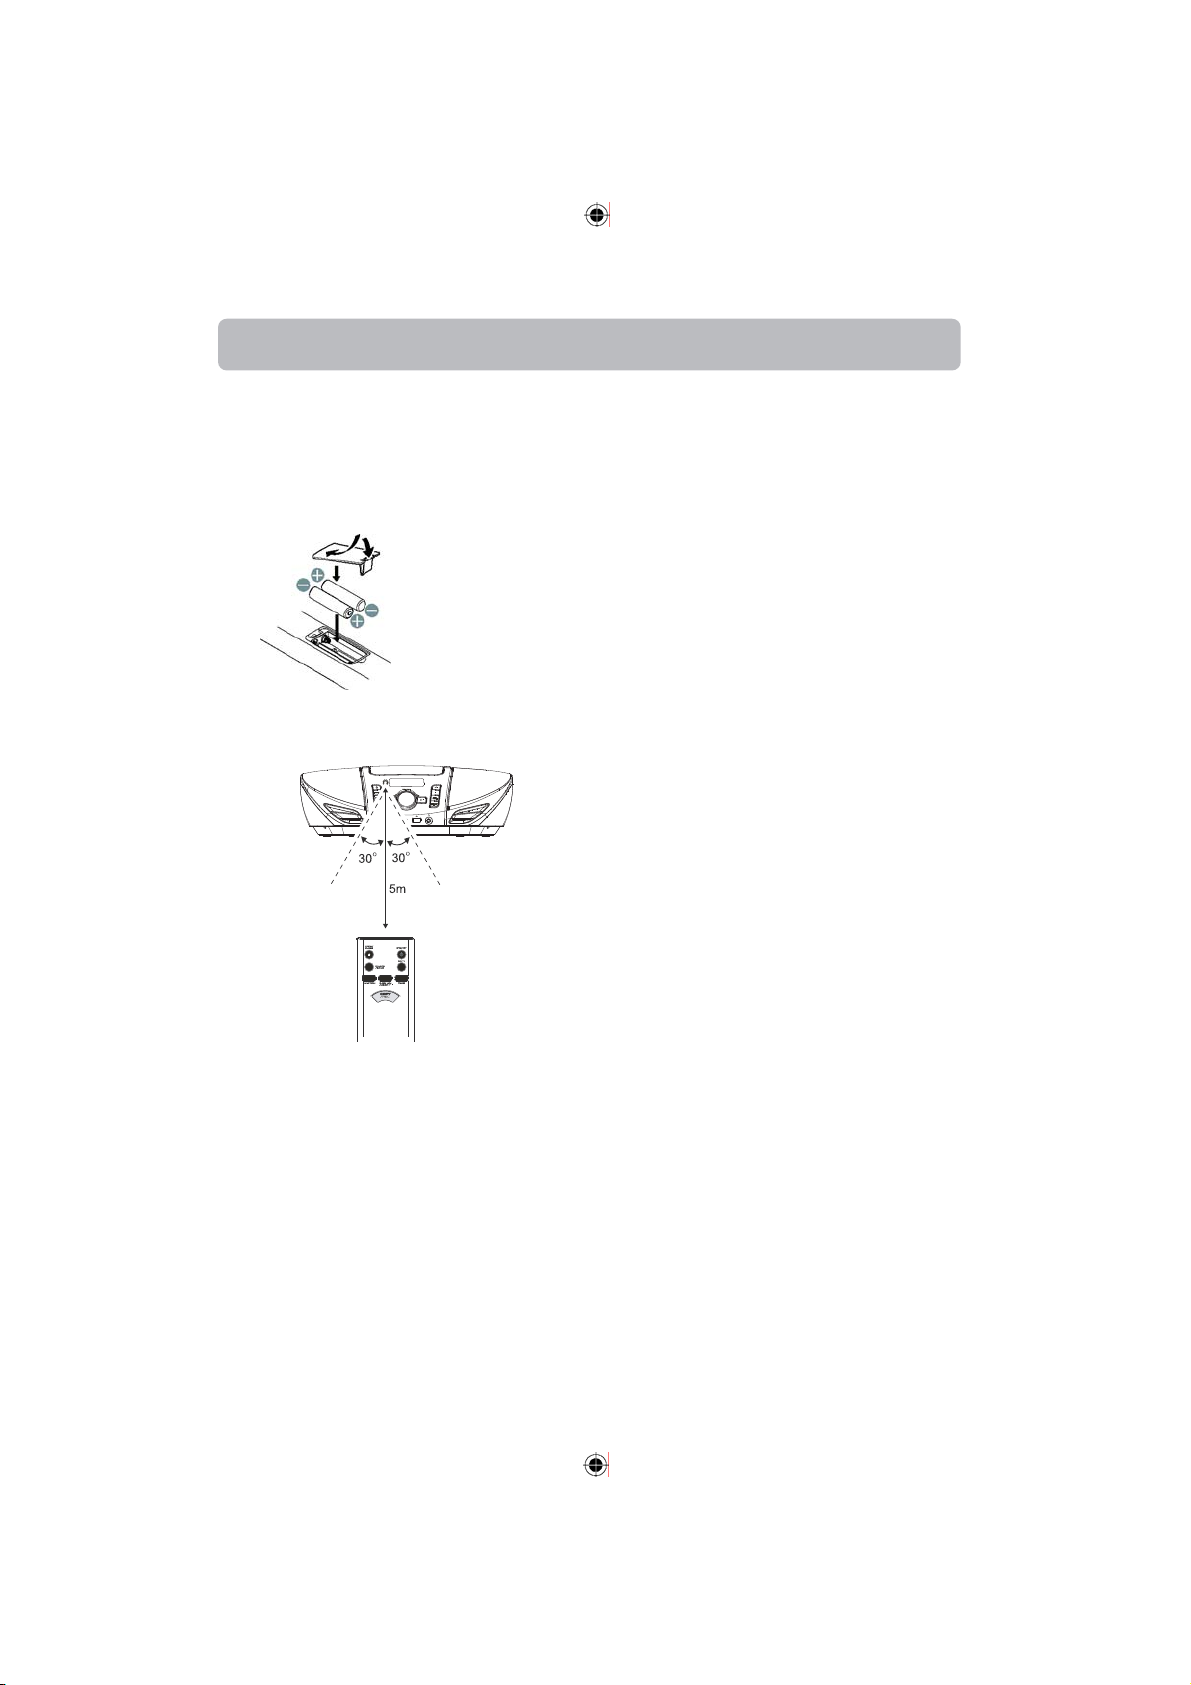
1. Dra ut FM-antennen
• Dra ut teleskopantennen. Luta och vrid antennen. Gör den kortare om signalen är för stark (om
• Sätt i två AAA-batterier i fjärrkontrollen. Kontrollera att polaritetsmärkningen (+ och -) är rätt (se bild).
sändaren är nära).
2. Sätt i batterier i fjärrkontrollen
• Sätt tillbaka batterifackets lock när du har lagt i batterierna.
• Fjärrkontrollen fungerar inom 5 meter från spelaren. Håll fjärrkontrollen inom 30 graders vinkel i
förhållande till fjärrsensorn.
3. Anslut spelaren
• Systemet är avsett för användning i vägguttag på 230 V/50 Hz växelström. Om spelaren ansluts till annan
strömförsörjning kan den skadas och garantin gäller inte.
6
Page 8
Page 9
Reglage
STANDBY– Slå på eller stäng av spelaren (till standbyläge)
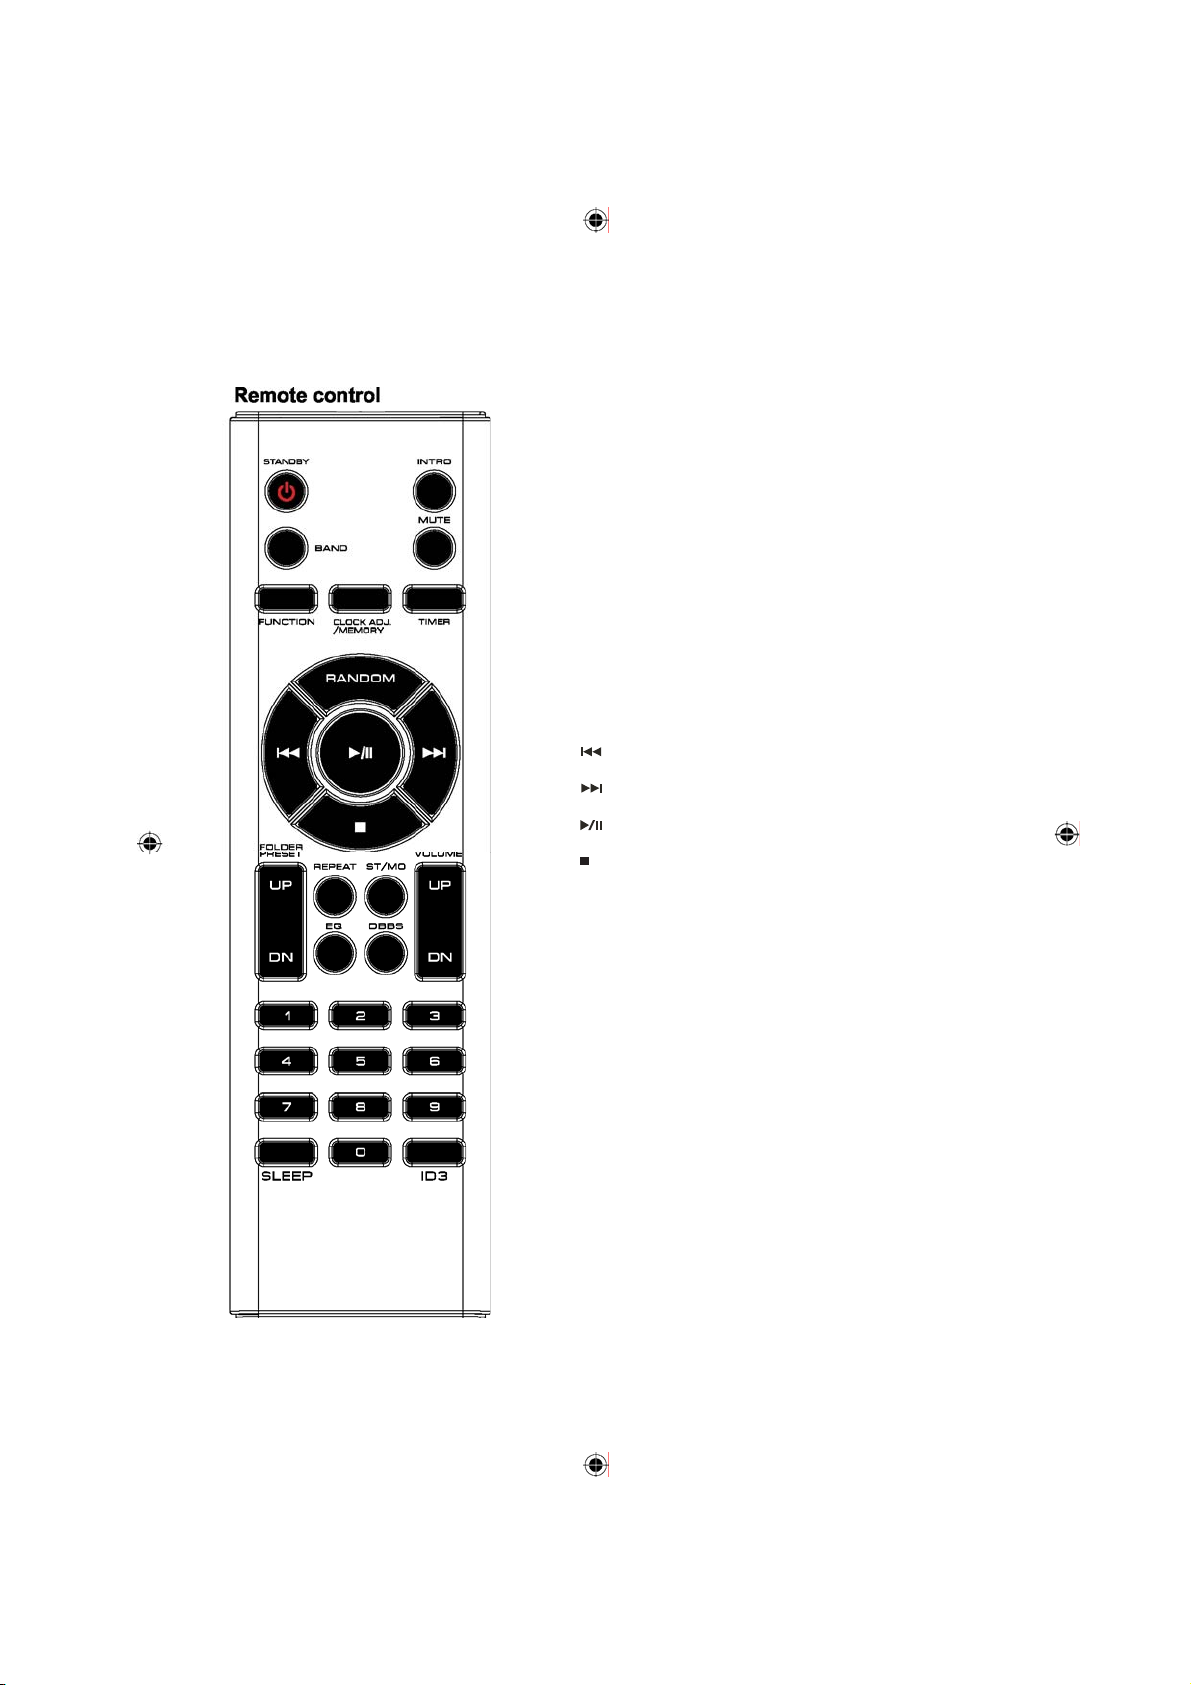
INTRO – Spelar de första 10 sekunderna av alla spår på CD:n.
BAND – välj radioband
MUTE – Stäng av eller sätt på ljudet
FUNCTION – Välj ljudkälla (CD, radio, kort, USB
och AUX)
MEMORY/CLOCK – Spara en station eller ett
spår eller ställ in klockan
TIMER –Inställning av timer
RANDOM – välj slumpvis uppspelning.
– Föregående, snabbspolning bakåt
– Nästa, snabbspolning framåt
– Starta eller pausa vid uppspelning
/Symbol/ Avbryt uppspelningen
PRESET/FOLDER UP/DN – Välj mapp på MP3-skivor,
USB-minne eller minneskort. Välj förinställda stationer
REPEAT – Välj repetitionsläge under uppspelning
ST/MO – Välj mellan stereo- och monoljud i FM läge
EQ – Välj ett förinställt equalizer-läge
DBBS – Slå på eller stäng av bass boost
VOLUME UP/DN –Ställ in volymen
0-9 – Välj spår eller förinställd kanal direkt
SLEEP – Aktivera insomningsfunktionen
ID3 – Visa information om MP3-filer under
uppspelning
8
Page 10
Reglage
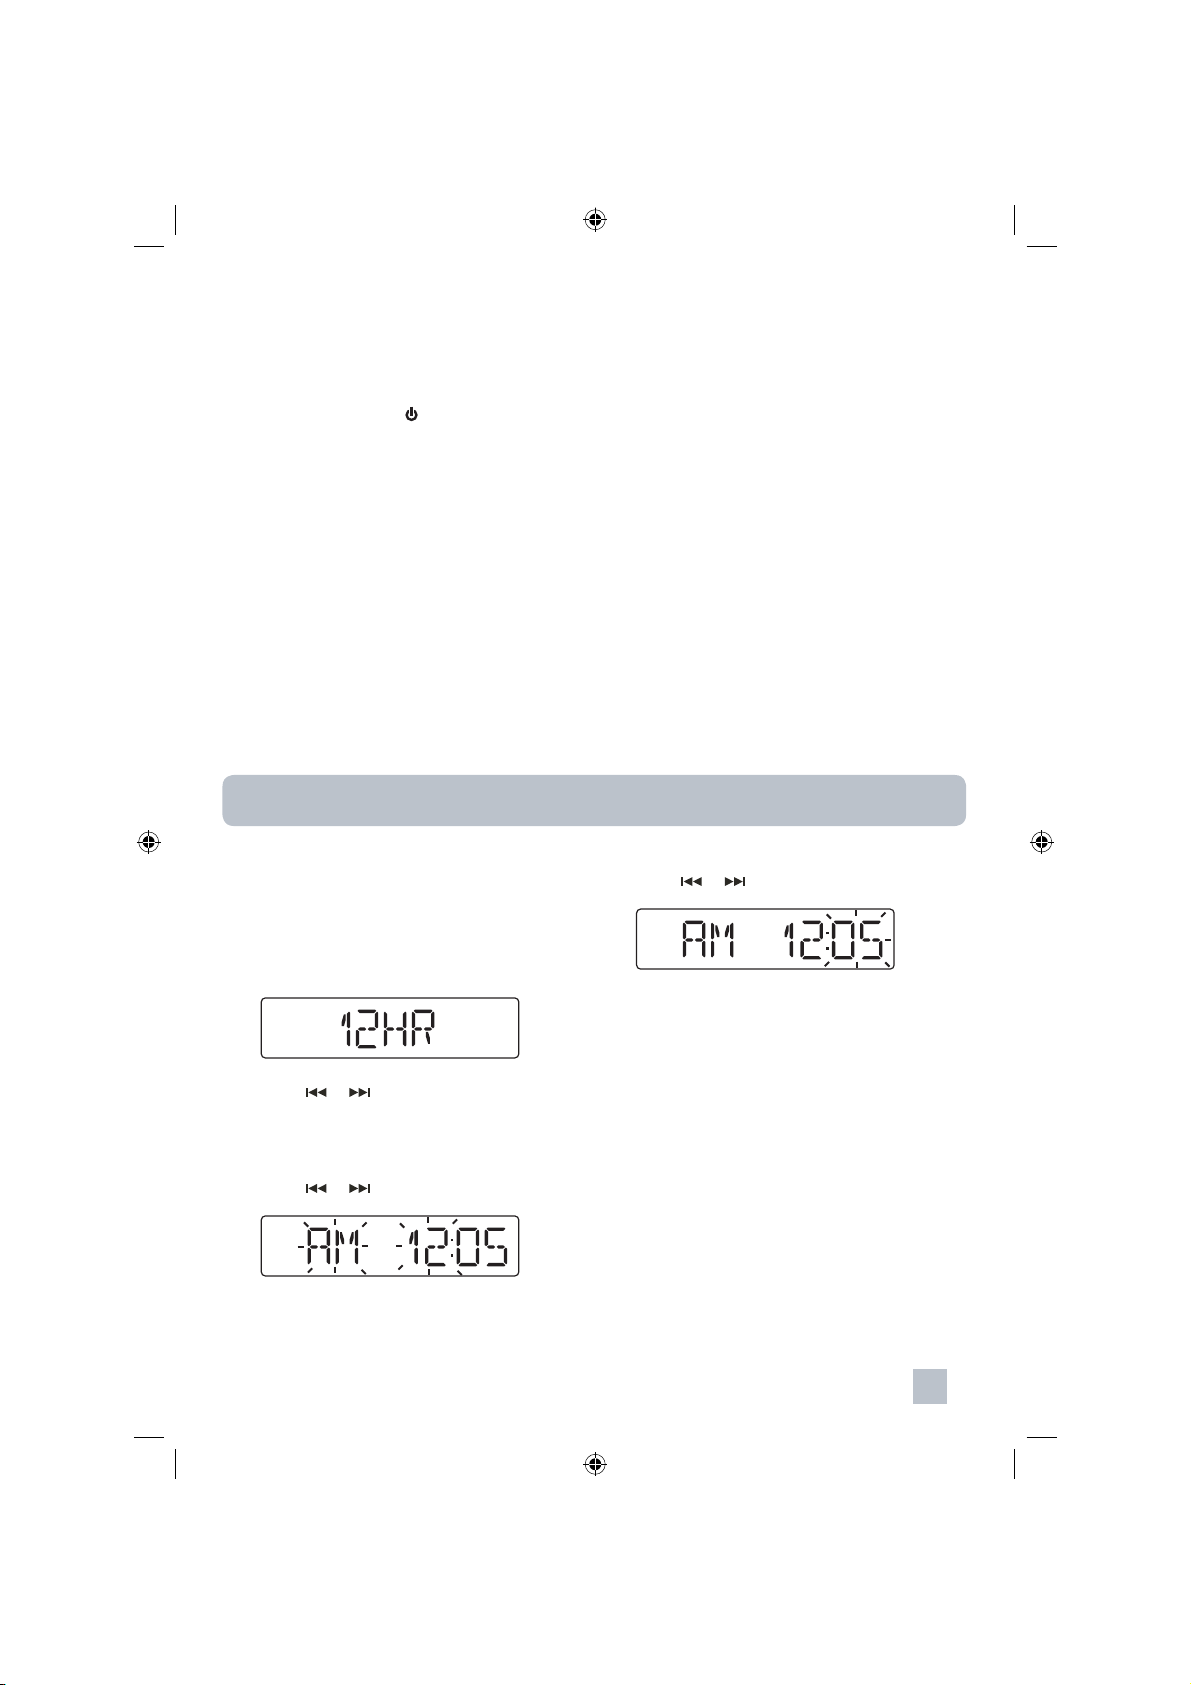
Slå på eller stäng av spelaren
• T ryck på STANDBY eller /Symbol/ för att slå på
eller stänga av spelaren till standbyläge.
Ställa in ljudet
• Vri d på VOLUME - / + eller tryck på VOLUME UP/DN för att
ställa in ljudnivån. Aktuell volym visas en kort stund på
displayen som sedan övergår till föregående visning.
• T ryck på EQ (elektronisk equalizer) flera gånger för att välja ett
förinställt equalizer-läge ( Flat, Cl assic, Rock, Pop och
Jazz). Ikonen för valt eq ualizer-läge visas längst ned på
displayen.
• T ryck på DBBS för att slå på eller stänga av bass boost. Ikonen
för vald DBBS visas längst ned på displayen.
• Tryck på knappen MUTE för att stänga av ljudet tillfälligt.
Tryck en gång till för återgå till normalt ljud.
Klocka, timer och insomningsfunktion
Klocka
Ställa in tiden
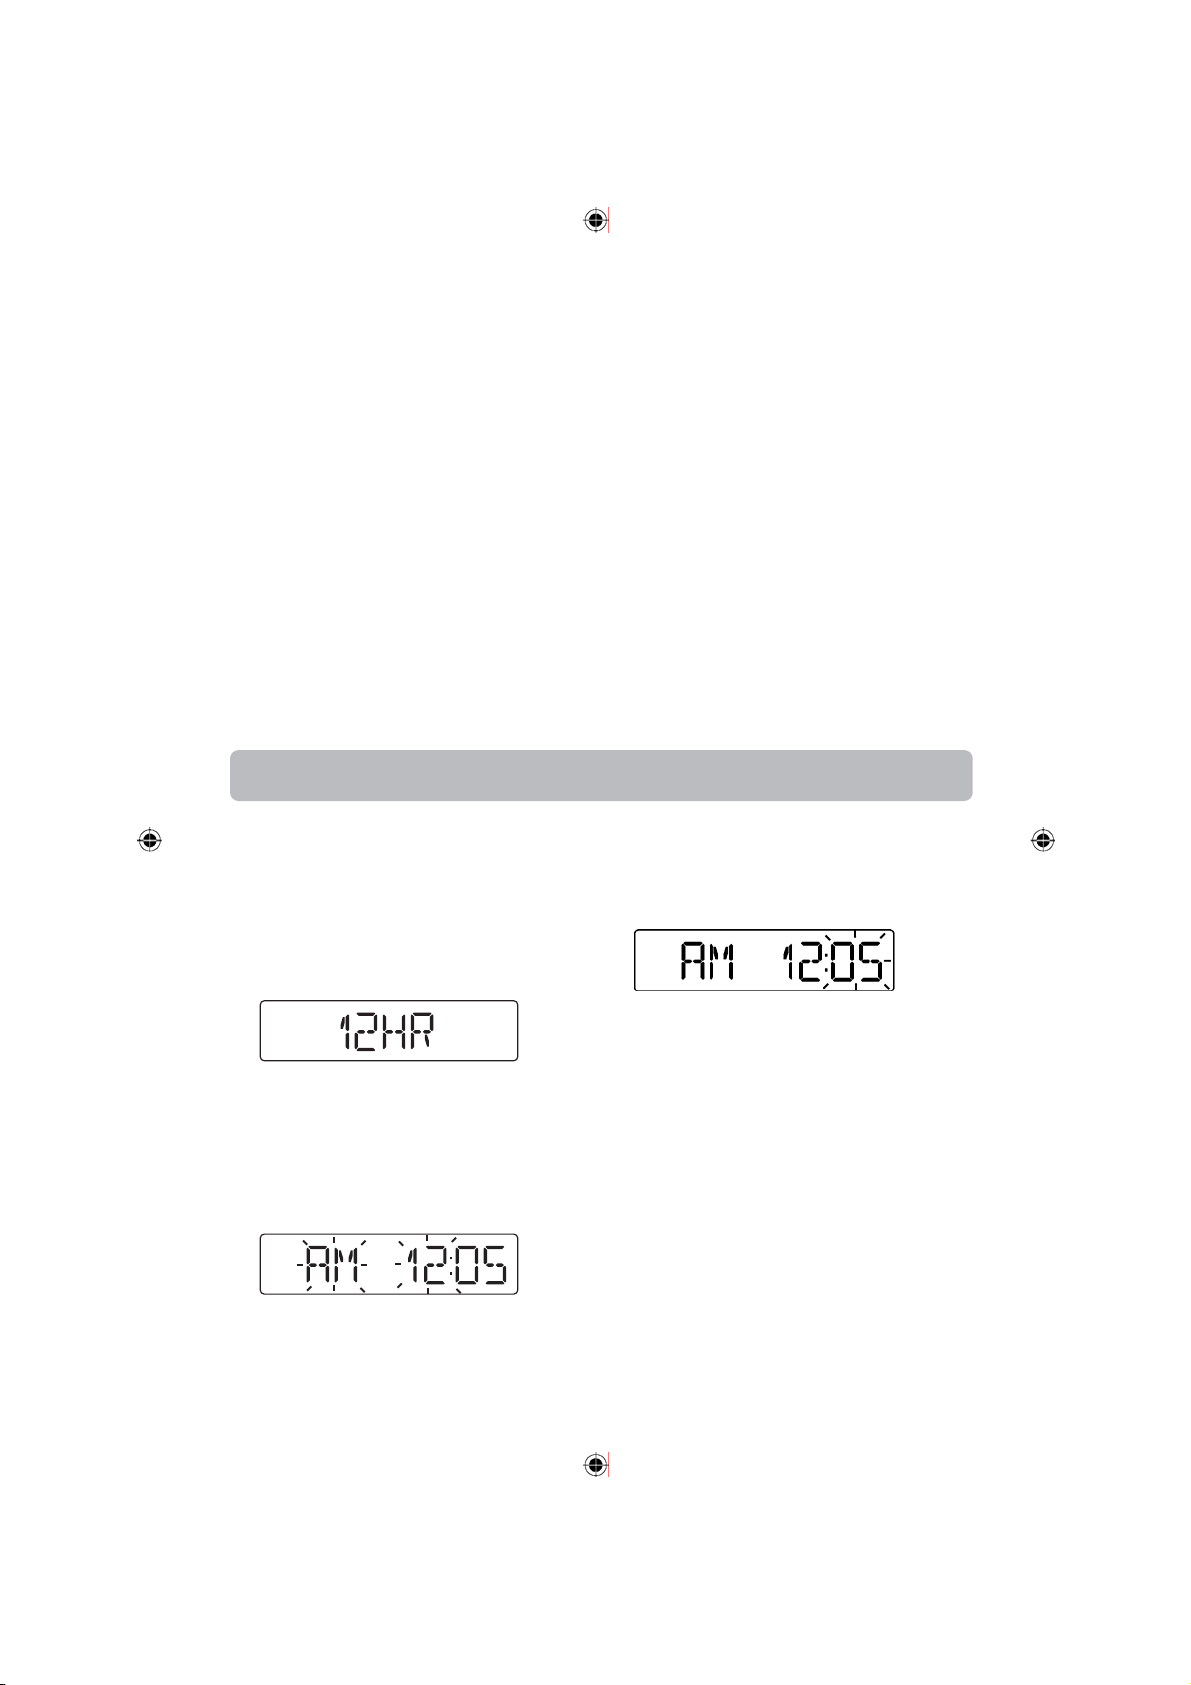
1. Tryck in och håll kvar MEMORY/CLOCK när
spelaren är påslagen. Aktuell tid visas Tryck på
MEMORY/CLOCK igen. 12HR eller 24HR visas
på displayen.
6. Tr yck på /Symbol/ eller /Symbol/ för att ställa
in minuterna.
2. T ryck på /Symbol/ eller /Symbol/ för att
välja visningssystem med 12 eller 24 timmar.
3. Tryck på MEMORY/CLOCK för att bekräfta.
4. Tr yck på /Symbol/ eller /Symbol/ för att ställa in
tiden.
5. Tryck på MEMORY/CLOCK för att bekräfta.
7. T ryck på MEMORY/CLOCK igen. Nu har du
ställt in klockan.
Visa tiden när spelaren är påslagen
• T ryck in MEMORY/CLOCK när spelaren är
påslagen och håll inne för att se aktuell tid en
kort stund.
9
Page 11
Klocka, timer och insomningsfunktion
Timer
Det finns en timerfunktion i spelaren så att
spelaren kan slås på eller stängas av en specifik
tid. Se till att du har ställt in klockan för att använda
timerfunktionen.
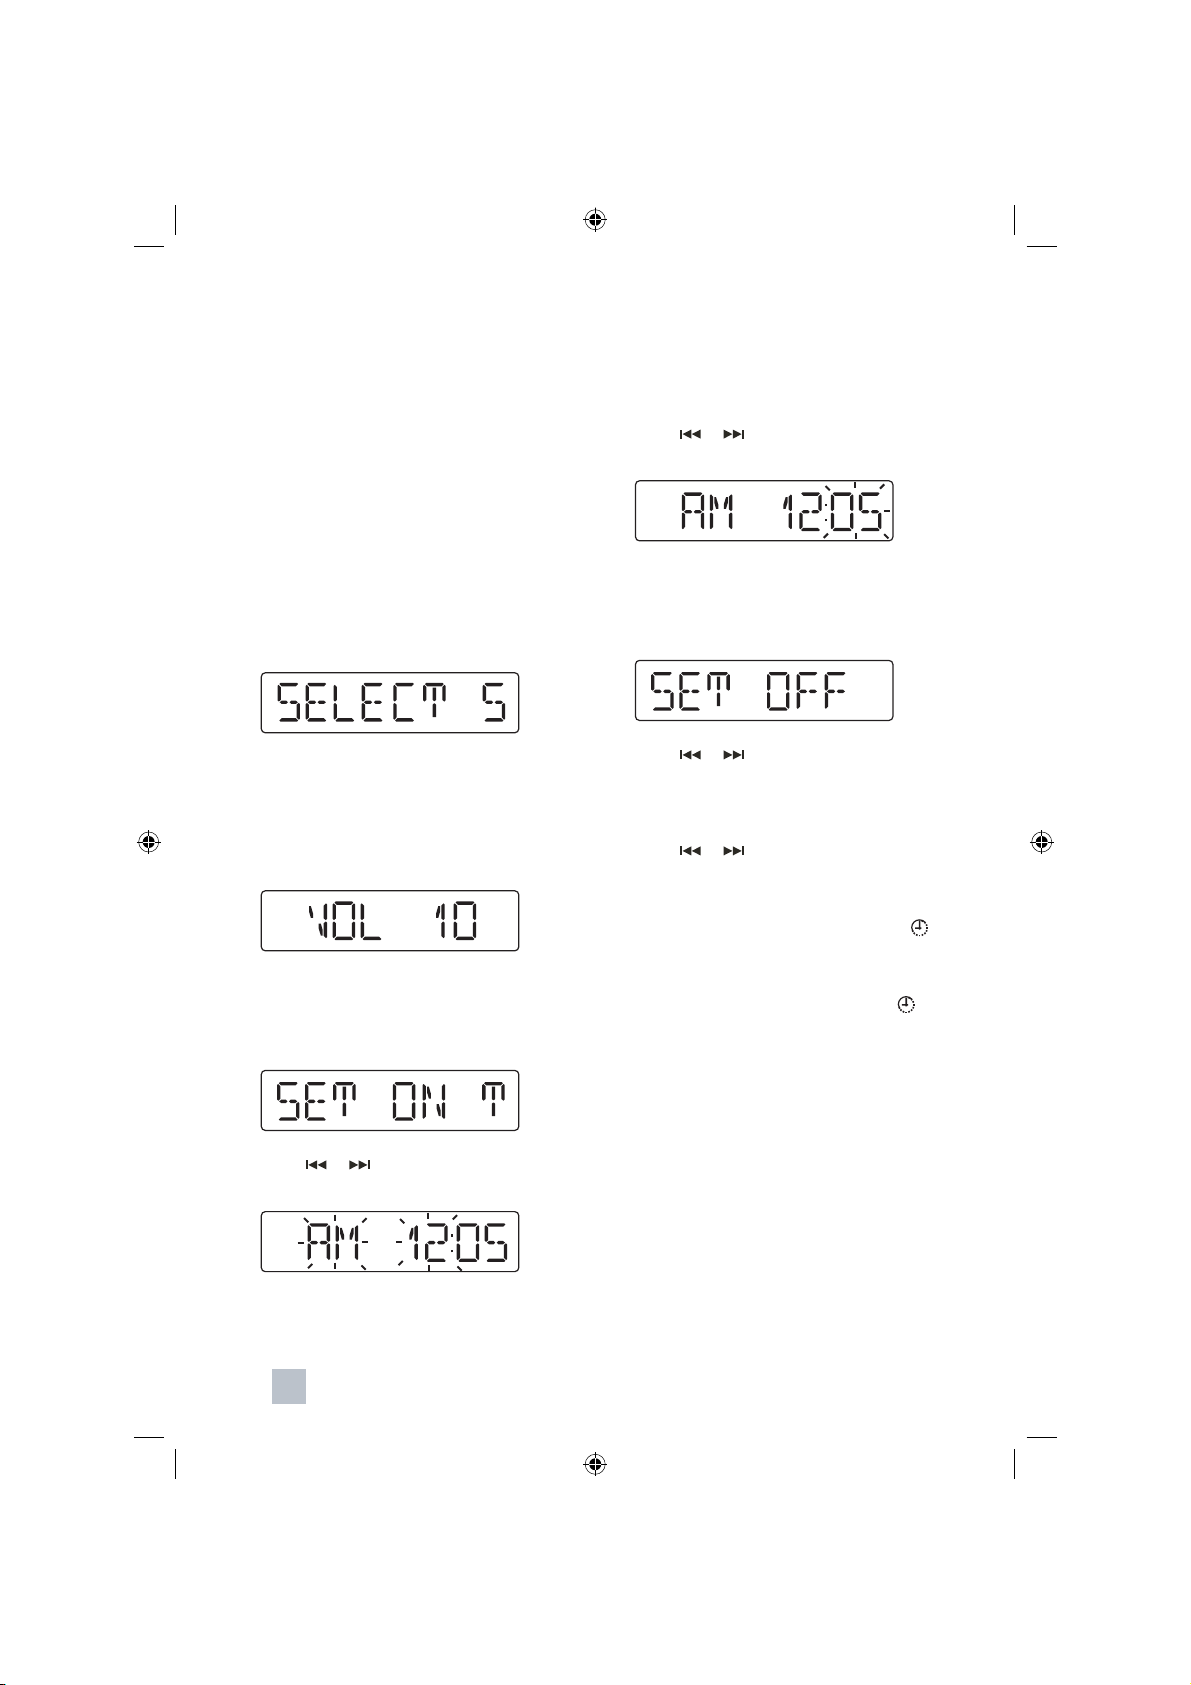
Aktivera timern
1. T ryck på TIMER på fjärrkontrollen när spelaren
är påslagen.
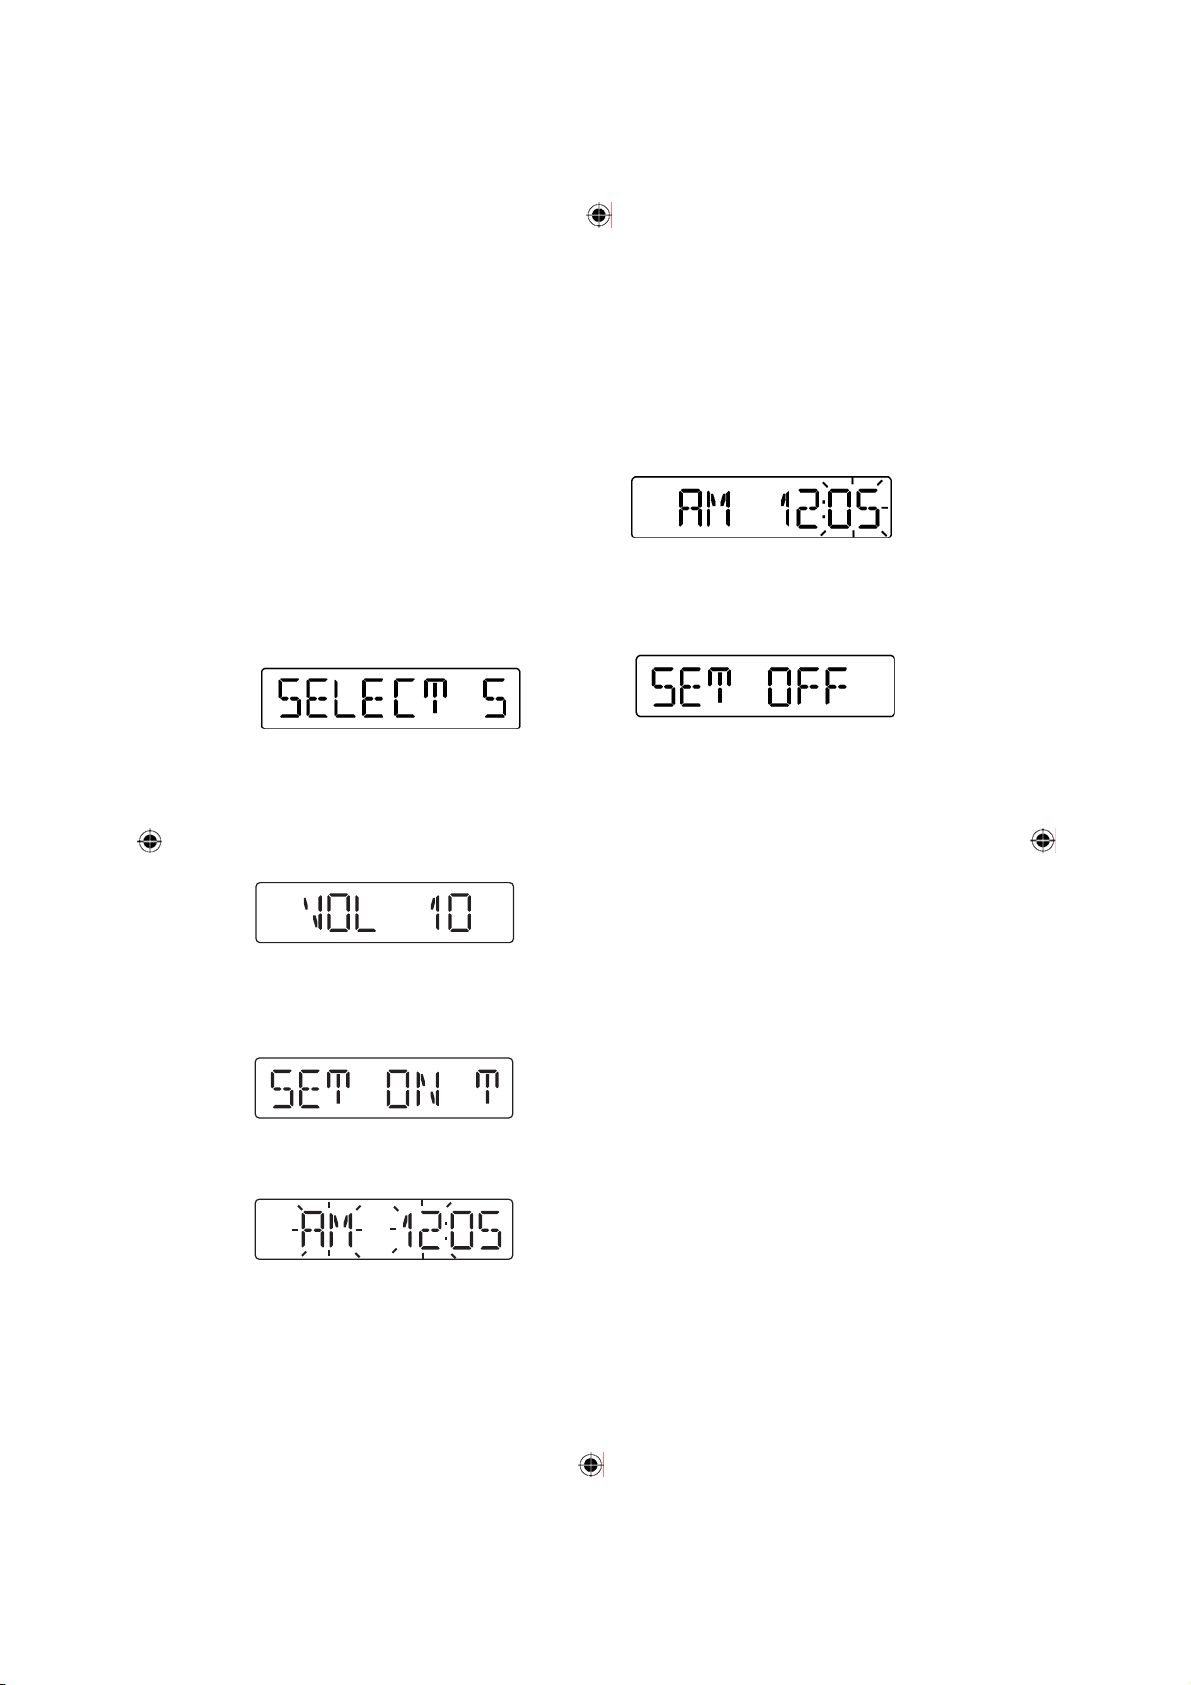
2. När du ser meddelandet SELECT SOURCES
(välj källa) trycker du på FUNCTION flera
gånger för att välja ljudkälla som ska spelas när
timern aktiveras.
3. Tr yck på TIMER för att bekräfta.
4. När du ser meddelandet VOL XX (där XX är
aktuell volym), trycker du på VOLUME UP eller
DN för att ställa in ljudnivån som ska användas
när timern aktiveras.
5. Tr yck på TIMER för att bekräfta.
8. T ryck på TIMER för att bekräfta.
9. Try ck på /Symbol/ eller /Symbol/ för att ange
minuterna när timern ska aktiveras.
12. Tr yck på TIMER för att bekräfta.
13. Tr yck på TIMER när du ser meddelandet SET
OFF TIMER (stäng av timern).
12. T ryck på /Symbol/ eller /Symbol/ för att
ange timmen när timern ska avaktiveras.
13. T ryck på TIMER för att bekräfta.
14. T ryck på /Symbol/ eller /Symbol/för att ange
minuterna när timern ska avaktiveras.
15. Tryck på TIMER för att bekräfta.
• Nu har du ställt in timern. Timerikonen
(/Symbol/) tänds på displayen.
6. Tryck på TIMER när du ser meddelandet SET
ON TIMER (slå på timern).
7. Tryck på eller för att ange timmen när
timern ska aktiveras.
10
Stänga av timern
• T ryck på TIMER en gång. Timerikonen
(/Symbol/) försvinner på displayen.
OBS! Se till att det finns en CD-skiva tillgänglig när
timern (larmet) är inställd på CD. Om
USB-minne eller CD/MMC-kort inte finns
tillgängligt, används FM som standard.
Page 12
Klocka, timer och insomningsfunktion
Insomningsfunktion
I spelaren finns en programmerbar
insomningsfunktion så att du kan spela under en
inställd tid innan spelaren stängs av automatiskt.
Använda insomningsfunktionen
1. Slå på spelaren och välj en ljudkälla som ska
spelas.
2. T ryck på SLEEP flera gånger i följd för att välja
önskad tidslängd (90, 80, 70, 60, 50, 40, 30, 20,
10 minuter eller OFF) innan spelaren ska
stängas av automatiskt.
• Välj OFF om du vill avbryta denna
funktion.
• Displayen återgår till föregående display efter
några sekunder. Nu har du ställt in
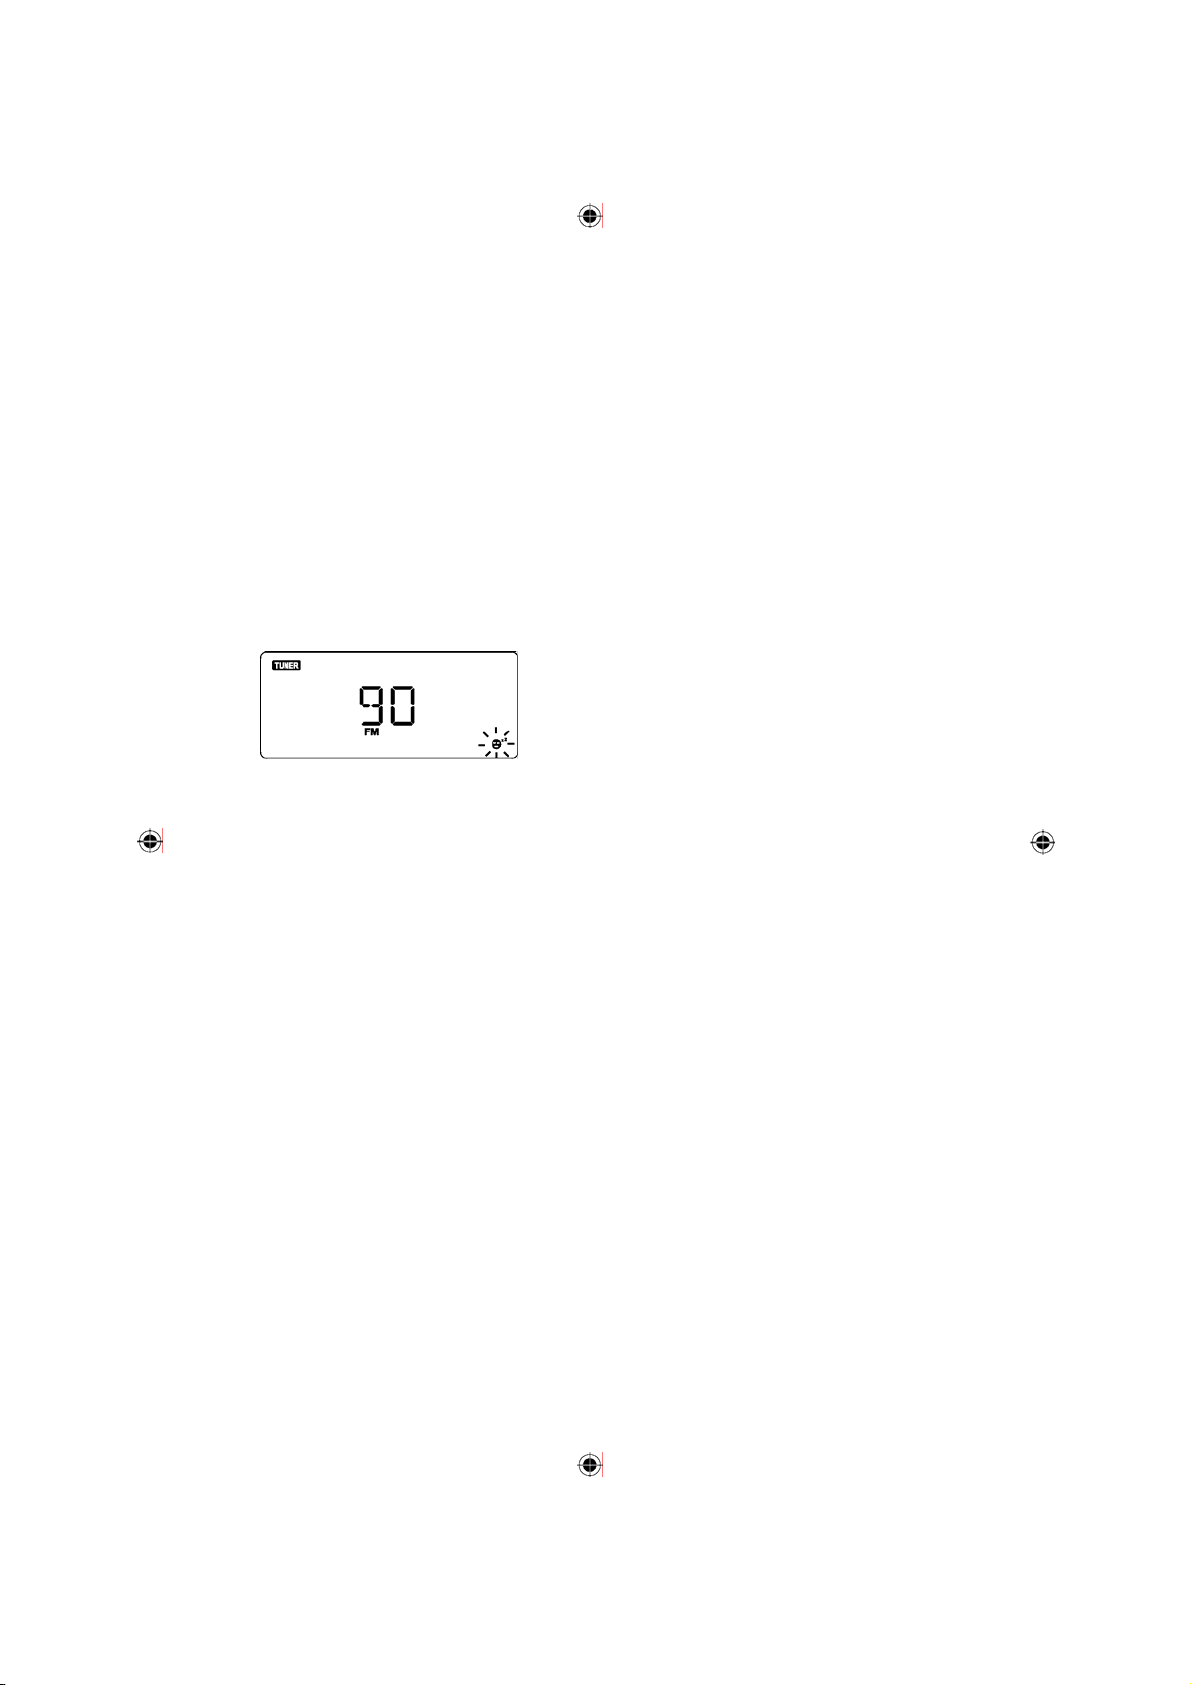
insomningsfunktionen. En insomningsikon
(/Symbol/) visas längst ned till höger på
displayen.
• I CD-läge fungerar spelaren bara tills CD-skivan
är slut. Om du ställer in insomnin gsfunktionen på
90 minuter, men din CD-skiva e ndast är på 45
minuter, stoppar spelaren uppspelningen efter 45
minuter.
3. Om du vill kontrollera hur lång tid s om återstår
innan spe laren st ängs av au tomatiskt t rycker
du på SLEEP en gång.
4. T ryck på STANDBY- eller /Symbol/ knappen
om du vill stänga av spelaren i förtid.
11
Page 13
Spela CD-skiva
Kompatibla skivtyper
Denna spelare stöder uppspelning av följande
CD-skivor:
• CD Audio (ljud-CD)
• CD-R
• CD-RW
• Möjligheten att spela upp vissa brännbara
skivor kan bero på skivans kvalitet eller skick,
inspelningens kvalitet, brännarens
egenskaper eller programvaran. Uppspelning
kan inte garanteras i alla situationer. Detta
tyder inte på problem med spelaren.
Kompatibla ljudformat
• Spelaren stöder uppspelning av låtar i
CD-audio- (förinspelade CD-skivor) och
MP3-format. Denna spelare stöder inte Digital
Rights Management (DRM) och kan inte spela
upp låtar inköpta från iTunes eller andra låtar i
AAC-format, låtar i ATRAC-format eller låtar
inköpta från vissa webbaserade butiker. Det
kan gå att omvandla din musik till ett av de
spelbara komprimerade formaten eller
bränna den till en ljud-CD, beroende på
DRM-restriktionerna.
• Inspelade CD-skivor skapas i enlighet med
filsystemet ISO9660 CD-ROM. Systemet kan
läsa media som innehåller upp till 16
mappnivåer, totalt 99 mappar och upp till 999
filer. Kinesiska tecken kan inte visas, men
skivor med dessa tecken kan fortfarande
spelas upp. Filändelsen ska vara .mp3
eller .MP3. MP3-filer stöds med 8-384 kbps
kodningshastighet (inklusive VBR-kodning),
32/44,1/48 kHz samplingshastighet.
CD-uppspelning
Välja CD-läge
• Tryck på FUNCTION flera gånger tills CD-läge
är valt.
• CD-ikonen tänds på displayen när CD-läget
valts.
Börja spela en CD-skiva
1. Tryck på kanten av CD-luckan (vid OPEN/
CLOSE-märkningen) för att öppna CD-facket.
OPEN visas på displayen
2. Ladda en ljud- eller data-CD med MP3-filer i
skivfacket.
3. Tryck på kanten av CD-luckan (vid
OPEN/CLOSE-märkningen) för att stänga
CD-facket. Nu bör spelaren läsa information
om skivan.
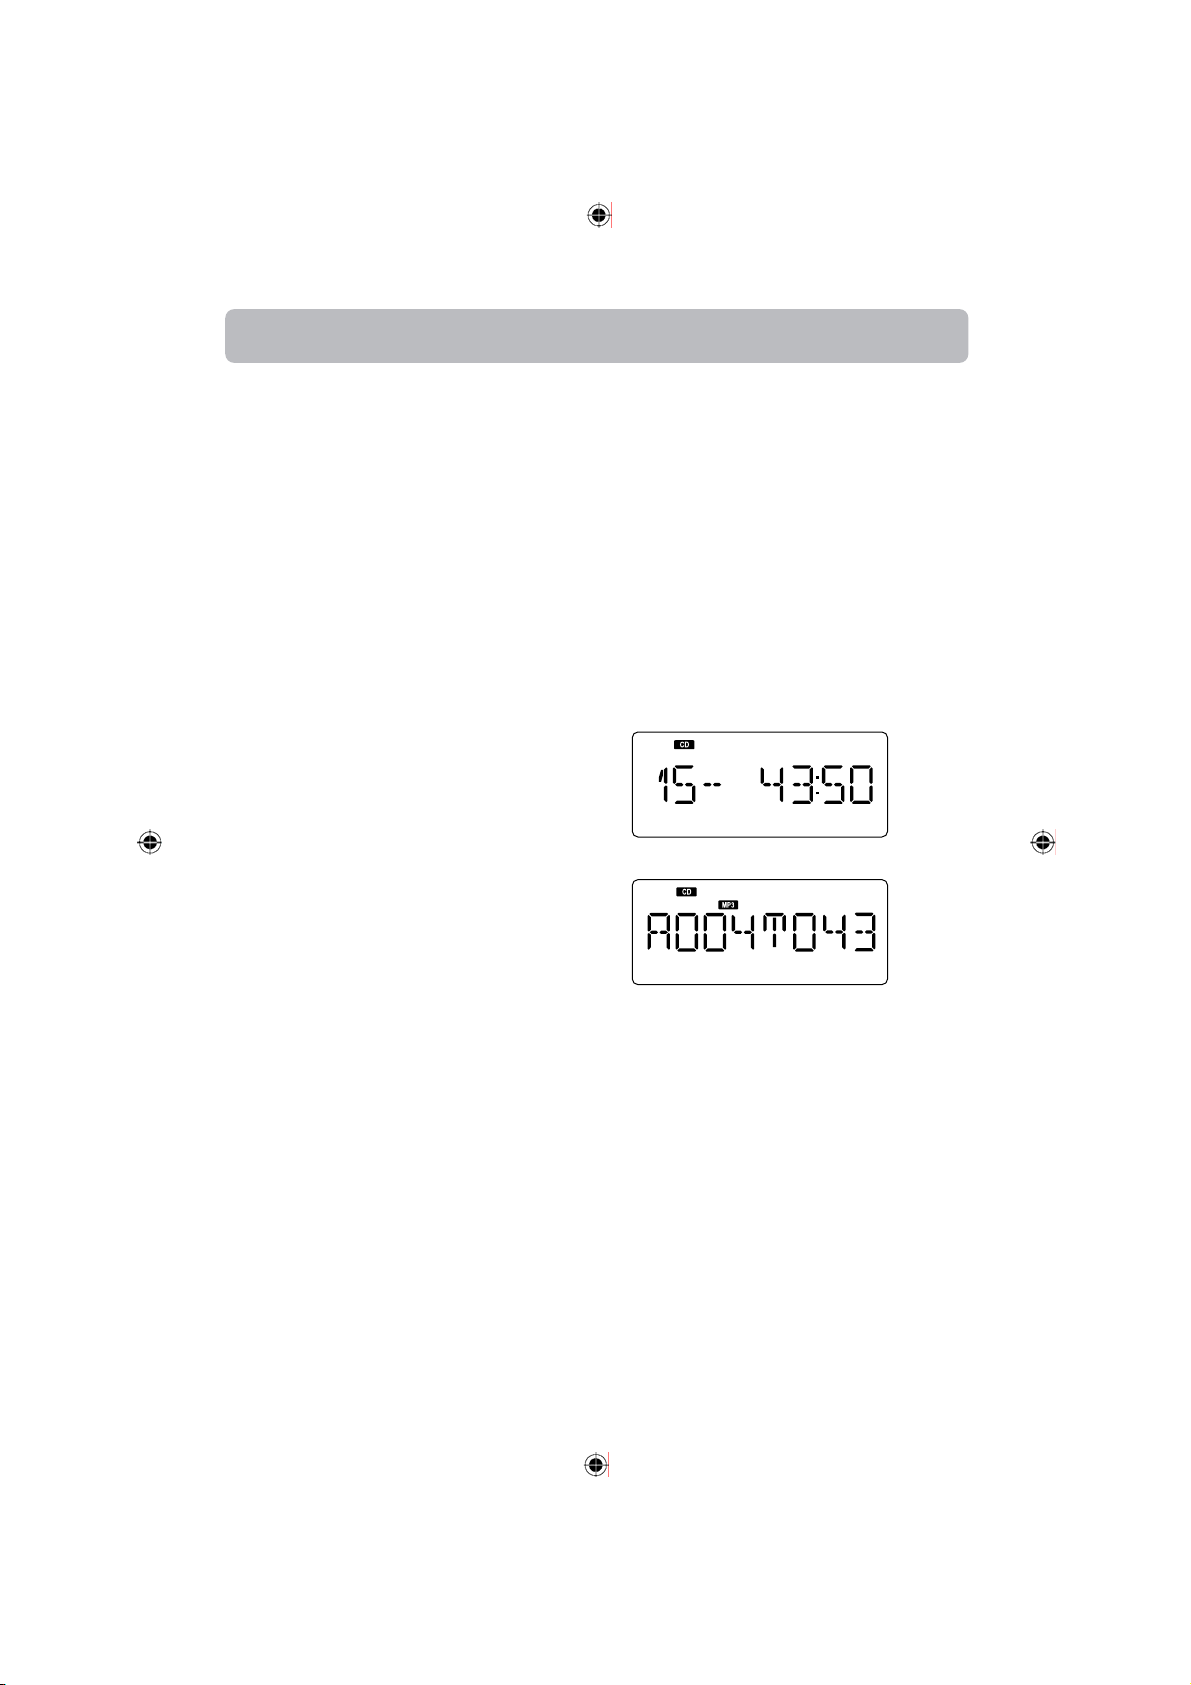
Total number
of tracks
Audio CD
Total number
of folders
MP3 disc
• Eftersom MP3-skivor innehåller mycket mer
information än vanliga CD-skivor, kan det ta
längre tid för spelaren att läsa all information
från dem. Detta är helt normalt och tyder inte
på problem med spelaren.
Total playback time
Total number
of tracks
12
Page 14
CD-uppspelning
Spela upp
1. Tr yck på /Symbol/ för att starta uppspelningen.
2. Under uppspelning trycker du på /Symbol/ för
att pausa. Tryck en gång till för återta
uppspelningen.
3. T ryck på /Symbol/ eller /Symbol/ för att hoppa
till föregående eller nästa spår.
• Du kan också använda sifferknapparna (0-9)
för att välja spår- eller filnummer direkt.
4. Tryck och håll inne /Symbol/ eller /Symbol/ för
att snabbspola bakåt eller framåt inom
samma spår eller fil. Släpp knappen om du vill
återgå till uppspelningen med normal
hastighet.
5. Tryck på STOP (/Symbol/) för att avbryta
uppspelningen.
Väljer mapp på en MP3-skiva
• T ryck på FOLDER UP eller DN för att välja
en mapp på en MP3-skiva. Spelaren börjar
spela från den förs ta låten i den valda
mappen.
Visa information (ID3-tagg) om MP3-filerna
• När du spelar MP3-filer kan du trycka på ID3
på fjärrkontrollen för att se mer information
om den aktuella filen.
Välja ett uppspelningsläge
• T ryck på PLAY MODE flera gånger på
fjärrkontrollen för att välja ett uppspelningsläge
Repetera en (/Symbol/)
Repetera album* (/Symbol/ ALBUM)
Repetera alla (/Symbol/ ALL)
Slumpspelning (/Symbol/)
Avbryt uppspelningsläget (ingen ikon)
• * Repetition är bara tillgängligt för
MP3-skivor.
• Ikonen för valt repetitionsläge eller
slumpmässigt spelläge visas på displayen.
Programmera uppspelning
Det progr ammerade uppspelningsläget ger dig
möjlighet att programmera totalt 40 spår i önskad
ordning. Du kan också pr ogrammera samm a
spår/fil och spela den flera gånger i följd.
1. Stoppa eventuell uppspelning av skiva
i CD-läge.
2. När uppspelningen har avbrutits, trycker du på
MEMORY/CLOCK.
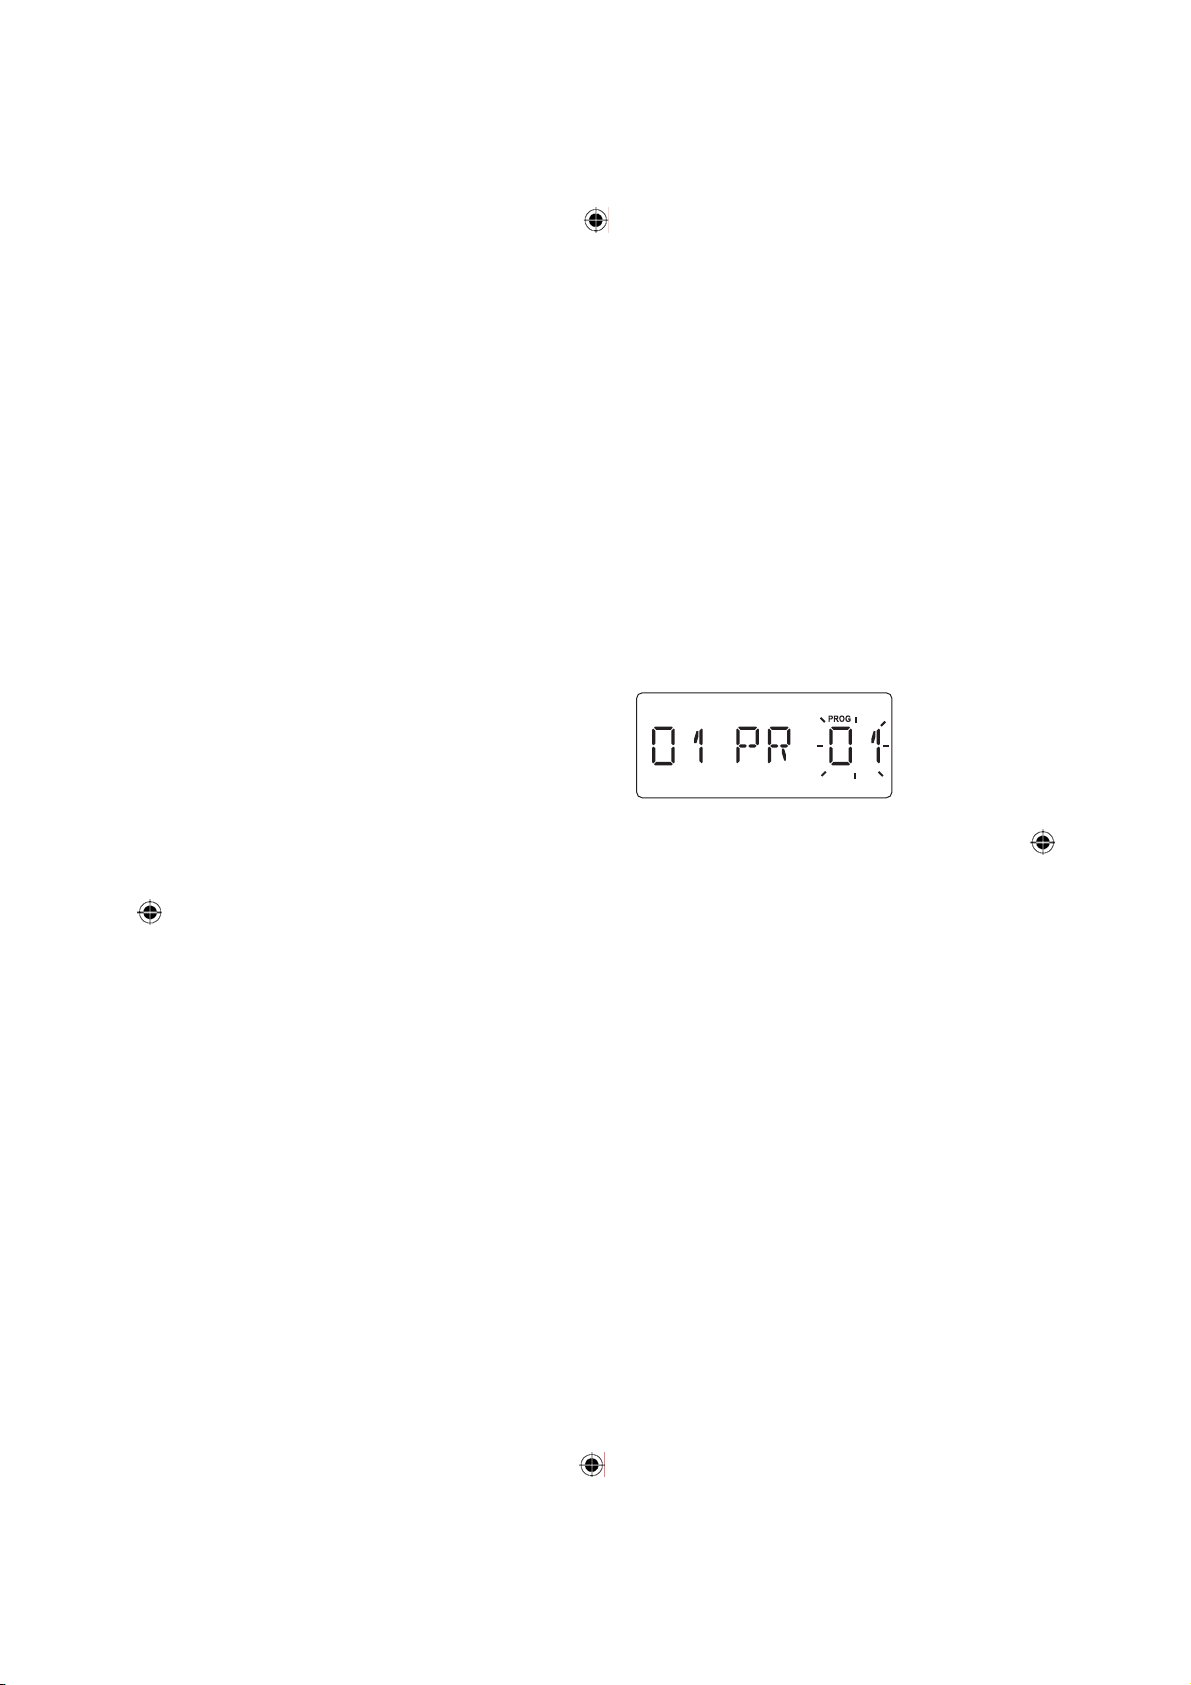
• PROG och PR01 visas på displayen. PROG
anger programmeringsläge och PR01 den första
programmeringspositionen
3. Tr yck på /Symbol/ eller /Symbol/ för att välja
den första programmeringspositionen.
4. Tr yck på MEMORY/CLOCK för att spara
det valda spåret på
programmeringspositionen.
5. Upprepa steg 3 och 4 för att programmera
fler spår. Det går att programmera upp till 40
spår.
6. Tr yck på /Symbol/ för att börja spela
de programmerade spåren. Uppspelningen
avbryts när alla programmerade spår har
spelats.
7. Om du vill spela alla programmerade spår
igen, trycker du på /Symbol/.
8. T ryck /Symbol/ två gånger i
programmeringsläge eller öppna CD-facket
om du vill radera den programmerade
sekvensen ur minnet.
• PROG försvinner från displayen.
13
Page 15
Radio
Välja radioläge
• T ryck på FUNCTION flera gånger tills
radioläget är valt.
• Radioikonen tänds på displayen när
radioläget valts.
Ändra frekvensband
• T ryck på DELETE/BAND ii radioläge för
att växla mellan FM och MW.
Söka efter stationer
• T ryck på /Symbol/ eller /Symbol/ för att
ställa in frekvensen. Använd denna metod
för att ställa in stationer med dålig
mottagning som inte kan identifieras av den
automatiska stationssökningen.
• Tryck och håll inne /Symbol/ eller /Symbol/
tills frekvensen på displayen börjar ändras och
släpp sedan knappen för att automatiskt söka
efter nästa tillgängliga station.
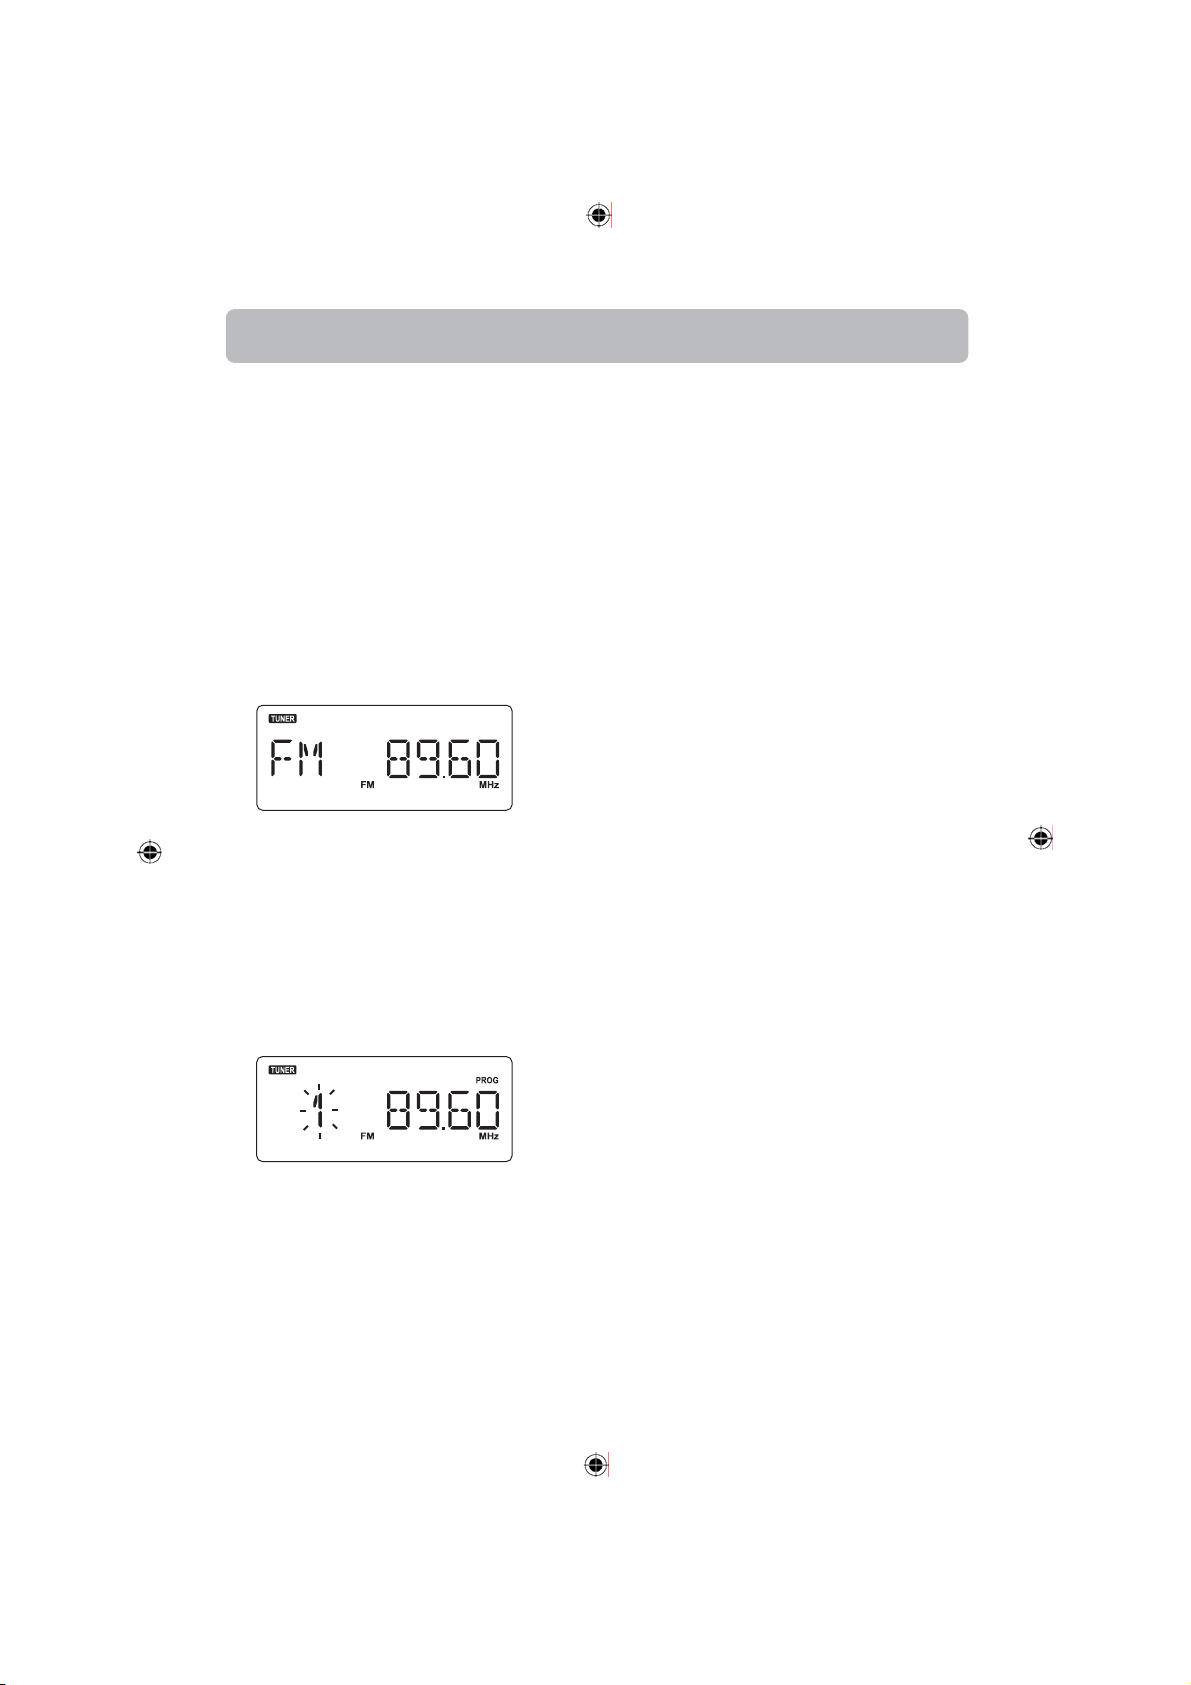
Spara en station
1. Ställ in en frekvens och tryck på
MEMORY/CLOCK.
Lyssna på en sparad station
• T ryck på UP eller DN för att välja nummer p å
förinställd kanal eller tryck på sifferknapparna
(0-9) fö r att di rekt ange num ret på den
förinställda kanalen.
Slå på eller stänga av stereoljudet i
FM-läge
• T ryck på ST/MO på fjärrkontrollen för att slå
på eller stänga av stereoljudet.
Antenn
FM-antenn
• Dra ut teleskopantennen. Luta och vrid
antennen. Gör den kortare om signalen är för
stark (om sändaren är nära).
AM-antenn
• Spelaren har en inbyggd antenn. Rikta istället
antennen genom att vrida hela apparaten.
2. Tryck på PRESET UP eller DN på
fjärrkontrollen och välj ett kanalnummer att
spara stationen på.
• Du kan spara upp till 30 kanaler på FM och 10
kanaler på MW.
3. Tryck på MEMORY/CLOCK igen.
14
Page 16
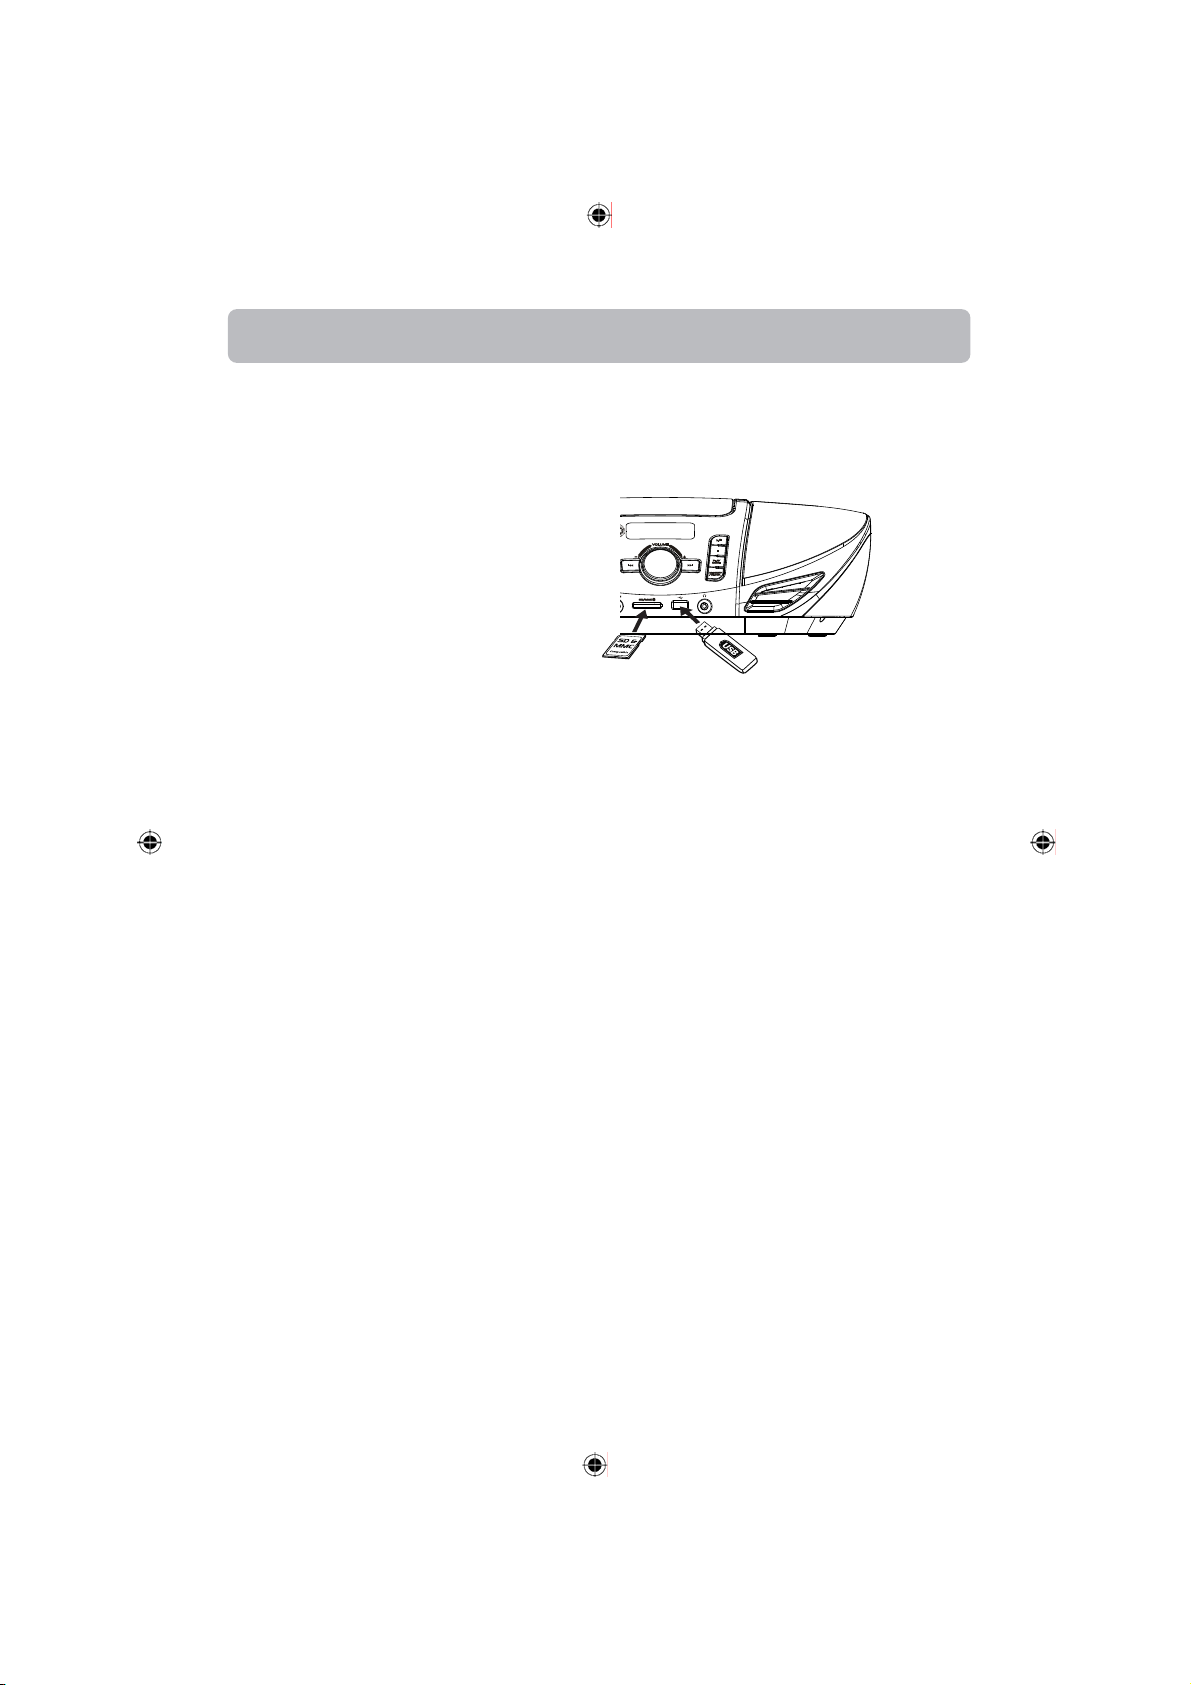
USB och SD/MMC
Du kan spela MP3-filer so finns lagrade på ett
USB-minne eller ett SD/MMC-kort anslutet till
spelaren.
Spelarens kan endast spela låtar i MP3-format
via USB-porten och minneskortfacket. Den kan
inte spela låtar köpta från iTunes eller andra låtar
i AAC-format, i ATRAC-format eller andra låtar
köpta från webbaserade butiker. Det kan gå att
omvandla din musik till ett av de spelbara
komprimerade formaten eller bränna den till en
ljud-CD, beroende på DRM-restriktionerna.
Kompatibla minneslagringsenheter
Denna spelare stöder uppspelning av musik från
flash USB-enhet och minneskort (se nedan).
•
Secure Digital
•
miniSD
•
microSD
•
Multimedia-kort (MMC)
•
Försök inte att ansluta andra minneskort än
TM
TM
(SD)
(endast med adapter)
TM
(endast med adapter)
de som anges ovan. Då kan minneskortet
eller spelaren skadas.
•
Denna spelare är konstruerad för att spela
media från SD/MMC-kort och från USB
flashminne som uppfyller standarden för
USB-masslagring. Uppspelning av media
från USB-anslutna enheter s om
MP3-spelare som normalt kräver en driver
för att kunna fungera med en PC stöds inte.
Uppspelning från alla fysiskt kompatibla
minnesenheter kan ej alltid garanteras i alla
situationer. Detta tyder inte på problem med
spelaren.
Uppspelning av USB, SD/MMC
Komma till USB- eller SD/MMC-läge
•
Tryck på FUNCTION upprepade gånger på
huvudenheten tills USB- eller kortläge (CARD)
(för SD/MMC) har valts.
•
Ikonerna USB eller CARD tänds på displayen
när USB- eller kortläget har valts.
Ansluta USB-enhet eller SD/MMC-kort till
spelaren
•
För försiktigt in ett USB-minne eller ett
SD/MMC-kort i USB-porten eller kortfacket
på spelarens framsida.
Söka och lyssna på en musikfil
När enheten har anslutits söker spelaren
automatiskt efter MP3-filer.
1. Tryck på /Symbol/ för att starta uppspelningen.
2. Tryck på /Symbol/ för att pausa i
uppspelningen och tryck igen för att återuppta
uppspelningen.
3. Tryck på FOLDER UP eller DN för att välja en
mapp.
4. Tryck på /Symbol/ eller /Symbol/ för att hoppa
till föregående eller nästa fil.
5. Tryck och håll inne eller för att
snabbsp ola bakåt eller framåt inom
samma fil. Släpp knappen om du vill återgå
till uppspelning med normal hastighet.
6. Tryck på /Symbol/ för att avbryta
uppspelningen.
Övriga uppspelningsfunktioner
Repetera uppspelning
•
•
Uppspelning i slumpordning
•
Programmerad uppspelning (upp till 40 filer)
Detta fungerar på samma sätt som vid
uppspelning av CD-skiva. Mer information finns
på sid13-14.
Koppla ur USB-enhet eller SD/MMC-kort
Ta ut USB-minnet ur USB-porten eller
•
SD/MMC-kortet ur kortfacket.
15
Page 17

r
Extern ingång (aux)
Ansluta och lyssna på en extern källa
1. Anslut din externa källa (exempelvis
MP3-spelare) till AUX IN-uttaget på spelarens
framsida.
2. Slå på spelaren och din externa källa.
3. Tr yck på FUNCTION upprepade gånger för
att välja AUX-läge och lyssna på ljud från
den externa källan.
• AUX indikatorn visas på displayen när
AUX-läget har valts.
4. Ställ in volymen på den externa källan till
mellanläge och ställ in huvudvolymen på
spelaren till önskad nivå.
• Vrid inte upp volymen på den externa källan fö
mycket, eftersom det kan störa ljudkvaliteten.
• Övriga inställningar av uppspelningen görs på
den externa källan.
16
Page 18

Felsökning
Allmänt
Ingen
spänning
• Spelaren är inte rätt ansluten till nätuttaget.
Kontrollera alla sladdar och kablar.
Det händer inget när man trycker på spelarens
knappar
• Den inb yggda mikroprocessorn kanske inte
fungerar på grund av extern elektrisk störning.
Dra ut stickkontakten och anslut den igen.
Fjärrkontrollen fungerar inte
• Kontrollera att det inte finns något hinder
mellan spelaren och fjärrkontrollen.
• Flytta närmare spelaren.
• Batterierna är urladdade. Byt batterier.
Inget ljud
• För låg volym. Höj volymen.
• Hörlurar är anslutna till spelaren.
Uppspelning av skiva
Skivan spelas inte
• Kontrollera att det ligger en skiva i skivfacket.
• Kontrollera att CD-skivans tryckta sida är vänd
uppåt.
• Kontrollera att uppspelningen inte är pausad.
• Kontrollera att spelaren är i CD-läge.
CD-skivan hackar
• Gör rent skivan.
• Kontrollera att skivan inte är skev, repad
eller skadad på annat sätt.
• Kontrollera om något får spelaren att
vibrera. Flytta den i så fall.
Radio
Dålig radiomottagning
• FM-antennen är inte ordentligt utdragen och
rätt placerad. Dra ut antennen helt och
prova med ett annat läge.
• Stäng av elektriska apparater i närheten,
exempelvis hårfönar, dammsugare,
mikrovågsugnar och lysrörslampor.
USB och SD/MMC
Kan inte spela musikfiler på anslutet
USB-minne eller SD/MMC-kort
• Kon trollera att USB-minnet eller
SD/MMC-kortet sitter ordentligt i.
• DRM-musikfiler (Digital Right Management)
spelas inte.
17
Page 19
Skötsel
Var rädd om skivorna
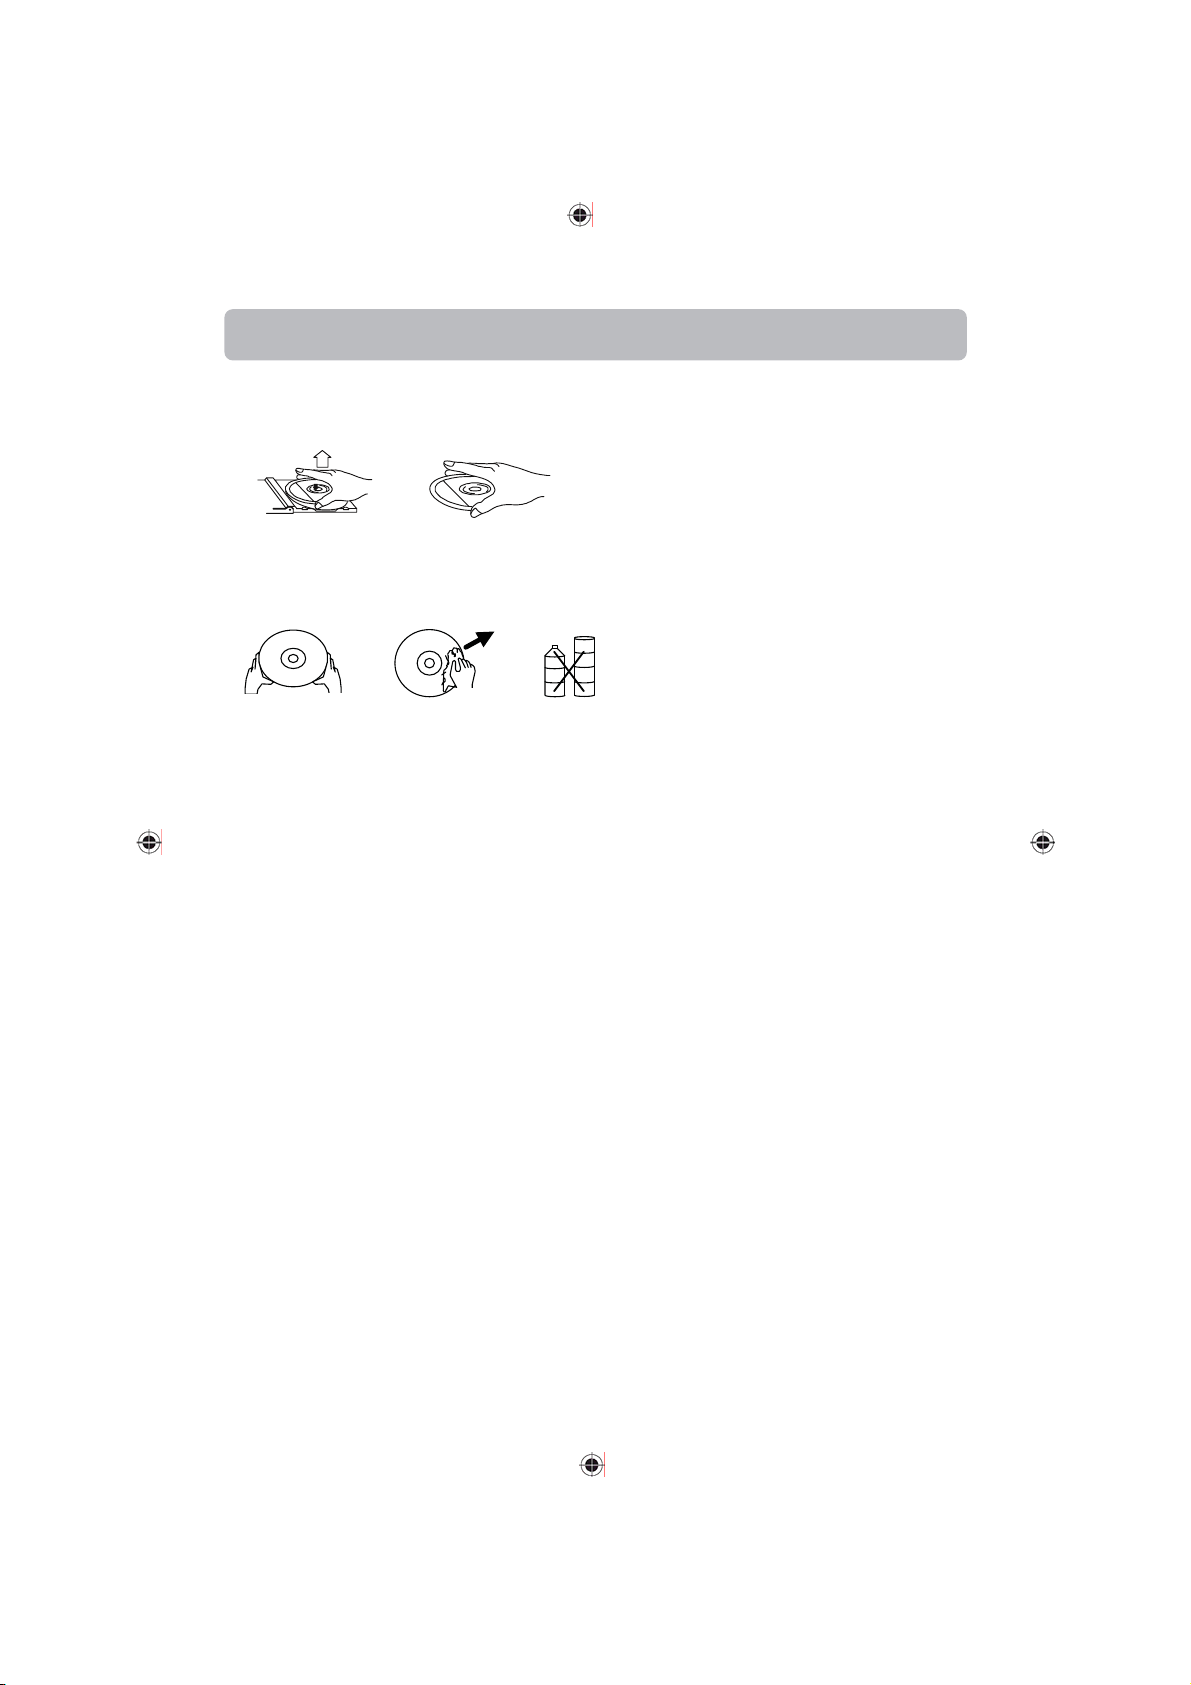
Ta ur skivan ur fodralet genom att trycka ner mitten i fodralet och lyfta ur den med ett försiktigt tag om
skivans ytterkant.
Fingeravtryck och damm torkas av försiktigt från skivans inspelade sida med en mjuk trasa. Till skillnad
från grammofonskivor har CD-skivorna inga spår där det kan samlas damm och smuts. Därför räcker det
med en mjuk trasa för att få bort de flesta partiklar. Torka skivan rakt inifrån och utåt kanterna. Små
dammpartiklar och ljusa fläckar påverkar inte uppspelningskvaliteten.
Torka av skivan regelbundet med en mjuk, luddfri, torr trasa. Anvä nd inte rengöringsmedel eller trasor
med slipeffekt på skivorna. Vid behov används en rengö ringssats avsedd för CD -skivor. Skriv inte på
skivorna och klistra inte fast etiketter.
Var rädd om spelaren
Ett dammigt hölje torkas av med en mjuk och torr dammtrasa. Använd inte vax, poleringsspray eller
trasor med slipeffekt.
Var försiktig
Se till att inte vatten eller annan vätska kommer in i spelaren vid rengöring.
18
Page 20
Tekniska specifikationer
1. Allmänt
Strömförsörjning
Effektförbrukning
230 V AC, 50 Hz
30 W (i drift) 1,5
W (standby)
Vikt (huvudenhet med 2 högtalare)
2. Förstärkare
Effekt
3. Radiomottagare
FM frekvensområde
MW frekvensområde
Förinställda stationer
4. CD-spelare
Uppspelningssystem
DAC
Frekvensområde
5. Kort/USB
Stöd för minneskort
Stöd för USB
6. Högtalarsystem
Högtalare 2 st 2-vägshögtalare
Impedans 4 ohm
2,65 kg
2 x 3.5 Watt RMS
87.5 MHz till 108 MHz
522 kHz till 1620 kHz
FM: 30, MW: 10
Compact Disc Digital Audio 8
gånger översampling, 1 bit
D/A-omvandlare.
100 – 20 000 Hz
MMC max 2 GB, SD max 8 GB
Flashminne max 16 GB
19
Page 21
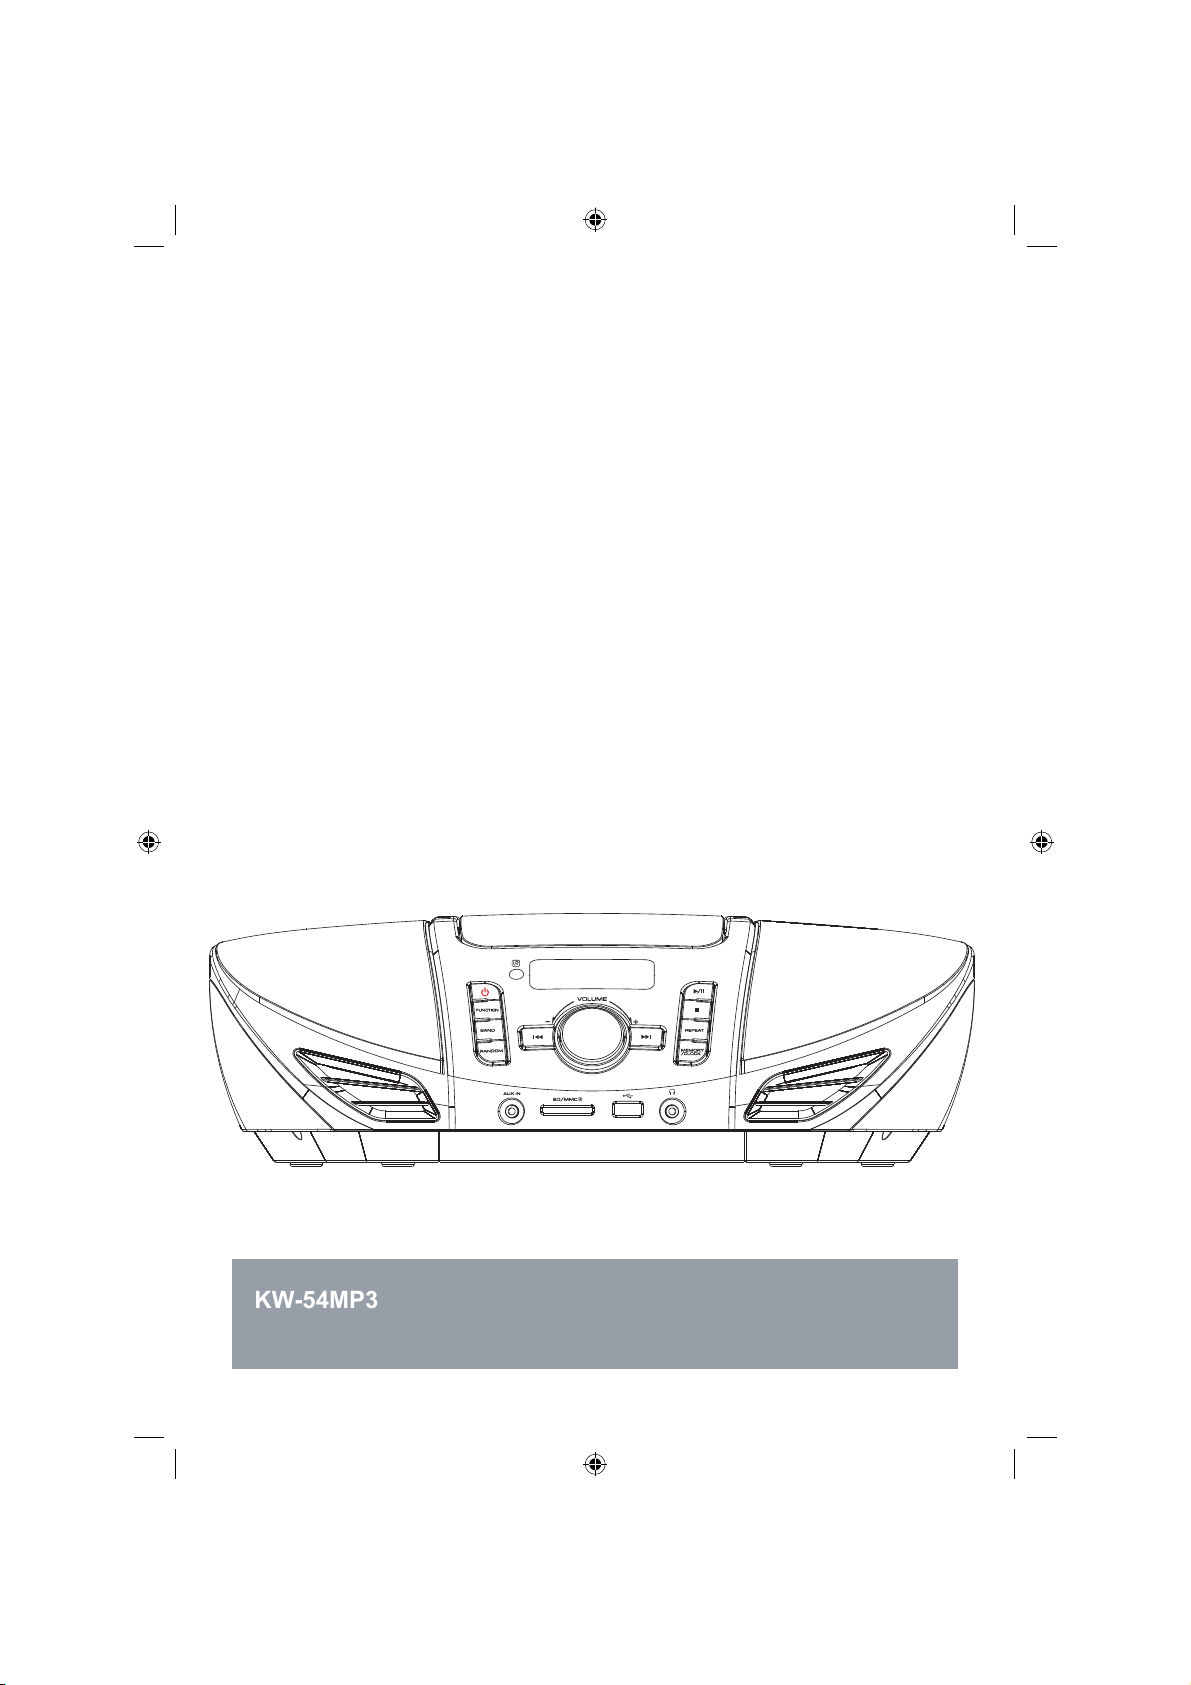
User Manual
KW-54MP3
Multi-source Micro Hi-Fi Audio System
1
Page 22
17
17
17
17
17
18
18
18
18
19
Page 23
Safety information
IMPORTANT SAFETY INSTRUCTIONS
TO PREVENT FIRE OR SHOCK HAZARD, DO NOT USE THIS PLUG WITH AN EXTENSION CORD, RECEPTACLE OR OTHER
OUTLET UNLESS THE BLADE SCAN BE FULLY INSERTED TO PREVENT BLADE EXPOSURE. TO PREVENT FIRE OR SHOCK
HAZARD, DO NOT EXPOSE THIS APPLIANCE TO RAIN OR MOISTURE.
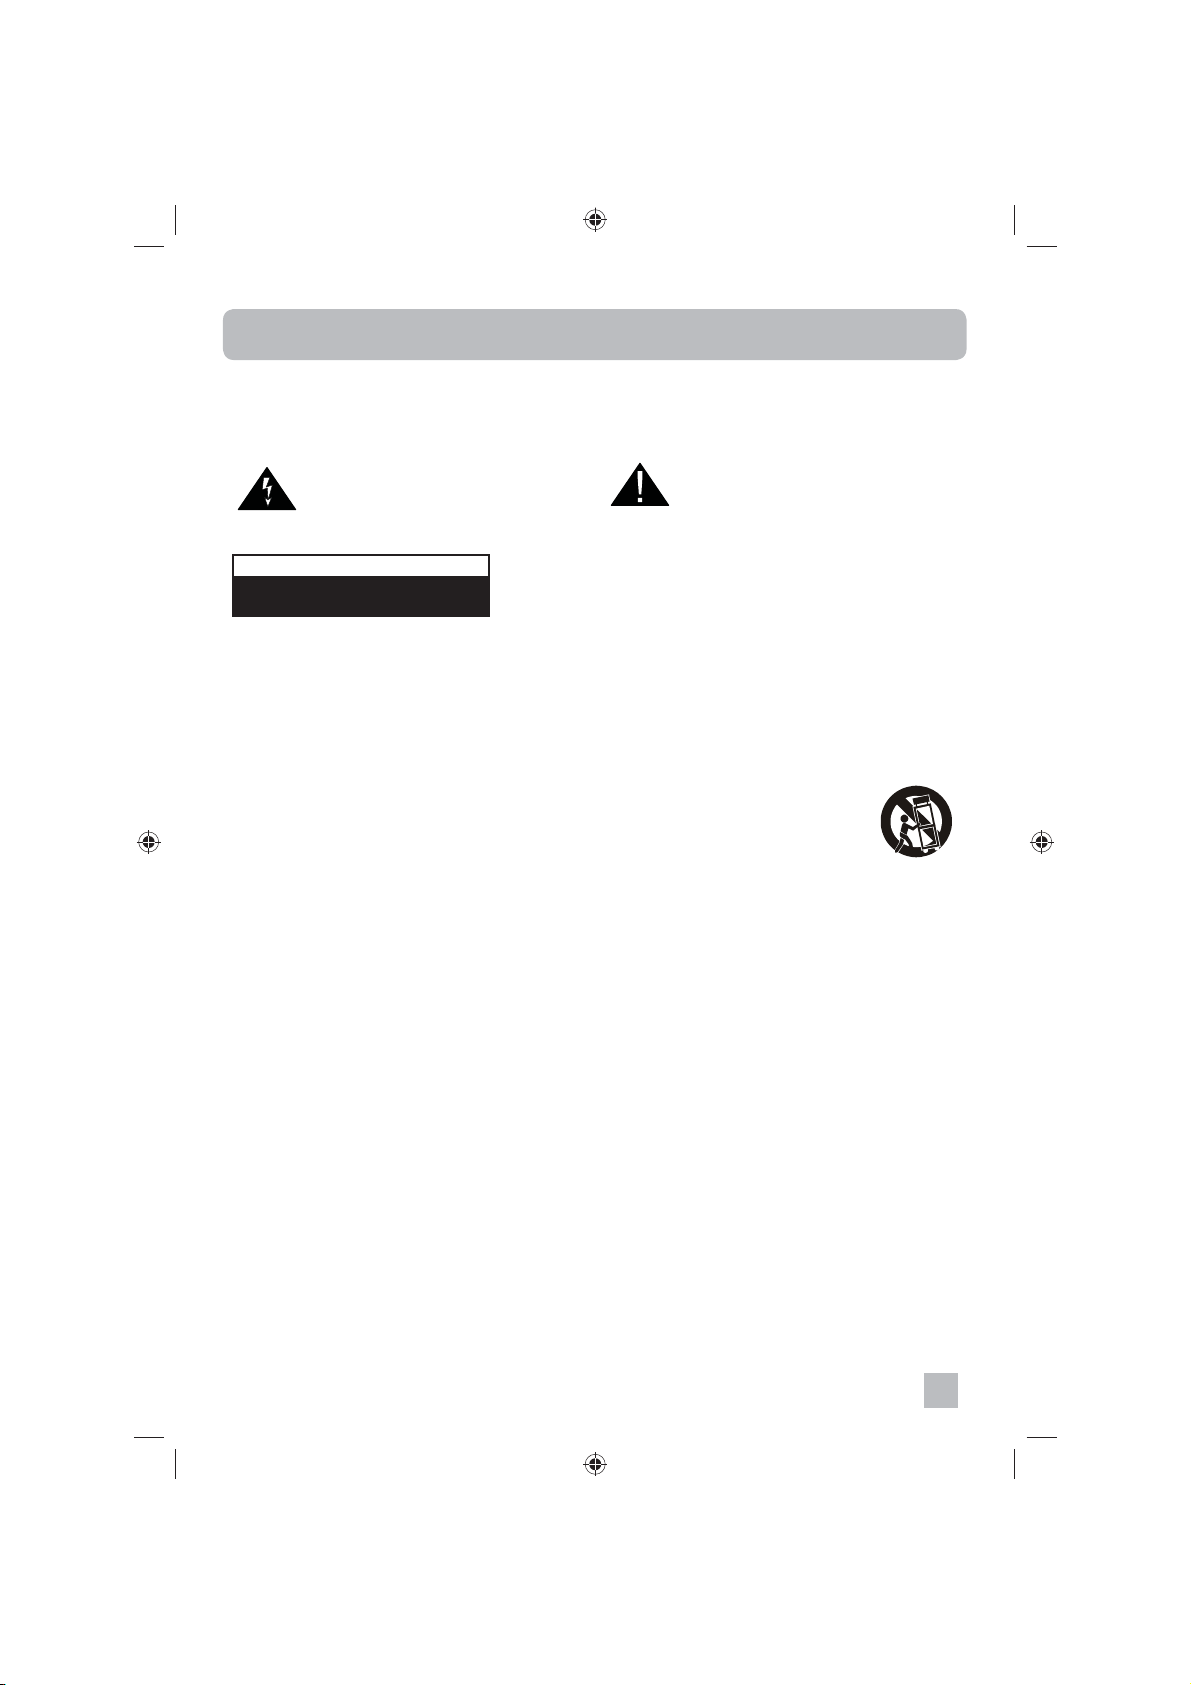
The lightning flash with arrow-head symbol, within an
equilateral triangle is intended to alert the user to the
presence of uninsulated ‘dangerous voltage’ within
magnitude to constitute a risk of electric shock to persons.
1. READ INSTRUCTIONS - All the safety and operating instructions should be read before the product is operated.
2. RETAIN INSTRUCTIONS -The safety and operating instructions should be retained for future reference.
3. HEED WARNINGS - All warnings on the product and in the operating instructions should be adhered to.
4. FOLLOW INSTRUCTIONS - All operating and use instructions should be followed.
5. CLEANING - Unplug this product from the wall outlet before cleaning. Do not use liquid cleaners or aerosol cleaners. Use a damp
6. ATTACHMENTS - Do not use attachments not recommended by the product manufacturer as they may cause hazards.
7. WATER AND MOISTURE - Do not use this product near water - for example, near a bath tub, wash bowl, kitchen sink, or laundry
8. ACCESSORIES - Do not place this product on an unstable cart, stand, tripod, bracket, or table. The product may
9. VENTILATION - Slots and openings in the cabinet are provided for ventilation and to ensure reliable operation of the product and
10. POWER SOURCES - This product should be operated only from the type of power source indicated on the marking label. If you
11. POWER-CORD PROTECTION - Power-supply cords should be routed so that they are not likely to be walked on or pinched by
12. NON-USE PERIODS - The power cord of the product should be unplugged from the outlet when left unused for long periods of
13. LIGHTNING - For added protection for this product during a lightning storm, or when it is left unattended and unused for long
14. POWER LINES -An outside antenna system should not be located in the vicinity of overhead power lines or other electric light or
15. OVERLOADING - Do not overload wall outlets, extension cords, or integral convenience receptacles as this can result in a risk of
16. OBJECT AND LIQUID ENTRY - Never push objects of any kind into this product through openings as they may touch dangerous
17. SERVICING - Do not attempt to service this product yourself as opening or removing covers may expose you to dangerous voltage
18. DAMAGES REQUIRING SERVICE - Unplug this product from the wall outlet and refer servicing to qualified service personnel
a) When the power-supply cord or plug is damaged.
b) If liquid has been spilled, or objects have fallen into the product.
c) If the product has been exposed to rain or water.
d) If the product does not operate normally by following the operating instructions. Adjust only those controls that are covered by the
e) When the product exhibits a distinct change in performance -this indicates a need for service.
19. REPLACEMENT PARTS - When replacement parts are required, be sure the service technician has used replacement parts
the product’s enclosure that may be of sufficient
RISK OF ELECTRIC SHOCK
CAUTION
DO NOT OPEN
cloth for cleaning.
tub; in a wet basement; or near a swimming pool; and the like. This appliance shall not be exposed to dripping or splashing water
and no object lled with liquids such as vases shall be placed on the apparatus.
fall, causing serious injury to a child or adult, and serious damage to the product. Use only with a cart, stand, tripod,
bracket, or table recommended by the manufacturer, or sold with the product. Any mounting of the product should
follow the manufacturer instructions, and should use a mounting accessory recommended by the manufacturer. A
product and cart combination should be moved with care -quick stops, excessive force and uneven surfaces may
cause the product and cart combination to overturn.
to protect it from overheating, and these openings must not be blocked or covered. The openings should never be blocked by
placing the product on a bed, sofa, rug or other similar surface. This product should not be placed in a built-in installation, such as
a bookcase or rack, unless proper ventilation is provided or the manufacturer*instructions have been adhered to.
are not sure of the type of power supply to your home, consult your product dealer or local power company. For products intended
to operate from battery power, or other sources, refer to the operating instructions.
items placed upon or against them, paying particular attention to cords at plugs, convenience receptacles, and the point of exit
from the product.
time.
periods of time, unplug it from the wall outlet and disconnect the antenna or cable system. This will present damage to the product
due to lightning and power-line surges.
power circuits, or where it can fall into such power lines or other electric light or power circuits, or where it can fall into such power
lines or circuits. When installing an outside antenna system, extreme care should be taken to keep from touching such power lines
or circuits as contact with them might be fatal.
re or electric shock.
voltage points or short-out parts that could result in a fire or electric shock. Never spill liquid of any kind on the product.
or other hazards. Refer all servicing to qualified service personnel.
under the following conditions.
operating instructions as an improving adjustment of other controls may result in damage and will often require extensive work by a
qualified technician to restore the product to its normal operation.
WARNING: TO REDUCE THE RISK OF ELECTRIC SHOCK, DO NOT
REMOVE COVER (OR BACK). NO USER SERVICEABLE PARTS
INSIDE, REFER SERVICING TO QUALIFIED SERVICE PERSONNEL.
appliance.
The exclamation point within an equilateral triangle
is intended to alert the user to the presence of
important operating and maintenance (servicing)
instructions in the literature accompanying the
3
Page 24
Safety information
specified by the manufacturer or having the same characteristics as the original part. Unauthorized substitutions may result in fire,
electric shock or other hazards.
20. SAFETY CHECK - Upon completion of any service or repair to this product, ask the service technician to perform safety checks to
determine that the product is in proper operating condition.
21. HEAT - The product should be situated away from heat sources such as radiators, heat registers, stoves or other products
(including amplifiers) that produce heat.
22. Caution: Changes or modifications not expressly approved by the party responsible for compliance could void the user’s authority
to operate the equipment. Changes or modifications made without written approval may void the user’s authority to operate this
equipment.
23. Excess sound pressure from earphones and headphones can cause hearing loss.
24. Battery shall not be exposed to excessive heat such as sunshine, fire or the like.
25. WARNING: Only use attachments/accessories specified or provided by the manufacturer (such as the exclusive supply
adapter, battery etc).
26. WARNING:To reduce the risk of fire or electric shock, do not expose this apparatus to rain or moisture. The apparatus
shall not be exposed to dripping or splashing and that objects filled with liquids, such as vases, shall not be placed on
apparatus.
27. WARNING: The batteries shall not be exposed to excessive heat such as sunshine, fire or the like.
28. WARNING: The direct plug-in adapter is used as disconnect device, the disconnect device shall remain readily operable.
29. Correct Disposal of this product. This marking indicates that this product should not be disposed with other
household wastes throughout the EU. To prevent possible harm to the environment or human health from uncontrolled
waste disposal, recycle it responsibly to promote the sustainable reuse of material resources. To return your used
device, please use the return and collection systems or contact the retailer where the product was purchased. They
can take this product for environmental safe recycling.
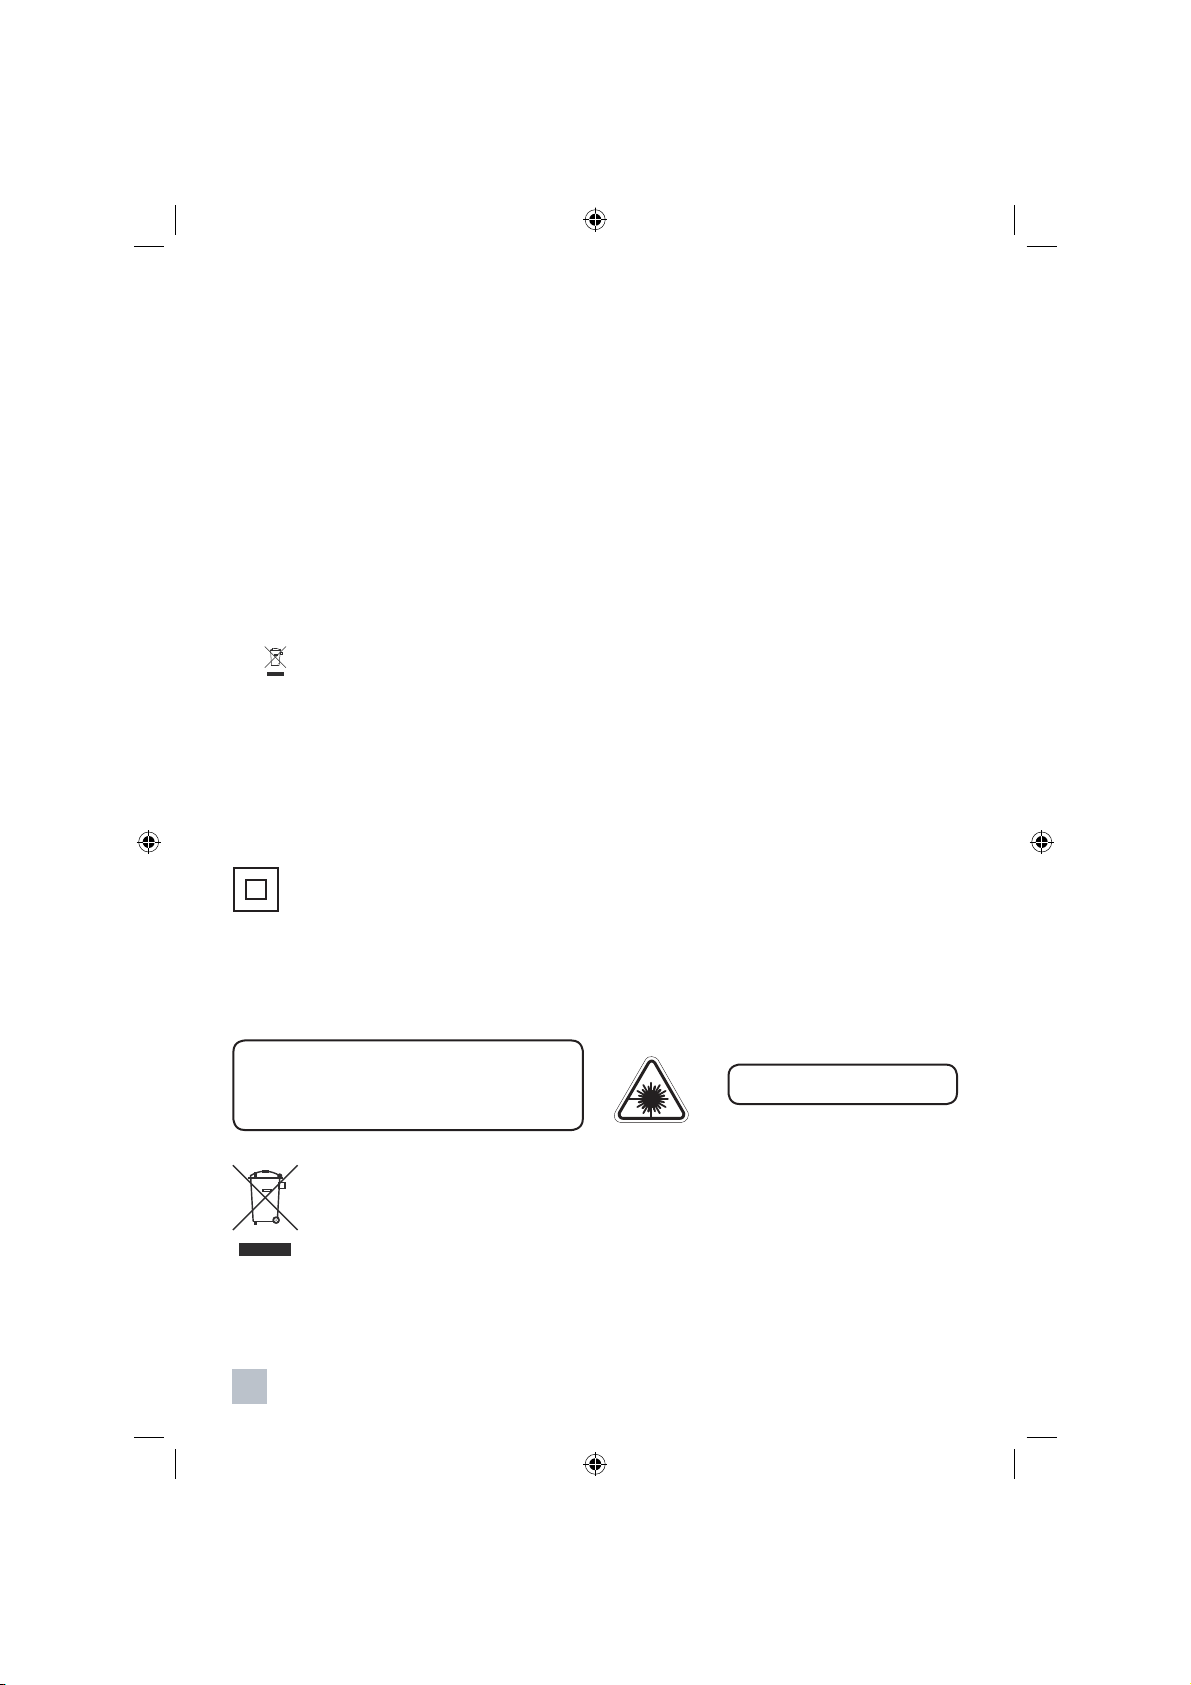
Class II construction double insulated. This product must not be connected to earth.
WARNING: DANGER OF RADIATION
These labels tell you that the unit contains a laser component. Opening the CD compartment lid and defeating the
safety interlocks will expose the user to radiation from the laser beam. Do not stare into the laser while it is operating.
CAUTION!
HAZARDOUS LASER RADIATION WHEN OPEN
AND INTERLOCK FAILED OR DEFEATED. AVOID
CLASS 1 LASER PRODUCT
EXPOSURE TO BEAM
Waste electrical and electronic products must not be disposed of with household waste. Please refer to
the retailer from whom you purchased this item for disposal instructions.
Batteries and packaging materials can be recycled using your local collection facilities.
4
Page 25

Unpacking the unit
Carefully remove the unit from the carton and
remove all packing material from the unit. Make
sure that you have all the following items:
• Main unit (x1)
• Remote control (x1)
• User manual
If any item is missing, consult your dealer
immediately
.
We suggest that you retain the original carton
and packing materials in case it is necessary
to return your unit for service. This is the only
way to protect the unit from damage in transit.
When you dispose of the carton and packing
materials, please do so properly. We care about
our environment.
Remove any descriptive labels or stickers from
the front panel of the unit. Do not remove any
labels or stickers that may be affi xed to the
bottom of the main unit or the speakers.
Precautions for the unit
Security
• Before operation, check if the voltage of the unit is
in line with the local voltage.
• Hold the plug to disconnect it from the mains outlet.
Do not pull the power cord.
• When the plug of the unit is connected to the mains
outlet, the unit will be still connected to AC even of
the power is turned off.
• Disconnect the plug as soon as liquid or objects
enter the unit. The unit cannot be used until being
checked by experts.
• Do not open the cabinet. Laser rays employed by
the unit may damage eyes. Any servicing should be
done by qualifi ed service personnel.
Placement
• Put the unit where ventilation is good enough to
prevent overheating.
• Never put the unit in direct sunlight or near heat
sources.
• To protect the pickup, do not put the unit where
there is a lot of dust. If there is dust on the pickup,
use a cleaning disc to clean it. Refer to the
operation instructions of the cleaning disc you
bought.
Condensation
• The unit is suddenly moved from a cold place to a
warm place.
• Use of the unit in a humid place.
• In these cases, the unit will not work. Unloading the
disc and leaving the unit on for about one hour will
evaporate the water, allowing the unit to function
normally again.
Cleaning
• Use a soft cloth with a little neutral detergent to
wipe the cabinet, panel and controls. Never use
abrasive paper, polishing powder or any solvent
such as alcohol or gasoline.
5
Page 26
Basic setup
1. Extend the FM antenna
• Pull out the telescopic antenna. Incline and turn the antenna. Reduce its lenghth if the signal is
too strong (very close to a transmitter).
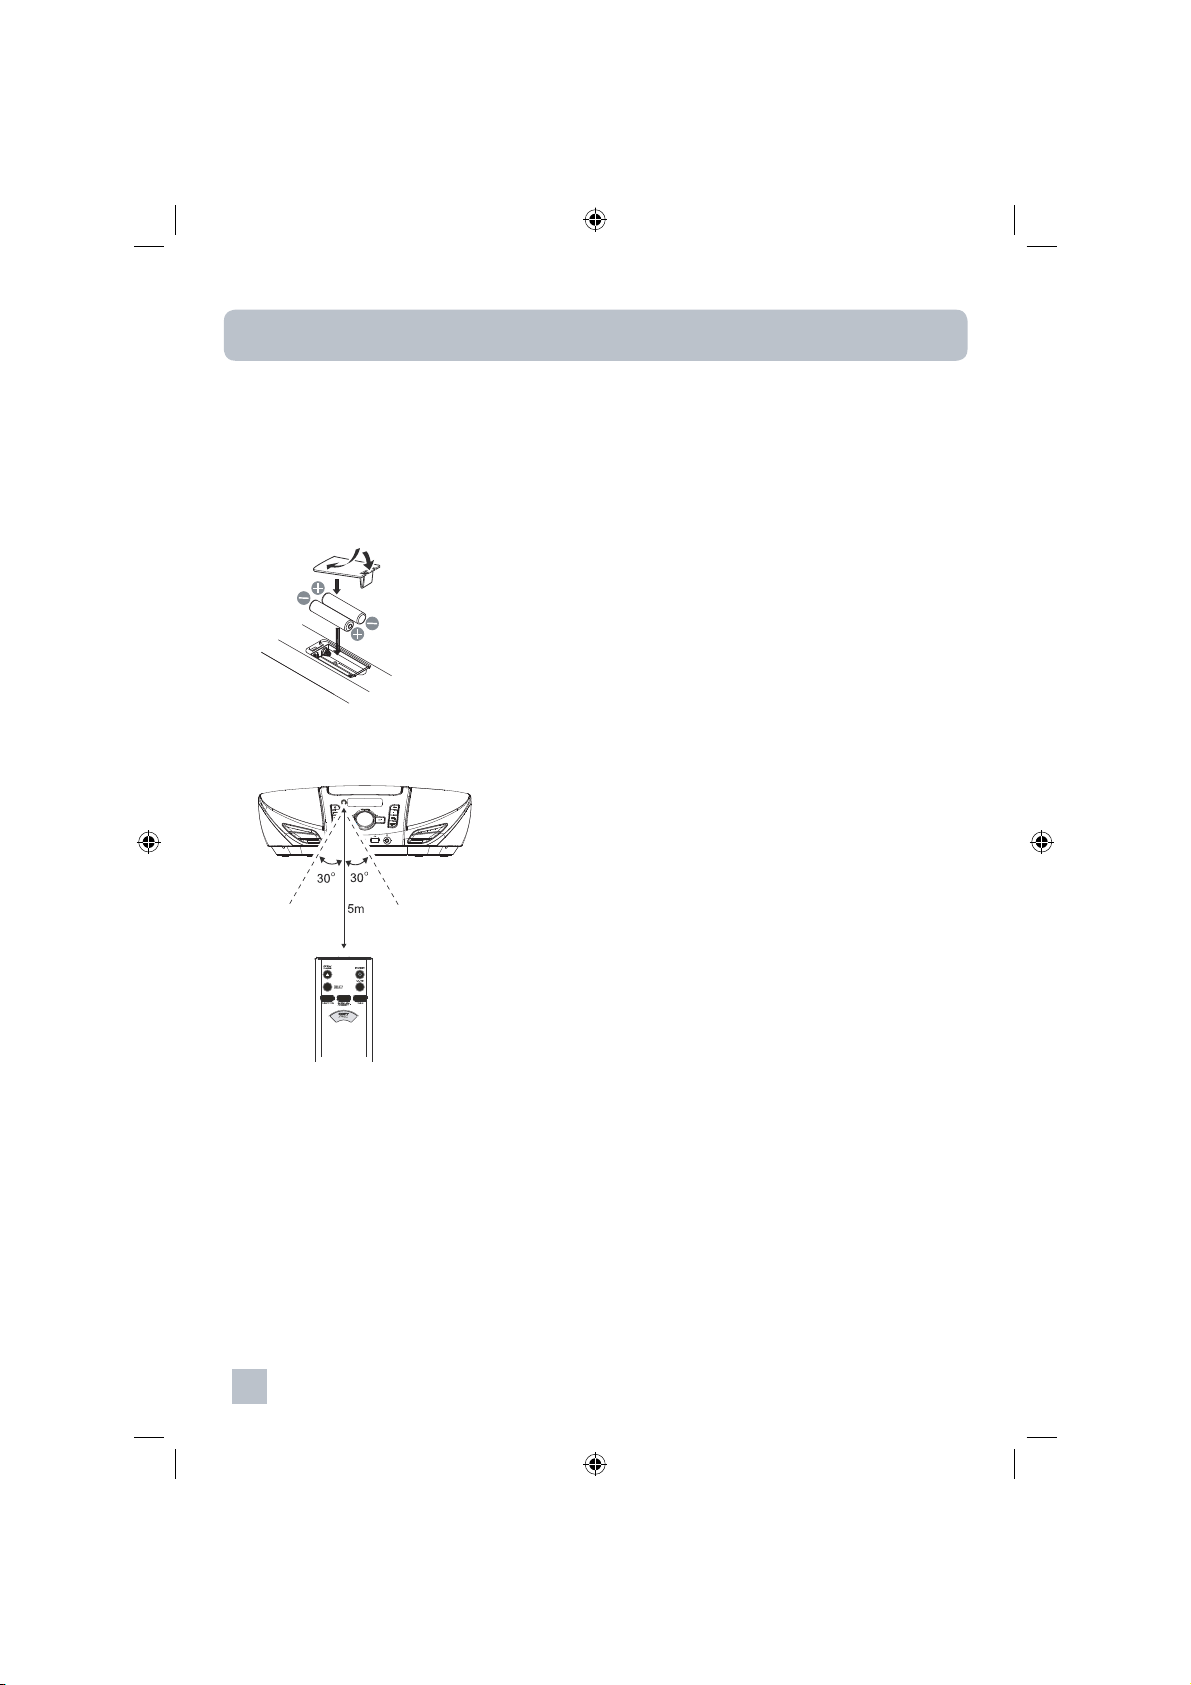
2. Insert batteries into the Remote Control
• Insert two AAA batteries into the remote control while observing the correct (+) and (-) polarities as
shown.
• Remember to replace the battery compartment door after inserting the batteries.
• The remote control range is approximately 5 metres. Keep within about 30 degrees of the remote
sensor.
3. Connect the power
• This system is designed to operate on 230V 50Hz AC house current. Connecting this unit to any
other power supply could result in damage to the unit which is not covered by your warranty.
6
Page 27
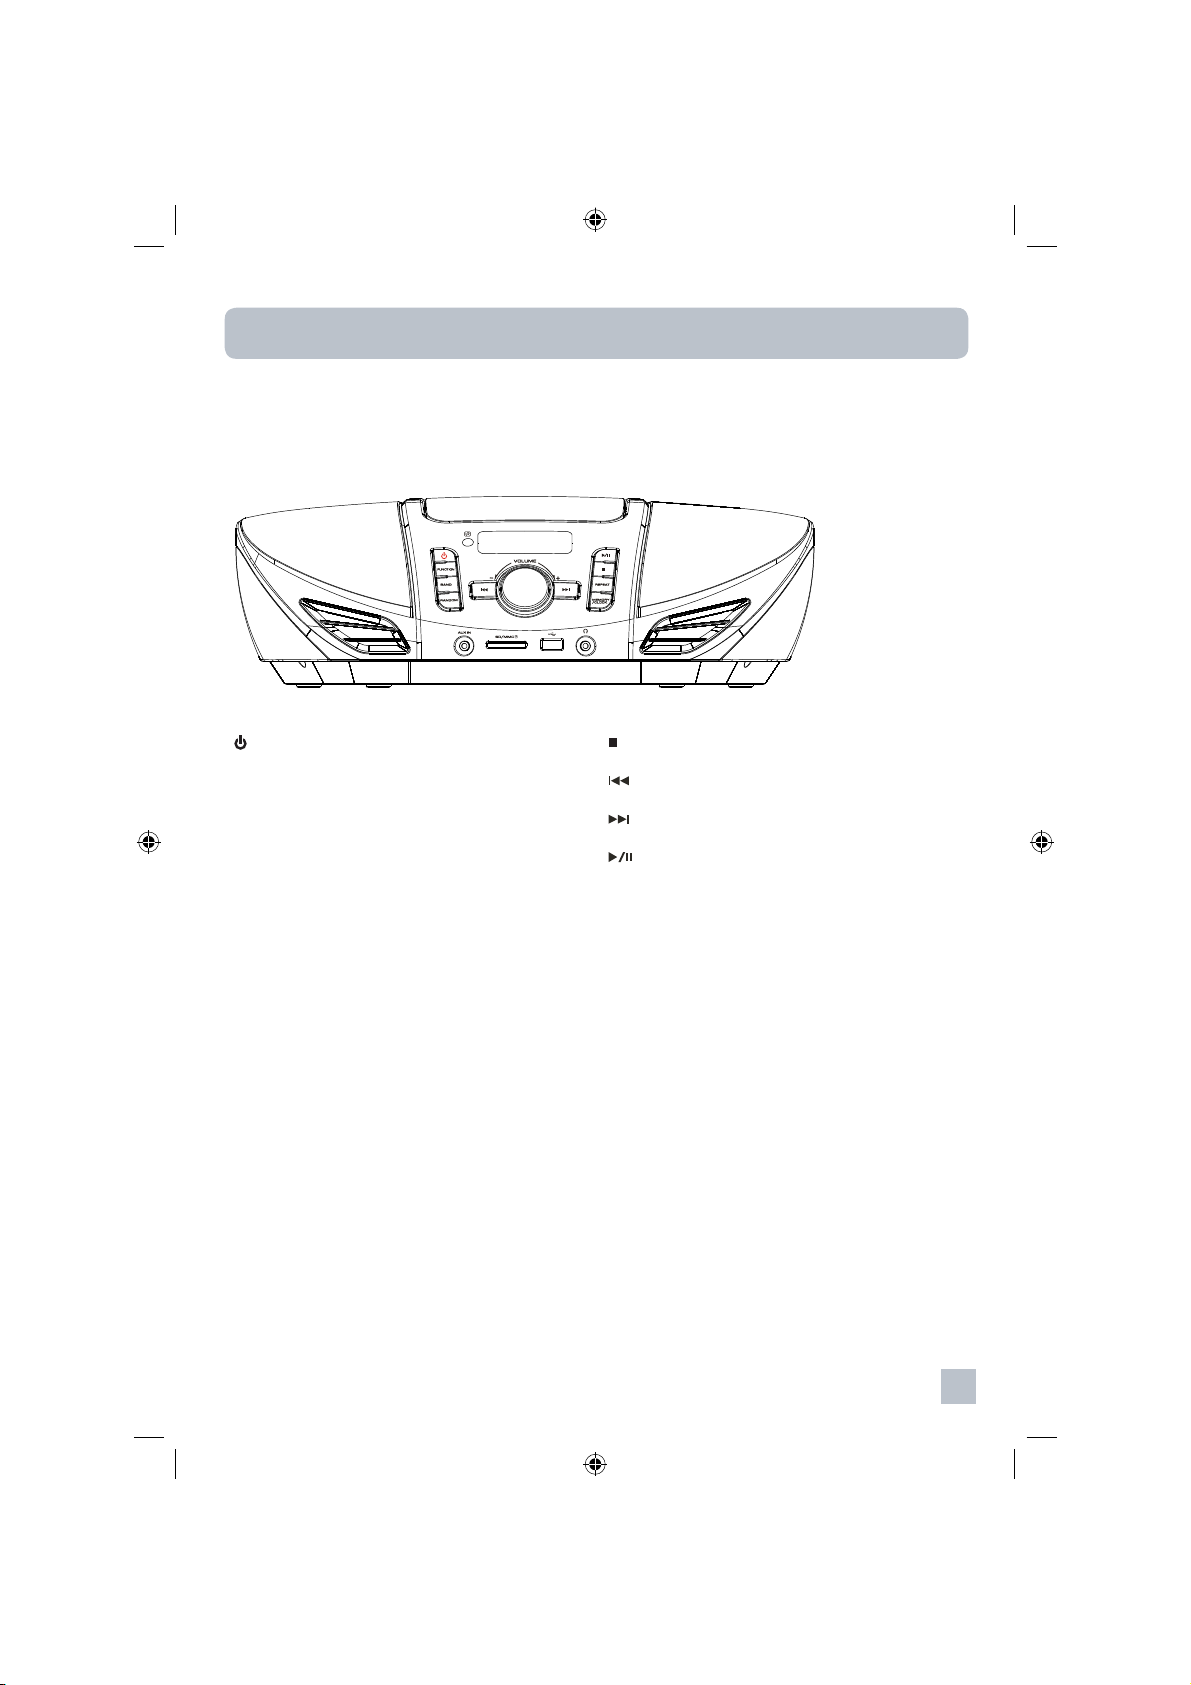
General controls
Main unit
– Turn on or off (standby) the unit
FUNCTION – Select sound source (CD, Tuner,
Card, USB,and AUX)
MEMORY/CLOCK – Store station or track into
program; adjust the clock
– select radio band
BAND
RANDOM
VOLUME– / + – Adjust volume
REPEAT
(Repeat one-Repeat album(MP3 only)Repeat all)
– select the RANDOM playback.
– Select different repeat mode
– Stop playback
– Previous, fast reverse
– Next, fast forward
– Start or pause playback
AUX IN – Auxiliary input jack
PHONES – Headphones jack
USB – USB device connector
SD/MMC – SD/MMC card slot
7
Page 28
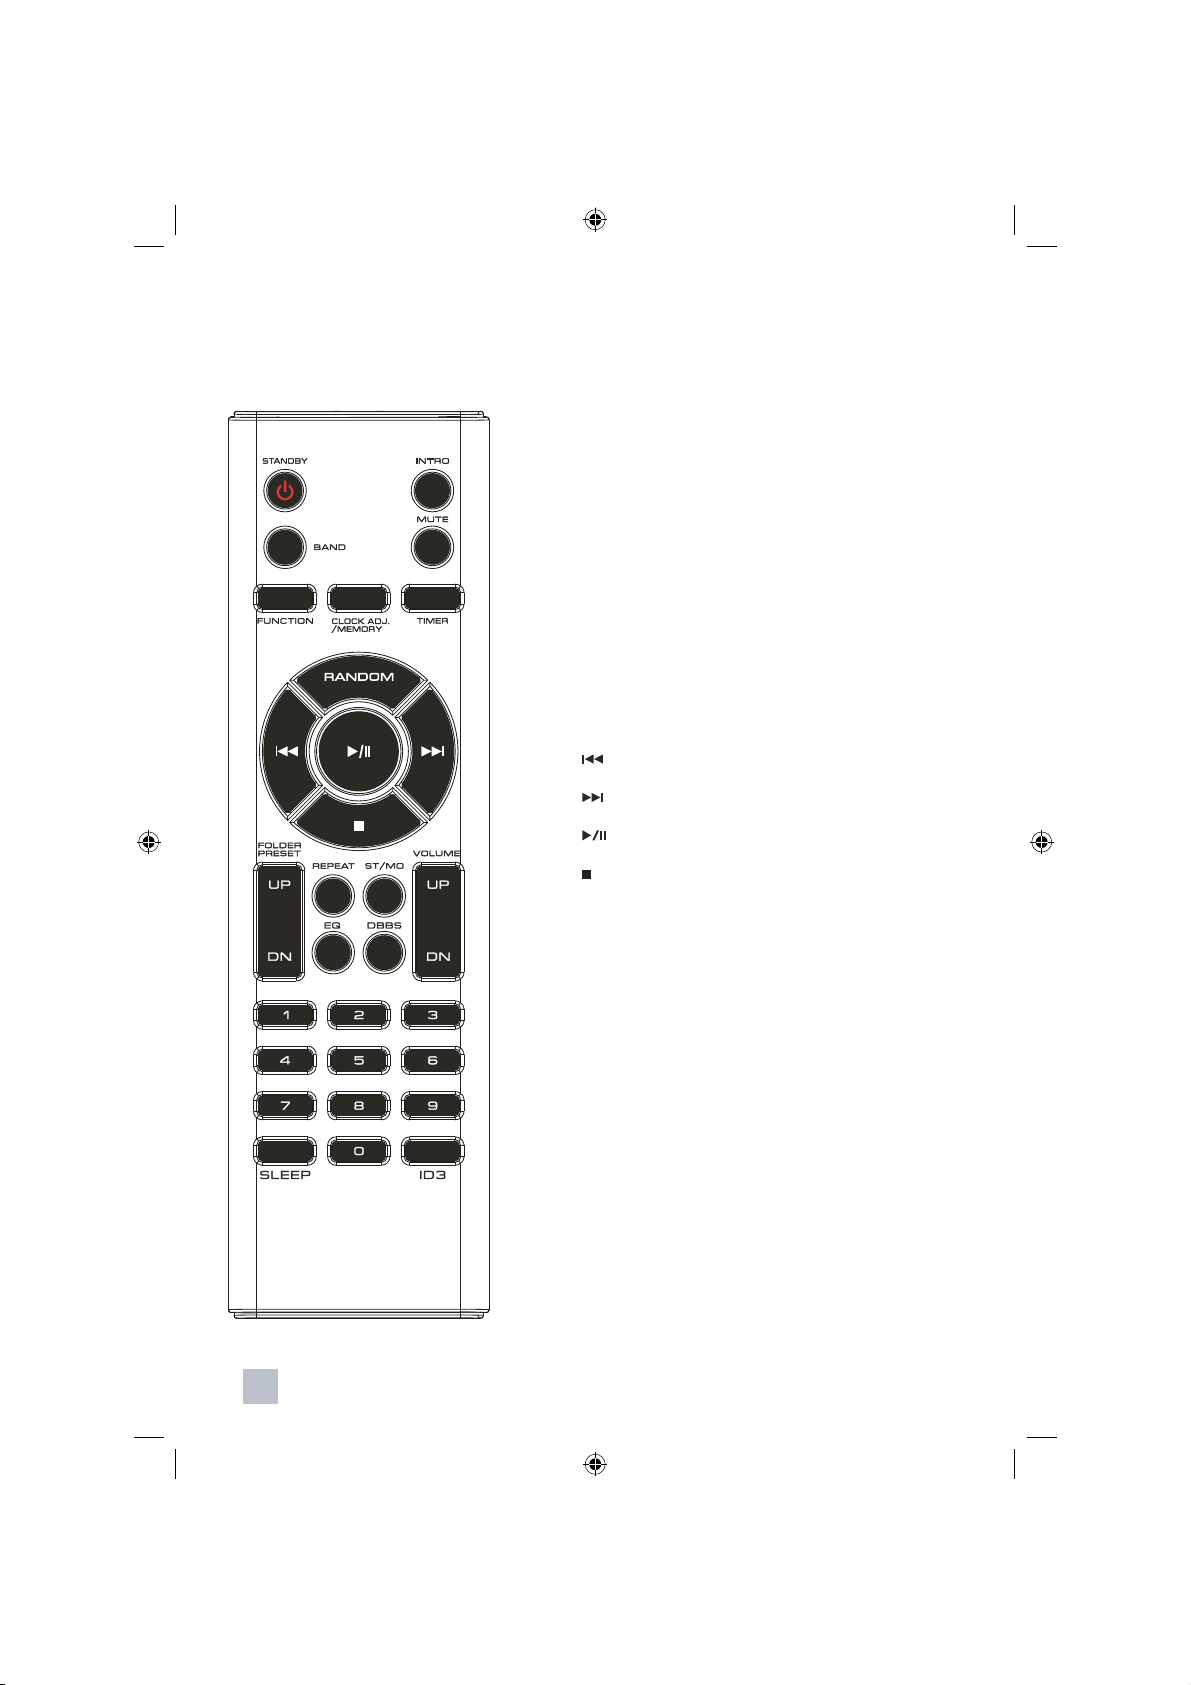
General controls
Remote control
STANDBY
INTRO
BAND
MUTE – Cut or restore sound output
FUNCTION – Select sound source (CD, Tuner,
Card, USB, M IC and AUX)
MEMORY/CLOCK – Store station or track into
program; adjust the clock
TIMER – Access timer setting mode
RANDOM – select the RANDOM playback.
– Stop playback
PRESET/FOLDER UP/DN – Select folder on MP3 discs,
USB device or memory card; select preset stations
REPEAT – Select a repeat mode during playback
– Turn on or off (standby) the unit
–Continuous plays every CD tracks for first 10 seconds.
–select radio band
– Previous, fast reverse
– Next, fast forward
– Start or pause playback
ST/MO – Select between stereo and mono sounds
in FM mode
EQ – Select a preset equalizer mode
DBBS – Turn on or off the bass boost
VOLUME UP/DN – Adjust volume
0-9 – For direct track or preset channel selection
SLEEP – Activate the sleep function
ID3 – Display information of mp3 files during
playback
8
Page 29
General controls
Switch on or off the unit
• Press STANDBY or to turn the unit on or
off (standby mode).
Control the audio output
• Rotate VOLUME - / + and press VOLUME
UP/DN to adjust the sound level. The current
volume shows on the display briefly before
returning to the previous display.
• Press EQ (Electronic Equalizer) repeatedly to
select a preset equalizer mode (Flat, Classic,
Rock, Pop and Jazz). The selected EQ mode
icon shows at the bottom of the display.
• Press DBBS to turn bass boost on or off.
When selected, DBBS icon shows at the
bottom of the display.
• Press MUTE to temporarily cut the audio
output. Press again to restore.
Clock, timer and sleep function
Clock
To set the time:
1. When the unit is turned on, press and hold
MEMORY/CLOCK. The current time appears.
Press MEMORY/CLOCK again. 12HR or 24HR
shows on the display.
2. Press or to select 12 or 24 hour time
display.
3. Press MEMORY/CLOCK to confirm.
4. Press or to set the hour time.
5. Press MEMORY/CLOCK to confirm.
6. Press
7. Press MEMORY/CLOCK. The clock time is
now set.
To show the clock time when the unit is
turned on:
• Press and hold MEMORY/CLOCK when the
unit is turned on to show the current clock
time briefly.
or to set the minute time.
9
Page 30
Clock, timer and sleep function
Timer
The unit includes a timer function to turn on and
off the unit at a specifi c time. Make sure you
have correctly set the clock time to use the timer
function.
To activate the timer:
1. When the unit is turned on, press TIMER on
the remote control.
2. When you see the message SELECT
SOURCES
to select the sound source to play when the
timer activates.
3. Press TIMER to confirm.
4. When you see the message VOL XX (where
XX is the current volume level), press
VOLUME UP or DN to set the volume level
when the timer activates.
, press FUNCTION repeatedly
8. Press TIMER to confirm.
9. Press
timer activation.
10. Press TIMER to confirm.
11. When you see the message SET OFF
TIMER, press TIMER.
12. Press or to set the hour time for the
timer deactivation.
13. Press TIMER to confirm.
14. Press
timer deactivation.
15. Press TIMER to confirm.
• The Timer is now set. The Timer icon (
lights on the display.
or to set the minute time for the
or to set the minute time for the
)
5. Press TIMER to confirm.
6. When you see the message SET ON TIMER,
press TIMER.
7. Press or to set the hour time for the
timer activation.
10
To cancel the timer:
• Press TIMER once. The Timer icon (
disappears on the display.
NOTE: Please make sure CD is available when alarm
to CD is set. If the USB device or CD/MMC card
is not available, FM will be the default source.
)
Page 31
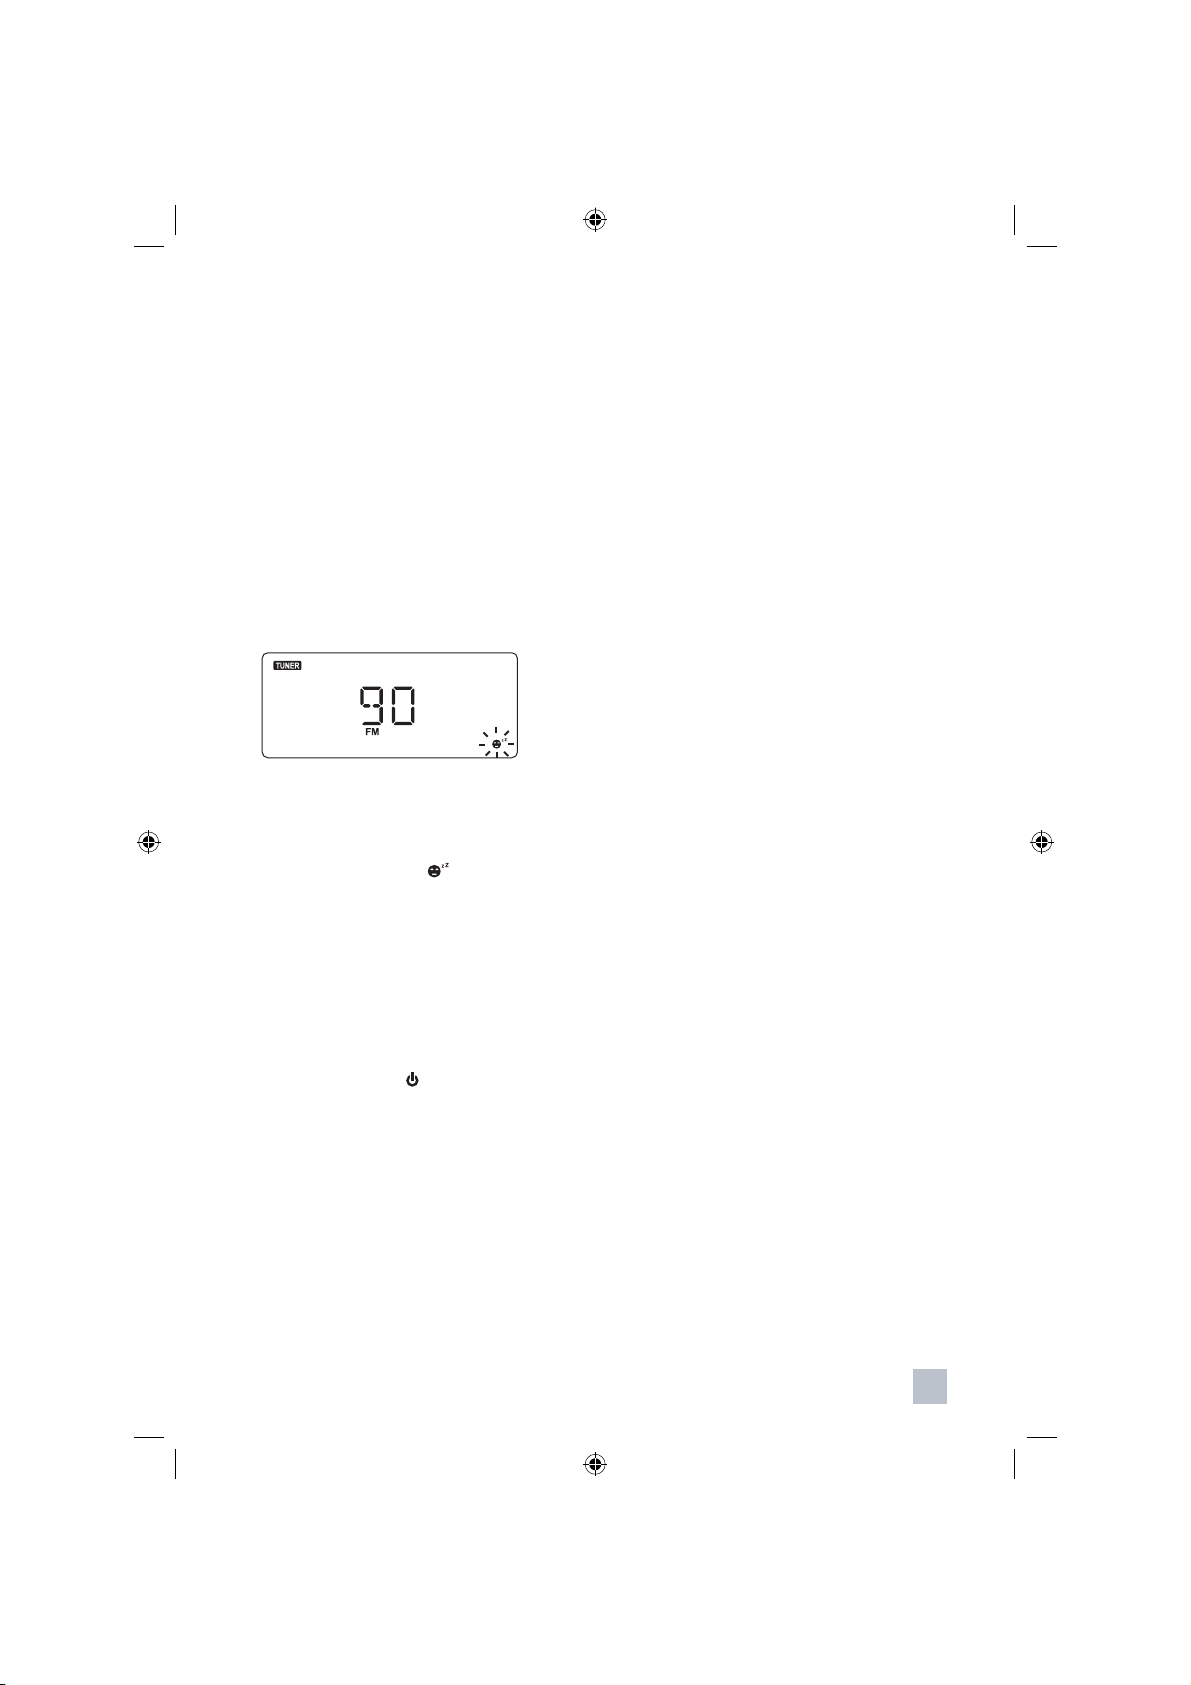
Clock, timer and sleep function
Sleep function
The unit includes a programmable sleep function
to play the unit for a set length of time before
turning off automatically.
To use the sleep function:
1. Turn on the unit and select a sound source to
play.
2. Press SLEEP repeatedly to select a
desirable length of time (90, 80, 70, 60, 50,
40, 30, 20, 10 minutes and OFF) before the
unit turns off automatically.
• Select OFF if you want to cancel this
function.
• The display will return to the previous display
after a few seconds. The sleep function is
now set. A Sleep icon (
lower right corner of the display.
• For CD mode, the unit will only operate until
the CD ends. If you set the Sleep function for
90 minutes but your CD can only run for 45
minutes, the unit will stop playback after 45
minutes.
) shows at the
3. To check the remaining time before the unit
turns off automatically, press SLEEP once.
4. Press STANDBY or
off the unit early.
if you decided to turn
11
Page 32
CD playback
Compatible disc types
This unit supports playback of CD disc of the
following types:
• CD Audio
• CD-R
• CD-RW
• The ability to play certain recordable discs
may depend on the quality or physical
condition of the disc, the quality of the
recording, or characteristics of the recording
device or software application. Playback
cannot be guaranteed in all situations. This
is not an indication of any problem with the
unit.
Compatible audio formats
• The unit supports playback of songs in CDaudio (pre-recorded CDs) and mp3 format.
This unit does not support Digital Rights
Management (DRM) and cannot play songs
purchased from iTunes or other songs in AAC
format, songs in ATRAC format or songs
purchased from some online music retailers.
It may be possible to convert your music to
one of the playable compressed formats,
or burn it to an audio CD, depending on the
DRM restrictions.
• Recorded CD discs should be created in
accordance with the ISO9660 CD-ROM
file system. The system can read media
containing up to 16 levels of directories, 99
total directories and up to 999 total files.
Chinese characters cannot be displayed
however files featuring them can be played
back. File extensions should be .mp3 or
.MP3. MP3 files are supported at 8-384kbps
encoding rate (including VBR encoding),
32/44.1/48kHz sampling rate.
CD playback operations
To access the CD mode:
• Press FUNCTION repeatedly until CD mode
is selected.
• The CD icon lights on the display when CD
mode is selected.
To start CD playback:
1. Press the CD door at the edge marked OPEN/
CLOSE to open the disc compartment door.
shows on the display
OPEN
2. Load an audio CD or data CD with MP3 files
onto the disc tray.
3. Press the CD door at the edge marked OPEN/
CLOSE to close the disc compartment door.
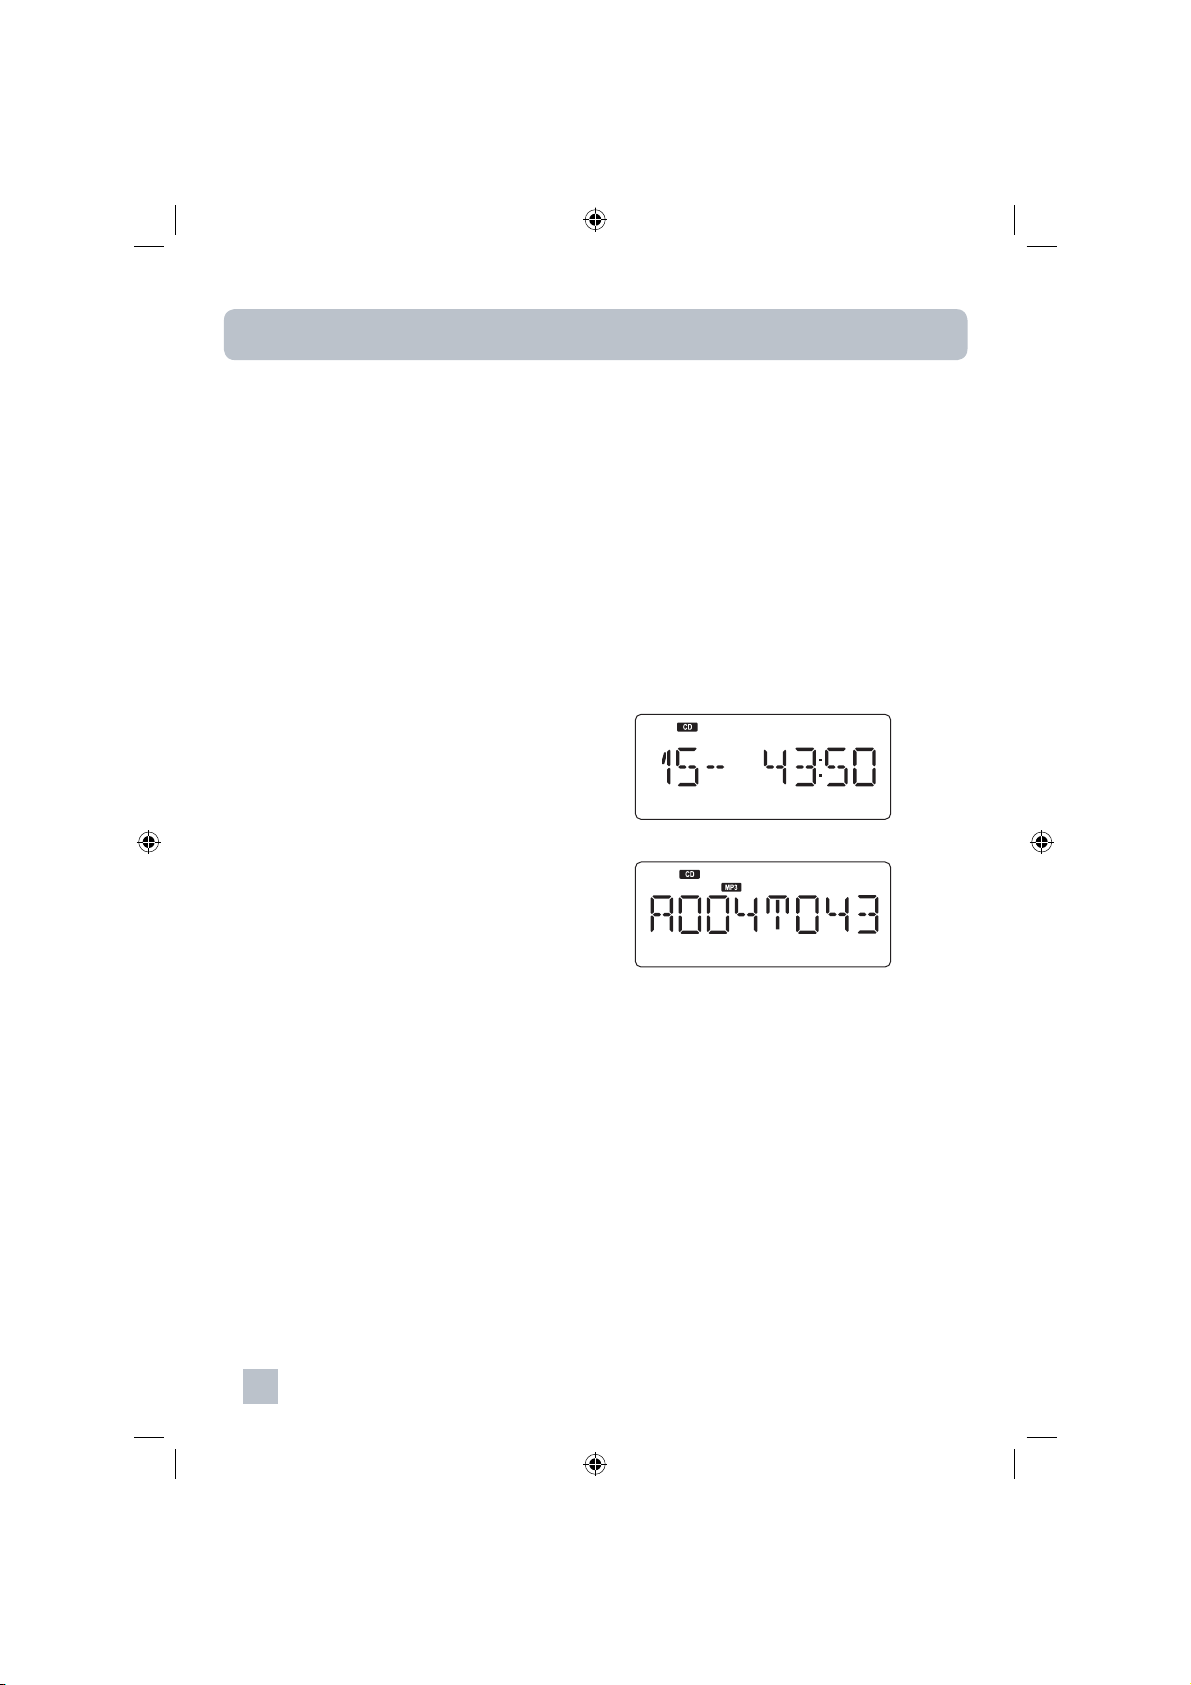
The unit should read the disc information.
Total number
of tracks
Audio CD
Total number
of folders
MP3 disc
• As MP3 discs contain much more information
than normal CDs, the unit may take longer
time to read all information from them. This
is normal and not an indication of any problem
with the unit.
Total playback time
Total number
of tracks
12
Page 33
CD playback
To operate the playback:
1. Press
2. During playback, press
again to resume.
3. Press
track.
• Use also the number buttons (0-9) to input
the track/fi le number for direct selection.
4. Press and hold or to scan backward
or forward within the same track/fi le. Release
the button to resume to playback at normal
speed.
5. Press to stop the playback.
To select a folder on a mp3 disc:
• Press FOLDER UP or DN to select a folder
on a mp3 disc. The unit will start playback
from the fi rst song in the selected folder.
To show information (ID3 tag) of mp3 fi les:
• During playback of mp3 fi les, press ID3 on
the remote control to show more information
of the current fi le.
To select a playback mode:
• Press PLAY MODE repeatedly on the remote
control to select a playback mode
Repeat one (
Repeat album* (
Repeat all (
Random (
Cancel playback mode (no icon)
• * Repeat album is only available for MP3
discs.
• The selected repeat or random mode icon will
show on the display.
to start playback.
to pause it. Press
or to skip to the previous or next
)
ALBUM )
ALL )
)
To program the playback:
The program playback mode lets you program a
total of 40 tracks in any desired order. You can
also program the same track/fi le to play several
times within a program sequence.
1. In CD mode, press
playback.
2. While playback is stopped, press MEMORY/
CLOCK.
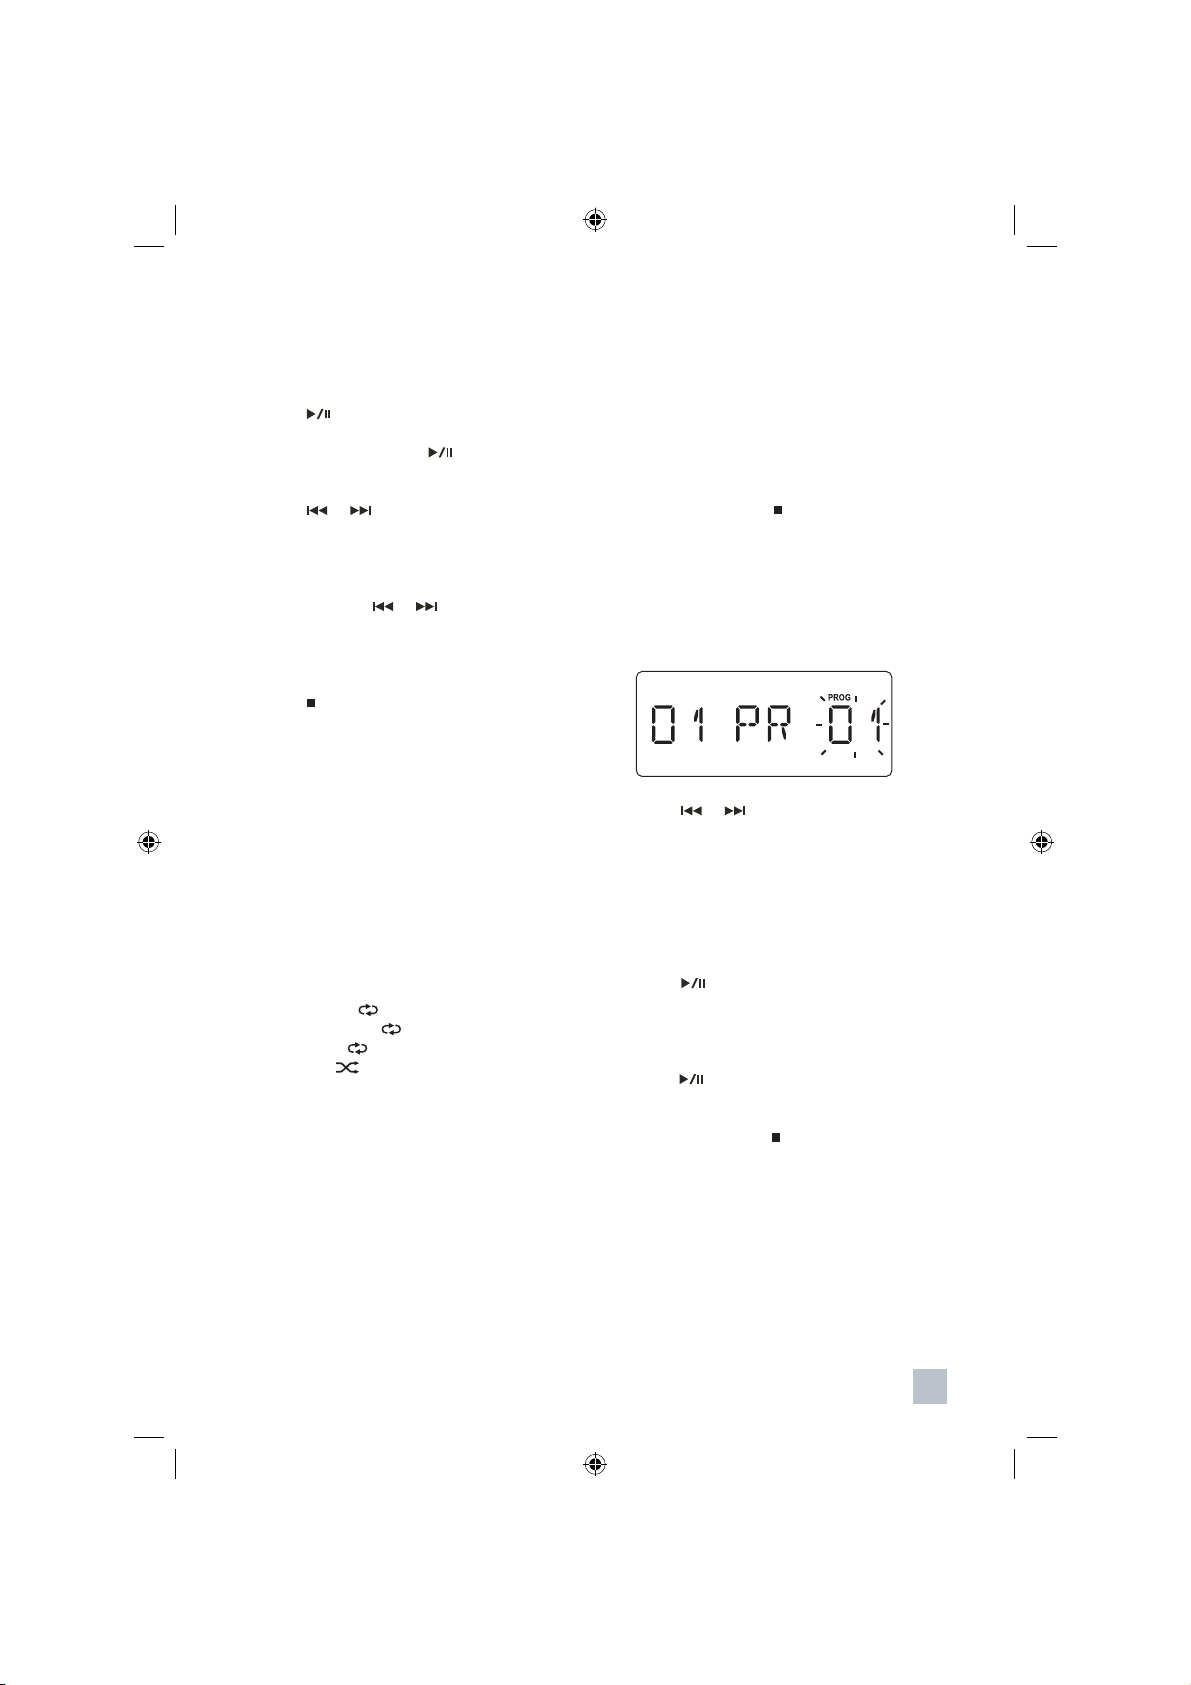
• PROG and PR01 shows on the display. PROG
stands for program mode whereas PR01
stands for the fi rst program location.
3. Press or to select the track for the fi rst
program location.
4. Press MEMORY/CLOCK to store the
selected track into the program location.
5. Repeat steps 3 and 4 to program more
tracks. Up to 40 tracks can be programmed.
6. Press
programmed tracks. Playback will stop after
all programmed tracks are played.
7. To play back the programmed tracks again,
press .
8. To cancel the programmed sequence from
the memory, press
mode, or open the disc compartment door.
• PROG disappears from the display.
to start playback of the
to stop any disc
twice in the programme
13
Page 34
Tuner
To access the Tuner mode:
• Press FUNCTION repeatedly until Tuner
mode is selected.
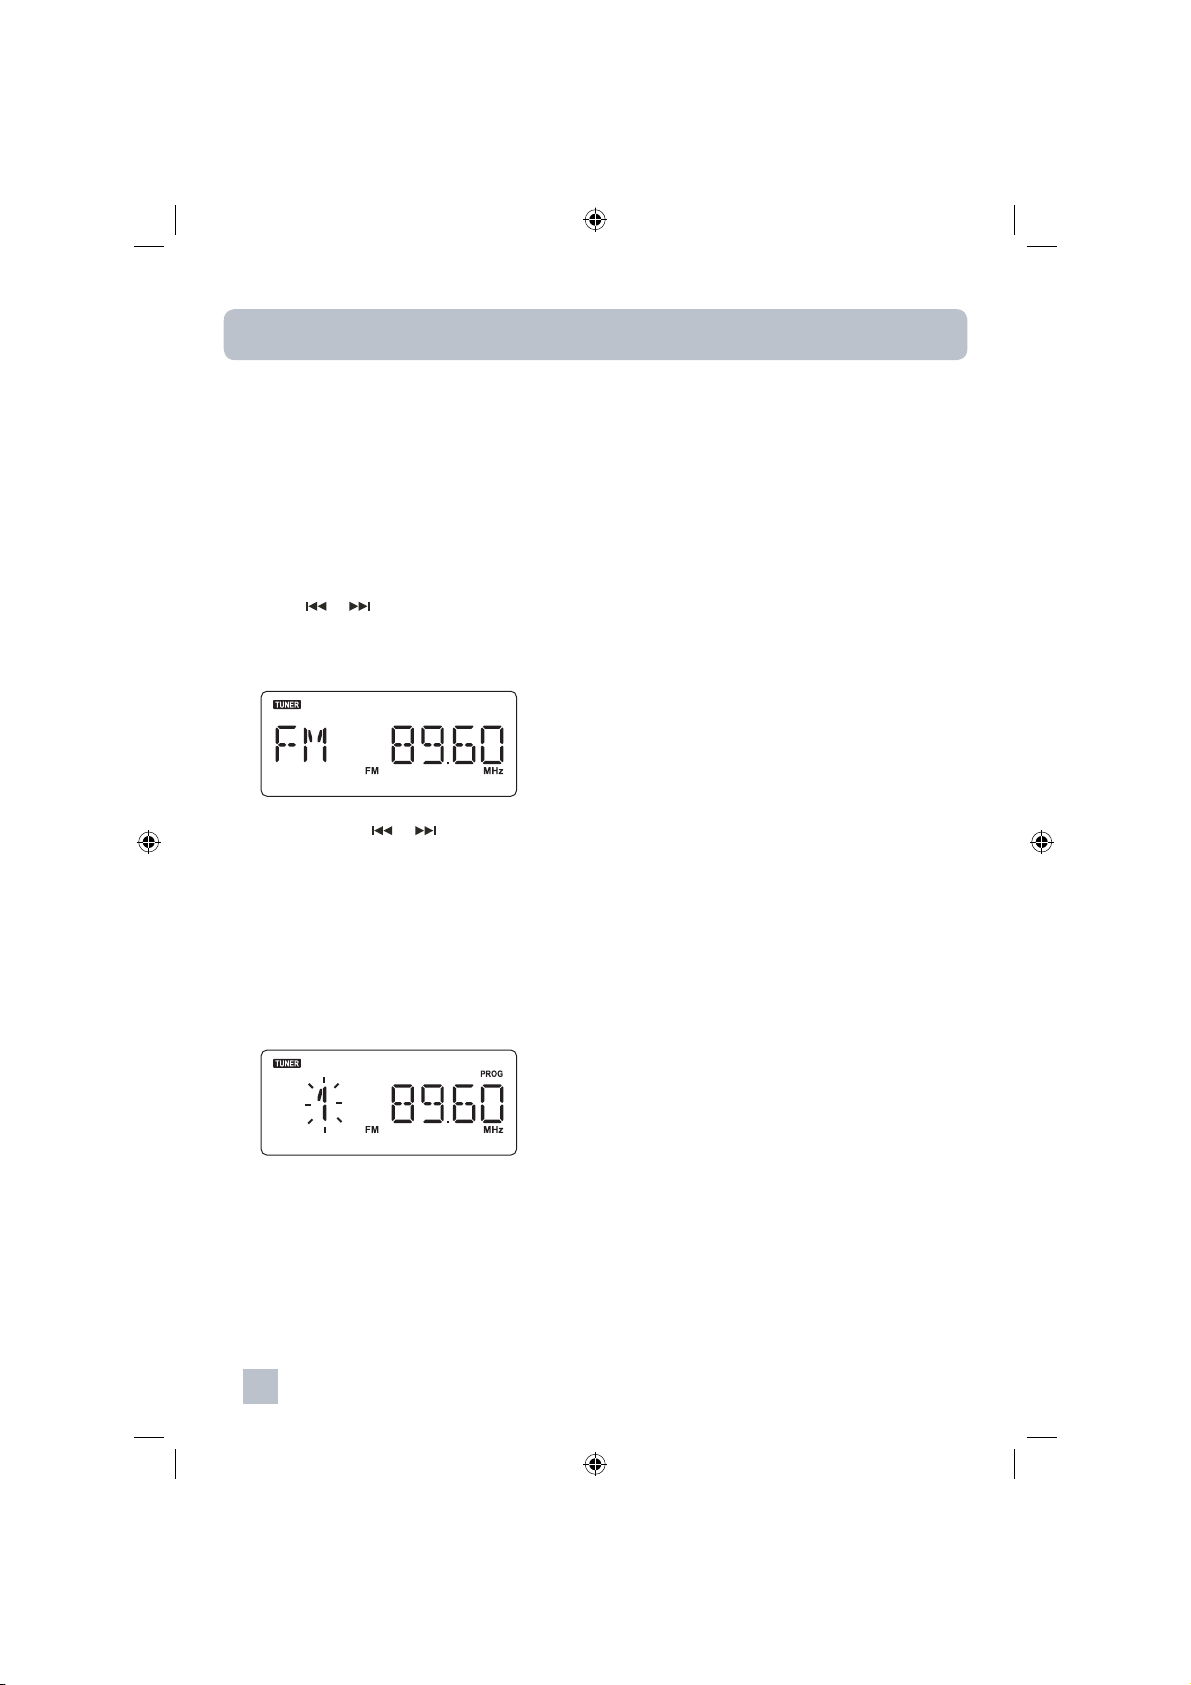
• The TUNER icon lights on the display when
tuner mode is selected.
To change tuner band:
• Press DELETE/BAND in tuner mode to
switch between FM and MW band.
To perform a station search:
• Press
Use this method to tune to weak or distant
stations that are not strong enough to be
recognized by the automatic searching.
• Press and hold or until the frequency
on the display begins to change and then
release the button to automatically search for
the next available station.
To store a station as a preset:
1. Tune to a frequency and then press
MEMORY/CLOCK.
or to adjust the frequency.
To listen to a preset station:
• In Tuner mode, press PRESET UP or DN to
select a preset number
buttons (0-9) for inputting the preset channel
number.
To turn on or off the stereo sound in FM
mode:
• Press ST/MO on the remote control to turn
on or off the stereo sound.
, or press the number
Antenna
FM antenna
• Pull out the telescopic atenna. Incline and turn
the antenna. Reduce its length if the signal is
too strong(very close to a transmitter).
AM antenna
• The set is provided with a built-in antenna.
Direct this
antenna by turning the whole set.
2. Press PRESET UP or DN on the remote
control to select a preset channel number.
• You can save up to 30 channels in FM band
and 10 channels in MW band.
3. Press MEMORY/CLOCK.
14
Page 35
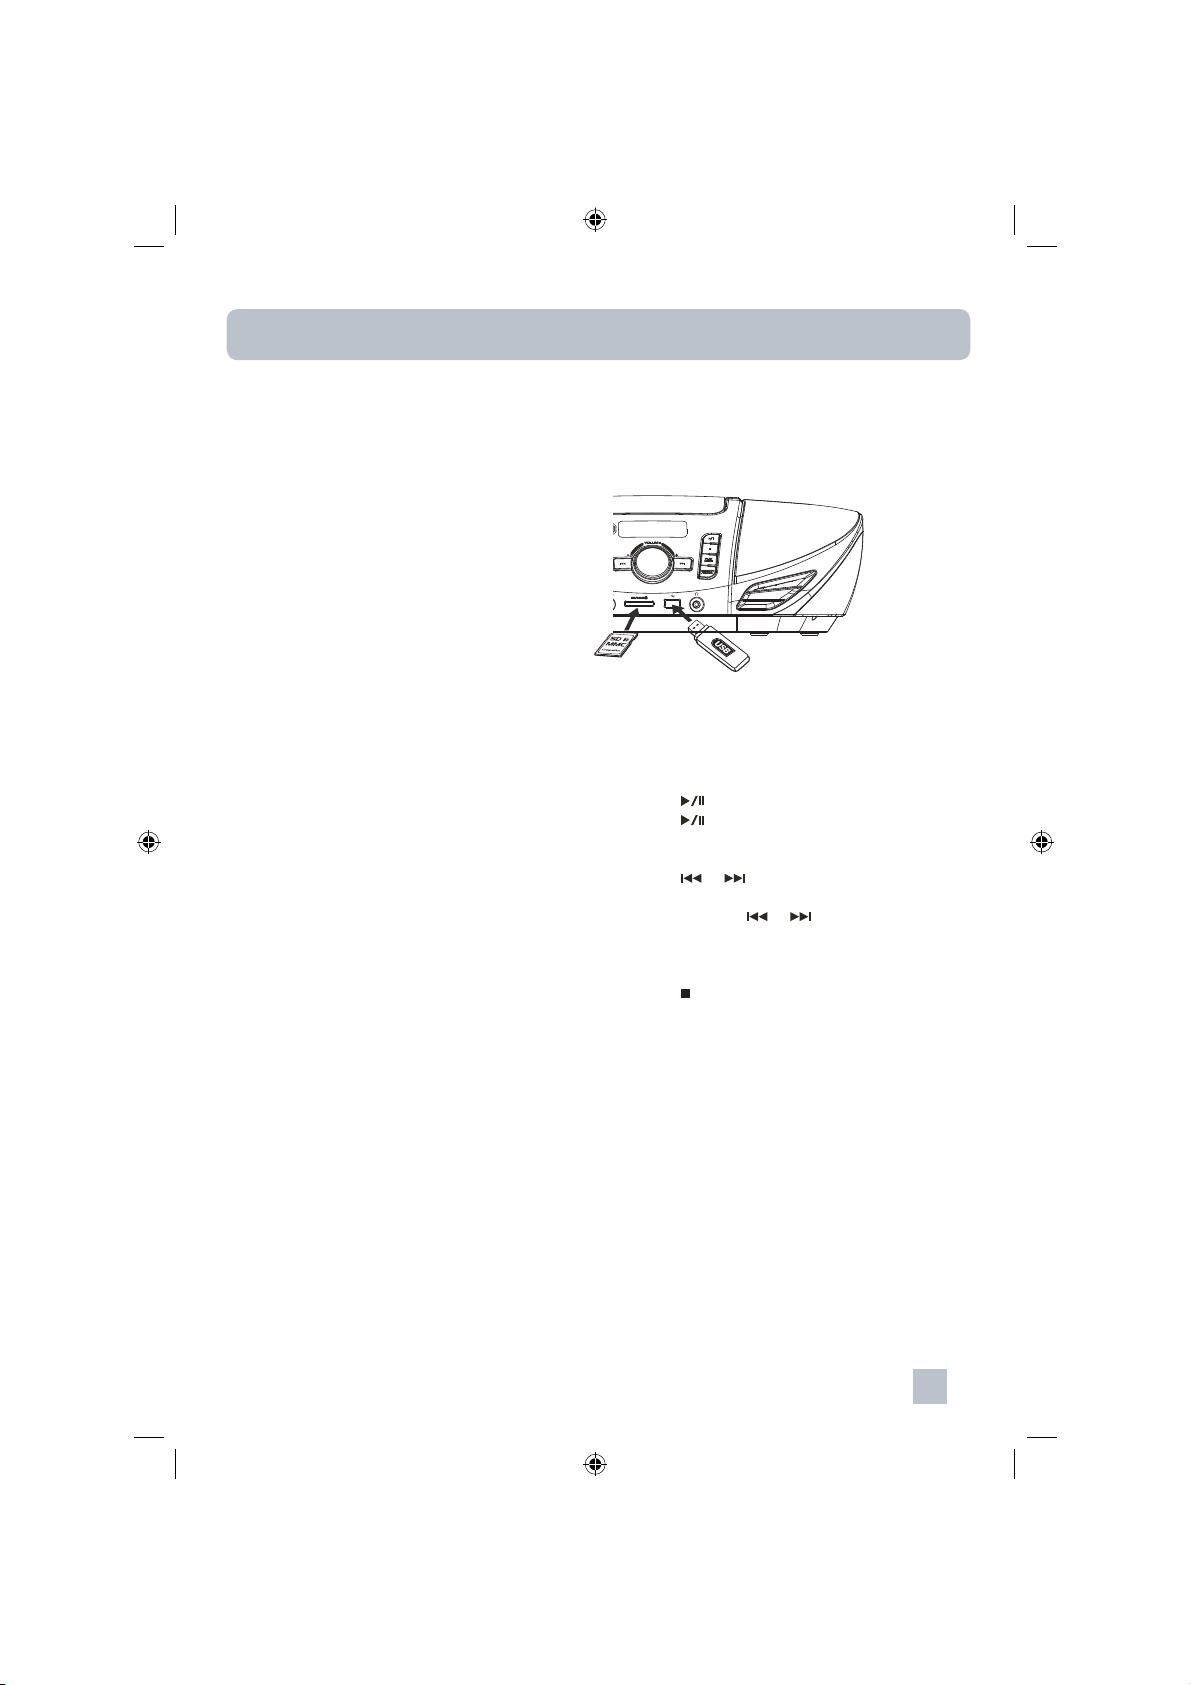
USB and SD/MMC
You can play back MP3 fi les stored on a USB
device or SD/MMC card connected to the unit.
The USB port/memory card slot on this system
enables playback of songs only in MP3 format.
It cannot play songs purchased from iTunes or
other songs in AAC format, songs in ATRAC
format or songs purchased from some online
music retailers. It may be possible to convert
your music to one of the playable compressed
formats, or burn it to an audio CD, depending on
the DRM restrictions.
Compatible storage device
This unit supports playback of music from fl ash
USB drive and memory card (as below).
• Secure Digital
• miniSD
• microSD
TM
TM
(SD)
(with adapter only)
TM
(with adapter only)
• Multimedia Card (MMC)
• Do not attempt to insert memory cards other
than those indicated above. This may cause
damage to the memory card or the unit.
• This player is designed to play media from
SD/MMC card devices and from USB fl ash
memory devices that comply with the USB
Mass Storage standard. Playback of media
from USB connected devices such as
mp3 players that generally require drivers
for interaction with a PC is not supported.
Playback from all physically compatible
fl ash devices cannot be guaranteed in all
situations. This is not an indication of any
problem with the unit.
USB, SD/MMC playback operations
To access the USB or SD/MMC mode:
• Press FUNCTION repeatedly on the main
unit until USB or CARD (for SD/MMC) mode
is selected.
• The USB or CARD icon lights on the display
when USB or Card mode is selected.
To connect USB device or SD/MMC card to
the unit:
• Insert a USB device or an SD/MMC card
gently to the connector or card slot at the
front of the unit.
To browse and listen to a music fi le:
Once connected, the unit will search for mp3
fi les.
1. Press
2. Press
to start playback.
to pause the playback, press again
to resume.
3. Press FOLDER UP or DN to select a folder.
4. Press
or to skip to the previous or next
fi le.
5. Press and hold
or to scan backward
or forward within the same fi le. Release
the button to resume to playback at normal
speed.
6. Press
to stop the playback.
Other playback features:
• Repeat playback
• Random playback
• Program playback (up to 40 fi les)
The operation procedures are the same as CD
playback. Refer to page 13-14 for details.
To disconnect the USB device or SD/MMC
card:
• Simply unplug the USB device from the
connector or remove the SD/MMC card from
the card slot.
15
Page 36

Auxiliary input
To connect and listen to your auxiliary
source:
1. Connect your auxiliary source (e.g. mp3
player) to the AUX IN jack at the front of the
unit.
2. Turn on the unit and your auxiliary source.
3. Press FUNCTION repeatedly to select AUX
mode to listen to the audio input from the
auxiliary source.
• The AUX indicator shows on the display
when AUX mode is selected.
4. Adjust the auxiliary source to mid-range
volume and adjust the master volume on the
unit.
• Do not turn the volume of the auxiliary source
too high as this may affect the sound quality.
• For other playback controls, control them on
your auxiliary source.
16
Page 37

Troubleshooting tips
General
No power
• AC connection is not complete. Check all
cords and cables.
Unit does not respond to key presses
• The built-in microprocessor may malfunction
due to external electrical interference. Unplug
the AC power cord and then plug it back in.
Unable to operate the unit from the remote
control
• Make sure there is no obstacle between the
unit and the remote control.
• Move closer to the unit.
• The batteries are exhausted. Replace the
batteries.
No sound is heard
• Volume is too low. Increase the volume.
• Headphones are connected.
Disc playback
Disc does not play
• Check that the CD is in the tray.
• Check that the CD label is facing up.
• Check that pause mode is not on.
• Check that the CD function is selected.
CD sound skips
• Clean the disc.
• Check the disc for warping, scratches, or
other damage.
• Check if something is causing the unit to
vibrate. If so, move the unit.
Radio
Poor radio reception
• The FM antenna is not properly extended
and positioned. Extend completely and try
another position.
• Turn off nearby electrical appliances, such as
hair dryer, vacuum cleaner, microwave and
fl uorescent lights.
USB, SD/MMC
Cannot play back music fi les on connected
USB or SD/MMC card
• Make sure USB device or SD/MMC card is
securely connected.
• Digital Right Management (DRM) type music
fi les will not be played.
17
Page 38
Care and maintenance
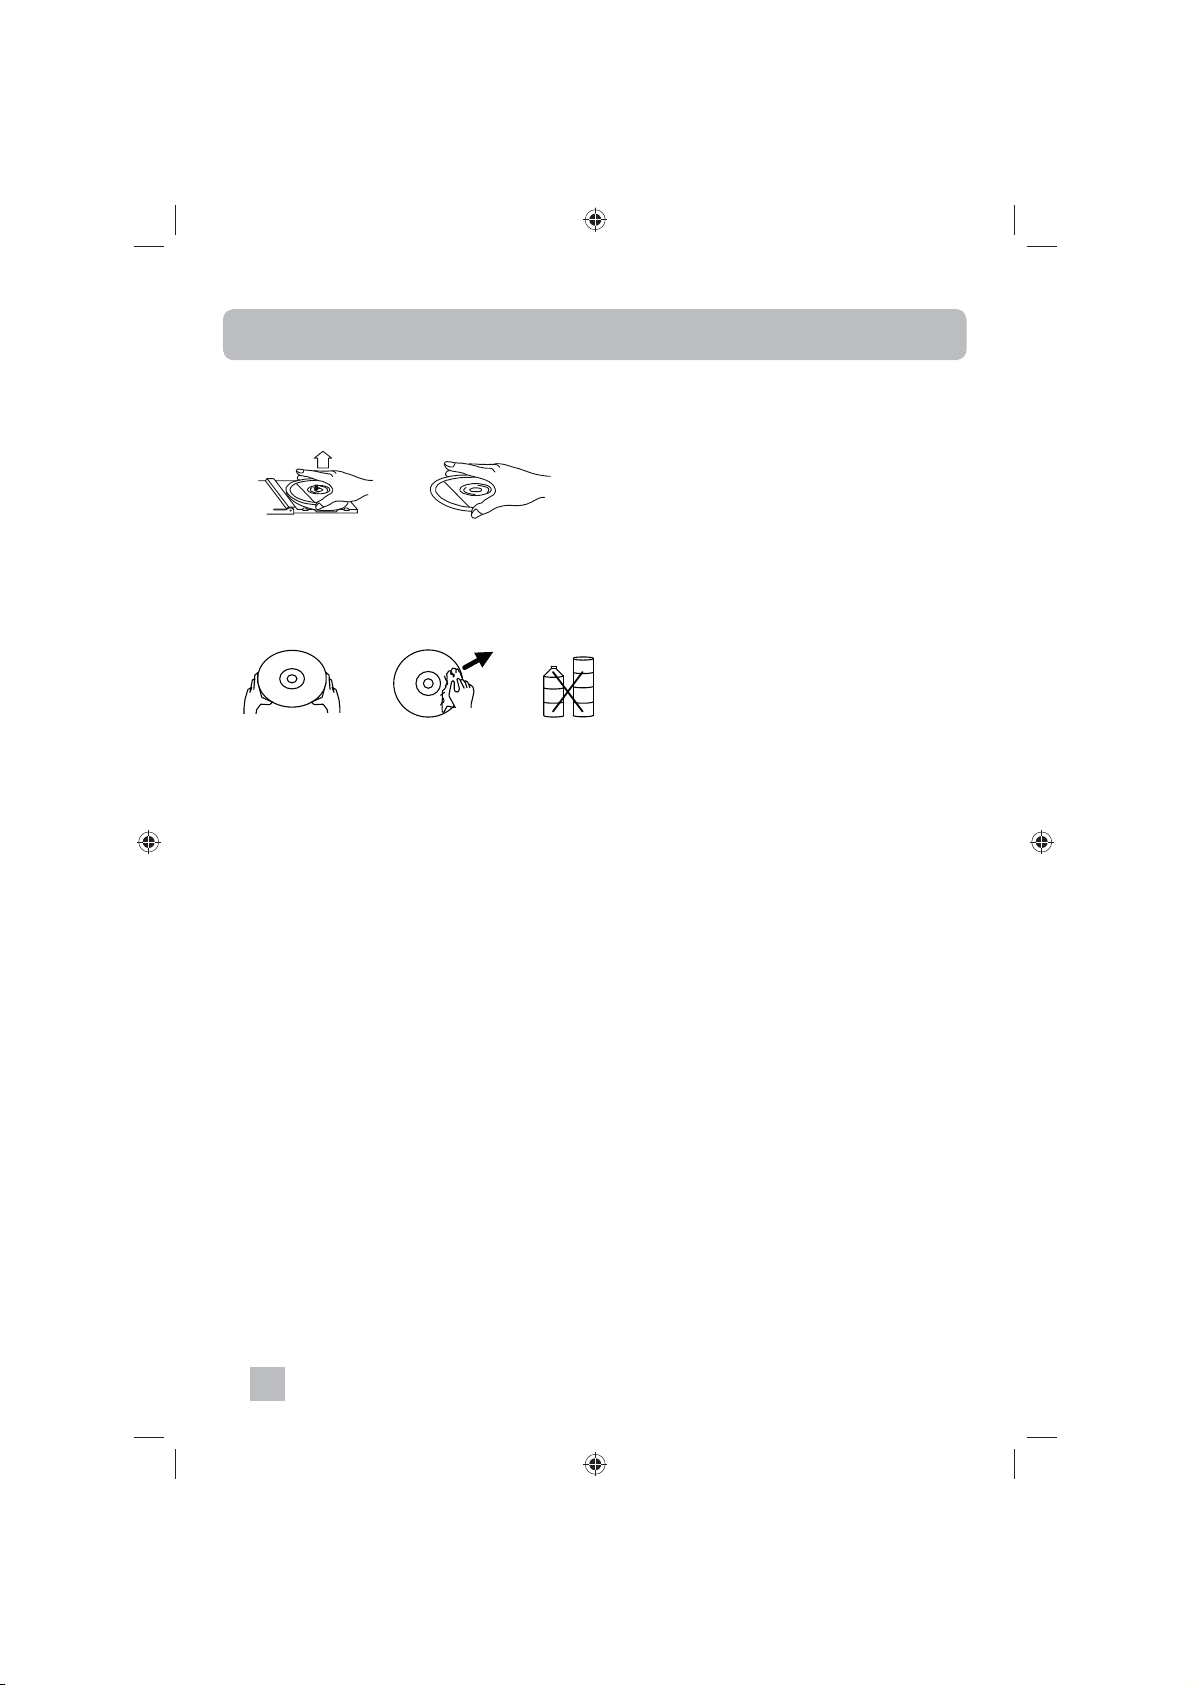
Compact Disc Care
To remove a disc from its storage case, press down on the center of the case and lift the disc out,
holding it carefully by the edges.
Finger prints and dust should be carefully wiped off the disc’s recorded surface with a soft cloth. Unlike
conventional records, compact discs have no grooves to collect dust and microscopic debris, so gently
wiping with a soft cloth should remove most particles. Wipe in a straight line from the inside to the
outside of the disc. Small dust particles and light stains will have absolutely no effect on reproduction
quality.
Clean the disc periodically with a soft, lint-free, dry cloth. Never use detergents or abrasive cleaners
to clean the disc. If necessary, use a CD cleaning kit. Never write on or af x labels to the surface of
compact discs.
Care of the cabinet
If the cabinet becomes dusty, wipe it with a soft dry dust cloth. Do not use any wax, polish sprays, or
abrasive cleaners on the cabinet.
Caution
Never allow any water or other liquids to get inside the unit while cleaning.
18
Page 39
Technical specifi cations
1. General
Power requirements
Power consumption
230V AC, 50 Hz
30W (operation)
1.5W (standby)
Weight of main unit with 2 speakers
2. Amplifi er section
Power Output
3. Tuner
FM Tuning range
MW Tuning range
Preset memory stations
4. CD player section
Playback system
DAC
Frequency response
5. Card/USB Section
Flash memory card support
USB Support
6. Speaker system
Speakers
Impedance
2.65 Kg
2 x 3.5 Watt RMS
87.5 MHz to 108 MHz
522 KHz to 1620 KHz
FM: 30, MW: 10
Compact Disc Digital Audio
8 times over sampling,
1 bit D/A converter.
100 - 20,000 Hz
MMC up to 2GB; SD up to 8GB
Flash Storage Device up to 16 GB
2 Way 2 Speakers
4 ohms
19
Page 40

 Loading...