

Page 1
!
MANUAL
101414 - LS-120 Videoprocessor
Highlite International B.V. – Vestastraat 2 – 6468 EX – Kerkrade – the
Netherlands
NARROW CAST FUNCTION EXPLAINED
Page 2
In order to use the narrow cast function inside the LS-120 it’s neccesary to upload the content to
the SD card or USB stick. LS-120 will not autoplay content from the SD card or USB stick without
preparing the content with the LS-120 software.
These are the steps you need to follow in order to play content from your SD card or USB stick.
-
Format the SD card or USB stick and use FAT32
-
Insert the SD card or USB stick inside the LS-120 (backside)
-
Install the LS-120 software (Windows only)
-
Make sure the LS-120 and the computer are connected to the same network and are in the
same IP range, in our test we used IP 192.168.1.2 for our computer, 192.168.1.254 for our
router and 192.168.1.200 for the LS-120
-
Install the LS-120 software
-
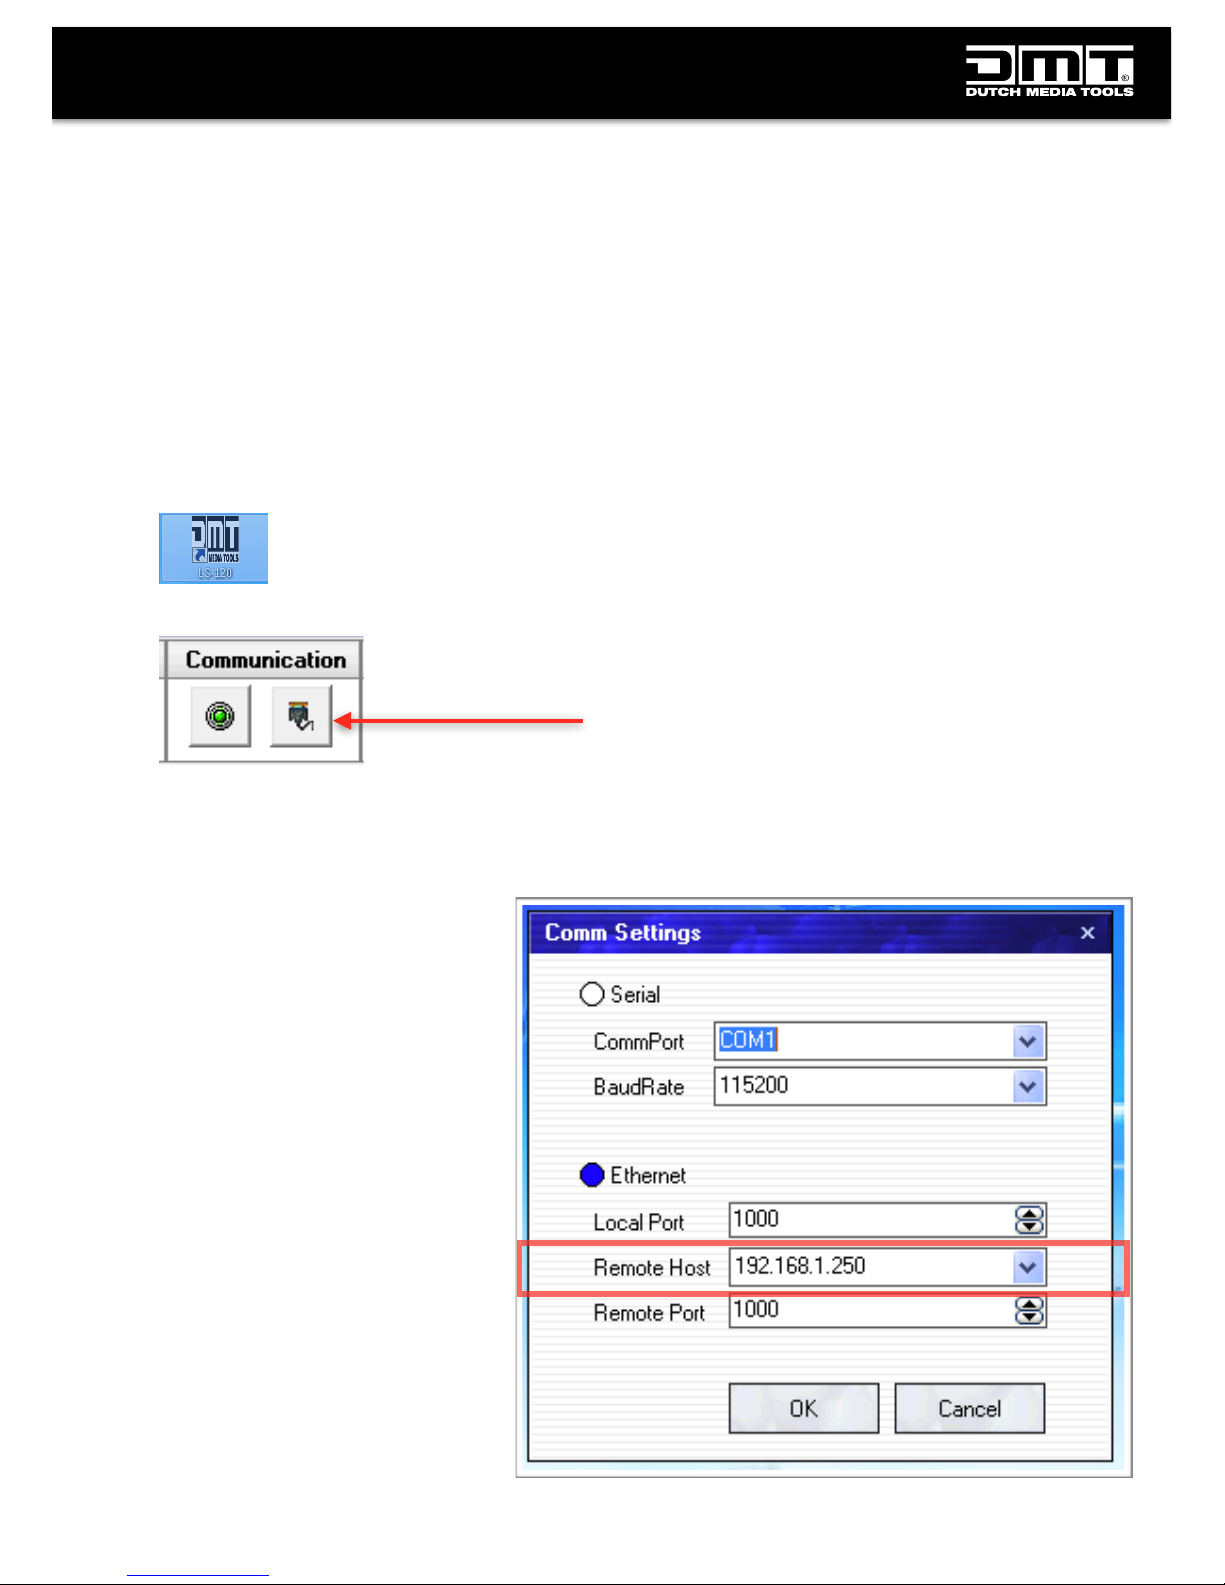
Double click the LS-120 icon to start the software
-
Now set the proper ip of the LS-120. In able to do this you need to click the following button:
-
The following screen will open and you can set the IP adress of your LS-120:
set the ip address of the LS-120 here, you
can find the ip adress by clicking the
“menu” button on the front panel and go to
<system>, <ethernet> <ip adress>
Click “Ok” when done
101414 - LS 120 how to upload content
Page 3
-
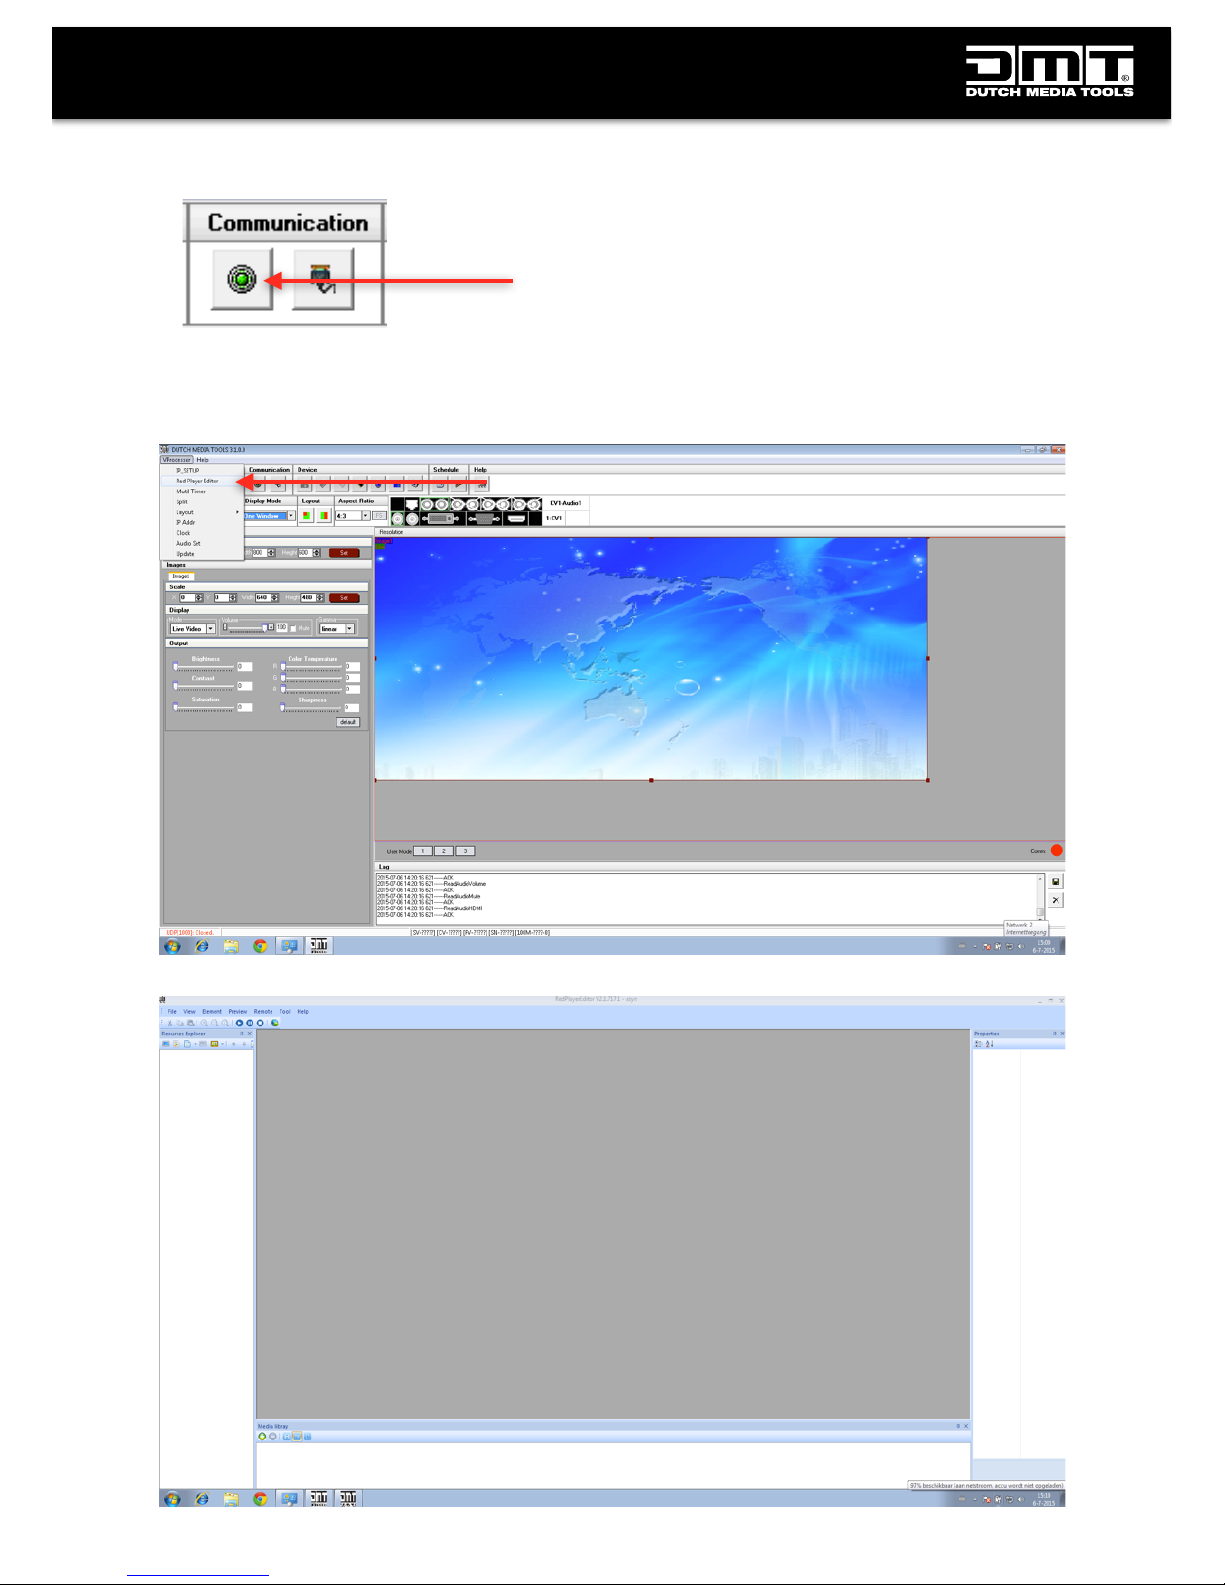
Next you need to open the communcation with the LS-120, to do so push this button:
-
When communication with the LS-120 is estabilist, you need to open the “Red Player Editor”
software to create the “program” which contains the video or image files you want to upload. To
do so, open the “Red Player Editor” from the file menu:
101414 - LS 120 how to upload content
Page 4
-
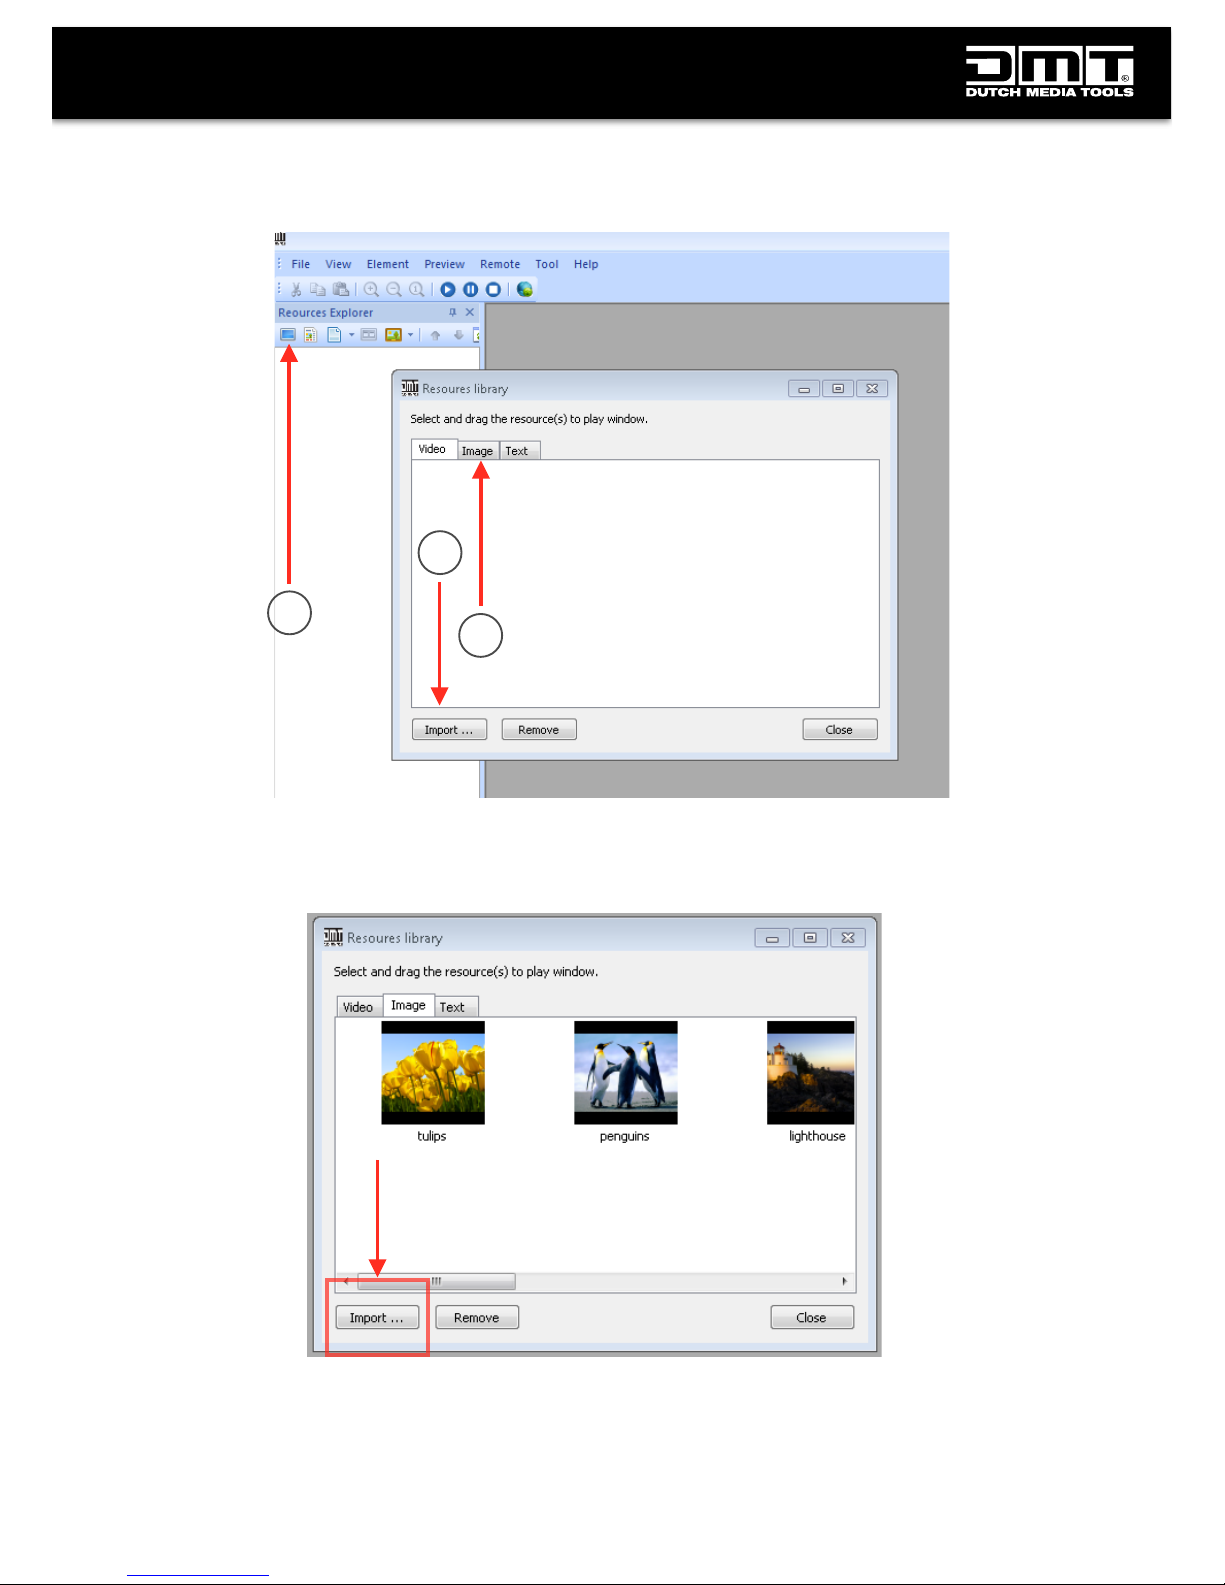
First step in the Red Player Editor is to import files, in this manual we only use images. Click the
icon to open the import screen:
-
Look for the images that you want to use in your program, select and import them:
101414 - LS 120 how to upload content
2
3
Page 5
-
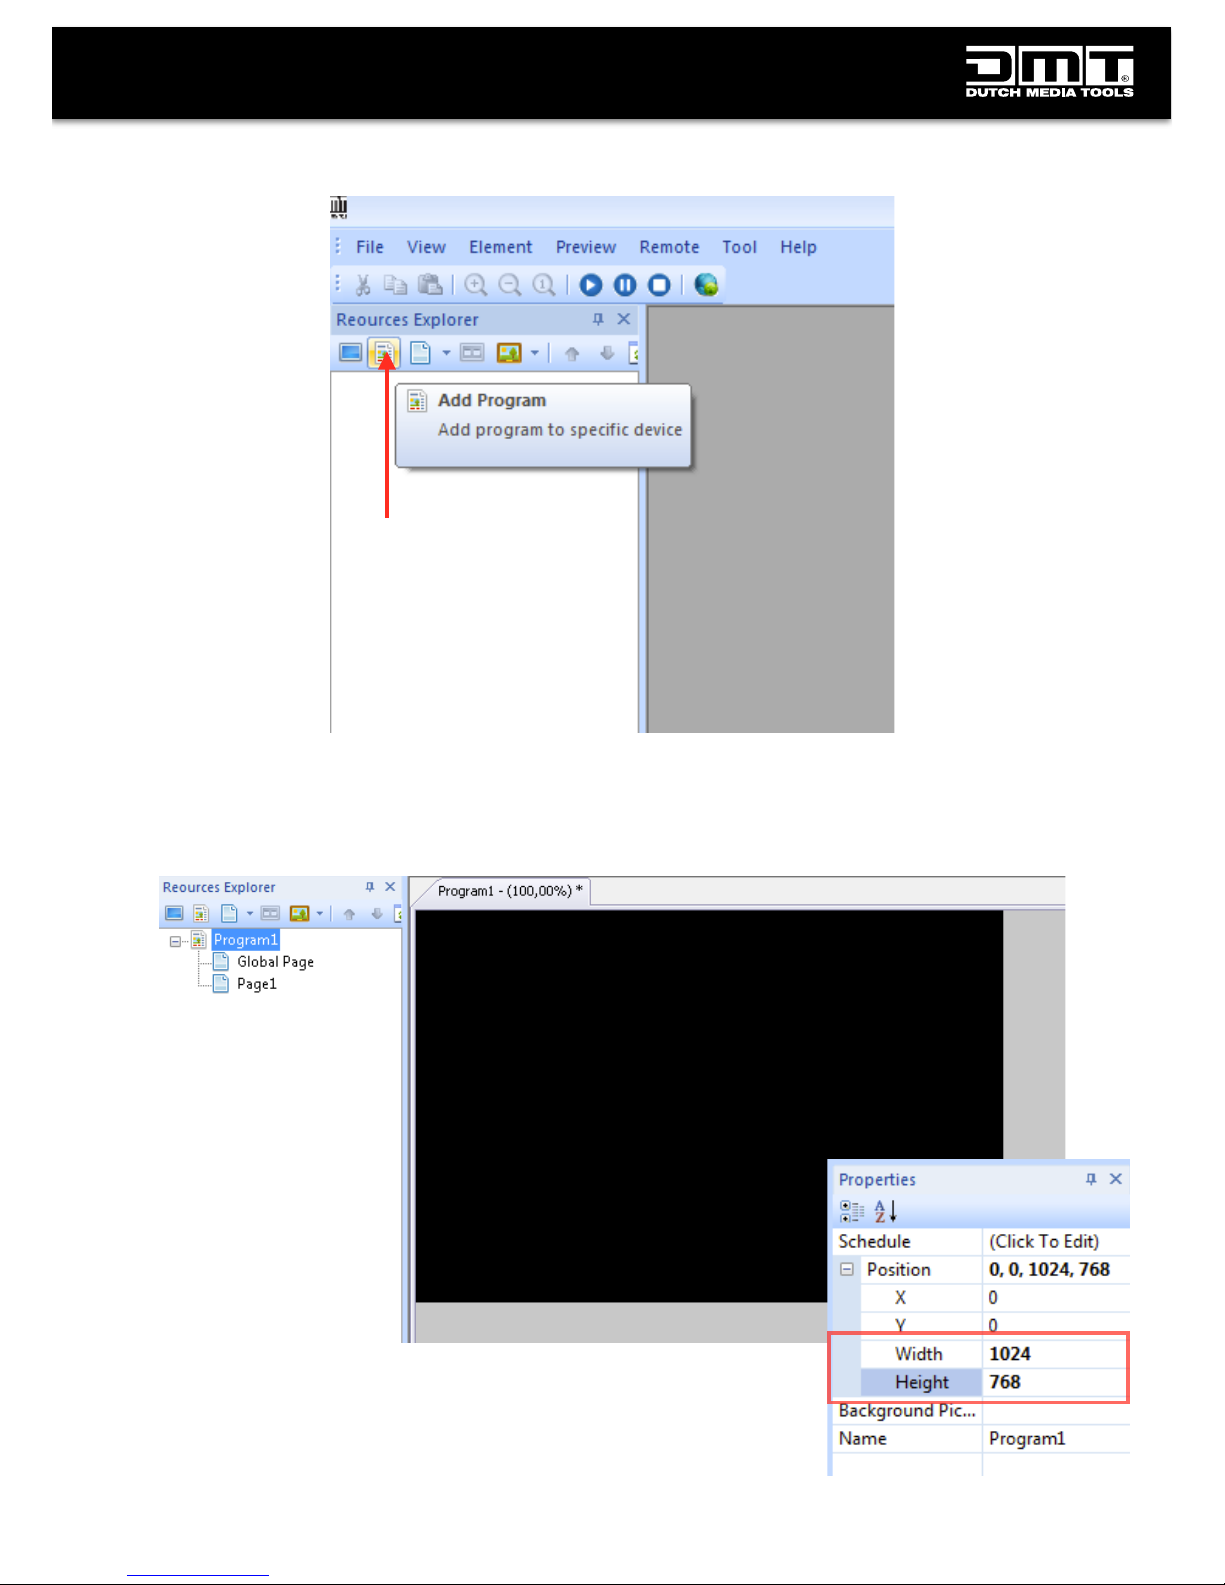
Now start a new “program” by clicking “Add Program”
-
Click on “Program1” and change the resolution settings on the right hand side of the screen:
101414 - LS 120 how to upload content
Page 6
-
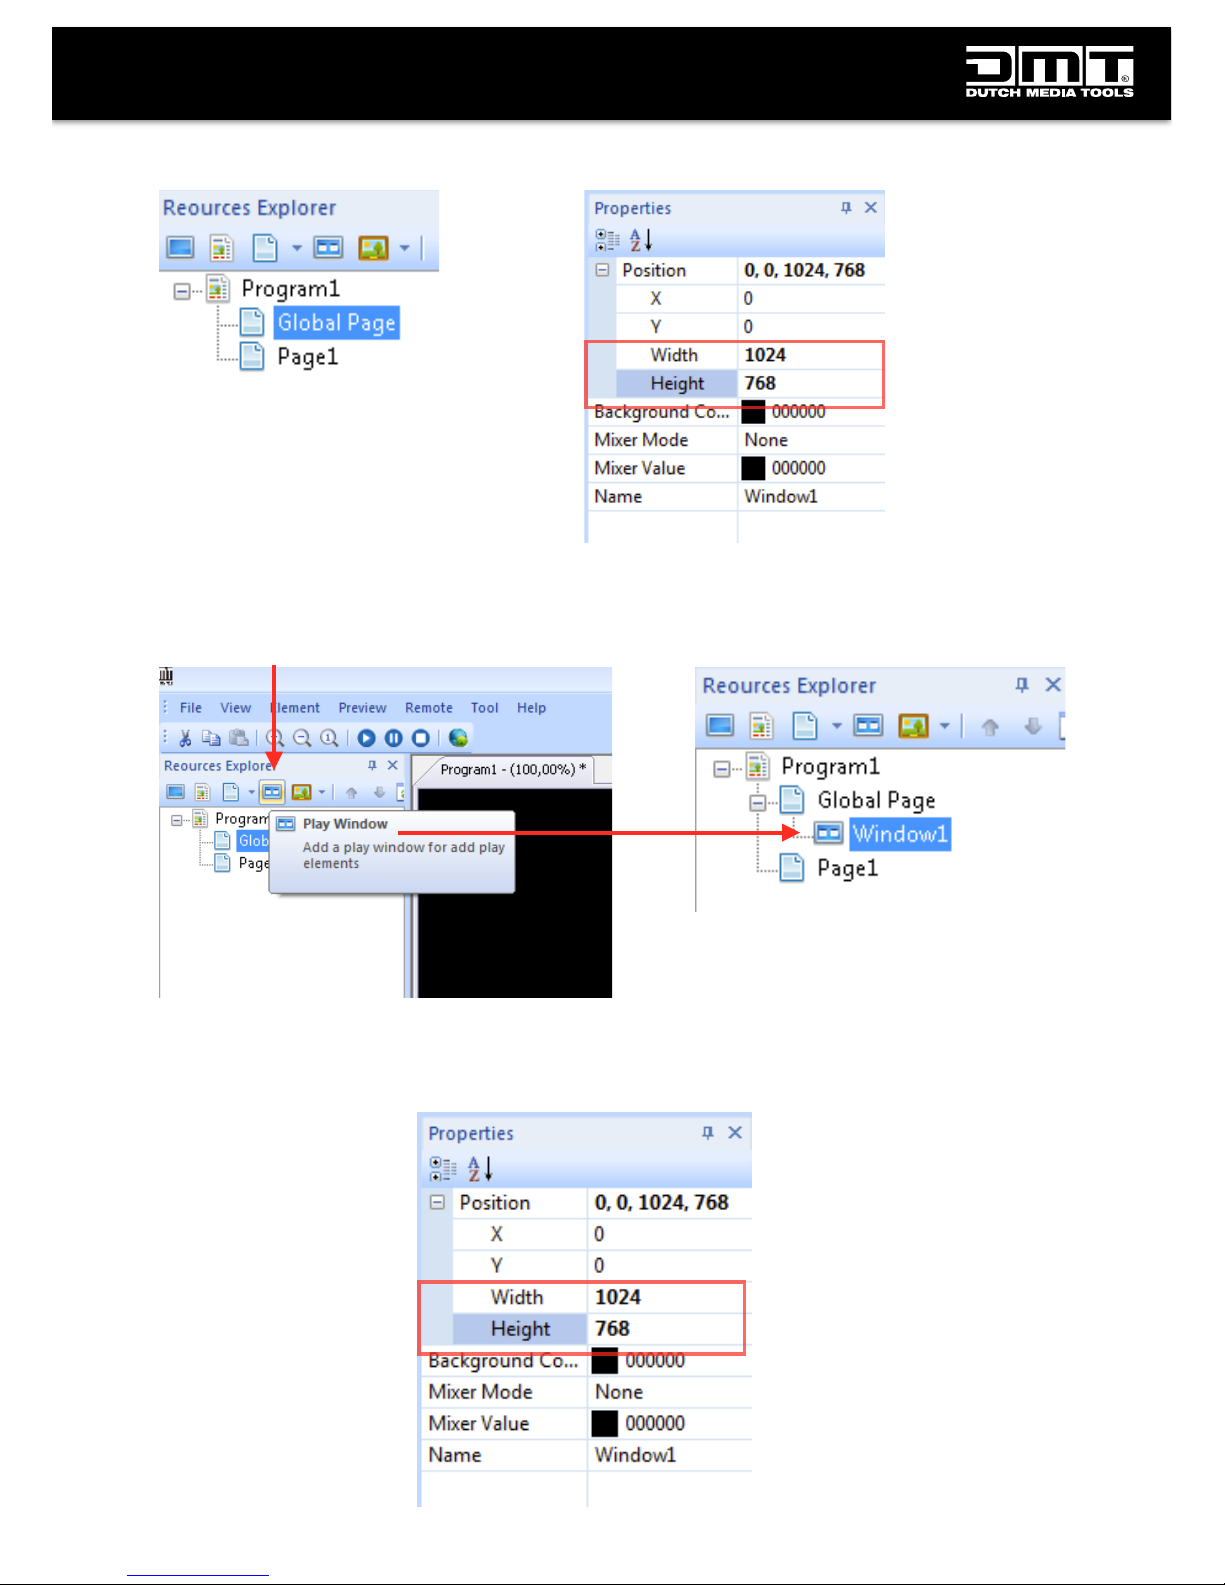
Click on “Global Page” and change the resolution to 1024x768
-
Next step is to add a “Play Window”
- Click on “Window1” and change the resolution to 1024 x 768, you can do this on the right hand
side of the screen
101414 - LS 120 how to upload content
Page 7
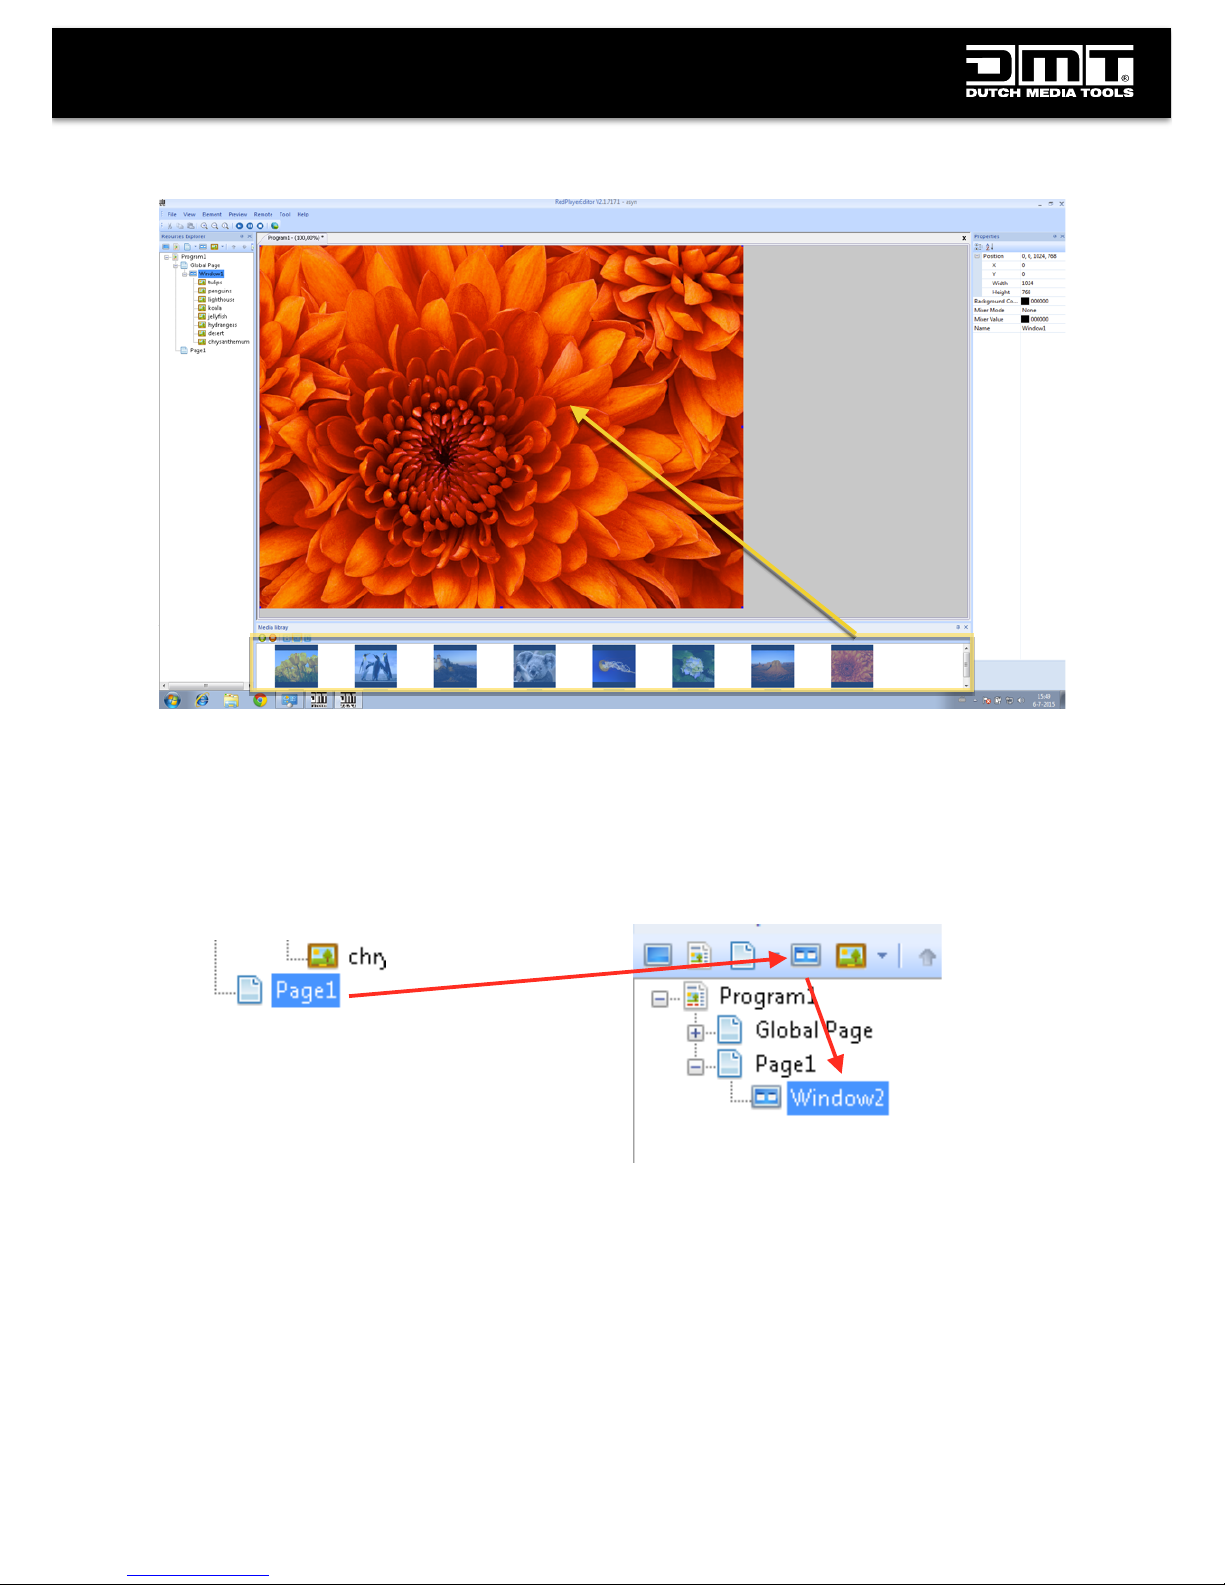
- Now drag the images from the image library to the program window
- When all images are added to “Window1”, please click on “Page1” and add another “Play
Window” just like we did for “Window1”
-
Last step we need to do before uploading the program to the LS-120, is add an item to
“Page1”. Without, the program cannot be uploaded. The item we add will not show on the
output because it’s “underneath” the “Window1” layer, it’s only needed for programming
reasons.
101414 - LS 120 how to upload content
Page 8
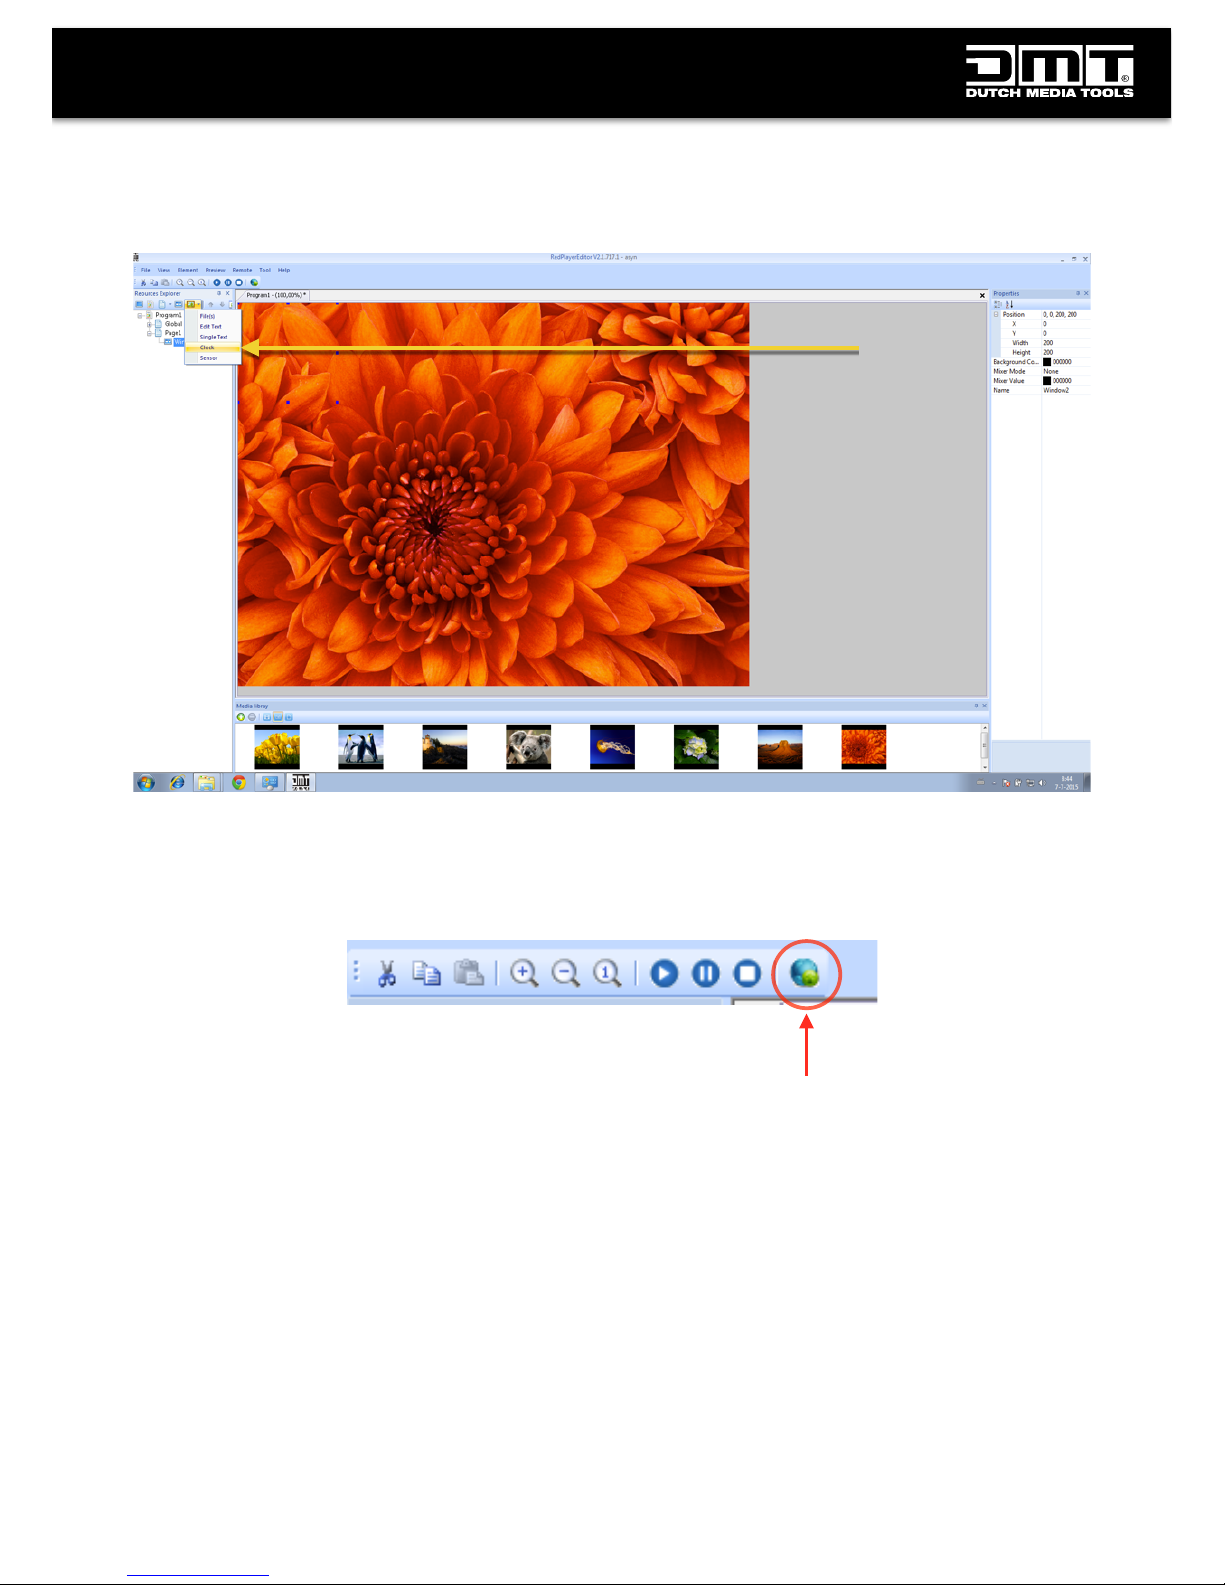
- Inside “Window2” we add a “clock” as said before, this will not show on the output and is only
be need for programming reasons.
After this we are ready to send the program to the LS-120. To do so, click the “globe” icon in the
menu bar;
101414 - LS 120 how to upload content
Page 9
-
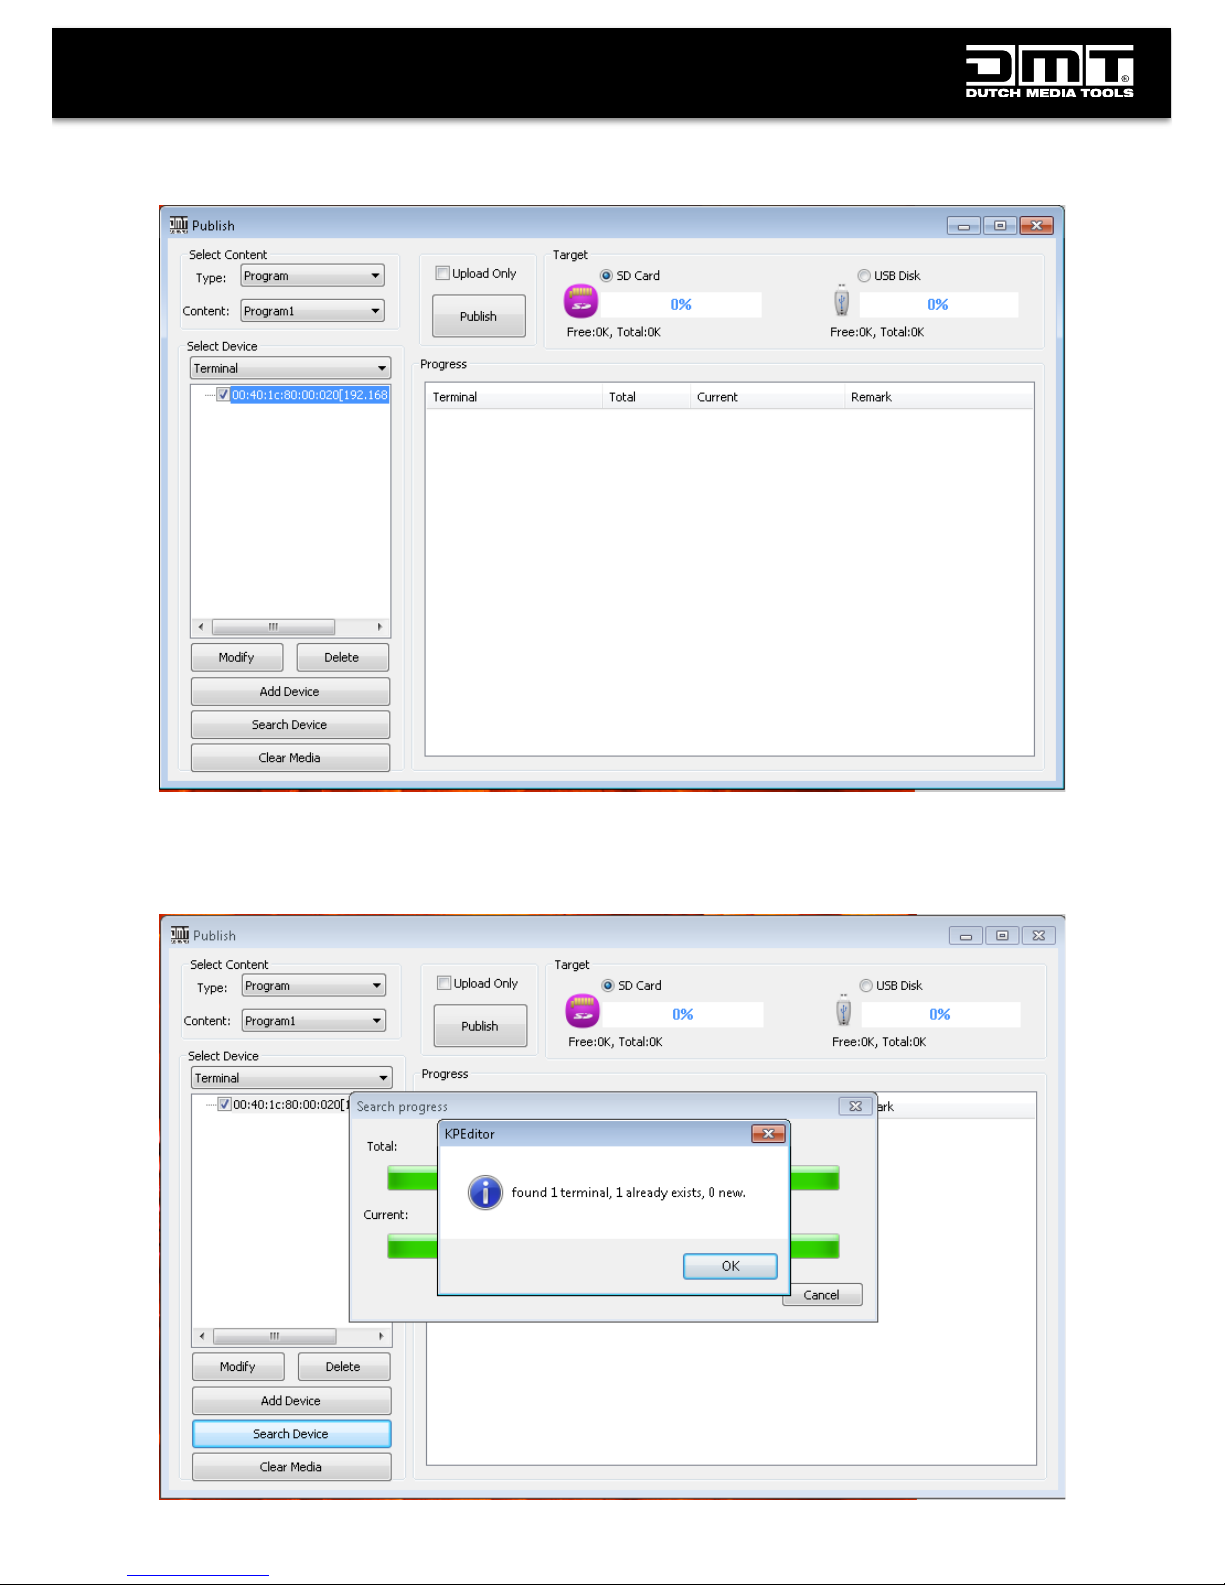
Click on the button “Search Device” to search for the LS-120 in the network
- When all network settings are correct, the program will show the following screen
101414 - LS 120 how to upload content
Page 10
-
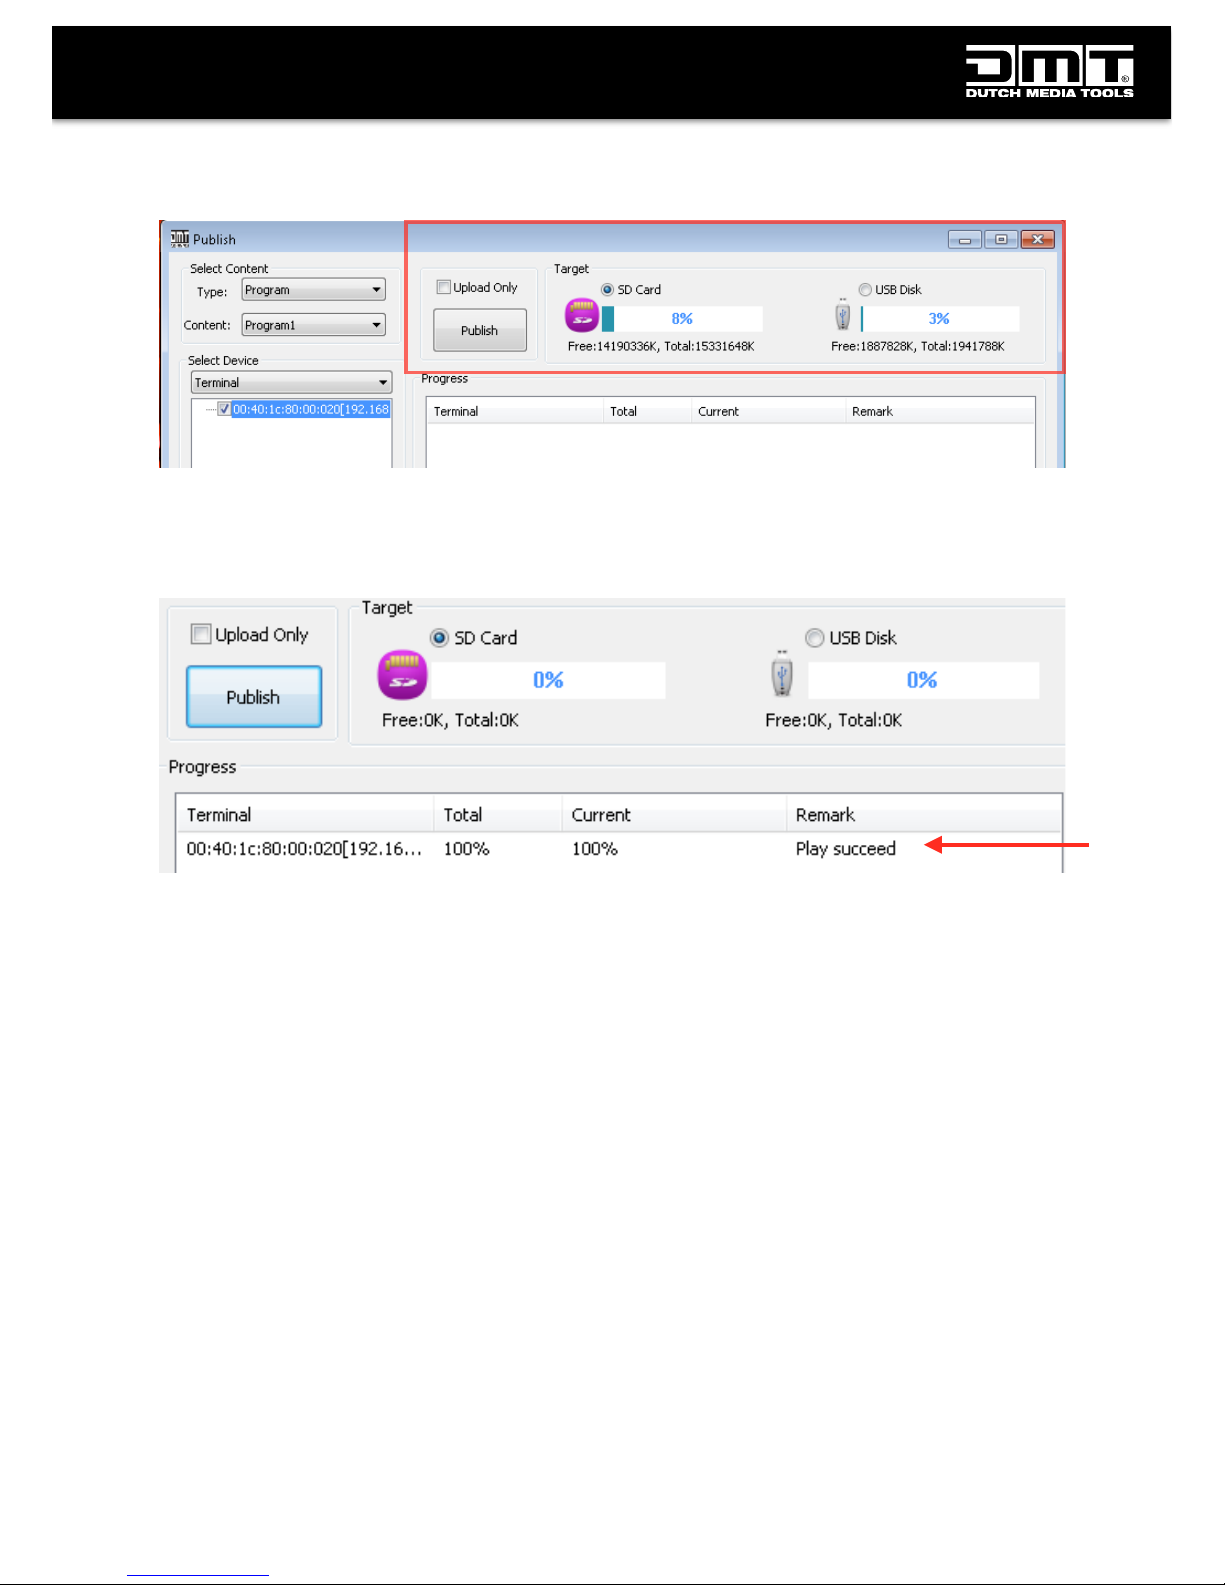
Click on the found LS-120 and select “SD Card” or “USB Disk”, then click the “Publish” button
-
When the upload was succesful, the following message will show and the LS-120 will start to
play the program (make sure USB button on the front panel is pushed and led is flashing)
101414 - LS 120 how to upload content
 Loading...