

Page 1
PROGRAMMING GUIDE
XR200 COMMAND PROCESSOR™ PANEL and
XR2400F ADDRESSABLE FIRE ALARM CONTROL PANEL
Page 2

MODEL XR200
COMMAND PROCESSOR
PROGRAMMING GUIDE
FCC NOTICE
This equipment generates and uses radio frequency energy and, if not installed and used properly in strict accordance with
the manufacturer's instructions, may cause interference with radio and television reception. It has been type tested and
found to comply with the limits for a Class B computing device in accordance with the specification in Subpart J of Part 15
of FCC Rules, which are designed to provide reasonable protection against such interference in a residential installation. If
this equipment does cause interference to radio or television reception, which can be determined by turning the equipment
off and on, the installer is encouraged to try to correct the interference by one or more of the following measures:
Reorient the receiving antenna
Relocate the computer with respect to the receiver
Move the computer away from the receiver
Plug the computer into a different outlet so that computer and receiver are on different branch circuits
If necessary, the installer should consult the dealer or an experienced radio/television technician for additional suggestions.
The installer may find the following booklet, prepared by the Federal Communications Commission, helpful:
"How to identify and Resolve Radio-TV Interference Problems."
This booklet is available from the U.S. Government Printing Office, Washington D.C. 20402
Stock No. 004-000-00345-4
Copyright © 1995 - 2002 Digital Monitoring Products, Inc.
Information furnished by DMP is believed to be accurate and reliable.
This information is subject to change without notice.
Page 3

TABLE OF CONTENTS
Introduction
Revisions to This Document........................................................ viii
1.1 Before you begin ............................................................ 1
1.2 Getting Started .............................................................. 1
1.3 Programmer Operation..................................................... 2
1.4 Programmer Lockout Codes............................................... 2
1.5 Reset Timeout ................................................................ 3
1.6 Special Keys................................................................... 3
1.7 Entering Alpha Characters ................................................ 3
1.8 Entering Non-Alpha Characters .......................................... 4
1.9 Keypad Prompts Display Current Programming...................... 4
Initialization
2.1 Initialization .................................................................. 5
2.2 Clear All Memory ............................................................ 5
2.3 Clear All Codes ............................................................... 5
2.4 Clear All Schedules.......................................................... 5
2.5 Clear Display Events Memory ............................................ 5
2.6 Clear Zone Information .................................................... 5
2.7 Clear Area Information .................................................... 5
2.8 Clear Output Information ................................................. 5
2.9 Clear Communication and Remote Options .......................... 5
2.10 Set to Factory Defaults .................................................... 5
Communication
3.1 Communication .............................................................. 6
3.2 Communication Type ....................................................... 6
3.2.1 Retry Time ..................................................................... 6
3.2.2 Host Backup ................................................................... 7
3.2.3 Modem Setup ................................................................. 7
3.2.4 UL AA............................................................................ 8
3.3 2ND Phone Line .............................................................. 9
3.3.1 Test Frequency .............................................................. 10
3.4 Account Number ............................................................10
3.5 Transmit Delay ..............................................................10
3.6 DTMF ...........................................................................10
3.7 Events Manager ............................................................. 10
3.8 Defer Test Time .............................................................11
3.9 Test Frequency .............................................................. 11
3.10 Test Time .....................................................................11
3.11 Receiver One Programming ..............................................12
3.12 Alarm Reports ...............................................................12
3.13 Supervisory/Trouble Reports ............................................ 12
3.14 Opening/Closing and User Reports ....................................12
3.15 Test Report ...................................................................12
3.16 Backup Reporting ........................................................... 1 2
3.17 First Telephone Number ..................................................12
3.18 Second Telephone Number ...............................................12
3.19 Receiver One Programming ..............................................13
3.20 Pager Type.................................................................... 13
3.21 Alarm Reports ...............................................................13
3.22 Supervisory/Trouble Reports ............................................ 13
3.23 Opening/Closing and User Reports ....................................13
3.24 Test Report ...................................................................13
3.25 Backup Reporting ........................................................... 1 3
3.26 First Telephone Number ..................................................13
3.27 Second Telephone Number ...............................................13
3.28 Pager Identification Number ............................................ 13
PageSection
Digital Monitoring Products XR200/XR2400F Programming Guide
iii
Page 4

TABLE OF CONTENTS
Device Setup
4.1 Device Setup .................................................................14
4.2 Maximum Partitions........................................................14
4.3 Device Type .................................................................. 14
4.4 Partition Number ........................................................... 14
Remote Options
5.1 Remote Options .............................................................15
5.2 Remote Key...................................................................15
5.3 Manufacturer Authorization ............................................. 15
5.4 Armed Rings .................................................................. 15
5.5 Disarmed Rings ..............................................................15
5.6 Alarm Receiver Authorization ........................................... 15
5.7 Service Receiver Authorization ......................................... 16
5.8 Remote Phone Number .................................................... 16
5.9 Remote Disarm .............................................................. 16
System Reports
6.1 System Reports..............................................................17
6.2 Abort Report ................................................................. 17
6.3 Restoral Reports ............................................................17
6.4 Bypass Reports ..............................................................17
6.5 Schedule Change Reports................................................. 1 7
6.6 Code Change Reports ...................................................... 17
6.7 Access Keypads..............................................................17
6.8 Ambush ........................................................................17
System Options
7.1 System Options..............................................................18
7.2 Closing Wait.................................................................. 18
7.3 Entry Delay 1 ................................................................18
7.4 Cross Zone Time ............................................................ 18
7.5 Zone Retard Delay.......................................................... 18
7.6 Power Fail Delay............................................................ 18
7.7 Swinger Bypass Trips....................................................... 18
7.8 Reset Swinger Bypass...................................................... 18
7.9 Video/Alarm Verification................................................. 19
7.10 Time Zone Changes ........................................................19
7.11 AC Cycles .....................................................................19
PageSection
XR200/XR2400F Programming Guide Digital Monitoring Products
iv
Page 5

TABLE OF CONTENTS
Output Options
8.1 Output Options .............................................................. 20
8.2 Bell Cutoff Time ............................................................20
8.3 Automatic Bell Test ........................................................ 20
8.4 Bell Action .................................................................... 20
8.4.1 Fire Bell Action ............................................................. 20
8.4.2 Burglary Bell Action........................................................ 20
8.4.3 Supervisory Bell Action ...................................................2 0
8.4.4 Panic Bell Action............................................................ 20
8.4.5 Emergency Bell Action ....................................................20
8.4.6 Auxiliary 1 Bell Action .................................................... 20
8.4.7 Auxiliary 2 Bell Action .................................................... 20
8.5 Output Action................................................................20
8.5.1 Cutoff Output................................................................ 20
8.5.2 Output Cutoff Time ........................................................ 20
8.5.3 Communication Fail Output .............................................21
8.5.4 Fire Alarm Output .......................................................... 21
8.5.5 Fire Trouble Output ........................................................ 21
8.5.6 Ambush Output .............................................................. 21
8.5.7 Entry Output ................................................................. 21
8.5.8 Exit Output ...................................................................21
8.5.9 Ready Output ................................................................ 21
8.5.10 Phone Trouble Output ..................................................... 21
8.5.11 Late To Close Output ......................................................2 1
8.5.12 Device Fail Output .........................................................21
8.5.13 Sensor Reset Output ....................................................... 2 1
Menu Display
9.1 Menu Display ................................................................. 22
9.2 Armed Status ................................................................ 22
9.3 Time ............................................................................ 22
9.4 Arm/Disarm .................................................................. 22
Status List
10.1 Status List ....................................................................23
10.2 Display Keypads ............................................................. 23
10.3 System Monitor Troubles ................................................. 23
10.4 Fire Zones ....................................................................23
10.5 Burglary Zones .............................................................. 24
10.6 Supervisory Zones ..........................................................24
10.7 Panic Zones .................................................................. 24
10.8 Emergency Zones ...........................................................24
10.9 Auxiliary 1 Zones ...........................................................24
10.10 Auxiliary 2 Zones ...........................................................24
Printer Reports
11.1 Printer Reports .............................................................. 25
11.2 Arm and Disarm Reports ..................................................25
11.3 Zone Reports.................................................................25
11.4 User Command Reports ................................................... 25
11.5 Door Access Reports .......................................................25
11.6 Supervisory Reports........................................................ 25
PageSection
Digital Monitoring Products XR200/XR2400F Programming Guide
v
Page 6

TABLE OF CONTENTS
Host Log Reports
12.1 Host Log Reports............................................................ 26
12.2 Modem Setup ................................................................ 26
12.3 Arm and Disarm Reports ..................................................26
12.4 Zone Reports.................................................................26
12.5 User Command Reports ................................................... 26
12.6 Door Access Reports .......................................................26
12.7 Supervisory Reports........................................................ 26
Area Information
13.1 Area Information ........................................................... 27
13.2 Partition Number ........................................................... 27
13.3 Arming Mode ................................................................. 27
13.4 Exit Delay..................................................................... 27
13.5 Burglary Bell Output ....................................................... 2 7
13.6 Opening/Closing Reports ................................................. 28
13.7 Closing Check ................................................................ 28
13.8 Closing Code .................................................................28
13.9 Any Bypass....................................................................28
13.10 Area Schedules .............................................................. 28
13.11 Primary/Secondary Schedules........................................... 28
13.12 Area Number .................................................................28
13.13 Area Name .................................................................... 29
13.14 Account Number ............................................................29
13.15 Automatic Arming .......................................................... 2 9
13.16 Bad Zones ..................................................................... 29
13.17 Automatic Disarming ......................................................29
13.18 Armed Output Number ....................................................30
13.19 Common Area ................................................................ 30
Zone Information
14.1 Zone Information ........................................................... 31
14.2 Zone Number ................................................................ 31
14.3 Zone Name ................................................................... 31
14.4 Zone Type ..................................................................... 31
14.5 Fire Bell Output............................................................. 32
14.6 Partition Number ........................................................... 32
14.6.1 Area Number .................................................................32
14.6.2 Area Assignment ............................................................32
14.6.3 Arming Zone Area Assignment ..........................................32
14.6.4 Style............................................................................33
14.7 Next Zone..................................................................... 33
14.7.1 Wireless ....................................................................... 34
14.7.2 Check-in Time ...............................................................34
14.7.3 Internal Contact ............................................................34
14.7.4 End-of-Line ................................................................... 34
14.7.5 Normally Open .............................................................. 34
14.8 Alarm Action .................................................................3 4
14.9 Disarmed Open ..............................................................34
14.9.1 Report to Transmit .........................................................35
14.9.2 Output Number .............................................................. 35
14.9.3 Output Action................................................................35
14.10 Swinger Bypass .............................................................. 36
14.11 Prewarn Addresses ......................................................... 36
14.12 Entry Delay ...................................................................36
PageSection
XR200/XR2400F Programming Guide Digital Monitoring Products
vi
Page 7

TABLE OF CONTENTS
14.13 Zone Retard .................................................................. 36
14.14 Presignal Addresses ........................................................36
14.15 Fast Response ...............................................................36
14.16 Cross Zone .................................................................... 37
14.17 Priority ........................................................................ 37
14.17.1 Program Transmitter ....................................................... 37
14.17.2 Connect Transmitter ....................................................... 37
14.17.3 Connect Command Transmitter .........................................37
Stop
15.1 Stop ............................................................................ 38
Set Lockout Code
16.1 Set Lockout Code ...........................................................38
Appendix
17.1 Diagnostics function ....................................................... 39
17.2 Using the 984 Command Function .....................................40
17.3 Using the Walk Test ........................................................41
Walk Test......................................................................41
Zone Types.................................................................... 41
Bell Action .................................................................... 4 1
Trip Counter.................................................................. 41
Failed Zones Display ....................................................... 42
Local Printer for Walk Test .............................................. 4 2
17.4 690 Series Keypads Speaker Operation............................... 42
17.5 Pager Direct Specifications.............................................. 42
17.6 Cross Zoning .................................................................43
17.7 Events Manager ............................................................. 43
17.8Modem Setup Information................................................43
17.9 Host Backup Examples ....................................................44
17.10 462N Network Interface Card Examples ............................. 45
17.11 Zone Type Descriptions ...................................................46
17.12 Zone Type Specifications .................................................47
17.13 Common Keypad Messages ...............................................48
PageSection
Digital Monitoring Products XR200/XR2400F Programming Guide
vii
Page 8

REVISIONS
TABLE OF CONTENTS
PageSection
Revisions to This Document
This section explains the changes that were made to this document during this revision. This section lists the date
and the change that was made, the section number and section heading, and a quick summary of the change.
Date Section Number and Heading Quick Explanation of Changes
5/02 2.2 Clear All Memory Programming Prompt added to initialize all programming.
5/02 3.6 DTMF Programming Default changed to YES
5/02 3.9 Test Frequency Programming Default changed to 1
5/02 7.4 Cross Zone Time Programming Default changed to 4.
5/02 17.10 462N Examples Table revised for clarity.
3/02 3.2.4 UL AA Check-in Time and Fail Time defaults changed to 1 (one).
1/02 3 Communication DNET programming type removed.
1/02 12 Host Log Reports Section added for Host Log Reports feature.
Note: All subsequent section numbers adjusted.
1/02 17.9 462N Examples Section added to explain how to use the 462N card with Host Log
Reports, Host Communication, and Host Backup.
12/01 3.2.1 Retry Time Section added for new programming operation.
12/01 3.2.2 Host Backup Section added for new programming operation.
12/01 3.2.3 Modem Setup Section expanded for new programming operation.
12/01 3.2.4 UL AA Section added for new programming operation.
12/01 16 Appendix Entire section rearranged for clarity.
21/01 16.3 Using the Walk Test Clarification added regarding bells.
12/01 16.5 Pager Direct Specifications Information added about Pager Direct.
12/01 16.6 Cross Zoning Clarification added about method of reporting tripped cross zones.
12/01 16.8 Modem Setup Information Information added regarding modem setup strings.
12/02 16.9 Host Backup Examples Scenarios for Host Backup added for clarity.
12/01 16.12 Common Keypad Examples Section added to help troubleshoot some common keypad messages
that may appear on the keypad display.
12/01 Entire Document New Layout.
XR200/XR2400F Programming Guide Digital Monitoring Products
viii
Page 9
1 - INTRODUCTION
1.1 Before you begin
This guide provides programming information for the DMP XR200 Command Processor™ Panel and the XR2400F
Addressable Fire Alarm Control Panel. After this Introduction, the remaining sections describe the functions of each
programming menu item along with the available options. Before starting to program, we recommend you read
through the contents of this guide. The information contained here allows you to quickly learn the programming
options and operational capabilities of the panel.
In addition to this guide, you should also read and be familiar with the following XR200 documents:
• XR200 Installation Guide (LT-0197)
• XR200 Product Specification (LT-0198)
• XR200 Security Command
If you are using the XR2400F Addressable Fire Alarm Control Panel, you should also read and be familiar with these
documents:
• XR2400F Installation Guide (LT-0554)
• XR2400F Product Specification (LT-0517)
• XR2400F User's Guide (LT-0560)
Internal Programmer
The panel contains all of its programming information in an on-board processor and does not require an external
programmer. You can perform all programming tasks through a DMP alphanumeric keypad set to address one.
®
User's Guide (LT-0287)
Programming Information Sheet
Included with each panel are the Programming Information Sheets. These list the various programming prompts and
available options for programming the panel. Before starting to program, we recommend you completely fill out
each sheet with the programming options you intend to enter into the panel.
Having completed programming sheets available while entering data helps prevent errors and can shorten the time
you spend programming. Completed sheets also provide you with an accurate record of the panel's program you can
keep on file for future system service or expansion. The remainder of this Introduction provides instructions for
starting and ending a programming session using the alphanumeric keypad.
1.2 Getting Started
Ground Yourself Before Handling the Panel! Touch any grounded metal, such as the enclosure, before
touching the panel to discharge static.
Remove All Power From the Panel! Remove all AC and Battery power from the panel before installing
or connecting any modules, cards, or wires to the panel.
Before starting to program the panel, make sure the panel is properly grounded, and also ensure that the AC and
battery power is applied to the appropriate panel terminals. All wiring connections and grounding instructions are
detailed in the XR200 Installation Guide (LT-0197) and the XR2400F Installation Guide (LT-0554).
XR200/XR2400F Programming Guide Digital Monitoring Products
1
Page 10

1 - INTRODUCTION
Accessing the Programmer
1. Install the reset jumper across the two J16 reset pins for two seconds. See Figure 1.
2. Remove the reset jumper and place it over just one pin for future use.
3. Enter the code 6653 (PROG) into an alphanumeric keypad set to address one. Press COMMAND.
4. The keypad displays PROGRAMMER.
J16
GND
1
AC
234
AC +B -B
BELL
56
GND SMK
78
GND
10 11 121314
9
RED
YEL GRN BLK
GND
L1 L2
1516171819
L3
GND
Command Processor Reset
202122 23 24 252627 28
GND
L4 L5 L6 L7 L8 L9- L9+ L10- L10+
Figure 1: J16 Reset Jumper
You are now ready to start programming the panel. Pressing the COMMAND key scrolls you through the programming
functions listed in the programmer. Each of these functions are described in detail in sections 2 to 15.
Initializing the Panel
After installing the panel, use the Initialization function to set to defaults the panel's programming. Note: The
default user code is 99. This should be changed as soon as the system is operational.
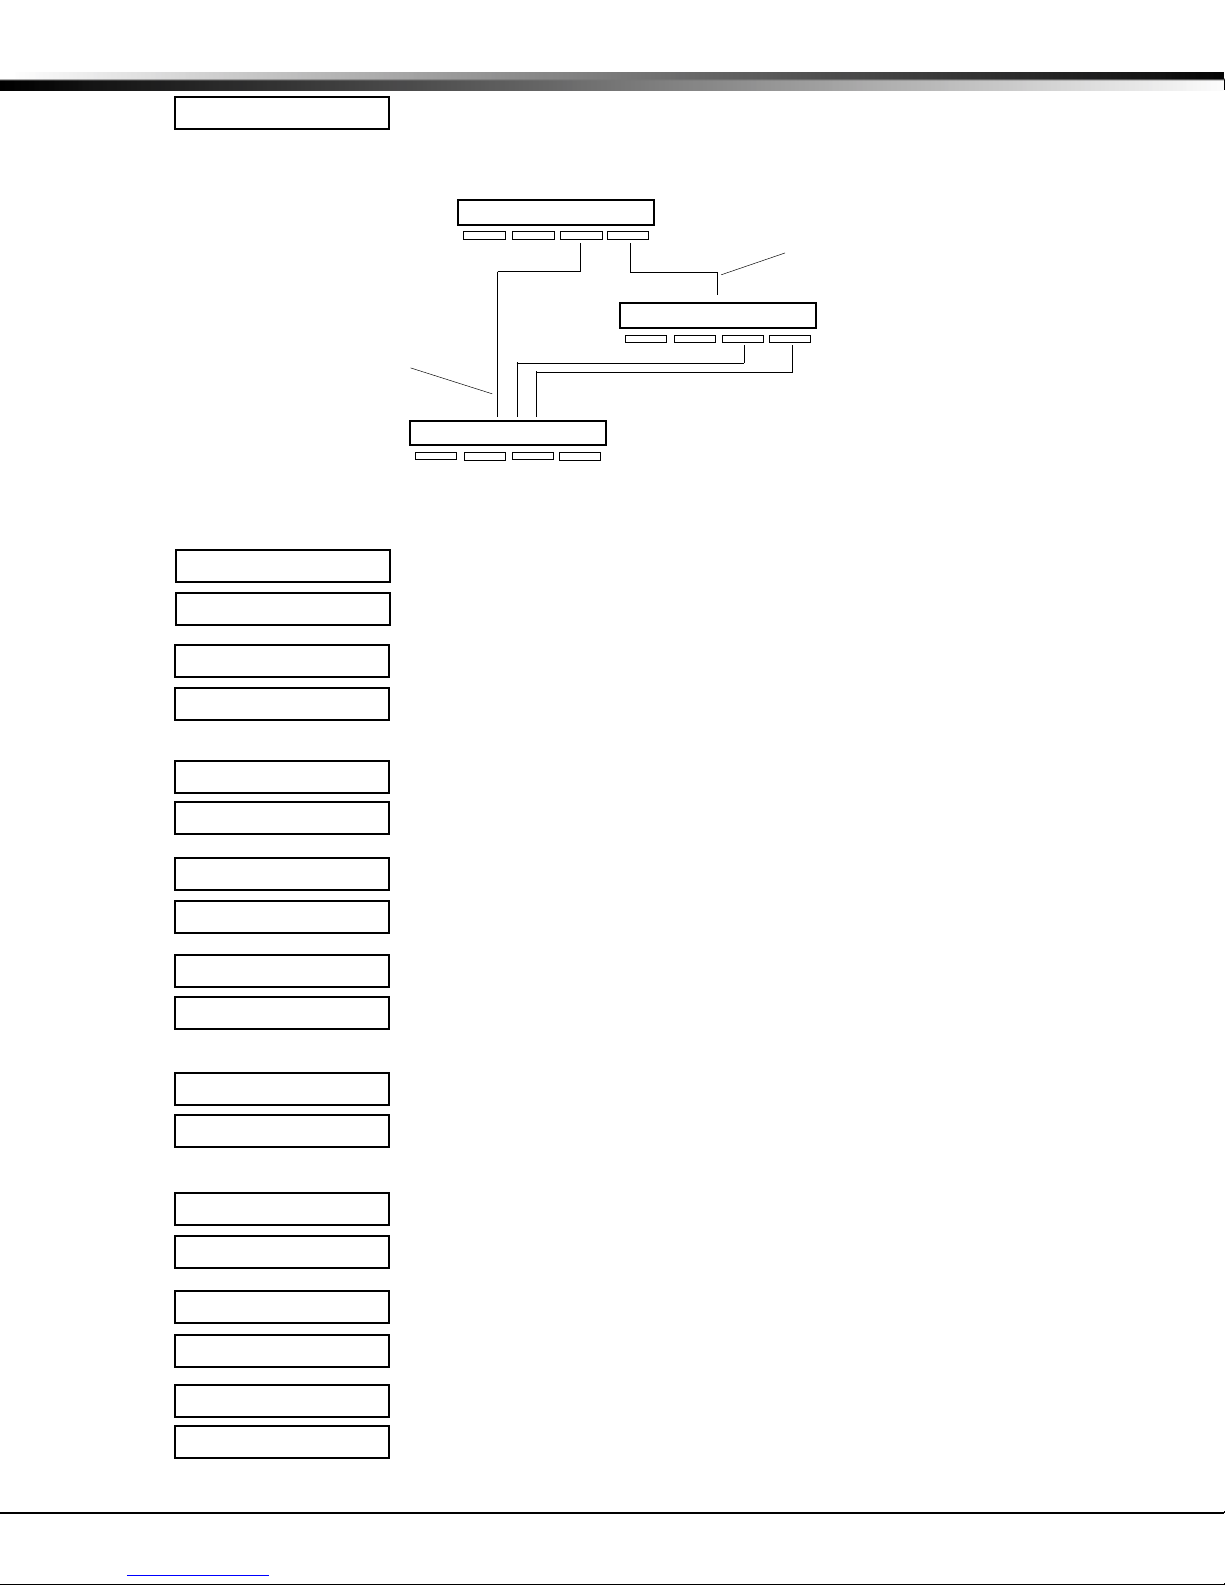
1.3 Programmer Operation
There are 14 programming sections to choose from:
Menu Item Section Menu Item Section
Initialization 2 Menu Display 9
Communication 3 Status List 10
Device Setup 4 Printer Reports 11
Remote Options 5 Area Information 12
System Reports 6 Zone Information 13
System Options 7 Stop 14
Output Options 8 Set Lockout Code 15
To select a section for programming, press any one of the Select keys when the name of that section is displayed on
the keypad. The detailed instructions for each programming step are found in sections 2 to 15.
1.4 Programmer Lockout Codes
The panel allows you to enter the programming function without entering a lockout code using the steps 1 to 4 listed
in Getting Started. We recommend, however, that you install a Lockout Code that restricts programming to only
those persons your company authorizes. You can do this by using the SET LOCKOUT CODE feature in the
Programmer. Use this new Lockout Code to restrict any unauthorized programming of the panel.
After resetting the panel and entering the code 6653, the keypad displays PROGRAMMER. Press COMMAND to
advance through the programming sections until SET LOCKOUT CODE is displayed (after STOP). Press any top row
Select key. The keypad displays ENTER CODE: – . Enter a 3 to 5 digit Programmer Lockout Code and press
COMMAND. The keypad displays ENTER AGAIN followed by ENTER CODE: –. Enter the same 3 to 5 digit code a
second time and press COMMAND. The keypad displays CODE CHANGED.
Note: The panel will not accept a 5-digit Lockout Code higher than 65535. The new code number must now be
entered before the programmer function can be accessed.
The Lockout Code should be written down and kept in a secure place with access limited to only those persons
authorized by your company to program the panel.
Digital Monitoring Products XR200/XR2400F Programming Guide
2
Page 11
1 - INTRODUCTION
1.5 Reset Timeout
The panel has a feature that requires you to enter the Programmer within 30 minutes of resetting the panel. After
30 minutes, if you attempt to program by entering the 6653 (PROG) code, the keypad displays: RESET PANEL. You
must reset the panel and enter the program code within the next 30 minutes.
If you are already in the Programmer and do not press any keys on the programming keypad for 30 minutes, the
panel terminates programming. All data entered up to that time is saved in the panel's memory.
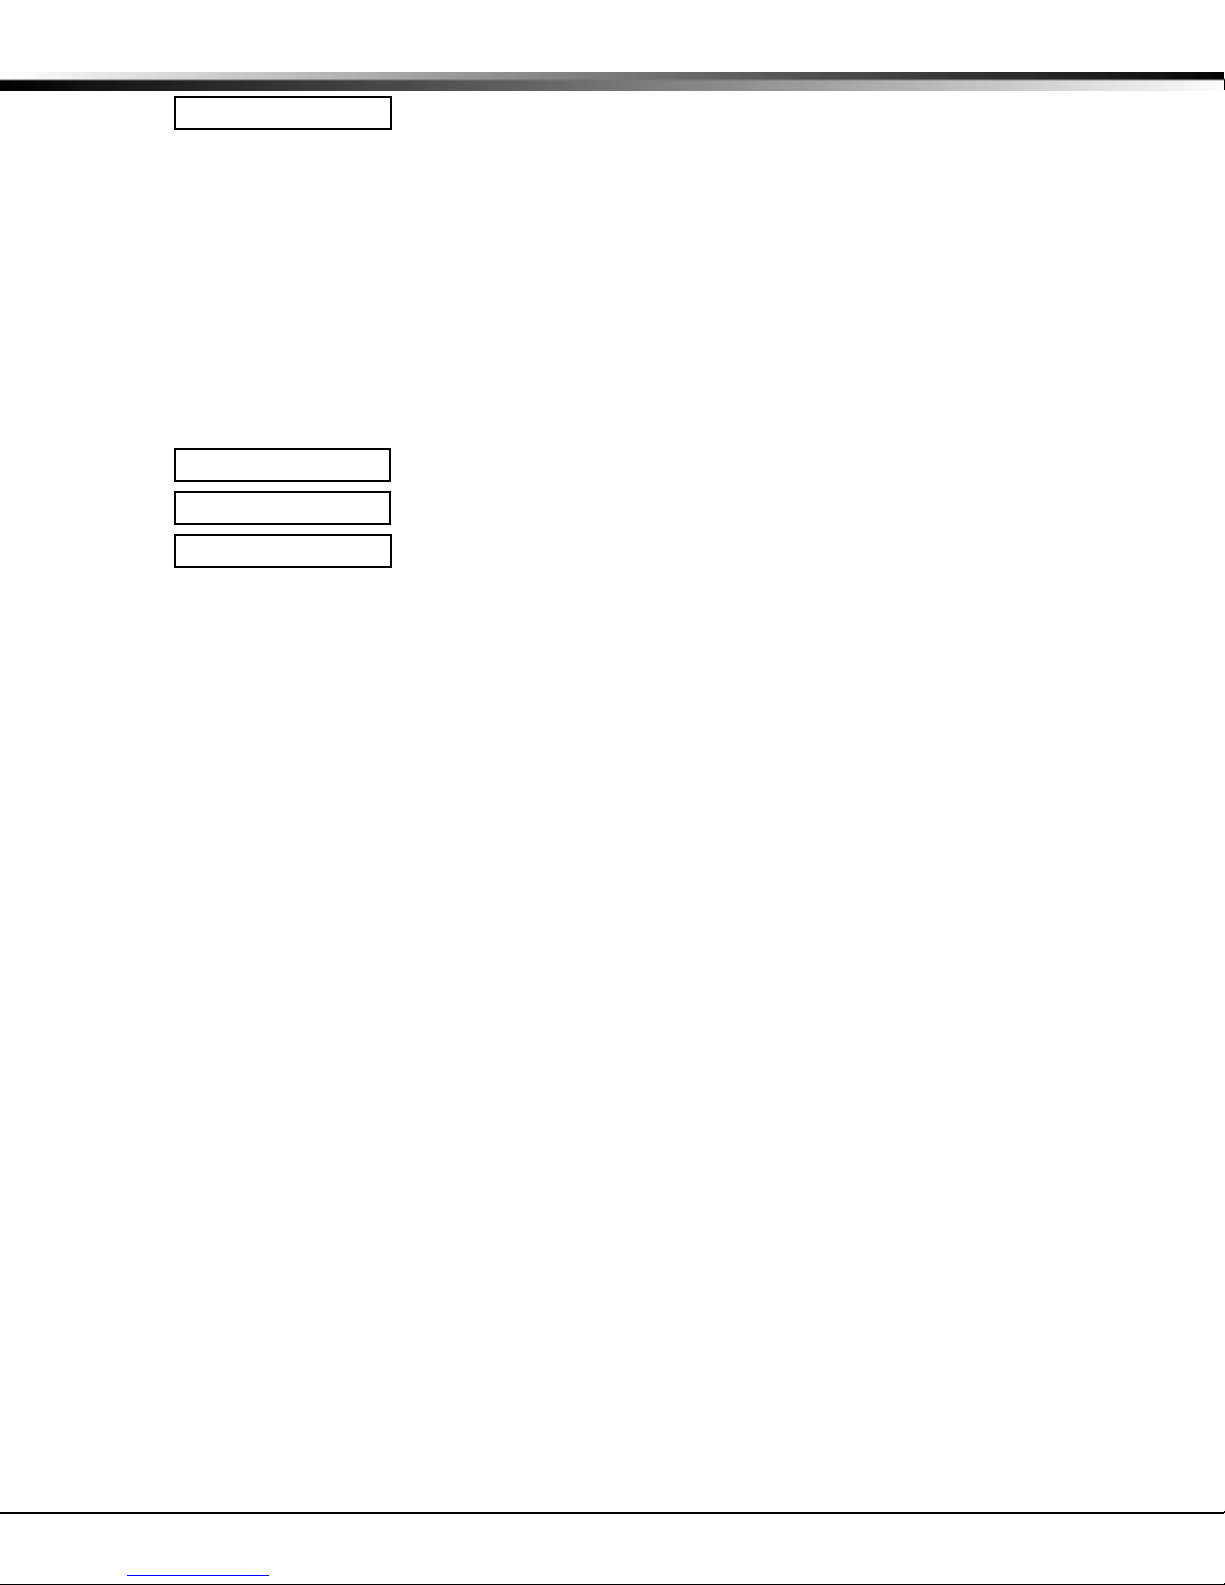
1.6 Special Keys
COMMAND Key
The COMMAND key allows you to go forward through the programming menu and through each step of a programming
section. As you go through the programming, the keypad display shows any current programming already stored in
the panel's memory. If the information is not to be changed, press the COMMAND key to advance to the next step.
The COMMAND key is also used to enter information into the panel's memory such as phone numbers or zone names.
Press the COMMAND key after you have entered the information and it is being displayed correctly on the keypad.
Back Arrow Key
Use the Back Arrow key to back up one step while programming.
The Back Arrow key is also used when an error is made while
entering information. Press the Back Arrow key once to erase the
last character entered.
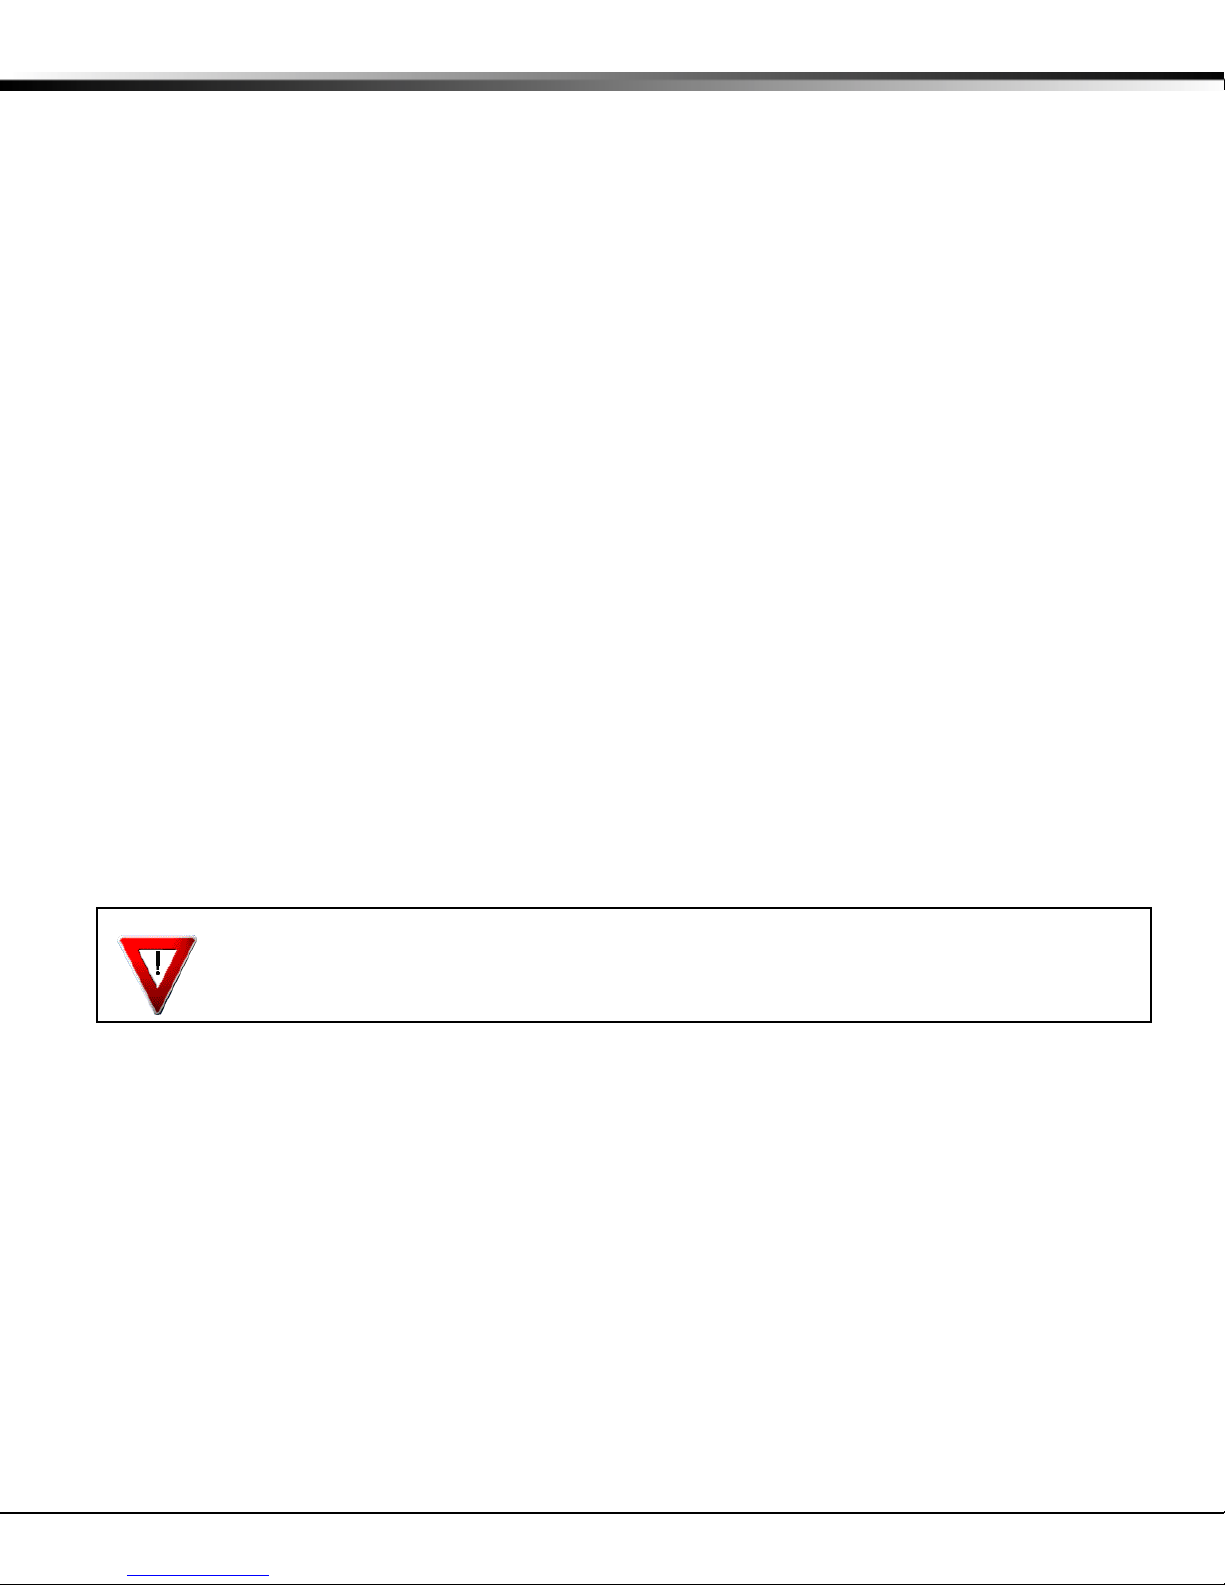
Select Keys
The top row of keys are called the Select keys. Each time a Select
key is to be used, the keypad displays the function or options above
the key. Displaying choices above the individual Select keys allows
them to be used for many different applications. For example, you
can enter AM or PM when programming the automatic test time or
answer YES or NO for a system option.
During programming, the Select keys also allow you to change information currently in the panel's memory by
pressing the appropriate Select key under the display then entering the new information through the keypad.
POWER
ARMED
ABC PRINTING
FRI 2: 51 AM
Select Keys
1234
AB C D E F G H I JKL
5678
MN O
P Q R
90
YZ
ST U
Back Arrow Key
Figure 2: Keypad Function keys
VWX
COMMAND Key
COMMAND
When there are more than four response options available, pressing the COMMAND key brings up the next 1 to 4
options on the keypad display. Pressing the Back Arrow key allows you to review the previous four choices.
The Select keys are also used for selecting a section from the programming menu by pressing any one of the Select
keys when the name of the programming section you want is displayed.
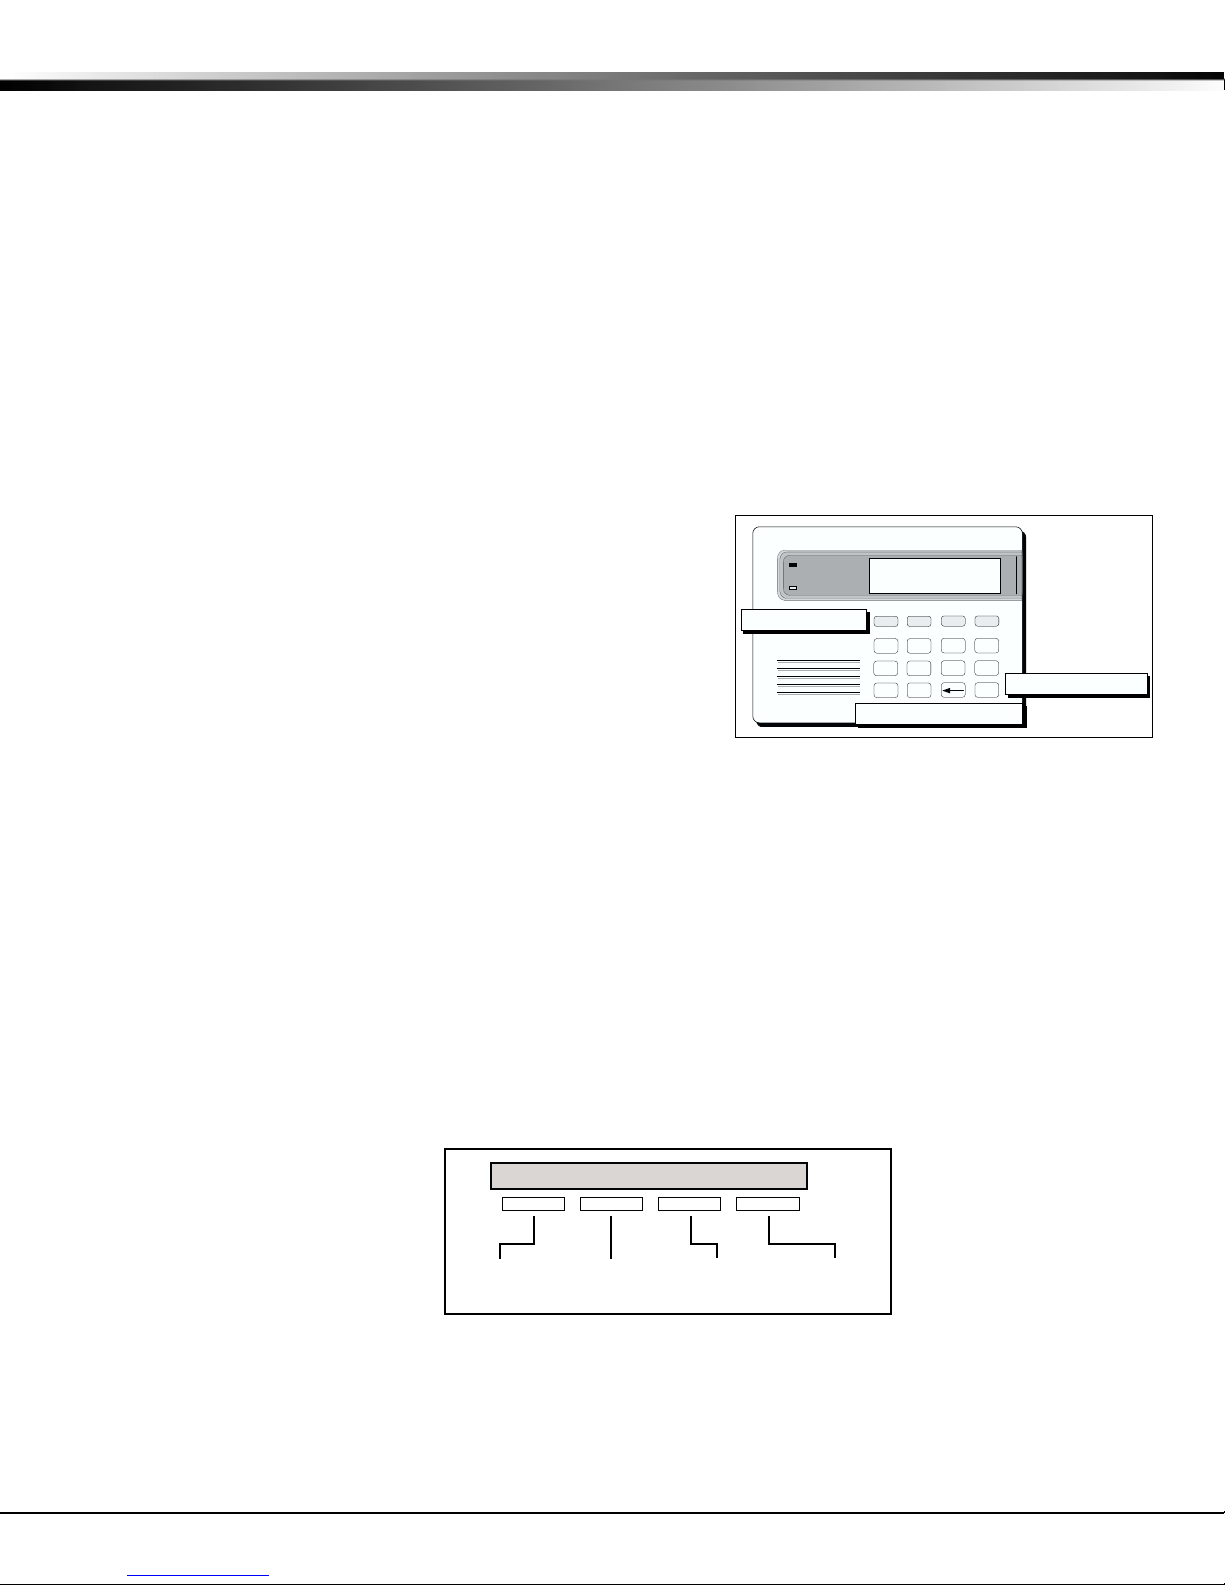
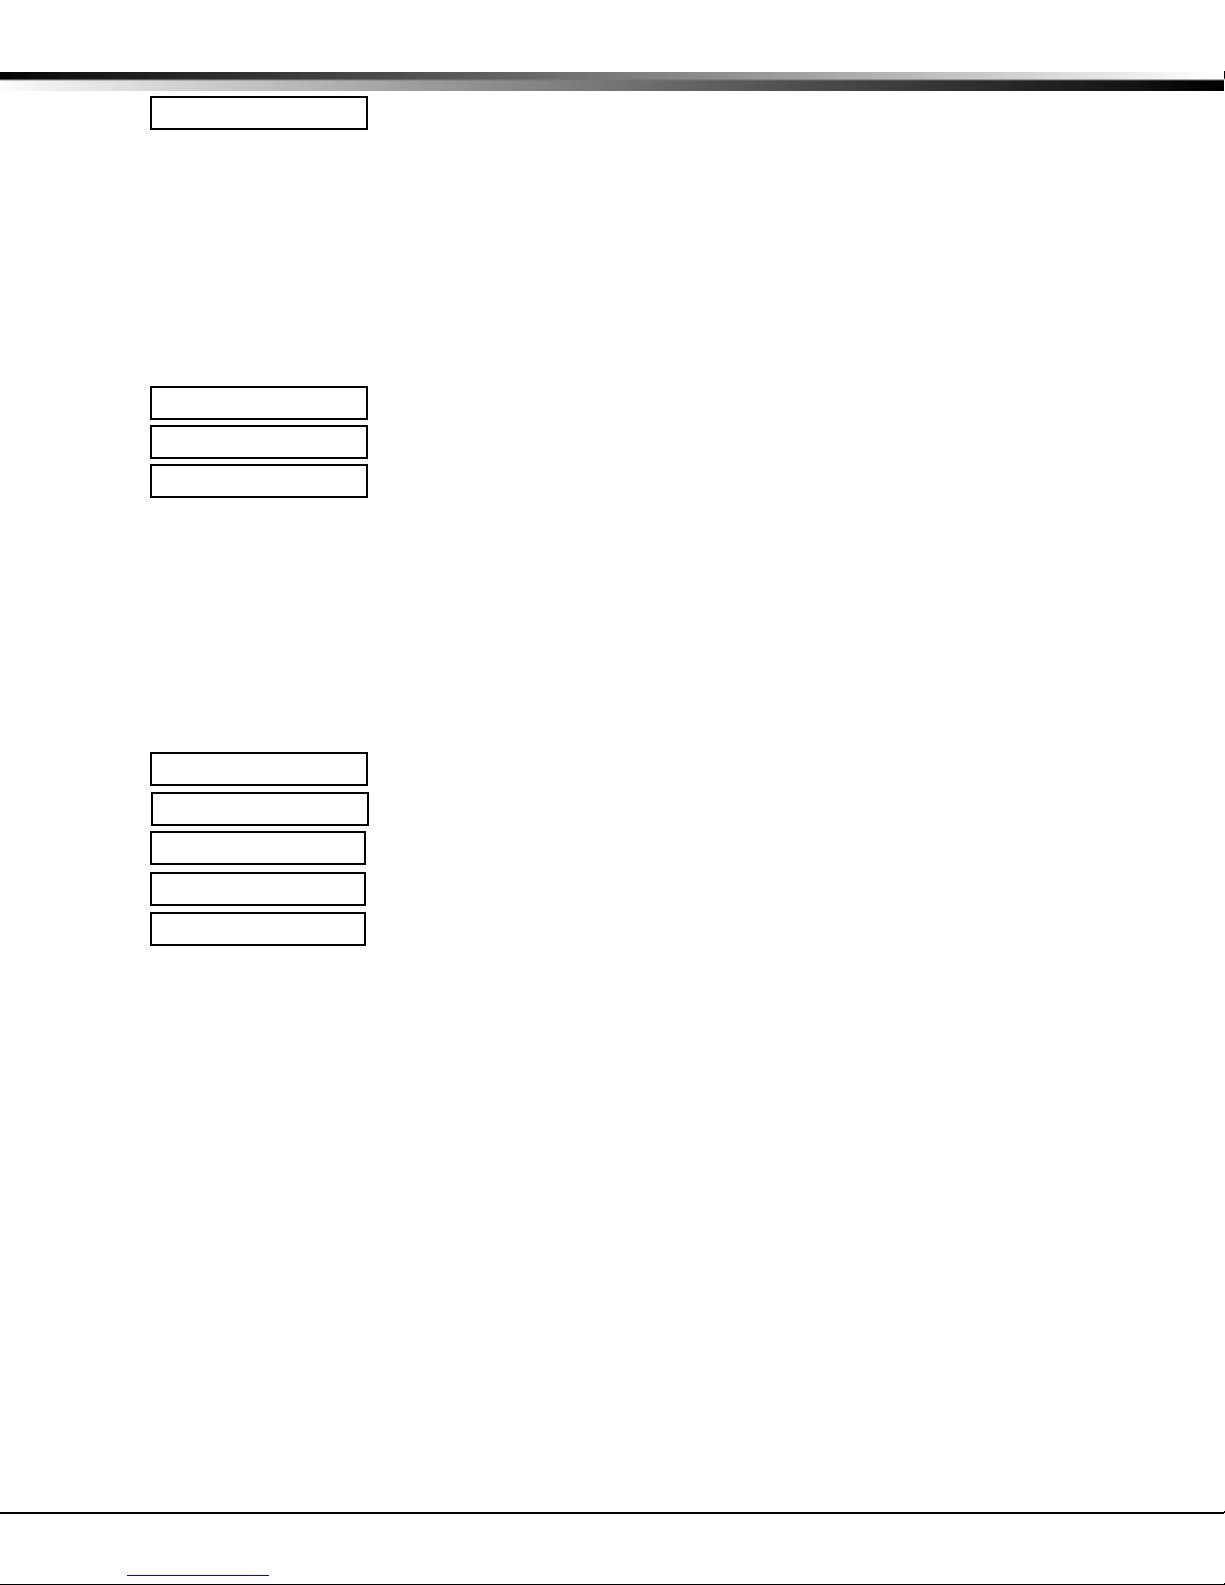
1.7 Entering Alpha Characters
Some options during programming require you to enter alpha characters. To enter an alpha character, press the key
that has that letter written below it. The keypad displays the number digit of the key. Next, press the Select key
that corresponds to the location of the letter under the key. Pressing a different Select key changes the letter.
When another digit key is pressed, the last letter displayed is retained and the process is started over.
CBA
Left
Character
Figure 3: Keypad Display and Select keys
Center
Character
Right
Character
(
Special
Character
XR200/XR2400F Programming Guide Digital Monitoring Products
3
Page 12
1 - INTRODUCTION
90
1234
5678
COMMAND
ABC ( DEF ) GHI ! JKL ?
MNO / PQR & STU $ VWX ,
YZ
(space)
'
- . * #
1.8 Entering Non-Alpha Characters
To enter a space in an alpha entry, press the 9 digit key
followed by the third Select key. The three characters on
the 9 digit key are Y, Z, and space. You can also enter the
following characters: – (dash), . (period), * (asterisk), and
# (pound sign) using the zero key and the four Select keys
from left to right. For example, to enter a – (dash), press
the zero key and then the left Select key. A dash now
appears in the keypad display.
Figure 4: Special Characters
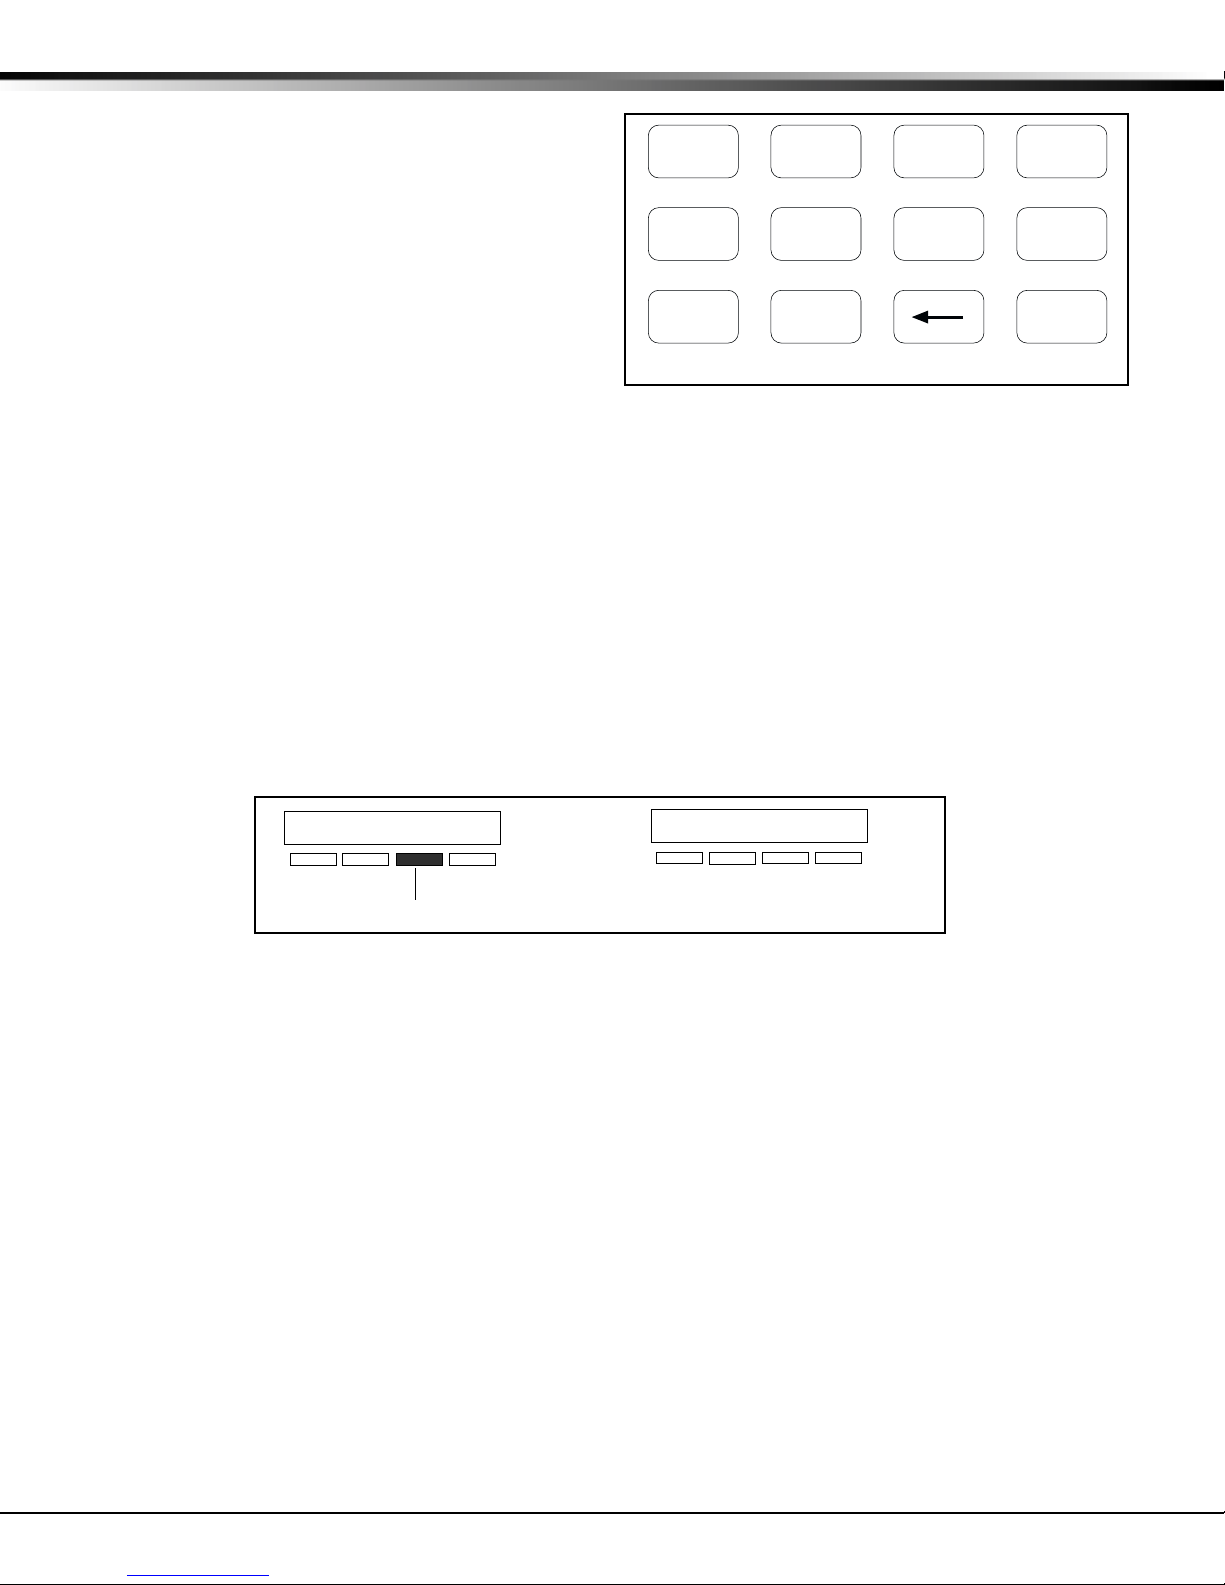
1.9 Keypad Prompts Display Current Programming
Each programming prompt displayed at the keypad shows the currently selected option in the panel's memory. These
options are either shown as a number, a blank, or a NO or YES. To change a number or blank to a new number, press
any top row Select key. The current option is replaced with a dash. Press the number(s) on the keypad you want to
enter as the new number for that prompt.
It is not necessary to enter numbers with leading zeros. The panel automatically right justifies the number when you
press the COMMAND key.
To change a programming prompt that requires a NO or YES response, press the top row Select key under the
response not selected.
For example, if the current prompt is selected as YES and you want to change it to NO, press the third top row
Select key. The display changes to NO. Press the COMMAND key to go to the next prompt. See Figure 5.
BELL TST YES
Press a top row select key.
Figure 5: Changing the Current Programming Option
NEXT
The keypad display changes to the newly
selected option. Press COMMAND.
BELL TST NO
Digital Monitoring Products XR200/XR2400F Programming Guide
4
Page 13
2 - INITIALIZATION
2.1 Initialization
INITIALIZATION
This function allows you to clear selected parts of the panel's program back to the
factory defaults in preparation for system programming.
For each initialization section, the
Programmer provides a NO or YES option.
Selecting NO advances you to the next
section prompt and does not initialize
that section of the program.
2.2 Clear All Memory
INIT ALL? NO YES
CODES? NO YES
SCHEDS? NO YES
NO - Leaves existing programming intact.
SURE? YES NO
2.3 Clear All Codes
CODES? NO YES
YES - Clears all memory.
NO - Leaves existing codes intact.
SURE? YES NO
YES - Clears the user code memory and assigns the user code number 99 to the
highest user position in each partition.
Selecting YES advances you to a
confirmation prompt.
SURE? YES NO
If you select YES, the panel initializes that section of the
program and advances you to the next section prompt.
If you select NO, the panel advances you to the next section
prompt but does not initialize that section of the program.
2.4 Clear All Schedules
SCHDS? NO YES
SURE? YES NO
NO - Leaves existing schedules intact.
YES - Clears all primary, secondary, permanent, temporary, and output schedules.
2.5 Clear Display Events Memory
EVENTS? NO YES
NO - Leaves existing event memory intact.
SURE? YES NO
YES - Clears the Security Command keypad display events memory.
2.6 Clear Zone Information
ZONES? NO YES
NO - Leaves existing zone information intact.
SURE? YES NO
YES - Clears the zone information for all zones. All zones are marked * UNUSED *
and must be renamed before being able to display on any system keypad.
2.7 Clear Area Information
AREAS? NO YES
SURE? YES NO
NO - Leaves existing area information intact.
YES - Clears the area information for all areas. All areas are marked * UNUSED *
and must be renamed before being able to display on any system keypad.
2.8 Clear Output Information
OUTPUTS? NO YES
SURE? YES NO
NO - Leaves existing output information intact.
YES - Clears all programmed Output names and any output cutoff assignment.
2.9 Clear Communication and Remote Options
COM/RMT? NO YES
SURE? YES NO
NO - Leaves existing communication and remote options intact.
YES - Clears communication and remote options programming to factory defaults.
2.10 Set to Factory Defaults
DEFAULTS NO YES
SURE? YES NO
NO - Leaves existing panel programming intact.
YES - Sets the remainder of the panel's programming back to the factory defaults.
XR200/XR2400F Programming Guide Digital Monitoring Products
5
Page 14

3 - COMMUNICATION
3.1 Communication
COMMUNICATION
This section of programming allows you to configure the communication options
for the panel. The information you program varies with the Communication Type
you select.
3.2 Communication Type
COMM TYPE: DD
Specifies the communication method the panel uses to report system events to
DMP SCS-1 Receivers or non-DMP receivers. Press any Select key.
NONE DD MPX M2E
NONE - For local systems. Selecting this ends communication programming.
When COMM TYPE = NONE and there is an unrestored System Trouble, then the
keypad will sound daily at 10:00 AM.
DD - Digital Dialer communication to a DMP SCS-1 Receiver.
MPX - Multiplex communication to a DMP SCS-1 Receiver.
M2E - Modem IIe communication to non-DMP receivers. This format sends the
report codes of the Radionics Modem IIe communication format to the receiver(s)
programmed in Receiver 1 and 2 programming. Once the receiver has been
contacted, the panel waits approximately 45 seconds for the Modem IIe handshake
before hanging up and making another attempt.
Note: Do not use the M2E communication option if the system has over 255 zones
and/or over 254 users. When using Modem IIe to communicate between a
Radionics D6500 receiver and the XR200-485 panel, zone numbers 256 to 299 and
user numbers 255 to 999 CANNOT be received by the D6500. Zone numbers
greater than 255 will be reported as 255. User numbers greater than 254 will be
reported as 000.
C I D HST
CID - This option allows the panel to communicate to non-DMP receivers using the
Ademco Contact ID format. When selected, the panel sends all of its alarm,
trouble, and supervisory reports to the receiver(s) programmed in Receiver 1 and
2 Programming. The panel sends reports to the receiver using either CID or
standard DMP SDLC based on each receiver's ability to process the CID format.
The panel determines whether the receiver can process the CID format by the
acknowledgment tones the receiver transmits when first contacted. If the
receiver can process the CID format, only those event reports for which there are
CID definitions will be sent by the panel. This restriction prevents the panel from
dialing the receiver for a report it cannot send.
HST (Host) - Asynchronous communication using the 462N Network Interface Card.
The DMP Host/Output reporting format is transmitted over an asynchronous data
network to the SCS-1 Receiver. If you need to send a duplicate signal to the
central station and you have selected HST, use Receiver 2 programming to send
the duplicate signal.
Note: When HST is selected, 2ND LINE programming allows you to select D2 for
two line supervision when using a Model 893 or 893A Dual Phone Line Module.
There are extra options available if you selected HST for the communication type.
These options are explained in sections 3.2.1 through 3.2.4.
3.2.1 Retry Time
RETRY TIME: -
After selecting HST, the keypad displays RETRY TIME: -. Enter the number of
seconds (3 to 15 seconds) the panel should wait before retrying to send a message
to the receiver if an acknowledgment was not received. The panel will retry as
many times as possible for a period of one minute before sending a network
trouble message. For example, if RETRY TIME is set to 15, the panel will retry 4
times. The default RETRY TIME is 5 seconds.
Digital Monitoring Products XR200/XR2400F Programming Guide
6
Page 15
3 - COMMUNICATION
3.2.2 Host Backup
HST BCKUP NO YES
After displaying the RETRY TIME prompt, the keypad displays HST BCKUP NO YES.
Select YES to enable Host Backup. Select NO to disable Host Backup.
There are two ways to use the Host Backup feature to send messages through the
backup Host. You could have two 462N cards on the panel and assign the Modem
Setup String to send the backup messages through a backup network device, such
as a cellular radio, to the receiver. Alternatively, you can have one 462N card and
assign the Modem Setup String to route the backup messages to the backup
receiver. Refer to the Appendix for more information about using the Host
Backup feature.
Note: When using two 462N cards, Host Backup must be set to YES.
Note: You can still program 2ND LINE for a different communication type, such as
CELL or DD.
3.2.3 Modem Setup
MODEM SETUP:
The keypad displays MODEM SETUP:. Press COMMAND. Enter up to two lines of 16
–
–
characters to equal 32 characters for the string that is sent to the device
connected to the 462N Network Interface Card. If the network device is an iCOM
and you are using Host Backup, refer below for the iCOM's setup string. If you are
using a non-DMP network device such as a CDPD Modem, refer to the device's
literature for the setup string.
If HST BCKUP is NO and the device connected to the 462N card is a DMP network
device, do not enter a Modem Setup String in this field. If the device is not a DMP
network device, enter the device's Modem Setup String in this field.
If HST BCKUP is selected as YES and you are using two 462N Cards, enter the
Modem Setup String for the second network device. The Modem Setup String is
sent to the second network device, such as a cellular radio, which sends the
messages to the receiver. If the backup network device is a second iCOM, you do
not need to enter a Modem Setup String.
If HST BCKUP is selected as YES and you are using one 462N Card, enter the
Modem Setup String to send the message to a backup receiver. The panel will
attempt to send messages to the receiver using the Remote IP Address
programmed in the iCOM. If the first attempt fails, the panel uses the Modem
Setup String to send the messages to the backup receiver.
Note: If you are using a non-DMP network device and an iCOM, use the non-DMP
device as the backup device. If not, the Modem Setup String entered will override
the IP Address of the iCOM and will not be used for the non-DMP network device.
The Modem Setup String for the iCOM should be entered as follows:
AT#UCXXX.XXX.XXX.XXX#PPPPP. To enter the #, press 0 and the far right top
row Select key. To enter the . (periods), press 0 and the second from the left
Select key. Enter the backup IP Address in place of the Xs. Also enter the UDP
Port Number in place of the Ps. The default port number is 2001. You do not
need to enter leading zeros.
Note: If you are using Host Backup and UL AA is set to YES, the panel will only
send the S72 (WARNING: NETWORK TROUBLE) message after the first series of
host message attempts fails. Refer to the Appendix for information about Host
options.
XR200/XR2400F Programming Guide Digital Monitoring Products
7
Page 16
3 - COMMUNICATION
3.2.4 UL AA
UL AA NO YES
At the UL AA prompt, select YES to enable AA Mode or NO to disable AA Mode. NO
is the default setting. UL AA involves check-in reports. Check-in reports are a
method of supervising the panel's communication with the receiver. To be UL AA
compliant, panels must check-in with the receiver every 6 minutes when armed.
The SCS-1 Receiver verifies that the next Check-in report is received at the
appropriate time. SCS-1/805 or higher firmware is required in the SCS-1 Receiver.
When AA is selected and the check-in fails after one minute, the panel sends a
WARNING: NETWORK TROUBLE (S72) report on the 2ND LINE. The next time the
HST report is successfully sent, the panel sends a NETWORK RESTORED (S73)
report over the 2ND LINE.
UL AA NO YES
DISARM CHKIN RND
If you select YES for UL AA, the DISARM CHKIN prompt displays. Press any
Select key to display MINUTES: - RND. Enter the number of minutes, from 1 to
6, between disarmed check-in reports. If any area is armed, the report is
automatically sent every 6 minutes.
MINUTES: - RND
To select RND (Random), press the top right select key. RND is the default
setting. Selecting RND causes the panel to send the Check-in report at random
times. When all areas are disarmed, the panel sends the report randomly but
always between 5 to 60 minutes. If any area is armed, the panel sends the
report every 6 minutes.
Note: NET TRBL, Network Fail Notification, is automatically enabled when UL
AA is enabled. NET TRBL allows the panel to detect a failure of the primary
host, send an S72, Network Trouble message, through the DD if it is
programmed as the second line. When the primary host restores the panel will
send an S73, Network Restored message.
UL AA NO YES
SUB CODE NO YES
CHECKIN: 1
FAIL TIME: 1
NET TRBL NO YES
If you select NO for UL AA, the SUB CODE prompt is displayed. Select YES if
the panel will send a Panel Substitution Code when communicating with the
receiver. The Panel Substitution Code increases the level of security by helping
to ensure that the panel sending the message to the receiver has not been
substituted by another panel. By default, SUB CODE is NO. When UL AA is YES,
the substitution code is always sent.
At the CHECKIN: - prompt, enter the number of minutes, from 0 to 240,
between check-in reports when the panel is armed or disarmed. Check-in
reports are a method of supervising the panel for communication with the
receiver. Enter 0 (Zero) to disable the check-in. The default CHECKIN is 1.
Note: When used for Fire Protective Signaling, the Check-in Time should not
exceed 1 minute.
Entering a FAIL TIME allows the receiver to miss multiple check-ins before
logging that the panel is missing. For example, if CHECKIN is 10 and FAIL TIME
is 30, the receiver only indicates a Panel Not Responding after 30 minutes. The
FAIL TIME must be equal to or greater than the CHECKIN time: If the CHECKIN
is 10 minutes, the FAIL TIME must be 10 or more. The maximum FAIL TIME is
240 minutes. The default FAIL TIME is 1 (one).
Select YES at the NET TRBL prompt to Enable Network Fail Notification. When
UL AA is enabled, this feature is automatically enabled.
When NET TRBL is YES and the panel detects a failure of primary host
communication, the panel will send an S72, Network Trouble message, through
the DD if it is programmed as the second line. Also, the trouble keypads will
sound a continuous tone and display “NETWORK -TRBL.” Press any key to
silence the tone.
When the primary host restores the panel will send an S73, Network Restored
message, through the DD if it is programmed as the second line. The
“NETWORK -TRBL” display will be removed from the keypad and the tone will
automatically silence.
Digital Monitoring Products XR200/XR2400F Programming Guide
8
Page 17
3 - COMMUNICATION
3.3 2ND Phone Line
2ND LINE: NONE
Allows you to use a second communication line to send reports to the SCS-1
Receiver should the first phone line fail. The default 2nd Phone Line for the
XR200 is NONE. The default 2nd Phone Line for the XR2400F is DD.
If 2ND LINE is DD or CELL (and you are not using a 462N Network Interface Card),
you will need to install a DMP 893 or 893A Dual Phone Line Module to connect both
the main and secondary phone lines to the panel.
Both DD and MPX type systems can be backed up with a dialer or cellular line.
Multiplex lines cannot be used as a secondary line.
NONE DD CELL HST
NONE - A second line is not used.
DD - Dialer communication to a DMP SCS-1 Receiver. When using M2E or CID as
the main Communication Type, choose DD to communicate to an M2E or CID
receiver on the 2ND LINE.
CELL - Cellular dialer communication with Cell-Miser™ restrictions. When CellMiser is selected, the following call restrictions apply to the panel.
1. Only zone alarms, Ambush, Line 1 Trouble, Abort, Recall Test, and Delayed
Events are sent over the cellular system. Delayed Events are only sent if the
cellular call was made for one of the other allowed reports.
2. Line 1 Trouble is sent only once during each armed period.
3. The dialing sequence uses the first phone number on line 1 only and the
second phone number on line 2 only. This allows the panel to use the cellular phone number for cellular calls only without needing prefixes or area
codes for land line dialing.
If 2ND LINE = DD If 2ND LINE = CELL
Panel dials the 1st ph # twice on Line 1 Panel dials the 1st ph # twice on Line 1
Panel dials the 1st ph # twice on Line 2 Panel dials the 2nd ph # twice on Line 2
Panel dials the 2nd ph # twice on Line 1 Panel dials the 1st ph # twice on Line 1
Panel dials the 2nd ph # twice on Line 2 Panel dials the 2nd ph # twice on Line 2
Panel dials the 1st ph # twice on Line 1 Panel dials the 1st ph # twice on Line 1
NONE DD CELL D2
M2E
NONE DD CELL HST
D2 - Select D2 to allow supervision of a second telephone line connected to a
Model 893 or 893A Dual Phone Line Module. D2 is only displayed if HST is the main
Communication type.
M2E - Select M2E to allow 2nd line communication using the Modem IIe format
when HST is the main communication type. M2E is only displayed if HST is the
main communication type.
HST (HOST) - DMP Asynchronous communication to a DMP SCS-1 Receiver or Host
automation system. If HST is selected as the Communication Type, HST will not
be displayed as an option in 2ND LINE. If HST is selected for 2ND LINE, all zone
alarms and restorals are duplicated on the asynchronous channel in addition to the
main communication method.
When HST is used as the main or 2ND LINE communication method, the account
number must not begin with a number that matches a line number being used for
multiplex service on the same SCS-1 Receiver. This allows the Redisplay NonRestored status list to work properly in receivers with SCS1/805 or higher
firmware.
XR200/XR2400F Programming Guide Digital Monitoring Products
9
Page 18

3 - COMMUNICATION
3.3.1 Test Frequency
TEST FREQ: NONE
Specifies the communication test interval for the second phone line. This is
displayed if 2ND LINE is programmed as DD, CELL or HST. The default Test
Frequency is NONE.
NONE REG 7 30
NONE - No communication test is made on the second line.
REG - A 2ND LINE communication test is made each time the regular
communication test is completed.
7 - A communication test is made every 7 days at the test time programmed for
the regular communication test. Test time deferrals are disregarded.
30 - A communication test is made every 30 days at the test time programmed for
the regular communication test. Test time deferrals are disregarded.
If the 2ND LINE test fails to communicate after 10 attempts, the regular
communication channel sends a WARNING: PANEL BACKUP COMMUNICATION FAIL
(S12) report. The next time the panel sends a report over the 2ND LINE, the
regular communication channel sends a BACKUP COMMUNICATION LINE RESTORED
(S04) report.
3.4 Account Number
ACCT NO: 1 2 3 4 5
Enter the account number sent to the SCS-1 Receiver.
DD and HST - The range of valid account numbers for a panel using these
Communication Types is 1 to 65535. For accounts of four digits or less, do not
enter leading zeros. The panel automatically right justifies the account number.
CID and M2E - Choose an account number between 1 to 9999.
MPX - A 5-digit account number is required for panels using these formats. The
first digit is the receiver line number. The second digit is always zero. The last
three digits are the panel's account number. This number must be between the
range of 000 and 127. Individual area account numbers must be between the
range of 128 to 999 on the same line. Example: 10128 to 10999.
3.5 Transmit Delay
XMIT DELAY: 0
Enter the length of time the panel waits before sending burglary reports to the
receiver. The available range is 1 to 60 seconds. Alarm bells and relay outputs
are not delayed during this period. Burglary Outputs in section 8 must be
programmed for pulsed or steady. Set Abort Reports in section 6 to YES if Opening
and Closing reports are not being sent.
Enter zero to disable Transmit Delay. The default Transmit Delay is 0 (zero).
3.6 DTMF
DTMF NO YES
YES enables tone dialing by the panel. NO enables rotary dialing.
3.7 Events Manager
EVENT MGR: SEND
Specifies when non-alarm reports are sent to the receiver. This selection does not
SND DLY KEEP
affect zone alarm, zone trouble, zone restoral, supervisory, or serviceman
messages. Closing reports are not delayed if the Closing Wait option is YES.
SND - If send is selected, all reports are sent to the receiver as they occur.
DLY - All non-alarm reports are held until the panel's memory buffer contains 133
events or until the panel's next communication with the receiver. Contact ID and
Modem IIe do not delay reports but send them as they occur.
KEEP - All non-alarm reports are held in the panel's memory buffer until they are
overwritten by new activity. You can view the contents of the memory buffer
using DMP Remote Link™ or System Link™. You can also use the display events
feature in the User Menu. Refer to the Appendix for a table listing the delayed
report types. Contact ID and Modem IIe do not delay reports but send them as
they occur.
Digital Monitoring Products XR200/XR2400F Programming Guide
10
Page 19

3 - COMMUNICATION
3.8 Defer Test Time
DFR TEST NO YES
Select YES to allow the programmed test report to be deferred if the panel
communicates with a receiver within the time set in Test Frequency. Select NO to
send the test report as programmed regardless of previous panel communication.
3.9 Test Frequency
TEST FREQ: 1
Allows you to set how often the panel sends a test report to the SCS-1 receiver.
Enter from 1 to 60 days. This prompt is not displayed if Defer Test Time is NO.
3.10 Test Time
TEST TIME
Press COMMAND to show the enter test time display. Enter the time of day the
0 : 0 0 A M P M
TEST DAY: ALL
panel sends the test report to the SCS-1 Receiver. Use entries between 12:00 to
11:59 and then choose AM or PM. When Defer Test Time is set to NO, this option
allows you to program the day of the week the test report is sent. Choose one
day of the week or all days.
XR200/XR2400F Programming Guide Digital Monitoring Products
11
Page 20

3 - COMMUNICATION
3.11 Receiver One Programming
RECEIVER 1 PROG
Allows you to set the options for the first receiver the panel attempts to contact
when sending reports. The panel supports communication to two receivers.
3.12 Alarm Reports
ALARM NO YES
YES sends Abort, Alarm, Alarm Restoral, Ambush, Exit Error, and System Recently
Armed reports to this receiver.
3.13 Supervisory/Trouble Reports
SPV/TRBL NO YES
YES sends Supervisory, Trouble, Trouble Restoral, Force Armed, Zone Fault reports,
and Serviceman Messages to this receiver.
3.14 Opening/Closing and User Reports
O/C USER NO YES
YES sends Opening, Closing, Door Access, Late to Close, Unauthorized Entry,
Schedule and Code changes, Zone Reset, and Zone Bypass reports by user to this
receiver.
3.15 Test Report
TEST RPT NO YES
Enter YES to enable the system test report to be sent to this receiver. Reports are
sent according to the programming in Test Frequency and Test Time.
3.16 Backup Reporting
BACKUP NO YES
Enter YES to enable this receiver to be a backup to the other receiver in the event
the other receiver cannot be contacted.
3.17 First Telephone Number
FIRST PHONE NO.
This is the first number the panel dials when sending reports to this receiver.
–
Phone numbers can be up to two lines of 16 characters to equal 32 characters.
You can program a three second pause in the dialing sequence by entering the
–
letter P. You can program a dial tone detect by entering the letter D. These
characters are counted as part of the 32 allowable characters.
Area code selection for cellular communication: You can also enter a letter "C"
in the first or second phone number. When entered, the characters before the "C"
are only used when a 2nd LINE Cellular call is being made. All other calls made
on the main phone line will only use the characters entered after the letter "C".
The letter "C" is never dialed and is recognized by the panel as a marker only.
If a dial tone detect "D" is entered it causes the panel to begin dialing as soon as a
dial tone is detected. The panel waits a maximum of five seconds for a dial tone
on the first attempt. If a dial tone is not detected, the panel hangs up and then
picks up the line again. After waiting another five seconds without dial tone, the
panel begins dialing on the second through tenth attempts.
3.18 Second Telephone Number
SECOND PHONE NO.
–
–
The panel dials the second number when two successive tries using the first
number have failed. If the panel cannot reach the receiver after two attempts
using the second number, it returns to the first number and makes two additional
attempts. A total of ten dialing attempts are made using the first and second
phone numbers.
Each number can be up to 32 characters in length including any P or D characters
entered for pause and dial tone detect.
Should all ten attempts fail, the panel clears the communication buffer and makes
one communication attempt each hour to send a TRANSMIT FAILED (S87) report to
the receiver. The report information that was not sent to the receiver is available
from the Display Events feature of the User Menu and can be downloaded with
DMP Remote Link™ software.
Digital Monitoring Products XR200/XR2400F Programming Guide
12
Page 21

3 - COMMUNICATION
3.19 Receiver Two Programming
RECEIVER 2 PROG
Allows you to set the options for the second receiver the panel attempts to
contact when sending reports. If you select YES for any of the second receiver
options, you must have at least one phone number programmed in Receiver 2
programming.
3.20 Pager Type
PAGER? NONE
This option allows the panel to send Alarm, Trouble, Opening, Closing, and Late to
Close reports to a customer's numeric or alphanumeric pager. The panel uses
DTMF tones for numeric pagers and Glenayre protocol for alphanumeric pagers to
NONE NUM ALPHA
generate the account and report information sent over the pager terminal
equipment. Selecting NONE allows you to use the Receiver 2 Programming to send
panel reports to a second receiver.
NONE - The pager reporting option is not being used.
NUMERIC - Reports are sent to the customer's numeric only pager.
ALPHANUMERIC - Reports are sent to the customer's alphanumeric pager.
3.21 Alarm Reports
ALARM NO YES
See section Alarm Reports on previous page.
3.22 Supervisory/Trouble Reports
SPV/TRBL NO YES
See section Supervisory/Trouble Reports on previous page.
3.23 Opening/Closing and User Reports
O/C USER NO YES
See Opening/Closing and User Reports on previous page.
3.24 Test Report
TEST RPT NO YES
See Test Report on previous page.
3.25 Backup Reporting
BACKUP NO YES
See Backup Reporting on previous page.
3.26 First Telephone Number
FIRST PHONE NO.
Enter the phone number the panel will dial to send reports to the receiver or
–
–
pager. Phone numbers can be up to two lines of 16 characters in length to equal
32 characters. You can program a three second pause in the dialing sequence by
entering the letter P. You can program a dial tone detect by entering the letter D.
These characters are counted as part of the 32 allowable characters.
3.27 Second Telephone Number
SECOND PHONE NO.
–
–
When PAGER? is NONE. The panel dials the second number when two successive
tries using the first number have failed. If the panel cannot reach the receiver
after two attempts using the second number, it returns to the first number and
makes two additional attempts. A total of ten dialing attempts are made using
the first and second phone numbers.
Each number can be up to 32 characters in length including any P or D characters
entered for pause and dial tone detect.
3.28 Pager Identification Number
PAGER ID NUMBER
–
Enter a pager identification number if your pager uses one. For numeric paging,
the panel waits for nine seconds after having dialed the First Phone Number
–
before sending the Pager ID. After the Pager ID has been transmitted, the panel
waits another three seconds before sending the actual pager message containing
the panel reports. You can program additional three second pauses by entering a
letter P for each pause you want to add.
XR200/XR2400F Programming Guide Digital Monitoring Products
13
Page 22

4 - DEVICE SETUP
4.1 Device Setup
DEVICE SETUP
This section allows you to define the physical configuration of the panel. Enter
the number of partitions in the system and the types of devices installed at each
address along with their assigned partition. You can install and address up to
eight supervised devices on the keypad data bus. Zones are available only from
addresses 1-8.
A description of each option follows:
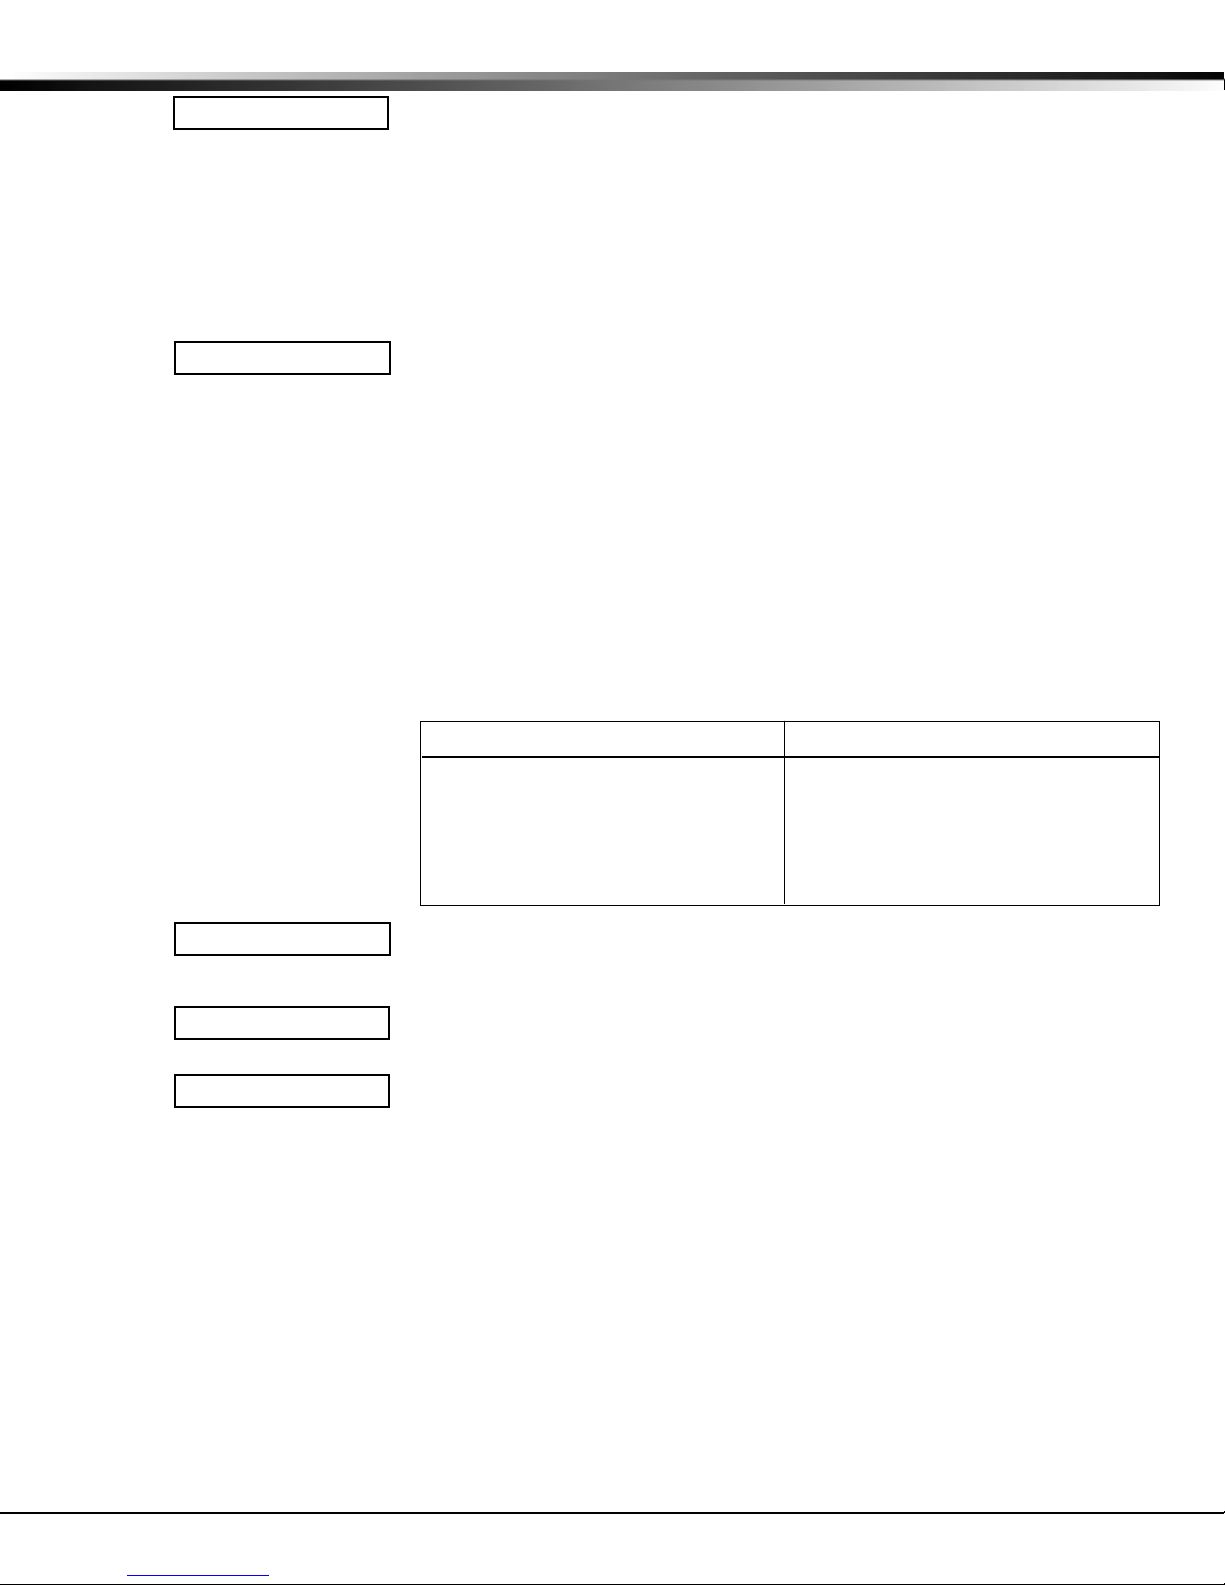
4.2 Maximum Partitions
MAX PARTITION: 1
Maximum number of partitions you want in this system. You can choose from 1 to
4. To change the number displayed, press any Select key, enter the number of
partitions you want to enable, and press COMMAND.
Changing the number of partitions resets user codes: Whenever you change the
number of partitions on the panel, all programmed user codes are cleared. The
only user code available after a partition change is the factory default of 99.
Partitions
Enabled
Areas Available
1 1 to 8 1 to 200
2 Partition 1 - 1 to 8
Partition 2 - 1 to 4
3 Partition 1 - 1 to 8
Partition 2 - 1 to 4
Partition 3 - 1 to 4
4 Partition 1 - 1 to 8
Partition 2 - 1 to 4
Partition 3 - 1 to 4
Partition 4 - 1 to 4
User Codes
Available
XR200
Partition 1 - up to 100
Partition 2 - up to 100
Partition 1 - up to 50
Partition 2 - up to 50
Partition 3 - up to 50
Partition 1 - up to 50
Partition 2 - up to 50
Partition 3 - up to 50
Partition 4 - up to 50
4.3 Device Type
DEVICE NO: -
This prompt allows you to specify that a device is installed at a particular address
on the keypad bus.
DEVICE 1: STNDRD
STANDARD - The device is either a Security Command keypad, a 711, 714, or 715
Zone Expander, a 6155LX PIR, 5845LX Glassbreak Detector, or a 733 Wiegand
Interface Module.
STD FIRE NONE
FIRE - The device is an Addressable Fire Alarm Control panel or a Model 630F
Remote Fire Command Center.
NONE - No device is set for this address.
If you entered 2, 3, or 4 in section 4.2 MAX PARTITION, the keypad displays the
PARTITION NO: prompt. If there is only one partition programmed in section 4.2,
the keypad does not display the partition assignment prompt.
4.4 Partition Number
PARTITION NO: 1
Enter the partition number where the current device being programmed is
assigned. For systems with more than one partition, press any top row Select key
then enter a 1, 2, 3, or 4. Press COMMAND to program the next device. The
keypad can have up to eight devices.
Digital Monitoring Products XR200/XR2400F Programming Guide
14
Page 23

5 - REMOTE OPTIONS
5.1 Remote Options
REMOTE OPTIONS
This section allows you to enter the information needed for Remote Command/
Remote Programming operation.
5.2 Remote Key
RMT KEY:
This option allows you to enter a code of up to eight digits for use in verifying the
authority of an alarm or service receiver to perform a remote command/
programming session. The Remote Link™ program must give the correct key to the
panel before being allowed any remote functions. All panels are shipped from the
factory with the key preset as blank.
To enter a remote key or change the current one, press a top row Select key and
enter any combination of up to eight digits. Press COMMAND. The current key is
never displayed.
5.3 Manufacturer Authorization
MFG AUTH NO YES
Select YES to allow DMP Technical Support technicians to access the panel during
system service or troubleshooting. This authorization automatically expires within
one hour.
DMP remote service is provided on a read only basis: DMP technicians can look
at the system programming and make suggestions only. Alterations can only be
accomplished by the installing company's service personnel.
5.4 Armed Rings
ARM RINGS: 0
Enter the number of rings the panel counts before answering the phone line when
all areas of the system are armed. Any number from 1 to 15 can be entered. If
zero is entered, the panel does not answer the phone when all areas of the system
are armed. The default Armed Rings for the XR200 is 0 (zero). The default
number of Armed Rings for the XR2400F is 10.
5.5 Disarmed Rings
DISARM RINGS: 0
Enter the number of rings the panel counts before answering the phone line while
any areas of the system are disarmed. Any number from 1 to 15 can be entered.
If zero is entered, the panel does not answer the phone when any area of the
system is disarmed. The default number of Disarmed Rings for the XR200 is 0
(zero). The default number of Disarmed Rings for the XR2400F is 10.
5.6 Alarm Receiver Authorization
ALR RCVR NO YES
Select YES to enable remote commands and programming to be accepted from the
alarm SCS-1 Receiver. The Remote Key option can also be required.
With YES selected, the panel requests the receiver key during its first
communication with the first SCS-1 receiver. The panel retains this alarm
receiver key in memory and allows remote commands to be accepted from the
alarm receiver. If an alarm occurs during a remote connect, the alarm report is
immediately sent to this receiver only.
When NO is selected, remote commands and programming are not accepted from
the alarm SCS-1 Receiver.
XR200/XR2400F Programming Guide Digital Monitoring Products
15
Page 24

5 - REMOTE OPTIONS
5.7 Service Receiver Authorization
SVC RCVR NO YES
YES enables remote commands and programming to be accepted from a secondary
service receiver other than the alarm SCS-1 Receiver. The Remote Key option can
also be required.
With YES selected, the panel requests the service receiver key the first time it is
contacted by the service receiver. The panel retains this service receiver key in
memory and accepts remote commands from the service receiver.
If an alarm occurs during a remote connect, the panel disconnects from the
service receiver and calls the alarm receiver. Alarm reports are only sent to the
alarm receiver. It is important that the alarm receiver key and the service
receiver key programmed at the central station are NOT the same so the panel
can determine the difference between receivers.
When NO is selected remote commands and programming are not accepted from a
secondary service receiver.
This option must be YES to allow programming from a directly connected
computer or an Ether-Com.
5.8 Remote Phone Number
REMOTE PHONE NO
-
-
Press COMMAND to enter the phone number the panel dials whenever remote
programming is requested. After entering a phone number, the panel allows
remote commands and programming only after it has first been called by the
authorized receiver, disconnected itself, and has redialed the remote phone
number.
If a Remote Phone Number is NOT entered, and Alarm Receiver and Service
Receiver is YES the panel allows remote commands and programming without
disconnecting and redialing. The phone number can be up to two lines of 16
characters to equal 32. Enter a D for dial tone detect and a P for a 3 second
pause.
Note: When not in the Programming Menu, the function 984 + COMMAND can be
entered at the keypad, and a remote options menu appears. This menu contains
the following options:
NBR RMT PICKUP
NUMBER - The panel allows you to enter into the keypad a phone number you
want the panel to dial. Enter any required prefixes and area codes.
REMOTE - The panel dials the phone number programmed in Remote Phone
Number.
PICKUP - The panel picks up the phone line as Remote Link™ calls in. The phone
must be ringing before selecting PICKUP.
5.9 Remote Disarm
DISARM NO YES
YES allows the panel to be disarmed remotely. NO disables remote disarming.
Digital Monitoring Products XR200/XR2400F Programming Guide
16
Page 25

6 - SYSTEM REPORTS
6.1 System Reports
SYSTEM REPORTS
This section allows you to select specific system reports the panel sends to the
receiver.
6.2 Abort Report
ABORT NO YES
YES allows the panel to send an alarm abort report to the receiver any time an
area is disarmed after an alarm report has been sent and the Bell Cutoff Time has
not expired. No alarmed zones can still be armed. If the communication type is
set to DD, a Warning: Alarm Bell Silenced report is also sent if the alarm bell is
silenced by a user.
Abort reports are also sent when the system is disarmed during Transmit Delay and
the Bell Output Timer is active.
Note: Abort reports will not be sent for Fire zones, Fire Verify, or Supervisory type
zones.
6.3 Restoral Reports
RESTORAL: YES
This option allows you to control when and if a zone restoral report is sent to the
central station receiver. Press a Select key to display the following options:
NO - Disables the zone restoral report option. Zones continue to operate normally
NO YES DISARM
but do not send restoral reports to the receiver.
YES - Enables the zone restoral report option. Zone restorals are sent whenever a
zone restores from a trouble or alarm condition.
DISARM - This option causes the panel to send restoral reports for a non-24-hour
zone whenever a zone that has restored from a trouble or alarm condition is
disarmed. All 24-hour zones send restoral reports as they restore.
6.4 Bypass Reports
BYPASS NO YES
YES allows the panel to send all zone bypasses, resets, and force arm reports to
the receiver. The bypass report includes the zone number, zone name, and the
user name and number of the individual operating the system. Reports will only
be sent if O/C User in Communications is set YES for Receiver 1 or Receiver 2.
6.5 Schedule Change Reports
SCHD CHG NO YES
YES allows the panel to send all permanent and temporary, primary and secondary
schedule changes to the receiver. The report includes the day, opening time,
closing time, and the user name and number of the individual making the change.
Schedule changes made through Remote Link™ are not sent to the printer or
Display Events. Reports will only be sent if O/C User in Communications is set YES
for Receiver 1 or Receiver 2. XR200 default setting is YES; XR2400F is NO.
6.6 Code Change Reports
CODE CHG NO YES
YES allows the panel to send all code additions, changes, and deletions to the
receiver. The code change report includes the user name and number added or
deleted and the user name and number of the individual making the change. Code
changes made through Remote Link™ are not sent to the printer or Display Events.
Reports will only be sent if O/C User in Communications is set YES for Receiver 1
or Receiver 2. XR200 default setting is YES; XR2400F is NO.
6.7 Access Keypads
ACS KEY: - - - - - - - -
Enter the keypad addresses that send door access reports to the receiver. A report
is sent with each door access made from the selected keypads. Keypads at
addresses not selected still operate the door strike relay but do not send door
access reports. The report includes the user name and number and the keypad
address used.
6.8 Ambush
AMBUSH NO YES
YES allows an ambush report to be sent anytime user code number 1 is entered at
a keypad. NO disables the ambush report and allows user number one to operate
the same as all other codes. If YES, you can program one Ambush code for each
partition in the system.
XR200/XR2400F Programming Guide Digital Monitoring Products
17
Page 26

7 - SYSTEM OPTIONS
7.1 System Options
SYSTEM OPTIONS
This section allows you to select system wide parameters used in the operation of
the system. A description of each System Option follows:
7.2 Closing Wait
CLS WAIT NO YES
When YES, the keypad displays ONE MOMENT... while the system waits for an
acknowledge from the receiver before arming the selected area(s) and performing
a Bell Test (if selected). The acknowledge must be received within 90 seconds.
Exit delays begin after this period. Opening/Closing reports must be YES to
enable Closing Wait.
7.3 Entry Delay 1
ENTRY DLY 1: 30
ENTRY DLY 2: 60
ENTRY DLY 3: 90
ENTRY DLY 4: 120
Enter the Entry Delay time for all Exit type zones programmed to use Entry Delay
1. When an armed Exit type zone is faulted, the keypad prewarn tone begins
sounding and ENTER CODE:- displays on all keypads programmed to prewarn for
that zone. The area must be disarmed before the delay expires or an alarm report
is sent to the receiver. All zones in that area are delayed along with the Exit
zone. Entry Delay times can be from 1 to 250 seconds.
Repeat the above for each entry delay being used in the system.
7.4 Cross Zone Time
CRS ZONE TM: 4
Enter the time allowed between zone faults. When zones are cross zoned, a
second cross zoned zone in the same partition must fault within this time in order
for an alarm report from the first zone to be sent to the receiver. If the cross
zone time expires without the second zone faulting, only a zone fault from the
first zone is reported. Cross zone time can be from 4 to 250 seconds. Entering
zero disables this function. See the Appendix.
7.5 Zone Retard Delay
RETARD DLY: 10
Enter the retard time assigned to Fire, Supervisory, Auxiliary 1, and Auxiliary 2
type zones. The retard delay only functions when the zone is shorted. The zone
must remain shorted for the entire length of the Retard Delay before being
recognized by the panel. The Zone Retard Delay can be from 1 to 250 seconds.
Entering a zero disables this function.
7.6 Power Fail Delay
PWR FAIL HRS: 1
This option tracks the duration of an AC power failure. When the AC power is off
for the length of the programmed delay time, an AC power failure report is sent to
the receiver. The delay time can be from 1 to 9 hours. Entering a zero sends the
AC power failure report after a 15 second delay. XR200 default setting is 1;
XR2400F is 6.
7.7 Swinger Bypass Trips
SWGRBYPS TRIPS: 3
Enter the number of times a zone can go into an alarm or trouble condition within
one hour before being automatically bypassed. You can select from 1 to 7 trips.
Bypassed zones are automatically reset when the area they are assigned to is
disarmed. All 24 hour zones are reset when any area of the system is disarmed.
Entering a zero disables this function.
How it works
The panel's hour timer starts at 59 minutes past the hour. If the hour timer
expires before the trip counter is exceeded, the trip counter returns to zero. If
the trip counter is exceeded before the hour expires, the zone is automatically
bypassed by the panel. A report of the automatic bypass is sent to the receiver if
Bypass Reports has been selected as YES.
7.8 Reset Swinger Bypass
RST SBYP NO YES
When YES is selected, an automatically bypassed zone is reset if it remains in a
normal condition for one complete hour after being bypassed. A report of the
automatic reset is sent to the receiver if Bypass Reports has been selected as YES.
Digital Monitoring Products XR200/XR2400F Programming Guide
18
Page 27

7 - SYSTEM OPTIONS
7.9 Video/Alarm Verification
VIDEO NO YES
Selecting YES forces the panel to wait for 60 seconds after a successful
communication with a central station receiver before making any additional
communication attempts. This 60-second period can be used to allow video
transmission or alarm verification (such as 2-way voice) equipment to use the
phone line. After the 60-second timer, the panel can once again seize the phone
line and send any reports being buffered.
The Video option must be set to NO if any fire protection is connected to the
panel.
7.10 Time Zone Changes
TIME CHG NO YES
This function allows the panel to request automatic time changes from the DMP
SCS-1 receiver. For the receiver to send time changes, it must be programmed to
send time changes and must be receiving time change updates from the host
automation computer at least every 24 hours. Default is YES.
HRS FROM GMT: 6
When time zone is programmed YES, enter the number (0-23) that indicates the
Greenwich Time zone (GMT) where the panel is located. The default is 6. See
table below for GMT values.
TMGytiC
0hgrubnidE,acnalbasaC,nilbuD,nobsiL,aivornoM,nodnoL
1serozA,dnalsIedreVepaC
2citnaltA-diM
3ailisarB,nwotegroeG,seriAsoneuB
4zaPaL,sacaraC,)adanaC(emiTcitnaltA
5amiL,atogoB,)adanaC,SU(emiTnretsaE
6nawehctaksaS,ytiCocixeM,)adanaC,SU(emiTlartneC
7anozirA,)adanaC,SU(emiTniatnuoM
8anaujiT,)adanaC,SU(emiTcificaP
9aksalA
01iiawaH
11aomaS,sdnalsIyawdiM
21nielajawK,dnalkcuA,notgnilleW,sdnalsIllahsraM,ijiF
31ainodelaCweN
41yendyS,mauG
51luoeS,oykoT
61eropagniS,gnoKgnoH
71ionaH,kokgnaB
81ytamlA,akahD
91ihcaraK,dabamalsI
02nazaK,ibahDubA
12dadhgaB,wocsoM
22eporuEnretsaE
32nilreB,siraP,emoR
7.11 AC Cycles
AC CYCLES: 60 Hz
This function allows you to select either a 60 Hz or 50 Hz electrical AC cycle.
50Hz 60Hz
When 60HZ is selected, the XR200 will operate on a 60 Hz cycle used in the U.S.A.
Select 50HZ for the XR200 to operate on a 50 Hz cycle used in countries other than
the U.S.A. The default value is 60 Hz.
XR200/XR2400F Programming Guide Digital Monitoring Products
19
Page 28

8 - OUTPUT OPTIONS
8.1 Output Options
OUTPUT OPTIONS
This function allows you to program the panel's Bell Output functions and certain
Relay Output options. Dry contact relays and voltage outputs are available using
the output harness on the panel. See the Installation Guide for more information.
8.2 Bell Cutoff Time
BELL CUTOFF: 15
Enter the maximum time from 1 to 99 minutes the Bell Output remains on. If the
Bell Output is manually silenced or the area is disarmed, the cutoff time is reset.
Enter zero to provide continuous bell output. XR200 default setting is 15 minutes;
XR2400F is 5 minutes.
8.3 Automatic Bell Test
BELL TST NO YES
When YES is selected, the Bell Output is turned on for 2 seconds each time a
partition is completely armed from a keypad. This test is delayed until the
Closing Wait acknowledge is received (if selected). If the Closing Wait
acknowledge is not received within 90 seconds, the bell test will not occur. The
Bell Test only occurs when the areas are armed from a keypad. Arming performed
from an Arming zone or from Remote Link™ does not activate the Bell Test.
8.4 Bell Action
BELL ACTION . . . .
This section allows you to define the type of Bell Output for zone alarms.
(Trouble conditions do not activate the Bell Output.) Press COMMAND to display
the default Bell Output for each zone type. To change the output, press any
Select key and enter S to provide a Steady Bell Output, P for a Pulsed output. T
for a Temporal Code 3 output, and N for no Bell Output.
8.4.1 Fire Bell Action
FIRE TYPE: P
Defines Bell Action for Fire Type zones. The XR200 factory default is set at P. The
XR2400F factory default is set at S.
8.4.2 Burglary Bell Action
BURGLARY TYPE: S
Defines Bell Action for Burglary Type zones and Exit Error output. The XR200
factory default is set at S. The XR2400F factory default is set at N.
8.4.3 Supervisory Bell Action
SUPRVSRY TYPE: N
Defines Bell Action for Supervisory Type zones. The default is set at N.
8.4.4 Panic Bell Action
PANIC TYPE: N
Defines Bell Action for Panic Type zones. The default is set at N.
8.4.5 Emergency Bell Action
EMERGNCY TYPE: N
Defines Bell Action for Emergency Type zones. The default is set at N.
8.4.6 Auxiliary 1 Bell Action
AUXLRY I TYPE: N
Defines Bell Action for Auxiliary 1 Type zones. The default is set at N.
8.4.7 Auxiliary 2 Bell Action
AUXLRY 2 TYPE: N
Defines Bell Action for Auxiliary 2 Type zones. The default is set at N.
8.5 Output Action
OUTPUT ACTION . . .
This option allows you to define the operation of the XR200 and XR2400F relay
outputs. The panel provides two Form C relays (1 and 2) and eight 12 VDC voltage
outputs (3 to 10) rated at 50mA each. You can expand the system to 200
additional relay outputs (numbered 100 to 299) using multiple 716 Output
Expander Modules and at least two expansion interface cards.
8.5.1 Cutoff Output
CO OUTS: - - - - -
Outputs 1 to 8 can be entered here to turn off after a time specified in CUTOFF
TIME. To disable this option, press any Select key to clear the display then press
COMMAND. The Cutoff Output displays NONE when no outputs are selected.
8.5.2 Output Cutoff Time
CUTOFF TIME: 0
If a Cutoff Output is assigned, you can enter a Cutoff Time of 1 to 99 minutes for
the output to remain on. Enter zero for continuous output.
Digital Monitoring Products XR200/XR2400F Programming Guide
20
Page 29

8 - OUTPUT OPTIONS
8.5.3 Communication Fail Output
COM FAIL OUT: 0
Enter output number to turn on when any of the following conditions occur:
• a DD system fails to communicate on three successive dial attempts
• a MPX system does not communicate with the receiver for 150 seconds or if
the backup communication line transmits a report
To clear the output, disarm any area. Enter zero to disable this output.
8.5.4 Fire Alarm Output
FIRE ALR OUT: 0
Enter output number to turn on when a fire type zone is placed in alarm. The
output is turned off using the Sensor Reset option while no additional fire type
zones are in alarm. Enter zero to disable this output. This output is not
compatible with Cutoff Outputs.
8.5.5 Fire Trouble Output
FIRE TRB OUT: 0
Enter output number to turn on when a fire type zone is placed in trouble or when
a supervisory type zone is placed in alarm or trouble. The output is turned off
when all fire and supervisory type zones are restored to normal. Enter zero to
disable this output. This output is not compatible with Cutoff Outputs.
8.5.6 Ambush Output
AMBUSH OUT: 0
Enter output number to turn on when an Ambush code is entered at a keypad. The
output is turned off using the Sensor Reset option. Enter zero to disable.
8.5.7 Entry Output
ENTRY OUT: 0
Enter output number to turn on at the start of the entry delay time. The output is
turned off when the area is disarmed or the entry delay time expires. Enter zero
to disable this output.
8.5.8 Exit Output
EXIT OUT: 0
Enter output number to turn on when an exit delay time starts in any area of the
system. The output is turned off when the area arms or when the arming has
been stopped. Enter zero to disable this output.
8.5.9 Ready Output
READY OUT: 0
Enter output number to turn on when all disarmed burglary zones are in a normal
state. The output is turned off when any disarmed burglary type zone is in a bad
state. Enter zero to disable. This output is not compatible with Cutoff Outputs.
8.5.10 Phone Trouble Output
PH TRBL OUT: 0
Enter output number to turn on when the phone line monitor in the DMP 893 or
893A Dual Phone Line Module detects a voltage below 3 VDC. The output is turned
off when phone voltage rises above 3 VDC. Enter zero to disable this output.
8.5.11 Late To Close Output
LATE CLS OUT: 0
Enter the output number to turn on at the expiration of a Closing schedule. The
output activates simultaneously with the CLOSING TIME! keypad display. The
output is turned off when the area is armed, the Closing is extended, or the
schedule is changed. Enter zero to disable this output.
8.5.12 Device Fail Output
DVC FAIL OUT: 0
Enter output number to turn on when an addressed device fails to respond to
polling from the panel. A Missing Device report is also sent to the receiver. The
output is turned off when the device responds to polling or is removed from the
system. Enter zero to disable this output and LX-Bus™ device fail reporting to
the receiver. If any keypad addressed device is unsupervised, then this output
option cannot be used.
8.5.13 Sensor Reset Output
SNSR RST OUT: 0
Enter an output number to turn on when a Sensor Reset is performed at a keypad.
The output turns off automatically 5 seconds later. This function can be used to
reset smoke detectors that are operated by an external power supply through a
Model 716 Output Expander Module. Enter zero to disable this output.
XR200/XR2400F Programming Guide Digital Monitoring Products
21
Page 30

9 - MENU DISPLAY
9.1 Menu Display
MENU DISPLAY
Menu Display allows you to select at which keypad addresses the user can access
the following functions.
A description of each menu option follows.
9.2 Armed Status
ARM STAT 12345678
Enter the keypad addresses that show the armed areas for their partitions. For
example, if address 1 is enabled here, it can display the armed areas within its
partition. Each armed area is displayed with its area number. The User Menu
Armed Areas function also displays the custom area name you enter in the Area
Information section of the Programmer.
The XR200 has all keypads selected by default. The XR2400F has no keypads
selected by default.
9.3 Time
TIME DSP 12345678
Enter the keypad addresses that can display the time and day of the week.
9.4 Arm/Disarm
ARM/DIS 12345678
Enter the keypad addresses from which users can arm and disarm areas in a
partition.
The XR200 has all keypads selected by default. The XR2400F has no keypads
selected by default.
Digital Monitoring Products XR200/XR2400F Programming Guide
22
Page 31

10 - STATUS LIST
10.1 Status List
STATUS LIST
This function allows you to select the zone alarms and troubles, and system
monitor troubles displayed at the keypads. The Status List function operates
automatically when the keypad is not performing any other function.
The keypad stays in the Status List until the user chooses to go to system arming/
disarming or a menu option. Status List alternates with the Armed Status on
keypad addresses selected in Armed Status Menu Display. You can choose to have
System Monitor troubles placed in the list, the different zone types placed in the
list, and at which keypad addresses they will display.
A description of how each is displayed in the Status List follows.
10.2 Display Keypads
DISPLAY KEYPADS:
This option defines which keypad addresses display the various status information.
Any combination of addresses can be entered to display the status items that
follow. If you do not want a particular status item to display, do not enter any
addresses.
10.3 System Monitor Troubles
SYS TRB 12345678
Specifies the addresses where any trouble on a System Monitor is displayed. The
System Monitors include the following:
AC Power
Battery Power
Closing Check
The name of the System Monitor is placed in the Status List and the keypad steady
trouble buzzer sounds. The buzzer remains on until any top row Select key is
pressed on the keypad. The name remains in the list until the condition is
restored.
10.4 Fire Zones
FIRE 12345678
Specifies the addresses where all fire zone alarms and troubles are displayed. The
zone name is displayed and, if it is a trouble condition, the keypad steady trouble
buzzer sounds. The buzzer remains on until any top row Select key is pressed.
The name remains in the list until the user clears it with the Sensor Reset
function.
When using the 690, 790, 791, or 793 Security Command LCD Keypads or the 630F
Remote Fire Command Center, the panel provides distinct speaker tones from the
keypad for Fire. See below.
Fire On - Fire zone alarm and Bell Output or Fire Bell Output is ON.
Off - Alarm Silence.
Panel Box Tamper
Phone Line 1
Phone Line 2 (requires the 893 or 893A Dual Phone Line Module)
XR200/XR2400F Programming Guide Digital Monitoring Products
23
Page 32

10 - STATUS LIST
10.5 Burglary Zones
BURGLRY 12345678
Specifies the addresses where all burglary zone alarms and troubles are displayed.
Burglary zones include Night, Day, and Exit type zones. Burglary zone troubles
remain in the list until the zone restores. The XR200 has all keypads selected by
default. The XR2400F has no keypads selected by default.
For zone alarms, only the last burglary zone tripped remains in the list. The alarm
remains in the list until another burglary zone goes into alarm, any area of the
system is disarmed, or 10 minutes elapses without an alarm. This ensures that if a
burglary is in progress the last zone tripped remains in the list even if the zone
has been restored.
The keypad buzzer sounds for one second on burglary alarms.
When using the 690, 790, 791, or 793 Security Command LCD Keypads or the 630F
Remote Fire Command Center, the panel provides distinct speaker tones from the
keypad for Burglary. See below.
On - Burglary zone alarm and Bell Output or Burglary Bell Output is ON.
Off - Alarm Silence.
10.6 Supervisory Zones
SPRVSRY 12345678
Specifies the addresses where all supervisory zone alarms and troubles are
displayed. Supervisory zones are entered in the status list and sound the keypad
buzzer until a valid user code is entered at any keypad address.
10.7 Panic Zones
PANIC - - - - - - - -
Specifies the addresses where all panic zone alarms and troubles are displayed.
The name of the zone remains in the list until the zone restores. The keypad
buzzer does not sound for panic alarms or troubles.
10.8 Emergency Zones
EMERGCY - - - - - - -
Specifies the addresses where all emergency zone alarms and troubles are
displayed. The name of the zone remains in the list until the zone restores. The
keypad buzzer does not sound for emergency alarms or troubles.
10.9 Auxiliary 1 Zones
AUX 1 - - - - - - - -
Specifies the addresses where all Auxiliary 1 zone alarms and troubles are
displayed. The name of the zone remains in the list until the zone restores. The
keypad buzzer does not sound for Auxiliary 1 alarms or troubles.
10.10 Auxiliary 2 Zones
AUX 2 - - - - - - - -
Specifies the addresses where all Auxiliary 2 zone alarms and troubles are
displayed. The name of the zone remains in the list until the zone restores. The
keypad buzzer does not sound for Auxiliary 2 alarms or troubles.
Digital Monitoring Products XR200/XR2400F Programming Guide
24
Page 33

11 - PRINTER REPORTS
11.1 Printer Reports
PRINTER REPORTS
This section allows you to define the operation of a local printer connected to the
panel through the use of a DMP 462P Printer Interface Card. The 462P allows you
to connect the DMP SCS-PTR or other compatible 40-character or 80-character
serial printer to the panel.
Printing the panel's event buffer
The Display Events option in the User Menu contains a PRINT command that allows
the user to send the contents of the panel's event buffer to a local printer. The
PRINT option is visible whether or not a 462P Printer Interface Card is attached to
the panel.
11.2 Arm and Disarm Reports
ARM/DIS NO YES
Prints arming, disarming, and Late to Close reports. Includes the area number,
name, and action (armed, disarmed, or late), the user number, user name, and
time and date.
11.3 Zone Reports
ZONE NO YES
Prints changes in the status of active zones. Includes the zone number, name, and
type as well as the action (alarm, trouble, bypass, etc.) user number (if
applicable) and area name.
11.4 User Command Reports
USR CMDS NO YES
Prints user code changes, outputs turned on or off (if operated by a schedule, SCH
is shown in Display Events in place of the user number), schedule changes, and
User Menu functions.
11.5 Door Access Reports
DOOR ACS NO YES
Prints door access activity. Includes the door number, user number and name, and
the time and date of the door access.
11.6 Supervisory Reports
SUPV MSG NO YES
Prints System Monitor Troubles and system events. See Status List - System
Monitor Troubles.
XR200/XR2400F Programming Guide Digital Monitoring Products
25
Page 34

12 - HOST LOG REPORTS
12.1 Host Log Reports
HOST LOG REPORTS
This section allows you to program the types of logging reports the panel will send
through the 462N Network Interface Card. The reports include information such
as the type of activity, time and date of the activity, and user name and number.
These data logging reports can be accessed using the Advanced Reporting
Module. See the Advanced Reporting Module User’s Guide, LT-0645.
Note: The network connection that the Host Log Reports are sent through is not
monitored for network trouble. Therefore, the Host Log Reports option should
NOT replace the primary communication method.
If there is trouble with the network connection, the panel will continue to
attempt to send the Host Log Reports until the connection is reestablished. The
panel will then send the reports. A Network Trouble message will not be sent if
the connection is lost. The Host Log Reports have the lowest priority of panel
reports sent.
For information about the 462N card capabilities with Host Log Reports and Host
Communication method, see 462N Card Examples in the Appendix.
12.2 Modem Setup
MODEM SETUP:
–
The keypad displays MODEM SETUP:. Press COMMAND. Enter up to two lines of 16
characters to equal 32 characters for the string that is sent to the network device
connected to the 462N Network Interface Card.
–
If you are using a direct connection through the 462N card to a Remote Link
computer, do not enter a Modem Setup String here.
If your network device is an iCOM, enter the following setup string:
AT#UCXXX.XXX.XXX.XXX#PPPPP. The Xs represent the target IP Address of the
iCOM, and the Ps represent the port number. The default port number is 2001.
An example of a modem setup is: AT#UC192.168.001.099#2001. To enter the #,
press 0 and then the far right Select key. To enter the . (period), press 0 and then
the second Select key from the left.
Note: The Modem Setup String entered CANNOT be the same as that entered in Communication.
12.3 Arm and Disarm Reports
ARM/DIS NO YES
Sends arming, disarming and Late to Close events. Includes the area number,
name and action, the user number and name, and the time and date.
12.4 Zone Reports
ZONE NO YES
Sends changes in the status of active zones. Includes the zone number, name, and
type as well as the action (alarm, trouble, bypass, etc.) user number (if
applicable) and area name. When the Walk Test or Panic Zone Test (485B only) is
performed, Verify and Fail messages are also sent for each zone.
12.5 User Command Reports
USR CMDS NO YES
Sends user code changes, schedule changes, and door access denied events.
12.6 Door Access Reports
DOOR ACS NO YES
Sends door access activity. Includes the door number, first and second (485B only)
user number, first and second (485B only) user name, and the time and date.
12.7 Supervisory Reports
SUPV MSG NO YES
Sends system monitor reports, such as AC and battery, and system event reports.
Supervisory Reports also sends the following reports:
• Abort • Exit Error
• Ambush • System Recently Armed
• Alarm Bell Silenced • Unauthorized Entry
• Late to Close (only sent as a Supervisory Report if Area Schedules is not
enabled, Closing Check is enabled, and an opening/closing schedule has
been programmed.)
Note: To send these reports through the host logger, you must enable SUPV MSG.
Digital Monitoring Products XR200/XR2400F Programming Guide
26
Page 35

13 - AREA INFORMATION
13.1 Area Information
AREA INFORMATION
Allows you to assign functions to the different areas within a partition. All non-24
hour zones must be assigned to an active area. See Zone Information.
You activate an area by assigning it a name. See Area Name. A name is given to
each active area in place of a number to assist the user during arming and
disarming.
Note: The XR2400F does not require Area Information programming
13.2 Partition Number
PARTITION NO: 1
Enter the partition number to program. Partition 1 using area arming can have up
to eight areas on the panel. Partitions 2, 3, and 4 using area arming can each
have up to four independent areas.
This prompt is not displayed if you only entered one partition in Device Setup.
13.3 Arming Mode
MODE: AREA SYS
This option allows you to program how the areas in this partition operate. The
options you can choose are listed below:
AREA A / P H / A
AREA ARMING— all areas of the partition can be programmed and operated
independently. Partition 1 provides up to eight areas and partitions 2 to 4 each
provide up to four areas.
ALL/PERIMETER—only areas 1 and 2 are activated and operate as a perimeter and
interior system only.
HOME/AWAY—three areas can be used: Perimeter, Interior, and Bedrooms. If you
assign zones to the Bedrooms area, the keypad display shows HOME SLEEP AWAY
when the user arms the system. If you do not assign zones to the Bedrooms area,
the keypad only displays HOME AWAY to the end user.
With the HOME SLEEP AWAY option, the user can:
1. Select HOME to arm just the perimeter.
2. Select SLEEP to arm the perimeter and interior (non bedroom areas).
3. Select AWAY to arm all three areas.
13.4 Exit Delay
EXIT DELAY: 45
Enter the exit delay time for all Exit type zones in this partition. When the exit
delay time starts, all activity on that zone and other non-24 hour zone types in the
area are ignored until the exit delay expires. This delay countdown is displayed
on the keypad.
If an Exit zone is in a bad condition at the end of the exit delay:
• the alarm bell sounds for 2 seconds
• an Exit Error report is sent to the central station receiver
• the bad Exit zone is force armed
If any other zone type is placed in a bad condition at the end of the exit delay an
alarm is indicated. The exit delay can be from 1 to 250 seconds.
Enter zero to disable the Exit Delay feature.
13.5 Burglary Bell Output
BURG BEL OUT: 0
Enter the output number (0 to 10, 100 to 299) that is turned on any time a
Burglary type zone in this partition is placed in alarm. The output is turned off
when you disarm the area in which the alarm occurred and no other Burglary type
zones are in alarm. The output can also be turned off using the Alarm Silence
option in the User Menu or by entering a user code with the authority to silence
alarms. The duration of this bell output follows the time entered in the System
Options/Bell Cutoff Time prompt. See section Output Options - Bell Cutoff. If
Bell Test is YES, the Burglary Bell Output entered here is turned on for two
seconds each time the system is armed.
XR200/XR2400F Programming Guide Digital Monitoring Products
27
Page 36

13 - AREA INFORMATION
13.6 Opening/Closing Reports
O/C RPTS NO YES
This option allows an Opening report to be sent to the receiver whenever an area
within this partition is disarmed. A Closing report is also sent to the receiver
when any area within this partition is armed.
13.7 Closing Check
CLS CHK NO YES
Select YES to enable the panel to verify that all areas in this partition have been
armed after temporary or permanent schedules have expired. If the Closing Check
finds any areas disarmed past the scheduled time, the keypad selected to display
System Trouble Status emits a steady beep and displays CLOSING TIME!.
If you select Area Schedules, the appropriate area name is displayed followed by LATE. The keypad's steady beep is silenced by pressing any top row Select key. If
the system is not armed or a temporary schedule not entered to extend the
closing within ten minutes, a no closing report is sent to the SCS-1 Receiver if
AUTO ARM is NO. See Automatic Arming. If the area has been disarmed outside
of any permanent or temporary schedule, the closing check sequence occurs one
hour after the area is disarmed and continues each hour until the area is armed or
the schedule is extended.
13.8 Closing Code
CLS CODE NO YES
When YES is selected, a code number is required for system arming. If NO is
selected, a code number is not required for system arming.
13.9 Any Bypass
ANY BYPS NO YES
When YES is selected, zones can be bypassed without a code number during the
arming sequence. A code number is always required to use the Bypass Zones
option from the menu.
13.10 Area Schedules
AREA SCH NO YES
Select YES to allow each area in this partition to set its own permanent and
temporary, or primary and secondary user disarming schedules. If Yes is selected,
you must program a schedule for each area in each partition. Enter NO to provide
one set of user disarming schedules for each partition.
13.11 Primary/Secondary Schedules
PRI/SEC NO YES
Select YES to provide primary and secondary schedules for this partition or each
area within this partition depending on the Area Schedules option selected. Enter
NO to use permanent and temporary schedules.
Choosing Schedules
Primary and Secondary schedules are ideal for auto arming and disarming of
individual areas and for creating Opening/Closing windows during which users with
a level 1 or 2 authority can disarm the system. Having two separate schedules
allows you to create two Opening/Closing windows for each day. One could be for
normal business activity and the other could be for cleaning crews or a second
shift. Once programmed, these schedules operate continually until changed.
Permanent schedules are identical to Primary and Secondary schedules and can be
used for the same purposes. Temporary schedules however, once programmed,
expire at the end of their closing time and must be programmed again. This
feature allows you to create a temporary schedule that lets a delivery or
repairman disarm and occupy an area for a specified time without the schedule
occurring again.
13.12 Area Number
AREA NO: –
Enter the number of the area in this partition you are programming. In an area
system, partition 1 can have up to 8 areas. Partitions 2 to 4 can each have up to 4
areas. After entering the area number, press COMMAND to enter the area name.
Digital Monitoring Products XR200/XR2400F Programming Guide
28
Page 37

13 - AREA INFORMATION
13.13 Area Name
* UNUSED *
The area name can be up to 16 alphanumeric characters. All others are marked
unused. For instructions on entering alphanumeric characters see section 1.7
Entering Alpha Characters. To add an area name to the system, press any Select
key and then enter up to 16 characters for the new area name. Press COMMAND
to continue.
To mark an active area unused, delete the old name by pressing a top row Select
key, then press the COMMAND key. The programmer automatically programs the
name as *UNUSED*. If you have already cleared Area Information during
Initialization, all areas will be marked * UNUSED *. See Initialization section.
13.14 Account Number
ACCOUNT NO: 12345
Enter the account number to be sent to the receiver for this area. Choose an
account number compatible with the Communication Type selected in
Communications. The default account number is the one previously entered. If
the Communication Type selected multiplex, you must choose an account number
between 128 and 999.
Below illustrates proper assignment of multiplex account numbers to DMP SCS-1
Receivers:
Receiver Line Main Account # Area Account #
1 10000 to 10127 10128 to 10999
2 20000 to 20127 20128 to 20999
3 30000 to 30127 30128 to 30999
4 40000 to 40127 40128 to 40999
5 50000 to 50127 50128 to 50999
13.15 Automatic Arming
AUTO ARM NO YES
Select YES to allow this area to arm automatically according to permanent,
temporary, or extended schedules. If no schedules are programmed, the area will
auto arm every hour.
If closing check is selected as YES, the automatic arming function does not take
place until the expiration of a ten minute Closing Check delay. See Closing Check.
If the area has been disarmed outside of any permanent or temporary schedule,
the closing check sequence occurs one hour after the area is disarmed.
At arming, bad zones are handled according to the option selected in section Bad
Zones. If a closing report is sent, the user number is indicated as SCH on the SCS1 Receiver. NO disables automatic arming for this area.
13.16 Bad Zones
BAD ZONES: BYP
At the time of automatic arming, some zones in the area may not be in a normal
condition. This option allows you to program the panel's response to these bad
zones. This option is not displayed if AUTO ARM is NO.
BYP FORC REF
BYP - All bad zones are bypassed. A report of the bypass is sent to the receiver if
Bypass Reports is YES. The report indicates SCH as the user number.
FORC - All bad zones are force armed. Zones force armed in a bad condition are
capable of restoring and reporting an alarm if tripped. A report of the forced zone
is transmitted if Bypass Reports is YES. The report indicates SCH as the user
number.
REF - The automatic arming is refused and no arming takes place. A No Closing
report is sent to the receiver regardless of the Closing Check selection.
13.17 Automatic Disarming
AUTO DIS NO YES
NO disables automatic disarming by schedule for this area. When YES is selected,
the area automatically disarms according to permanent or temporary schedules.
If an opening report is sent to the receiver, the user number is indicated as SCH.
XR200/XR2400F Programming Guide Digital Monitoring Products
29
Page 38

13 - AREA INFORMATION
13.18 Armed Output Number
OUTPUT NO: 0
Enter the output to turn on when this area is armed. The output is turned off
when this area is disarmed. The output cannot be turned on from the Outputs
On/Off option of the User Menu.
13.19 Common Area
COMMON NO YES
Select YES to enable this area to operate as a common area. This area is armed
when the last area in the partition is armed and is disarmed when the first area in
the partition is disarmed. You can have multiple common areas in each partition.
For the common area to work properly, do not assign any user codes to the
common area. A user’s code can be programmed to arm and disarm the common
area from a keypad at any time, but the common area will not function as a
common area.
Digital Monitoring Products XR200/XR2400F Programming Guide
30
Page 39

14 - ZONE INFORMATION
14.1 Zone Information
ZONE INFORMATION
Zone Information allows you to define the operation of each protection zone used
in the system. All protection zones, whether located on a command processor
panel, Security Command keypad, or zone expander are programmed the same
way.
The first three zones of the XR2400F have been preset by the factory. NAC 1
Trouble has been programmed to Zone 1 and NAC 2 Trouble has been programmed
for Zone 2. Power Supply Trouble has been programmed to Zone 3. Power Supply
AC has been programmed to Zone 3.
14.2 Zone Number
ZONE NO: -
Enter the number of the zone you intend to program. Press COMMAND to enter a
zone name. For instructions on entering alphanumeric characters, see the
Introduction section.
14.3 Zone Name
* UNUSED *
Zone names can have up to 16 alphanumeric characters. A name must be given to
each zone in the system. The name can display at the keypads during arming and
disarming so the user does not have to memorize zone numbers. Users can
associate a zone name with a particular protection point. A zone that is not part
of the system must be marked unused.
To add a zone name to the system, press any Select key and then enter up to 16
characters for the new zone name. Press COMMAND to continue.
To mark a zone unused, delete the old name by pressing a top row Select key, then
press the COMMAND key. The programmer automatically programs the name as *
UNUSED *. If you have already cleared Zone Information during Initialization, the
zones will be marked * UNUSED *.
14.4 Zone Type
ZONE TYPE: BLANK
The Zone Type defines the panel's response to the zone being opened or shorted.
This is called the Alarm Action. There are up to 13 possible alarm action
responses depending on the zone type and any restrictions it may have. See the
Zone Type chart in the Appendix.
When you assign a Zone Type to a zone, responses are made automatically for the
zone. There are 12 Zone Types to choose from. Application descriptions for each
zone type can be found in the Appendix section of this manual.
– – NT DY EX
F I PN EM SV
To enter a new Zone Type, press any Select key. The display lists all of the
available Zone Types four at a time.
Blank, Night, Day, or Exit. Press COMMAND for additional zone types.
Fire, Panic, Emergency, or Supervisory. Press COMMAND for additional zone types.
A1 A2 FV AR
Auxiliary 1, Auxiliary 2, Fire Verify, or Arming (keyswitch). Press the Back Arrow
key to display the previous zone types. When the Zone Type you want is
displayed, press the Select key beneath it.
If you select Blank, Night, Day, Exit, Auxiliary 1, Auxiliary 2, or Arming as the Zone
Type, the zone must be assigned to an active area. If you select Fire, Fire Verify,
Panic, Emergency, or Supervisory as the Zone Type, it is a 24-hour zone that is
always armed and no area assignment is needed.
Zone Type Specifications
The panel contains 12 default zone types for use in configuring the system. These
zone types provide the most commonly selected functions for their applications.
All zone types except the Arming zone type can be customized by changing the
options listed below.
Refer to the Appendix for complete zone type descriptions.
XR200/XR2400F Programming Guide Digital Monitoring Products
31
Page 40

14 - ZONE INFORMATION
14.5 Fire Bell Output
FIRE BEL OUT: 0
This output (1 to 10, 100 to 299) is turned on any time a Fire, Fire Verify, or
Supervisory zone is placed in alarm. The output is turned off by any the following
actions:
• When the User Menu Alarm Silence function is performed.
• When a valid user code is entered to silence the bell.
• When the Silence key is pressed on the XR2400F or the 630F Remote Fire
Command Center.
• Using the Outputs On/Off function in the User Menu.
• The expiration of the Bell Cutoff time.
NOTE: When programming XR2400F fire zones, assign output number 1 to Fire
Bell Output to turn on NAC 1 and output number 2 to turn on NAC 2. This
causes a NAC to turn on when a fire zone is in alarm.
14.6 Partition Number
PARTITION NO: 1
Enter the partition number where this zone is being assigned.
14.6.1 Area Number
AREA NO: -
For an Area system, enter the area number where this zone is being assigned.
14.6.2 Area Assignment
AREA : PERIMETER
For an All/Perimeter system, choose INT. (interior) or PERIM (perimeter). For a
Home/Away system, choose INT (interior), BDRM (bedroom), or PERIM (perimeter).
Press the Select key under your selection.
14.6.3 Arming Zone Area Assignment
AREAS:1 _ _ _ _ _ _ _
If the zone has been programmed as an Arming Type (AR), the only information to
enter is the areas the zone controls. If the Arming zone is in a partition
programmed as an Area system, enter the area numbers to be armed and
PERIM ALL
disarmed.
If the partition is in an All/Perimeter system, select either PERIM (perimeter) or
HOME SLEEP AWAY
ALL.
If the partition is in a Home/Away system, select HOME (for the perimeter area),
SLEEP (for perimeter and interior areas), or AWAY (for perimeter, interior, and
bedrooms areas).
If the Arming zone is opened while any areas it controls are armed, a burglary
alarm occurs. If the zone is restored to normal, the areas cannot be disarmed
using the Arming zone until at least one other area within the same partition is
disarmed remotely, from a keypad, or from another Arming zone.
If the Arming zone is opened while all areas assigned to it are disarmed, a burglary
trouble occurs. If the zone restores to normal, a burglary restoral occurs.
To visually indicate the armed state of the area(s), you can assign an Armed
Output to individual areas and use remote LEDs at the keyswitch. The LED turns
on or off to indicate to the user the armed state of the area(s).
If any bad zones are present when the Arming zone is shorted, the LED delays
lighting for five seconds. If during the five second delay the Arming zone is
shorted again, no arming takes place. To force arm bad zones, the Any Bypass
option must be set to YES. A priority zone cannot be force armed.
Digital Monitoring Products XR200/XR2400F Programming Guide
32
Page 41

14 - ZONE INFORMATION
14.6.4 Style
STYLE:
This option specifies the style for the arming/disarming operation. The default
for STYLE: is TGL (toggle). Pressing any top row select key will display the STYLE
options. To view more style options press the command key. The following is a
description of the action for each option.
TGL ARM DIS STEP
TGL (Toggle)
When the zone changes from normal to shorted, the programmed areas toggle
between the armed or disarmed condition. When restored to normal, no action
occurs. When the zone is opened from a normal (disarmed) state, a trouble is
reported. When opened from a shorted (armed) state, an alarm is reported and
the zone is disabled until you disarm the area(s) from either a keypad or Remote
Link.
ARM
When the zone is shorted, the programmed areas are armed. When restored to
normal, no action occurs. When the zone is opened from a normal (disarmed)
state, a trouble is reported. When opened from a shorted (armed) state, an alarm
is reported.
DIS (Disarm)
When programmed as an AREA system, a short will disarm the programmed areas.
When programmed as a ALL/PERIM or HOME/AWAY system, a short will disarm ALL
areas. When restored to normal, no action occurs. When the zone is opened from
a normal (disarmed) state, a trouble is reported.
STEP
When programmed as an AREA system, a short will arm the areas and beep the
keypads once. When programmed as ALL/PERIM or HOME/AWAY, on the first short
HOME (PERIMETER) will arm and beep the keypads once. On the second short,
SLEEP will arm for HOME/AWAY systems and beep the keypads twice. When
programmed as ALL/PERIM, the INTERIOR will arm and beep the keypads twice.
On the third short, AWAY will arm and beep the keypads three times. A normal
condition will cause no action. An open condition will disarm the programmed
areas and beep the keypads for one second.
Note: This arming style is designed for wireless arming pendants. When using a
arming/disarming keyswitch locate the keyswitch within the protected area.
MNT (Maintain)
When the zone is shorted, the programmed areas are armed. When restored to
normal, the programmed areas are disarmed and any alarm bells are silenced.
When the zone is opened from a normal (disarmed) state, a trouble is reported. If
opened from a shorted (armed) state, an alarm is reported and the zone is
disabled until you disarm the area(s) from either a keypad or Remote Link.
14.7 Next Zone
NEXT ZN? NO YES
When YES is selected, the programming for the zone terminates and the display
returns to Zone Number, allowing you to enter a new zone number. To make any
alterations to the Alarm Action for a zone, answer the Next Zone prompt with NO.
The Alarm Action is then defined in the following sections.
NOTE: The following five prompts are for use with an FA400 Remote Wireless
Receiver.
Zones 100 through 299 have wireless capability when using the FA400 Remote
Wireless Receiver: If you are programming zones 100 to 299, selecting NO to
NEXT ZONE - NO YES displays the prompt WIRELESS NO. This display is not
visible unless you are programming zones in this range. If the zone you are
programming is intended for wireless devices, select YES and refer to the
programming instructions below. Select NO to continue programming non-wireless
zones in the 100 to 299 range.
XR200/XR2400F Programming Guide Digital Monitoring Products
33
Page 42

14 - ZONE INFORMATION
14.7.1 Wireless
WIRELESS NO YES
Select YES if you are programming a wireless zone. Press the COMMAND key to
continue with wireless programming.
14.7.2 Check-in Time
CHECK IN TM: 60
You can set transmitters to check in automatically every 10, 30, or 60 seconds or
not at all. To change the default of 60 seconds, press any Select key to display
the default display of NONE 10 30 60. Press the Select key under the check-in
time you want for this zone.
14.7.3 Internal Contact
INT CONT NO YES
Select YES to use an internal contact on the wireless transmitter. Select NO to
use an external contact. When NO, the following two prompts are displayed.
14.7.4 End-of-Line
E O L NO YES
Select YES to supervise an external contact connected to the transmitter. At the
contact, install a 2.2k Ohm End-of-Line resistor in parallel for Normally Open
contacts and in series for Normally Closed contacts.
14.7.5 Normally Open
NRM OPEN YES
Select NO if the contact connected to the transmitter is a Normally Closed type.
14.8 Alarm Action
ALARM ACTION . . .
This option allows you to change the standard definitions of any Zone Type. When
the Zone Type is specified, the Alarm Action for that zone is stored in memory.
If the Zone Type is Blank, Night, Day, Exit, Auxiliary 1, or Auxiliary 2 it is a non-24
hour zone and the Alarm Action programing begins with Disarmed Open.
If the Zone Type is Fire, Panic, Emergency, or Supervisory it is a 24-hour zone that
is always armed and the Alarm Action programming begins with Armed Open.
The Fire Verify Zone Type functions the same as Fire Type, with the following
exceptions: When a Fire Verify zone initiates an alarm, the panel performs a
Sensor Reset. If any Fire Verify zone initiates an alarm within 120 seconds after
the reset, an alarm is indicated. If an alarm is initiated after 120 seconds, the
cycle is repeated and a zone fault report is sent to the receiver.
Do NOT program Fire Verify Zone Types for Zone Retard.
14.9 Disarmed Open
DISARMED OPEN
Defines the action taken by the panel when the zone is opened while the area is
disarmed. There are three actions to define:
Report to transmit Relay Output to activate Relay
Output action
You must also make these selections for the Disarmed Short, Armed Open, and
Armed Short zone conditions. Press COMMAND to continue. A description of each
selection is found on the following page.
Digital Monitoring Products XR200/XR2400F Programming Guide
34
Page 43

14 - ZONE INFORMATION
14.9.1 Report to Transmit
MSG: TROUBLE
You can send two report types to the SCS-1 Receiver: Alarm (A) and Trouble (T).
Press any Select key to display the following report options.
ALARM - Selecting A, allows an alarm report to be sent to the receiver and the
A T L -
bell output to activate according to zone type. See Bell Action. The zone name
appears in the panel's alarmed zones and status lists.
TROUBLE - Selecting T allows a trouble report to be sent to the receiver and the
zone name to appear in the panel's alarmed zones and status lists.
UL requirements prevent the Alarm (A) and Trouble (T) action for Fire (FI), Fire
Verify (FV), and Supervisory (SV) zone types from being changed.
LOCAL - When you select L, an alarm report is NOT sent to the receiver. The bell
output still activates according to zone type. The zone name appears in the
panel's alarmed zones and status lists. NOTE: You can also select L for a zone to
send alarm reports to the subscriber's personal pager only and not to the central
station. The PAGER option in the Communication section must be enabled.
A T S -
SILENCE/RESET - When a programmed SV zone is connected to the DMP Model 303
Silence/Reset switch, the zone can be used to silence the alarm bell and perform
a sensor reset without using a keypad. For Supervisory type zones an S message
replaces the L message in alarm action programming of the zone. A report is NOT
sent to the receiver except for the bell silence report.
– - When you select a – (dash), reports are NOT sent to the receiver. The bell
output does not activate and there is no display in the panel's alarmed zones or
status list. Only the relay output selected in the next section operates.
14.9.2 Output Number
OUTPUT NO: 0
You can specify any of the Relay Outputs on the panel to be activated by a zone
condition (1 to 10, 100 to 299 if Model 716 used). The output can be activated
regardless of the report to transmit or whether or not the zone is programmed as
local. An output activated by an armed zone is turned off when the zone's area is
disarmed by a user.
To enter an output number, press a top row Select key followed by the output
number. Press the COMMAND key.
It is important to note that the polling cycle for the LX-Bus is 1.6 seconds.
Therefore, any zone conditions detected on the LX-Bus may take up to 1.6 seconds
to be indicated at the panel. Any Model 716 relay actions on the LX-Bus may take
up to 1.6 seconds to activate after the zone condition is indicated at the panel.
14.9.3 Output Action
OUTPUT: NONE
Entering an Output Number displays this prompt. This prompt allows you to assign
an output action to the relay. A description of the output actions is below:
STEADY - The output is turned on and remains on until the area is disarmed, an
STD PLS MOM FOLW
output cutoff time expires, or the output is reset from the keypad menu.
PULSE - The output alternates one second on and one second off. Note: The
pulsing rate for a Model 716 relay attached to the LX-Bus is 1.6 seconds.
MOMENTARY - The output is turned on only once for one second.
FOLLOW - The output is turned on and remains on while the zone is in an off
normal, or bad condition. When the zone restores, the output is turned off.
After you have made the three previous selections, the display prompts you again
for the same three selections for Disarmed Short, Armed Open, and Armed Short
conditions. If the zone is a 24-hour type, only the Armed Open and Armed Short
conditions are displayed. When you have programmed all of the zone conditions,
the Swinger Bypass selection is then displayed.
XR200/XR2400F Programming Guide Digital Monitoring Products
35
Page 44

14 - ZONE INFORMATION
14.10 Swinger Bypass
SWGR BYP NO YES
YES allows the zone to be swinger bypassed by the panel according to the
specifications programmed in Swinger Bypass Trips and Reset Swinger Bypass. The
Bypass condition will be displayed in the keypad Status List. Selecting NO disables
swinger bypassing for this zone.
How it works
If within one hour, a zone trips the total number of times AS specified in Swinger
Bypass Trips, the panel bypasses it until the following conditions occur; the area in
which the zone is assigned is disarmed, the zone is manually reset through the
Bypass Zones? keypad User Menu function, the zone remains normal for one hour
and the Reset Swinger Bypass is YES.
If the zone trips fewer than the specified times within one hour, the bypass trip
counter returns to zero and the process must be repeated.
A report of the swinger bypass is sent to the receiver if Bypass Reports is YES.
14.11 Prewarn Addresses
PREWARN: 12345678
At the start of the entry delay, all keypad addresses selected here display ENTER
CODE:-. If you want the prewarn to sound at all eight addresses, leave the
default as shown.
To delete an address, press the matching number on the keypad. To disable
prewarning at all keypads, press a top row key to clear the addresses shown.
Press the COMMAND key when the address selection is complete.
14.12 Entry Delay
ENTRY DELAY: 1
Select the entry timer for this zone. Entry timers 1 to 4 are programmed in
System Options.
14.13 Zone Retard
RETARD NO YES
When you select YES, the zone operates with the zone retard delay. The retard
functions only in zone short conditions.
The zone must remain shorted for the full length of the retard delay before the
panel recognizes its condition. If you select NO, the zone operates without a
retard delay.
14.14 Presignal Addresses
PRESGNL: NONE
You can enable any combination of keypad addresses to sound a presignal tone
during the time a zone is in retard delay. The presignal tone silences when the
zone restores or the retard delay expires.
To enable a presignal address, press any top row Select key followed by the
number of the keypad address. You can enable the presignal for all eight keypad
addresses. To disable a presignal address press the matching number digit again.
Press the COMMAND key when the address selection is complete. The Presignal
prompt is only displayed when Retard is selected as YES.
14.15 Fast Response
FAST RSP NO YES
Select YES to provide a zone response time of 167ms. Select NO to provide a
normal zone response time of 500ms. Zones 100 to 299 have a fixed response
time of 200ms and do not display this prompt.
Digital Monitoring Products XR200/XR2400F Programming Guide
36
Page 45

14 - ZONE INFORMATION
14.16 Cross Zone
CRS ZONE NO YES
Select YES to enable cross zoning for this zone. Cross zoning requires one or more
armed zones to fault within a programmed time before an alarm report is sent to
the receiver.
When a cross zoned zone trips, the bell action assigned to the zone activates. The
cross zone time specified in System Options begins to count down. If another
cross zoned zone in the same area faults, or if the first zone restores and faults
again before a Sensor Reset is done, the panel sends an alarm report.
If no other cross zoned zone in the same area trips before the cross zone time
expires, the panel sends only a zone fault report to the receiver.
Cross zoning is not compatible with all zone types: You cannot enable cross
zoning for Fire verify zones or for any Fire zones that have Retard Delay enabled.
14.17 Priority
PRIORITY NO YES
Select YES to provide additional protection for the premises by requiring this zone
to be in a normal condition before its assigned area can be armed.
ZONE NO: –
ZONE NUMBER - Enter the zone number to program next. Follow the descriptions
of each programming prompt. If all zones are programmed, press the Back Arrow
key at the ZONE NO: – display to continue.
Note: If you programmed any wireless zones, press the Back Arrow key for the
following wireless programming. The next three prompts are for use with the
FA400 Remote Wireless Receiver.
14.17.1 Program Transmitter
PRG XMTR? NO YES
Select YES to program wireless transmitters. Select NO to return to Zone
Information.
14.17.2 Connect Transmitter
CONNECT XMTR: ***
Connect the transmitter, whose zone number is displayed, to the Programming
Connector on the 472 Inovonics 900MHz Card using the 620 Programming Cable.
RESET THE TRANSMITTER. The keypad display prompts you for transmitters
starting from the lowest zone number to the highest.
At the CONNECT XMTR: prompt, you can also press a Select key and enter in any
wireless zone number (100 to 299 or 000 for the C100 and FA100 transmitters).
After programming all transmitters, press the COMMAND key.
14.17.3 Connect Command Transmitter
CONNECT FA100 P 1
Connect the FA100 or FA113 you want assigned to the partition shown (P1 =
Partition 1) to the 472 Card. Press the Alert button on the transmitter to initiate
programming. Repeat the programming for each partition. To use the Alert
button on the transmitter as a panic, program AMBUSH as YES in System Reports.
Additional Zone Programming
The remaining Zone Information you need to specify varies with the different Zone
Types. Below is a list of the remaining information needed:
If Zone Type Remaining Information
Exit Prewarn addresses/Entry Delay
XR200/XR2400F Programming Guide Digital Monitoring Products
Fire, Supervisory, Retard and Presignal addresses
Auxiliary 1 and 2
37
Page 46

15 - STOP
15.1 Stop
STOP
At the STOP prompt, pressing any Select key allows you to exit the Programmer
function of the panel. When selected, the panel performs an internal reset and
exits the programmer.
The STOP routine causes the following conditions to occur:
• All areas in all partitions are DISARMED
• All zones in all partitions are DISARMED
• The panel's Status List is CLEARED
During the reset, all keypad displays are momentarily blank for two seconds.
After the reset, the programming function is terminated and the keypads return to
the status list display.
Missing LX-Bus™ Modules Displayed
The Programmer includes a feature following the STOP routine that displays the
name of any programmed LX-Bus module not currently connected to the panel.
For example, if you had enabled any of the wireless options and not yet installed a
472 Inovonic
WIRELESS CARD. This is a helpful reminder to install the card. This feature can
also be a troubleshooting tool that could indicate a problem if you had installed
the card and still saw this message displayed. The following list shows the
different messages and their associated LX-Bus cards.
S 900MHz Card, after the STOP routine the panel would display NO
Keypad Display Missing Card
NO LXBUS CARD 481 LX-Bus™ Expansion Card
NO WIRELESS CARD 472 InovonicS 900MHz Card
NO PRINTER CARD 462P Printer Interface Card
NO HOST CARD 462N Network Interface Card
The above messages clear automatically from the keypad after a few moments.
16 - SET LOCKOUT CODE
16.1 Set Lockout Code
SET LOCKOUT CODE
Pressing COMMAND at the STOP prompt displays SET LOCKOUT CODE. This allows
you to program a code that will then be required to gain access to the panel's
internal Programmer through the keypad. You can change this code at any time to
any combination of numbers from 3 to 5 digits long. Leading zeros do not have to
be entered when using the lockout code. Initializing the panel will not clear a
Lockout Code. Lockout Codes can be changed through Remote Link.
Once you have changed the code, it is important to write it down somewhere and
store it in a safe place. Lost Lockout Codes require the panel to be sent back to
DMP for repair. You may cancel a Lockout Code by entering 00000 at the Set
Lockout Code command.
(with HOST communication selected)
Lockout Code restriction
Do not set a Lockout Code higher than 65535.
Digital Monitoring Products XR200/XR2400F Programming Guide
38
Page 47

17 - APPENDIX
17.1 Diagnostics function
The panel contains a Diagnostics function that allows test the communication integrity of the LX-Bus™, identify
individual zones, and also display the present electrical state of any zone. To use Diagnostics, reset the panel, enter
the Diagnostics code 2313 (DIAG), and press COMMAND.
Test LX-Bus
The first Diagnostic function you will see displayed is TEST LX-BUS. This function allows you to test the ability of
the 462N, 462P, 472, and 481 Interface Cards to communicate with zone and output expander modules connected to
their LX-Bus™ circuits.
To continue, press any top row Select key. The keypad displays LX-BUS 1 2. Press the Select key under 1 to test
LX-Bus™ circuit number 1. Press the Select key under 2 to test LX-Bus circuit number 2. The keypad now displays
ADDRESS: - . Enter a 2-digit LX-Bus address to which you have assigned a device and press COMMAND.
Important Note: A device address is not the same as a zone number. If you are testing 714 or 715 Zone Expander
Modules, which each contain four zones, the device address is the first zone number. When the panel polls a 714 or
715 on the LX-Bus™, it recognizes them as four zone devices and skips polling the remaining three zones (these are
polled internally by the module, which then transmits any status changes to the panel). This polling of addresses
greatly reduces the amount of time it takes the panel to poll all devices on the LX-Bus™.
When testing LX-Bus™ devices, enter only the addresses to which the modules have been set.
The keypad next displays TESTING . . . STOP during the testing of the device. At any time, you can press the
Select key under STOP to end the polling. The panel now records the number of no responses from the device. If all
polls are received back by the panel correctly, the keypad displays 00000/65535 FAIL. The 0 (zero) represents the
number of failed polling responses.
If one or more polling attempts fail, the keypad displays * * * * */65535 FAIL. (The * * * * * represents the number of
polling attempts that failed.) A display of 65535/65535 FAIL indicates a problem with the interface card or its LXBus™ wiring such as a bad or broken wire, harness not properly connected, or excessive noise or distance. It can also
mean that a zone number was entered that did not match a device address. Press the Back Arrow key to enter a new
device address or press COMMAND to exit the TEST LX-BUS option.
Zone Finder
The second Diagnostic function is the Zone Finder. Press the COMMAND to display ZONE FINDER. This function
allows you to identify individual zones on devices connected to the LX-Bus™ of an interface card, the panel, or any
zones on the keypad data bus. To use ZONE FINDER, press any top row Select key. The display changes to FAULT
ZONE. The next zone on the system that changes from a normal to an open or shorted state is displayed as ZONE
NO: * * *. To continue, press the Back Arrow key.
Zone State
Press the COMMAND to display the third Diagnostic function: ZONE STATE. This function allows you to enter any zone
number and check its current electrical state (Normal, Open, or Shorted). Press any Select key. The display changes
to ZONE NUMBER: _ . Enter in the number of the zone you want to check and press COMMAND. The panel then
displays the current state of the zone as either NRML (normal), OPEN, or SHORT.
XR200/XR2400F Programming Guide Digital Monitoring Products
39
Page 48

17 - APPENDIX
LX-Bus Status
The fourth Diagnostic function is the LX-BUS STATUS. This function allows the panel to poll all devices connected to
the LX-Bus™ of an interface card and check for any Overlapped, Missing, or Extra addresses. Below is a description
of each status item:
Overlap - An overlap occurs when a device's address is the same as any of the last three zones on another 714 or 715.
Example:
714 Address 00 711 Address 02
Zones 100 101 102 103 Zone 102
Overlap
The overlap feature cannot determine when two devices have the same address.
Missing - A missing occurs when a zone between 100 and 299 has been programmed in ZONE INFORMATION and no
device with that zone's address has been installed on the LX-Bus™. For example, if zone 110 has been programmed
but the device has not been installed or has been set to another address, the zone cannot be found by the panel and
a MISSING is displayed here in LX-BUS STATUS. To correct the problem, check your zone programming and
addressing of zone expansion modules.
Extra - A device is installed on the LX-Bus™ but none of its zones are programmed into the system.
Exiting the Diagnostics program
To exit the Diagnostics function, press the Back Arrow key until you see the display STOP then press any top row
Select key. The keypad returns to the Status List display.
17.2 Using the 984 Command Function
The 984 Command function allows you to connect the panel with a service receiver at a remote location for the
purpose of remote programming, retrieving the Event Buffer, or checking one or more elements of the current
program. To use the function, enter the numbers 9, 8, and 4 (984) and press COMMAND. The keypad display changes
to NBR RMT PICKUP.
NBR (number) - Select NBR if you want to enter a number for the panel to dial to reach the service receiver. Phone
numbers can be up to 32 characters in length. You can program a three second pause in the dialing sequence by
inserting the letter P before the number. You can program a dial tone detect by inserting the letter D. These
characters are counted as part of the allowable 32 characters.
RMT (remote phone number) - Select RMT if you want the panel to immediately seize the phone line and dial the
phone number programmed into the Remote Options section of the program. The Remote Options phone number is
to the modem being used by the DMP Remote Link™ software program.
PICKUP - Select this option if the person attempting the remote programming is currently ringing the phone line onto
which the panel is connected. Once the panel picks up the line, a verification process occurs and, if successful, the
panel grants remote access to its programming and Event Buffer.
Keypad Displays
When either the RMT or PICKUP options are used, the keypad displays LINE SEIZED. This indicates that the panel has
seized the line and is executing its program. If the line cannot be accessed, or if the RMT or PICKUP options are
used before all connects attempts are made, the keypad displays SYSTEM BUSY.
Digital Monitoring Products XR200/XR2400F Programming Guide
40
Page 49

17 - APPENDIX
17.3 Using the Walk Test
The panel provides a walk test feature that allows a single technician to test the protection devices connected to
zones on the system.
WALK TEST
*BG *FI *PN *SV
Walk Test
To conduct the Walk Test, reset control panel by momentarily placing a jumper on
J16. From the keypad, enter the code 8144 and press COMMAND. The keypad
displays WALK TEST for four seconds. If the system is monitored and the
communication type is DD or HST, the system sends a System Test Begin report to
the central station. After four seconds, the keypad displays the zone type choices
for testing.
Once in the Walk Test, you can go around and trip each protective device. As each
device is tripped, the panel sounds the alarm bells as programmed in BELL
ACTION (described on the following page) and then performs an automatic Sensor
Reset. Continue tripping devices until the entire system has been tested. The trip
counter on the keypad display increments by one each time a device is opened or
shorted.
To end the test, press the Select key under END. The panel sends a System Test
End to the central station and performs a final Sensor Reset. At the end of the
test, the keypad displays any zones that fail to trip. Below is an example.
Keypad display: SOUTH LOBBY
ZONE: 10 -FAIL
Zone Types
Press the select key directly below the zone type you want to test. An asterisk
next to the zone type indicates the zone type chosen for testing. Press the select
key again to deselect the zone type. When you have selected all the zone types
you want for testing, press the COMMAND key for the next Walk Test option to be
displayed. Pressing the Back Arrow key exits the One Man Walk Test.
BELL NO YES
TRIPS: xxx END
BG (Burglary zones) - Select BG if you want to test burglary zones. Includes all NT,
DY, EX, A1, and A2 zones.
FI (Fire zones) - Select FI if you want to test fire zones. Includes all FI and FV
zones.
PN (Panic zones) - Select PN if you want to test panic zones. Includes all PN and
EM zones.
SV (Supervisory zones) - Select SV to test supervisory zones. Includes all SV zones.
Bell Action
This option selects the bell output action when a zone under test is faulted. This
option allows the panel bell, and/or burglary bell, and/or fire bell to turn ON and
then OFF each time a zone is tripped (opened or shorted).
NO - Select NO for no bell output action during Walk Test.
YES - Select YES to turn on any bell output for 2 seconds during Walk Test.
PULS - Select PULS to turn on any bell output for 1/4 second during Walk Test.
Any LX-Bus device output will turn on for 1.6 seconds due to the polling cycle.
Trip Counter
Displays the number of zone trips during the Walk Test.
• Each time a selected zone is tripped, the keypad buzzes for two seconds.
• Each time a FI, FV, or SV zone is tripped, a Sensor Reset occurs.
XR200/XR2400F Programming Guide Digital Monitoring Products
41
Page 50

17 - APPENDIX
END - Press the select key directly below END to stop the Walk Test. When the
Walk Test ends or a 20 minute time-out expires, a final Sensor Reset occurs. The
System Test End message is sent to the receiver along with Verify and Fail
messages for each zone under test. Faulted zones are then displayed on the
keypad.
SOUTH LOBBY
Failed Zones Display
For each zone that did not trip (failed) at least once during the Walk Test, the
ZONE: 10 - FAIL
keypad displays the zone name and number and buzzes for one second. Press the
COMMAND key to display the next failed zone.
Local Printer for Walk Test
When the Walk Test is completed, a Verify or Fail message for each zone tested is
printed to the local printer. You must have a 462P Interface card to print Walk
Tests. Select YES for Zone under Printer Reports to enable the XR200 to print the
Walk Test.
17.4 690 Series Keypads Speaker Operation
When using the 690, 790, 791, or 793 Security Command LCD Keypads or the 630F Remote Fire Command Center, the
panel provides distinct speaker tones from the keypad for Fire, Burglary, Zone Monitor, and Prewarn events. The list
below details the conditions under which the speaker is turned on and off for each event.
Fire On - Fire zone alarm and Bell Output or Fire Bell Output is ON.
Off - Alarm Silence.
Burglary On - Burglary zone alarm and Bell Output or Burglary Bell Output is ON.
Off - Alarm Silence.
Zone Monitor On - One time only when a monitored zone is tripped.
Off - After one tone.
Prewarn On - During Entry Delay.
Off - When Entry Delay expires.
17.5 Pager Direct Specifications
The XR200 communicates in a full-duplex mode with a Glenayre alphanumeric pager terminal. The terminal modem
must accept the following parameters:
• 300 bps Bell 103 protocol
• Carrier detect response time = 300ms
• Delay between lost carrier and hang-up = 12.0 seconds
The following alphanumeric pager specifications must also be met in order for the pager to receive Pager Direct
reports:
Glenayre Electronics GL3000 protocol:
• 300 Baud
• 7 Bits Data
• 1 Stop Bit
• Even Parity
Digital Monitoring Products XR200/XR2400F Programming Guide
42
Page 51

17 - APPENDIX
17.6 Cross Zoning
Caution must be taken when cross zoning devices to ensure that the Cross Zone Time is long enough to allow an
intruder to trip both devices before it expires. A Cross Zone Time that is too short may allow an intruder to trip the
devices and have just a zone fault report sent to the central station.
When a Cross Zoned zone is tripped a FAULT report will be sent to the SCS-1 receiver. When two Cross Zoned zones
are tripped within the Cross Zone Time, both zones send to the receiver as ALARM signals. For example, if zones 1
and 2 are Cross Zoned zones, and only zone 1 is tripped, a FAULT report will be sent to the receiver for zone 1. If
zone 1 is tripped and zone 2 is tripped within the Cross Zone Time, an ALARM report is sent to the receiver for zone 1
and zone 2.
17.7 Events Manager
The Events Manager function allows you to delay sending certain reports to the central station receiver. Reports can
be kept in the panel's memory until overwritten by new activity or held until the memory buffer reaches 133 events.
When the buffer is filled, the panel automatically sends the stored reports to the central station receiver. Below is a
list of panel reports that can be delayed using the Events Manager option.
Immediately Delayed Report Type
Y Alarm
Y Trouble
Y Restore
Y Opening
Y Closing
Y Bypass
Y Reset
Y Supervisory
Y Add Codes
Y Delete Codes
Y Change Codes
Y Permanent Schedule Change
Y Temporary Schedule Change
Y Door Access
Y Door Access Denied
Y Late To Close
Y Force Armed Loop
17.8 Modem Setup Information
When a report is to be sent, the panel first sends "+++ATH
string characters entered in MODEM SETUP. This is followed with a space and a "
the panel with "CONNECT
If "CONNECT
c
" is properly received from the modem, the standard HST report/response sequences occur. After a
r
report is sent and acknowledged, or a report is sent and not acknowledged for a period of one minute, the panel
sends "+++ATH
c
" to the modem.
r
If no response is received from the modem after 60 seconds, the cycle is repeated. Any string other than
"CONNECT
c
" that is returned by the modem and ends with a "
r
made, a NETWORK TROUBLE message is sent to the central station if UL AA is selected as YES.
If the Host channel fails to receive a proper acknowledgment within 60 seconds, the panel sends a WARNING:
NETWORK TROUBLE (S72) report on the 2ND LINE. The next time a report is sent by the panel over the Host
channel, the panel sends a NETWORK RESTORED (S73) report over the 2ND LINE.
XR200/XR2400F Programming Guide Digital Monitoring Products
c
".
r
c
(carriage return)", waits one second then sends the dial
r
c
" is ignored. After three cycles and no connection is
r
c
." The modem must respond to
r
43
Page 52

17 - APPENDIX
17.9 Host Backup Examples
Several examples follow to explain scenarios in which you would use Host Backup and how to program the panel for
Host Backup.
When using Host Backup with Host Log Reports, refer to the next section, 462N Network Interface Card Examples.
Example 1: Two 462N Cards
This example describes the configuration and programming needed when you are using two 462N Cards and two
iCOMs to enable the Host Backup.
Hardware:
• XR200 version 110 or above • Two iCOM Internet Alarm Port Routers
• Two 462N Network Interface Cards • One SCS-1 Receiver
• One 460 Adaptor Card
Installation:
Install the primary 462N Card into slot 1 of the 460 Card, then connect the primary iCOM to the 462N card.
Install the backup 462N Card into slot 2 of the 460 Card, then connect the backup iCOM to the 462N.
Programming:
Select Host for Communication type. Enter AT#UCXXX.XXX.XXX.XXX#PPPPPP for the Modem Setup.
Note: Enter the Target IP Address for the backup iCOM connected to the 462N card in slot 2 in place of
XXX.XXX.XXX.XXX. Enter the port number in place of PPPPPP. The default port number is 2001.
Select YES for Host Backup. Enter the retry and check-in times.
Explanation:
Messages will be sent through the 462N card in slot 1 to the iCOM then to the SCS-1 Receiver. If the messages cannot
be sent that route, the panel will send them using the backup: The messages will be sent through the 462N Card in
slot 2 to the iCOM to the SCS-1 Receiver (the IP Address entered for the Modem Setup). If the panel cannot send the
messages through the backup 462N Card, the panel will then use the communication type selected for the 2nd Line.
Example 2: One 462N Card
This example describes the configuration and programming needed when using one 462N and one iCOM to enable the
Host Backup.
Hardware:
• XR200 version 110 or above • One iCOM Internet Alarm Router
• One 462N Network Interface Card • Two SCS-1 Receivers
Programming:
Select Host for Communication type. Enter AT#UCXXX.XXX.XXX.XXX#PPPPPP for the Modem Setup.
Note: Enter the Target IP Address for the backup SCS-1 Receiver in place of XXX.XXX.XXX.XXX. Enter the port number
in place of PPPPPP. The default port number is 2001.
Select YES for Host Backup. Enter the retry and check-in times.
Explanation:
Messages will be sent through the 462N card to the iCOM, then to the Main SCS-1 Receiver. If the messages cannot be
sent using that route, the panel will send them to the backup SCS-1 Receiver. The Modem Setup will then be used to
direct the messages to the backup receiver. If the panel cannot send the messages to the backup receiver, the panel
will then use the communication type selected for 2nd Line.
Example 3: Other Network Devices
It is also possible to use other network devices for the backup. You may use a cellular radio to route message to the
receiver. If you are using a network device other than an iCOM, you will need to obtain the Modem Setup String for
the network device. Generally the Setup String can be found in the literature provided with the device.
You may use the examples above as a guide when programming your network device. The major difference between
programming an iCOM for backup and another network device is the Modem Setup.
Digital Monitoring Products XR200/XR2400F Programming Guide
44
Page 53

17 - APPENDIX
17.10 462N Network Interface Card Examples
Several options are available when configuring the panel for Host communication, Host backup communication, and
Host Log Reports. All options use a 462N card and an iCOM Internet Alarm Router (an iCOM is not required for the
Host Log Reports when a direct connection is used).
The chart below outlines the different ways you can configure the panel for these three options. As shown in the
chart below, it is possible to use only one 462N card an one iCOM to meet all three of these needs. The chart also
explains when a Modem Setup is required.
When using a direct connection to a Advanced Reporting Module computer for the Host Log Reports, the 462N card
can only be used for logging: A separate card will be needed for Host Communication and Host Backup. Also, a
Modem Setup is not required when using a direct connection for the logger.
Refer to the Communication section and Host Log Reports section for more information. Also refer to Modem Setup
Information and Host Backup Examples in the Appendix.
snoitpOgnimmargorPlenaPdraC1sdraC2
tsoHpukcaBtsoHstropeRgoLtsoH1draC1draC2draC
seYoNoNtsoH
seYseYoN)pukcaBrofputeSmedoM(pukcaB,tsoHtsoH)pukcaBrofputeSmedoM(pukcaB
seYseYseY
seYseYseY
seYoNseY)gniggoLrofputeSmedoM(gniggoL,tsoHtsoHgniggoL
oNoNseYgniggoL
puteSmedoM(gniggoLdna,pukcaB,tsoH
)gniggoLdnapukcaBrof
puteSmedoM(gniggoLdna,pukcaB,tsoH
)gniggoLdnapukcaBrof
puteSmedoM(pukcaB,tsoH
)pukcaBrof
puteSmedoM(gniggoL,tsoH
)gniggoLrof
gniggoLrofputeSmedoM(gniggoL
)pukcaBrofputeSmedoM(pukcaB
XR200/XR2400F Programming Guide Digital Monitoring Products
45
Page 54

17 - APPENDIX
17.11 Zone Type Descriptions
This section describes applications for the default zone types in Zone Information programming.
NT (Night Zone) - Controlled instant zone used for perimeter doors and windows and interior devices such as PIRs and
Glassbreak detectors.
DY (Day zone) - Used for emergency doors or fire doors to sound the keypad buzzer and display the zone name when
the zone is faulted. Day zones also will send alarm reports to the receiver during the system's armed periods.
EX (Exit zone) - Initiates the entry delay timer when its assigned area is fully armed. Also, can initiate an exit delay
timer to allow a user to exit an area after the arming process has started.
PN (Panic zone) - Used for connecting to mechanical devices that allow a user to signal an emergency alarm. Panic
zones can provide either a silent or audible alarm with or without reporting to a central station receiver.
EM (Emergency zone) - These are used for reporting medical or other non-panic emergencies to the central station
receiver.
SV (Supervisory zone) - Used to provide 24-hour zone supervision to devices associated with fire systems. Typical
applications are tamper switches on Post Indicator Valves (PIVs), gate valves, and low and high temperature gauges.
FI (Fire zone) - Used for any type of powered or mechanical fire detection device. Typical applications are for smoke
detectors, sprinkler flowswitches, manual pull stations, and beam detectors. Retard, cross zoning, and pre-signal
options are available for the Fire zone type.
FV (Fire Verify zone) - Used primarily for smoke detector circuits to verify the existence of an actual fire condition.
When a Fire Verify zone initiates an alarm, the panel performs a Fire Reset. If any Fire Verify zone initiates an alarm
within 120 seconds after the reset, an alarm is indicated. If an alarm is initiated after 120 seconds, the cycle is
repeated.
A1 and A2 (Auxiliary 1 and Auxiliary 2) - These zones are similar to a Night zone and are typically used to protect
restricted areas within a protected premises.
AR (Arming zone) - This zone allows you to connect a keyswitch on a zone and use it to arm and disarm one or more
areas within a partition.
Digital Monitoring Products XR200/XR2400F Programming Guide
46
Page 55

17.12 Zone Type Specifications
y
17 - APPENDIX
XR200 ZONE INFORMATION Type Area Fire
Assign area and disarm condition
for NT, DY, EX, A1, A2, and AR onl
NT
Assign Prewarn and Entry Delay
for EX only
Assign Retard and Presignal
for FI, SV, A1, A2, and FV only FV AR 1
NIGHT NT 00A0A0Y NNN
DAY DY T0 T0 A0 A0 Y NNN
EXIT EX 00A0A0Y1-81NNN
FIRE FI T0 A0 N N +NNN
PANIC PN T0 A0 N NNN
EMERGENCY EM T0 A0 N NNN
SUPERVISORY SV T0 A0 N N +NNN
AUXILIARY 1 A1 T0 A0 T0 A0 N N+ NNN
AUXILIARY 2 A2 T0 A0 T0 A0 N N+ NNN
FIRE VERIFY FV T0 A0 N N N
ARMING AR TGL
DY EX
FI PN
EM SV
A1 A2 or T P T P T P T P or to to or to or or or ARM
Abbr.
INT Bell
BDRM Output
Partition Number
PERIM
to 1 - 8 100 to - F - F - F - STEP
4 299 S* S* MNT
1 to 10NL ML ML ML MY8 4Y8YYYDIS
Disarmed Disarmed Armed Armed
Open Short Open Short
Wireless
Message
Output
Action
Message
Output
Action
Message
Output
Action
Message
Output
Action
Swinger
Prewarn
Entry Delay
Retard Delay
Presignal
Fast Response
Cross Zone
Priority
YA SA S A SA SN 1 1 N1NNNTGL
– = This function is not enabled for this zone type.
= These zone functions are not available for this zone type.
+ = Retard must be YES before Presignal can be selected.
* = When SV zone is connected to 303 Silence/Reset Switch
Description of the programmable zone options
Below is a description of the various zone options shown on the table above. For additional information, read
through the Zone Information section of this manual.
Style
Zone Type Defaults - These are complete spellings of the abbreviations used for the zone types.
Type - These are the abbreviations used for the zone types.
Area - For a ALL/PERIM or HOME/SLEEP/AWAY system, this is either Interior, Bedroom, or Perimeter. For an
AREA system, 1 to 8.
Wireless - This zone is connected to a wireless transmitter. For use with the FA400 Remote Wireless Receiver.
Message - A = alarm report, T = trouble report, L = local with no report, - (dash) = no report, S = Sensor Reset and
alarm silence.
Output - These are the ten on-board and 200 off-board relay outputs.
Action - This selects the action of the output: S = steady, P = pulse, M = momentary, and F = follow
Swinger - The zone can be automatically shunted after a programmed number of trips.
Prewarn - This selects the keypad address that sounds the entry prewarn for this zone.
Entry Delay - This is the entry delay timer selected as the default for this zone.
Retard Delay - Provides a programmed retard time before an alarm is initiated from a shorted zone.
Presignal - Provides a keypad tone for zones in retard delay.
Fast Response - Provides a 167ms zone response instead of the normal 500ms response.
Cross Zone - Provides cross zoning with any of the 242 available zones.
Priority - Requires this zone to be in a normal condition before the area can be armed.
Style - These are the abbreviations you will see on the keypad for arming zone style:
TGL = Toggle, ARM = Arm only, DIS = Disarm only, STEP = Wireless arming, MNT = Maintain
XR200/XR2400F Programming Guide Digital Monitoring Products
47
Page 56

g
p
17.13 Common Keypad Messages
There are several common keypad messages that the keypad displays to inform the technician and end-user. The
common messages are described below. Possible solutions are also provided.
MessageMeanin
Invalid Area
Invalid Code
Invalid Level
Invalid Time
Closing Time
Late to Close
AC Trouble The system is not getting proper power. Check to be sure the AC connections are good.
Battery Trouble Battery is either low or missing.
Phone Line 1 Trouble
System Trouble or
Service Required
System Busy
4-Wire Bus Trouble
Tra nsmit Trouble
Tra ns mit F ail
Wireless Trouble
Non-Polled Address
Enter Code (when
entering programming)
Man Number
The user has attempted a door access for
an area they are not assigned.
The user code you have entered is not
recognized by the system.
The code you ha ve used does not have t he
authority level to access the desired option.
A user code assigned to a specific schedule
has entered outside of the valid schedule.
The schedule has expired but the area has
not been armed.
The system was not armed at its scheduled
closing time.
The panel is looking f or phone jack
supervision.
There is a problem with one or more of the
components in the system.
The system is performing another task with
a higher priority.
No superv ised device on bus Program a dev ice to be supervised.
Low Voltage or an open yellow wire Make sure all wires are connected.
Two devices on same address Program second device on address to an address of its own.
The panel has attempted to communicate
with the central station 3 times and has not
succeeded.
The panel has attempted to communicate
with the central station 10 times and has
not succeede d.
The wireless receiver is not communicating
with the 472 Hard-Wire-Less Card.
This means the device is not set to STD
(st andard) or FIRE in Dev ice Set up of
pro gr a mming.
A lockout code has been programmed for
the panel.
A serviceman number has been assigned
using Remote Link.
Change the user's access areas if access to the area is needed.
If access is not needed, the user cannot enter the area.
Check the user code and try again.
Check the user level to see is you have the correct level set for
the code. Remember that you can only grant a user authority if
you have the same authority or greater: You can't give what
you don't have.
See Schedules and User Codes.
Users still on the premises are reminded to arm the system or
extend the schedule to a later time.
Users still on the premises are reminded to arm the system or
extend the schedule to a later time.
Check to be sure the battery connections are good and the
battery is still good.
Install a jumper wire between terminals 2 and 7 on the phone
jack.
Make sure the J 16 jumper is remov ed. Make sure there is not
an open or short on the green data wire to the keypad. You
could also have a bad keypad or zone expander.
Wait a few moments for the system to finish the task. Also
make sure t hat t he J16 jumper is not installed. If System Busy
appears on the display for a long period of time, the processor
could be locked u
Verify your communication type, account number, and phone
numbe r. Make sure the tele phone line is co nnected and working
properly.
Verify your communication type, account number, and phone
numbe r. Make sure the tele phone line is co nnected and working
properly.
Check both devices and the wiring between those devices.
Make sure that STD or FIRE is selected in Dev ice Setup for each
device attached to the keypad bus.
Enter the lockout code.
Enter your Service Man Code to obtain access to the panel.
Po ssible S o lut io ns
.
800 - 641 - 4282
WWW.DMP.COM
LT-0196 (5/02) Copyright © 2002 Digital Monitoring Products
CITYWIDE, NATIONWIDE, WORLDWIDE
2500 N. PARTNERSHIP BLVD., SPRINGFIELD, MISSOURI 65803-8877
 Loading...