

Page 1
Sub-Irrigation
Self-Watering Kit Instructions
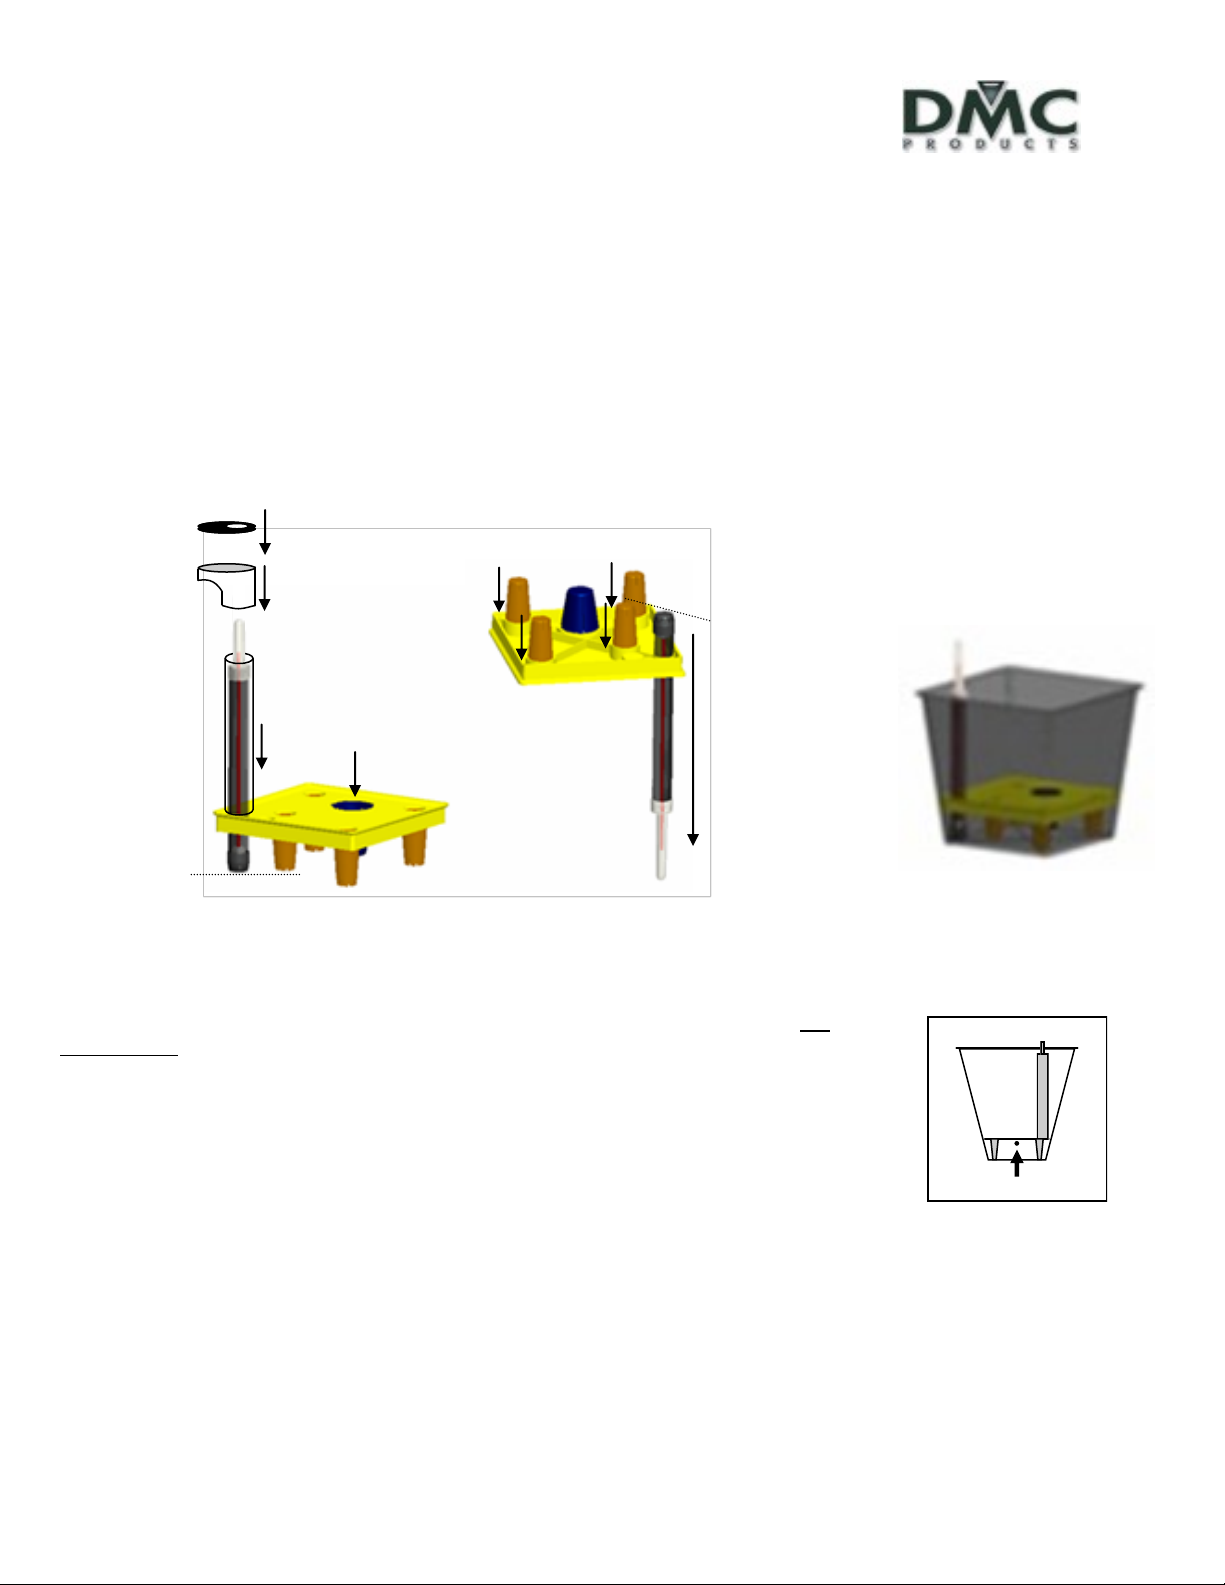
Contents:
(1) Plastic Liner
(1) Platform
(4) Feet
(1) Slotted Cup(s)
(1) Water Fill Tube
(1) Filler Spout
(1) Filler Cap
(1) Water-Level Indicator Assembly
Filler Cap
Feet (4)
Filler Spout
Water-Level Indicator
Must be level with Feet
Water-Level
Indicator
(Inside Water Fill Tube)
Water Fill
Tube
Slotted Cup
Platform
Water-Level Indicator
Must be level with Feet
Remove Clear Indicator
Cap, then insert from
the bottom. Please
note this is a tight fit.
Replace Indicator Cap
AFTER Inserting FILLER
SPOUT.
For Indoor/Outdoor Use
IMPORTANT! If using outdoors, we recommend drilling a 1/4” Drain Hole on the SIDE of the Plastic
Liner. This will allow excess water to drain without depleting the reservoir’s water supply. See
Illustration #1. When using Indoors, disregard this step.
After you assemble the Self-Watering Kit, place it inside the Plastic Liner.
Fill Plastic Liner with a pre-moistened planting mix, (not included). We recommend a blend of
sphagnum peat, perlite, and limestone to help wick moisture up from the reservoir’s water
supply. For best results, add a slow-release granular fertilizer to your plant mix.
Add Water as normal, from top of the plants, for the first 12 weeks. This will settle the plant
roots to ensure the soil is moist throughout.
After this period or once the roots have reached the water reservoir, fill the water reservoir
through the Water Fill Tube, until the water level indicator reaches "max".
Keep an eye on the Water Level Indicator to know when to refill the reservoir. Refill water
through the Water Fill Tube.
NOTE. IF YOU CHOOSE NOT TO USE THIS SELF-WATERING KIT AND YOU ARE USING OUTDOORS, BE
SURE TO DRILL A FEW DRAINAGE HOLES IN THE BOTTOM OF THE PLASTIC LINER.
ILLUSTRATION 1
Drill Drainage Hole here.
www.dmcproducts.com
 Loading...