

Page 1
Version 5.0 | 06/19/2014
User Manual
Wireless N Nano USB Adapter
DWA-131
Page 2

Table of Contents
Table of Contents
Product Overview .............................................................. 3
Package Contents ......................................................................... 3
System Requirements .................................................................3
Introduction ...................................................................................4
Features ............................................................................................5
Hardware Overview ..................................................................... 6
Installation ......................................................................... 7
Getting Started ..............................................................................7
Remove Existing Installations ..........................................7
Disable Other Wireless Adapters ..................................... 8
Wireless Installation Considerations ....................................10
Adapter Installation ...................................................................11
Wireless Connection Wizard ...........................................14
Push Button Conguration (PBC) ..................................16
Conguration ...................................................................18
D-Link Wireless Connection Manager .................................18
Wireless Networks ..............................................................19
Wi-Fi Protected Setup (WPS) ..........................................20
Personal Identication Number (PIN) ....................21
My Wireless Networks .......................................................23
Add Prole .......................................................................24
Modify Prole .................................................................25
Support ..................................................................................26
About ......................................................................................27
Connect to a Wireless Network ....................................... 29
®
Using Windows Vista
®
Using Windows
XP ....................................................................30
................................................................29
Wireless Security .............................................................31
What is WPA? ................................................................................31
Congure WPA/WPA2 Passphrase ........................................32
Using the D-Link Wireless Connection Manager .....32
®
Using Windows
Using Windows
Using the Windows
7 ...............................................................34
®
Vista ........................................................37
®
XP Utility ........................................39
Congure WPA/WPA2-Enterprise .........................................41
Using the D-Link Wireless Connection Manager.............41
Troubleshooting ..............................................................42
Wireless Basics .................................................................46
Wireless Modes ............................................................................50
Networking Basics ...........................................................51
Check your IP address ...............................................................51
®
Windows
Windows
XP Users .............................................................51
®
7/Windows Vista® Users ................................51
Statically Assign an IP address ...............................................52
®
Windows
Windows
XP Users .............................................................52
®
7/Windows Vista® Users ................................53
Technical Specications ..................................................54
Connect to a Wireless Network ....................................... 28
®
Using Windows
7 .......................................................................28
2D-Link DWA-131 User Manual
Page 3
Section 1 - Product Overview
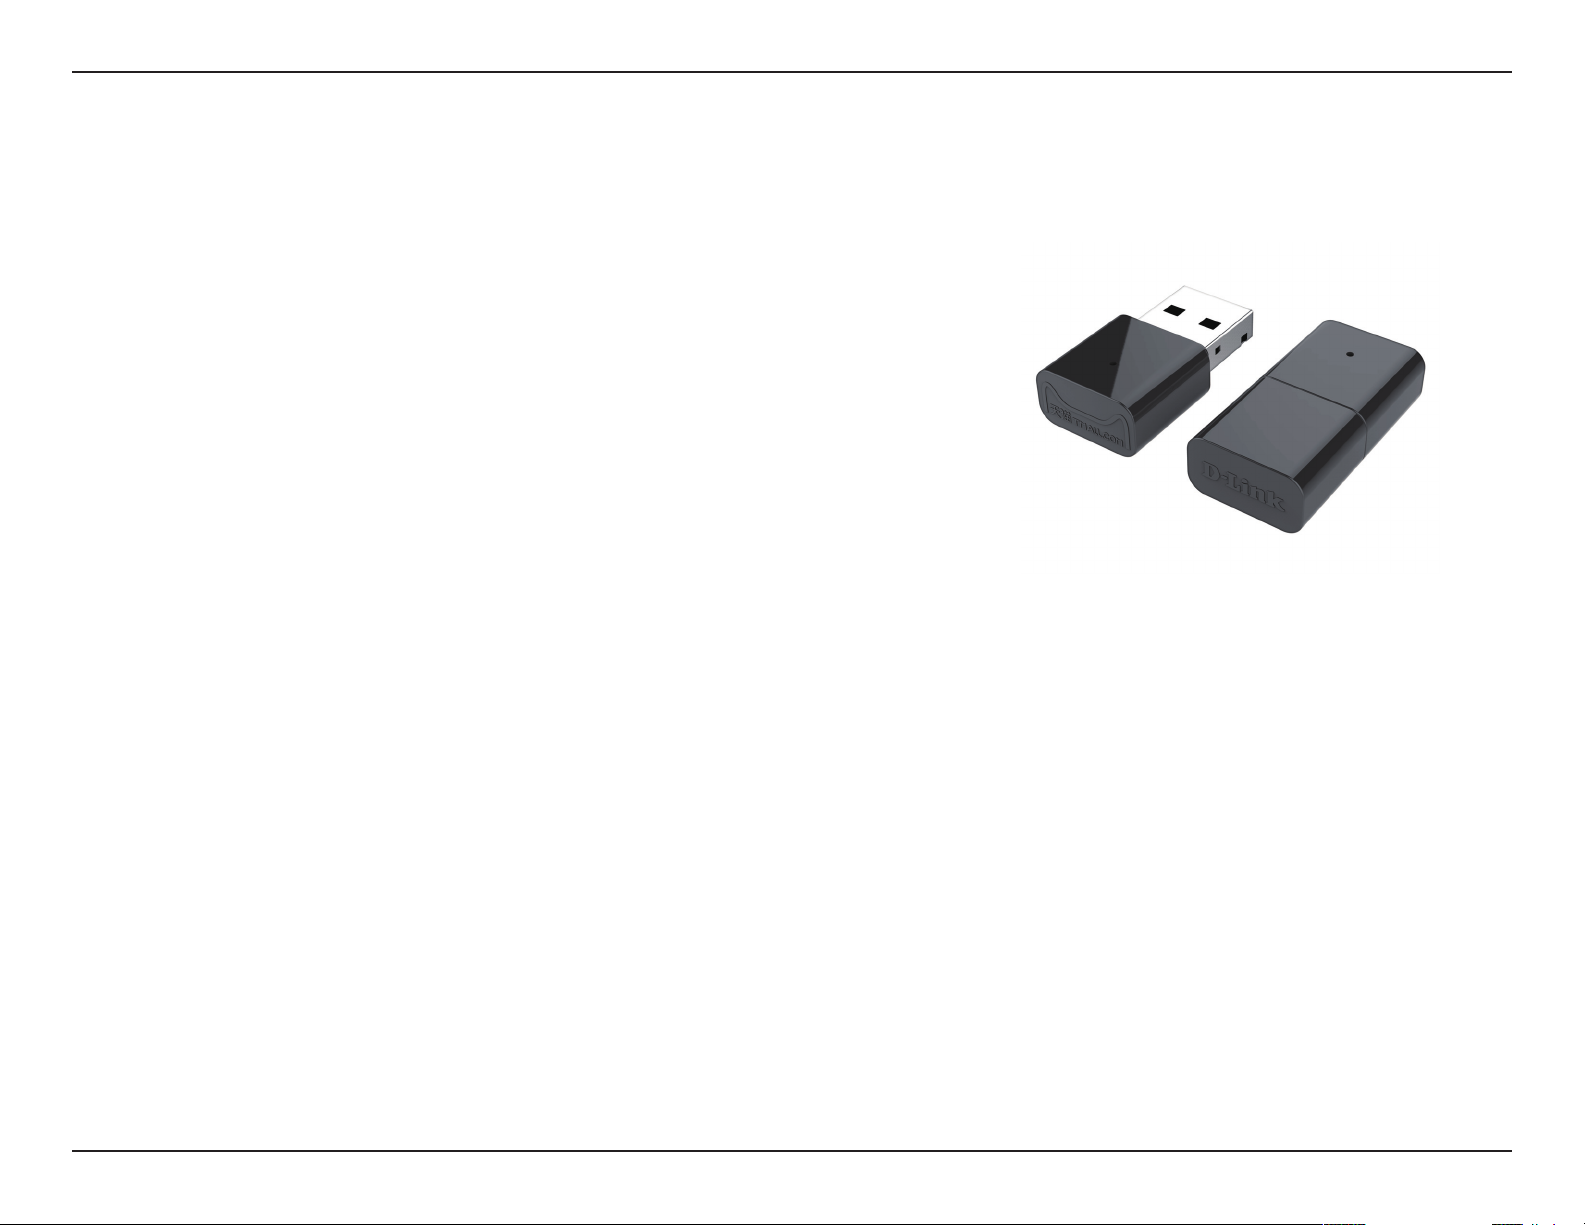
• D-Link DWA-131 Wireless N Nano USB Adapter
• Manual and Warranty on CD
• D-Link Wireless Connection Manager on CD
• Quick Installation Guide
Product Overview
Package Contents
System Requirements
• A computer or laptop with an available USB 2.0 port
®
• Windows
• CD-ROM Drive
• 300MHz processor and at least 64MB of RAM
• A 802.11n, 802.11b or 802.11g access point or wireless router
7, Windows® 8, Windows Vista® , XP (Service Pack 3)
3D-Link DWA-131 User Manual
Page 4

Section 1 - Product Overview
Introduction
The DWA-131 Wireless N Nano USB Adapter is a convenient wireless connectivity solution for desktop or notebook PCs. Instead
of stringing Ethernet cables to your PC or dismantling your desktop computer case, the DWA-131 can enable 802.11n wireless
connectivity by simply utilizing your desktop or notebook PC’s USB port.
Powered by Wireless N technology, the DWA-131 provides a faster wireless connection and superior reception than 802.11g*.
The DWA-131 is designed for use in bigger homes and for those that demand higher bandwidth networking. Maximize wireless
performance by connecting this USB Adapter to a Wireless N router and stay connected from virtually anywhere in the home.
This USB Adapter supports WPA and WPA2 encryption to prevent outside intrusion and protect your personal information
from being exposed.
D-Link’s Quick Setup Wizard guides you step-by-step through the installation process. You’ll be able to congure this USB
Adapter without having to call the teenager from down the street to help you. The D-Link Wireless Manager is included with
this product to keep track of all your most frequently accessed networks.
Compact in size, robust in speed the DWA-131 Wireless N Nano USB Adapter is great for travel and a convenient solution
for providing high performance wireless connectivity to your desktop or notebook PC. Enjoy the many benets of wireless
connectivity today!
* Maximum wireless signal rate derived from IEEE Standard 802.11g and 802.11n specications. Actual data throughput will vary. Network conditions and
environmental factors, including volume of network trac, building materials and construction, and network overhead, lower actual data throughput
rate. Environmental conditions will adversely aect wireless signal range.
4D-Link DWA-131 User Manual
Page 5

Section 1 - Product Overview
• Compact size for placement anywhere
• Convenience of Plug & Play installation
• Fully 802.11g compatible
• 802.11n compliant
• Powered by the USB port; no external power source required
Features
• USB 2.0 standard
• You can securely connect to a wireless network using WPA/WPA2 (Wi-Fi Protected Access) providing you a much
higher level of security for your data and communication than has previously been available.
• Position the DWA-131 almost anywhere in your workspace to achieve the best reception possible
• Supports Infrastructure networks via an access point
• User-friendly conguration and diagnostic utilities
* Using a USB 1.1 port will adversely aect throughput.
*
5D-Link DWA-131 User Manual
Page 6
Section 1 - Product Overview
Hardware Overview
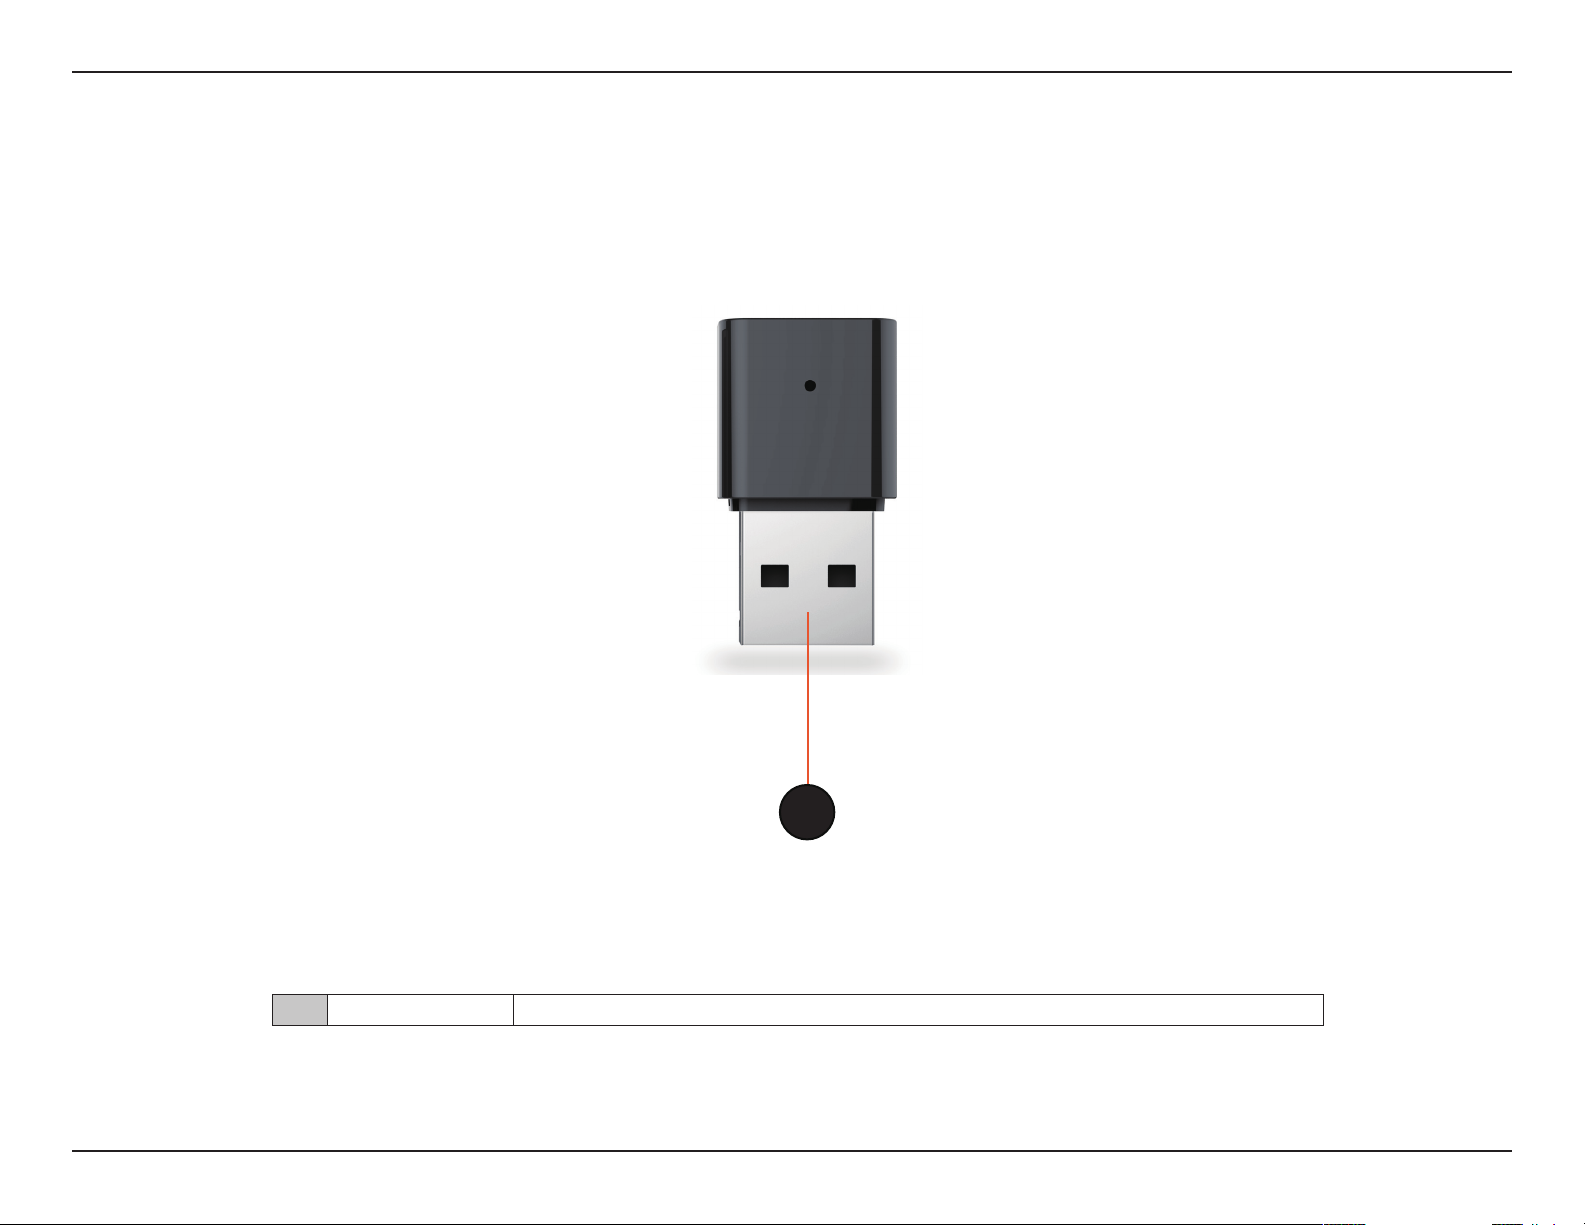
1
1 USB Connector Used to connect the DWA-131 to your computer.
6D-Link DWA-131 User Manual
Page 7

Section 2 - Installation
Installation
This section will walk you through the installation process. If you have a built-in wireless adapter, please disable it in device
manager before installing your D-Link adapter. Also, if you have previously installed another wireless adapter, please make
sure any software is uninstalled.
Getting Started
Before installing your new D-Link wireless adapter, please verify the following:
• Remove any previous installations of wireless adapters
• Disable any built-in wireless adapters
• Verify the settings such as the SSID and security settings of the network(s) you want to connect to
Remove Existing Installations
If you’ve installed a dierent manufacture’s adapter or a dierent model D-Link adapter, make sure the software is uninstalled
before installing the new software. Some utilities may cause a conict with the new software. If you plan to use multiple
adapters at dierent times, make sure the utilities are not set to load when your computer boots up. Windows® 7, Vista® and
XP users may use the built-in wireless utility for all adapters.
To remove any old software:
®
Windows
Windows XP/Vista
7 /8 users: Click Start > Control Panel > Programs and Features.
®
users: Click Start > Control Panel > Programs and Features.
7D-Link DWA-131 User Manual
Page 8
Section 2 - Installation
Disable Other Wireless Adapters
Most newer laptops may include a built-in wireless adapter. To prevent any conicts with the D-Link wireless adapter, it is
recommended to disable the wireless adapter (as well as any unused Ethernet adapters).
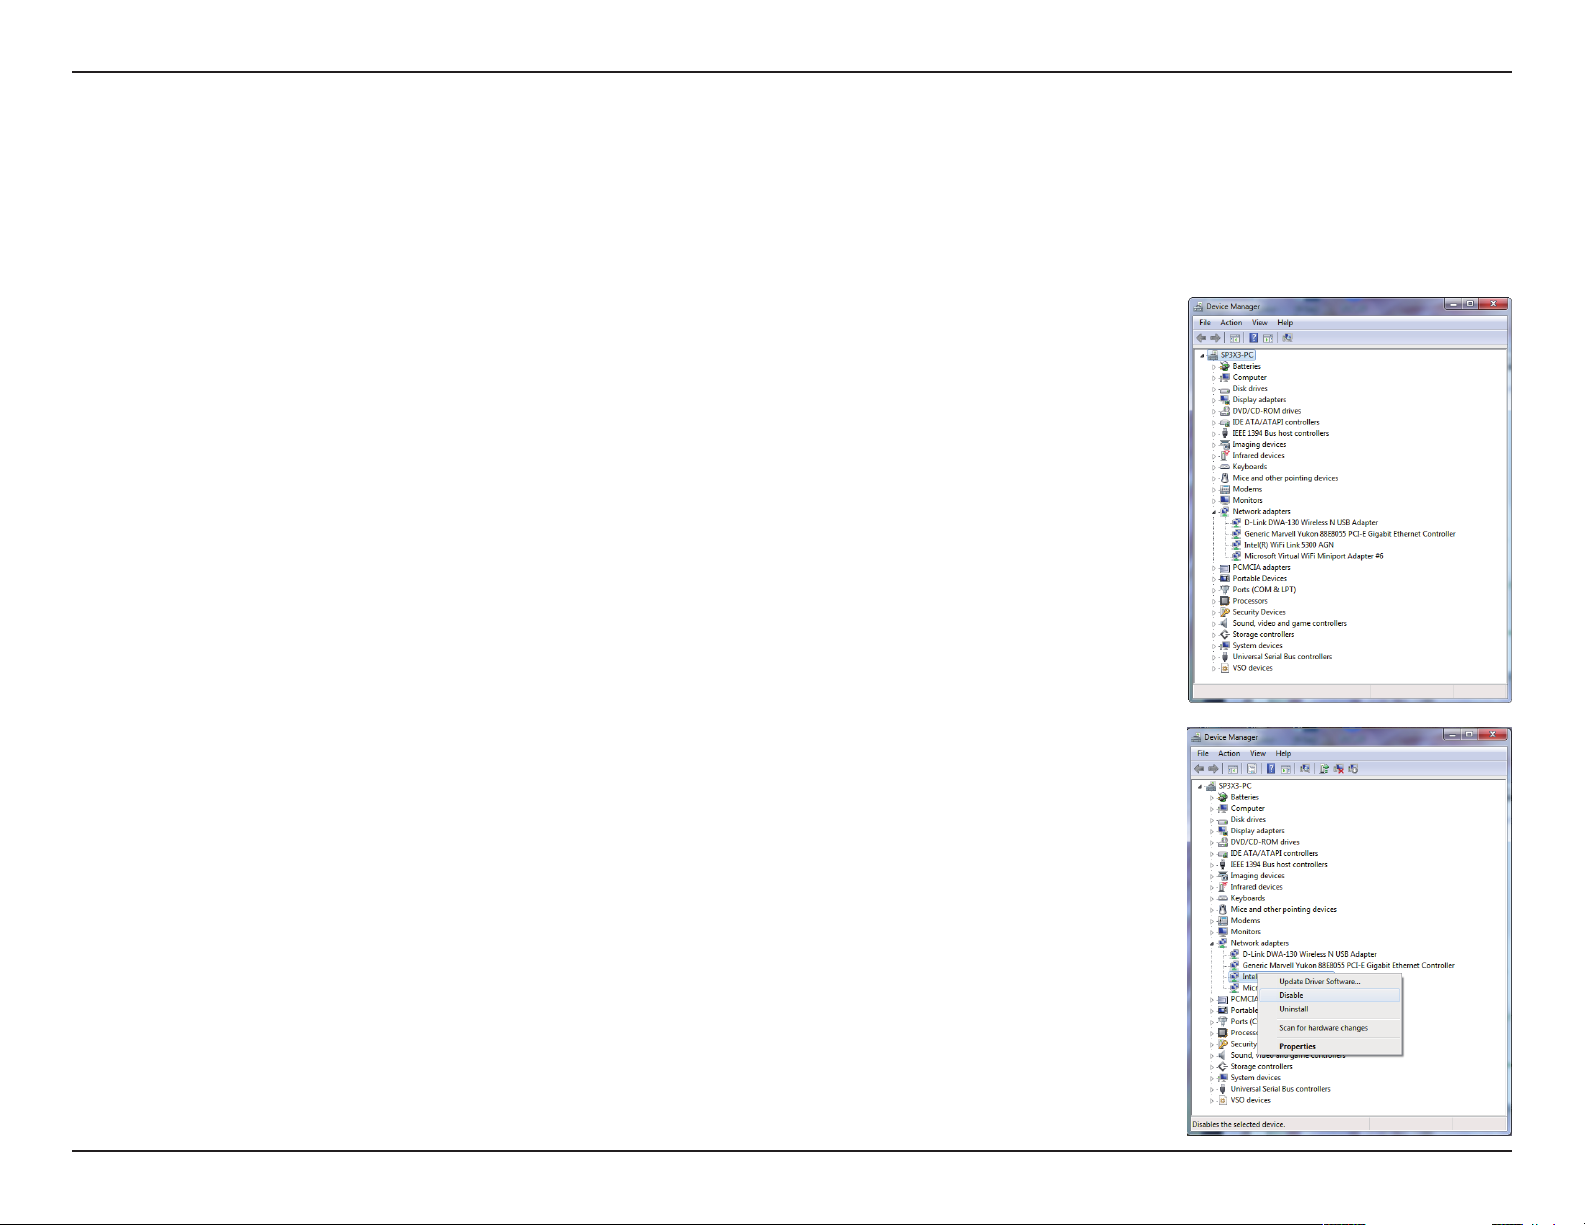
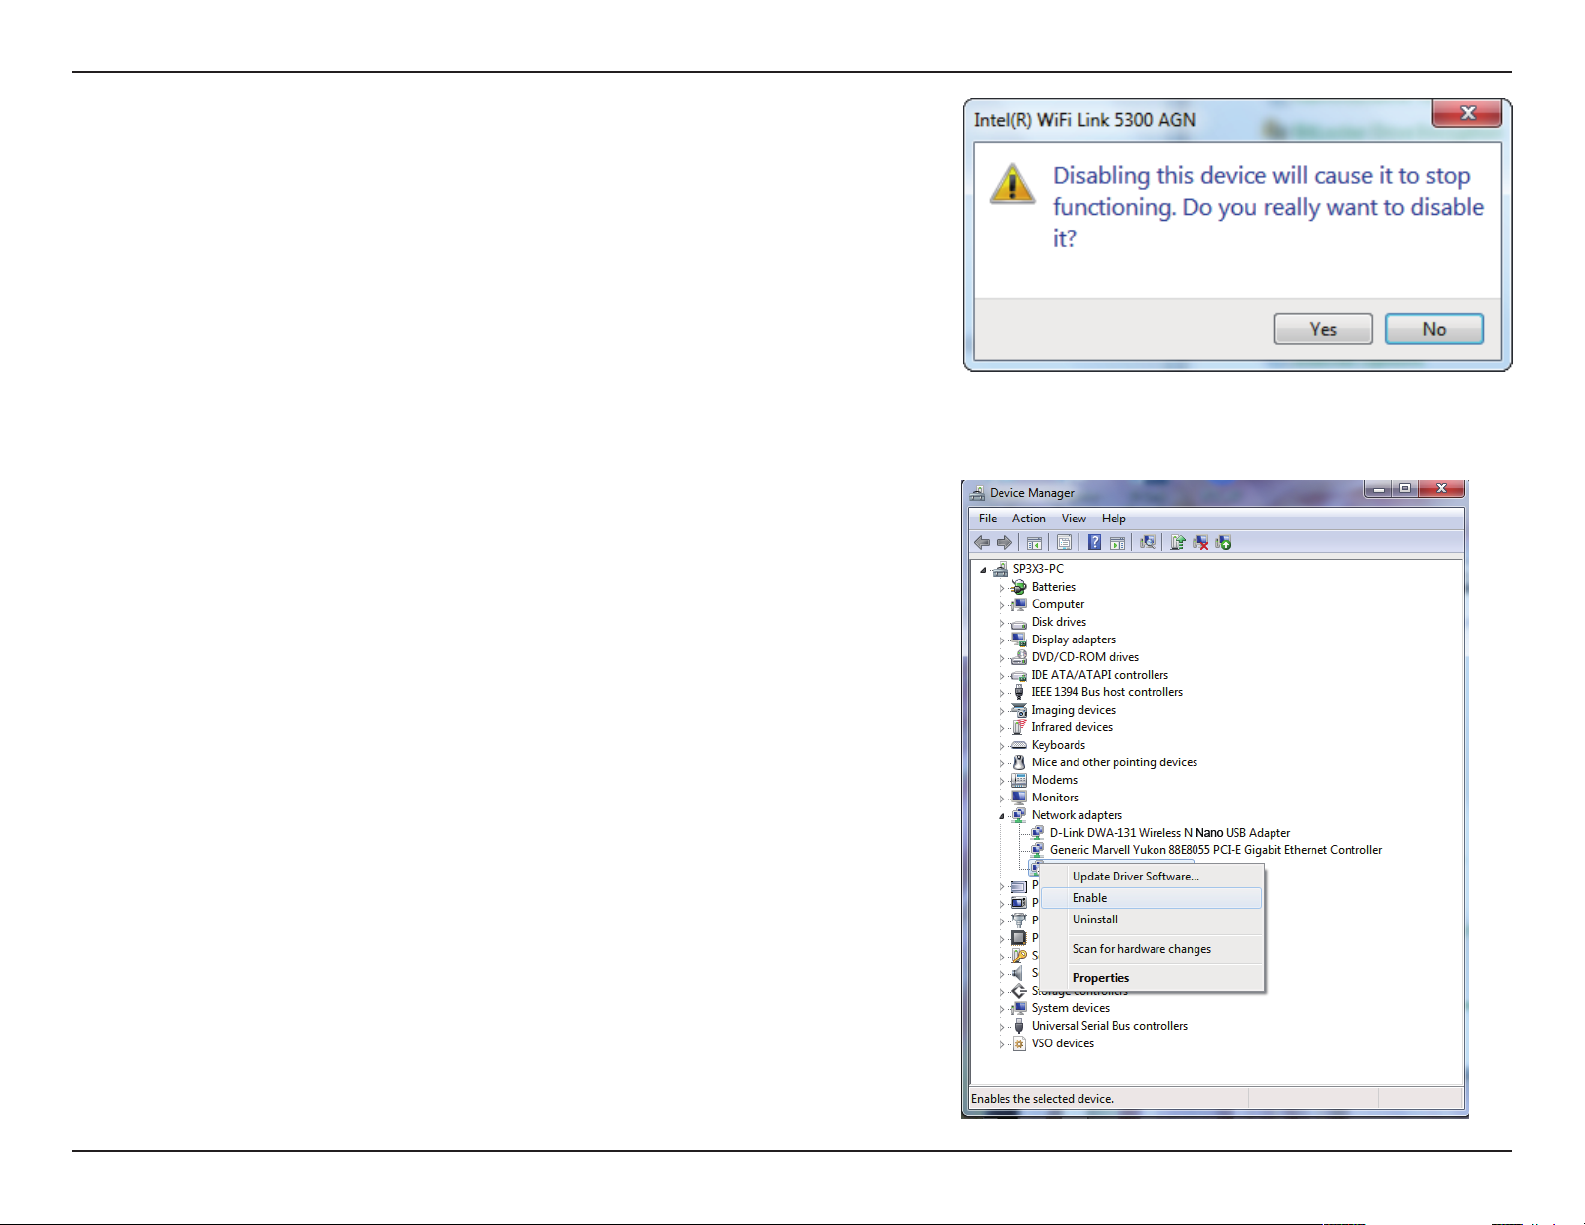
From the desktop, right-click on the My Computer icon and select Properties.
Click the Hardware tab and then click Device Manager. Scroll down the list and click the + sign
to the left of Network Adapters.
Right-click the adapter you would like to disable and select Disable.
8D-Link DWA-131 User Manual
Page 9
Section 2 - Installation
Click Yes to disable the adapter.
The adapter is now disabled. When disabled, a red X will be displayed.
Disabling the adapter will not remove the drivers. If you would like to use
the adapter, simply right-click it and select Enable.
9D-Link DWA-131 User Manual
Page 10

Section 2 - Installation
Wireless Installation Considerations
The D-Link wireless adapter lets you access your network using a wireless connection from virtually anywhere within the
operating range of your wireless network. Keep in mind that the number, thickness and location of walls, ceilings, or other
objects that the wireless signals must pass through, may limit the range. Typical ranges vary depending on the types of materials
and background RF (radio frequency) noise in your home or business. The key to maximizing wireless range is to follow these
basic guidelines:
1. Keep the number of walls and ceilings between the D-Link adapter and other network devices to a minimum
- each wall or ceiling can reduce your adapter’s range from 3-90 feet (1-30 meters.) Position your devices so
that the number of walls or ceilings is minimized.
2. Be aware of the direct line between network devices. A wall that is 1.5 feet thick (.5 meters), at a
45-degree angle appears to be almost 3 feet (1 meter) thick. At a 2-degree angle it looks over 42 feet (14 meters)
thick! Position devices so that the signal will travel straight through a wall or ceiling (instead of at an angle) for
better reception.
3. Building Materials make a dierence. A solid metal door or aluminum studs may have a negative eect on
range. Try to position access points, wireless routers, and computers so that the signal passes through drywall
or open doorways. Materials and objects such as glass, steel, metal, walls with insulation, water (sh tanks),
mirrors, le cabinets, brick, and concrete will degrade your wireless signal.
4. Keep your product away (at least 3-6 feet or 1-2 meters) from electrical devices or appliances that generate RF
noise.
5. If you are using 2.4GHz cordless phones or X-10 (wireless products such as ceiling fans, lights, and home security
systems), your wireless connection may degrade dramatically or drop completely. Make sure your 2.4GHz phone
base is as far away from your wireless devices as possible. The base transmits a signal even if the phone in not
in use.
10D-Link DWA-131 User Manual
Page 11
Section 2 - Installation
Adapter Installation
Warning: Do NOT install the DWA-131 Nano USB Adapter into your computer before installing the driver software from the
D-Link CD.
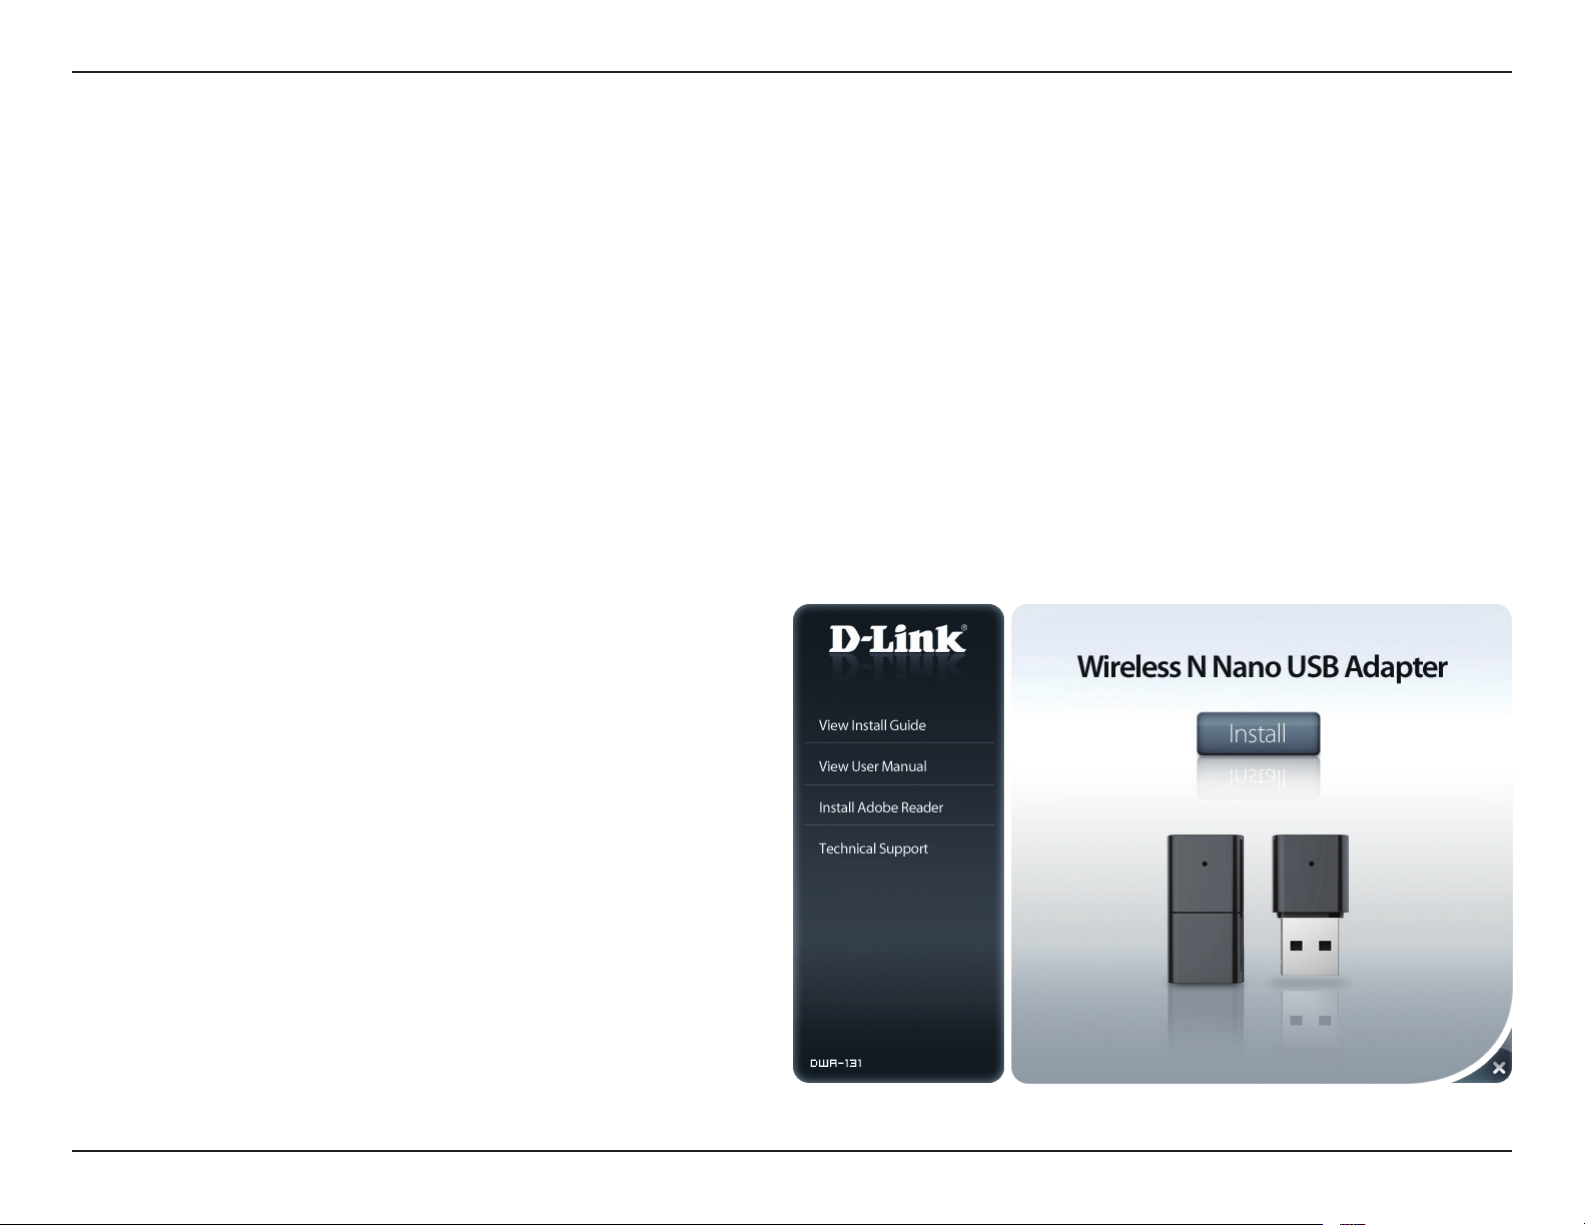
Turn on the computer and Insert the D-Link DWA-131 Driver CD in the CD-ROM drive.
If the CD Autorun function does not automatically start on your computer, go to Start > Run. In the run box type “D:\
autorun.exe” (where D: represents the drive letter of your CD-ROM drive).
When the autorun screen appears, click Install.
11D-Link DWA-131 User Manual
Page 12
Section 2 - Installation
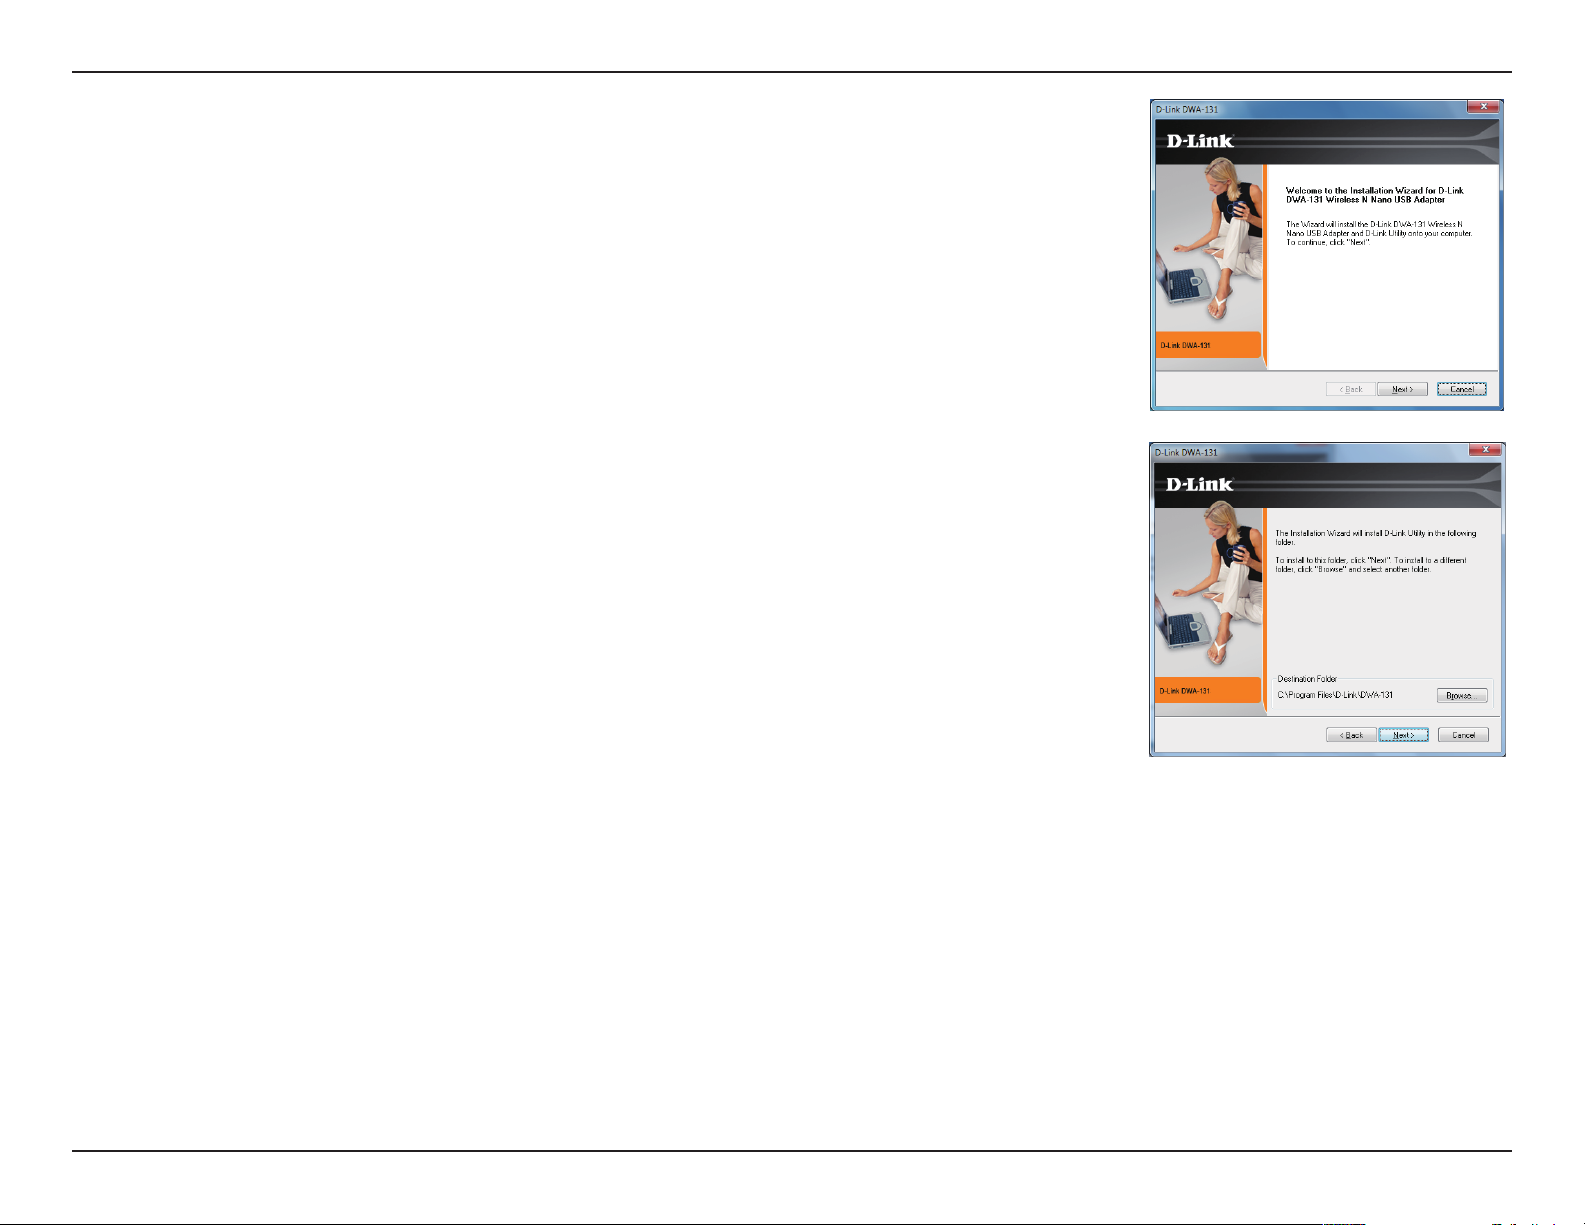
The InstallShield Wizard window will appear. Click Next to
continue.
By default setup will install to the default location: C:\Program Files\D-Link\DWA-131,
where C: represents the drive letter of your hard drive. To install to a dierent location
click Browse and specify the location. Click Next to continue.
12D-Link DWA-131 User Manual
Page 13
Section 2 - Installation
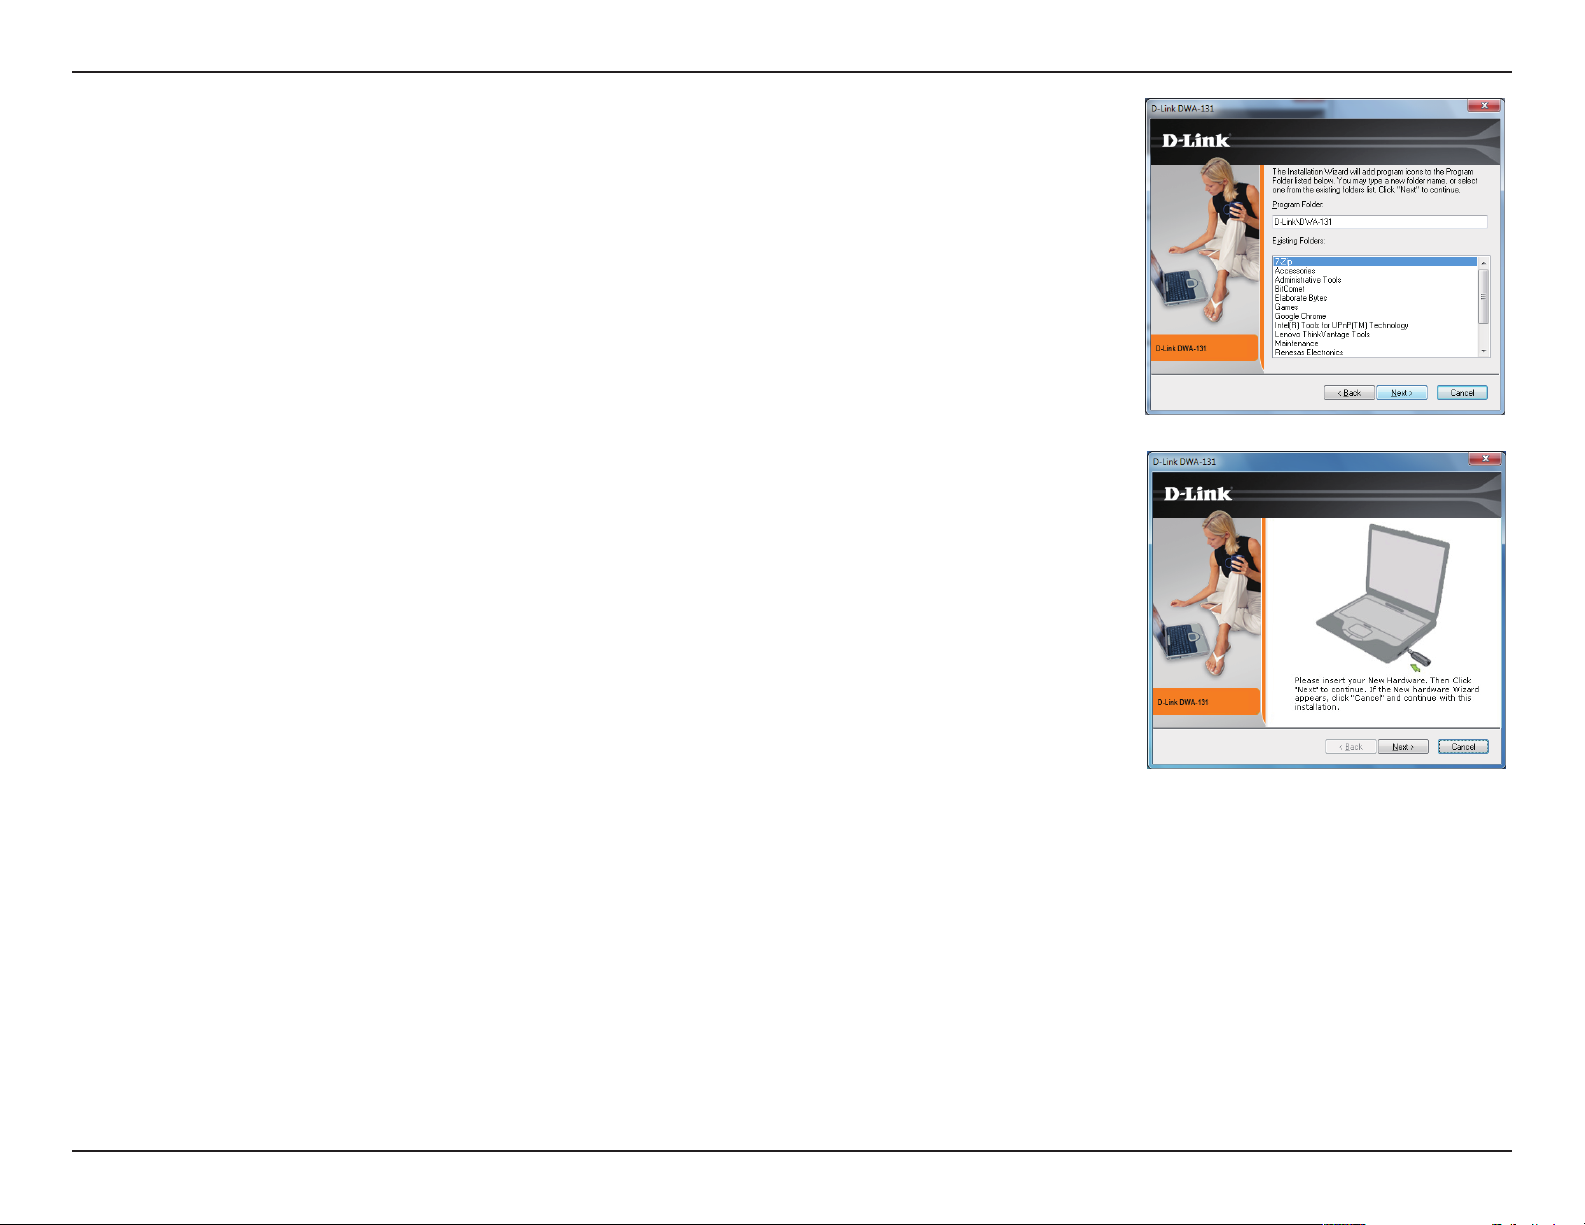
Insert the adapter into an available USB port on your computer. Click Next to
continue.
If the Found New Hardware Wizard appears, click Cancel.
The Wireless Connection Wizard will now appear.
If you want to manually connect to a wireless network, refer to page 20. The
following instructions will connect you to a wireless network using Wi-Fi
Protected Setup (WPS). Click Next to continue.
13D-Link DWA-131 User Manual
Page 14

Section 2 - Installation
Wireless Connection Wizard
Connect to your network by selecting to Manually type your Network Name
or using the Wi protected Setup (WPS). Click Next to continue.
Enter the network name (SSID) manually. If you enter the SSID incorrectly, you
will automatically be brought to the site survey page. Click Scan to display the
site survey page. Click Next to continue.
Click the Scan button to display a list of wireless networks (site survey). Select
the network name (SSID) and click Next.
14D-Link DWA-131 User Manual
Page 15
Section 2 - Installation
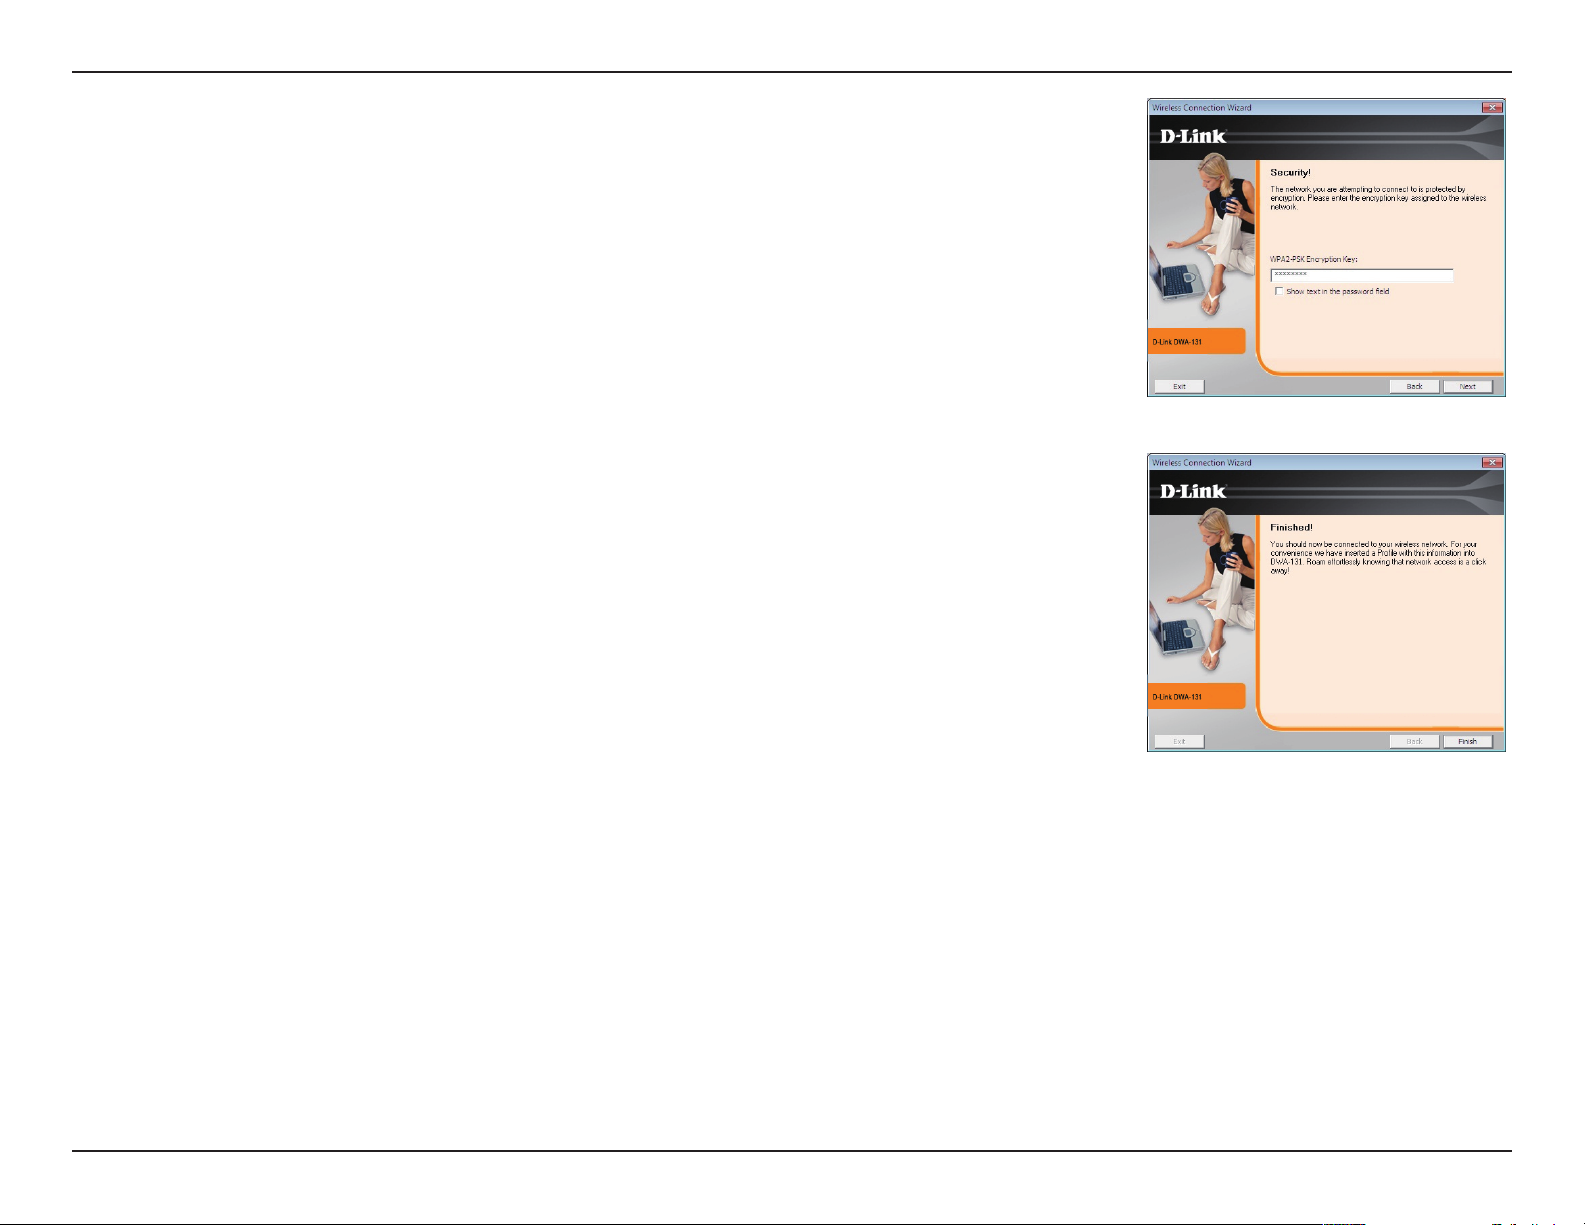
Click Finish to continue. If you are prompted to reboot your computer, select
Yes, I want to restart my computer now.
15D-Link DWA-131 User Manual
Page 16

Section 2 - Installation
Push Button Conguration (PBC)
Select “Use the WiFi Proctected Setup (WPS)” to initiate the conguration and
click Next.
To connect to your network using the WPS push button conguration method,
click the virtual button as shown in the screenshot.
Note: You may also connect to your network by pressing the WPS button on the
adapter and holding for two seconds until the wizard screen comes up. Then, press
the WPS button on the router/access point to continue.
Press the WPS button on your access point or wireless router within 2 minutes
to establish connectivity.
16D-Link DWA-131 User Manual
Page 17
Section 2 - Installation
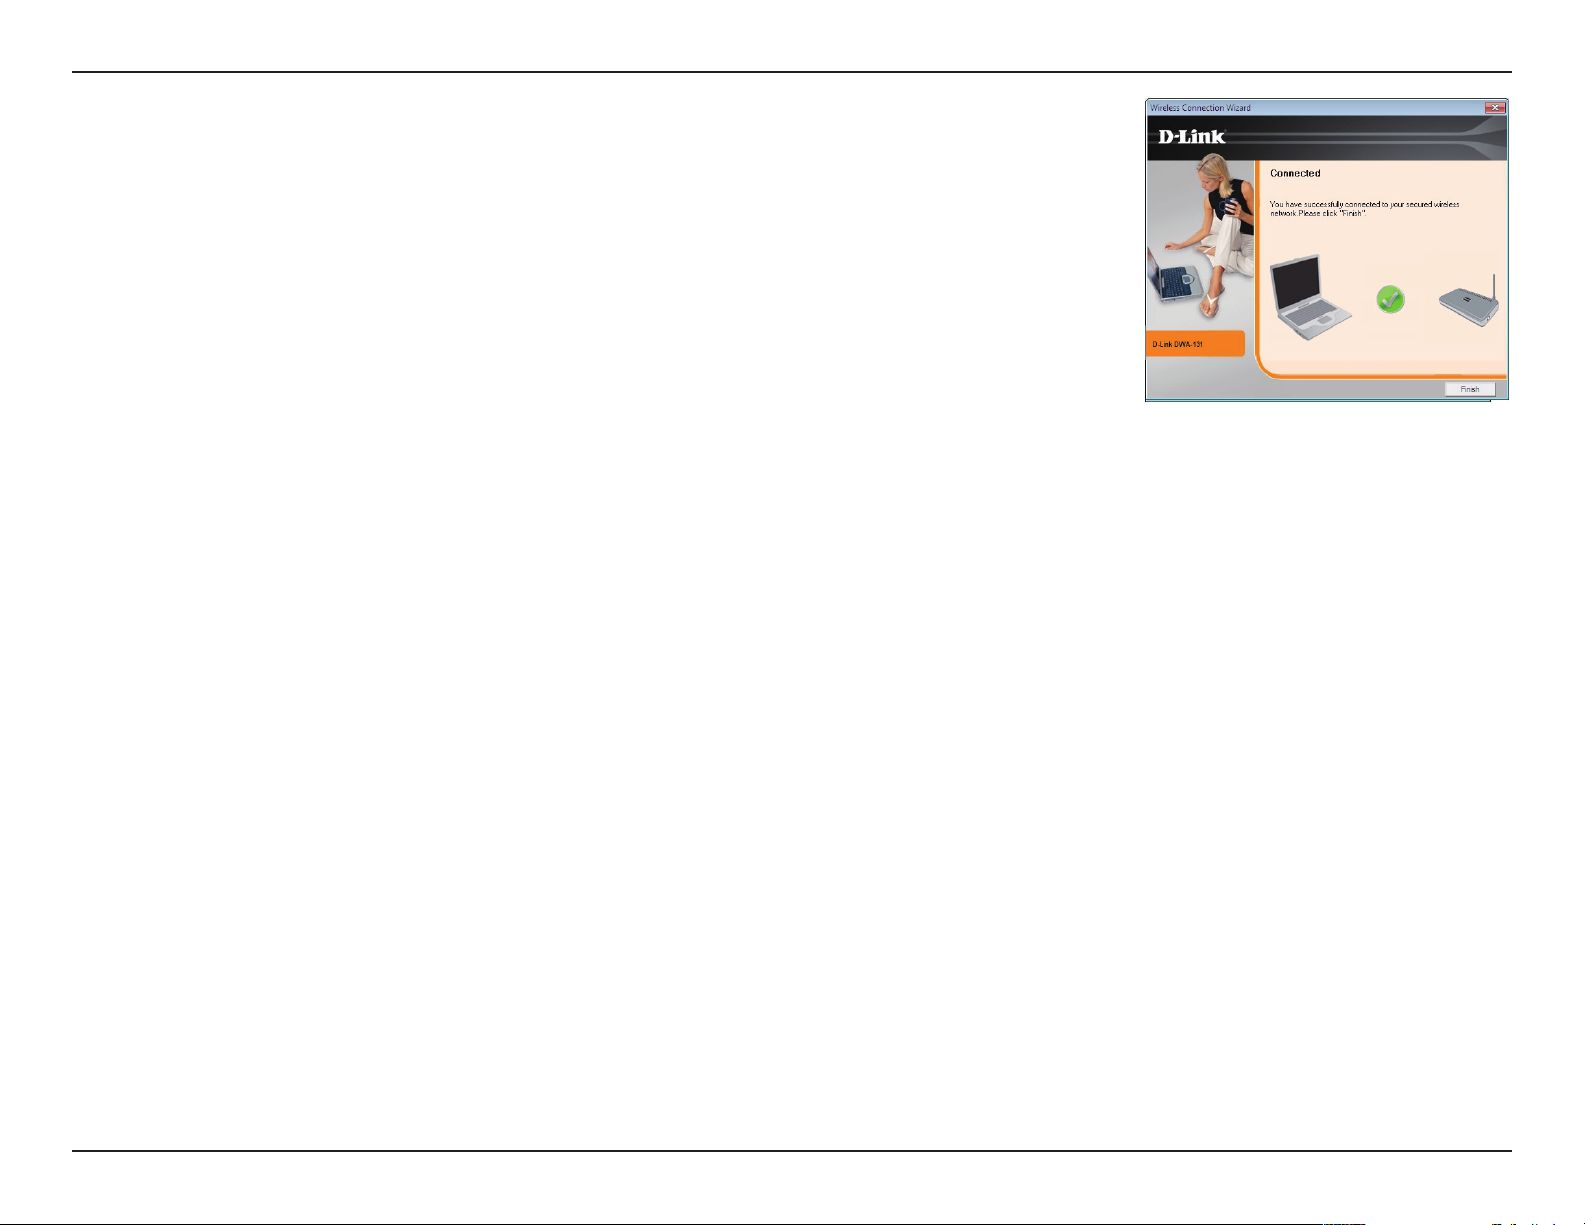
Click Finish to continue.
17D-Link DWA-131 User Manual
Page 18
Section 3 - Conguration
Conguration
This section will show you how to congure your new D-Link wireless adapter using the D-Link Utility as well as the Windows®
XP Zero Conguration Utility and Vista WLAN Autoconguration.
D-Link Wireless Connection Manager
The D-Link DWA-131 uses the Wireless Connection Manager as the management software. The manager provides the user an
easy interface to change any settings related to the wireless adapter. Clicking on the Wireless Connection Manager icon on
the desktop will start the Conguration.
If you are using Windows® 7, Vista®, or XP, please skip to pages 29, 30 or 31 respectively.
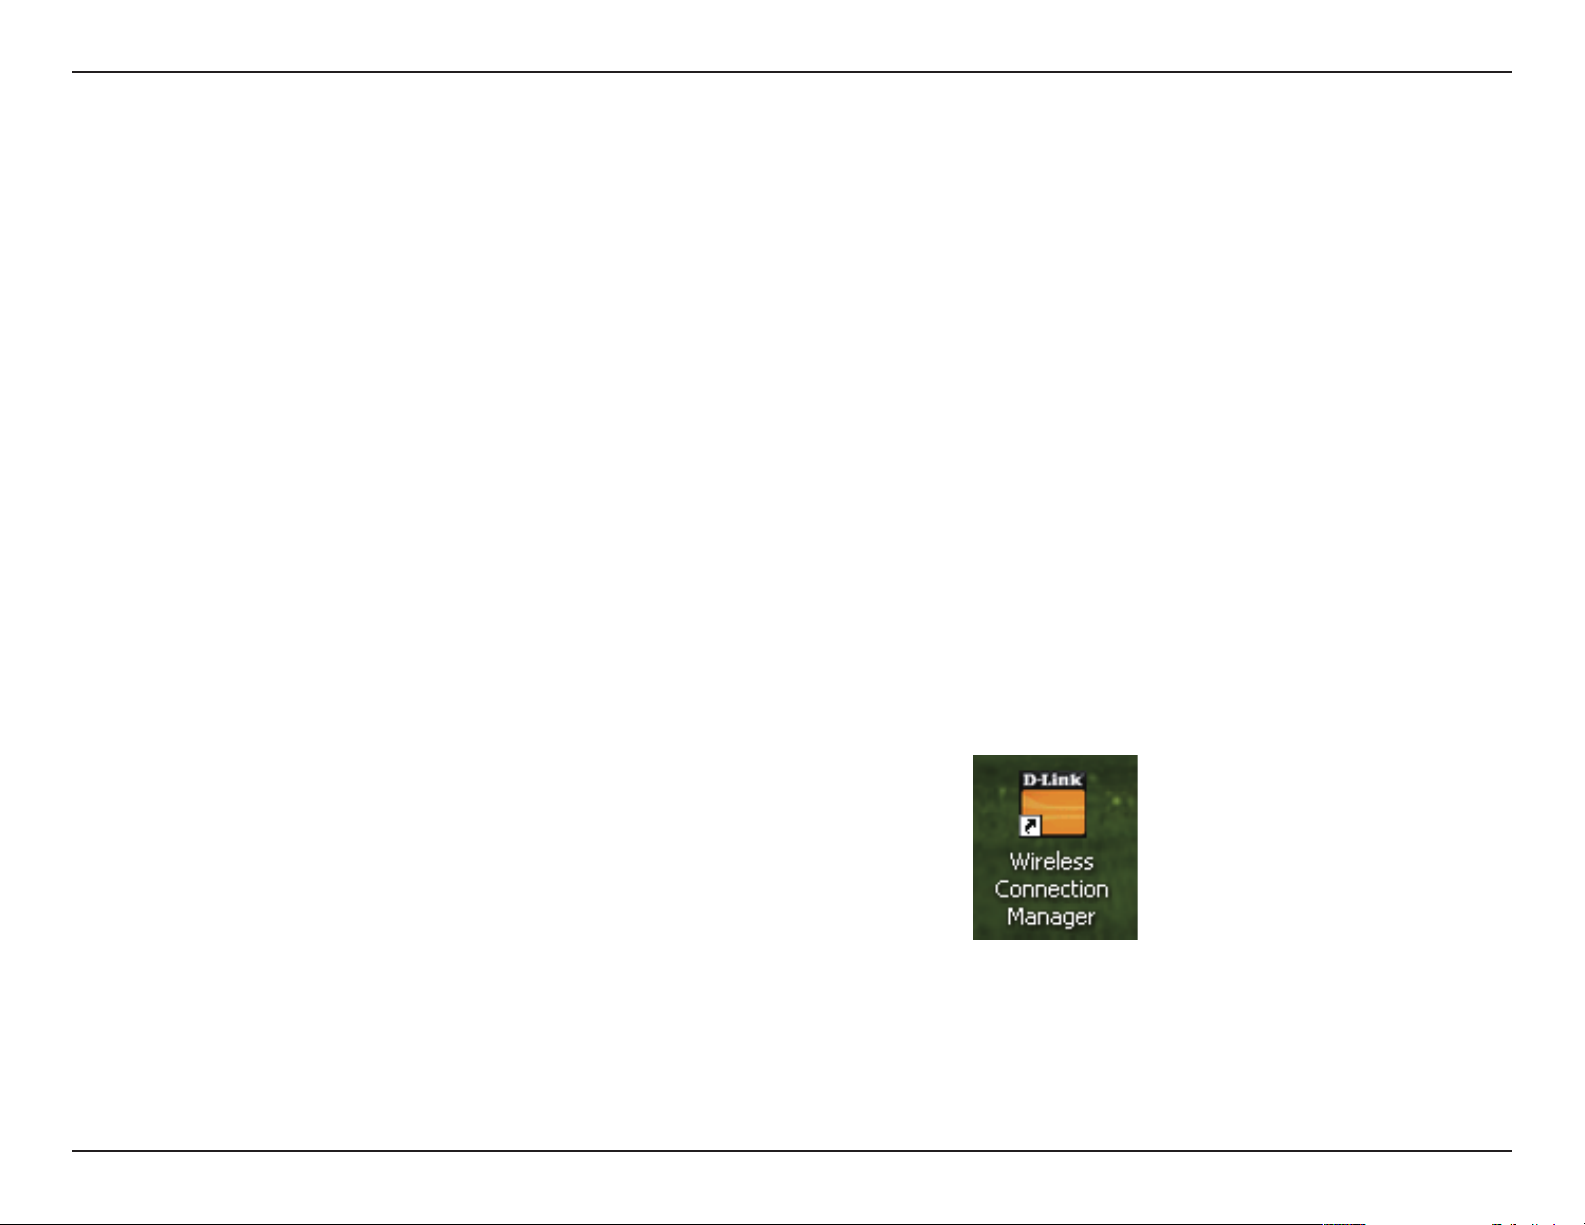
Double-click the Wireless Connection Manager icon on your desktop.
18D-Link DWA-131 User Manual
Page 19

Section 3 - Conguration
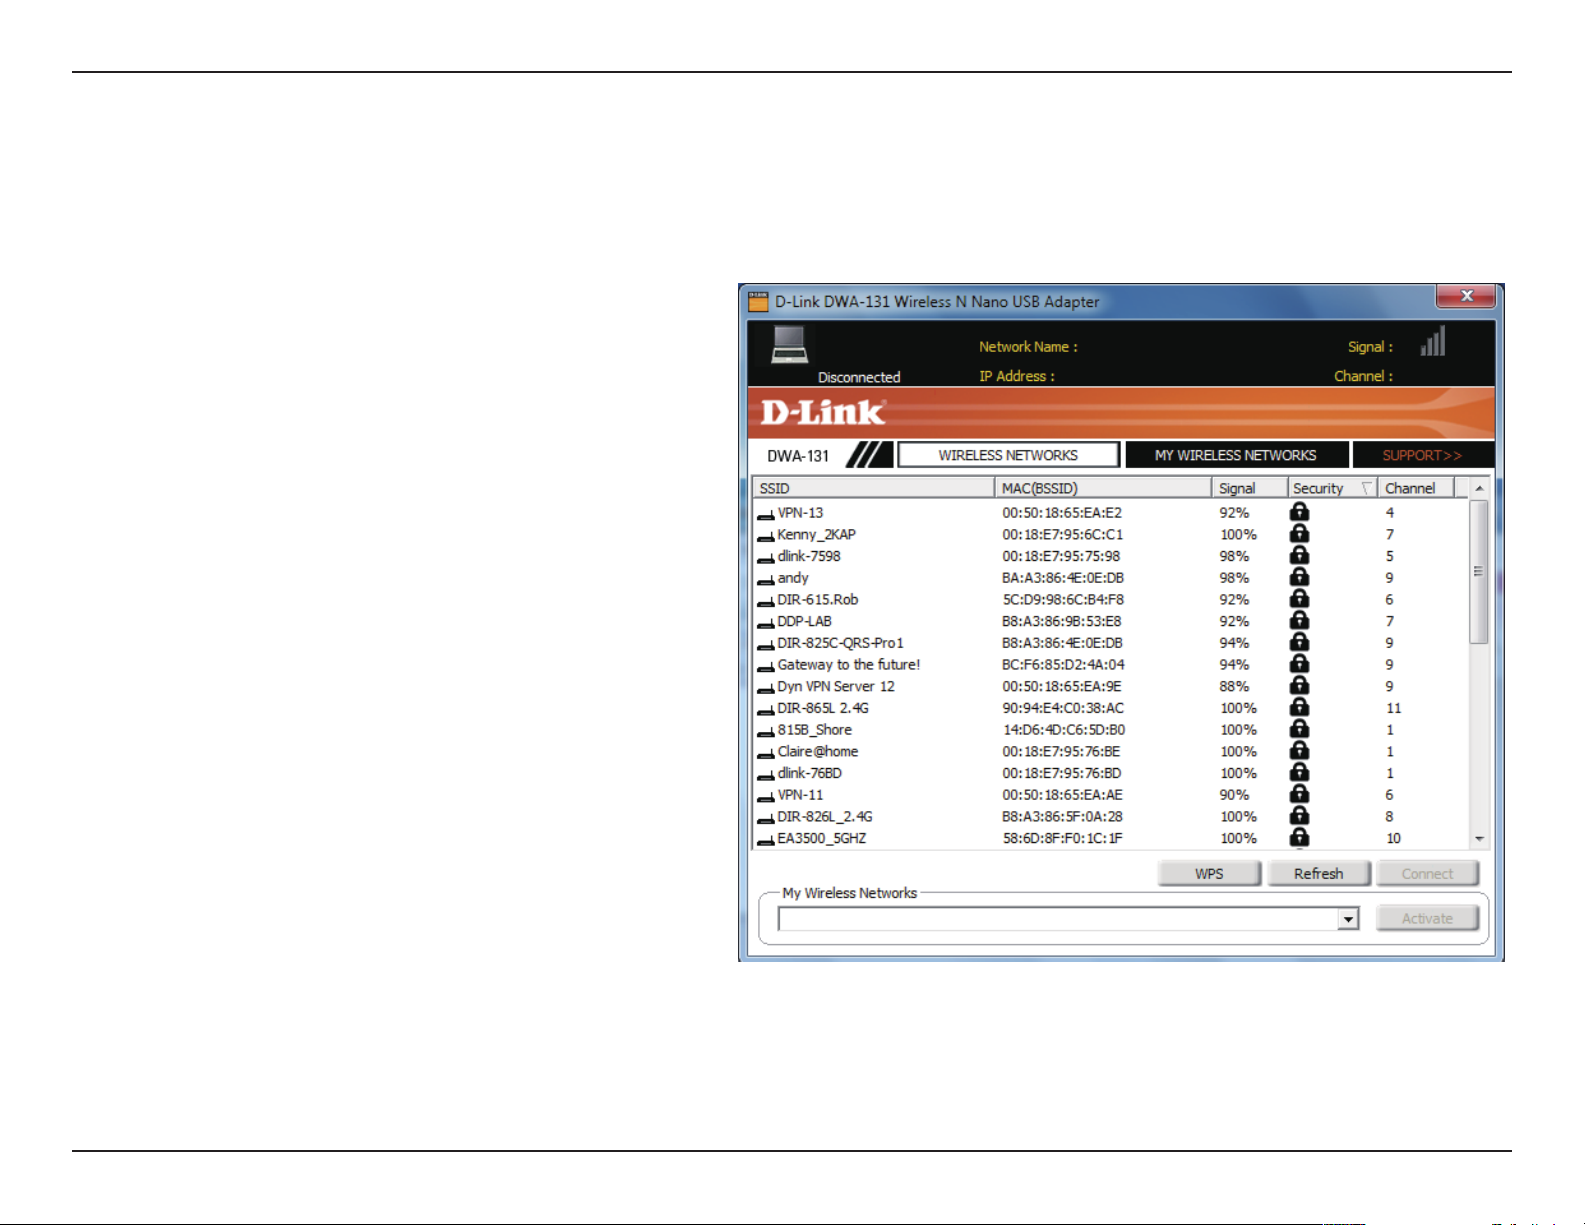
Wireless Networks
The Wireless Networks (Site Survey) page will display all wireless networks that are available in your area. To connect to a
network, simply highlight the wireless network (SSID) and click Connect.
SSID:
MAC:
Signal:
Security:
Channel:
WPS Button:
Refresh Button:
Connect Button:
Activate Button:
The SSID (Service Set Identier) is the name of the wireless network.
Displays the MAC address of the wireless device.
Displays the Link Quality of the wireless connection.
If there is a “lock” icon, this means the wireless network is secure. You must
know the encryption key/security settings to connect.
Displays the channel of the wireless network.
Connect to a wireless network using Wi-Fi Protected Setup. Refer to the next page.
Rescans for available wireless networks in your area.
Highlight a wireless network and click the Connect button. If the network is secure, a pop-up window will appear.
Enter the security information to connect (refer to the Wireless Security section for more information).
Select a wireless network prole from the drop-down menu and click
Activate to connect. Allow up to 30 seconds to connect.
19D-Link DWA-131 User Manual
Page 20

Section 3 - Conguration
Wi-Fi Protected Setup (WPS)
Wi-Fi Protected Setup (WPS) System is designed for easy setup of securityenabled Wi-Fi networks. It is recommended to have the access point or wireless
router nearby during setup.
For more information on WPS, visit the Wi-Fi Alliance website at www.wi-.org.
“Push Button Conguration” (PBC) is a virtual button in the utility that
connects you to other WPS-enabled devices. A connection can be established
by clicking on the virtual button, then pushing the physical button on the
access point or wireless router within 120 seconds. Refer to page 16.
“Personal Identification Number” (PIN) is a unique number generated
randomly by the wireless adapter’s utility. Entering this number in the utility of
the WPS-enabled wireless router or access point connects you with the intended
wireless network. Refer to the next page for more information.
20D-Link DWA-131 User Manual
Page 21
Section 3 - Conguration
Personal Identication Number (PIN)
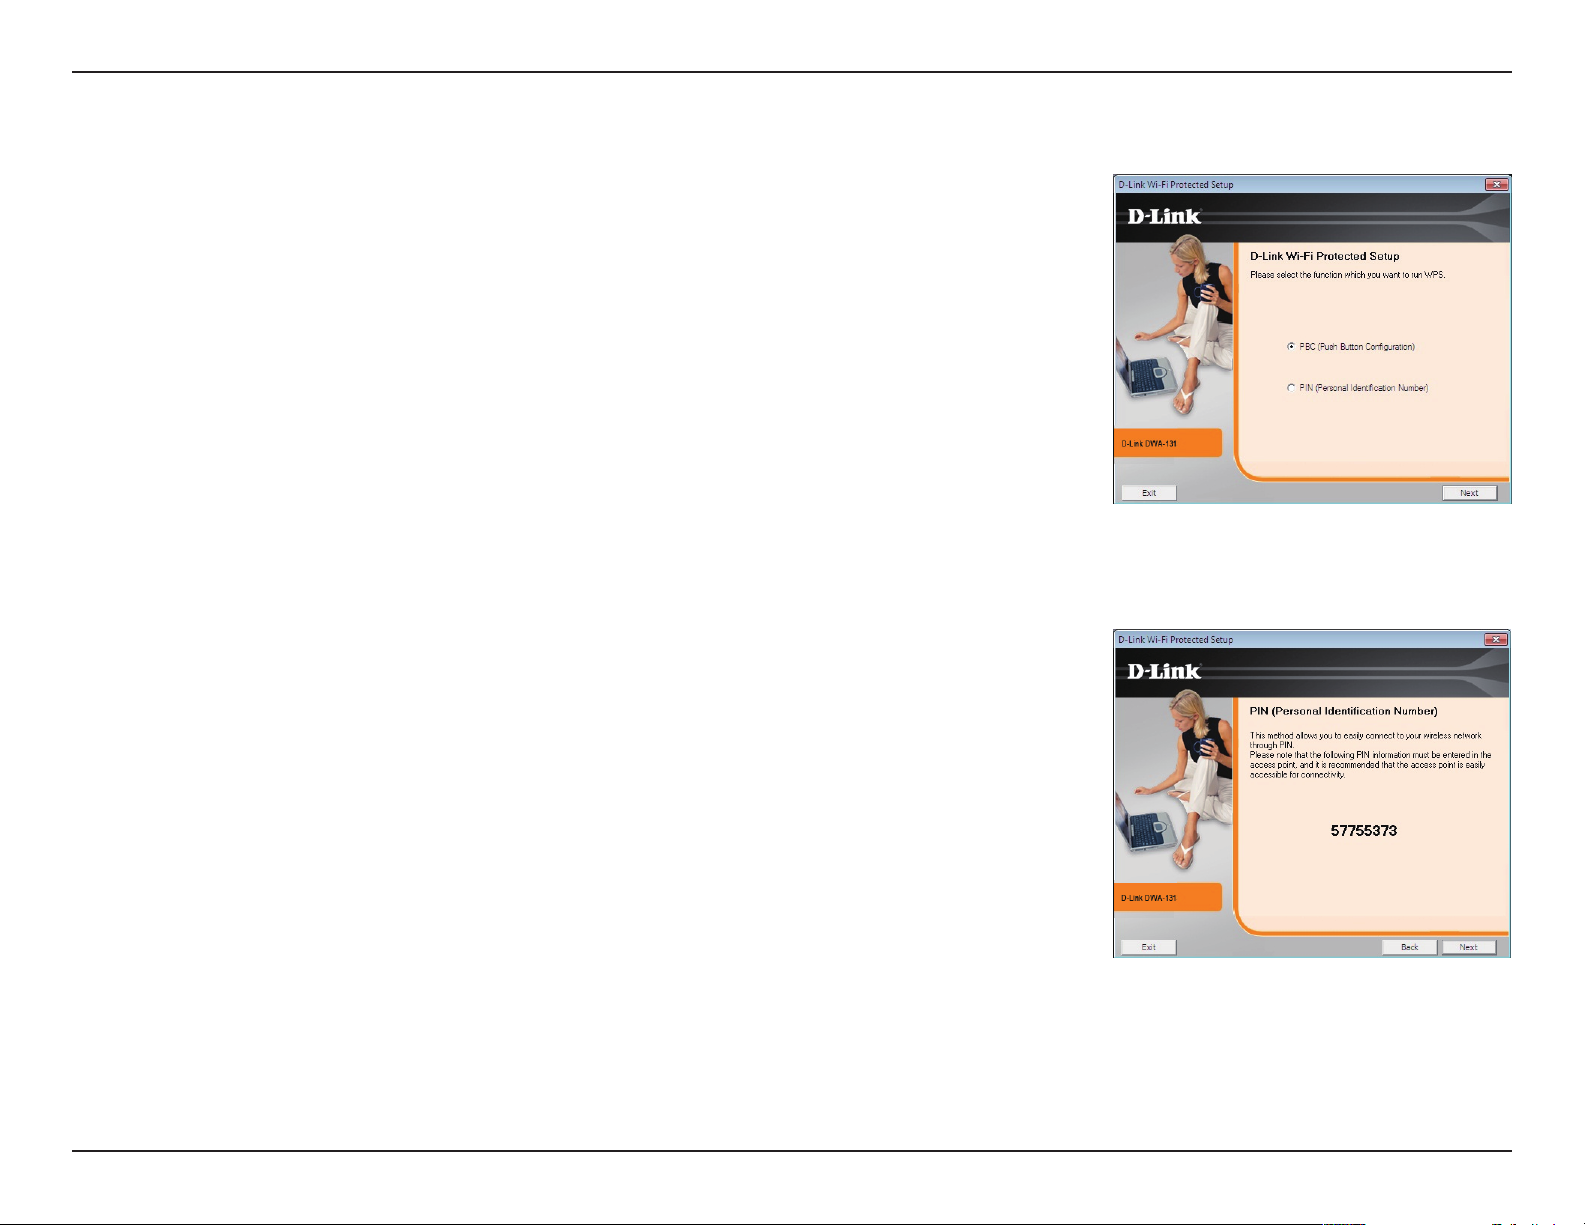
If you want to connect using the PBC method, refer to page 21. To use the PIN
method, select PIN (Personal Identication Number) and click Next.
Make sure your access point or wireless router is close by. Write down the
number on the screen. Enter this number in your access point or wireless router.
Please refer to the manufacture’s manual for instructions.
Once you click Next, you will have 2 minutes to enter this number in your
access point or wireless router.
21D-Link DWA-131 User Manual
Page 22
Section 3 - Conguration
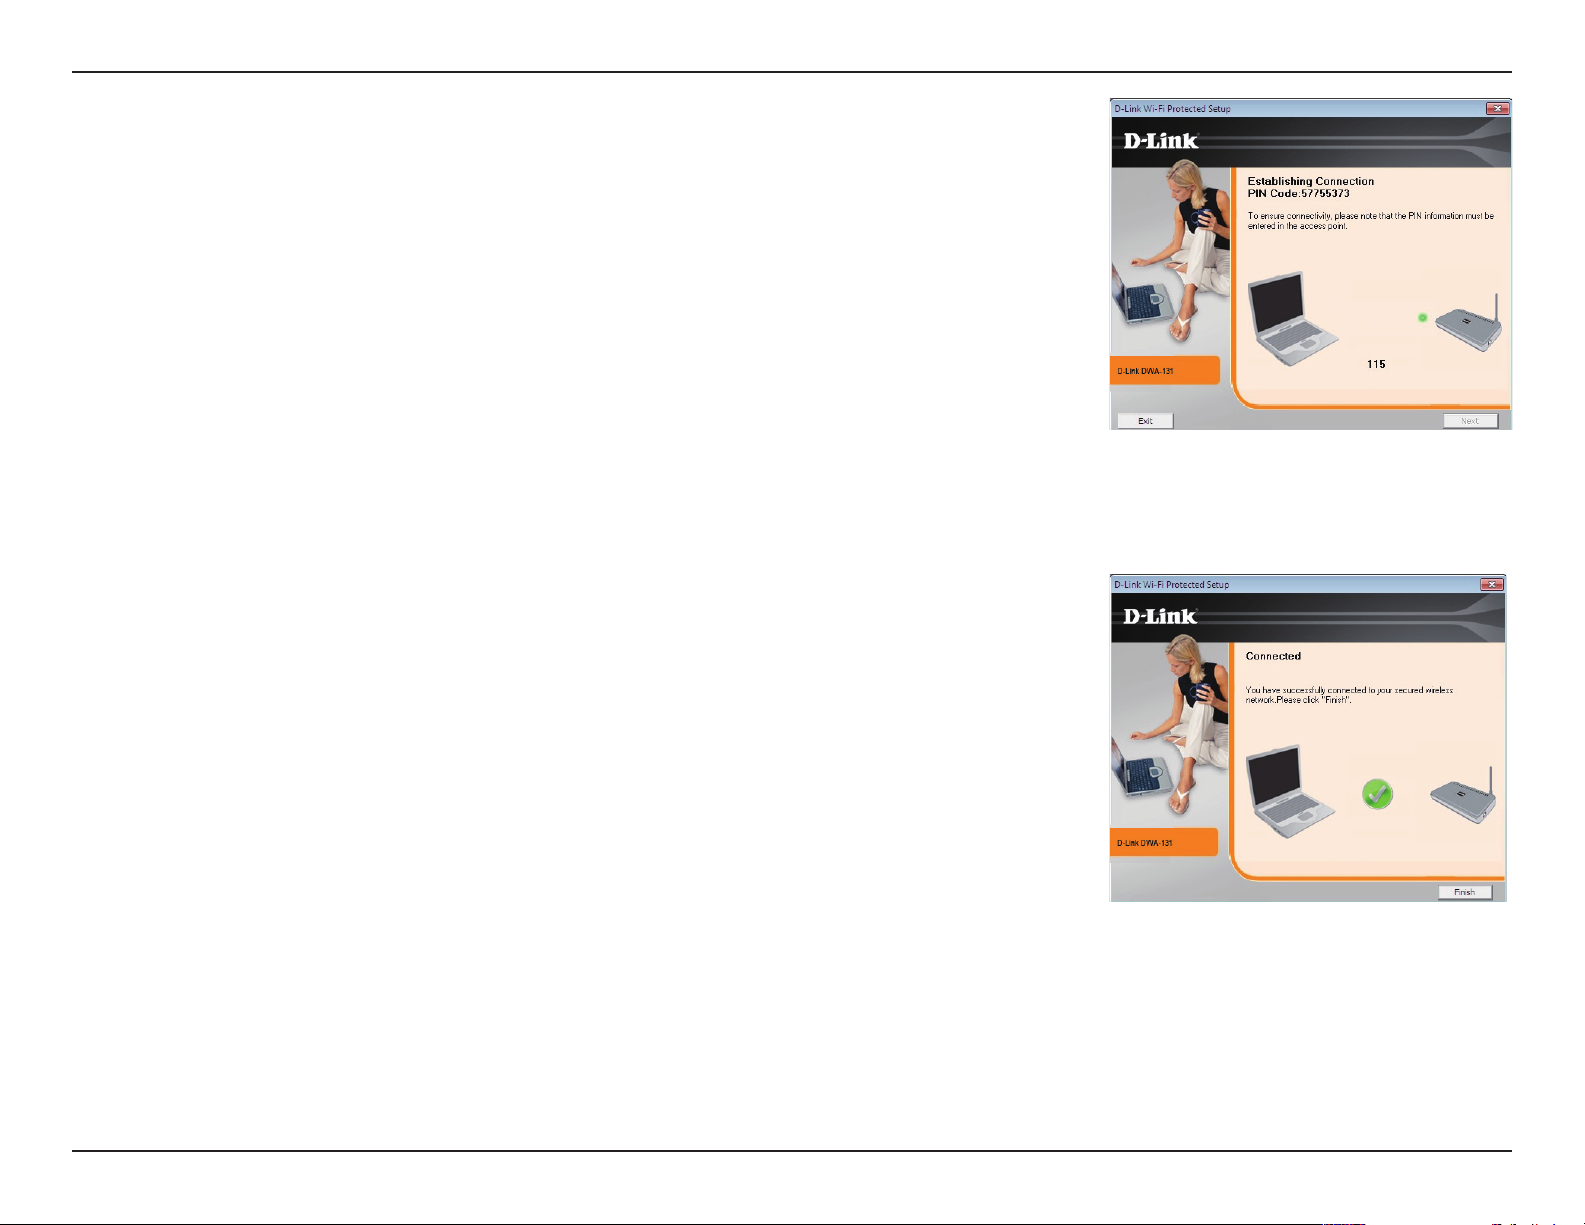
The adapter will try to establish connectivity to your access point or wireless
router.
When this screen appears, you have successfully established connectivity. Click
Finish to complete your setup.
22D-Link DWA-131 User Manual
Page 23
Section 3 - Conguration
My Wireless Networks
The My Wireless Networks page will allow you to create, edit, and delete wireless network proles. Every time you connect to
a network using the Wireless Networks page, a prole will automatically be created.
New Button:
Modify:
Delete:
Activate:
Prole Details:
To create a new wireless network prole (refer to
page 25).
To edit a current prole (refer to page 26).
To remove a prole.
To use a prole. Allow up to 30 seconds to connect
to the wireless network.
The Prole Details section will display information
about the wireless network such as the network
name (SSID), network type (Infrastructure), and if
the network is secured.
23D-Link DWA-131 User Manual
Page 24
Section 3 - Conguration
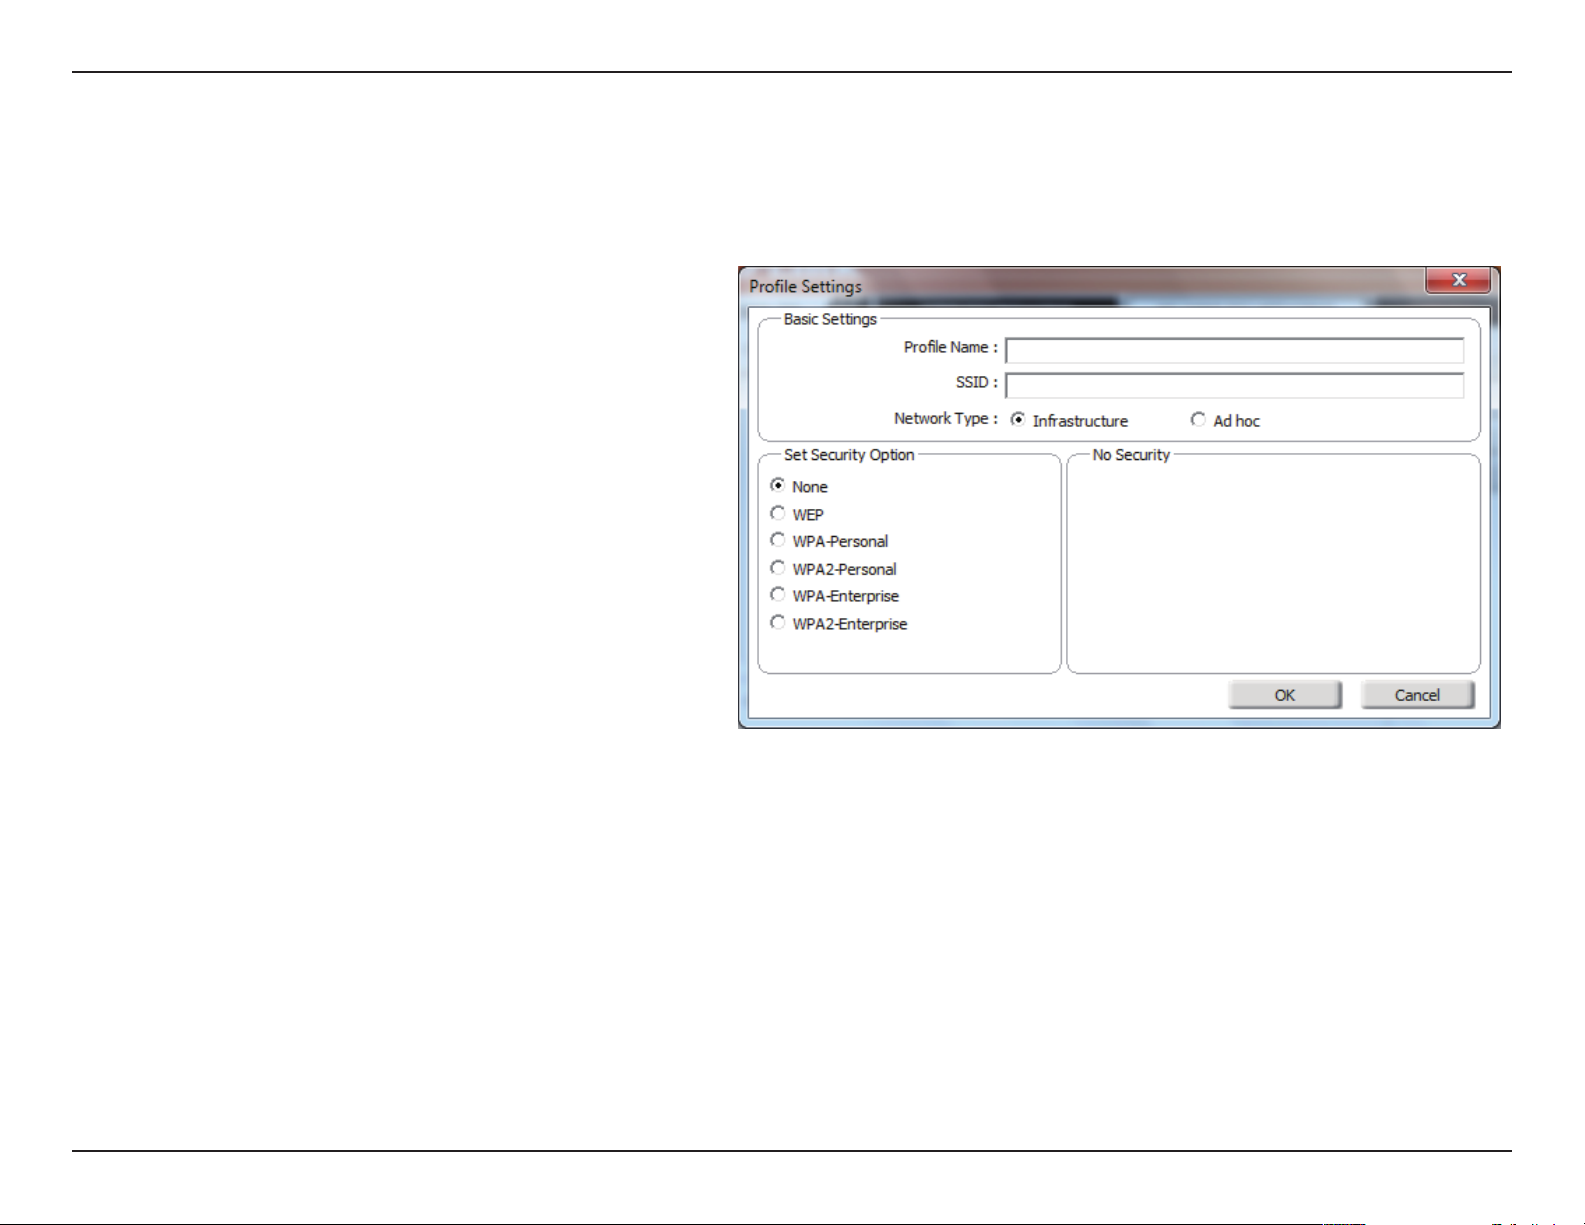
Add Prole
You may add a new network by clicking the New button from the My Wireless Networks page.
Prole Name:
SSID:
Network Type:
Security Type:
OK:
Enter a name for your profile (e.g. Home, Office,
Coee Shop).
Enter the SSID of the wireless network.
Select the network type. If you are connecting to a
wireless router or access point, select Infrastructure.
(Ad-hoc mode is not supported)
Select the type of security used. Please refer to the
Wireless Security section for more information.
Click OK to save your settings.
24D-Link DWA-131 User Manual
Page 25
Section 3 - Conguration
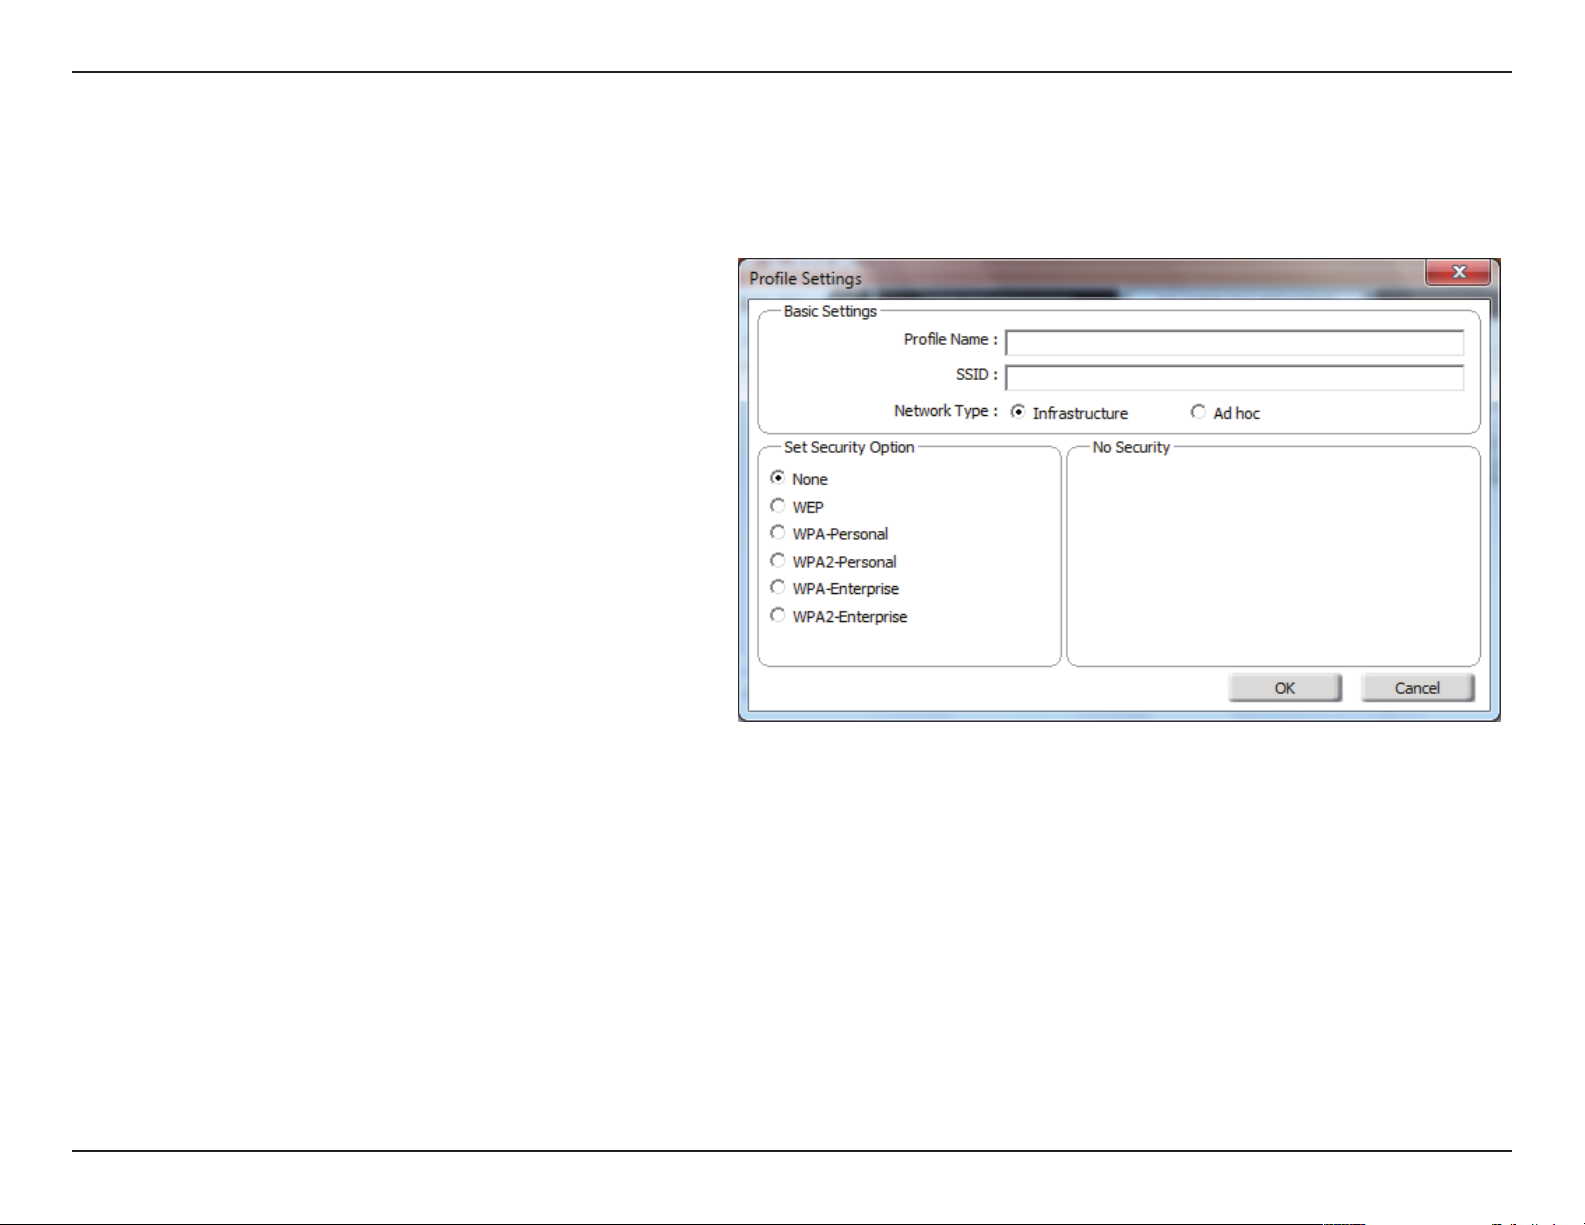
Modify Prole
You may edit an existing prole by selecting the prole and clicking the Modify button from the My Wireless Networks page.
Prole Name:
SSID:
Network Type:
Security Type:
OK:
Enter a name for your prole (e.g. Home, Oce,
Coee Shop).
Displays the SSID of the network.
Displays the network type.
Select the type of security used. Please refer to the
Wireless Security section for more information.
Click OK to save your settings.
25D-Link DWA-131 User Manual
Page 26

Section 3 - Conguration
Support
If you need help, click the Support button. A panel will appear to the right of the utility which will display information about
the utility.
26D-Link DWA-131 User Manual
Page 27
Section 3 - Conguration
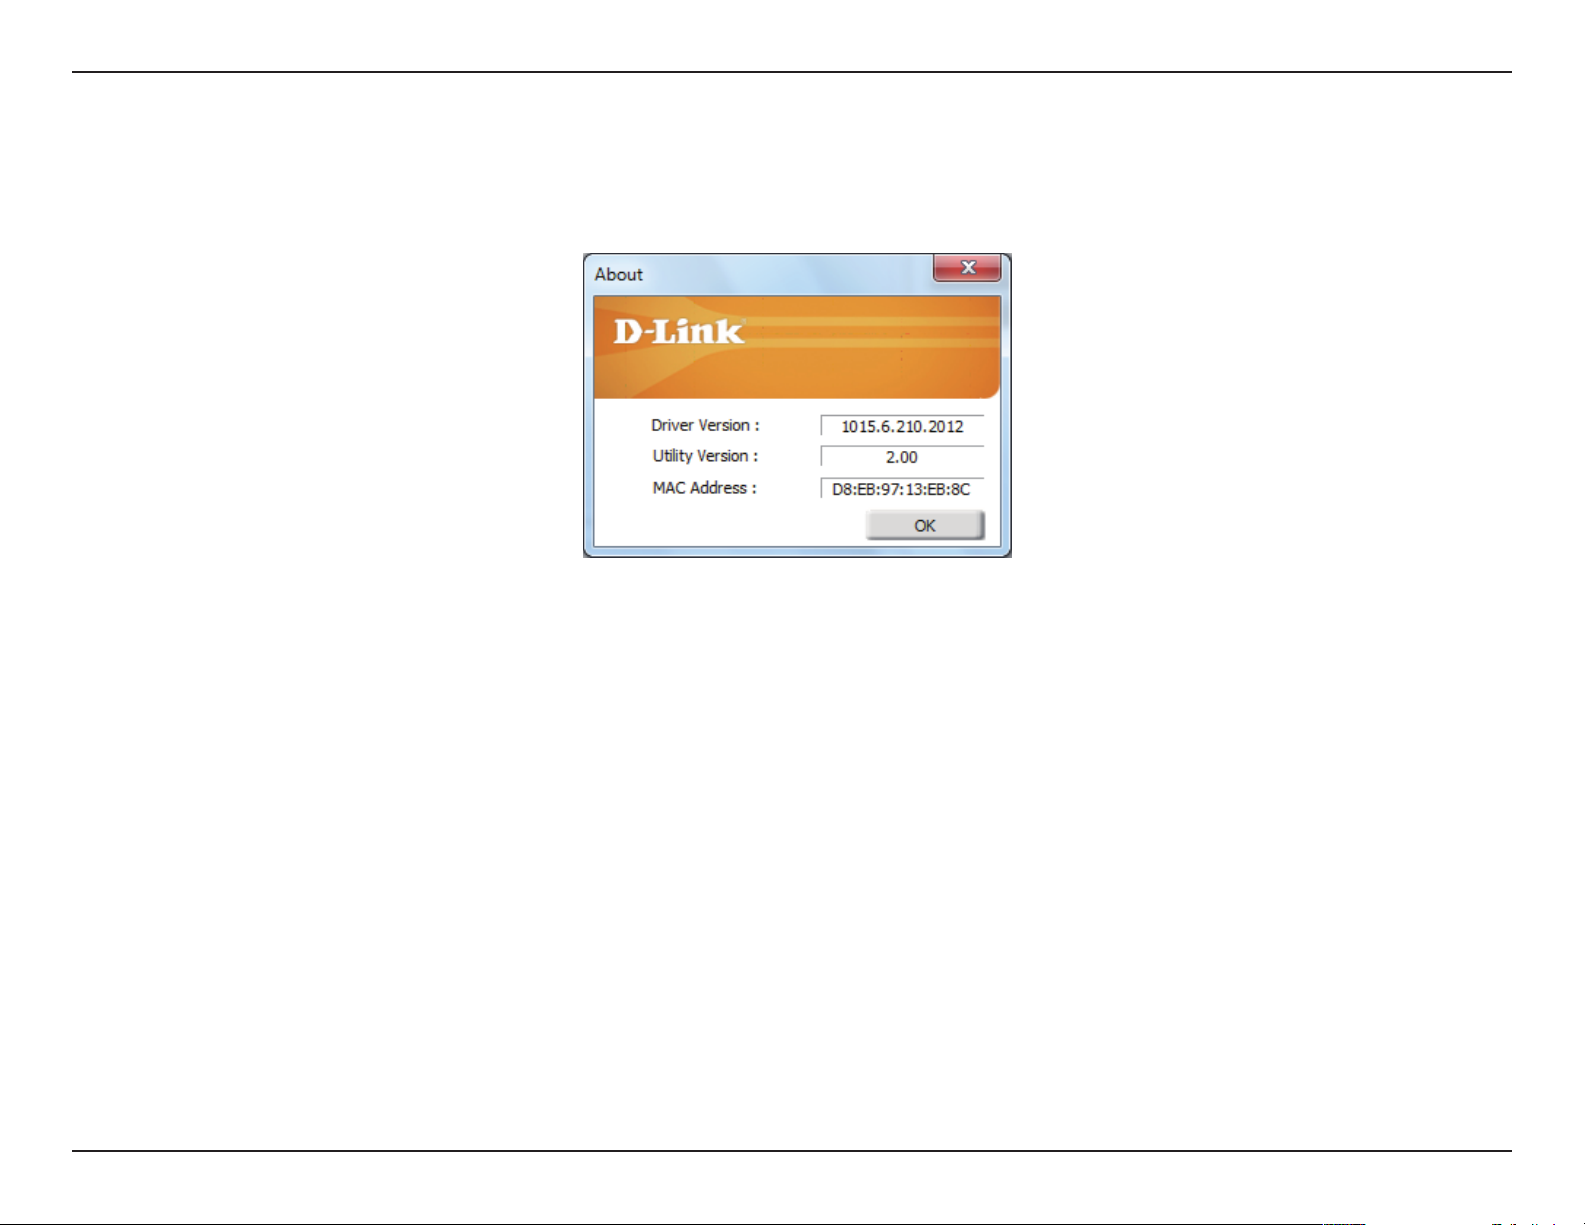
About
The About screen gives you information about the Firmware and Utility Versions of the DWA-131.
27D-Link DWA-131 User Manual
Page 28
Section 3 - Conguration
Connect to a Wireless Network
Using Windows® 7
Windows® 7 users may use the built-in wireless utility. If you are using another company’s utility, please refer to the user manual
of your wireless adapter for help with connecting to a wireless network. Most utilities will have a “site survey” option similar to
the Windows® 7 utility as seen below.
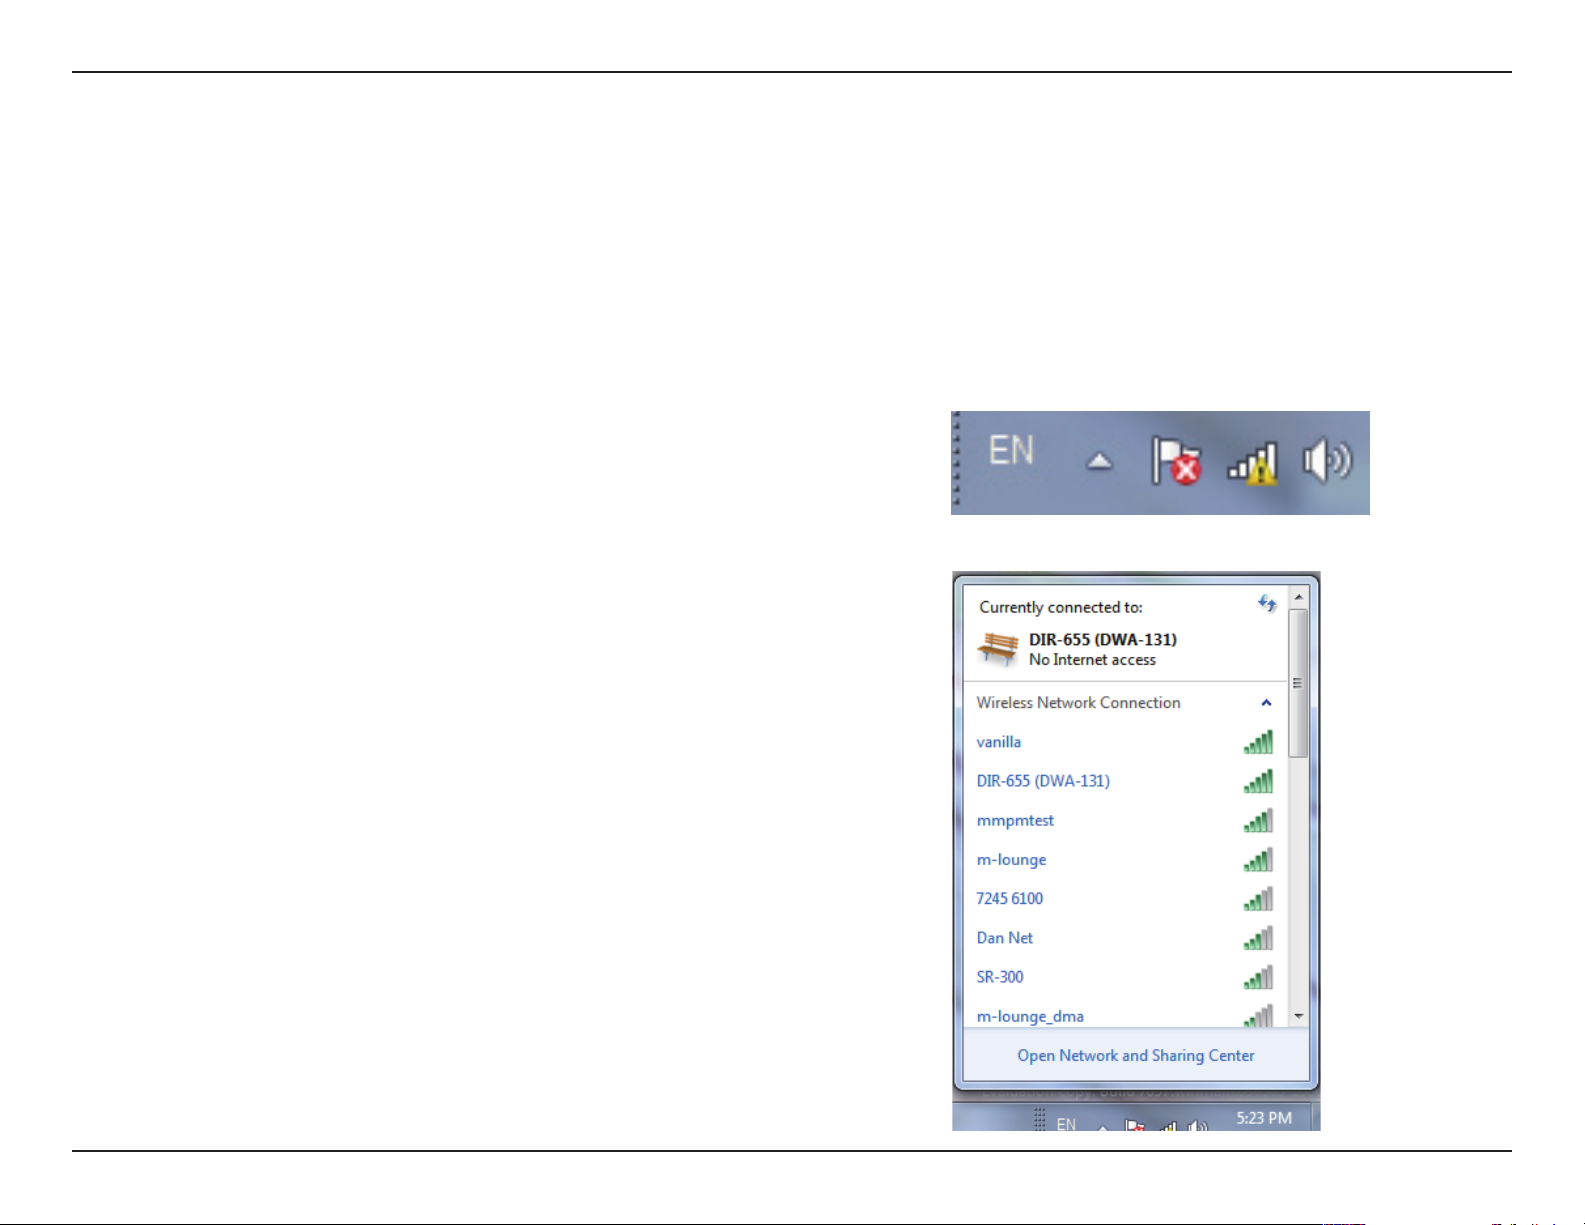
If you receive the Wireless Networks Detected bubble, click on
the center of the bubble to access the utility.
or
Left-click the wireless icon in your system tray (lower-right corner
next to the time).
The utility will display any available wireless networks in your area.
Click on a network (displayed using the SSID) and click the Connect
button.
If you get a good signal but cannot access the Internet, check your
TCP/IP settings for your wireless adapter. Refer to the Networking
Basics section in this manual for more information.
28D-Link DWA-131 User Manual
 Loading...