

Page 1

3
Page 2

Thank you very much . . .
. . . for choosing one of our Speaker Systems. This manual is valid for model LS-400 in
various colour combinations. For your own safety and in order to learn all about the
functions available, please read this manual and keep it for future reference. And if you once
sell the unit please include the manual.
www.dk-digital.com
© 2006 Copyright, manufacturer: DK digital GmbH
2
Page 3

Important Safety Instructions, please Read Carefully!
•
This unit is meant to transmit suitable analogue audio signals. Never use it for any other
purpose or in any other way than described in this manual.
•
When using an amplifier with a rated output power higher than the nominal input power
of the speakers, be very careful. Never exceed the maximum input of the speaker
system, otherwise the speakers will be destroyed.
•
Even if the output of the connected amplifier is lower than the load capacity of the
loudspeaker, an amplifier may not be operated at maximum volume, because that would
increase the risk of “clipping”, i.e. that there can be direct-current voltage at the
output of the amplifier if even only briefly. Direct-current voltage destroys the voice coils
of the loudspeakers.
•
Any time you notice distortion or abnormal sound, immediately reduce the volume
control on your amplifier to a lower setting.
•
Never attempt to open the housings of your speaker boxes or to service the product
beyond that described in this manual. All servicing or repair must be referred to qualified
service personnel authorised by us.
•
So that neither the wood nor the loudspeaker membranes can be damaged, this
appliance must never be operated in damp rooms (e.g. bathroom). The loudspeakers
must also only be operated within closed rooms.
•
Never let children play with the boxes or stick anything into it.
•
Do not leave the boxes in direct sunlight for a long time, otherwise discolouration may
result. Avoid positions with heavy dust or poor ventilation. The unit should not be
exposed to mechanical vibrations or shock.
•
You can use a soft damp cloth to clean the housings. Don’t use strong cleansing
products. NEVER touch the membrane of the speakers.
•
Lay the loudspeaker cable so that nobody can stumble over it.
3
Page 4
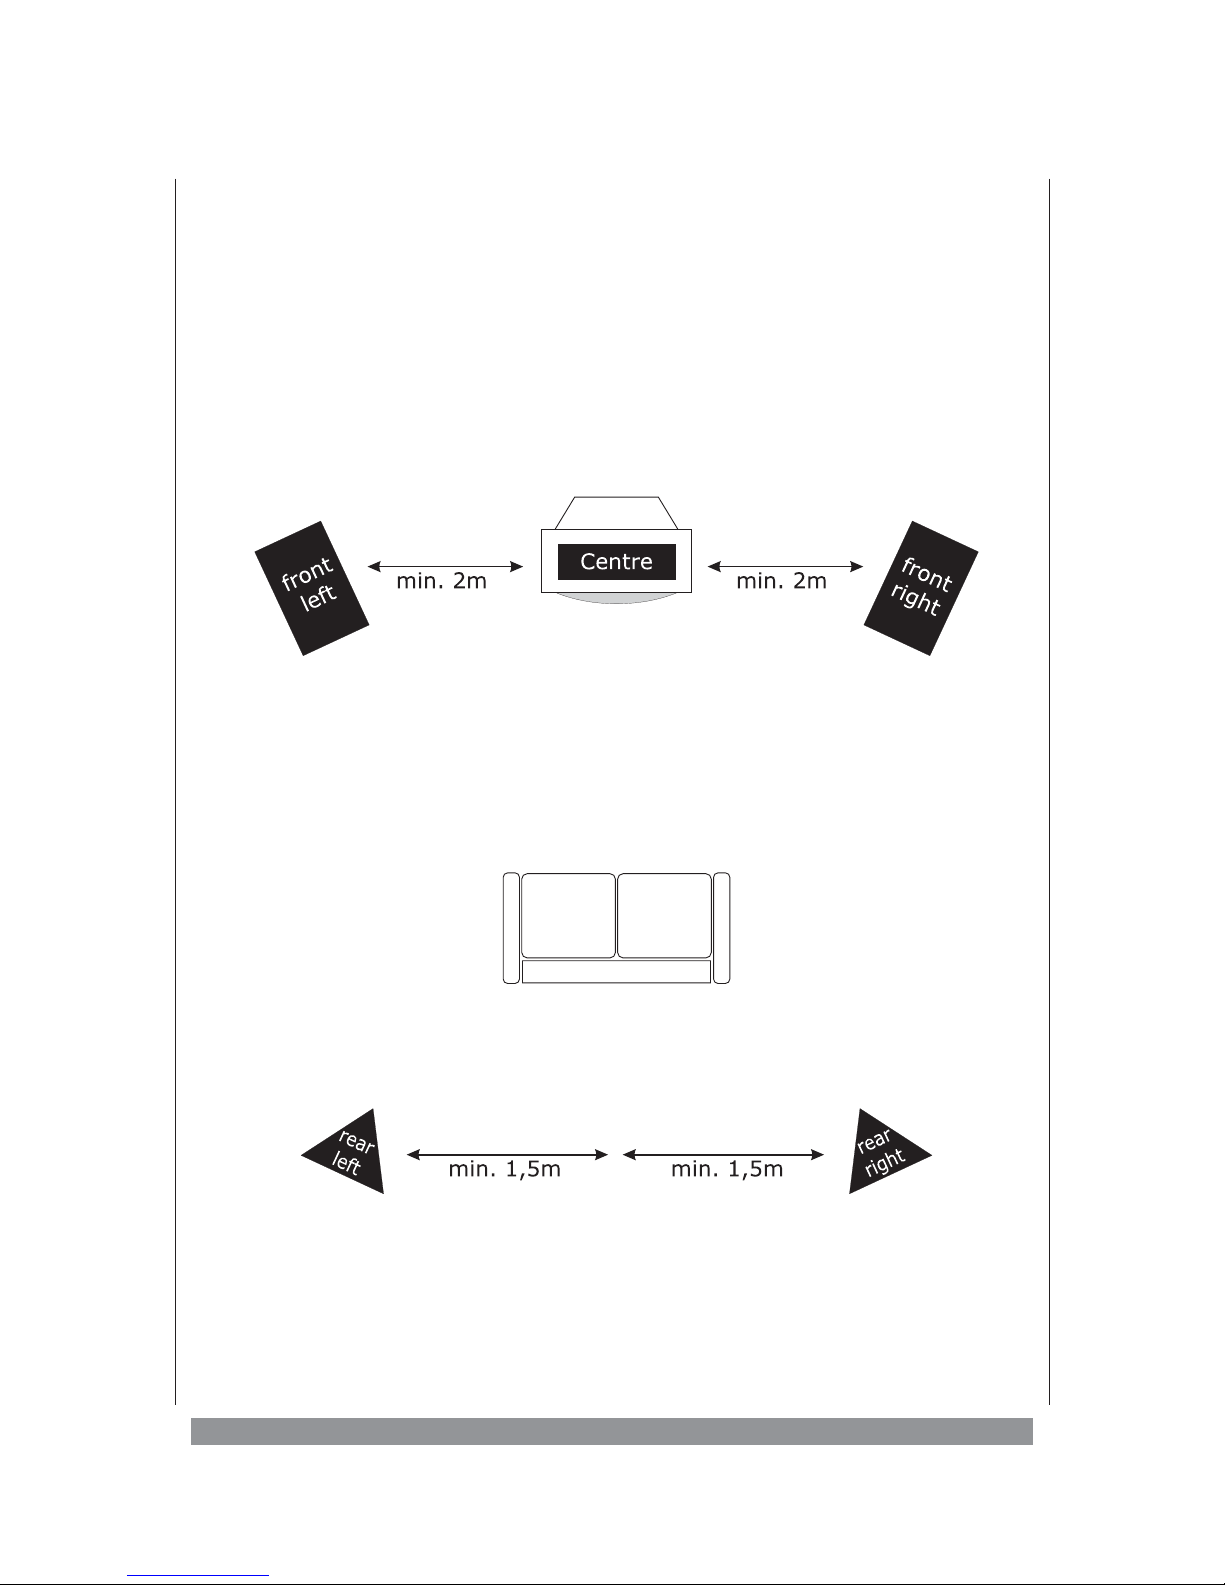
Positioning the Speakers
You can mount the speakers on a plane and stable surface. The rear surround speaker
boxes can, however, also be hung up at the wall as we have provided its back side with a
corresponding hanging possibility. For a most impressive you should follow these
recommendations:
Ø
The spacing between your loudspeakers and the listener will depend on the size of your
listening room. Please place the front speakers at least 2 metres apart left and right of
the centre speaker. The centre speaker should be placed on top or below the TV. The rear
speakers should be placed behind your seating position about 1,5 metre to the left and to
the right. There are rooms where this setup is not possible. As a compromise place the
rear speakers at the back of the room, facing your seating position.
Ø
All loudspeakers should face the listeners position and should be on the same level as the
listeners ears.
Ø
Take care not to set up the speakers close to a TV set as otherwise this can lead to slight
colour distortions of the TV picture. If that should happen increase the distance between
the speakers and the TV set. Then switch off the television and wait for 10 minutes before
you turn it on again. Any colour distortion should be fixed then. However, the centre spea
-
ker is magnetically shielded, so it should not cause any problems in the near of a TV set.
4
Page 5
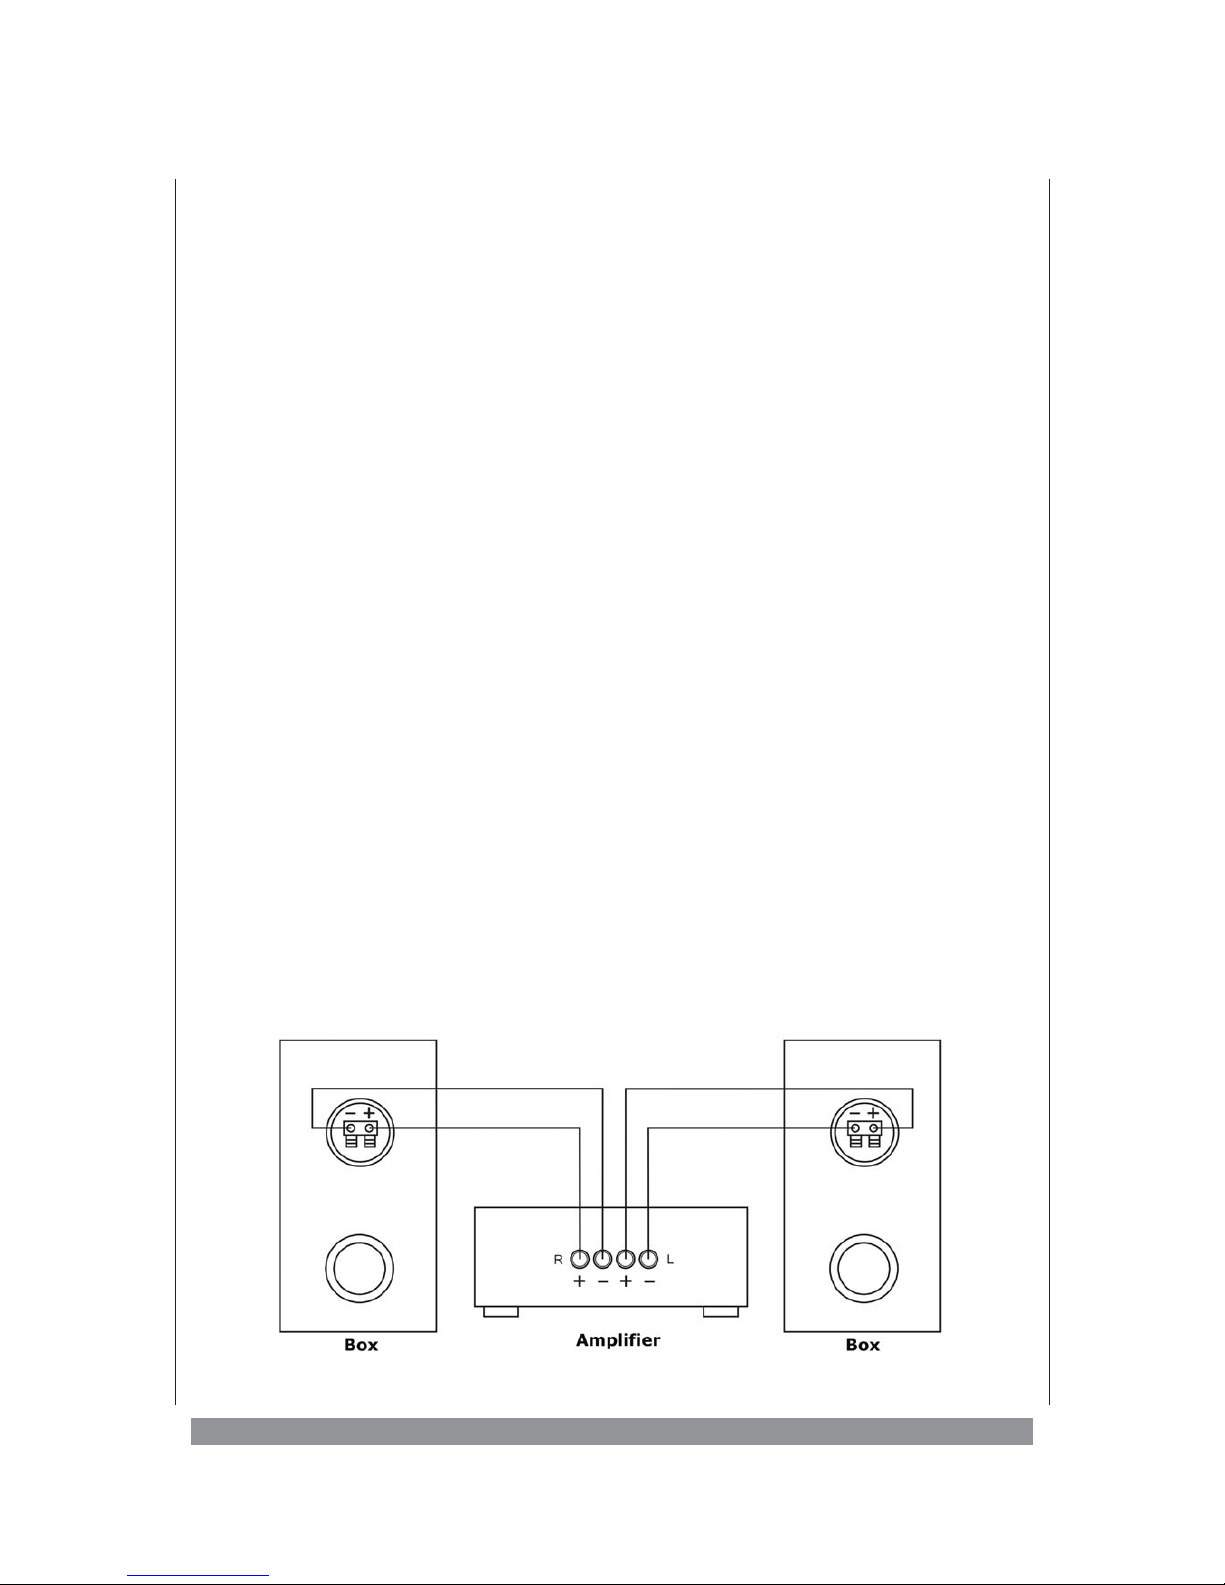
Connecting the Loudspeakers to the Amplifier
In order to avoid damage of the speakers or other connected devices, please establish all
connections while the amplifier is switched off.
Bi-Wiring Connection
On the back of the front speaker, there are 2 groups of connection terminals, whose + and –
poles are connected with one another. This means you can connect the speakers using
bi-wiring. The following consideration is behind the “bi-wiring” procedure:
All frequencies are broadcast together in the speaker cable in conventional connections.
However, this means that the low frequencies are broadcast with considerably higher
performance than the high frequencies. This can lead to loss of sound. Separate power
supply through two cables (one for the high frequency and one for the low frequency) can
lead to a noticeably improvement of tone.
If desired, you can control the mid-range/high-range systems and the low tones
separately. For this reason there are four spring clips on the connection terminal. With the
two upper ones, the mid-range/high-range systems are controlled and the lower spring
clips control the lower tones. In the factory, we electrically connected the + and – poles of
the upper and lower spring clips together with bridges. Through these bridges, the speaker
works in the conventional way, i.e. it is connected with the amplifier in a completely normal
way. It is irrelevant whether you use the upper or lower spring clips for this.
If you want to use the bi-wiring procedure, firstly please remove both bridges, with which
the + and – poles of the upper and lower connector groups are connected together. You
then need either 2 speaker cables or a special bi-wiring cable. On the amplifier, connect
both cables to the output of the appropriate channel. Connect the upper connections for the
mid-range/high-range systems with one cable and the lower connections with another
cable for the lower tones.
In phase connection
For optimum sound quality it is inevitable to connect speakers and amplifier in phase. I. e.,
within the respective channel (front right / left, centre, rear right / left)
- the „+ terminal” of the amplifier must be connected to the „+ terminal” of the box, and
- the „— terminal” of the amplifier must be connect to the „— terminal” of the box.
5
Page 6
If the speakers are out of phase (i.e. the + terminal of one amplifier channel is connected to
the – terminal of one speaker, and the – terminal of one amplifier channel is connected to
the + terminal of one speaker), the sound will be affected and the speakers may be
damaged.
If the phase is reversed, the surround image will be unstable, and the bass components will
not be clearly reproduced. Correctly connected (“in-phase”) speakers will give you a stable,
well-defined surround output, with a clear, powerful bass sound. Make sure that each +
terminal of the amplifier is correctly connected to the + terminals of the appropriate speaker.
Most speaker cables have one ridged or striped part, to help you distinguish + and —. If you
need to reverse the connections of one speaker to correct the phase, make sure the amplifier
is turned off before you disconnect the speaker. Make sure to connect all speaker boxes with
regard to their position to the correct surround channel output of the amplifier.
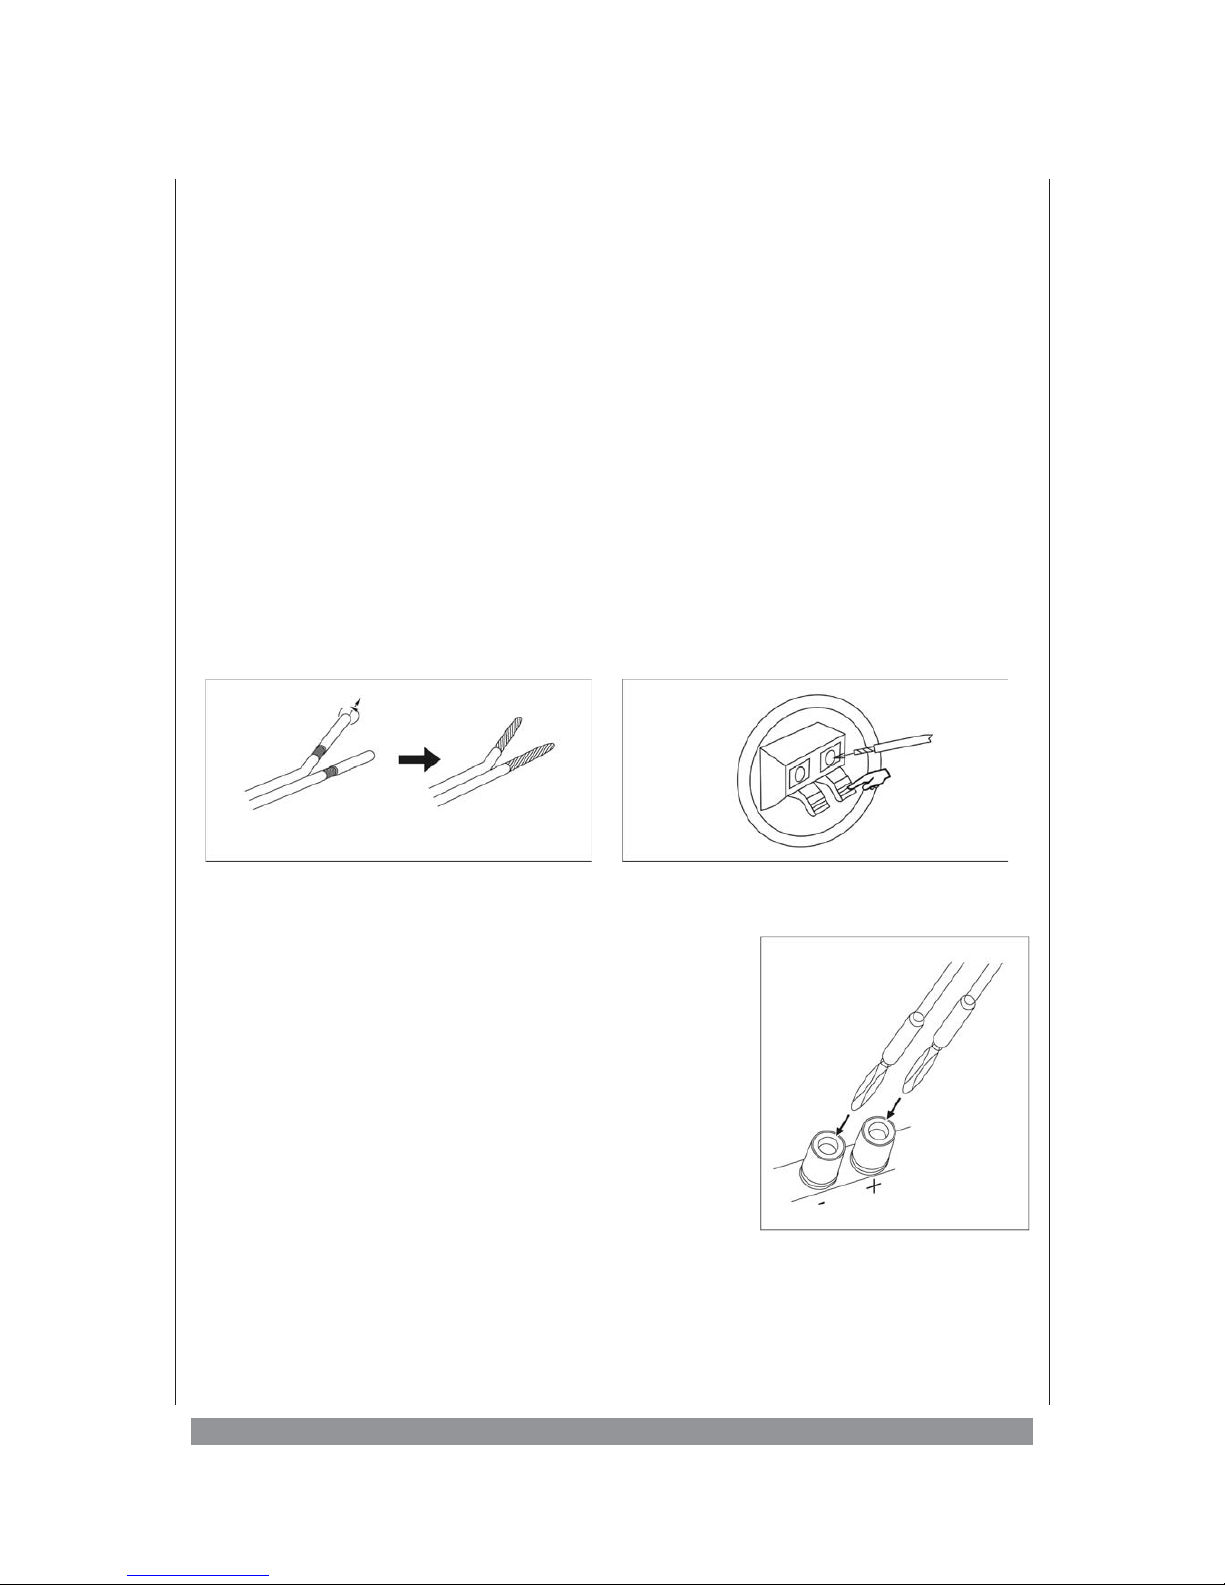
Establish connection
To connect the centre and surround speakers remove 2cm of insulation from the
loudspeaker cable. To connect the cable, twist the flex. Then open the loudspeaker clamp ,
stick the bared end of the cable - not insulated parts of the cable - into the opening, and
close the clamp.
You can connect the front speaker boxes using cable with
banana plugs. If you use cable without plugs turn the plastic
screw of the terminal counter clockwise to uncover an
opening within the terminal bolt. Stick the bared end of the
cable - not insulated parts of the cable - (as described
above) into the opening. Then turn the cover clock wise to
lock the terminal.
Please carefully read the instruction manual of the
respective amplifier to learn more about the speaker
connection.
You have paid attention to quality in your purchasing of loudspeakers and you should also
do this when choosing the loudspeaker cable. The cross-section and conductor material
play a decisive role in the later musical pleasure.
6
Page 7
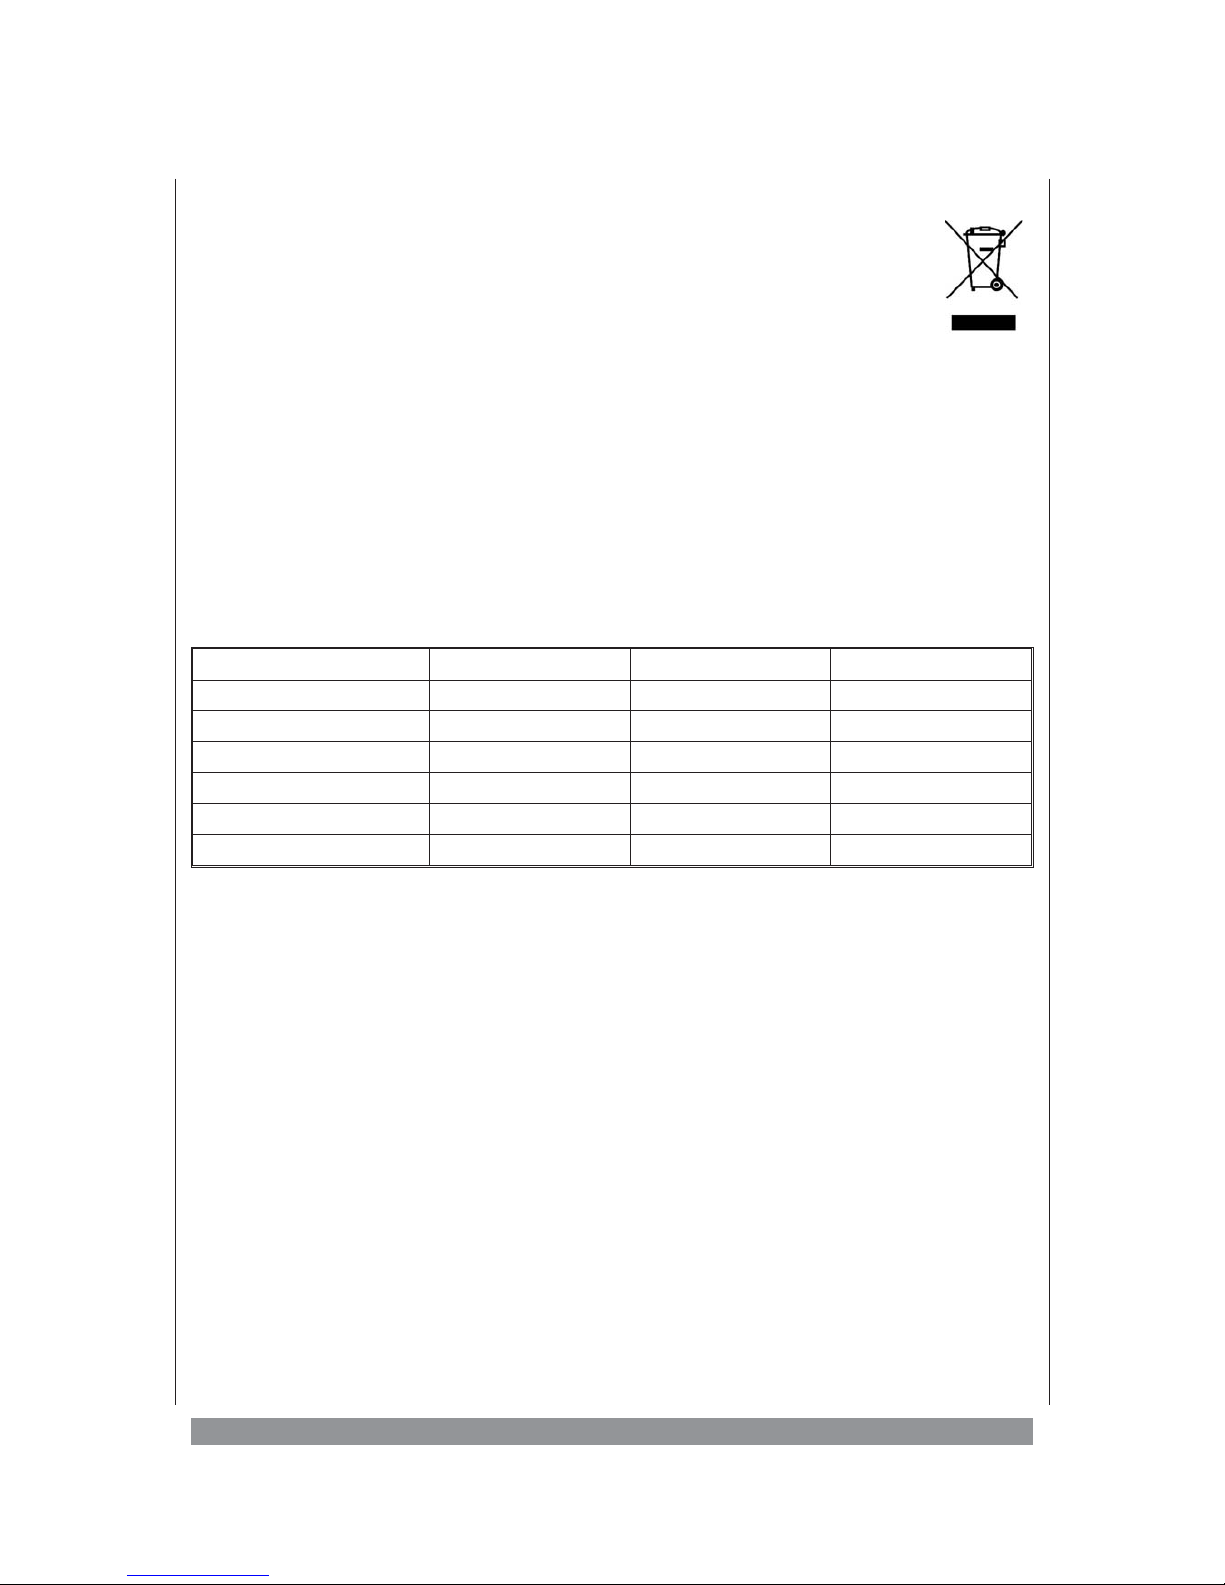
Disposal advise
When the operating life of this device has ended it must not be
disposed as domestic waste, but in accordance with national
environmental guidelines.
Support
In case of any problems or malfunctions occur while running your device, you have several
options to get help from our support-centre:
• Telephone (from Germany): 09 00/1393684(Euro 1.89/min)
• Fax (from Germany): 0 18 05 / 00 82 38
• per E-mail: [email protected]
Or visit us on our website (www.dk-digital.com), choose your language and click on
“Support”. Then fill-up the contact form provided there.
Technical specifications
Front Centre Rear
P.M.P.O. power rating 500 watts 250 watts 250 watts
RMS power rating 100 watts 50 watts 50 watts
Impedance 4 ohms 8 ohms 8 ohms
Sensitivity 89 db 88 db 88 db
Frequency response 40 Hz - 20 kHz 60 Hz - 20 kHz 60 Hz - 20 kHz
Dimensions (WxHxD) 220x1045 x 350 mm 545 x 155 x 190 mm 290 x 272 x 160 mm
7
Page 8

© 2006 Copyright
We reserve the right to correct errors and make technical alterations.
This manual is copyrighted. All rights reserved. Neither the manual as a whole
nor excerpts may be reproduced without our prior written permission.
DK digital GmbH
40878 Ratingen
Germany
www.dk-digital.com
 Loading...