

Page 1
USER MANUAL
MANUEL D’UTILISATION
BENUTZERHANDBUCH
GEBRUIKSAANWIJZING
MANUAL DE INSTRUCCIONES
MANUALE DI ISTRUZIONI
(English)
(Français)
(Deutsch)
(Nederlands)
(Español)
(Italiano)
01~02
03~04
05~06
07~08
09~10
11~12
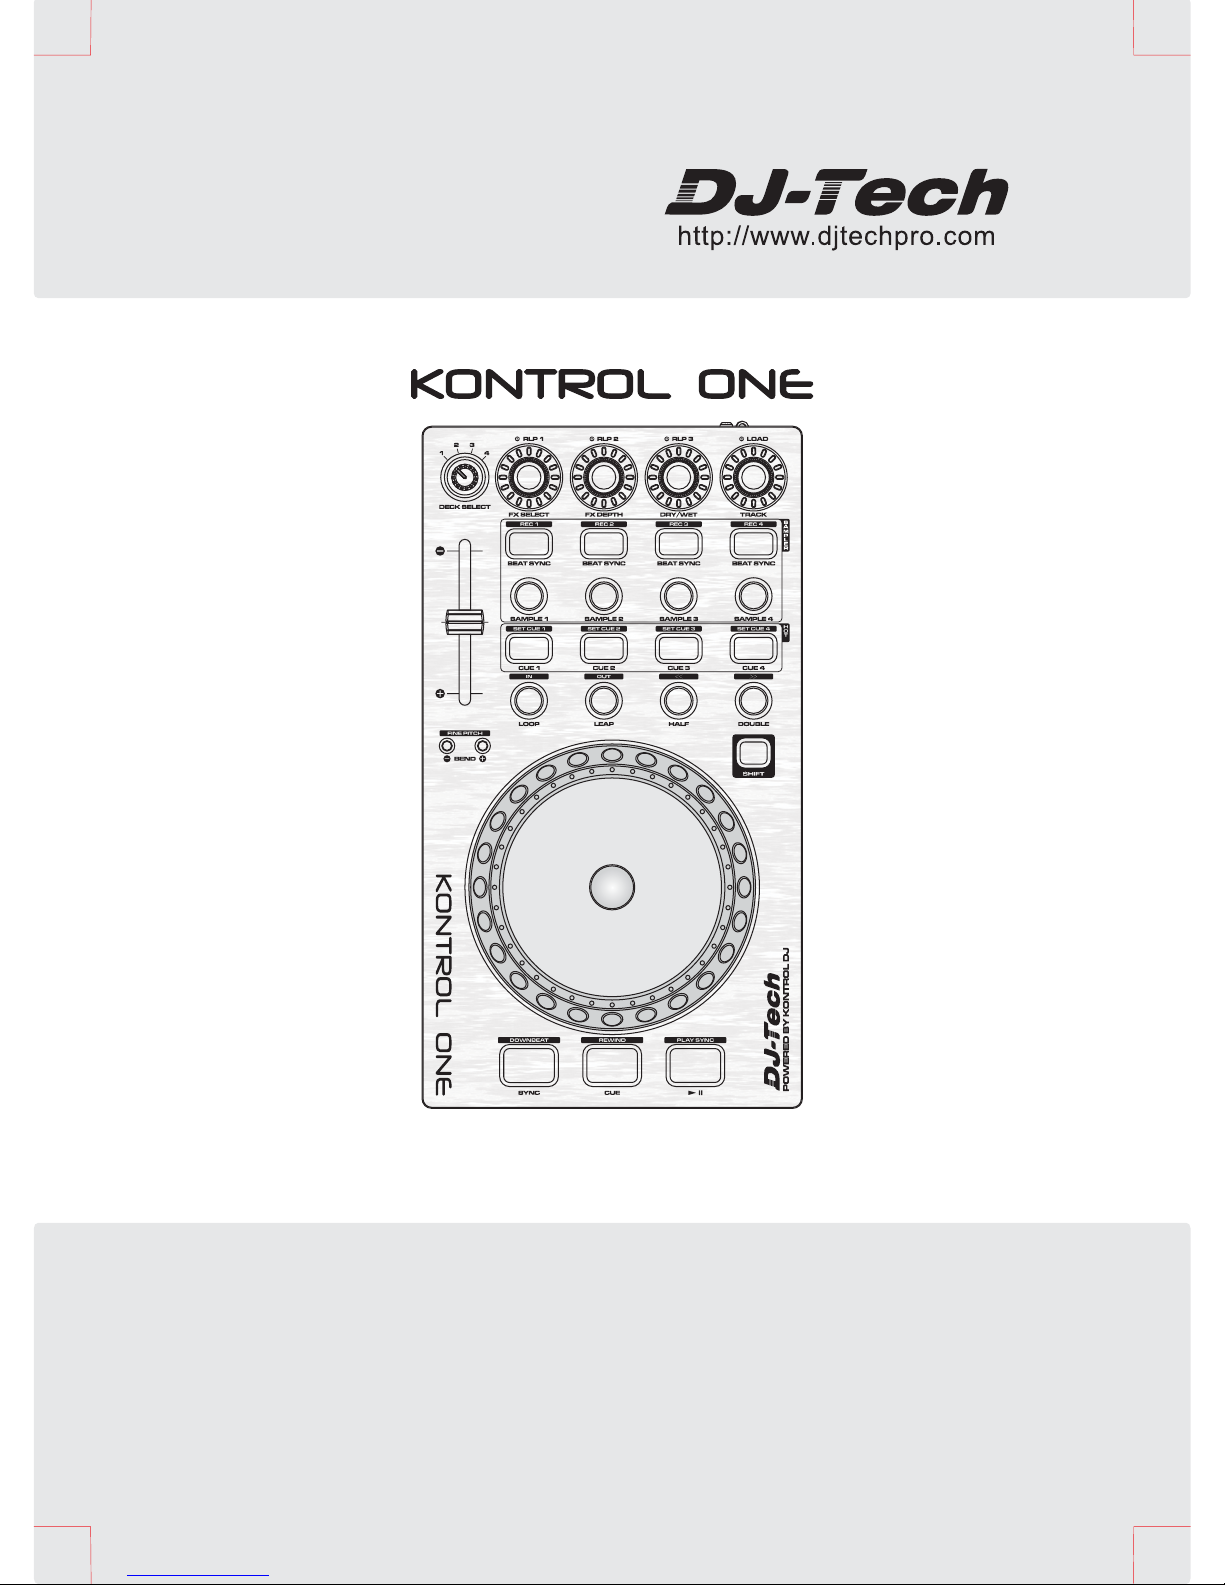
DJ MIDI CONTROLLER
Page 2
ESPAÑOL
ITALIANO
NEDERLANDS
ENGLISH
FRANÇAIS
DEUTSCH
1. Read these instructions.
2. Keep these instructions.
3. Heed all warnings.
4. Follow all instructions.
5. Do not use the apparatus near water.
6. Clean only with dry cloth.
7. Do not block any ventilation openings. Install in accordance with the manufacturer’s instructions.
8. Do not install near any heat sources such as radiators, heat registers, stoves, or other apparatus
(including amplifiers) that produce heat.
9. Do not defeat the safety purpose of the polarized or grounding-type plug. A polarized plug has two
blades with one wider than the other. A grounding- type plug has two blades and a third grounding
prong. The wide blade or the third prong is provided for your safety. If the provided plug does not fit into
your outlet, consult an electrician for replacement of the obsolete outlet.
10. Protect the power cord from being walked on or pinched particularly at plugs, convenience receptacles,
and the point where they exit from the apparatus.
11. Only use attachments/ accessories specified by the manufacturer.
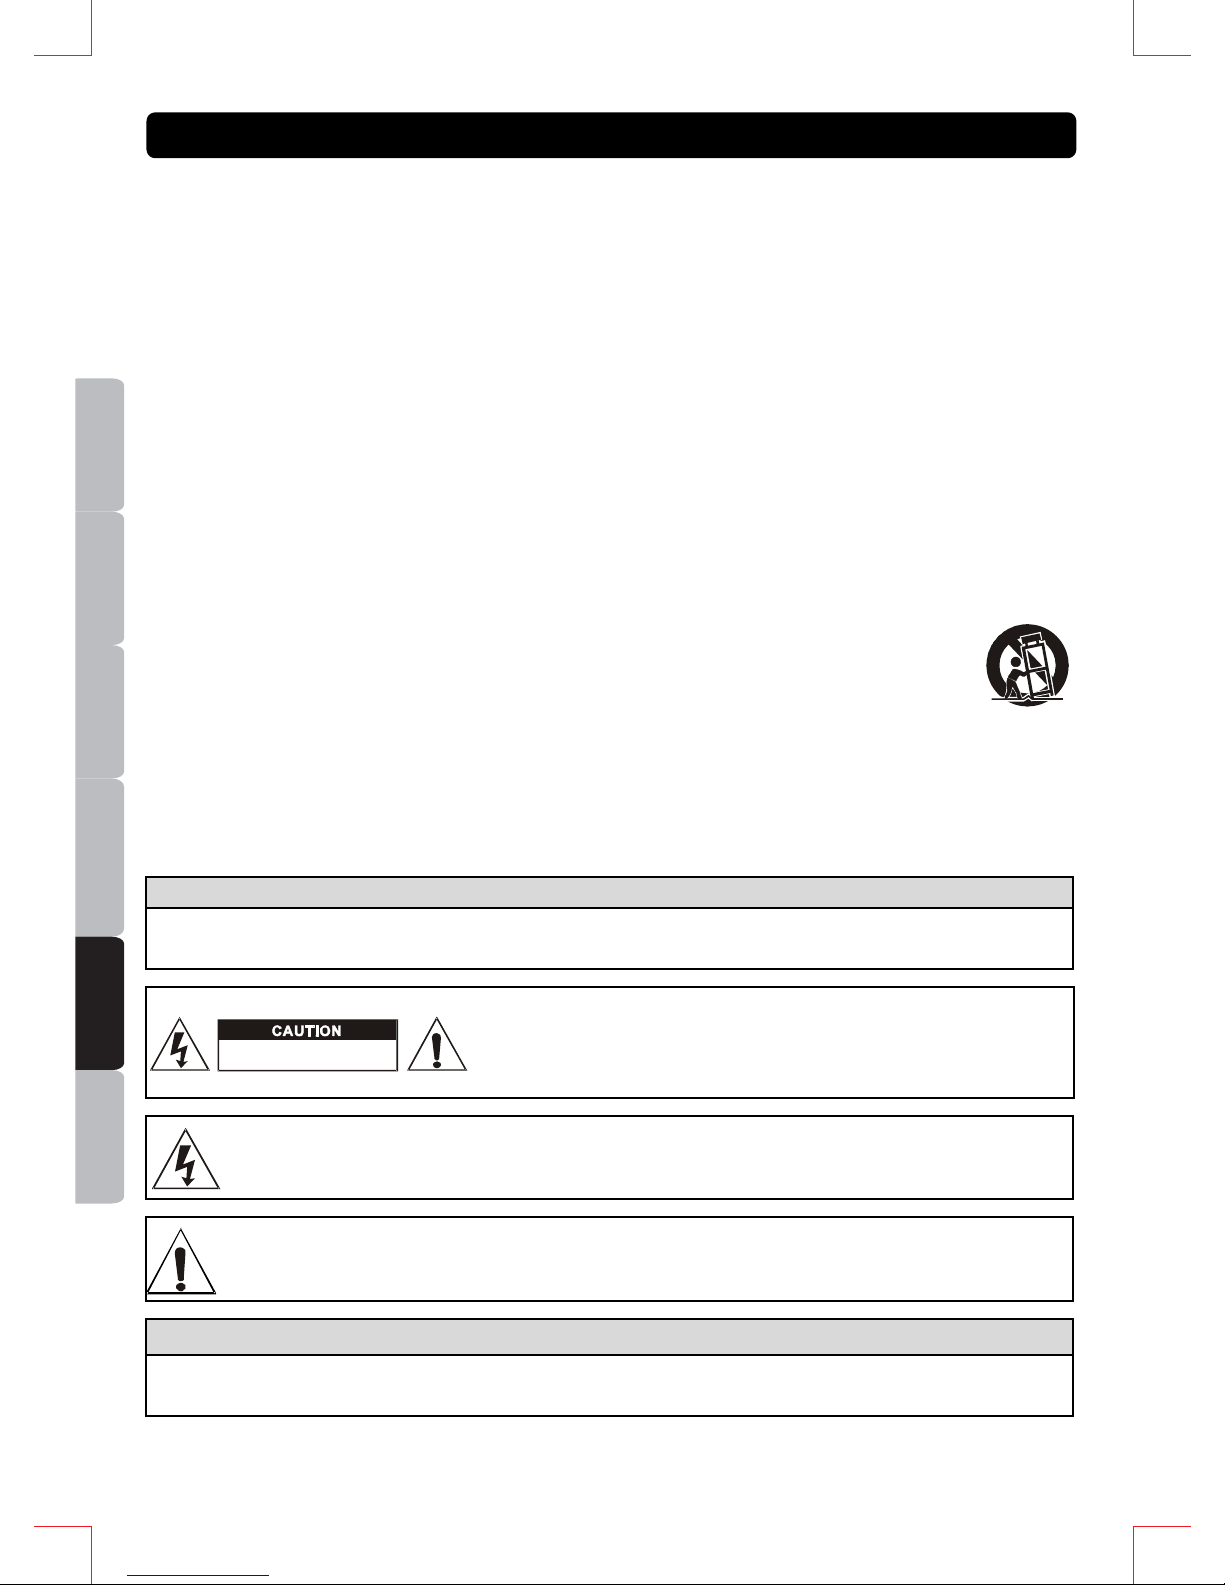
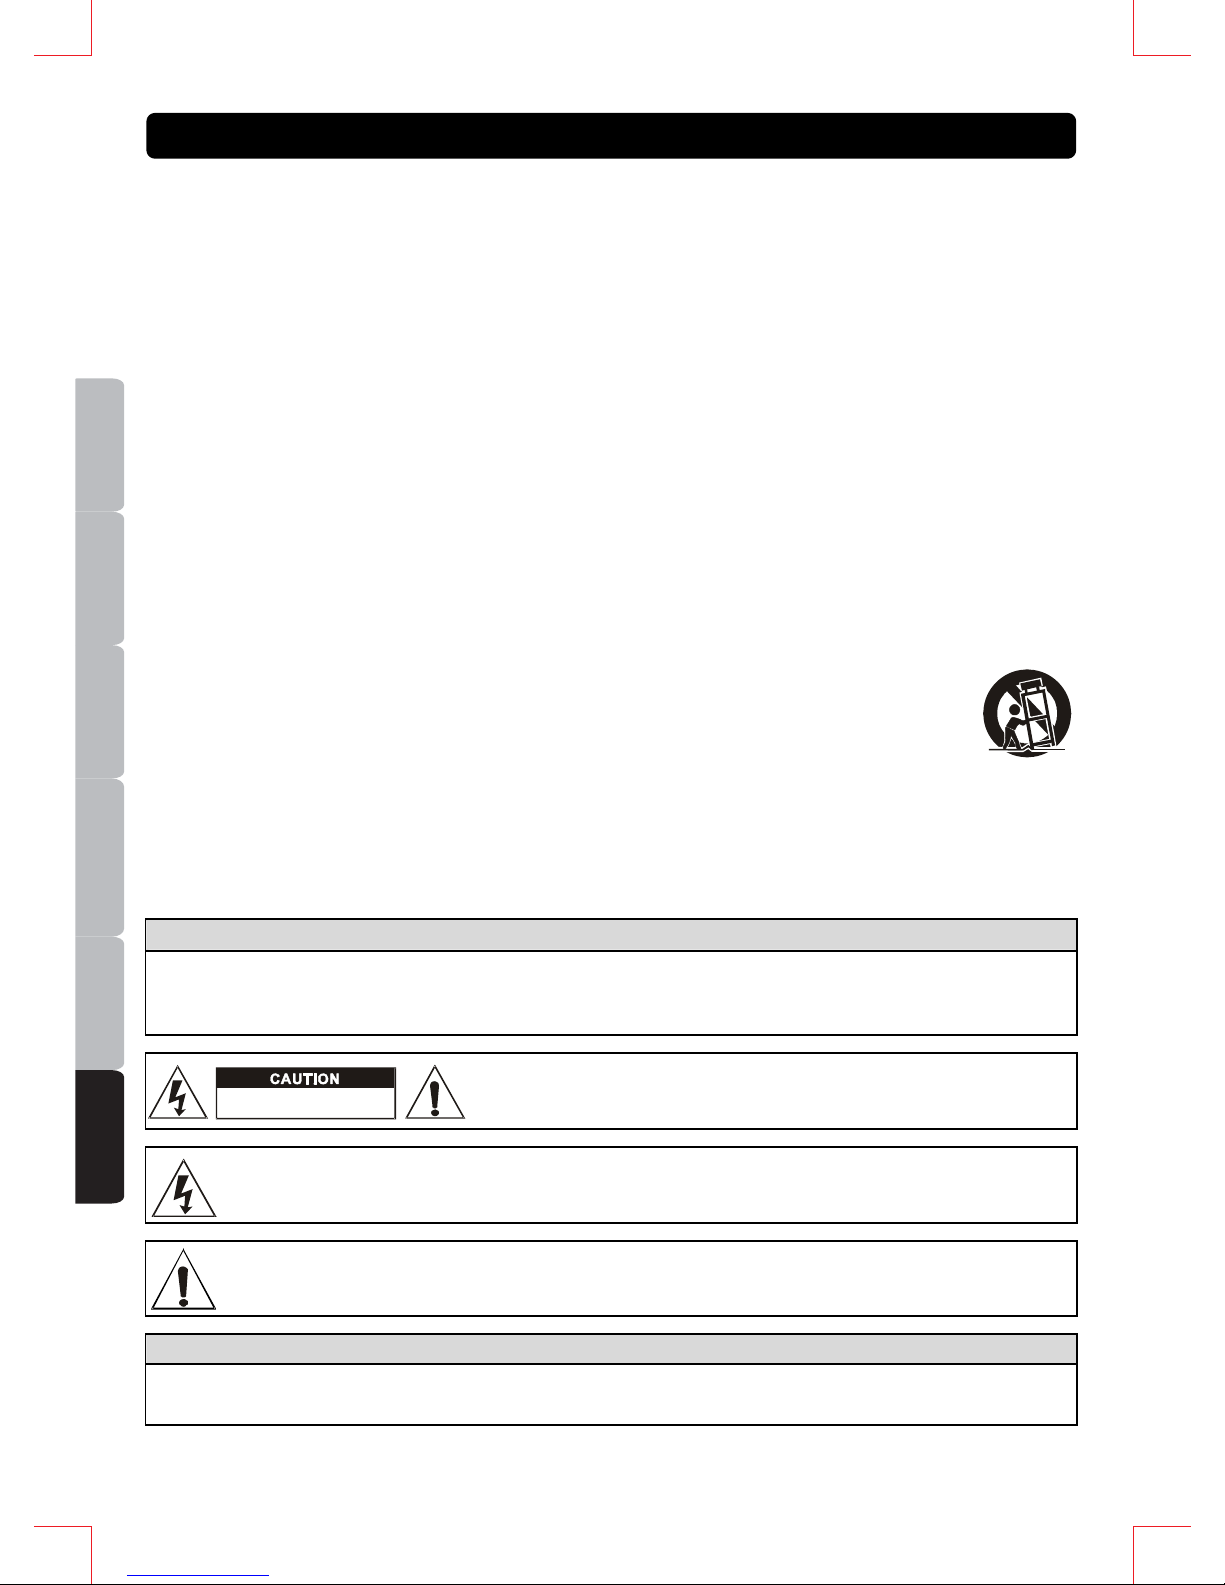
12. Use only with a cart, stand, tripod, bracket or table specified by the manufacturer, or
sold with the apparatus. When a cart is used, use caution when moving the
cart/apparatus combination to avoid injury from tip-over.
13. Unplug this apparatus during lighting storms or when unused for long periods of time.
14. Refer all servicing to qualified service personnel. Servicing is required when the apparatus has
been damaged in any way, such as power-supply cord or plug is damaged, liquid has been spilled
or objects have fallen into the apparatus, the apparatus has been exposed to rain or moisture, does
not operate normally, or has been dropped.
WARNING
To reduce the risk of fire or electric shock, do not expose this apparatus to rain or moisture. The
apparatus shall not be exposed to dripping or splashing and that no objects filled with liquids, such
as vases, shall be placed on the apparatus.
CAUTION: To reduce the risk of electric shock, do not
remove any cover. No user-serviceable parts inside. Refer
servicing to qualified service personnel only.
The lightning flash with arrowhead symbol within the equilateral triangle is intended to alert
the use to the presence of un-insulated “dangerous voltage” within the product’s enclosure
that may be of sufficient magnitude to constitute a risk of electric shock.
The exclamation point within the equilateral triangle is intended to alert the user to the
presence of important operation and maintenance (servicing) instructions in the literature
accompanying this appliance.
CAUTION
To prevent electric shock, do not use this polarized plug with an extension cord, receptacle or other
outlet unless the blades can be fully inserted to prevent blade exposure.
IMPORTANT SAFETY INSTRUCTIONS
DO NOT OPEN
RISK OF ELECTRIC SHOCK
1
Page 3
ESPAÑOL
ITALIANONEDERLANDS
ENGLISH
FRANÇAIS
DEUTSCH
y The KONTROL ONE is USB MIDI and provides simple plug & play features working with Windows/Mac.
y Jog wheel and control technology from the turntables.
y KONTROL ONE's control section via USB MIDI IN/OUT.
y A high resolution pulse sensor jog wheel
y Pitch bending, scratching and select song.
y The resistance value of the fader movement is AD converted
y The DATA SEND (LED)indicated the DATA is sent/received.
y The power source is selectable from USB bus-power and the exclusive power adaptor.
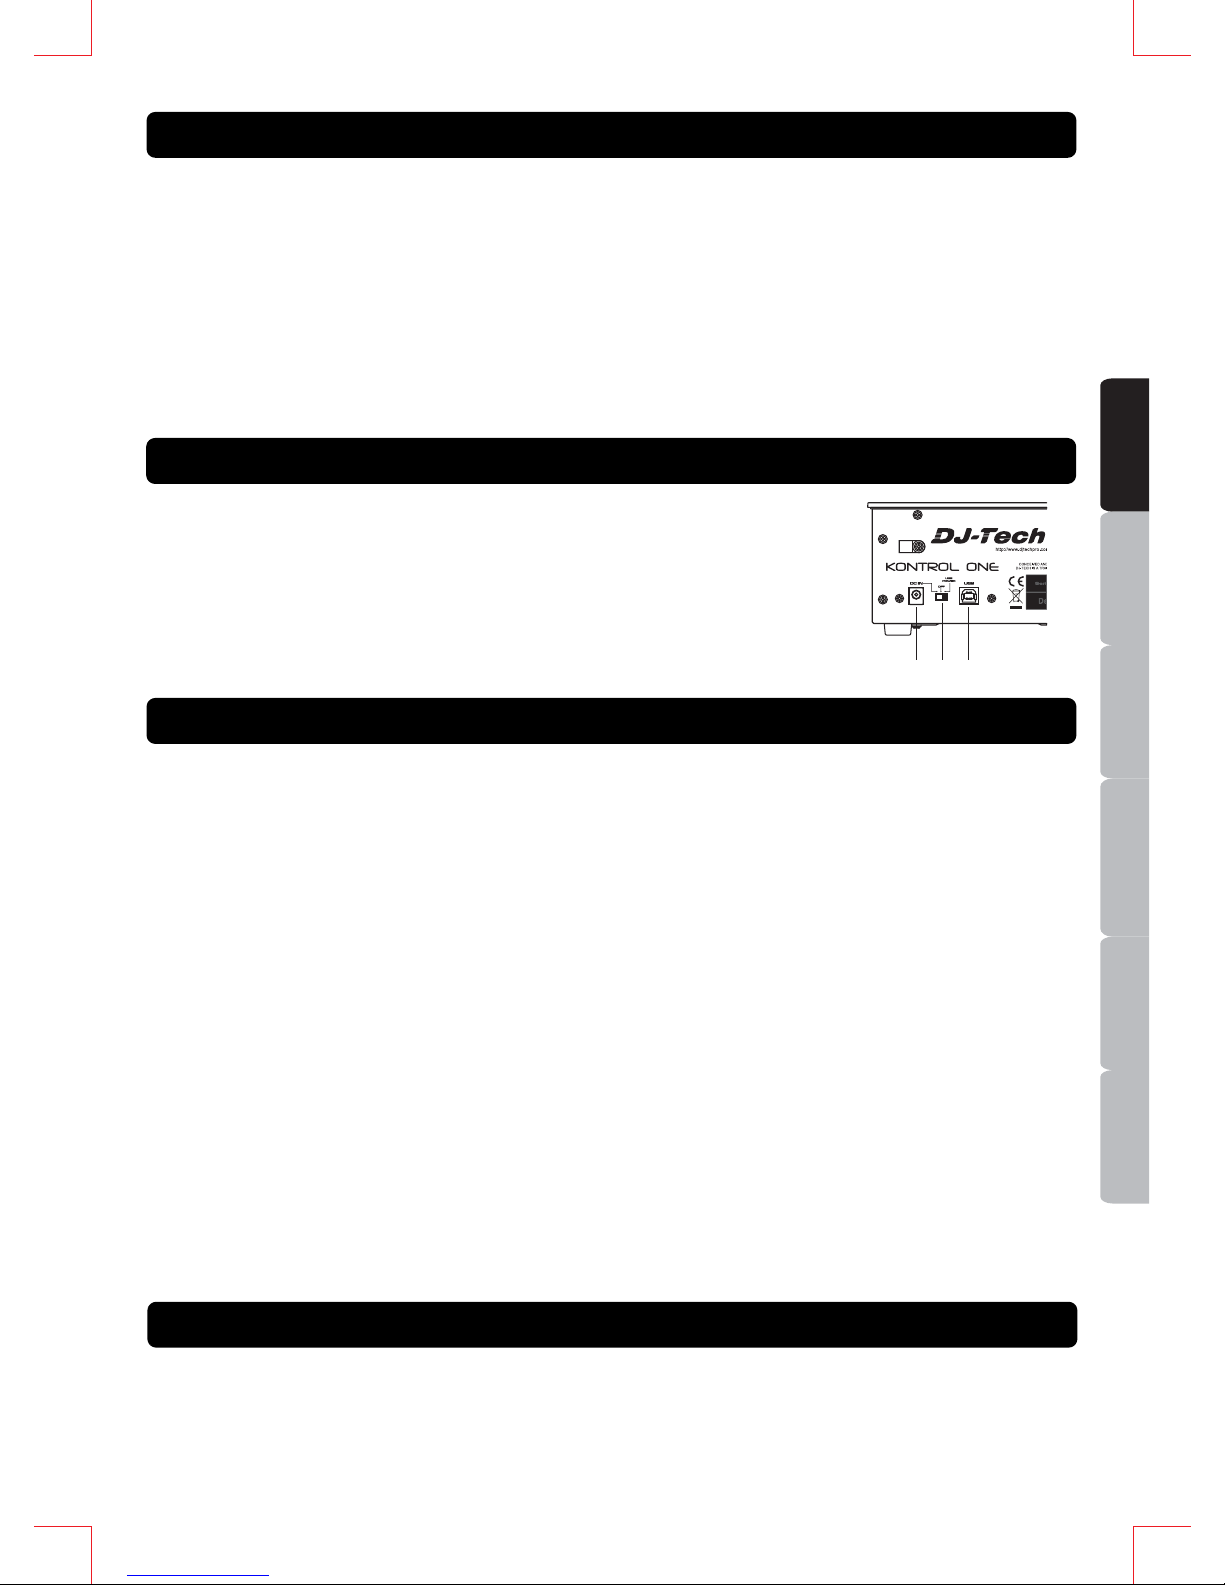
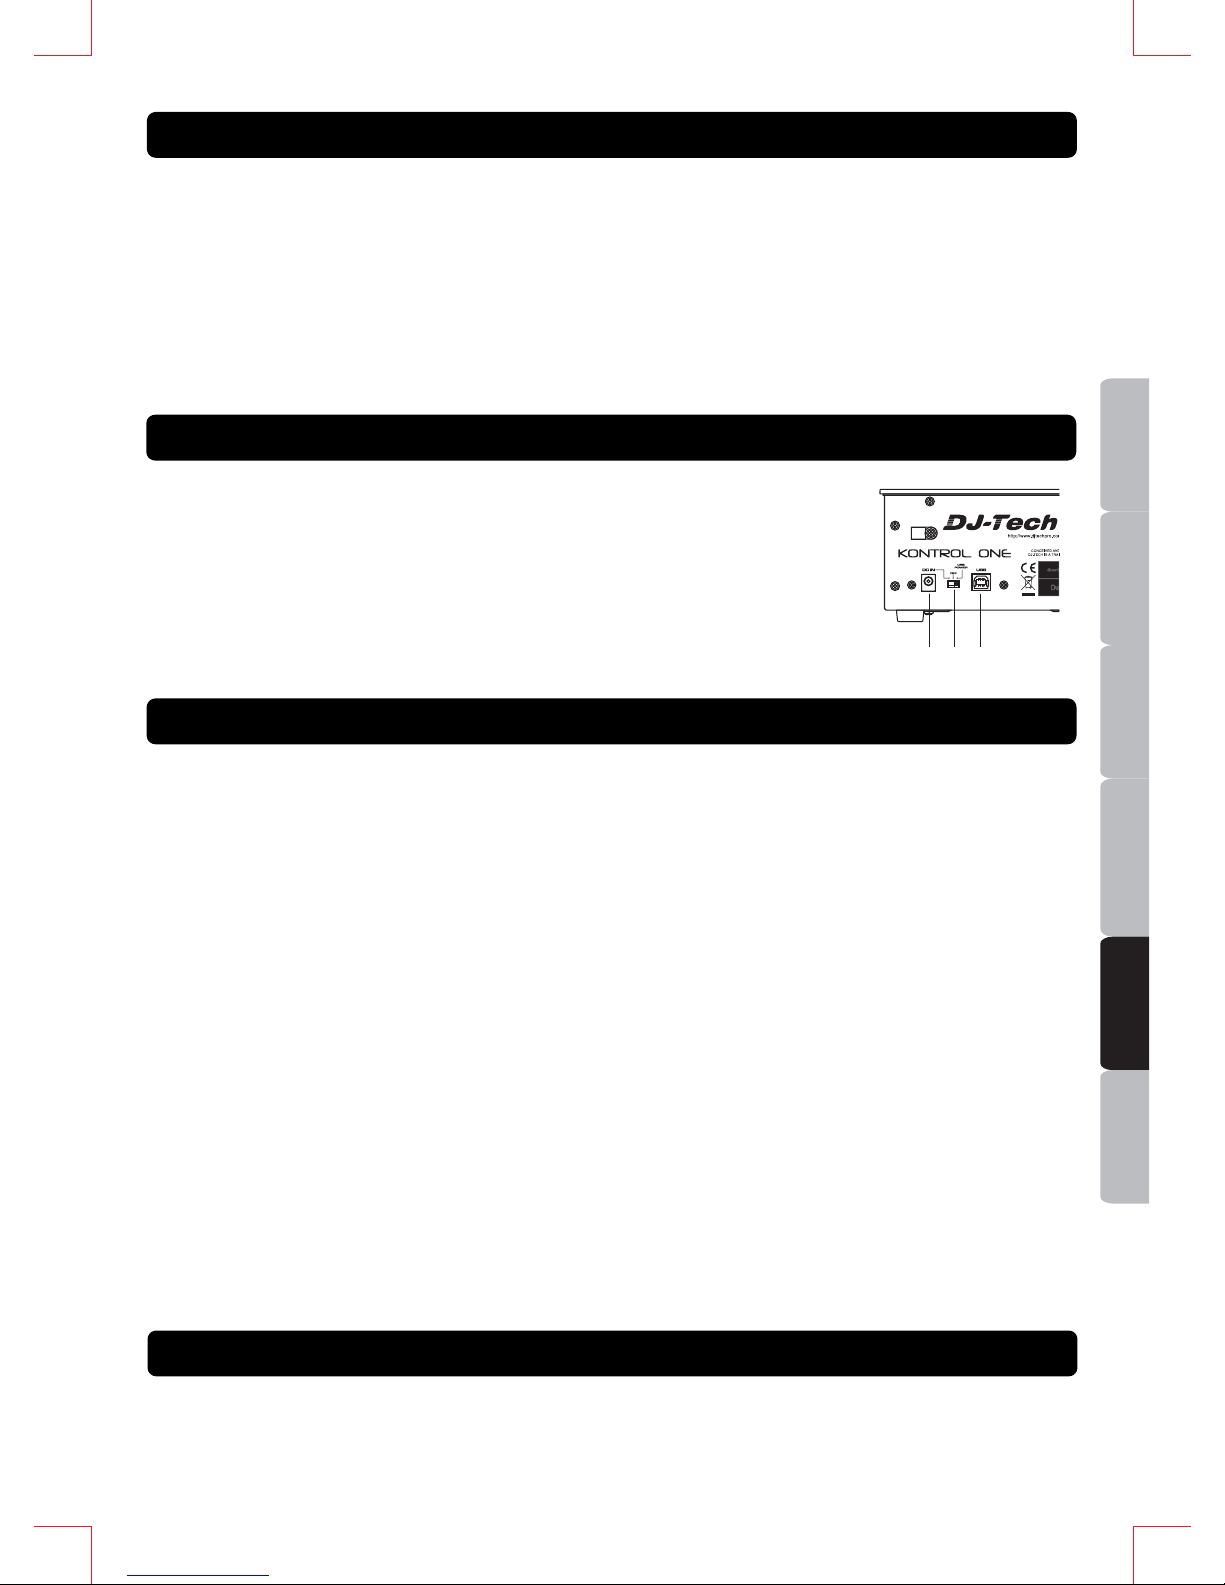
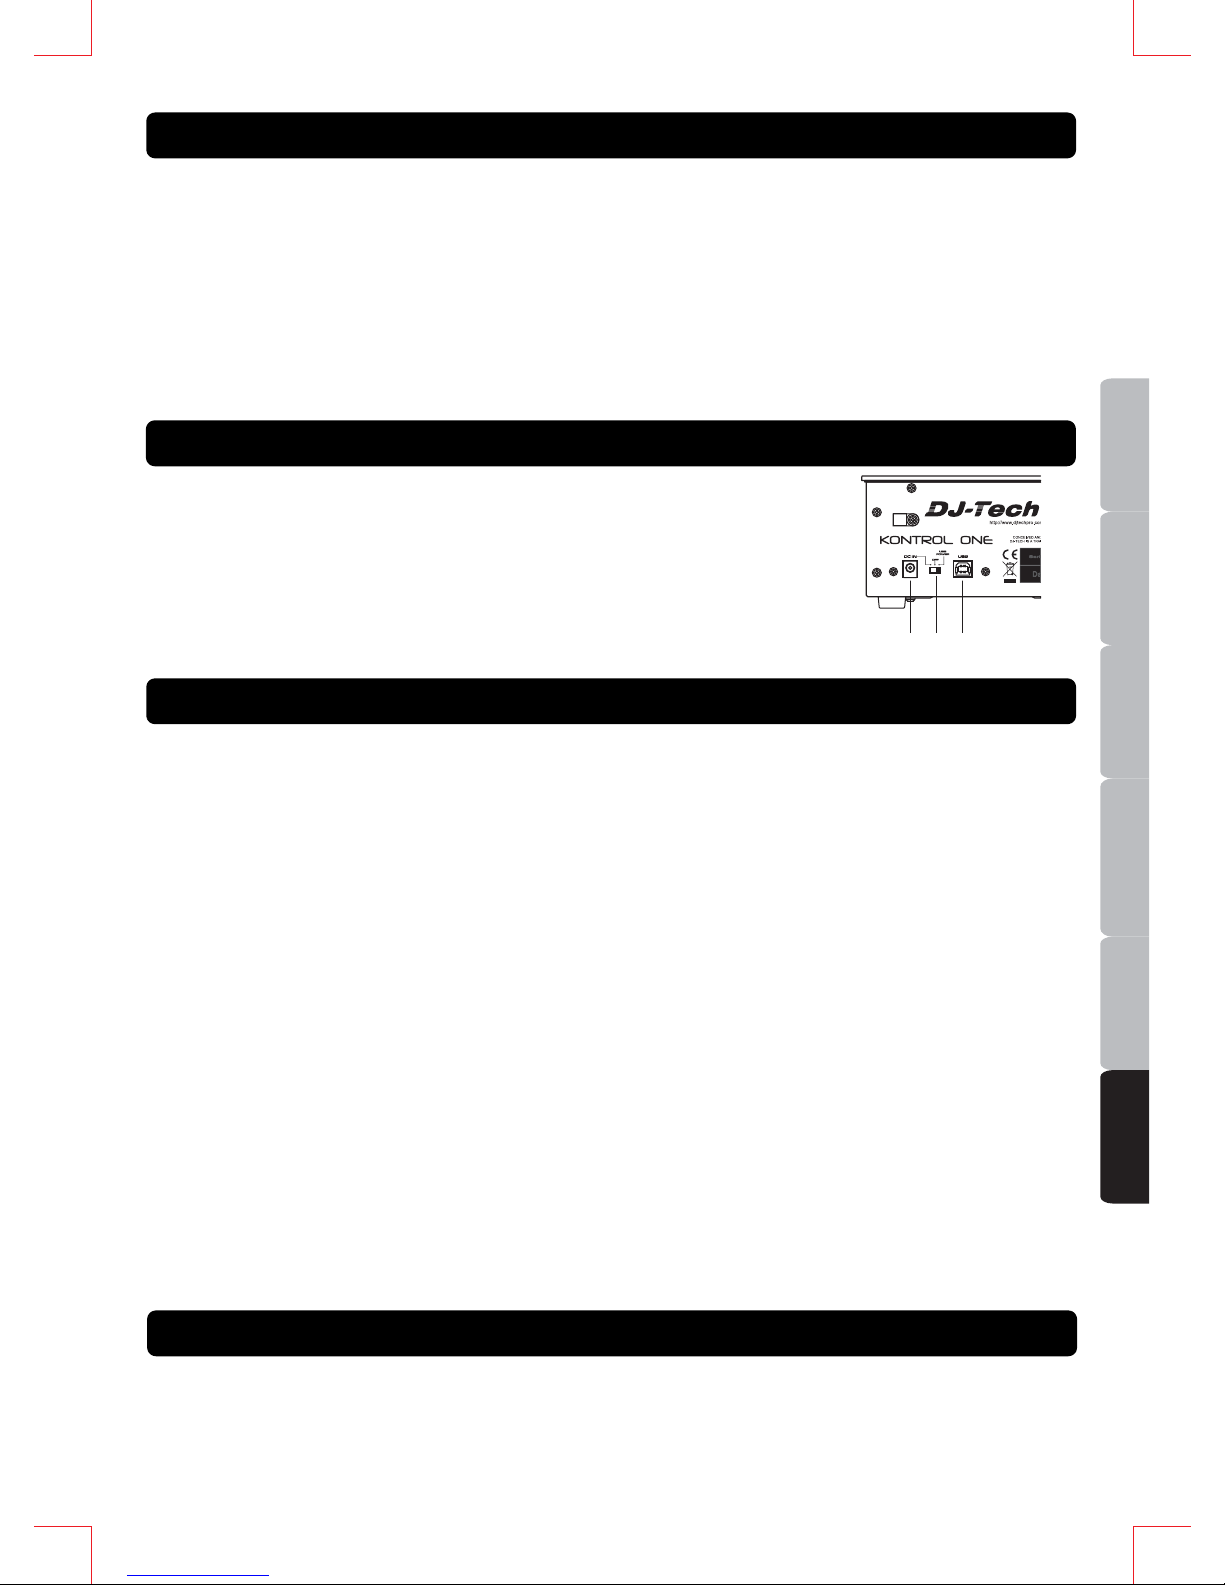
1. POWER CONNECTOR – Plug in power adapter here.
2. POWER SWITCH (Adaptor / OFF/ USB power) – Set the switch to AC
ADAPTOR when using the exclusive AC adaptor, set to USB BUS
POWER when using power provided from the computer via USB.
3. USB PORT INPUT – Used to connect a computer.
1. Install the software normally.
2. Connect the KONTROL ONE to computer normally.
3. Open the software.
4. Start up the software to perform settings with the KONTROL ONE.
Note: The software may not recognize the KONTROL ONE if it is connected to the computer after the
software has started.
5. Operations after the system recovering from power saving mode is not guaranteed.
Note: Power save setting is required to be set OFF.
6. Many DJ software products have a MIDI LEARN function. The KONTROL ONE can control all software
that has this function.
This function is used to KONTROL ONE as controls for parameters of the software.
Note: The MIDI LEARN setting for each software is different; please refer to each software's manual
for further instructions.
7. The MIDI data created with functions can be manually set with the software, if the software does not
support the MIDI LEARN function. Please refer to the software's manual for further instructions.
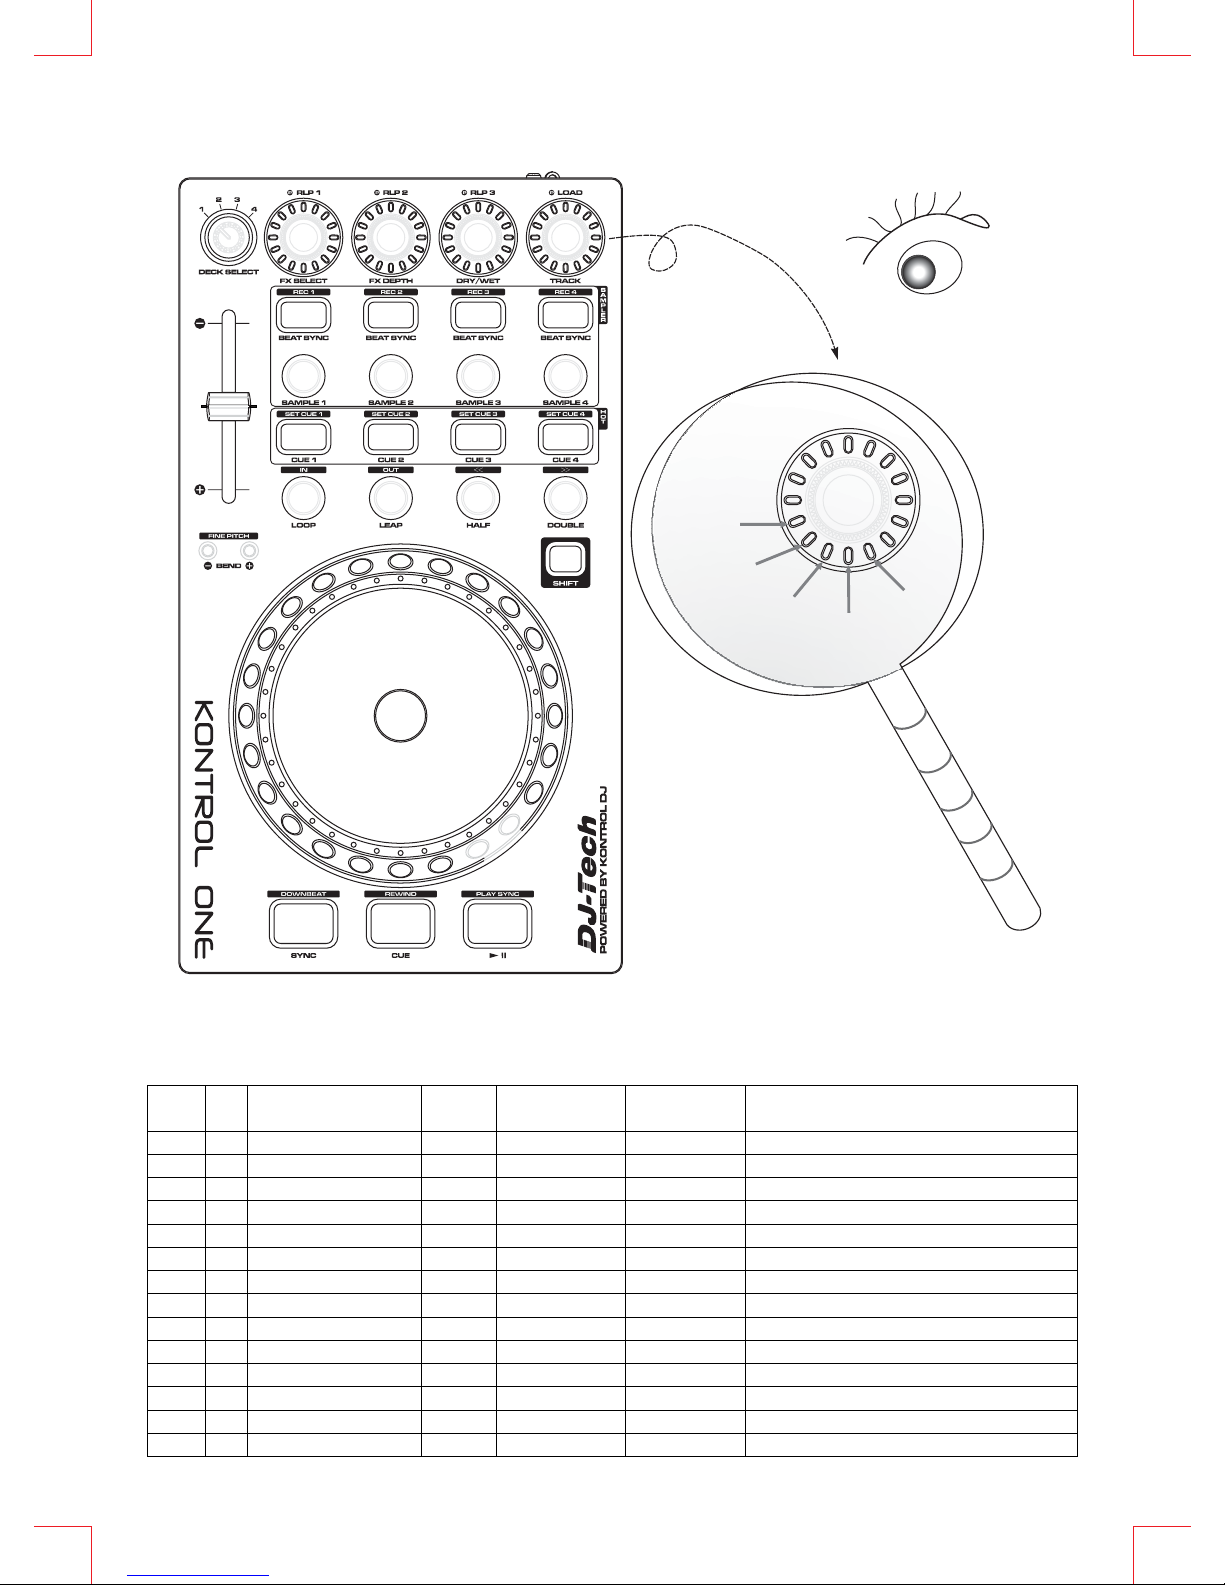
8. Hold the REWIND and PLAYBYNC button, then power on; KONTROL ONE will automatically calibrate
touch pad sensitivity and show the level of sensitivity with 4 LED rings on the top. Press DOWNBEAT
button to finish calibration.
POWER SUPPLY: DC 6V
DIMENSION: 160(W) × 289(D) × 107.5(H) mm
WEIGHT: 1.45 kg
MAIN FEATURES
OPERATIONS
SPECIFICATION
CONNECTION
1
2
3
2
Page 4
ESPAÑOL
ITALIANO
NEDERLANDS
ENGLISH
FRANÇAIS
DEUTSCH
1. Lire les instructions suivantes.
2. Conserver ce manuel
3. Faire attention aux avertissements
4. Suivre toutes les instructions
5. Ne pas utiliser l’appareil près de l’eau
6. Nettoyer uniquement avec un chiffon doux.
7. Ne pas obstruer les ouvertures de ventilation.
8. Installer conformément aux instructions du constructeur
9. Ne pas installer près des sources de chaleurs tels que radiateur, cuisinière ou tout autre appareil
qui produit de la chaleur.
10. Ne pas abîmer le cordon d’alimentation. Consulter un électricien si le cordon est abîmé.
11. Ne pas marcher sur les cordons d’alimentation.
12. Utiliser uniquement des accessoires recommandés par le fabricant.
13. Ne pas placer ce produit sur un chariot, un stand, un trépied ou une table instable, cela
pourrait causer des dommages sérieux à un enfant ou à un adulte.
14. Sur l’accomplissement de tout le service ou réparations à ce produit, demander à un technicien
qualifié d’exécuter des contrôles de sécurité pour déterminer que le produit est en condition de
fonctionnement approprié.
15. Le cordon d’alimentation est utilisé comme un dispositif de déconnexion, il doit être en parfait état
de fonctionnement.
AVERTISSEMENT
Pour réduire le risque d’incendie ou d’électrocution, ne pas exposer cet appareil à la pluie ou à
l’humidité. L’appareil ne doit pas être exposé à des projections de liquides et aucun objet rempli de
liquides, tels que des vases, ne doit être placé sur l’appareil.
Avertissement : Pour réduire les risques de chocs électriques, ne
pas ouvrir l’appareil. Référez-vous à un personnel qualifié.
Ce logo vous indique la présence de “tension dangereuse », il y a risque de choc électrique.
Ce logo vous indique des opérations de maintenance importante.
INFORMATIONS DE SECURITE
DO NOT OPEN
RISK OF ELECTRIC SHOCK
3
Page 5
ESPAÑOL
ITALIANONEDERLANDS
ENGLISH
FRANÇAIS
DEUTSCH
y The KONTROL ONE est en USB MIDI et offre une fonction simple plug & play sous Windows/Mac.
y Roue Jog et technologie de contrôle de la platine
y Section du contrôle du KONTROL ONE via USB MIDI IN/OUT.
y Haute sensibilité de la roue jog
y Pitch bending, scratching et sélection du morceau
y Valeur de la résistance du fader est en AD converti
y Le DATA SEND (LED) indique que le DATA est envoyé/reçu
y L’alimentation est via USB bus-power ou exclusive par adaptateur.
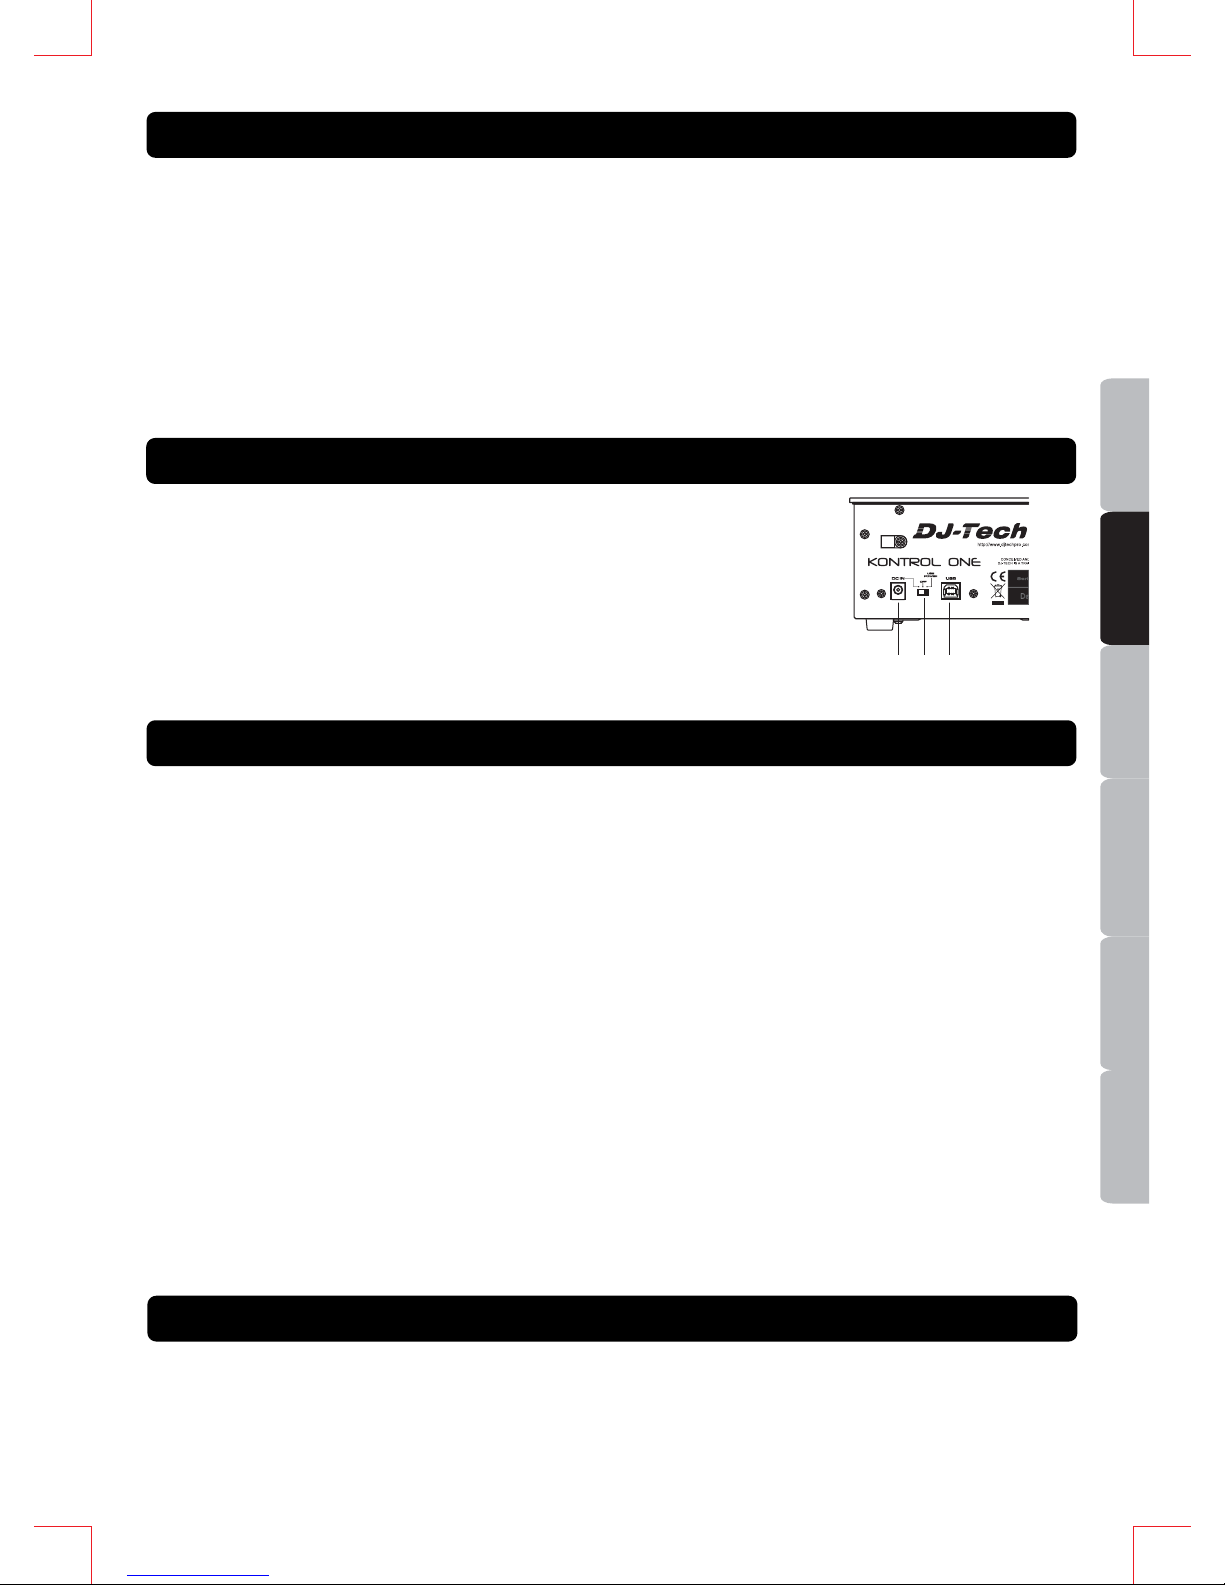
1. CONNECTEUR D’ALIMENTATION– Brancher l’alimentation ici.
2. BOUTON D’ALIMENTATION (ADAPTOR / OFF/ USB power) –
Réglez sur AC ADAPTOR pour utiliser exclusivement AC adaptor,
Réglez sur USB BUS POWER lorsque l’alimentation provient d’un
ordinateur via USB.
3. ENTREE PORT USB – Utilisé pour connecter un ordinateur
1. Installer le software normalement
2. Connecter le KONTROL ONE à l’ordinateur
3. ouvrir le software
4. démarrer le software pour effectuer les réglages avec le KONTROL ONE.
Remarque : Le software pourrait ne pas reconnaître le KONTROL ONE s’il a été connecté à
l’ordinateur après avoir démarré le software.
5. Les opérations après le système de récupération de mode d’économie d’énergie n’est pas garantie.
6. Beaucoup de produit DJ software à la fonction MIDI LEARN. Le KONTROL ONE peut contrôler tous les
softwares qui ont cette fonction.
Cette fonction est utilisée par le KONTROL ONE comme contrôles de paramètre du software.
Remarque : Le réglage du MIDI LEARN pour chaque software est différent, veuillez vous référez au
manuel d’utilisation de chaque software pour d’autres informations.
7. le MIDI data créé avec les fonctions peut être régler manuellement avec le software, si le software ne
supporte pas la fonction MIDI LEARN. veuillez vous référez au manuel d’utilisation de chaque
software pour d’autres informations.
8. Maintenir le bouton REWIND et PLAYBYNC, ensuite, allumer l’appareil; KONTROL ONE calibrera
automatiquement la sensibilité du pave tactile et montre un niveau de sensibilité avec 4 LE. Appuyer sur
le bouton DOWNBEAT pour terminer la calibration.
ALIMENTATION: DC 6V
DIMENSION: 160 × 289 × 107.5 mm
POIDS: 1.45 kg
FONCTIONS
OPERATIONS
SPECIFICATION
CONNECTION
1
2
3
4
Page 6
NEDERLANDS
ESPAÑOL
ITALIANO
ENGLISH
FRANÇAIS
DEUTSCH
1. Bitte lesen Sie diese Anweisungen.
2. Bitte bewahren Sie diese Anweisungen sorgfältig auf.
3. Beachten Sie alle Warnungen.
4. Befolgen Sie alle Anweisungen.
5. Verwenden Sie das Gerät nicht in Nähe von Wasser.
6. Reinigen Sie es nur mit einem trockenen Tuch.
7. Lassen Sie alle Lüftungsöffnungen unbedeckt. Installieren Sie das Gerät entsprechend den
Anweisungen des Herstellers.
8. Stellen Sie das Gerät nicht in der Nähe von Wärmequellen wie Heizkörpern, Luftschächten,
Wärmegeräten, Öfen oder anderen Wärme erzeugenden Geräten auf (zum Beispiel auch
Verstärker).
9. Behindern Sie nicht den Zugang zu den Sicherheitsvorrichtungen des gepolten Steckers oder des
Schukosteckers. Ein gepolter Stecker hat zwei Anschlussklemmen, eine davon ist breiter als die
andere. Ein Schukostecker hat zwei Anschlussklemmen und einen dritten Erdanschluss. Die breite
Klemme oder der dritte Anschluss dient Ihrer Sicherheit. Wenn der mitgelieferte Stecker nicht in
Ihre Steckdose passt, wenden Sie sich bitte an einen Elektriker, um die veraltete Steckdose zu
wechseln.
10. Schützen Sie das Stromkabel, damit niemand darauf tritt oder es gequetscht wird, besonders an
den Steckern und dort wo sie aus dem Gerät austreten.
11. Verwenden Sie nur Zubehör/Accessoires, die vom Hersteller vorgegeben wurden.
12. Nur mit vom Hersteller vorgegebenen oder mit dem Gerät verkauften Ständern, Wagen,
Stativ, Halterung oder Unterlage benutzen. Wenn ein Wagen verwendet wird, seien Sie
bitte vorsichtig, wenn Sie den Wagen/das Gerät gemeinsam bewegen, um
Verletzungen durch Umfallen zu vermeiden.
13. Ziehen Sie bei Gewitter oder wenn das Gerät über längere Zeit nicht benutzt wird den Stecker aus
der Steckdose.
14. Lassen Sie Wartungsarbeiten nur vom Fachmann ausführen. Reparaturen sind notwendig, wenn
das Gerät auf irgendeine Weise beschädigt wurde, zum Beispiel wenn das Stromkabel oder der
Netzstecker beschädigt sind, Flüssigkeit in das Gerät geraten ist oder Gegenstände auf das Gerät
gefallen sind, das Gerät Regen oder Feuchtigkeit ausgesetzt wurde, nicht normal funktioniert oder
herunter gefallen ist.
WARNHINWEIS
Um Brand- oder Stromschlaggefahren zu vermeiden, setzten Sie dieses Gerät keinem Regen oder
Feuchtigkeit aus. Das Gerät darf nicht Tropf- oder Spritzwasser ausgesetzt werden und es dürfen
keine mit Flüssigkeiten gefüllten Behältnisse, wie z.B. Vasen, auf das Gerät gestellt werden.
ACHTUNG: Um jegliche Gefahr eines Stromschlags zu vermeiden,
bauen Sie das Gerät nicht auseinander. Dieses Gerät enthält
keinerlei Teile, die vom Anwender repariert werden können. Lassen
Sie Wartungsarbeiten nur vom Fachmann ausführen.
Das Blitzsymbol mit einem Pfeil in einem gleichseitigen Dreieck warnt den Nutzer vor einer
„gefährlichen Spannung" im Gerät, mit einer Stärke, die eine Stromschlaggefahr darstellen kann.
Das Ausrufezeichen in einem Dreieck warnt den Anwender über das Vorhandensein von
wichtigen Hinweisen in den Unterlagen die das Gerät begleiten.
ACHTUNG
Um einen Stromschlag zu vermeiden, verwenden Sie diesen Stecker nicht mit einer
Verlängerungsschnur und achten Sie darauf, nur Steckdosen zu verwenden, in denen die Stecker
vollständig eingesteckt werden können.
WICHTIGE SICHERHEITSHINWEISE
DO NOT OPEN
RISK OF ELECTRIC SHOCK
5
Page 7
ESPAÑOL
ITALIANONEDERLANDS
ENGLISH
FRANÇAIS
DEUTSCH
y Das KONTROL ONE ist ein USB MIDI und liefert einfache Plug & Play-Funktionen, die mit Windows
/Mac zusammen arbeiten.
y Jog Wheel- und Steuerungs-Technologie wie solche bei einem Plattenspieler.
y Steuerungsteil des KONTROL ONE über USB MIDI IN/OUT
y Ein hochauflösendes Takt-Sensor-Jog Wheel
y Tonhöhe (Pitch bending), Scratchen und Select Song.
y Der Widerstandswert der Faderbewegung ist A/D-gewandelt
y Die Stromquelle kann vom USB Bus- und dem separaten Strom-Adapter ausgewählt werden.
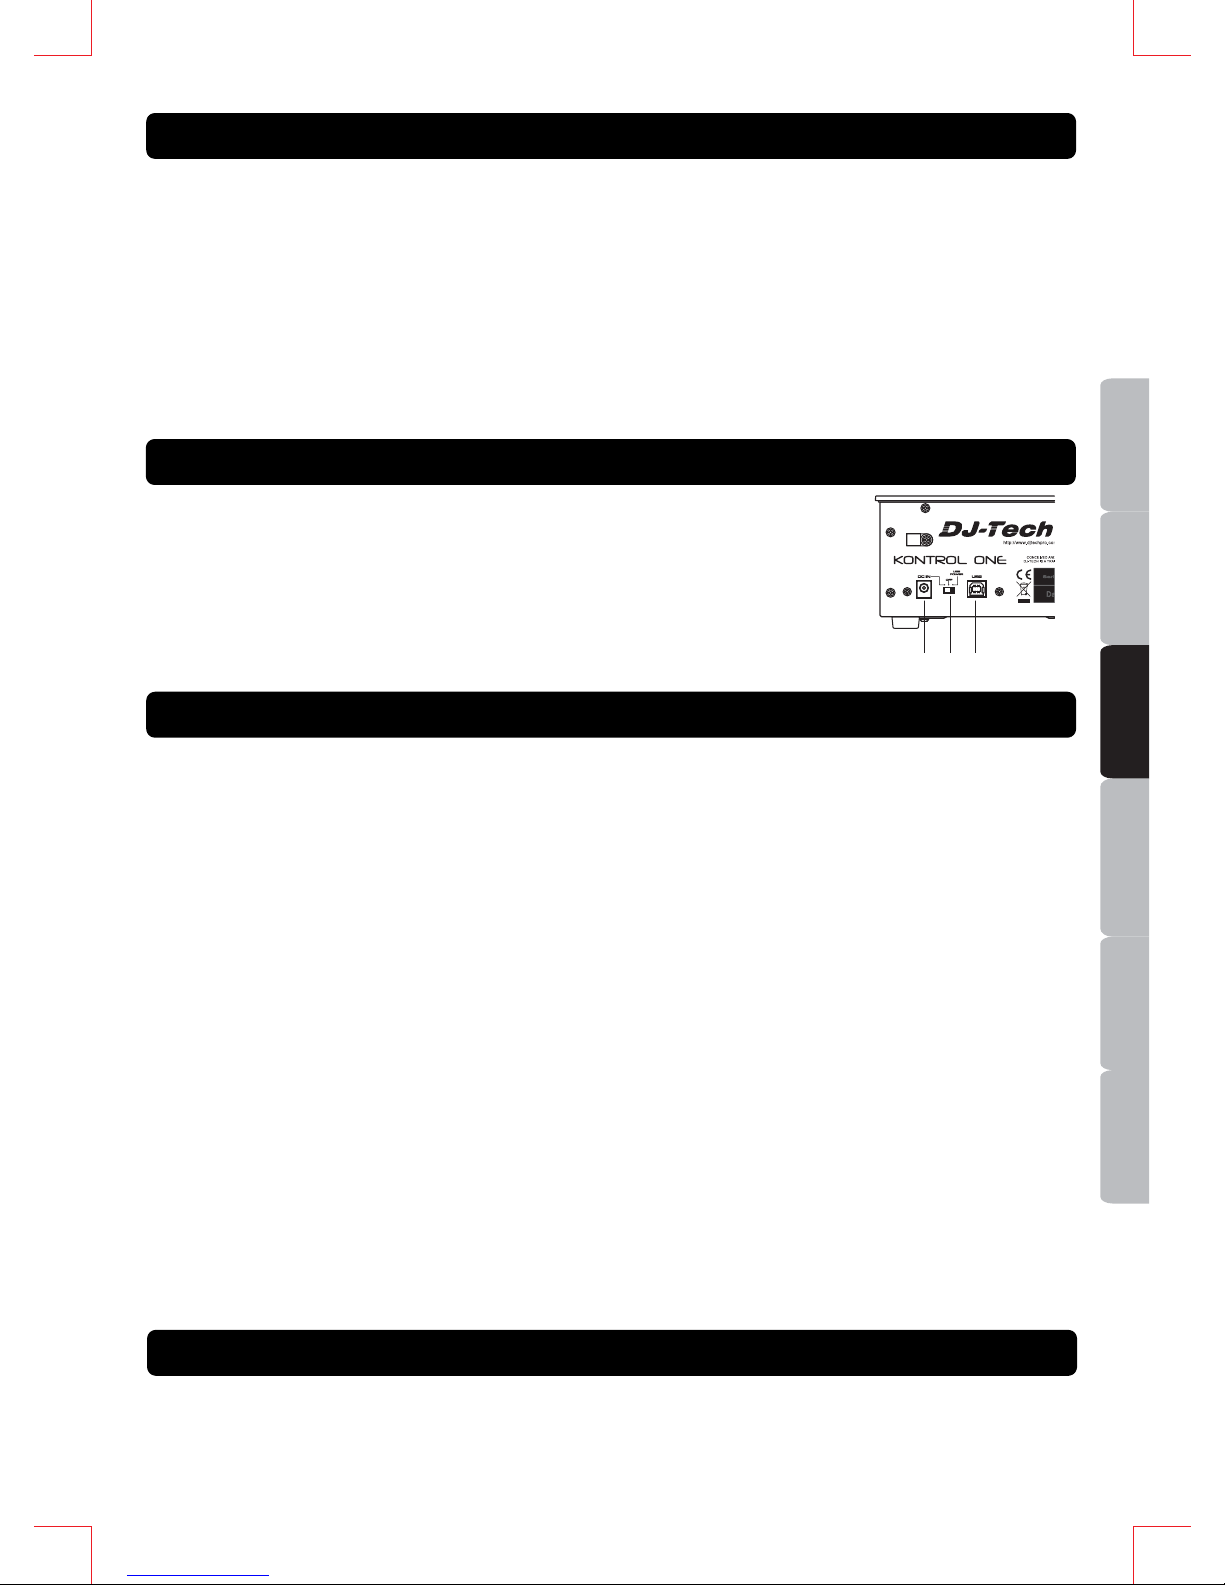
1. POWER CONNECTOR – Schließen Sie den Stromadapter hier an.
2. POWER SWITCH (Adapter / OFF (AUS)/ USB-Power) – Stellen Sie den
Schalter auf AC ADAPTOR, wenn Sie den separaten Wechselstromadapter
verwenden; stellen Sie ihn auf USB BUS POWER, wenn Sie den Strom
vom Computer über USB verwenden.
3. USB PORT INPUT – Zum Anschließen an einen Computer.
1. Installieren Sie die Software.
2. Schließen Sie den KONTROL ONE an den Computer an.
3. Öffnen Sie die Software.
4. Starten Sie die Software, um mit dem KONTROL ONE die Einstellungen vorzunehmen.
Anmerkung: Möglicherweise erkennt die Software den KONTROL ONE nicht, falls er erst nach
dem Starten der Software an den Computer angeschlossen wird.
5. Eine Funktion nach einem Computerstart (PC oder MAC) aus dem Ruhezustand (Stromsparmodus)
des Computers heraus kann nicht garantiert werden.
Anmerkung: Daher muss die Stromsparfunktion des Computers auf AUS gestellt sein.
6. Viele DJ-Softwareprodukte besitzen eine MIDI LERN-Funktion. Der KONTROL ONE kann jede
Software ansteuern, die diese Funktion besitzt. Diese Funktion wird für den KONTROL ONE als
Steuerung der Softwareparameter verwendet.
Anmerkung: Die MIDI LEARN-Einstellung ist bei jeder Software verschieden; bitte richten Sie sich
bezüglich weiterer Anweisungen dazu nach der Benutzeranleitung der Software.
7. Falls die Software die MIDI LEARN-Funktion nicht unterstütz, können die MIDI-Funktionsdaten an
der Software manuell eingestellt werden. Lesen Sie bitte weitere Bedienungsanweisungen hierzu
im Benutzerhandbuch Ihrer jeweiligen Software nach.
8. Halten Sie die Tasten REWIND und PLAYSYNC gedrückt. Schalten Sie das Gerät über den
Stromschalter ein. Der KONTOL ONE kalibriert automatisch die Touch Pad-Empfindlichkeit (am
Jog Wheel) und zeigt die Empfindlichkeitsstufe mit 4 LED-Ringen an der Oberseite an. Auf die
Taste DOWNBEAT drücken, um die Kalibrierung abzuschließen.
STROMVERSORGUNG: 6 V - Gleichstrom
ABMESSUNGEN: 107,5 (H) × 160 (B) × 289 (T) mm
GEWICHT: 1,45 kg
HAUPTFUNKTIONEN
BEDIENUNGSFUNKTIONEN
SPEZIFIKATIONEN
ANSCHLIEßEN
1
2
3
6
Page 8
ESPAÑOL
ITALIANO
NEDERLANDS
ENGLISH
FRANÇAIS
DEUTSCH
1. Lees deze voorschriften.
2. Bewaar deze voorschriften.
3. Houd rekening met alle waarschuwingen.
4. Volg alle voorschriften.
5. Gebruik het toestel niet in de nabijheid van water.
6. Reinig enkel met een droge doek.
7. Blokkeer de ventilatie-openingen niet. Installeer volgens de instructies van de fabrikant.
8. Niet installeren in de nabijheid van warmtebronnen zoals radiatoren, warmteroosters, ovens of
andere toestellen (inclusief versterkers) die warmte produceren.
9. Houd rekening met de veiligheidsdoelstelling van de gepolariseerde stekker of de aardingstekker.
Een gepolariseerde stekker heeft twee pinnen waarvan de ene breder is dan de andere. Een
aardingstekker heeft twee pinnen en een derde aardingspin. De brede pin of de derde pin zijn
voorzien voor uw veiligheid. Als de meegeleverde stekker niet in uw stopcontact past, raadpleeg
dan een elektricien voor vervanging van het verouderde stopcontact.
10. Bescherm de stroomkabels tegen vertrappelen of belemmeren, vooral aan de stekkers,
stopcontacten en het punt waar ze uit het toestel komen.
11. Gebruik enkel hulpstukken/toebehoren die door de fabrikant gespecificeerd worden.
12. Enkel gebruiken met een door de fabrikant gespecificeerde of met het toestel
meegeleverde kar, steun, drievoet, plank of tafel. Als er een kar wordt gebruikt,
wees dan voorzichtig als u het toestel verplaatst in een kar/toestel-combinatie
om letsels door omkantelen te vermijden.
13. Trek het toestel uit tijdens onweersbuien of als het toestel gedurende lange tijd niet wordt gebruikt.
14. Laat alle onderhoud over aan bevoegd onderhoudspersoneel. Onderhoud is nodig wanneer het
toestel op een of andere manier beschadigd is, bijvoorbeeld door een beschadigde voedingskabel
of stekker, als er vloeistof op het toestel gemorst is of er voorwerpen ingevallen zijn, als het toestel
werd blootgesteld aan regen of vocht, niet normaal werkt of gevallen.
WAARSCHUWING
Stel het toestel niet bloot aan regen of vocht om het risico op brand of elektrische schok te
vermijden. Het toestel mag niet blootgesteld worden aan druppels of spatten en er mogen geen
voorwerpen met vloeistof, zoals vazen, op het toestel geplaatst worden.
WAARSCHUWING: Geen beschermingen verwijderen om
het risico op elektrische schok te verminderen. Geen door
de gebruiker te repareren onderdelen. Laat onderhoud
enkel over aan bevoegd personeel.
Het symbool van een driehoek met een bliksemschicht die eindigt op een pijl is bedoeld om
de gebruiker te waarschuwen voor de aanwezigheid van ongeïsoleerde “gevaarlijke spanning”
in het product die van zulke omvang kan zijn dat het een risico op elektrische schok vormt.
De gelijkzijdige driehoek met het uitroepteken is bedoeld om de gebruiker te waarschuwen
voor de aanwezigheid van belangrijke bedienings- en onderhoudsvoorschriften in de
documentatie die bij dit toestel hoort.
WAARSCHUWING
Om elektrische schok te vermijden, de gepolariseerde stekker niet gebruiken met een verlengkabel,
stopcontact of andere ontvanger, tenzij de pinnen er helemaal kunnen ingestoken worden zodat er
geen blootstelling van de pinnen is.
BELANGRIJKE VEILIGHEIDSVOORSCHRIFTEN
DO NOT OPEN
RISK OF ELECTRIC SHOCK
7
Page 9

ESPAÑOL
ITALIANONEDERLANDS
ENGLISH
FRANÇAIS
DEUTSCH
y De KONTROL ONE is USB MIDI en verstrekt eenvoudige plug-and-play-eigenschappen onder Windows/Mac.
y Jog wheel en controletechnologie, zoals op een draaitafel.
y KONTROL ONE’s controlesectie via USB MIDI IN/OUT.
y Een jog wheel met een hogeresolutiepulssensor.
y Pitch bending, scratchen en tracks selecteren.
y De weerstandswaarde van de faderbeweging wordt omgezet van een analoge naar een digitale waarde.
y De voedingsbron kan gekozen worden uit de USB-poort en de exclusieve stroomadapter.
1. POWER CONNECTOR – Sluit hier de stroomadapter aan.
2. POWER SWITCH (Adaptor / OFF/ USB power) – Stel de schakelaar op
AC ADAPTOR in wanneer u de exclusieve AC-adapter gebruikt. Stel de
schakelaar op USB BUS POWER in wanneer u de energie van uw
computer via USB wilt gebruiken.
3. USB PORT INPUT – Gebruikt om met een computer een verbinding te maken.
1. Installeer de software normaal.
2. Sluit de KONTROL ONE normaal op de computer aan.
3. Open de software.
4. Start de software om de instellingen met de KONTROL ONE uit te voeren.
Opmerking: Het is mogelijk dat de software de KONTROL ONE niet herkent als het toestel op de
computer wordt aangesloten nadat de software gestart is.
5. De werking wordt niet gegarandeerd wanneer het systeem (pc of Mac) uit de
energiebesparingsmodus komt.
Opmerking: De energiebesparingsfunctie van de computer moet uitgeschakeld zijn.
6. Veel dj-softwareproducten hebben een MIDI LEARN-functie. De KONTROL ONE kan alle software
sturen die met deze functie is uitgerust. KONTROL ONE gebruikt deze functie om de parameters
van de software te controleren.
Opmerking: De MIDI LEARN-instelling is voor elke software anders. Raadpleeg de handleiding van
elke software voor verdere instructies.
7. De met de functies gecreëerde MIDI-gegevens kunnen handmatig met de software ingesteld
worden als de software de MIDI LEARN-functie niet ondersteunt. Raadpleeg de handleiding van de
software voor verdere instructies.
8. Houd de knoppen REWIND en PLAYSYNC ingedrukt. Schakel de unit met behulp van de
hoofdschakelaar in. KONTROL ONE zal onmiddellijk de gevoeligheid van het touchpad (op het jog
wheel) ijken en het gevoeligheidsniveau bovenaan met 4 led-ringen aangeven. Druk op de knop
DOWNBEAT om de ijking te voltooien.
STROOMTOEVOER: DC 6 V
AFMETINGEN: 160 (B) × 289 (D) × 107,5 (H) mm
GEWICHT: 1,45 kg
HOOFDEIGENSCHAPPEN
WERKING
SPECIFICATIES
AANSLUITING
1
2
3
8
Page 10
ESPAÑOL
ITALIANO
NEDERLANDS
ENGLISH
FRANÇAIS
DEUTSCH
1. Lea atentamente las siguientes instrucciones.
2. Conserve las instrucciones.
3. Respete todas las advertencias.
4. Siga todas las instrucciones.
5. No use este aparato cerca de fuentes de agua.
6. Límpielo únicamente con un paño suave.
7. No bloquee los orificios de ventilación. Instale el aparato siguiendo atentamente las instrucciones
del fabricante.
8. No coloque el aparato cerca de fuentes de calor, como radiadores, calefactores, amplificadores u
otros aparatos que despidan calor.
9. No retire el dispositivo de seguridad del enchufe polarizado o con puesta a tierra. Los enchufes
polarizados disponen de dos clavijas de diferente tamaño. Un enchufe con puesta a tierra dispone
de tres clavijas, de las cuales una es de puesta a tierra. La clavija más ancha (en el caso de los
enchufes polarizados) o la clavija de puesta a tierra (en el caso de los enchufes de puesta a tierra)
garantizan su seguridad. Si el enchufe suministrado no es compatible con su toma de corriente,
acuda a un electricista para que reemplace dicha toma.
10. Coloque el cable de alimentación de forma que no pueda ser pisado ni dañado de otro modo.
Preste especial atención al enchufe y al punto de conexión del cable al aparato.
11. Utilice únicamente los accesorios recomendados por el fabricante.
12. No coloque este aparato sobre una superficie inestable; podría provocar heridas
corporales o estropear el aparato. Si usa un carro para transportar el aparato, tenga
cuidado al desplazarlo para evitar que se caiga y se produzcan daños.
13. Desenchufe el aparato durante las tormentas o si no va a utilizarlo durante un periodo de tiempo
prolongado.
14. Para las operaciones de mantenimiento, póngase en contacto con personal técnico cualificado. El
aparato ha de repararse siempre que haya sufrido daños: deterioro del cable de alimentación o del
enchufe, caída de líquido u objetos sobre el aparato, exposición a la lluvia o la humedad,
funcionamiento defectuoso o caída del propio aparato.
ATENCIÓN
Para reducir el riesgo de incendio o de descarga eléctrica, no exponga este aparato a la lluvia o la
humedad. No coloque objetos llenos de líquido, como jarrones, cerca del aparato.
ATENCIÓN: Para reducir el riesgo de descarga eléctrica, no
desmonte el aparato. En su interior no hay ninguna pieza que pueda
ser reparada por el usuario. Para las operaciones de mantenimiento,
póngase en contacto con personal técnico cualificado.
El símbolo del rayo terminado en forma de flecha dentro de un triángulo equilátero advierte
al usuario de la presencia de voltaje peligroso no aislado en el interior del aparato de
magnitud suficiente para constituir un riesgo de descarga eléctrica para las personas.
El signo de exclamación dentro de un triángulo equilátero es una señal de aviso que alerta
al usuario de la existencia de instrucciones importantes de funcionamiento y
mantenimiento en la documentación que acompaña al producto.
ATENCIÓN
Para evitar el riesgo de descarga eléctrica, introduzca completamente las clavijas del enchufe en la
toma de corriente.
INSTRUCCIONES DE SEGURIDAD
DO NOT OPEN
RISK OF ELECTRIC SHOCK
9
Page 11
ESPAÑOL
ITALIANONEDERLANDS
ENGLISH
FRANÇAIS
DEUTSCH
y KONTROL ONE es un controlador MIDI con puerto USB que dispone de un sistema plug and play
compatible con Windows/Mac.
y Rueda jog y tecnología de control como en los giradiscos.
y Control por medio del puerto USB (entrada/salida).
y Rueda jog de alta sensibilidad.
y Pitch bend, scratching y selección de canciones.
y El valor de la resistencia del fader se convierte de analógico en digital.
y Puede seleccionarse la alimentación a través del puerto USB o del adaptador de corriente incluido.
1. TOMA DE ALIMENTACIÓN – Para conectar el adaptador de alimentación.
2. CONMUTADOR DE ALIMENTACIÓN (DC IN / OFF / USB POWER) –
Coloque el conmutador en la posición «DC IN» cuando utilice el adaptador
de corriente y en la posición «USB POWER» cuando utilice el ordenador
como fuente de alimentación a través del puerto USB.
3. PUERTO USB – Para conectar un ordenador.
1. Instale el software.
2. Conecte KONTROL ONE al ordenador a través del puerto USB.
3. Abra el software.
4. El software permite realizar ajustes en KONTROL ONE.
Nota: Puede que el software no reconozca KONTROL ONE si se conecta al ordenador después de
que el software se haya iniciado.
5. No se garantiza un correcto funcionamiento del aparato inmediatamente después de que el ordenador
abandone el modo de ahorro de energía.
Nota: El ordenador debe configurarse de forma que no se active nunca al modo de ahorro de energía.
6. Muchos software para DJ están equipados con la función MIDI LEARN. KONTROL ONE es
compatible con todos los software que poseen esta función. KONTROL ONE utiliza esta función
para controlar los parámetros del software.
Nota: La configuración de la función MIDI LEARN puede variar de un software a otro. Consulte el
manual del software para más información.
7. Los datos MIDI creados con las distintas funciones pueden ajustarse de forma manual usando el
software si este no es compatible con la función MIDI MEARN. Consulte el manual del software
para más información.
8. Mantenga pulsados los botones REWIND y PLAYSYNC. A continuación, encienda el aparato por
medio del conmutador de alimentación. KONTROL ONE calibrará automáticamente la sensibilidad
de la rueda jog y mostrará el nivel de sensibilidad a través de los 4 pilotos LED situados en la parte
superior. Pulse el botón DOWNBEAT para finalizar la calibración.
ALIMENTACIÓN: CC 6V
DIMENSIONES: 160 (ancho) x 289 (profundo) x 107,5 (alto) mm
PESO: 1,45 kg
CARACTERÍSTICAS PRINCIPALES
USO
CARACTERÍSTICAS TÉCNICAS
CONEXIONES
1
2
3
10
Page 12
ESPAÑOL
ITALIANO
NEDERLANDS
ENGLISH
FRANÇAIS
DEUTSCH
1. Leggete le istruzioni.
2. Conservate le istruzioni.
3. Rispettate tutte le avvertenze.
4. Seguite tutte le istruzioni.
5. Non servitevi dell’apparecchio vicino all’acqua.
6. Per pulirlo utilizzate solo panni asciutti.
7. Non ostruite le aperture di ventilazione. Installate l’apparecchio seguendo le istruzioni del fabbricante.
8. Non collocate il prodotto vicino a fonti di calore quali radiatori, stufe, bocche per l’uscita di aria calda
o ogni altro apparecchio che emette calore (compresi gli amplificatori).
9. Non neutralizzate la funzione di sicurezza della spina polarizzata o con spinotto di protezione. Una
spina polarizzata ha due lame di cui una più ampia dell’altra. Una spina con spinotto di protezione è
dotata di due lame e di un terzo polo di messa a terra. La lama più larga e il terzo polo sono forniti
per la vostra sicurezza. Se la spina fornita in dotazione non entra nella vostra presa di corrente,
rivolgetevi a un elettricista per sostituire la vecchia presa.
10. Proteggete il cavo di alimentazione in modo tale che non sia calpestato o schiacciato, in particolare
in corrispondenza delle spine, delle prese e del punto in cui escono dall'apparecchio.
11. Utilizzate esclusivamente componenti/accessori specificati dal produttore.
12. Utilizzate l’apparecchio solo con carrelli, sostegni, treppiedi, staffe o tavoli specificati
dal costruttore o venduti insieme all'apparecchio. Se usate un carrello, fate attenzione
durante gli spostamenti per evitare infortuni causati da un eventuale ribaltamento del
carrello stesso.
13. Scollegate l’apparecchio durante i temporali o quando rimane inutilizzato per lunghi periodi di tempo.
14. Per qualunque intervento di assistenza rivolgersi a personale qualificato. È necessario intervenire
sull’apparecchio ogniqualvolta sia stato danneggiato in qualsiasi modo, ad esempio in caso di
danneggiamento di spina o cavo di alimentazione, versamento di liquido sull’apparecchio o caduta di
oggetti all'interno, esposizione dell'apparecchio a pioggia o umidità, funzionamento irregolare o caduta.
AVVERTENZA
Per ridurre il rischio d'incendio o di scossa elettrica, non esponete l'apparecchio alla pioggia o
all'umidità. Non esponete l’apparecchio all'acqua (schizzi, gocciolamento) e non collocate oggetti
contenenti liquidi (ad esempio un vaso) in prossimità dell'apparecchio.
ATTENZIONE: Per evitare il rischio di scossa elettrica, non aprite
l’alloggiamento. All'interno non vi sono parti utilizzabili dall'utente. Per
ogni intervento rivolgersi esclusivamente a personale qualificato.
Il simbolo del fulmine con punta di freccia all'interno di un triangolo equilatero segnala la
presenza di un “pericoloso voltaggio” non isolato entro il perimetro del prodotto di
grandezza sufficiente a comportare il rischio di folgorazione.
Il punto esclamativo all’interno del triangolo equilatero segnala all'utilizzatore la presenza di
importanti istruzioni operative e di manutenzione nella guida che accompagna l’apparecchio.
ATTENZIONE
Per evitare scosse elettriche, non utilizzate la presa polarizzata con una prolunga, un connettore o altra
presa se non quando gli spinotti possono essere inseriti interamente (per evitare che rimangano scoperti).
IMPORTANTI AVVERTENZE DI SICUREZZA
DO NOT OPEN
RISK OF ELECTRIC SHOCK
11
Page 13
ESPAÑOL
ITALIANONEDERLANDS
ENGLISH
FRANÇAIS
DEUTSCH
y KONTROL ONE è un controller MIDI con porta USB per una facile connessione plug & play compatibile
con Windows/Mac.
y Manopola jog e tecnologia di controllo simile a quelle di un giradischi.
y Controllo attraverso la porta USB.
y Alta sensibilità della manopola jog.
y Funzioni pitch bend, scratch e selezione di canzoni.
y Il valore di resistenza del fader è convertito da analogico a digitale.
y È possibile scegliere di alimentare l’apparecchio tramite USB oppure tramite il cavo di alimentazione fornito.
1. Ingresso alimentazione DC IN – Per collegare l’adattatore di corrente.
2. Selettore di alimentazione DC IN/OFF/USB POWER (alimentazione di
rete / spento / alimentazione via USB) – Spostate il selettore in funzione
della sorgente di alimentazione utilizzata: elettrica (DC IN) oppure tramite
il computer (USB POWER).
3. Porta USB – Per collegare l’apparecchio ad un computer.
1. Installate il software.
2. Collegate KONTROL ONE al computer tramite la porta USB.
3. Avviate il software.
4. Il software permette di utilizzare KONTROL ONE.
Nota: È possibile che il software non riconosca KONTROL ONE se questo è stato collegato
all’apparecchio dopo l’avvio del software.
5. È possibile che l’apparecchio non funzioni correttamente subito dopo un periodo di standby del computer.
Nota: È necessario che il computer sia impostato in modo tale che il sistema non entri mai in
modalità di risparmio energetico.
6. Molti software per DJ sono dotati della funzione MIDI LEARN. Con KONTROL ONE è possibile
controllare tutti i software dotati di questa funzione. Attraverso questa funzione, KONTROL ONE
controlla i parametri del software.
Nota: L’impostazione della funzione MIDI LEARN è diversa in ogni software. Si prega di fare
riferimento al manuale del software per ulteriori informazioni.
7. I dati MIDI creati con le diverse funzioni possono essere impostati manualmente tramite il software
qualora il software non supporti la funzione MIDI LEARN. Si prega di fare riferimento al manuale del
software per ulteriori dettagli.
8. Premete i tasti REWIND e PLAYSYNC. Accendete l’unità tramite il selettore di alimentazione.
KONTROL ONE calibra automaticamente la sensibilità dei pad sulla manopola jog e indica il livello
di sensibilità tramite i quattro anelli luminosi posti nella parte superiore dell’apparecchio. Premete il
tasto DOWNBEAT per terminare la calibrazione.
ALIMENTAZIONE: DC 6V
DIMENSIONI: 160 (L) x 107,5 (A) x 289 (Prof.) mm
PESO: 1,45 kg
CARATTERISTICHE PRINCIPALI
FUNZIONAMENTO
SPECIFICHE TECNICHE
COLLEGAMENTI
1
2
3
12
Page 14
MIDI MAP
KEY WORD
REF.
NO.
I/O FUNCTION
MIDI
CODE
CHANNEL+
MIDI CODE
FUNCTION
CODE
ACTION
1 O DECK SELECT 09 9X , X=0~3 8Y, Y=0~3 *NOTE 1
2 O REC1 09 9X 09H 7FH:ON/00H:OFF
3 O REC2 09 9X 08H 7FH:ON/00H:OFF
4 O REC3 09 9X 07H 7FH:ON/00H:OFF
5 O REC4 09 9X 06H 7FH:ON/00H:OFF
6 O SAMPLE1 09 9X 0EH 7FH:ON/00H:OFF
7 O SAMPLE2 09 9X 0DH 7FH:ON/00H:OFF
8 O SAMPLE3 09 9X 0CH 7FH:ON/00H:OFF
9 O SAMPLE4 09 9X 0BH 7FH:ON/00H:OFF
10 O CUE1 09 9X 13H 7FH:ON/00H:OFF
11 O CUE2 09 9X 12H 7FH:ON/00H:OFF
12 O CUE3 09 9X 11H 7FH:ON/00H:OFF
13 O CUE4 09 9X 10H 7FH:ON/00H:OFF
14 O LOOP 09 9X 18H 7FH:ON/00H:OFF
04
04H
03
03H
02
02H
01
01H
6
06H
7
07CH
8
08H
9
09H
14
0EH
13
0DH
12
0CH
11
0BH
16
10H
17
11H
18
12H
19
13H
24
18H
23
17H
22
16H
21
15H
12
0CH
25
19H
30
1EH
TOUCH CODE:31(1FH)
33
21H
28
1CH
27
1BH
29
1DH
WHEEL CODE:
32(20H)
EX:RLP1
16~23
32~39
24~31
08~15
127
Page 15

KEY WORD
REF.
NO.
I/O FUNCTION
MIDI
CODE
CHANNEL+
MIDI CODE
FUNCTION
CODE
ACTION
15 O LEAP 09 9X 17H 7FH:ON/00H:OFF
16 O HALF 09 9X 16H 7FH:ON/00H:OFF
17 O DOUBLE 09 9X 15H 7FH:ON/00H:OFF
18 O SHIFT 09 9X 1AH 7FH:ON/00H:OFF
19 O SYNC 09 9X 1DH 7FH:ON/00H:OFF
20 O CUE 09 9X 1CH 7FH:ON/00H:OFF
21 O PLAY 09 9X 1BH 7FH:ON/00H:OFF
22 O BEND+ 09 9X 1EH 7FH:ON/00H:OFF
23 O BEND- 09 9X 19H 7FH:ON/00H:OFF
24 O RLP1 09 9X 04H 7FH:ON/00H:OFF
25 O RLP2 09 9X 03H 7FH:ON/00H:OFF
26 O RLP3 09 9X 02H 7FH:ON/00H:OFF
27 O LOAD 09 9X 01H 7FH:ON/00H:OFF
28 O RLP1 ENCODER 0B BX 37H 7FH:TURN RIGHT/01H:TURN LEFT
29 O RLP2 ENCODER 0B BX 36H 7FH:TURN RIGHT/01H:TURN LEFT
30 O RLP3 ENCODER 0B BX 35H 7FH:TURN RIGHT/01H:TURN LEFT
31 O LOAD ENCODER 0B BX 34H 7FH:TURN RIGHT/01H:TURN LEFT
32 O TOUCH 09 9X 1FH 7FH:ON/00H:OFF
33 O WHEEL 0B BX 20H 7FH:TURN RIGHT/01H:TURN LEFT
34 I VR 0B BX 21H 00~7F
35 I RLP1 LED RING 0B BX 37H 00~7F (*NOTE 2)
36 I RLP2 LED RING 0B BX 36H 00~7F (*NOTE 2)
37 I RLP3 LED RING 0B BX 35H 00~7F (*NOTE 2)
38 I LOAD LED RING 0B BX 34H 00~7F (*NOTE 2)
39 I REC1 LED 09 9X 09H 7FH:ON/00H:OFF
40 I REC2 LED 09 9X 08H 7FH:ON/00H:OFF
41 I REC3 LED 09 9X 07H 7FH:ON/00H:OFF
42 I REC4 LED 09 9X 06H 7FH:ON/00H:OFF
43 I SAMPLE1 LED 09 9X 0EH 7FH:ON/00H:OFF
44 I SAMPLE2 LED 09 9X 0DH 7FH:ON/00H:OFF
45 I SAMPLE3 LED 09 9X 0CH 7FH:ON/00H:OFF
46 I SAMPLE4 LED 09 9X 0BH 7FH:ON/00H:OFF
47 I CUE1 LED 09 9X 13H 7FH:ON/00H:OFF
48 I CUE2 LED 09 9X 12H 7FH:ON/00H:OFF
49 I CUE3 LED 09 9X 11H 7FH:ON/00H:OFF
50 I CUE4 LED 09 9X 10H 7FH:ON/00H:OFF
51 I LOOP LED 09 9X 18H 7FH:ON/00H:OFF
52 I LEAP LED 09 9X 17H 7FH:ON/00H:OFF
53 I HALF LED 09 9X 16H 7FH:ON/00H:OFF
54 I DOUBLE LED 09 9X 15H 7FH:ON/00H:OFF
55 I SHIFT LED 09 9X 12H 7FH:ON/00H:OFF
56 I SYNC LED 09 9X 1DH 7FH:ON/00H:OFF
57 I CUE LED 09 9X 1CH 7FH:ON/00H:OFF
58 I PLAY LED 09 9X 1BH 7FH:ON/00H:OFF
*NOTE1.
EXAMPLE
DECK1 CHANGE TO DECK2 => 90 81 7F
DECK2 CHANGE TO DECK3 => 91 82 7F
DECK3 CHANGE TO DECK4 => 92 83 7F
DECK4 CHANGE TO DECK3 => 93 82 7F
DECK3 CHANGE TO DECK2 => 92 81 7F
DECK2 CHANGE TO DECK1 => 91 80 7F
*NOTE2.
LED RINGS CODE
00~07 => 0 => ALL LED OFF
08~15 => 8 => 1 LE D ON
16~23 => 16 => 2 LEDS ON
24~31 => 24 => 3 LEDS ON
.....
120~126 => 120 => 15 LEDS ON
127 => 127 => ALL LEDS ON
Page 16

 Loading...