

Page 1
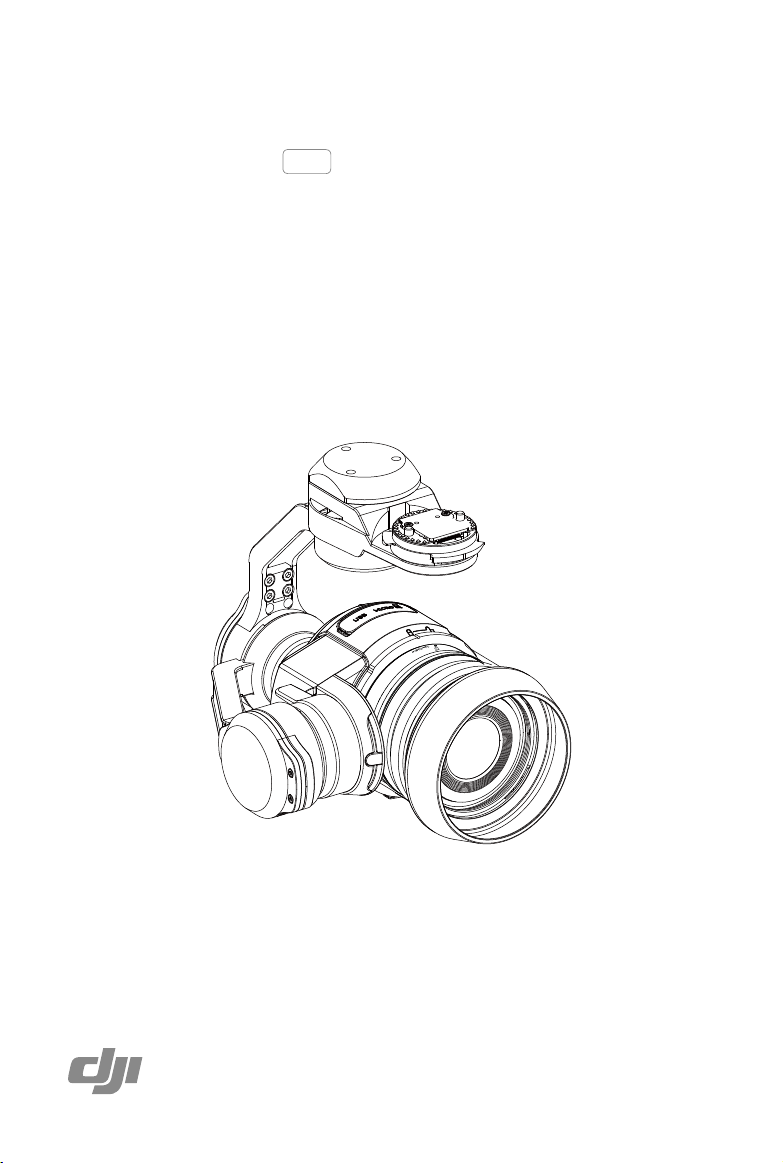
ZENMUSE X5
User Manual
2015.09
V1.0
Page 2
Searching for Keywords
Search for keywords such as “battery” and “install” to nd a topic. If you are using Adobe
Acrobat Reader to read this document, press Ctrl+F on Windows or Command+F on Mac to
begin a search.
Navigating to a Topic
View a complete list of topics in the table of contents. Click on a topic to navigate to that
section.
Using this manual
Legends
Warning Important Hints and Tips Reference
Before Flight
Read the following documents before using the Zenmuse X5:
1. Zenmuse X5 In the Box
2. Zenmuse X5 User Manual
3. Zenmuse X5 Safety Guidelines and Disclaimer
Check that all of the items are included in the package. We recommend that you watch all
tutorial videos on the official DJI website and read the Disclaimer and Safety Guidelines
before you y. Refer to the User Manual for more detailed information.
Watch the video tutorials
Please watch the tutorial videos at the link below, which demonstrates how to use Zenmuse
X5 safely:
http://www.dji.com/product/zenmuse-x5s/video
2015 DJI. All Rights Reserved.
2
©
Page 3

Contents
Using this manual
Legends
Before Flight
Watch the video tutorials
Contents
Product Prole
Overview
In the Box
Optional Accessories
Components
Getting Started
Read the information below before setting up your Zenmuse X5
Supported Devices
Supported Lenses for the Inspire 1
Supported Filters
Supported Micro SD Cards
Installing the Camera Lens
Mounting the Zenmuse X5 to the Inspire 1
Replace the Inspire 1 Gimbal Mounting Plate
Attach the Zenmuse X5
Mechanical Range
Operating the Camera
Camera Panel
Basic Shooting
Taking Photos
Recording Videos
Advanced Settings
Exposure Modes
Photo Styles
White Balance
List of Settings
Managing your Photos and Videos
Playback
Downloading your Files
Appendix
Specications
Status LED
2
2
2
2
3
4
4
5
5
6
7
7
7
7
7
7
7
9
9
10
10
11
11
11
11
11
12
12
12
12
13
14
14
14
14
14
16
2015 DJI. All Rights Reserved.
©
3
Page 4

Product Prole
Overview
The Zenmuse X5 offers advanced photographers a high-performance, robust gimbal and
camera system with an M4/3 interchangeable lens. The Type 4/3 CMOS sensor supports
video recording in 4K and 16MP still photos. It can be mounted onto designated DJI devices
such as the Inspire 1.
The Zenmuse X5 lens kit comes with the DJI MFT 15mm f/1.7 ASPH that provides a 72 degree
eld of view and a manually adjustable f/1.7-f/16 aperture range. The camera can shoot burst,
AEB or time-lapse in JPEG and DNG RAW, and output video in MP4 and MOV formats. Live
HD video from the camera can be viewed on your mobile device through the DJI GO app .
The 3-axis gimbal provides an incredibly stable platform for the camera to capture clear shots
even during high speed maneuvers. The gimbal tilts the camera across a -90° to +30° pitch
angle and pans a full 360 degrees, independent of its carrier’s movement.
2015 DJI. All Rights Reserved.
4
©
Page 5
ZENMUSE X5 User Manual
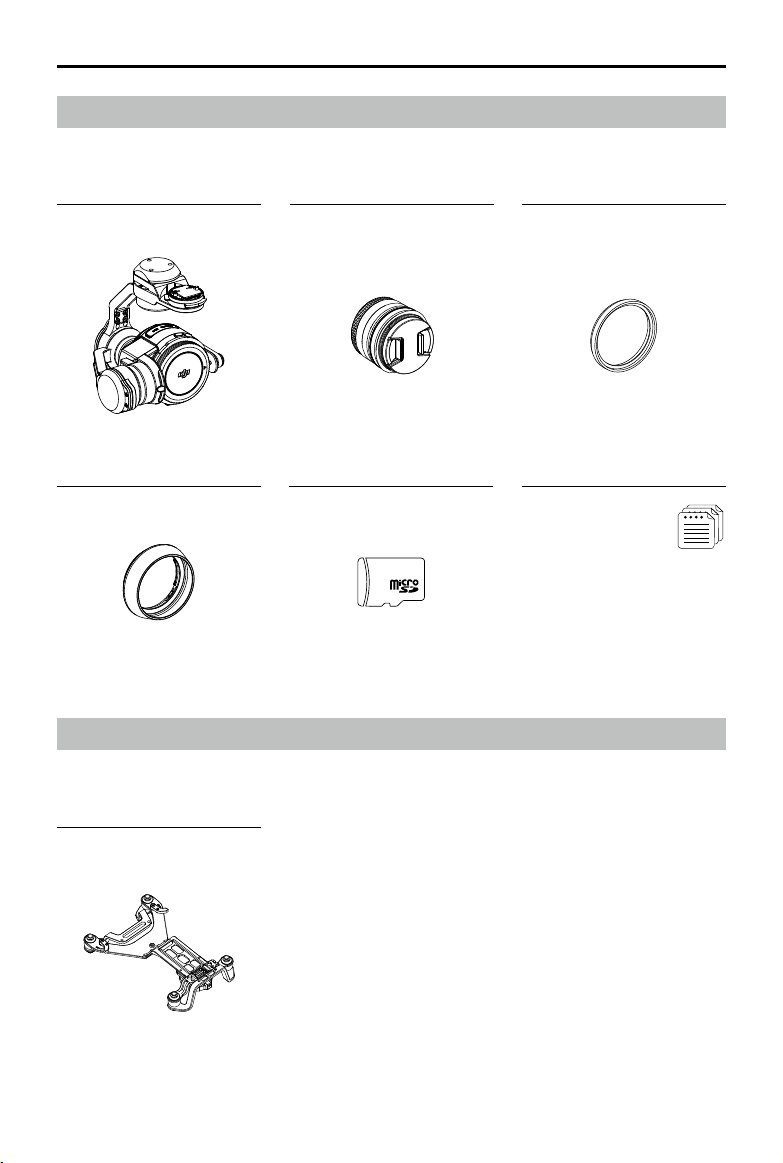
In the Box
Check that all of the following items are in your package. If any items are missing, please
contact DJI or your local dealer.
Gimbal and Camera Body ×1
DJI MFT 15mm f/1.7 ASPH
Balancing Ring* ×1
Lens* ×1
Lens Hood* ×1 16GB Micro SD Card ×1
* The original lens, balancing ring and lens hood are only included in the Zenmuse X5 lens kit. Accessories for other supported
lenses can be purchased separately on the DJI Store.
Manuals
ZENMUSE X5 In the Box
ZENMUSE X5 Disclaimer and Safety Guidelines
Optional Accessories
The Zenmuse X5 can be mounted on the Inspire 1 aircraft with the following accessory which
is available on the DJI Store.
Inspire 1 Gimbal Mounting
Plate ×1
2015 DJI. All Rights Reserved.
©
5
Page 6
ZENMUSE X5 User Manual
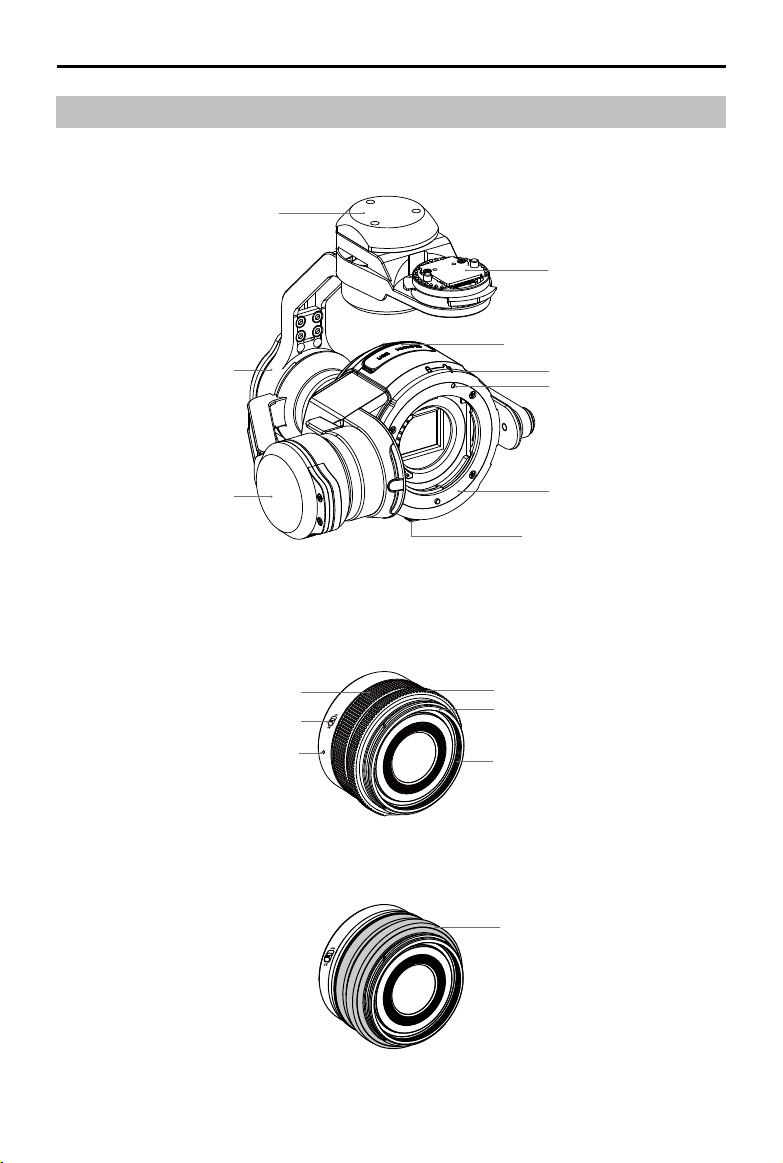
Components
Zenmuse X5 Gimbal and Camera
Pan Motor
Roll Motor
Gimbal Connector
Micro SD Card Slot/Micro USB Port
Lens Lock
Lens Mount Index
Tilt Motor
DJI MFT 15mm f/1.7 ASPH Lens
Focusing Ring
AF/MF Switch
Lens Mount Index
Lens Mount
Lens Release Button
Aperture Ring
Lens Hood Thread
46mm Lens Filter Thread
Dust Cover
2015 DJI. All Rights Reserved.
6
©
Page 7

Getting Started
Read the information below before setting up your Zenmuse X5
Supported Devices
The Zenmuse X5 can be attached to the following device:
DJI Inspire 1
Supported Lenses for the Inspire 1
The Zenmuse X5 currently supports the following lenses, and will support more lenses in the
future.
DJI MFT 15mm f/1.7 ASPH
Panasonic Lumix G Leica DG Summilux 15mm f/1.7 ASPH
Olympus M.Zuiko Digital ED 12mm f/2.0
Olympus M.Zuiko 17mm f1.8 (Balancing ring will be available on the DJI Store soon)
Supported Filters
Filters must have a weight of 7-11 g, with those weighing 10-11 g performing the best.
Outside this range, the lter will decrease gimbal performance. DJI MFT 15mm f/1.7 ASPH
supports lters with a size of 46mm.
The Balancing Ring must be installed on the camera lens when a lter is not used.
Supported Micro SD Cards
The Zenmuse X5 comes with a 16GB Micro SD card, but also supports Micro SD cards with a
capacity of up to 64GB. We recommend using a UHS-1 Micro SD card to minimize the delay
when reading and writing high resolution video data.
DO NOT remove the Micro SD card from the Zenmuse X5 when it is powered on.
Installing the Camera Lens
The following steps use the DJI MFT 15mm f/1.7 ASPH as illustration of how to mount the
camera lens to the camera body. Be sure to power off the battery before installation.
1. Remove the camera body cap.
2. While holding down the Lens Release Button, rotate the Lens Lock clockwise to unlock it.
3. Remove the lens cap and rear cap.
2
1
Lens Release Button
3
2015 DJI. All Rights Reserved.
©
7
Page 8

ZENMUSE X5 User Manual
4. Align the two Lens Mount Indexes on the camera body and camera lens, and insert the
camera lens into the body of the camera.
5. Rotate the camera lens clockwise until you hear a click.
6. Rotate the Lens Lock counterclockwise to lock it.
7. Mount the Balancing Ring (or a lter) and the Lens Hood.
8. Insert the Micro SD card.
6
Balancing Ring (or Filter)
Lens Hood
4
5
7
To remove the camera lens, power off the battery and then:
1. While holding down the Lens Release Button, rotate the Lens Lock clockwise to unlock it.
2. While holding down the Lens Release Button, rotate the camera lens counterclockwise to
detach it.
Lens Release Button
It is recommended to wrap the dust cover around the lens for aerial applications. The
DJI specied dust cover can be installed on the DJI MFT 15mm f/1.7 ASPH and the
Panasonic Lumix G Leica DG Summilux 15mm f/1.7 ASPH. Purchase an appropriate
dust cover for the Olympus M.Zuiko Digital ED 12mm f/2.0 if necessary.
It is important to tighten the Lens Lock after attaching the camera lens, as this can
reduce the vibrations of the lens when the aircraft is moving in ight. Always loosen
the Lens Lock before attaching and detaching the camera lens.
A lter can be installed in place of the Camera Balancing Ring. Remember to use a
lter that fullls the weight requirement.
The Lens Hood can only be installed on the DJI MFT 15mm f/1.7 ASPH or Panasonic
Lumix G Leica DG Summilux 15mm f/1.7 ASPH. DO NOT install the Lens Hood on
the Olympus M.Zuiko Digital ED 12mm f/2.0.
2015 DJI. All Rights Reserved.
8
©
Page 9

ZENMUSE X5 User Manual
Be sure to set the lens to AF mode.
Always hold down the Lens Release Button before rotating the Lens Lock to unlock
it.
Mounting the Zenmuse X5 to the Inspire 1
(Watch Video: http://www.dji.com/product/inspire-1/video)
Replace the Inspire 1 Gimbal Mounting Plate
1. Remove the two black dampers at the front.
2. Disconnect the 10-PIN cable and 8-PIN cable in order. Be careful not to damage the
gimbal cables.
3. Remove the other two black dampers.
4. Attach the new gimbal mounting plate as shown below. With their flat sides facing
outwards, align the rear mounting plates with the rear bracket's screw holes. Tighten the
screws with a screwdriver.
5. Connect the 8-PIN cable and 10-PIN cable in order.
6. Place the front mounting bracket to the front bracket with its grooved side facing inwards.
Adjust the 8-PIN cable and 10-PIN cable to avoid protrusion, and then tighten the screws.
Rear Mounting
Plate
Front Mounting
Plate
Mounting
Position
2015 DJI. All Rights Reserved.
©
9
Page 10

ZENMUSE X5 User Manual
Attach the Zenmuse X5
Ensure to power off the aircraft.
1. Rotate the Gimbal Lock to the unlocked position.
2. Align the key on the damping plate with the slot on the gimbal’s pan motor.
3. While aligning the white lines on the Gimbal Connector and Gimbal Lock, insert the Gimbal
Connector.
4. Rotate the Gimbal Lock to the locked position.
1
Key
Slot
Gimbal Lock
Mounting Place
Gimbal Connector
4
2
3
Be careful not to damage the Gimbal Connector and its metal contacts when
attaching or storing the Zenmuse X5.
Mechanical Range
The 3-axis gimbal provides a incredibly stable and mobile platform for the camera system
to capture completely smooth images and video. The gimbal can tilt the camera up to 120
degrees and pan 320 degrees in either direction, providing 640 degrees of yaw rotation.
+
30°
0°
-90°
Ground Level
-320°
+
320°
DO NOT attach or detach the Zenmuse X5 when the aircraft is powered on.
Take off from a at, open area and protect the gimbal after powering up.
2015 DJI. All Rights Reserved.
10
©
Page 11

Operating the Camera
Camera Panel
All camera operations are done on the Camera Panel in Camera View of the DJI GO app.
[1]
[2]
[3]
[4]
[5]
Always set the camera lens to AF mode. The focus and aperture will be controlled by
the DJI GO app digitally.
[1] Menu
[2] Photo/Video Switch
[3] Shutter/Record Button
[4] Playback
[5] Settings
Basic Shooting
Taking Photos
Slide the Photo/Video Switch to the position. Tap the button or the shutter button on the
remote controller to take a single photo. Choose from one of the shooting modes by tapping
“MENU” -> -> Photo.
1. Burst Mode
Take 3, 5, or 7 shots in a row.
2. AEB (Auto Exposure Bracketing)
Take 3 or 5 bracketed frames with ±0.7EV steps for exposure compensation.
3. Time-lapse
Take photos in 5, 7, 10, 20 or 30 second intervals.
Recording Videos
Slide the Photo/Recording Switch to the position. Tap the icon or the Record Button on the
remote controller to start or stop recording video.
2015 DJI. All Rights Reserved.
©
11
Page 12

ZENMUSE X5 User Manual
Advanced Settings
Exposure Modes
Tap to choose from the following exposure modes:
1. AUTO
The shutter speed and aperture are set automatically to obtain the correct exposure.
2. S (Shutter Priority)
Set your desired shutter speed, while the camera chooses the aperture automatically. This
mode is ideal for freezing action, creating motion blur or low-light shots.
3. A (Aperture Priority)
Set your desired aperture, while the camera chooses the shutter speed automatically. This
mode provides a wider depth of eld and can be used to blur out backgrounds.
4. M (Manual Exposure)
In general, increase the ISO for low light environments, and decrease the ISO if the
surrounding is very bright.
Photo Styles
Tap MENU -> -> Style to choose from the following styles:
1. Standard
A general-purpose style for most scenes.
2. Landscape
The camera will focus on as much of the scene as possible by using a large depth of eld.
3. Soft
Suitable for scenes with natural or soft colors.
4. Custom
Sharpness: -3 to +3
Contrast: -3 to +3
Saturation: -3 to +3
White Balance
Tap MENU -> ->White Balance to choose from the following modes:
1. Auto
The camera adjusts the white balance automatically.
2. Sunny / Cloudy / Incandescent / Neon
Choose one of these modes if natural-looking colors cannot be achieved through photo
styles.
3. Custom (2000K~10000K)
Set a value between 2000K and 10000K to compensate for a specic light source.
2015 DJI. All Rights Reserved.
12
©
Page 13

ZENMUSE X5 User Manual
List of Settings
Photo
Shooting Modes Single shoot, Burst Mode, AEB(3/5 bracketed frames), Time-lapse
Image Format JPEG, DNG, JPEG+DNG
Image Size 4:3, 16:9
White Balance Auto, Sunny, Cloudy, Incandescent, Neon, Custom (2000K~10000K)
Style Standard, Landscape, Soft, Custom (Sharpness/Contrast/ Saturation)
Color LOG, None, Vivid, Black White, Art, Film, Beach, Dream, Classic, Nostalgia
Video
Video Size
Video Format MOV, MP4
NTSC/ PAL PAL, NTSC
White Balance Auto, Sunny, Cloudy, Incandescent, Neon, Custom (2000K~10000K)
Style Standard, Landscape, Soft, Custom (Sharpness/Contrast/ Saturation)
Color LOG, None, Vivid, Black White, Art, Film, Beach, Dream, Classic, Nostalgia
General
Quick Preview Off, 1s, 2s, 3s, 4s, 5s, 6s, 7s, 8s, 9s, and 10s
Anti-Flicker Auto, 60Hz, and 50Hz
Show Grid Off, Grid Line, Grid + Diagonal, Center Point
File Index Mode Reset, Continuous
Others
UHD:4K (4096×2160) 24/25p, 4K (3840×2160) 24/25/30p,
2.7K (2704×1520) 24/25/30p; FHD:1920×1080 24/25/30/48/50/60p
Show Histograms, Video Captions, Lens Prole, Reset Camera Settings,
Format SD Card
2015 DJI. All Rights Reserved.
©
13
Page 14

ZENMUSE X5 User Manual
Managing your Photos and Videos
Playback
Tap in the DJI GO app or press the Playback Button on the remote controller to review
photos and videos that you have captured. Press the same button again to return to capturing
images.
Downloading your Files
Download your photo and video les to your PC via the Micro USB Port or using a Micro SD
card reader.
The camera must be powered on to access the les.
Appendix
Specifications
General
Name Zenmuse X5
Dimensions
Weight
Operating Temperature 32° to 104° F (0° to 40° C)
Camera
Lens
2015 DJI. All Rights Reserved.
14
©
4.7 (W) x 5.3 (H) x 5.5 (D) inches
120 (W) x 135 (H) x 140 (D) mm
530 g (Including original lens, balancing ring, lens hood,
Micro SD card)
Replaceable lens
M43 mount supporting auto-focus
Page 15

ZENMUSE X5 User Manual
DJI MFT 15mm f/1.7 ASPH
Supported Lenses
Panasonic Lumix G Leica DG Summilux 15mm f/1.7 ASPH
Olympus M.Zuiko Digital ED 12mm f/2.0
Olympus M.Zuiko 17mm f1.8
Sensor Type 4/3 CMOS sensor
Effective Pixels 16 M
Max Resolution 4608x3456
ISO Range 100 to 25600
Electronic Shutter Speed 8 to 1/8000 s
Field of View DJI MFT 15mm f/1.7 ASPH 72°
Single shot
Burst shooting:3/5/7 frames
Still Photography Modes
Auto Exposure Bracketing (AEB):3/5 bracketed frames at
0.7EV bias
Time-lapse
UHD:4K (4096×2160) 24/25p, 4K (3840×2160) 24/25/30p,
Video Resolution
2.7K (2704×1520) 24/25/30p;
FHD:1920×1080 24/25/30/48/50/60p
Max Video Bitrate 60 Mbps
Supported File Systems FAT32 (≤ 32 GB), exFAT (> 32 GB)
Photo Formats JPEG, DNG
VideoFormats MP4/MOV (MPEG-4 AVC/H.264)
Supported Storage Devices
Class 10 or UHS-1 or above Micro SD cards
Max capacity of 64 GB
Origin Lens
Name DJI MFT 15mm f/1.7 ASPH
Focal length f=15 mm (35 mm format equivalent 30 mm)
Aperture type 7 diaphragm blades/circular aperture diaphragm
Maximum aperture F1.7
Minimum aperture value F16
Lens construction 9 elements in 7 groups (3 aspherical lenses)
In focus distance 0.2 m to ∞ (from the focus distance reference line)
Mount Micro Four Thirds Mount
Angle of view 72°
Max. diameter Approx. 2.26 inches (57.5 mm)
Overall length Approx. 1.42 inches (36 mm)
Mass 115 g
2015 DJI. All Rights Reserved.
©
15
Page 16

ZENMUSE X5 User Manual
Gimbal
Angular Vibration Range ±0.02°
Mount Detachable
Controllable Range
Max Controllable Speed
Pitch:-90° to +30°
Pan:±320°
Pitch:120°/s
Pan:180°/s
Status LED
The Status LED describes the working status of the camera.
Status LED Camera Status
Solid Green Powered on; system is on standby.
Blinks Green quickly (0.1 on, 0.2s off) System is warming up.
Blinks Green once (0.2s off) Taking a single photo.
Blinks Green 3 times (0.2s on, 0.2s off) Burst shooting 3 to 5 photos.
Blinks Red slowly (0.8s on, 0.8s off) Recording video.
Blinks Green and Red alternatively
(0.8s Green, 0.8s Red)
Blinks Red quickly (0.2s on, 0.3s off) SD card error.
Solid Red Firmware update failed.
Blinks Red twice (0.1s on, 0.1s off) Camera overheated.
Firmware update in progress.
2015 DJI. All Rights Reserved.
16
©
Page 17

This content is subject to change.
Download the latest version from
www.dji.com/support
If you have any questions about this document, please contact DJI by
sending a message to
2015 DJI. All Rights Reserved.
©
DocSupport@dji.com
.
 Loading...