

Page 1
Lift Motor Replacement
As lift is disassembled, keep all parts in order for replacement on the lift.
1. Disconnect power to lift.
2. Remove the closure panel frame.
3. Remove the projector from the lift.
4. Use Duct Tape and tape the wire rope/cable onto the drum to prevent it
from loosening. Slack will let the cable “jump” over and need to be
spooled back onto the drum.
5. Secure the lower frame of the lift with straps/rope – preventing gravity
from letting the frame drop.
6. If the lift is in the retracted position, removal of the scissor sets can gain
better access to the motor assembly – it’s your choice to remove. Remove
the top and bottom scissor nuts – slide the scissor set to the rear of the lift
and remove.
Scissor Nuts
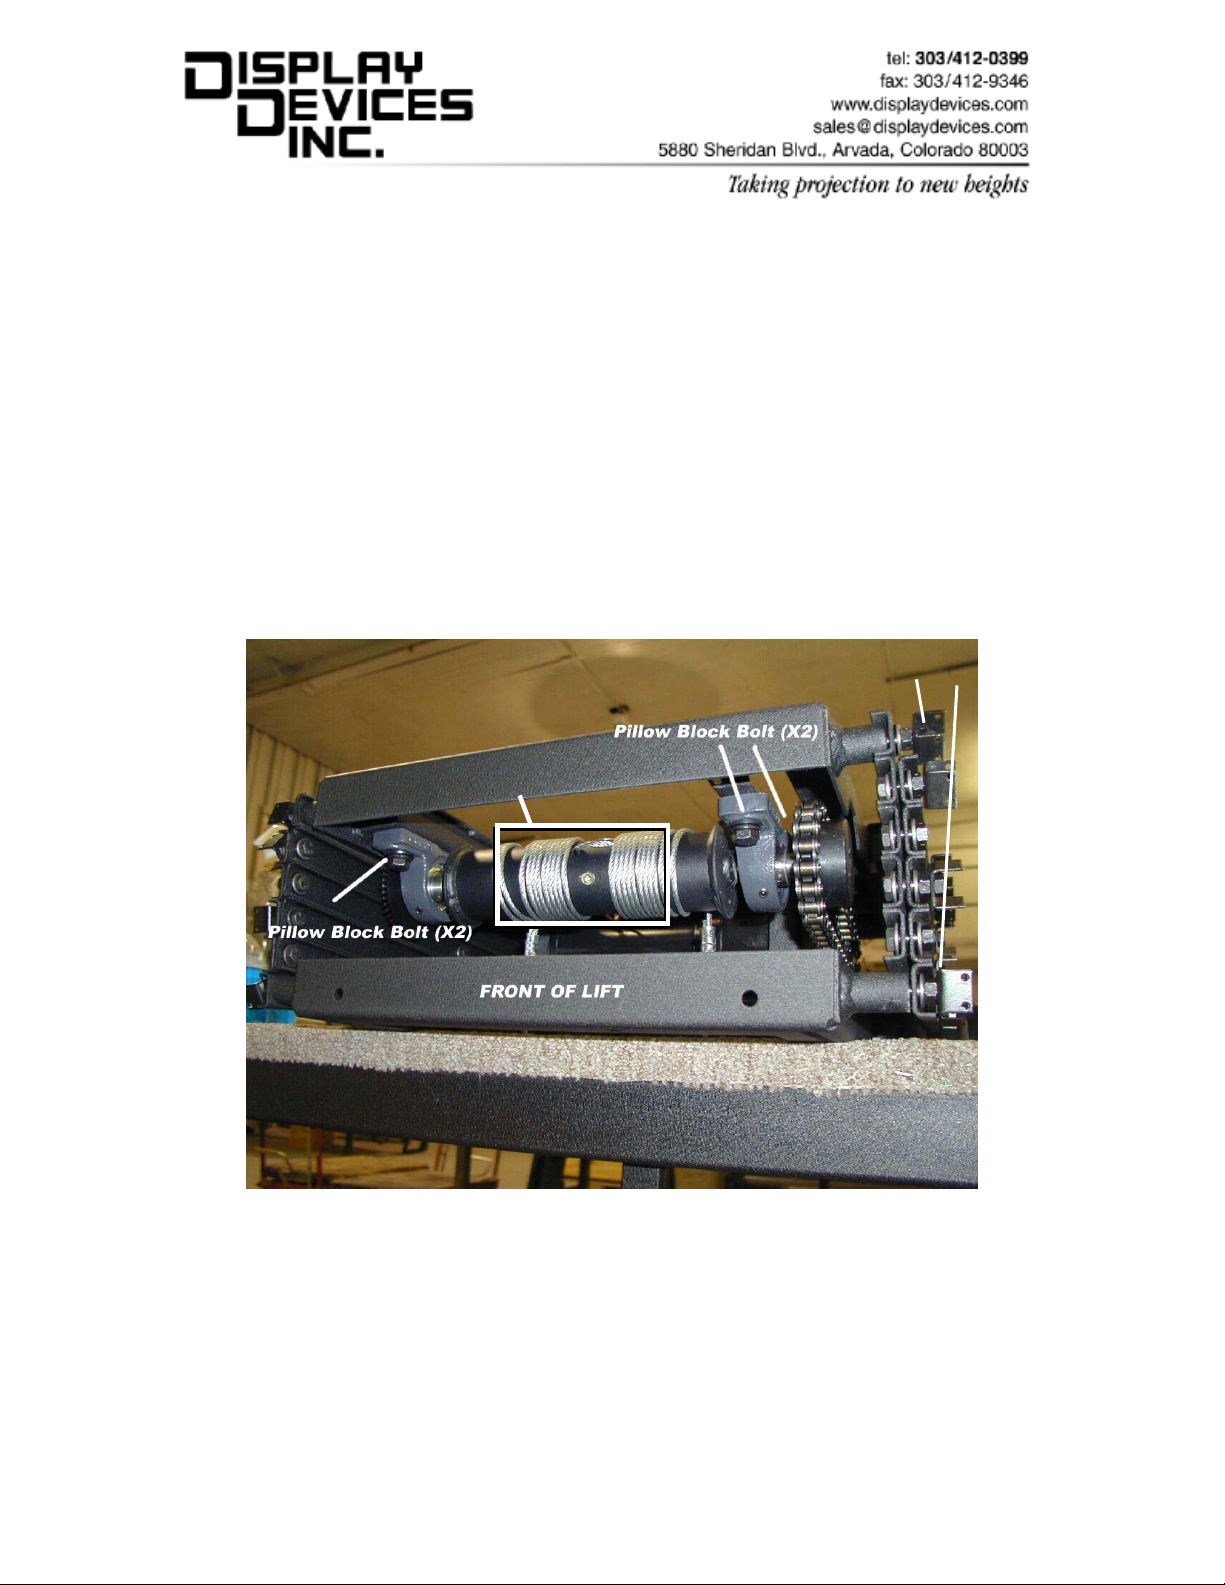
Tape cable securely
7. Loosen the bolts on the Pillow Blocks but do not remove
8. Loosen adjustment bolt on the right pillow block.
Note:
9.
You may need to remove the Slot Sensor and/or Slot Sensor Wheel
to avoid damaging them.
10. Remove the master connecting link on the chain – and remove chain.
11. Loosen the sprocket set screws and remove the sprocket from the motor
shaft.
12. Supporting the motor, remove the motor mounting hardware from the
frame.
1
Page 2

13. Position new motor and bolt back into place. Tighten hardware.
14. Replace sprocket on motor shaft. Do not tighten setscrews until aligned.
15. Reinstall chain, connecting master link.
16. Align sprockets squarely and tighten Pillow Block bolts and sprocket set
screws on motor shaft – be sure the setscrew is on the Keystock.
17. Reinstall scissors – do not over tighten the nuts impeding the motion of the
scissor pivot.
18. Verify all hardware is tightened and recheck the alignment of all
components.
19. Remove the Duct Tape from the cable drum.
20. Remove any straps used to support the lower frame.
21. Adjust the wire rope cable.
22. Be sure all tools are clear within the lift.
23. Turn on power – run unit to the home position – cycle the lift a few times.
24. Check alignment and level.
25. Replace projector and closure system.
Slot Sensor/wheel
(under frame)
Front
Pillow Block
Pillow Block
alignment
adjustment
Motor Mount
 Loading...