

Displaydata 120-0063, 120-0066, 120-0075, 120-0062, 120-0064 QSG
Evaluation Kit
Getting
Started Guide
The information disclosed herein is the exclusive property of ZBD Displays
Ltd. and is not to be disclosed without the written consent of ZBD Displays
Ltd. No part of this publication may be reproduced or transmitted in any
form or by any means including electronic storage, reproduction, execution
or transmission without the prior written consent of ZBD Displays Ltd.
This document is intended for limited circulation.
The information co n t a in e d in this document is subj ec t to ch a n g e w ithout
written notice and should not be construed as a commitment by ZBD Displays Ltd. unless such commitment is expressly given in a covering document.
Document Number: 550-0003-01
Date: 27th June 2008
© Copyright ZBD Displays Ltd. (2008)

Contents
Minimum system requirements 1
Installation 2
Create a Product 5
Assigning an EPOP 6
Updating an EPOP 7
Unassigning EPOPs 9
Re-assigning EPOPs 10
Minimum system requirements
Processor: 1.2GHz
Memory: 512 RAM
Free Disk Space: 4GB
Microsoft Windows XP Pro with Service Pack 2
Software Requirements
SQL Server Express
.NET framework 2.0
Please note if you do not have these installed, they will be installed
as part of the Bounce Software setup process.
For further information on how to use Bounce and for application programmers wishing to use the Bounce API please refer to the API reference that
can be found on the CDROM.
Installation Guide
Insert the Bounce Software CD into your CD-ROM drive. The install
setup.exe should auto start. If it doesn’t, Click on Start> Run and type
D:SETUP.EXE. Replace the D: with the appropriate drive letter for your
CD-ROM if it is not D.
Bounce is using a new installation application call ed Windows Installer. If
you do not use Windows Update to keep your PC up to date or if you have
not previously installed any applications that use this program, the Windows Installer will be placed on your PC. You will be notified that you will
need to restart your PC to activate the Windows Installer. Once you have
restarted your PC the installation of Bou nce will continue.
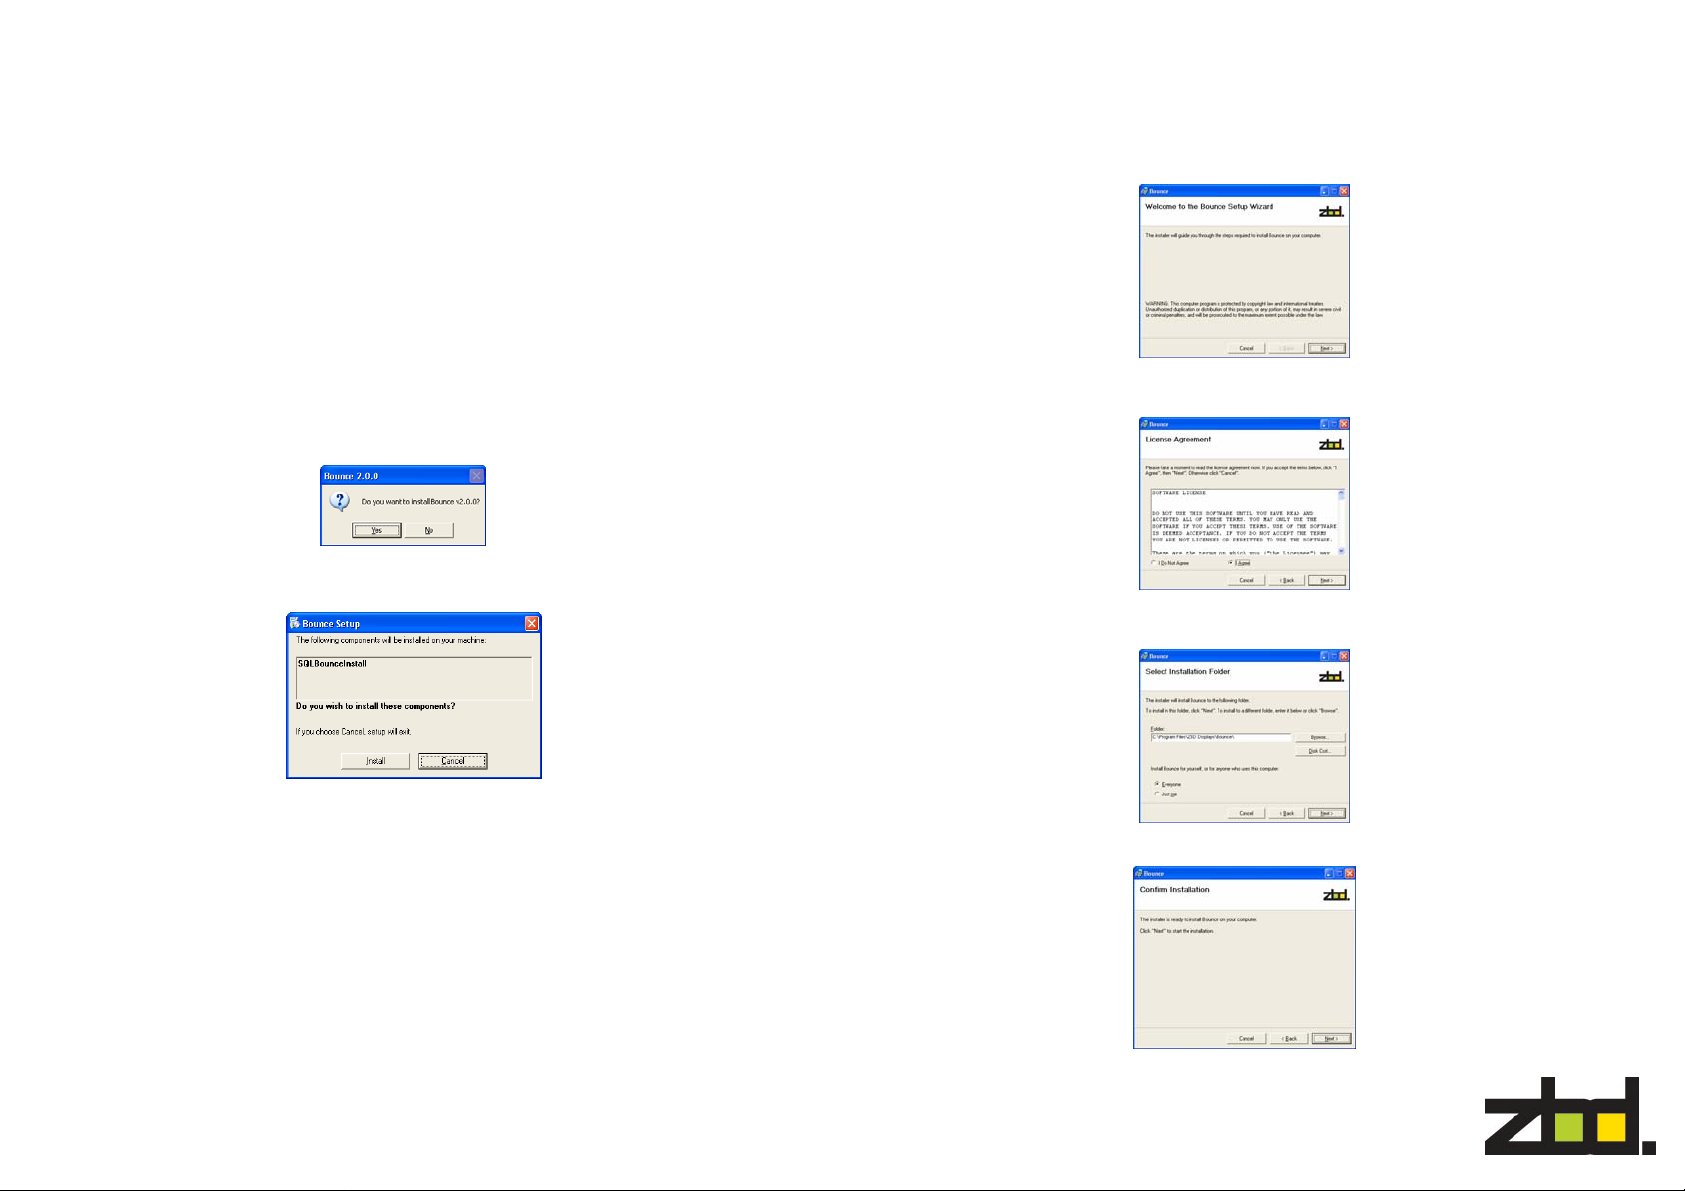
Once the installer starts you will get the following screen. Click Yes to
accept installation of Bounce
Click the Install button on the following screen, This will install SQL E x press
and the correct SQL Bounce database Instance
Now the Bounce Setup Wizard will start. Click Next
After you read the License Agreement, check the box that says I Agree and
click Next
It is recommended you use the default installation folder, leave as is and
click Next
On the following screen click Next
 Loading...