


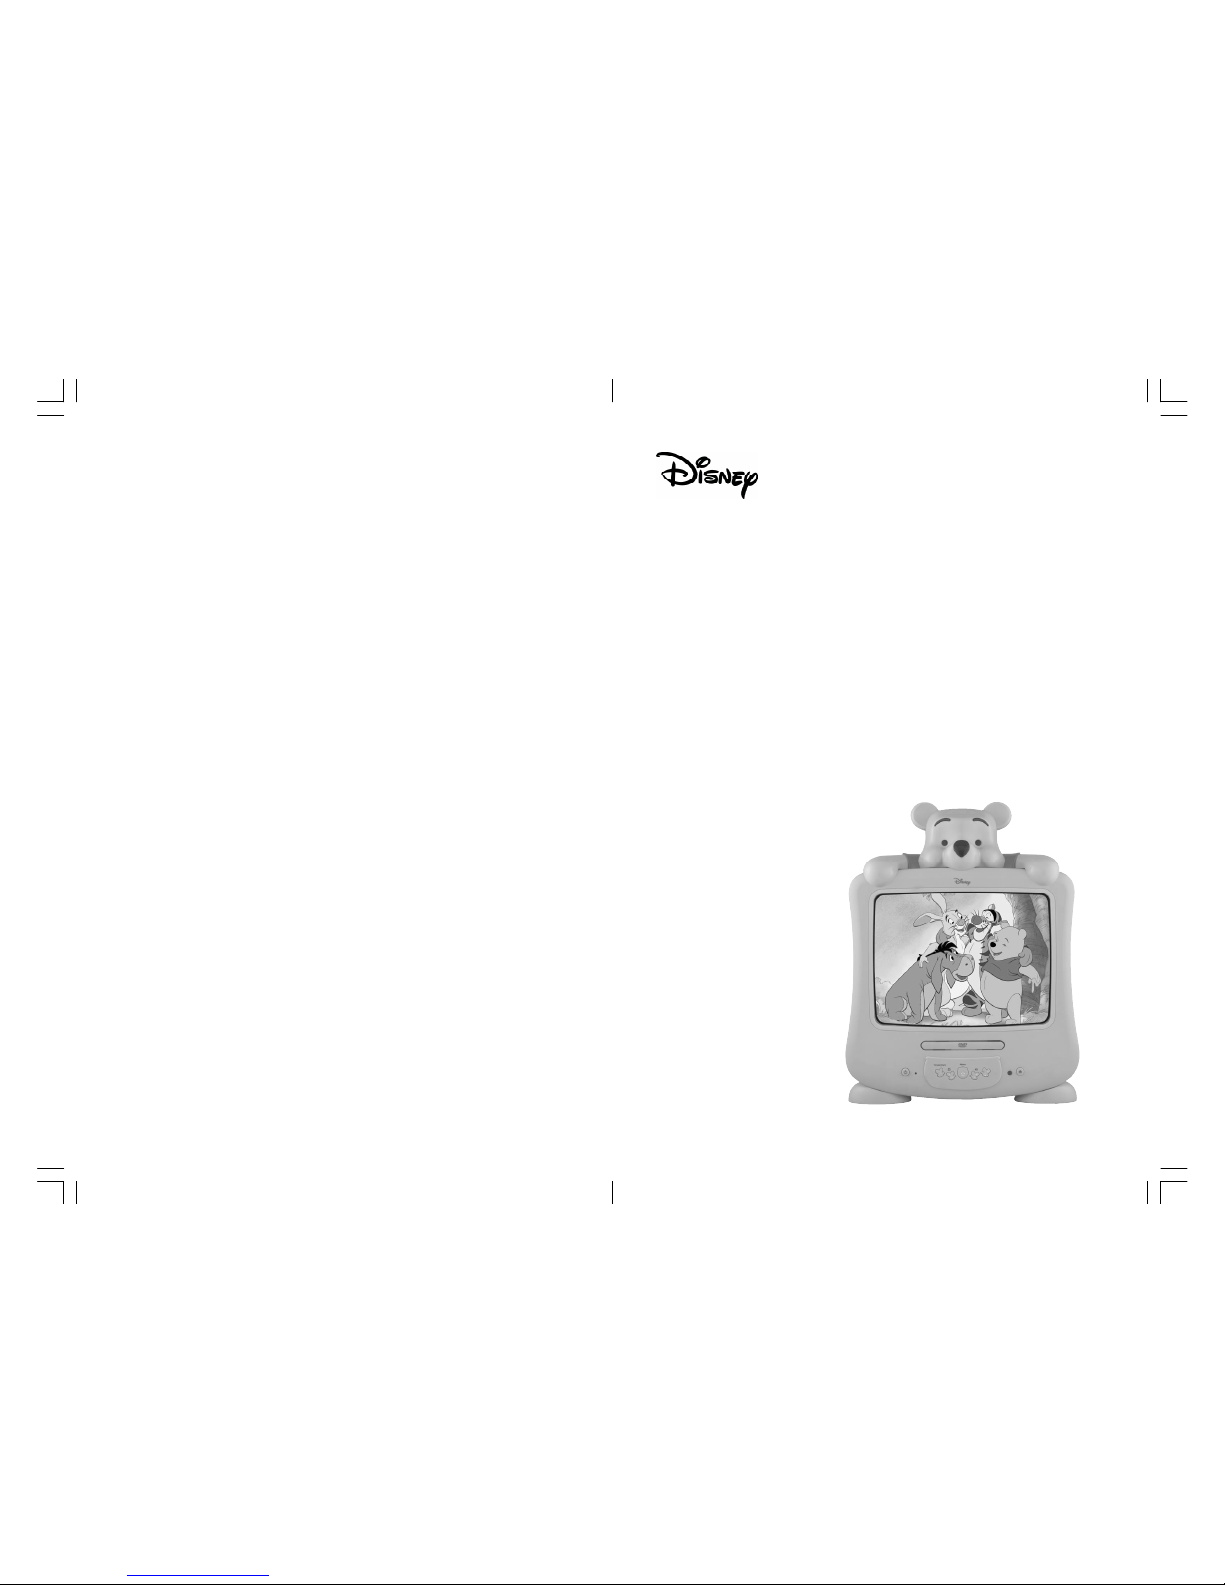
Disney W1320PTVD User Manual
User’s Guide
14" Colour TV/DVD
Manual del Usuario
TV/DVD 14" Color
Guide d’utilisation
TV/DVD 14 pouces Couleur
W1320PTVD
W1320PTVD MIT IC +MTK1389R12197-20.p65 2008/3/31, 下午 02:251
3
ENGLISH
INSTALLATION
LOCATE the receiver in the room where direct light does not strike the screen. Total darkness
or a reflection on the picture screen can cause eyestrain. Soft and indirect lighting is recommended for comfortable viewing.
ALLOW enough space between the receiver and the wall to permit proper ventilation.
AVOID excessive warm locations to prevent possible damage to the cabinet or component
failure.
CONNECTION
This TV receiver can be connected to AC: 220-240V~ 50Hz .
AUTOMATIC DEGAUSSING
All colour television receivers are sensitive to magnetic influences, usually caused by either
moving the receiver from one place to another or using certain electrical appliances near the
receiver. This residual magnetism as it is called, sometimes causes distortion which gives rise
to "blotchy" areas of colour in the picture. To avoid these effects the receiver incorporates an
automatic degaussing circuit which operates for a short while immediately each time the
receiver is switched on using the mains switch. This circuit removes any residual magnetism in
the metal parts of the picture tube and therefore ensures that each time the receiver is switched
lifelike. If the set is moved or faced in a different direction, the mains switch must be switched
off at least 10 minutes in order that the automatic degaussing circuit operates properly.
CAUTION: TO REDUCE THE RISK OF ELECTRIC SHOCK. DO NOT REMOVE COVER (OR
BACK).
NO USER SERVICEABLE PARTS INSIDE. REFER SERVICING TO QUALIFIED SERVICE
PERSONNEL.
The graphic symbols on the back cover of the set mean the followin g:
The lightning flash with arrowhead symbol within an equilateral triangle is
intended to alert the user to the presence of uninsulated "dangerous voltage"
within the product's enclosure that may be of sufficient magnitude to constitute
a risk of electric shock to persons.
The exclamation point within an equilateral triangle is intended to alert the
user to the presence of important operating and maintenance (servicing) instructions in the literature accompanying the appliance.
WARNING :
• To reduce the risk of fire or electric shock, do not expose this appliance to rain or
moisture.
• The apparatus shall not be exposed to dripping or splashing and that no objects filled
with liquids, such as vases, shall be placed on the apparatus.
• The mains plug is used as the disconnect device, the disconnect device shall remain
readily operable.
• In order to disconnect the apparatus from the mains completely, the mains plug should
be disconnected from the mains socket outlet completely.
CAUTION
Never tamper with any compon ents inside your set, or any other adjustment controls not
mentioned in this manual. All television receivers are high voltage instruments. Your PICTURE
TUBE is a h ighly vacuum. If broken, glass fragments will be violently expelled. Scratching,
Chipping or undue pressure is dangerous and should be avoided. When you clean the PICTURE
TUBE FACE or CABINET, the power cord should be removed from the wall socket then wipe the
receiver with a dry soft cloth. All "inside work" on your receiver must o nly be performed only
by the Professiona l Service Personnel.
DANGER
Manufactured under license from Dolby Laboratories “Dolby”,”Pro Logic”and the double-D
symbol are trademarks of Dolby Laboratories. Confiden tial unpublished works.© 1992-1997
Dolby Labora tories,lnc.All rights reserved.
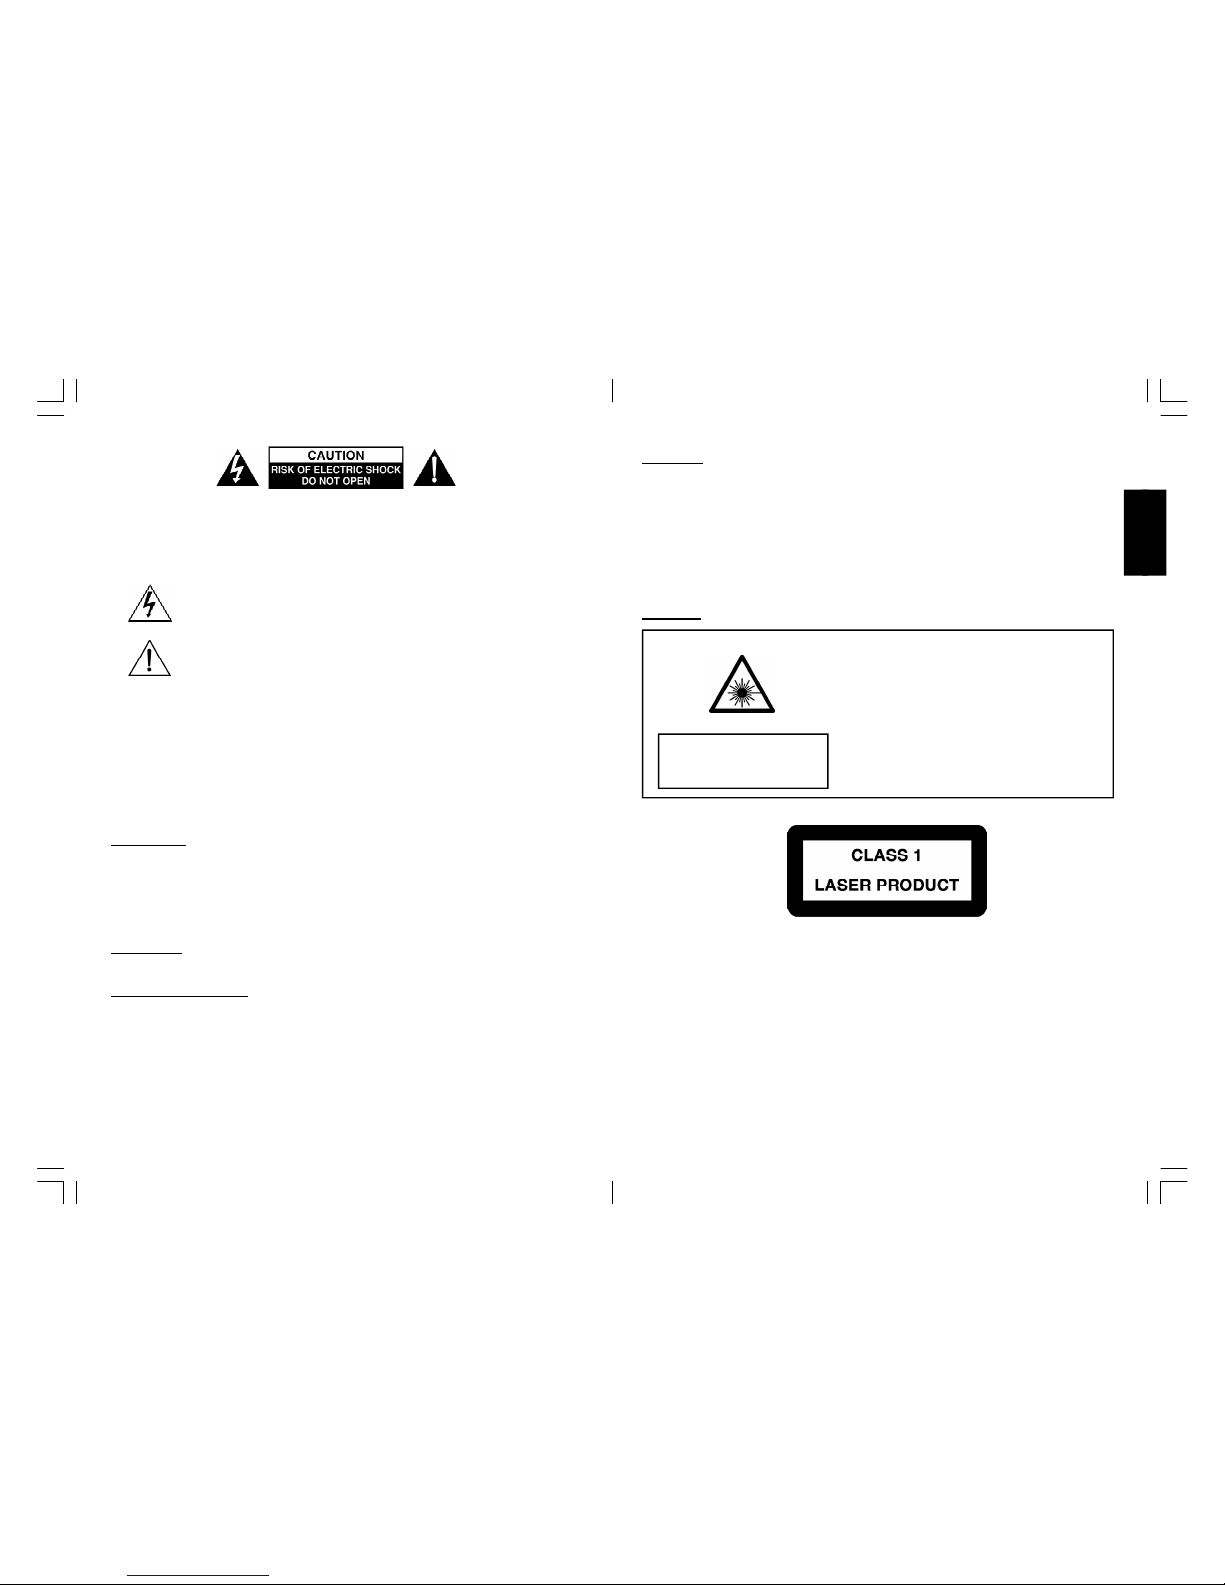
Invisible laser radiation when open
and interlock failed or defeated.
avoid direct exposure to laser beam.
LASER SAFETY
This unit employs an optical laser beam system in the CD
mechanism,designed with built in safeguards. Do not attempt
to disassemble, refer to qualified service personnel.
Exposure to this invisible laser light light beam may be harmful
to the human eye.
THIS IS A CLASS-1 LASER PRODUCT. USE OF CONTROLS,
OR ADJUSTMENTS OR PROCEDURES OTHER THAN THOSE
SPECIFIED HEREIN, MAY RESULT IN HAZARDO US LASER LIGHT BEAM EXPOSURE.
W1320PTVD MIT IC +MTK1389R12197-20.p65 2008/3/31, 下午 02:252-3
54
ENGLISH
This product incorporates copyright protection techn ology that is protected by U.S. patents a nd other intellectual property rights. Use of this copyright protection technology
must be authorized by Macrovision, and is intende d for home and other limited viewing
uses on ly unless otherwise authorized by Macrovision. Reverse engineering or disassembly is prohibited.”
Instructions on environment protection
Do not dispose of this product in the usual household garbage at the end of its life
cycle; hand it over at a collection point for the recycling of electrical and electronic
appliances. The symbol on the product, the instructions for use or the packing will
inform about the methods for disposal.
The materials are recyclable as mentioned in its marking. By recycling, material
recycling or oth er forms of re-utilization of old appliances, you are making an
important contribution to protect our environment.
Please inquire at the community administration for the authorized disposal location.
IMPORTANT SAFEGUARDS FOR PREFITTED MAINS PLUGS
FOR UK ONLY
For you conven ience a mains plug has been fitted to this appliance. For your safety please
observe the following information.
1. Should the fuse in the plug part remove the plug from the wall socket and replace the fuse
with a 3 Amp ASTA approved to BS 1362 fuse.
2. Never use the plug without the fuse cover fitted. Replacement fuse covers are available
from your dealer or most ele ctrical retail outlets.
3. If the mains plug is out o ff the cable remove the fuse and rewire the replacement plug in
accordance with instruction give in this manual.
4. CAUTION: Under no circumstances sh ould the discarded plug be inserted into the mains
socket. To prevent a sh ock hazard carefully dispose of the discarded plug.
Do not leave the plug lying around where children might play with it.
WARNING: To prevent fire or shock h azard do not expose this unit to rain or moisture.
CAUTION:
DANGEROUS VOLTAGES EXIST INSIDE THIS UNIT, DO NOT REMOVE COVER (OR
BACK).
NO USER SERVICEABLE PARTS INSIDE REFER SERVICING TO QUALIFIED SERVICE
PERSONNEL. DISCONNECT FROM MAINS SUPPLY WHEN NOT IN USE.
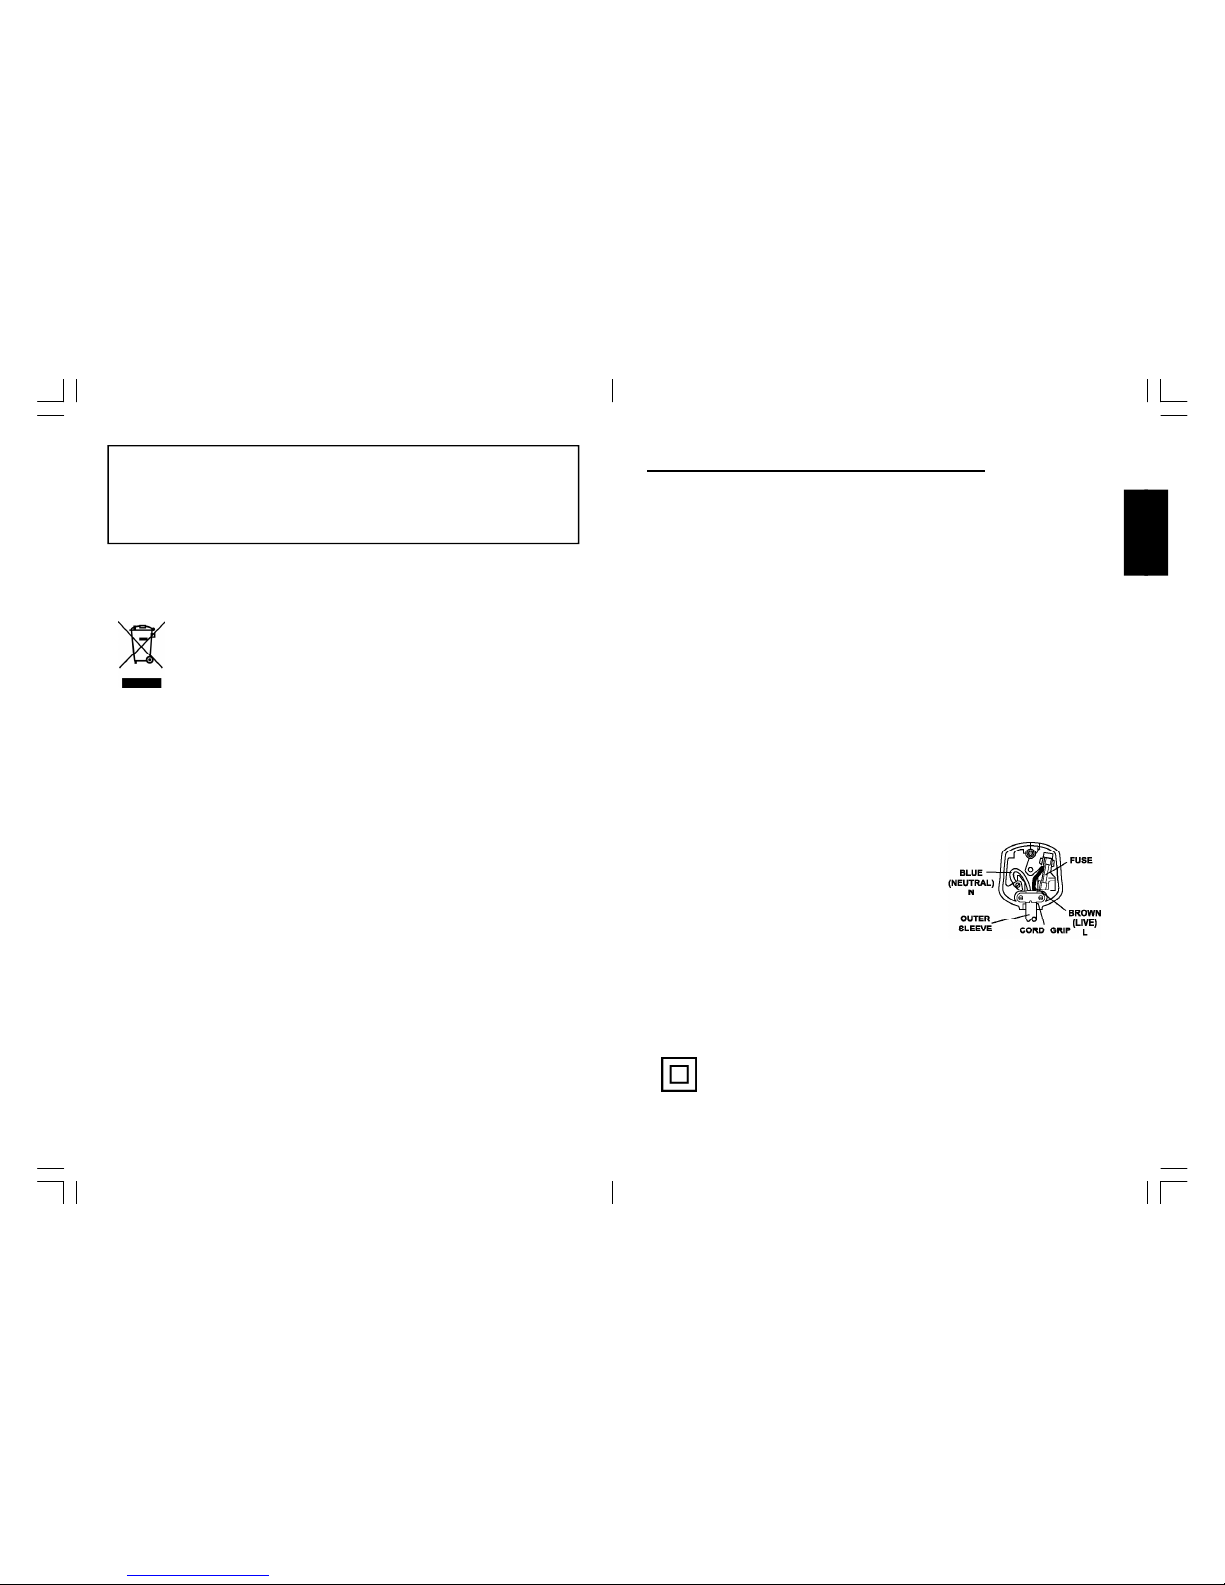
This wires in this mains lead are coloured in
accordance with the following wiring codes:
Blue................................... Neutral
Brown................................... Live
These wires must be
connected to the terminals in the plug as follows:
Blue Wire........................... N or Black
Brown Wire.......................... L or Red
Only a 3 Amp fuse should be fitted in the plug and a 5 Amp fuse at the distribution board for the
socket in use.
WARNING: UNDER NO CIRCUMSTANCES MUST THE LIVE OR NEUTRAL WIRES BE
CONNECTED TO THE EARTH TERMINAL IN A 3 - PIN MAINS PLUG.
This symbol means that this unit is double insulated. An earth connection is not
required.
W1320PTVD MIT IC +MTK1389R12197-20.p65 2008/3/31, 下午 02:254-5
76
ENGLISH
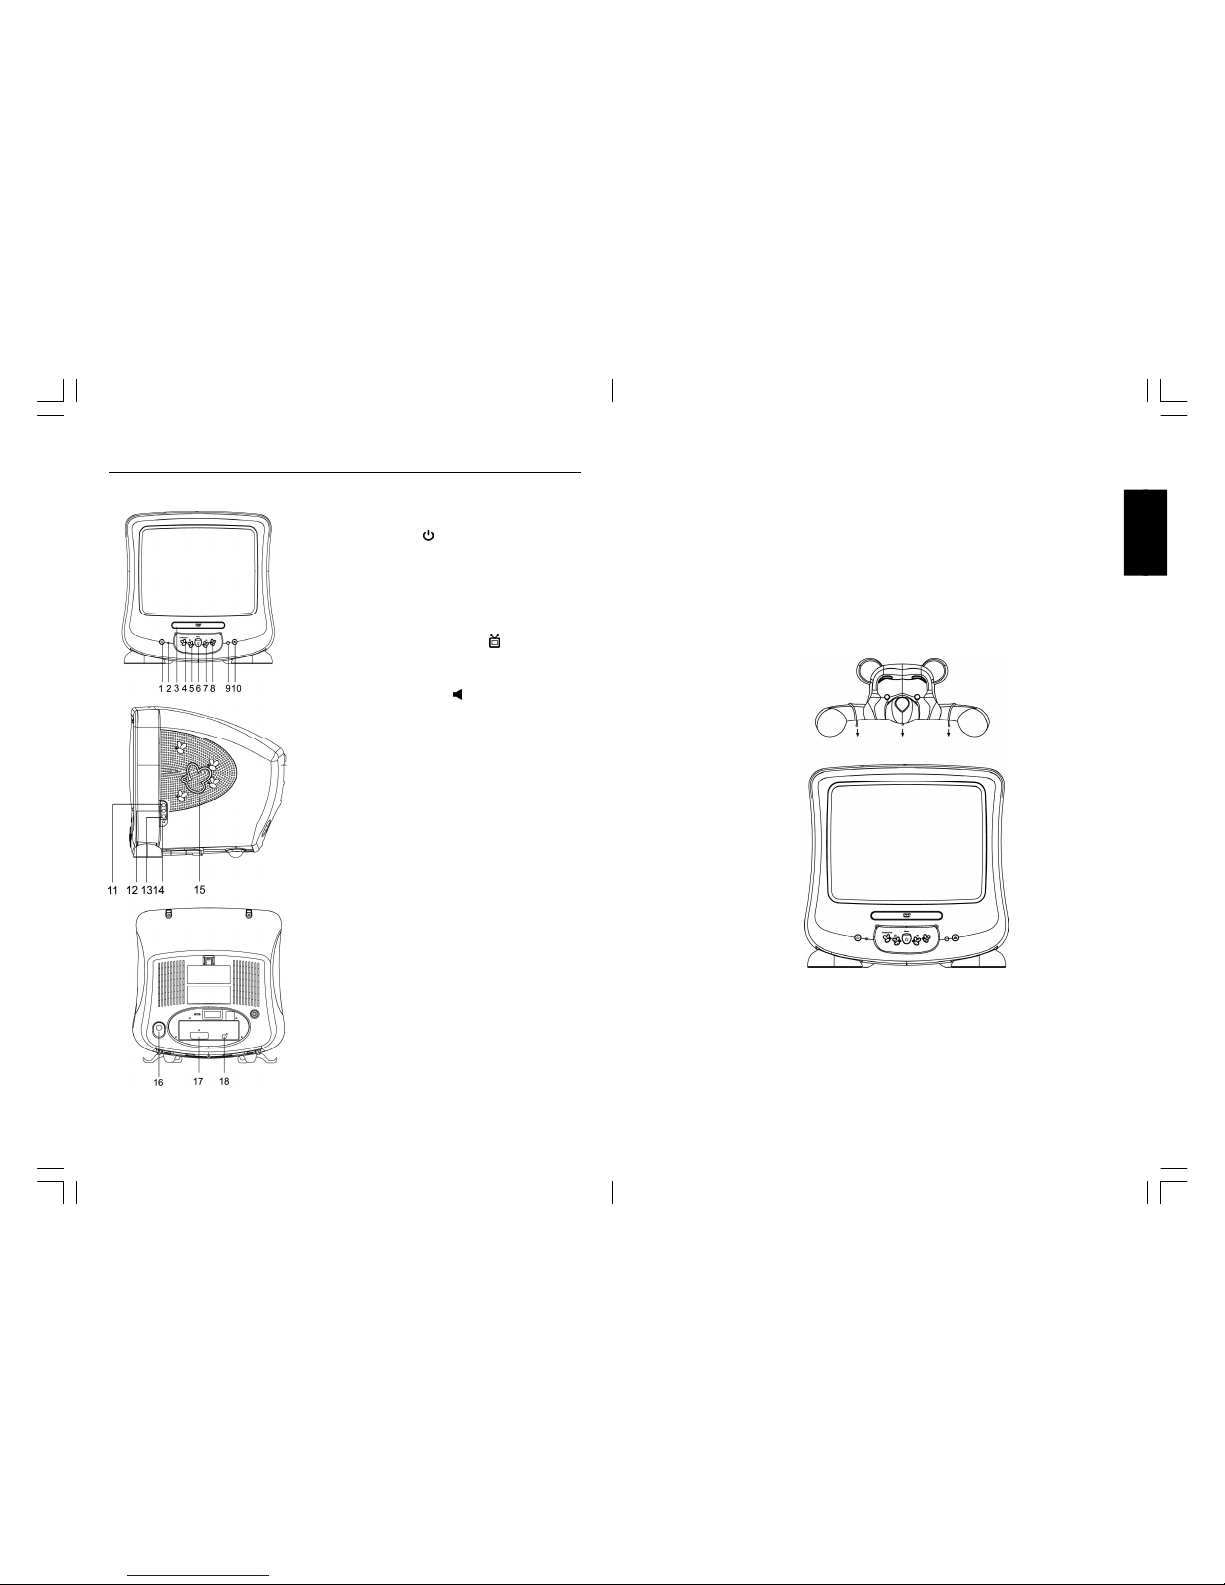
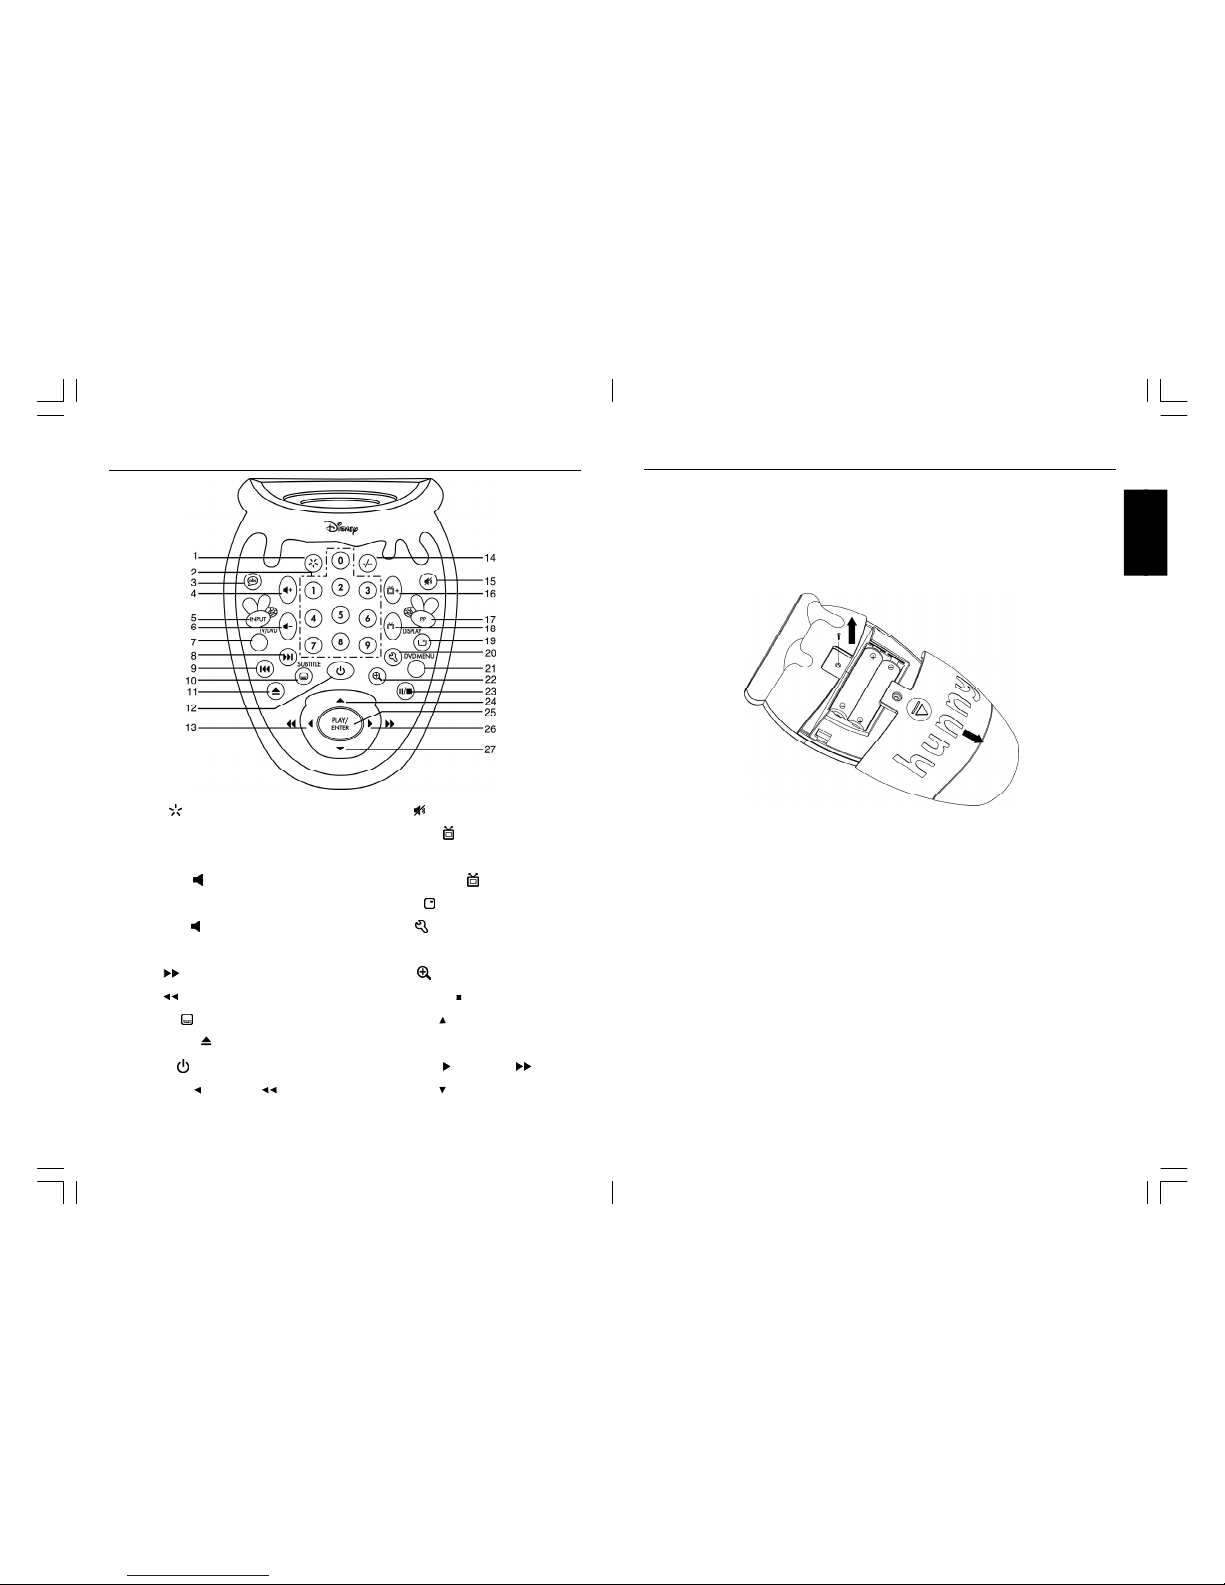
LOCATION OF CONTROLS
1. Power Button( )
2. Power indicator
3. DVD Tray
4. TV/AV/DVD Button
5. Channel Up/Down Button( +/-)
6. Menu Button
7. Volume +/- Button ( +/ - )
8. Play / Stop Button
9. Remote sensor
10. Open / Close Button
11. Side Audio (R) Input (AV 2)
12. Side Audio (L) Input (AV 2)
13. Side Video Input (AV 2)
14. Earphone Jack
15. Speaker
16. 75 ohm Antenna Socket
17. Scart connector (AV 1)
18. Audio digital Out Socket (For DVD only)
Insert the Pooh topper into the holes on the top of the unit
W1320PTVD MIT IC +MTK1389R12197-20.p65 2008/3/31, 下午 02:256-7
98
ENGLISH
REMOTE CONTROLREMOTE CONTROL
15. Mute ( ) Button
16. Channel up( + ) Button
17. PP Button
18. Channel down( -)Button
19. Display ( ) Button
20. Setup ( ) Button
21. DVD MENU Button
22. Zoom ( ) Button
23. Pause/Stop(
II/
) Button
24. Navigation( ) Button
25. Play/Enter Button
26. Navigation( )/Search( ) Button
27. Navigation( ) Button
1. Menu ( ) Button
2. Numeric (0~9) Buttons
3. Audio Button
4. Volume + ( +) Button
5. Input Button
6. Volume - ( -) Button
7. TV/DVD Mode Button
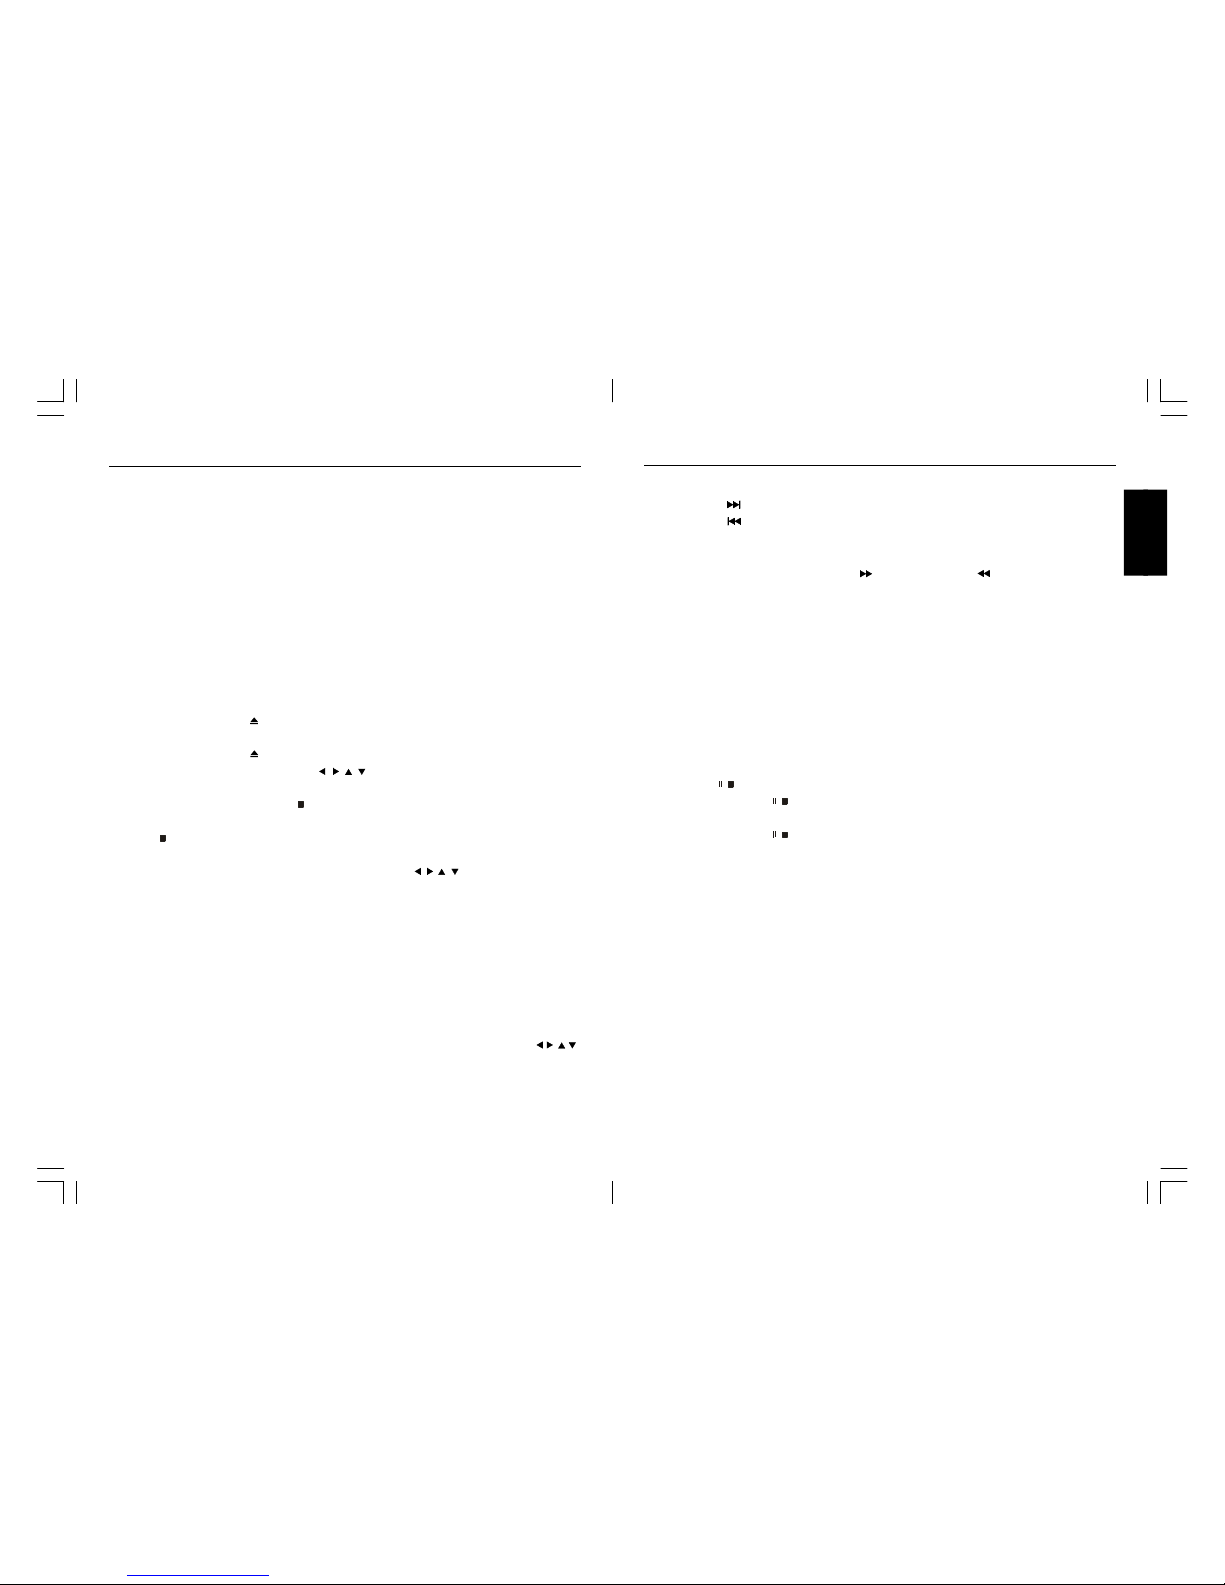
8. Skip( I ) Button
9. Skip( I ) Button
10. Subtitle ( ) Button
11. Open/Close( ) Button
12. Power ( ) Button
13. Navigation( )/Search( ) Button
14. Two or Three Digital Program Button
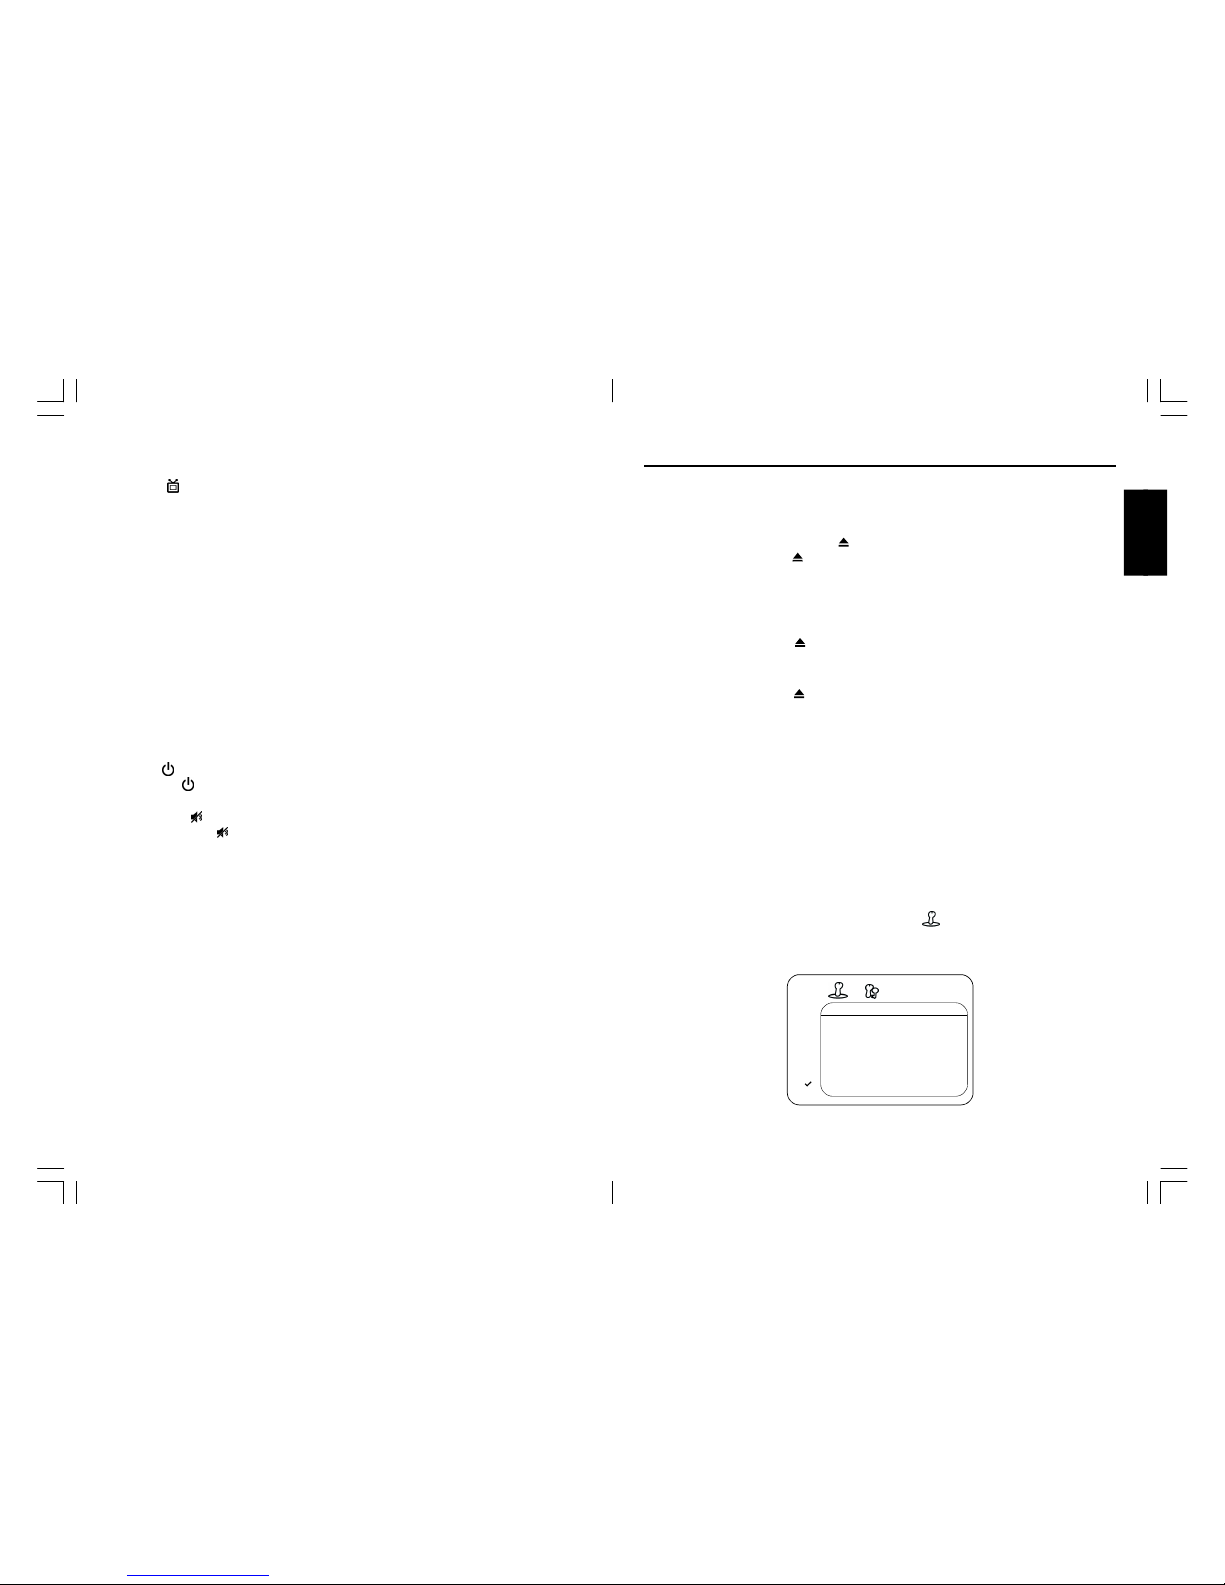
Inserting Remote Control Ba tteries
On the back of the remote control, Loosen the screw to open the battery compartment cover.
Insert two AAA batteries, ensuring that you follow the polarity diagram inside the battery
compartment.
Screw the battery compartment cover on the battery compartment.
Battery Disposa l
Please ensure batteries are disposed of safely. Never dispose of batteries in the fire or with
household waste. Check with your local authority for disposal regulations.
The batteries (battery pack or batteries installed) shall not be exposed to excessive heat such
as sunshine, fire or the like.
CAUTION
• Do not attempt to recharge, short-circuit, disassemble, heat or throw the batteries into the
fire.
• Placing with wrong or mixed polarities batteries will result in damage to the batteries and
/or may result in a malfunction of the unit.
• Do not mix old and new batteries.
• Dispose of batte ries properly in accordance with local law.
• Do not mix alkaline, standard (carbon-zinc),or rechargeable (nickel-cadmium) batteries.
W1320PTVD MIT IC +MTK1389R12197-20.p65 2008/3/31, 下午 02:258-9
1110
ENGLISH
OPERATING THE TELEVISION
Connect your TV aerial to the aerial input socket located on the back of the TV.
Push the Main Power Switch, Powe r Indicator will be illuminated. After few seconds the TV
screen will light up and will show interference on the screen. The TV will require tuning into the
available TV stations in your a rea.
Pre -setting the TV stations into the Memory
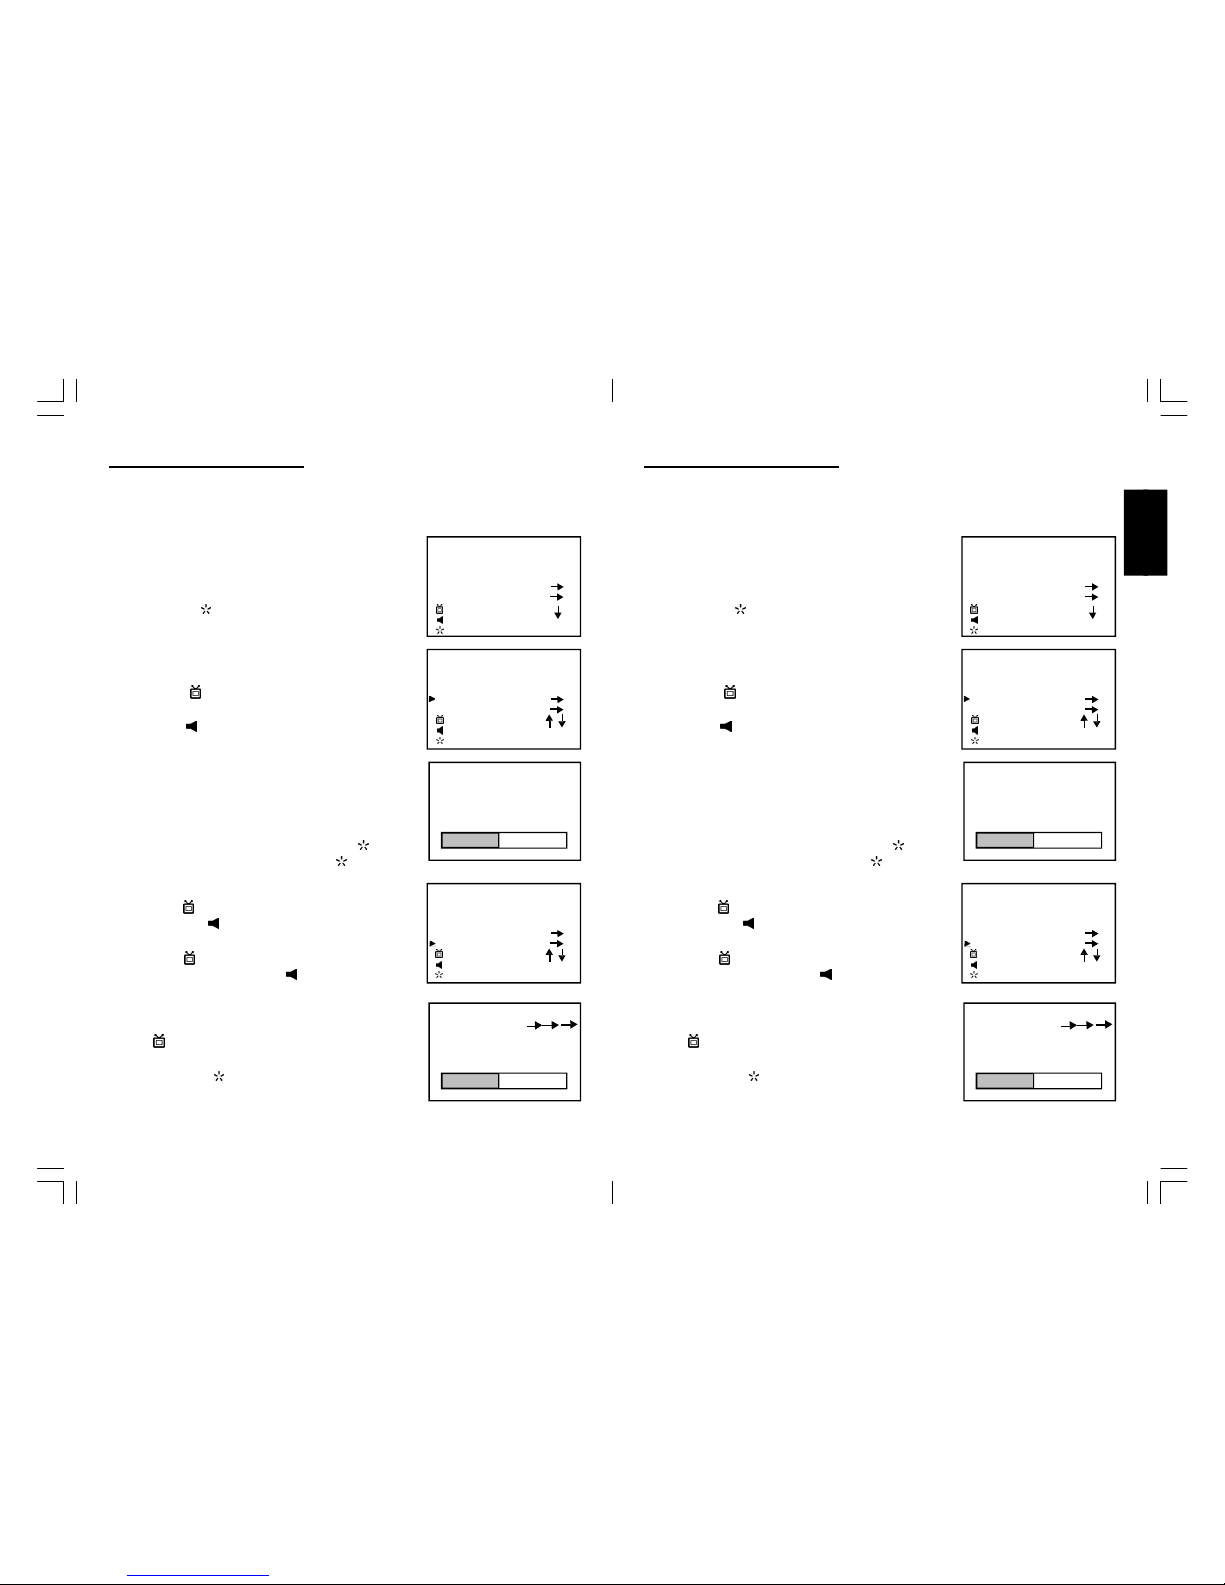
(Note: Preset tuning can only be carried out in TV Mode)
Press MENU “ ” three times on the remote handset ,the
TV screen will show TUNE mode as FIG.1
AUTO SEARCH
1. Press the “ -” to select th e AUTO SEARCH mode as
shown in FIG. 2
2. Press the “ +” to start the automatic scanning process
starting from VHF to UHF
and the TV stations will automatic store into the memory as
shown in FIG. 3
• Wh en scanning is completed, the set will tune to lowest
programme and show lowest programme number o n the
scre en.
• To stop auto search function to press MENU “ ” butto n.
• To exit the TUNE mode, press the MENU “ ” button.
MANUAL SEARCH
1. Press the “ +/-” button to select the PROGRAMME.
then press the “ +/-” button to select the desired
Programme number .
2. Press the “ +/-” button to select the MANUAL
SEARCH mode and press the “ +/-” button
to start th e search up the band. The TV screen will show
the tuning and when the first station received is located,
the tuning will stop and stored automatically . Then press
the “ +/-” button to recommence seek search to
the next TV station. as shown in FIG.4,FIG.5.
3. Press the MENU “ ” button to exit the manual.
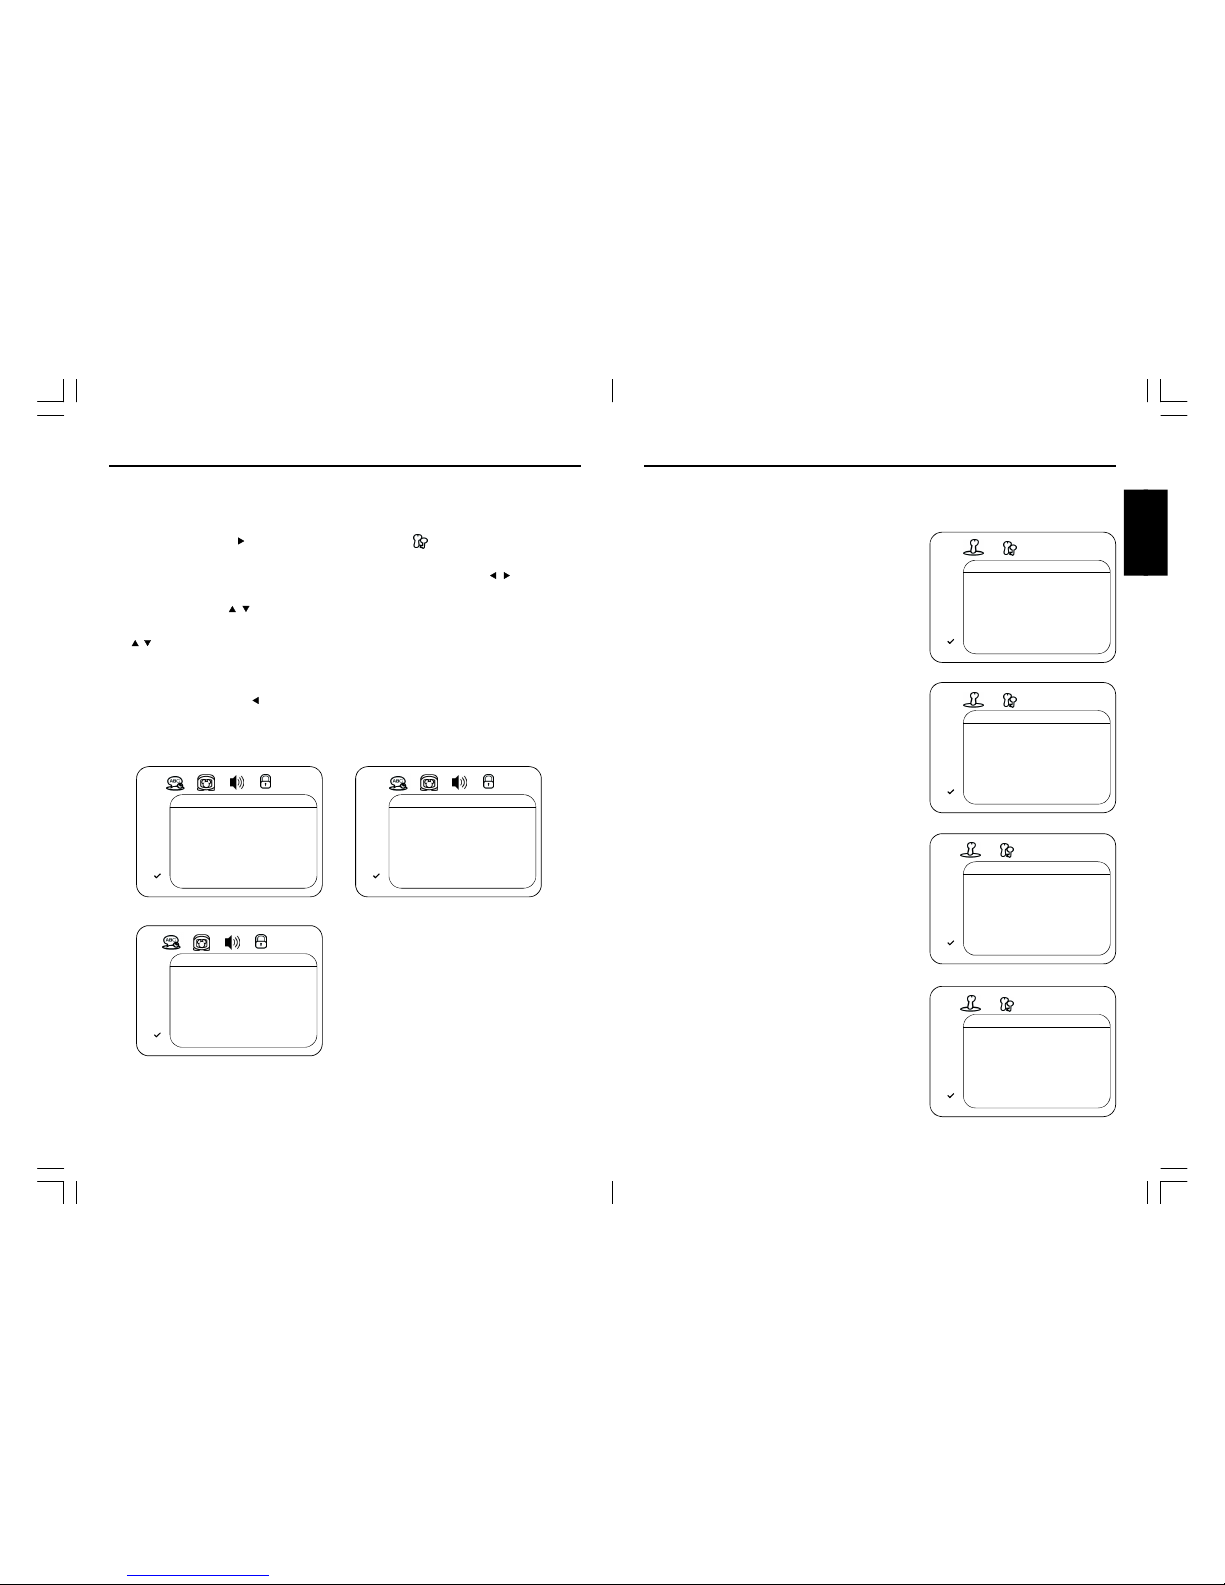
FIG .1
TUNE
C SYSTEM PAL
S SYSTEM BG
PROGRAM 1
AUTO SEARCH
MANUAL SEARCH
TUNE
C SYSTEM PAL
S SYSTEM BG
PROGRAM 1
AUTO SEARCH
MANUAL SEARCH
TUNE
C SYSTEM PAL
S SYSTEM BG
PROGRAM 1
AUTO SEARCH
MANUAL SEARCH
FIG .2
FIG .3
AUTO SEARCH
PROGRAM 1
BAND VHF L
FIG .4
MANUAL SEARCH
PROGRAM 1
BAND VHF L
FIG .5
ONLY FOR PAL- I ONLY FOR PAL- BG
SE LEC T
AD J U ST
EX IT
SE LEC T
AD J U ST
EX IT
SE LEC T
AD J U ST
EX IT
OPERATING THE TELEVISION
Connect your TV aerial to the aerial input socket located on the back of the TV.
Push the Main Power Switch, Powe r Indicator will be illuminated. After few seconds the TV
screen will light up and will show interference on the screen. The TV will require tuning into the
available TV stations in your a rea.
Pre -setting the TV stations into the Memory
(Note: Preset tuning can only be carried out in TV Mode)
Press MENU “ ” three times on the remote handset ,the
TV screen will show TUNE mode as FIG.1
AUTO SEARCH
1. Press the “ -” to select th e AUTO SEARCH mode as
shown in FIG. 2
2. Press the “ +” to start the automatic scanning process
starting from VHF to UHF
and the TV stations will automatic store into the memory as
shown in FIG. 3
• Wh en scanning is completed, the set will tune to lowest
programme and show lowest programme number o n the
scre en.
• To stop auto search function to press MENU “ ” butto n.
• To exit the TUNE mode, press the MENU “ ” button.
MANUAL SEARCH
1. Press the “ +/-” button to select the PROGRAMME.
then press the “ +/-” button to select the desired
Programme number .
2. Press the “ +/-” button to select the MANUAL
SEARCH mode and press the “ +/-” button
to start th e search up the band. The TV screen will show
the tuning and when the first station received is located,
the tuning will stop and stored automatically . Then press
the “ +/-” button to recommence seek search to
the next TV station. as shown in FIG.4,FIG.5.
3. Press the MENU “ ” button to exit the manual.
FIG .1
TUNE
C SYSTEM PAL
S SYSTEM I
PROGRAM 1
AUTO SEARCH
MANUAL SEARCH
TUNE
C SYSTEM PAL
S SYSTEM I
PROGRAM 1
AUTO SEARCH
MANUAL SEARCH
TUNE
C SYSTEM PAL
S SYSTEM I
PROGRAM 1
AUTO SEARCH
MANUAL SEARCH
FIG .2
FIG .3
AUTO SEARCH
PROGRAM 1
BAND VHF L
FIG .4
MANUAL SEARCH
PROGRAM 1
BAND VHF L
FIG .5
SE LEC T
AD J U ST
EX IT
SE LEC T
AD J U ST
EX IT
SE LEC T
AD J U ST
EX IT
W1320PTVD MIT IC +MTK1389R12197-20.p65 2008/3/31, 下午 02:2510-11
1312
ENGLISH
2) Press “ +/-” button to adjust sound level.
TV/AV/DVD Mode Button
• If video/audio input socket are in use, press TV/AV/DVD Mode button in the TV set, "AV1"
OR "AV2" will display on the top right corn er of the screen.
• Press TV/AV/DVD button to turn on DVD in the TV set. When DVD mo de is selected please
wait, the screen will be dark as it will take a few seconds to show the “DVD “at the top right
corner of the screen.
VOLUME
| | | | 06
CHANNEL SELECT AND VOLUME CONTROL
1) Press “ +/-” buttons to select TV station.
0 255
Press “ -”, the pro gramme no. will
appe ar on the top right corner and
change from a higher to lower number.
Press “ +”, the programme no. will change
from a lower no. to higher number.
TV AV 1 AV 2 DVD
PICTURE
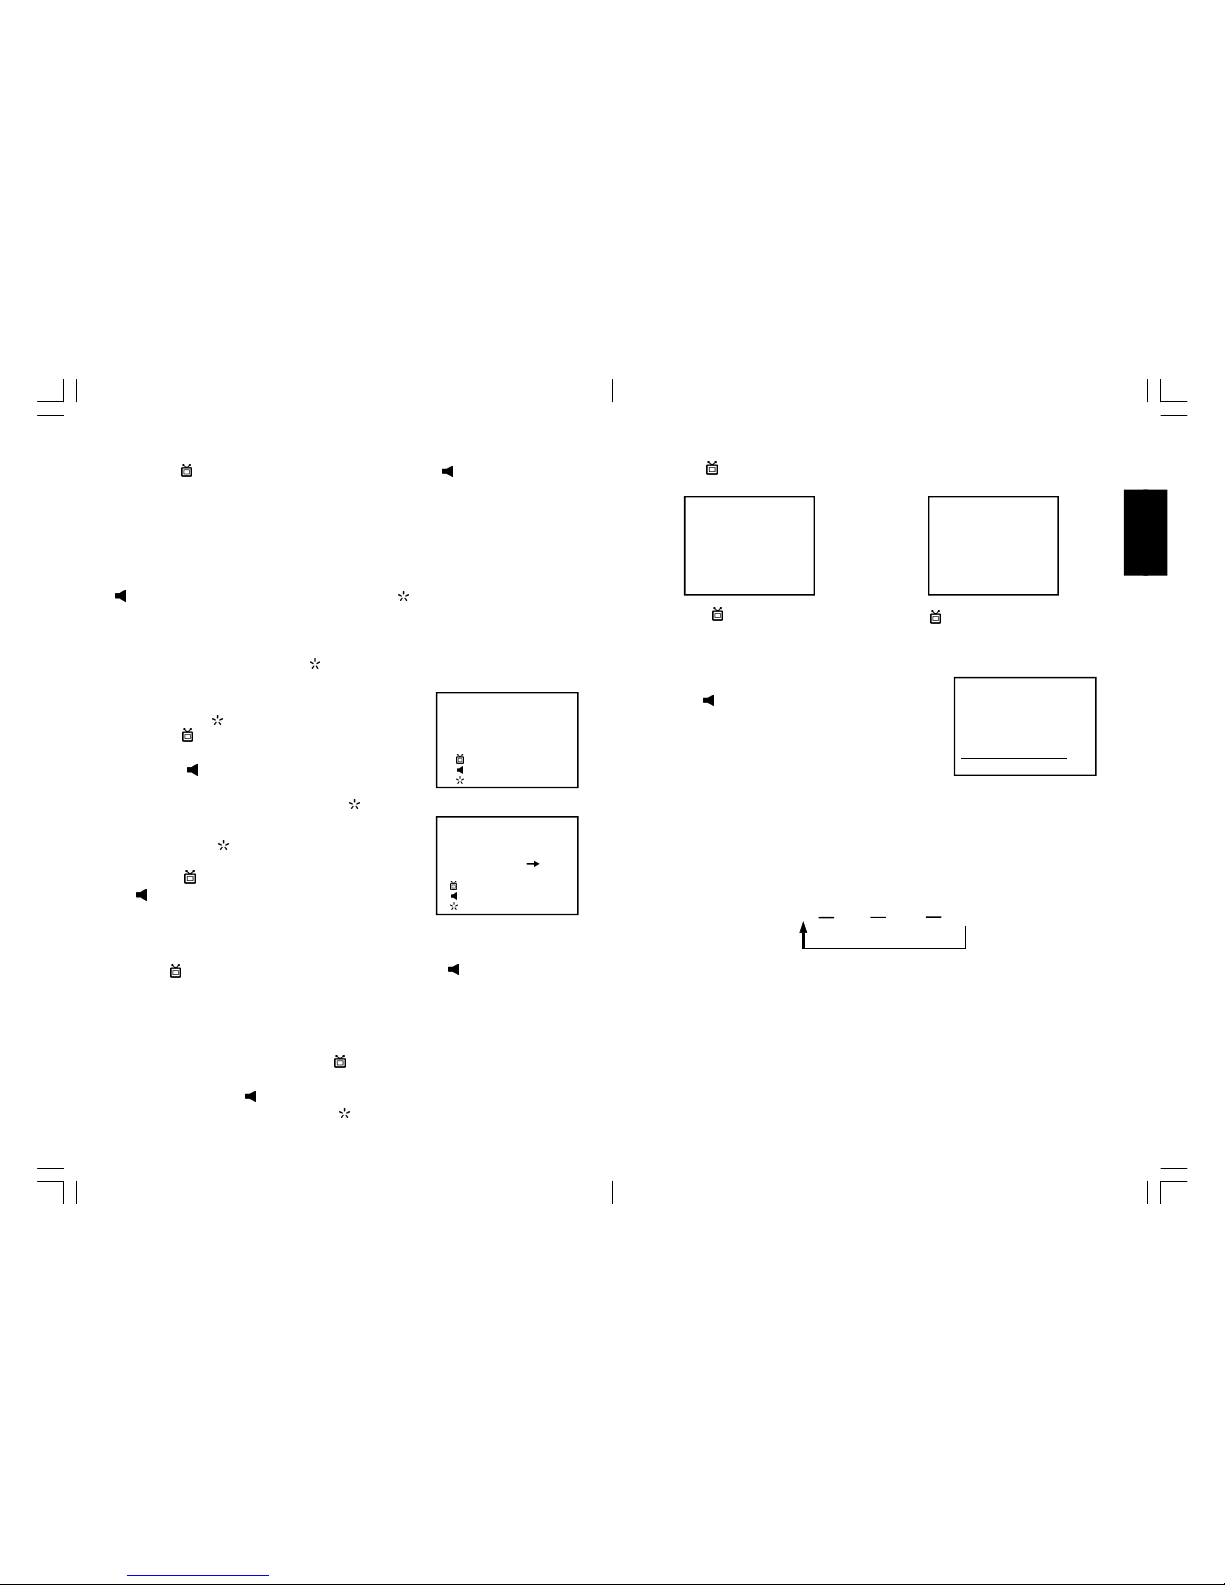
1. Press the MENU “ ”,TV screen will show PICTURE mode.
2. Press the “ +/-” to select the CONTRAST /BRIGHTNESS
/ COLOUR / SHARPNESS as show in FIG. 6.
3. Press the “ +/-” to the desired le vel, The level can be
adjust from 0 ~ 99.
• To exit the PICTURE Mode, press the MENU “ ” three times.
SET UP LANGUAGE
1. Press the MENU “ ” button twice to select the SETUP,ass
shown in figure 7 .
2. Press the “ +/-” to select the LANGUAGE,then press the
“ +/-” to select the desired language ENGLISH,
FRANCAISE, ESPANOL, PORTUGUES,NEDERLANDS,
ITALIANO, DEUTSCH.
C. SYSTEM
1. Press th e “ +/-” button to select the C SYSTEM then press “ +/-” button to change the
desired colour system PAL,NTSC,AUTO.
S SYSTEM
1. If the unit is the single sound system,it is fixed and cannot be adjusted.
Notes:
1. If ghost / noisy stations have been stored when using the AUTO SEARCH method, these can
be removed from the channel list by entering the SKIP Mode shown in the TUNE menu. Press the
“ + /-” and change the OFF state to ON. Press the MENU “ ” button to return to normal viewing.
The unwan ted station will be removed from the channel list when you change TV channels.
The SKIPPED station can be restored by re entering the TUNE menu and changing the SKIP ON
status to OFF.
2. To exit the TUNE mode, press MENU “ ” button.
BLUE BACK
Press the “ +/-” button to select the BLUE BACK and press the “ +/-” button
to adjust the blue Back-ground o n or off.
EXCHANGE
After storing TV stations by AUTO SEARCH or MANUAL SEARCH, the position of each TV
programme can be changed by the following method:
1. In the existing watching station press the “ -” button to select the EXCHANGE then
press the numaric buttons to Key in the desired programme no.which you want to move this
station to, then press the “ +”to confirm.
2. To exit the SETUP MODE, press the MENU “ ” button 2 times.
FIG .6
PICTURE
CONTRAST 50
BRIGHTNESS 50
COLOUR 50
SHARPNESS 50
FIG .7
SETUP
LANGUAGE ENGLISH
BLUE BACK ON
EXCHANGE 1 - - -
SE LEC T
AD J U ST
EX IT
SE LEC T
AD J U ST
EX IT
W1320PTVD MIT IC +MTK1389R12197-20.p65 2008/3/31, 下午 02:2512-13
1514
ENGLISH
OPERATING YOUR DVD
BASIC OPERATION
1. Press “TV/AV/DVD” button on the unit or press the TV/DVD direct key on the remote handset
to turn on DVD.
2. Press “OPEN / CLOSE (EJECT)” ( ) button to load disc in disc tray.
3. Press “OPEN / CLOSE” ( ) button to close the tray.
• Hold the d isc without touching either of its surfaces, position it with the printed title side
facing u p.
Play Disc s
1. Press the OPEN/CLOSE ( ) button on the front panel and load the Disc on the tray.
The label side should be facing upwards. For a Double-sided DVD Disc, put the disc with label
A/1 up.
2. Press the OPEN/CLOSE ( ) button again to close the tray and the disc will be loaded.
3. The Disc will be played automatically.
• If it is a DVD disc, it will show the Menu/Title Page on the screen.
• If it is a CD, it will play from the first.
4. Press the STOP button, if you want to stop the Disc playback You can resume playback by
pressing the PLAY button and it will start at the location whe re you have pressed stopped
(Resume Play).
5. Press the STOP Button twice to stop playback completely and return to the start.
TO ACCESS THE QUICK START MENUS:
To access the Quick Start menus, which will allow you to change the three most popular settings,
perform the following:
1. While in the DVD is in Stop mode, press the SETUP button to enter the Setup Menu.
2. Press the PLAY/ENTER button to select Quick setup( ).
3. Continue with steps 4-5 in the next section.
QUICK START MENU
< >
< >
QUICK SETUP
PLAYER MENU ENGLISH
TV DISPLAY 4:3 PAN&SCAN
TV T YPE PAL
DOLBY DIGITAL ON
4. REMOTE CONTROL OPERATION
CHANNEL Up and Down buttons
Press the “ +/-” button to select a higher or lower channel number.
0~9 Numberic Button
To select a TV station using A buttons 0~9.
For example:
Press number “9” button to select PROGRAMME “9”.
l Two digit Programme Number
For example:selecting PROGRAMME “12”
1. Press the -/-- button, on screen will show --.
2. Press the number “1” button,on screen will show “1-”.
3. Press the number “2” button,channel “12” will show.
l Three digit Programme number
For example:selecting PROGRAMME “123”
1. Press the -/-- button twice, on screen will show ---.
2. Press the number “1” button,on screen will show “1--”.
3. Press the number “2” button,on screen will show “12-”.
4. Press the number “3” button,on screen will show “123”.
POWER ( ) Button
l Press the button to switch the picture and sound ON/OFF the picture and sound.
MUTE Button ( )
l Press the Mute ( ) button to switch OFF the sound,press once again to switch ON the
sound.
INPUT Button
l Press the INPUT mode button to select VIDEO mode.Press again to go back to TV mode.
TV/DVD Button
l Press the TV/DVD mode button to select DVD mode. Press again to go back to TV mode.
(There will be a few seconds delay before entering the DVD mode).
AUTO POWER-OFF FUNCTION
l When the TV is in TV or AV(video) mode and it’s without a signal for about 6 minutes, it will
automa tically power off(standby mode) to save the energy.
W1320PTVD MIT IC +MTK1389R12197-20.p65 2008/3/31, 下午 02:2514-15
1716
ENGLISH
QUICK START MENU:
Access the Quick Start menu as described on page 16, then select/change the setup option as
described on page 17.
PLAYER MENU OPTION:
Select the PLAYER MENU to choose the desired
language(English, French , Spanish, German, Italian,
Portuguese, Nederland).
TV ASPECT OPTION:
Select 4:3 PS (Panscan), 4:3 Letterbox or 16:9 wide.
See page 19 for details.
TV TYPE OPTION:
Select the TV TYPE to choose the desired
PAL or NTSC system.
DOLBY DIGITAL OPTION:
When using the coaxial digital output, select ON to
turn the Dolby Digital ON or OFF to turn Dolby
Digital off.
OPERATING YOUR DVD
< >
< >
QUICK SETUP
PLAYE R MENU ENGLISH
TV DISPLAY 4:3 PAN&SCAN
TV T YPE PAL
DOLBY DIGITAL ON
< >
< >
QUICK SETUP
PLAYER MENU ENGLISH
TV DIS PLAY 4:3 PAN&S CAN
TV T YPE PAL
DOLBY DIGITAL ON
< >
< >
QUICK SETUP
PLAYER MENU ENGLISH
TV DISPLAY 4:3 PAN&SCAN
TV TYP E PAL
DOLBY DIGITAL ON
< >
< >
QUICK SETUP
PLAYER MENU ENGLISH
TV DISPLAY 4:3 PAN&SCAN
TV T YPE PAL
DOLBY DIGI TAL ON
OPERATING YOUR DVD
< >
< >
LANGUAGE
AUDIO LANG ENGLISH
SUBTITLE ENGLISH
DISC MENU ENGLISH
PLAYER MENU ENGLISH
MAIN MENU
< >
< >
DISPLAY
TV DISPLAY 4:3 PAN&SCAN
< >
< >
AUDIO
DRC ON
DOLBY DIGITAL ON
DOWN SAMPLING ON
TO ACCESS THE MAIN MENUS:
To access the four main menus, perform the following:
1. While in the DVD Stop mode, press the SETUP button to enter the Setup Menu.
2. Press the Navigation ( ) button to select the Main menus ( ), then press the PLAY/ENTER
button.
3. Select one of the Setup icons at the top of the screen using the Navigation ( , ) buttons, then
press the PLAY/ENTER button to select it.
4. Use the Navigation ( , ) buttons to select one of the setup options, then press the PLAY/
ENTER button to select it or change the setting. If there are more options, use the Navigation
( , ) buttons to select the desired option and press PLAY/ENTER button to confirm.
5. Press the SETUP button to exit setup.
TO RETURN TO THE PREVIOUS MENU,
simply press the Navigation ( ) button.
W1320PTVD MIT IC +MTK1389R12197-20.p65 2008/3/31, 下午 02:2516-17

1918
ENGLISH
LANGUAGE SETUP MENU:
Select the Language icon using the Navigation ( , ) buttons, press the PLAY/ENTER button and
then select/change the setup option as described on page 18.
AUDIO LANG
Select the language the DVD will be played back in.
The DVD must be recorded in the selected language,
otherwise the default language of the DVD will be
played.
SUBTITLE
Select the language the Subtitle will be in. The DVD
must be recorded in the selected language, otherwise
the default language of the DVD will be shown. Select
Off to turn off the subtitle.
DISC MENU
Select the language the DISC MENU will be in. The
DVD’s DISC MENU must be made in the selected
language, otherwise the default language of the
DVD will b e shown.
PLAYER MENU
Select the language for the PLAYER MENU will be in
(English, French , Spanish, German, Italian,
Portuguese, Nederland).
AUDIO SETUP MENU:
Select the Audio icon using the Navigation ( , ) buttons, then select/change the setup option
as described on page 19.
< >
< >
AUDIO
DRC ON
DOLBY DIGITAL ON
DOWN SAMPLING ON
DRC
Select ON to turn the DRC (Dynamic Range
Compression) on or OFF to turn DRC off. Dynamic
Range Compression will compress the dynamic range
of the DVD’s audio track.
DOLBY DIGITAL AND DOWN SAMPLING
When using the coaxial digital outp ut, select ON to
turn the Dolby Digital on or OFF to turn Dolby Digital
off.
When using the coaxial digital outpu t, select ON to
turn the Down Sampling on or OFF to turn Down
Sampling off.
When downsampling is ON, the digital output will be
sampling at 48K even if the original audio is encoding
in 96K for DVD.
< >
< >
AUDIO
DRC ON
DOLBY DIGITAL ON
DOWN SAMPLING ON
TV ASPECT
4:3PS: Select when the unit is connected to a con-
ventional TV. Video material formatted in the Pan Scan
style is played b ack in that style (the left and right
edges are cut off).
4:3 LETTERBOX: Select when the unit is connected
to a normal TV. Wide-screen images are shown on
the screen with a black band at the top or bottom.
16:9 WIDE: Select when the unit is connected to a
widescreen TV.
OPERATING YOUR DVD
< >
< >
DISPLAY
TV DIS PLAY 4:3 PAN&SCAN
DISPLAY SETUP MENU:
Select the Display icon using the Navigation ( , ) buttons, then select/change the setup option
as described on page 19.
OPERATING YOUR DVD
< >
< >
LANGUAGE
AUDIO LANG ENGLISH
SUBTITLE ENGLISH
DISC MENU ENGLISH
PLAYER MENU ENGLISH
< >
< >
LANGUAGE
AUDIO LANG ENGLISH
SUBTITLE ENGLISH
DISC MENU ENGLISH
PLAYER MENU ENGLISH
< >
< >
LANGUAGE
AUDIO LANG ENGLISH
SUBTITLE ENGLISH
DISC MENU ENGLISH
PLAYER MENU ENGLISH
< >
< >
LANGUAGE
AUDIO LANG ENGLISH
SUBTITLE ENGLISH
DISC MENU ENGLISH
PLAYE R MENU ENGLISH
W1320PTVD MIT IC +MTK1389R12197-20.p65 2008/3/31, 下午 02:2518-19
2120
ENGLISH
SKIP
Press the SKIP ( ) button to advance the DVD to the beginning of the next chapter.
Press the SKIP ( ) button to move the DVD to the beginning of the previous chapters.
SEARCH
During playback, press either the SEARCH ( ) button or SEARCH ( ) button to move the DVD
forward or backward at double (x2) speed to locate a specific section. Repeatedly press these
buttons and the speed will increase to x4, x8, x16 and resume normal playback.
The DVD will move forward or backward at high speed until the PLAY/ENTER button is pressed
again; normal playback will resume at that point.
DISPLAY
While playing a DVD, press the DISPLAY button once to view the title, elapsed title time and
remaining title time. Press a second time to view the chapter, elapsed chapter time and remaining
chapter time. Press a third time to view the layer setting (“L0” for layer 0, “L1” for layer 1). Press
a fourth time to turn the display off.
PAUSE/STOP( / )
Press the PAUSE/STOP ( / ) button once to pause the picture. Press the PLAY/ENTER button
again to resume normal playback.
Press the PAUSE/STOP ( / ) button twice to stop the playback.Press the PLAY/ENTER button
again to start playback from the beginning.
SUBTITLE
Press the SUBTITLE button to change the subtitle language .
Note: Number of subtitle available depends on the DVD disc.
LANGUAGE(AUDIO)
Press LANGUAGE button to change the Audio channel. This function is applicable for DVD and CD
audio but with different effects.
ZOOM
This function is applicab le for DVD. user can enlarge a static picture or a moving picture by
pressing the ZOOM button. there are 3 levels of zooming(2x,3x and 4x) and they can be achieved
one by one through subseqient key press on the zoom key.
DVD BASI C OPERATION(CONTINUED)
IMPORTANT NOTES:
• A symbol will appear at the upper right corner on the TV screen during operation if you try to
access a function that is not available on the disc.
• Some discs may take a few seconds to load.
• Always hold the disc without touching either of its surfaces. When inserting a disc, position
it with the printed title side facing up, align it with the guides and place it in its proper position.
• It is important that you read the manual that accompanies the DVD disc as there are features
that are on this DVD player that cannot be used with certain DVDs. There are also extra
features that are different for each DVD disc, so they are not explained in this owner’s manual.
PLAYBACK OF A DVD
1. Press “TV/AV/DVD” button on the unit or press the TV/DVD direct key on the remote handset
to turn ON DVD.
2. Press the OPEN/CLOSE ( ) button to open the disc tray. Insert a disc with the label side facing
up on the disc tray.
3. Press the OPEN/CLOSE ( ) button to close the disc tray. After loading, the menu screen of the
DVD should appear. Use the Navigation ( , , , ) buttons o select the desired option and the
PLAY/ENTER button to select it; playback will start immediately.
4. To stop playback, press the STOP ( ) button. Because the unit will remember where you
stopped, simply press the PLAY/ENTER button to resume playback where you left off. If the
STOP ( ) button is pressed twice, the unit will stop completely.
NOTES:
• If a MENU appears on the TV screen, press the Navigation ( , , , ) buttons to select the
desired option/item, then press the PLAY/ENTER button. Please make sure to refer to the disc’s
jacket or case for additional information.
• Resuming playback may not work on all discs.
CHAPTER SEARCH
Use this feature to directly go to a specific chapter.
Press the DISPLAY button twice, followed by the Number buttons (i.e. for number 12, press “1”,
“2”) to directly go to a chapter; playback will start immediately.
DVD MENU
Press the MENU button, and the Main Menu of the disc will appear. Use the Navigation ( , , , )
buttons to select the desired option, and then press the PLAY/ENTER button. This is not available
on all discs.
DVD BASIC OPERATION
W1320PTVD MIT IC +MTK1389R12197-20.p65 2008/3/31, 下午 02:2520-21

2322
ENGLISH
PLAYBACK OF A PICTURE CD
1. Press the “TV/AV/DVD” button on the unit or press the “TV/DVD”direct key on the remote
handset to turn DVD.
2. Press the Open/Close button to open the disc tray. Insert a picture CD with the label side facing
up on the disc tray.
3. Press the OPEN/CLOSE button to close the disc tray. After loading, the FOLDER/PICTURE menu
will appear on the TV screen. Press the Navigation ( , ) buttons to select the desired folder/
track.
4. Press the PLAY/ENTER button to confirm. Press the Navigation ( , ) buttons to select the
desired picture; the image preview of the picture will appear in the image preview area. Press
the PLAY/ENTER button to play the picture. You can also use the number button to enter a 3 digit number to select the desired picture, playback will start automatically. Press the
STOP ( ) button on main unit or press PAUSE/STOP ( / ) button on remote control twice to
stop playback.
5. To select other folders, press Navigation ( , ) button to select “- -” followed by press the
PLAY/ENTER button to go back to select the folders and use the Navigation ( , ) button to
select the desired folder again.
PICTURE CD OPERATIO N
Caring for Discs
• Treat the disc carefully. Handle the disc only by
its edges. Never allow your fingers to come in
contact with the shiny, unprinted side of the disc.
• Do not attach adhesive tape, stickers, etc. to the
disc label.
• Clean the disc periodically with a soft, lint-free,
dry cloth. Never use detergents or abrasive
cleaners to clean the disc. If necessary, use a
CD cleaning kit.
• If a disc skips or gets stuck on a section of the disc, it is probably dirty or damaged (scratched).
• When cleaning the disc, wipe in straight lines from the center of the disc to the outer edge of
the disc. Never wipe in circular motions.
• Discs should be stored in their cases after each use to avoid damage.
• Do not expose discs to direct sunlight, high humidity, high temperatures or dust, etc.
Prolonged exposure or extreme temperatures can warp the disc.
• Do not stick or write anything on either side of the disc. Sharp writing instruments, or the
ink, may damage the surface.
PLAYBACK OF A CD
1. Press “TV/AV/DVD” button on the unit or press the TV/DVD direct key on the remote handset
to turn ON DVD.
2. Press the OPEN/CLOSE button to open the disc tray. Insert a disc with the label side facing
up on the disc tray.
3. Press the OPEN/CLOSE button to close the disc tray. After loading, playback will start
automatically.
4. Press the STOP ( ) button on main unit or press PAUSE/STOP ( / ) button on remote control
twice to stop playback.
FORWARD( ) / REVERSE( )
1. Each press of the Search ( ) or ( ) button will increase the search as follows:
x 2 — > x 4 — > x 8 — > x16 — > Resume Normal Playback
2. Press the PLAY/ENTER button to resume normal playback.
DISPLAY
While playing a CD, press the DISPLAY button on ce to view the track, elapsed track time and
remaining track time. Press a second time to view the disc elapsed time and remaining time. Press
a third time to turn the display off.
SELECTING TRACKS USING THE NUMBER BUTTONS
Press the Number buttons corresponding to the track number you would like to play, and the unit
will playback the desired track automatically.
SELECTING TRACKS USING THE SKIP BUTTONS
During playback, press the SKIP( ) or ( ) button to select a track to be played.
CD BASIC O PERATION
W1320PTVD MIT IC +MTK1389R12197-20.p65 2008/3/31, 下午 02:2522-23
2524
ENGLISH
Your television is designed to give you trouble-free pe rformance for many years. If you have
a problem with your TV, try the solutions listed below.
There is no picture or sound, or the TV doesn’t turn on.
• Make sure th e TV is plugged in.
• Ma ke sure the MUTE is not set.
• Make sure the POWER is on.
• Make sure a headphone is not inserted.
• If there is neither picture nor sound , unplug the TV for 30 seconds, then plug it in and try
again.
There is no picture or sound on some UHF channels.
• Try another station . If the other stations are OK, it may be a station problem.
• Check that the antenna is connected & adjusted correctly, in g ood working order and has
no broken wires.
• See if anythin g is interfering with the antenna signal.
• Make sure the AIR/CABLE setting is correct.
The sound is OK, but the picture is poor.
• Try another station . If the other stations are OK, it may be a station problem.
• Check that the antenna is connected & adjusted correctly, in g ood working order and has
no broken wires.
There is poor reception on some channels.
• Try another station . If the other stations are OK, it may be a station problem.
• Check that the antenna is connected & adjusted correctly, in g ood working order and has
no broken wires.
Cannot tune to a cable channel.
• Make sure the AIR/CABLE setting is correct.
• The channel may not be programmed into memory.
The pic ture rolls, slants, shows lines, is grainy, has poor color, or has ghosts.
• Try another station . If the other stations are OK, it may be a station problem.
• Check that the antenna is connected & adjusted correctly, in g ood working order and has
no broken wires.
• See if anythin g is interfering with the antenna signal.
The remote control does not work.
• Make sure th e TV is plugged in.
• Make su re there are fresh batteries in the remote control.
• Make sure there is n othing blocking the remote control signal.
TROUBLESHOOTING
PLAYABLE DISCS:
The following discs can be played back on this DVD player:
DISC TYPES:
DVD
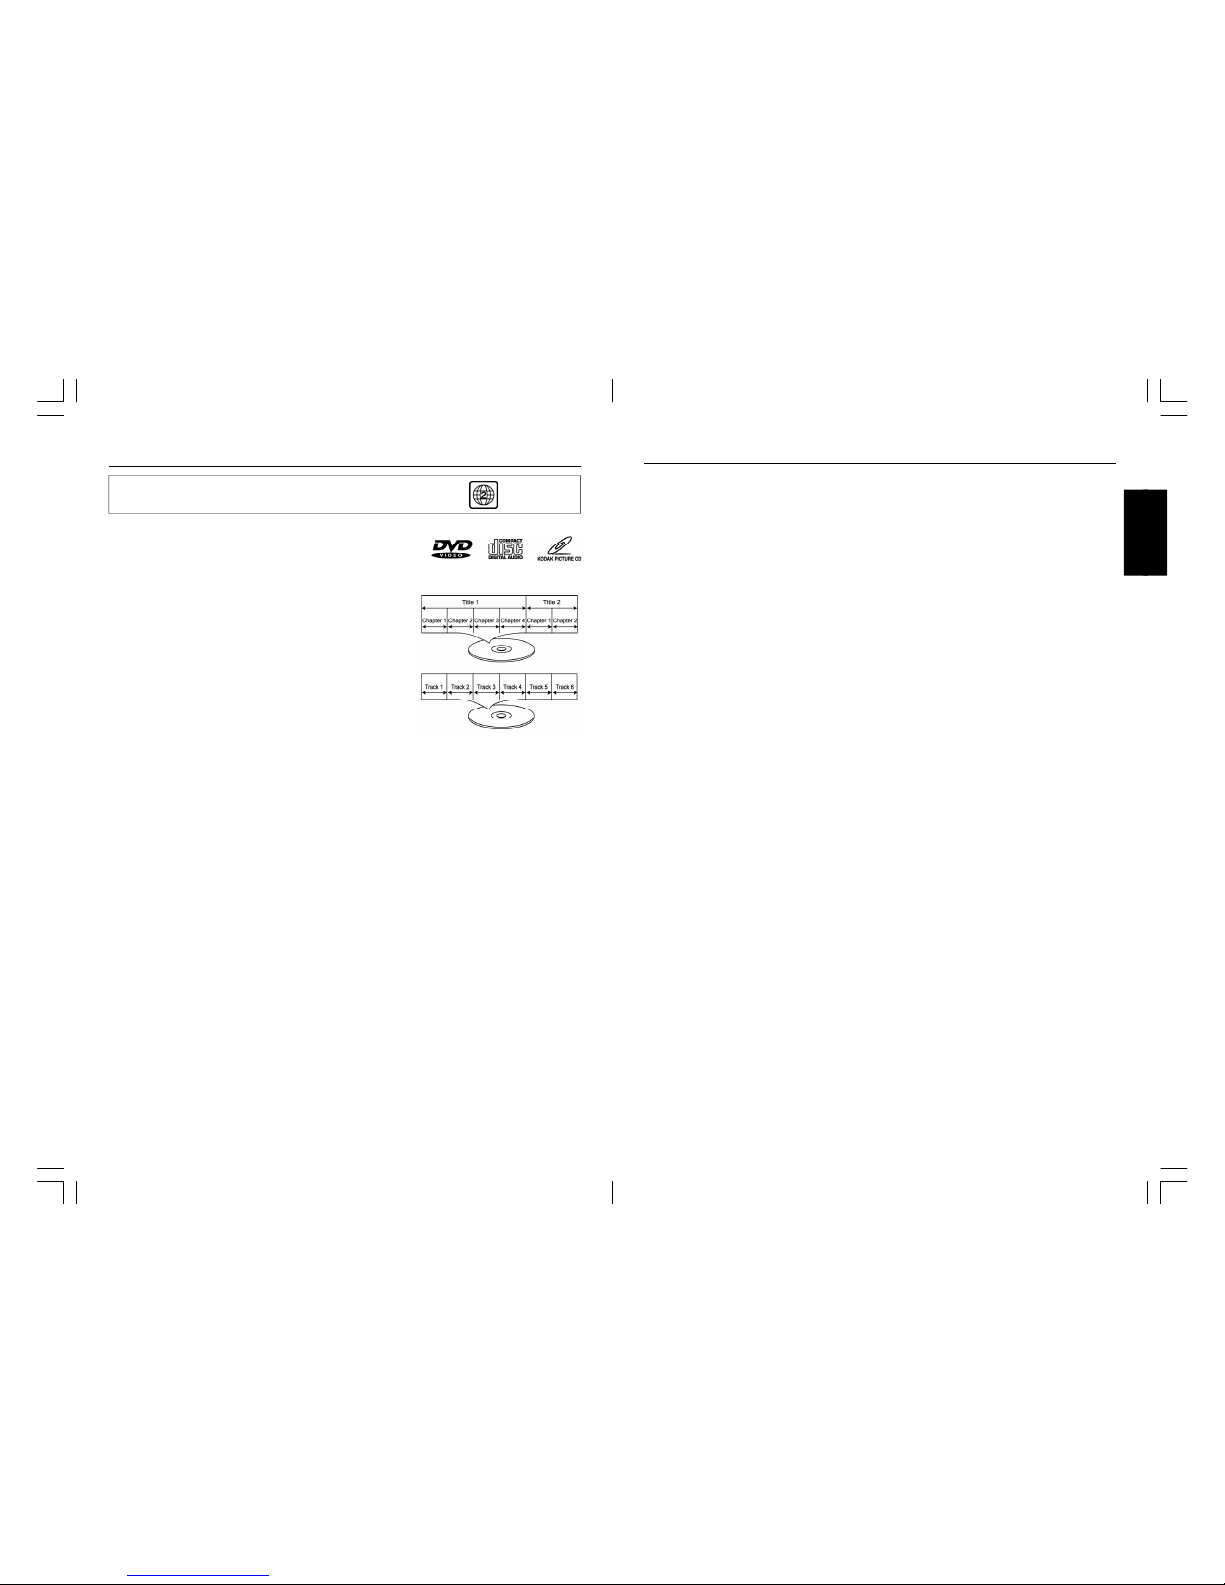
Data on most DVDs is divided into sections called “titles”
and then into subsections called “chapters”, each of which
is given a title or chapter number. Some features of this
DVD player will not operate with some DVD discs as they
are preset. If a function you selected does not run as
desired, refer to the manual accompanying the DVD disc.
AUIDO CD
Data on an audio CD is divided into sections called
“tracks”, each of which is given a track number.
IMPORTANT:
It is important that you read the manual that accompanies the DVD discs, as there are features
that are on the DVD player that cannot be used with certain DVDs. There are also extra features on
the DVD disc that are different for each DVD disc, so they are not explained in this owner’s manual.
This player conforms to the NTSC and PAL color systems. However, if you a re in the
USA, leave this setting on NTSC. If incorrectly set to PAL, the TV picture will roll
vertically. In this case, simply turn the DVD off, and then back on.
Notes on Copyright:
It is forbidden by law to copy, broadcast, show, bro adcast on cable, play in public and rent
copyrighted material without permission. DVD video discs are copy protected, and any recordings
made from these discs will be distorted. This product incorporates copyright protection technology that is protected by method claims of certain U.S. patents and other intellectual property rights
owners. Use of this copyright protection technology must be authorized by Macrovision Corporation,
and is intended for home and other limited viewing uses only unless otherwise authorized by
Macrovision Corporation. Reverse engineering or disassembly is prohibited.
Region Management Information:
This DVD Player is designed and manufactured to respond to the Region Management Information
that is recorded on a DVD disc. If the Region number described on the DVD disc does not correspond to the Region number of this DVD player, this DVD player cannot play that disc. You may not
be able to play back some DVD video on this player if they are purchased from outside your
geographic area or made for business purposes. When you try to playback an unauthorized disc,
“Region Error” appears on the TV screen.
ABOUT DISCS
The region number for this DVD Player is :
See the following page for information regarding region numbers.
W1320PTVD MIT IC +MTK1389R12197-20.p65 2008/3/31, 下午 02:2524-25
2726
ENGLISH
SPECI FICATIONS
It is not a toy and not for childre n under 8 years old
TV SECTION
Receiving Channels
VHF
L
CH 2 - 4
VHF
H
CH 5 - 12
UHF CH 21- 69
Tuner Type 255 Channel , VS TUNING
DVD SECTION
Laser Wave length 655nm
Laser p ower : Class 1
Signal System PAL/NTSC output
Digital audio output Coaxial digital output; pin jack
Headphone
Stereo in DVD mode
Mono in TV mode
GENERAL SECTION
AC Power Input AC 220-240V~ 5 0 Hz
AC Power Consumption 74W
Speaker 3” 78mm 8ohm x 2
Audio Output 1.5 W + 1.5 W
Dimensions L398 x W405 x H399 (mm)
Net W eight 11 kg
v Design and specifications are subject to change without notice.
This tele vision receiver represents a fine example of electronic engineering and construction.
As such it should be treated with care. We offer the following suggestions so you will enjoy this
product for the years to come.
Keep it dry. If water sh ould get on it, wipe if off
immediately. Water contains minerals that can
corrode electro nic circuits.
Do not store in hot areas. High temperatures can
shorten the life of electro nic devices, damage
batteries, and can even distort or melt certain plastics.
Do not drop your pro duct. This will likely result in
failure to operate. Circu it boards can crack and the
cases may not survive the impact. Handling your
product roughly will shorten its useful life.
Do not use or store in areas of high level of dirt or
dust. The electronic parts may be contaminated or
will wear prema turely.
Do not use harsh chemicals or strong cleaning
solvents to clean yo ur unit. You need only wipe
it with a slightly moist, never wet cloth.
Always make sure an y batteries used are fresh and
are of the correct type. Old or almost-dead batteries
are also dangerous.
A worn out ba ttery can leak chemicals which will
damage the electronic circuits.
CARE & MAINTENANCE
W1320PTVD MIT IC +MTK1389R12197-20.p65 2008/3/31, 下午 02:2526-27