

Page 1
Page 2
REGULATORY FACTORS
WIRELESS REMOTE CONTROL
This device complies with Part 15 of FCC Rules. Operation is subject to the following two
conditions:
(1) this device may not cause harmful interference, and
(2) this device must accept any interference received, including interference t hat may
causeundesired operation.
Changes or modifications to this device may void your authority to operate this equipment.
This equipment has been tested and found to comply with the limits for a Class B digital
device, pursuant to Part 15 of the FCC Rules. These limits are designed to provide
protection against harmful interference in a residential installation. This equipment
generates, uses and can radiate radio frequency energy and, if not installed and used in
accordance with the instructions, m ay cause harmful interference to radio communications.
However, there is no guarantee that in ter ference will not occur in a particular installation. If
thisequipmentdoes causeharmful interferenceto radio or television reception, which can
be determined by turning the equipment off and on, the use is encouraged to try to co rrect
the interference by one or more of the following measures:
• Re-orient or relocate the receiving antenna.
• Increase the separation between the equipment and receiver.
• Connect the equipment into an outlet on a circuit different from that to which the
receiver is connected.
• Consult the dealer or an experience radio/TV technician for help.
SAFETY INSTRUCTIONS
You must keep safety in mind while using this device. Keep these
and any other instructions for future reference.
INSTALLATION
Observe Warnings: Carefully follow all warnings on the device
and in the operating instructions.
Heat: DO NOT place the device near heat sources such as rad iators, stoves, heat
registers,or other appliances that produceheat.
CARE AND USE
Cleaning: DO NOT use liquid, abrasive, solvent, or aerosolcleaners. Use a dampcloth
for cleaning.
When Not in Use: Remove the batteries if this device is to be
left unattended or unusedfor a long period of time.
Referservicingto qualified personnelwhena solid object
or liquid has fallen onto or into the device.
DO NOT attempt to service this device. Refer all
servicing to qualified personnel. Opening covers other
than the battery cover will void the warranty.
Page 3

CONTENTS OF THIS USER GUIDE
Remote Control Basics.......................................2
Remote Control Batteries.................................... 2
Remote Control Signals: UHF and IR................. 3
Install an Attenuator............................................4
Remote Control Modes ....................................... 5
Remote Control Setup ........................................6
Set Up the Remote Control................................. 6
SettingUptoControlOtherDevices....6
Scan for Device Codes.........................7
Check the Device Codes......................8
Change the Address ........................................... 9
Switch Between TV and Device
Volume Control.................................................. 10
Remote Control Buttons................................... 11
Control the Receiver ..........................................11
Control a TV (or a Second TV).......................... 17
Control a VCR (Second VCR or a DVD Player) 20
Control a Cable TV Box .................................... 22
Control a Tuner or Amplifier.............................. 24
Device Codes ....................................................26
TV Codes..........................................................26
VCR Codes.......................................................28
Cable TV Box Codes.........................................29
DVD Player Codes............................................ 30
Tuner/Amplifier Codes.......................................30
Troubleshoot the Remote Control ...................31
Limited Warranty...............................................33
If You Need Help................................................35
Index...................................................................36
121716 1
Page 4
REMOTE CONTROL BASICS
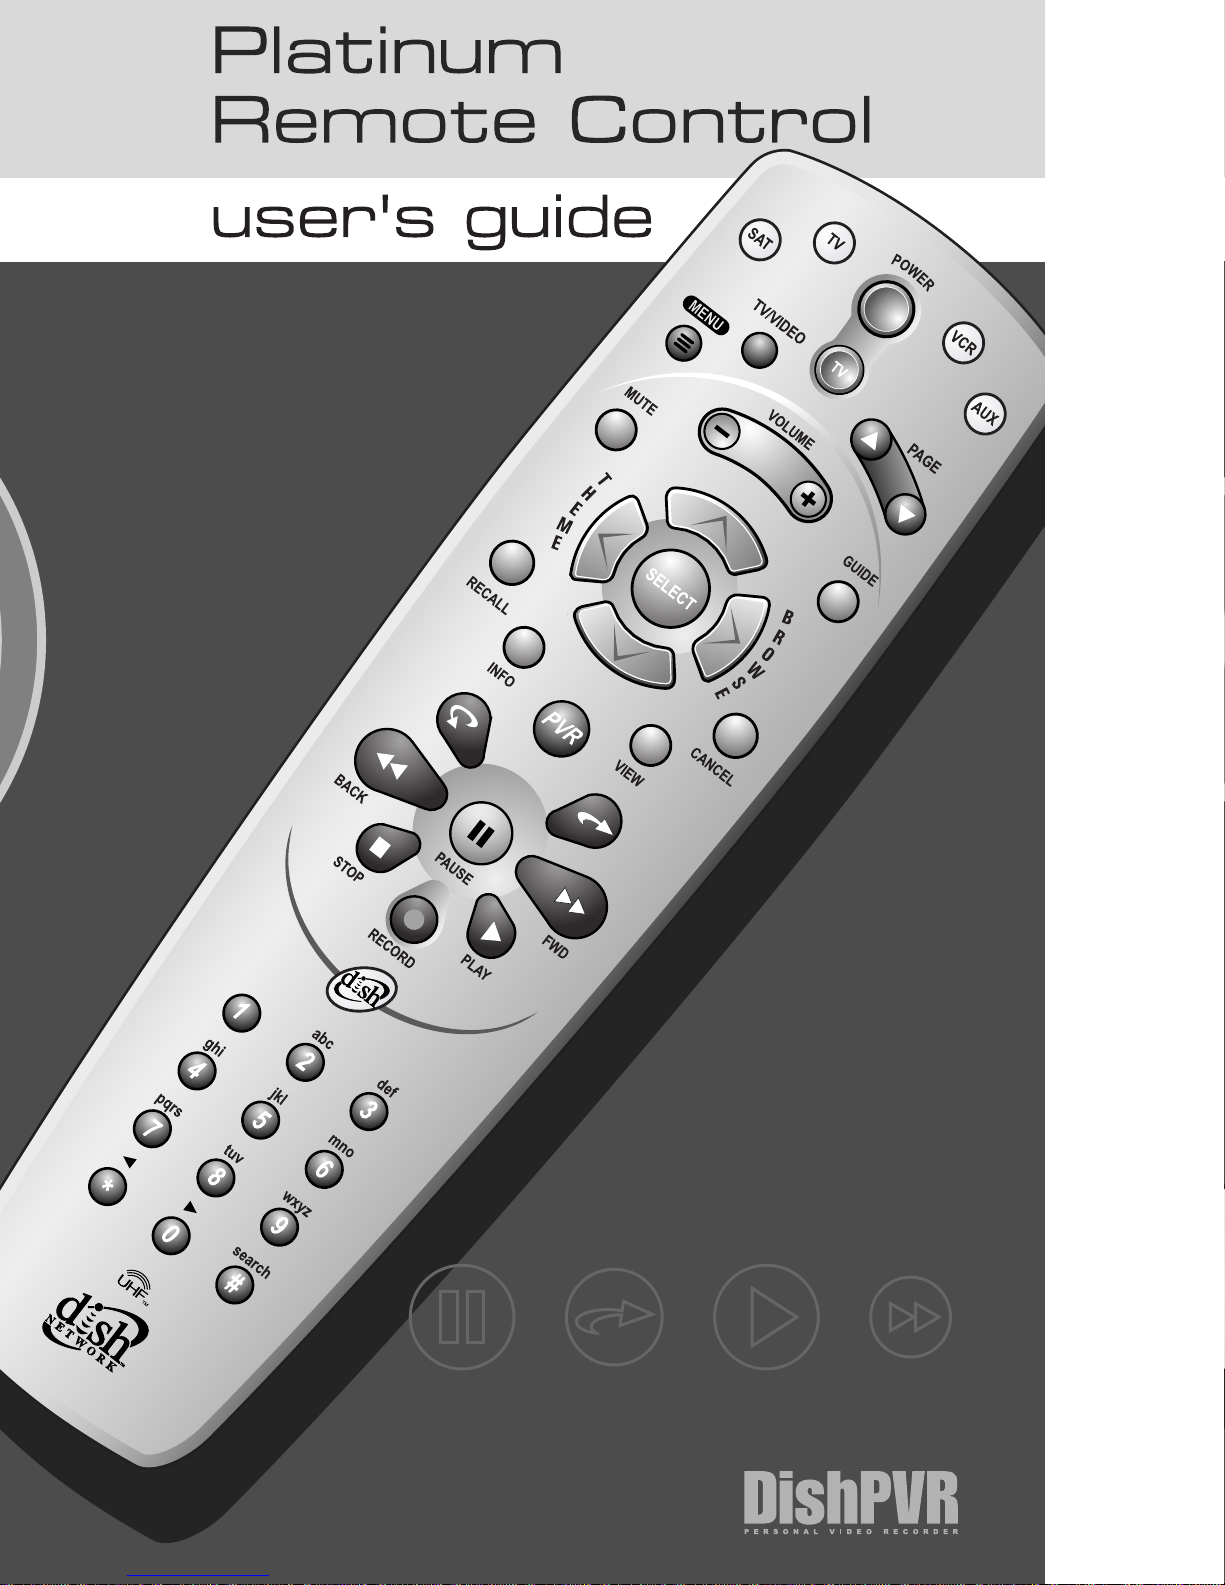
This remote control gives you easy access to all the features
of a DISH Network satellite TV receiver and lets you control PVR
features of a DISH Network DishPVR satellite receiver. These PVR
features let you record programming with full digital quality,
without a VCR.
You can set up the remote to control the satellite TV receiver and up to
threeother devices. These devices can be a TV,a VCR or DVD player,
and a third device.
REMOTE CONTROL BATTERIES
The remote control requires AAA batteries.
When you replace old batteries, you should
replace all of the batteries. Use batteries of
thesamekind,for example, alkaline or
carbon zinc, and don’t mix batteries of
different kinds. Alkaline batteries last longer.
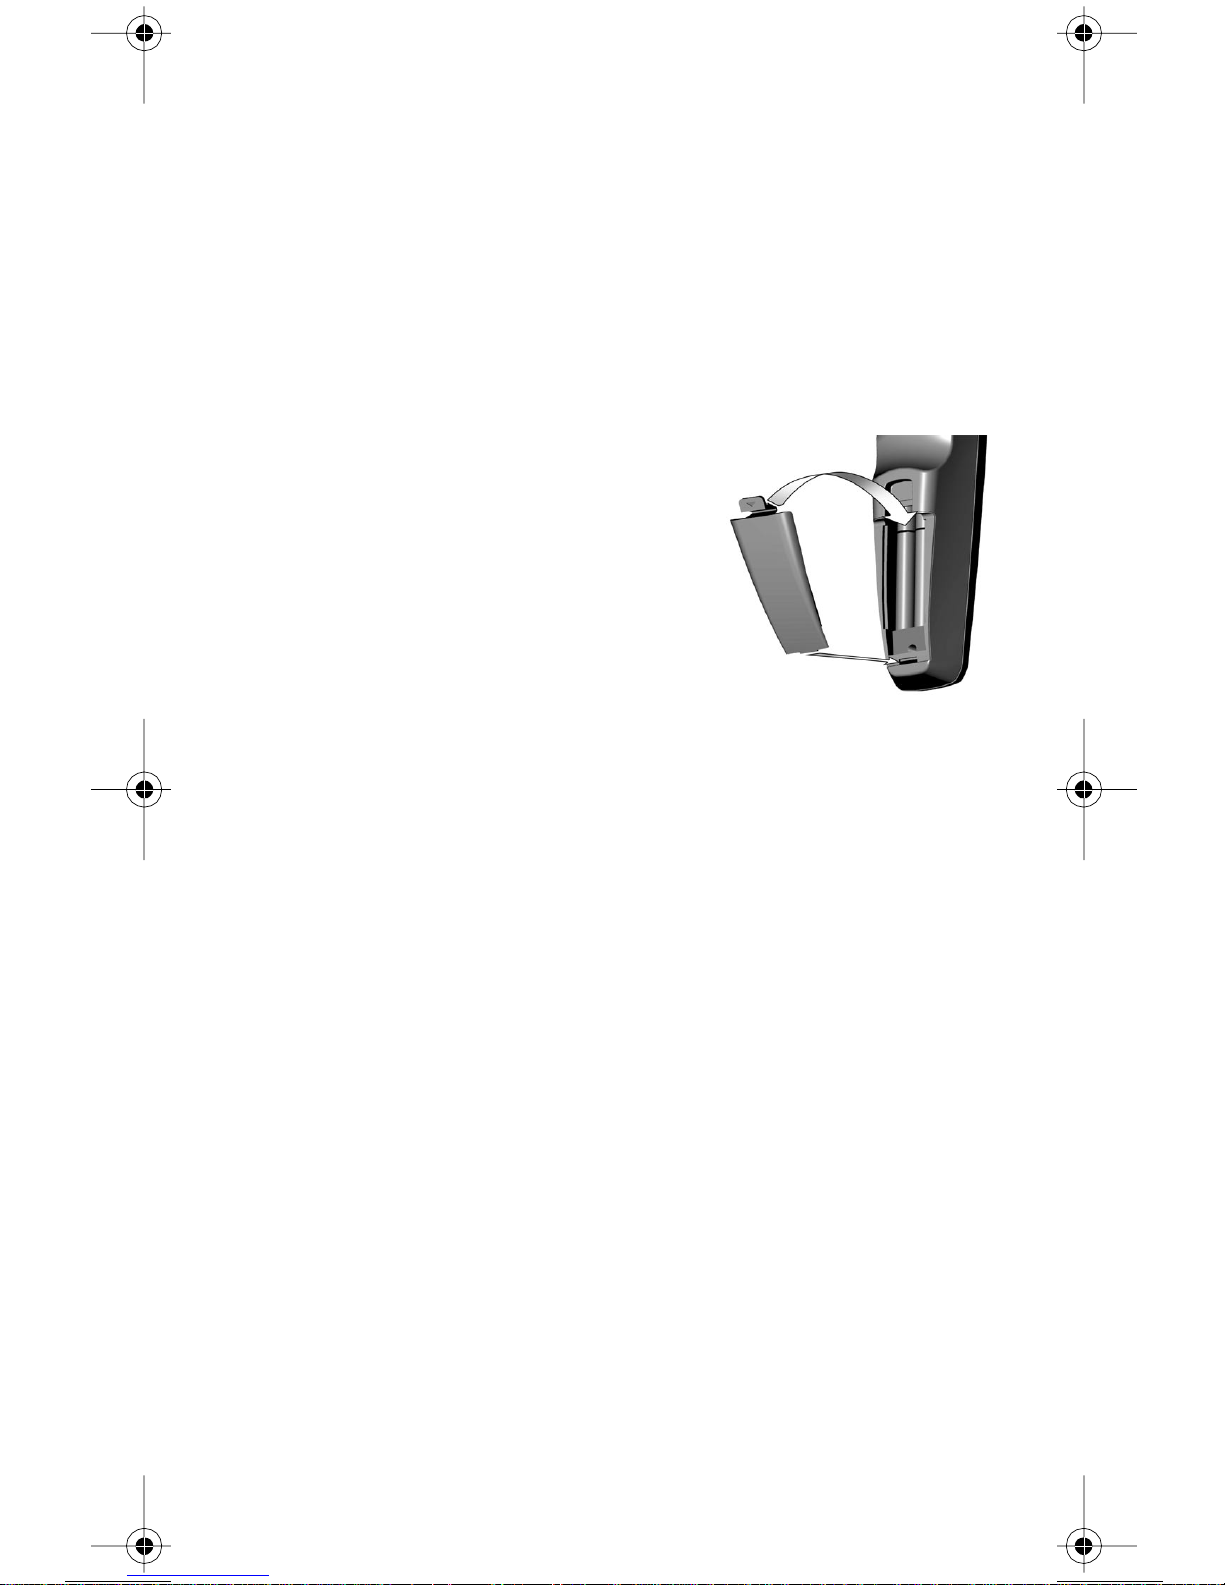
1. Press down on the battery cover’s
top latch and lift the cover off.
2. T ake out all of the old batteries.
3. Put the new batteries in. Make sure
you match the pl us (“+”) ends with the
plus markings on the battery case.
4. Fit the battery cover’s bottom tab
back into the slot at the bottom of the
battery case, and snap the cover back
into place.
2 121716
Page 5
REMOTE CONTROL SIGNALS: UHF AND IR
Theremotecontrolusesboth Ultra High Frequency (UHF) radio
signals and Infrared (IR) light signals to control the receiver
but uses onl y IR signals to control other devices.
• IR signal s travel only short distances (40 feet or less),
and can’t go through walls or other solid objects.
You must point the remote control right at the device
you want to control, with no objects to block the signal path.
• UHF signals travel long distances (100 feet or m ore) and can
go through walls and other solid objects. Because UHF signals
travel so far, the receiver may respond to signals from other
nearby remote controls. To handle this problem, see Change the
Address on page 9. If this doesn’t work, see Install an Attenuator
on page 4.
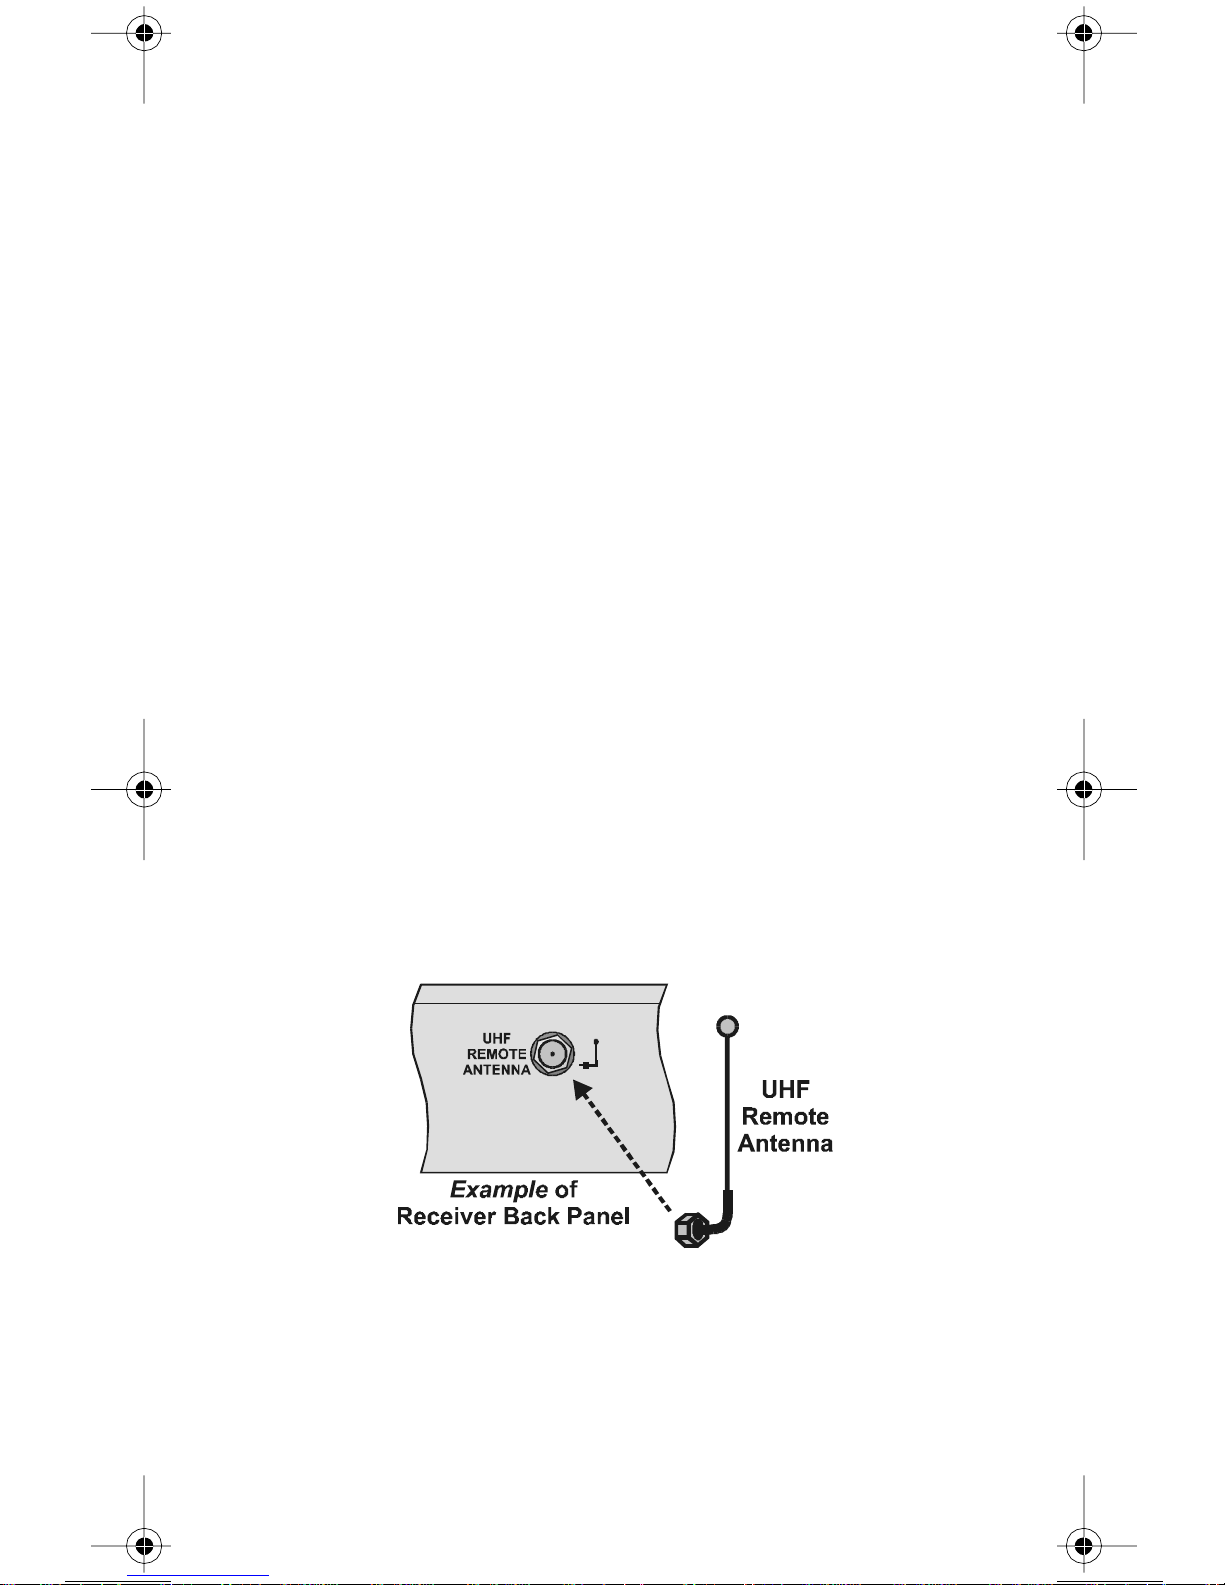
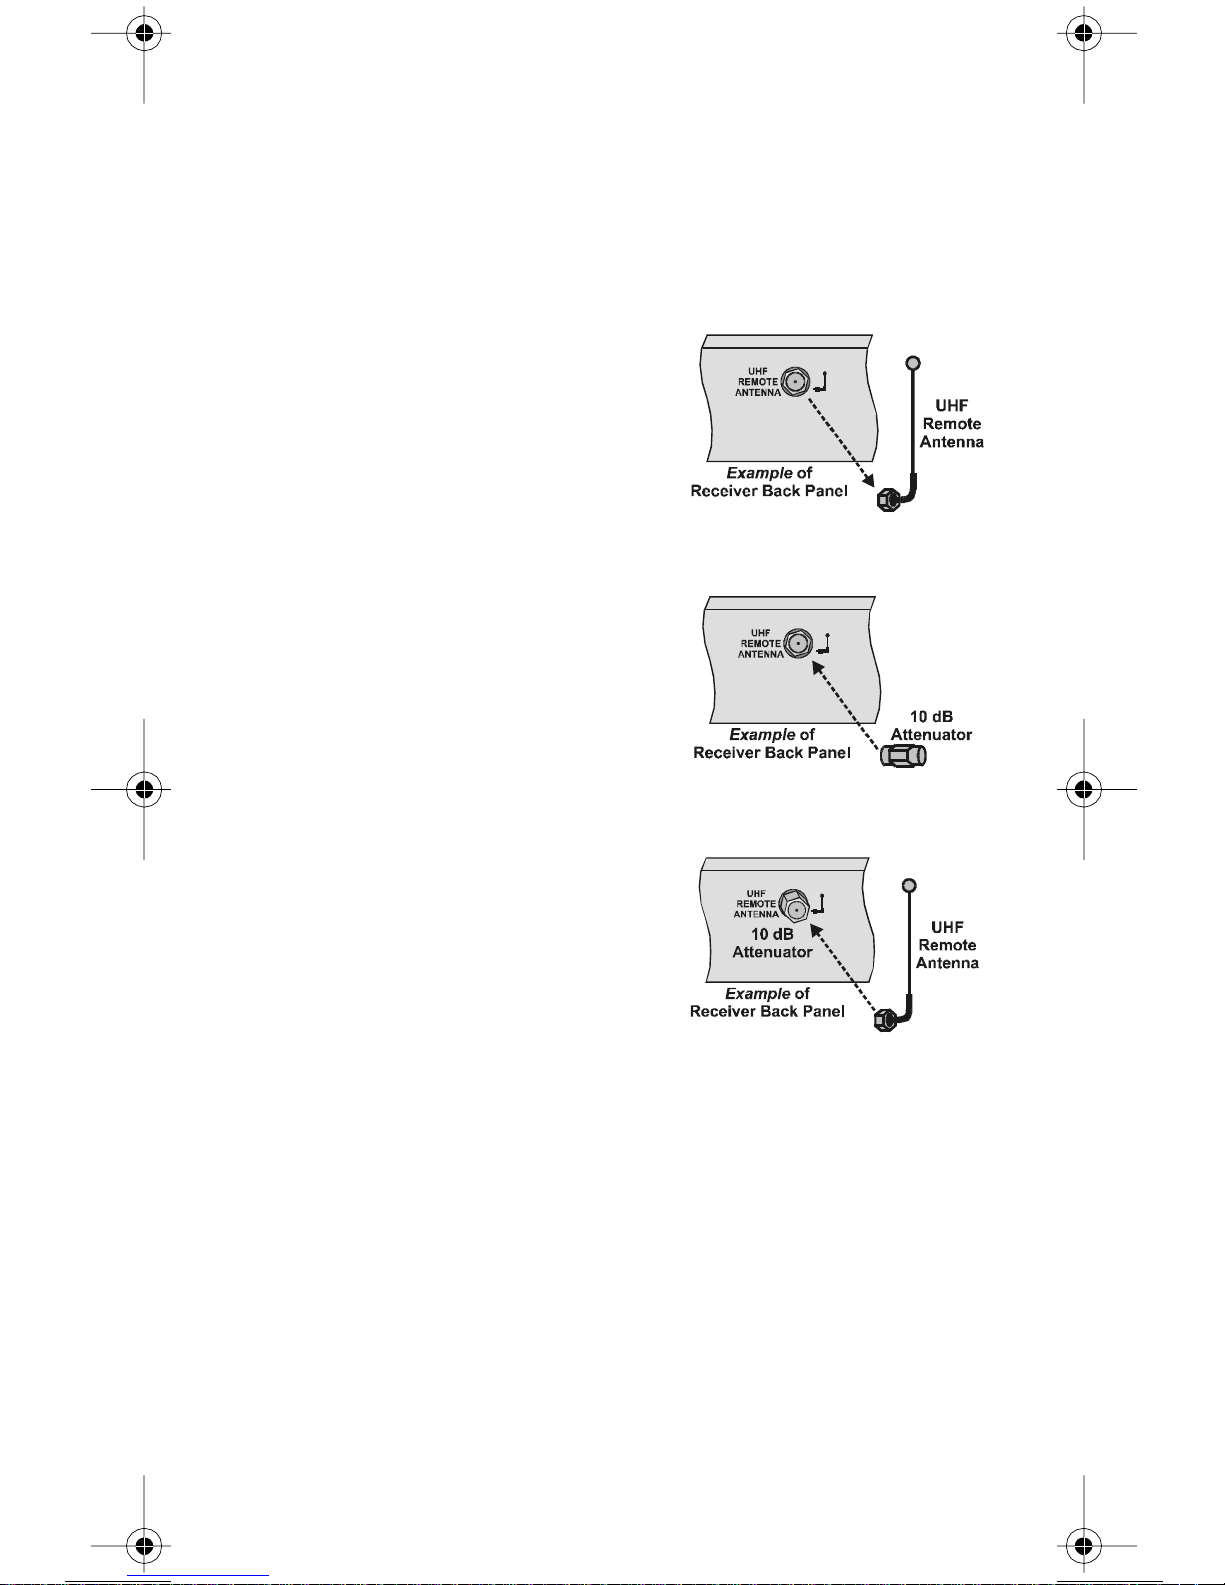
• You need to attach the UHF remote antenna to the receiver’s
back panel UHF REMOTE ANTENNAinput so you can use the
UHF capabilities of the rem ote (as shown in t he diagram below).
Note: Set the antenna straight up so you can use the rem ote
from as far away as possible. Don’t let the antenna touch
anything.
Note: If you don’tattach the antenna, you can still use the remote
to control the receiver at short distances. This is because
the remote sends both IR and UHF signals to the receiver.
121716 3
Page 6
INSTALL AN ATTENUATOR
Stray UHF signals can block signals from the remote control
to the receiver. To prevent blocks, you can install a 10 dB attenuator
(you can buy one from a consumer electronics parts store).
Note: This will help keep out stray UHF signals, but also cut down
how far away you can use the remote control.
1. Take the UHF antenna off
of the receiver’s back panel
UHF REMOTE ANTENNA
input.
2. Put a 10 dB attenuator onto the
UHF REMOTE ANTENNA
input.
3. Put the U HF antenna onto the
attenuator.
4 121716
Page 7
REMOTE CONTROL MODES
REGULAR MODES
You can set the remote to four different modes to control the receiver
or other devices.
Set up the remote to control a device like a TV or a VCR. See Set Up
theRemoteControlon page 6 for what to do.
Note:Theremotecomesalready set up to control the receiver, unless
you have changed the address on your receiver.
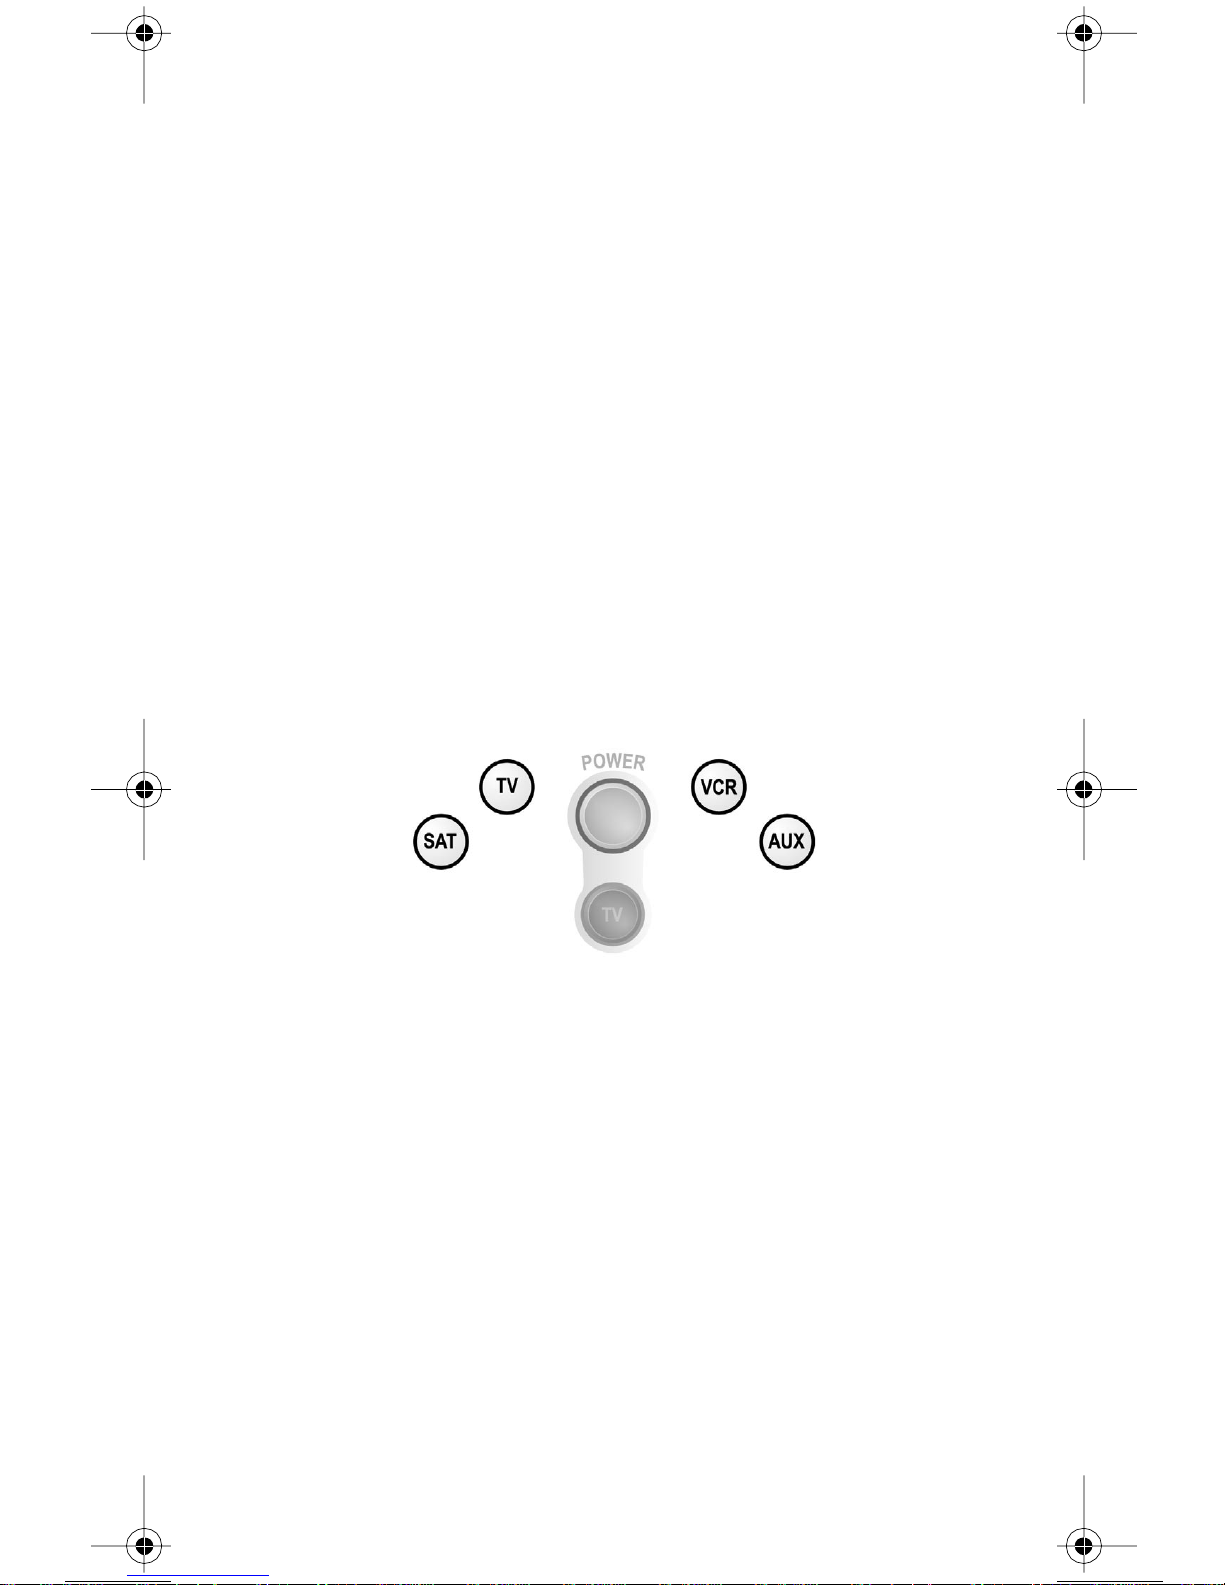
Use the remote control’s mode buttons, SAT (“satellite” receiver), TV,
VCR (for a VCR or a DVD player), and AUX (“auxiliary,” for a cable
TV box, a tuner, a second TV, a second VCR, a DVD player, or an
audio amplifier) to set the remote to the right mode for the device. To
change the m ode, press the button for the device you want the remote
to control. The mode button stays lit for two seconds to show you’ve
set the remote to that mode.
LIMITED MODE
You can program your remote control in limit ed mode to keep from
accident ally changing the channel on your TV or VCR. When you use
the remote to control your TV in limited mode, you will only be able to
use the POWER, MUTE,andVOLUME buttons. Also, when you use
the remote to control your VCR in li mited mode, you will only be able
to use the POWER and VCR function buttons. Set Up the Remote
Control on page 6 has a st ep t hat tells the remote control to go into
limited mode.
Note: Limited mode is not used with cable boxes or amplifiers.
121716 5
Page 8
REMOTE CONTROL SETUP
SET UPTHEREMOTE CONTROL
On the next few pages we tell you how to set up the remote to control
a TV, a VCR, or other devices.
When you get the remote it’s already set up to control the
receiver, unless you have changed the address on your
receiver. However, you m ust set up t he remote to control
theTVbeforeyoucanusetheMUTE andVOLUME
buttons. To setup the remote control, you can either
follow the directions in Setting Up to Control Other
Devices below or Scan for Device Codes on page 7.
SETTING UPTOCONTROL OTHER DEVICES
You can set up the remote to control other devices using the device
codes listed on page 26. Here’s what to do:
1. Use the device’s buttons or its remote control to turn the
device on.
2. Find the brand name of the device in the tables starting on
page 26.
If the brand isn’t listed, see Scan for Device Codes on page 7.
3. Press and hold the mode button for the device you want
the remote to control, for about three seconds. When all the
other m ode but tons light up, let go of the mode button - that
mode button should now be flashing.
For example, hold the TV mode button for a TV untilall of the
other m ode buttons light. When you let go,the TV mode light
will flash.
4. Only for the AUX mode,usetheNUMBER PAD to enter 0 for
a second TV, or 1for a second VCR, or 2 for a tuner, amplifier,
or cable box.
For any other mode, skip to step 5.
5. Use the number buttons to enter one of the
device codes from the table.
6. Only for limited mode,press1.
Note: If you want to use all of the remote
control’s featuresin TV mode, reprogram the
remote control following these instructions
but skip this step.
6 121716
Page 9
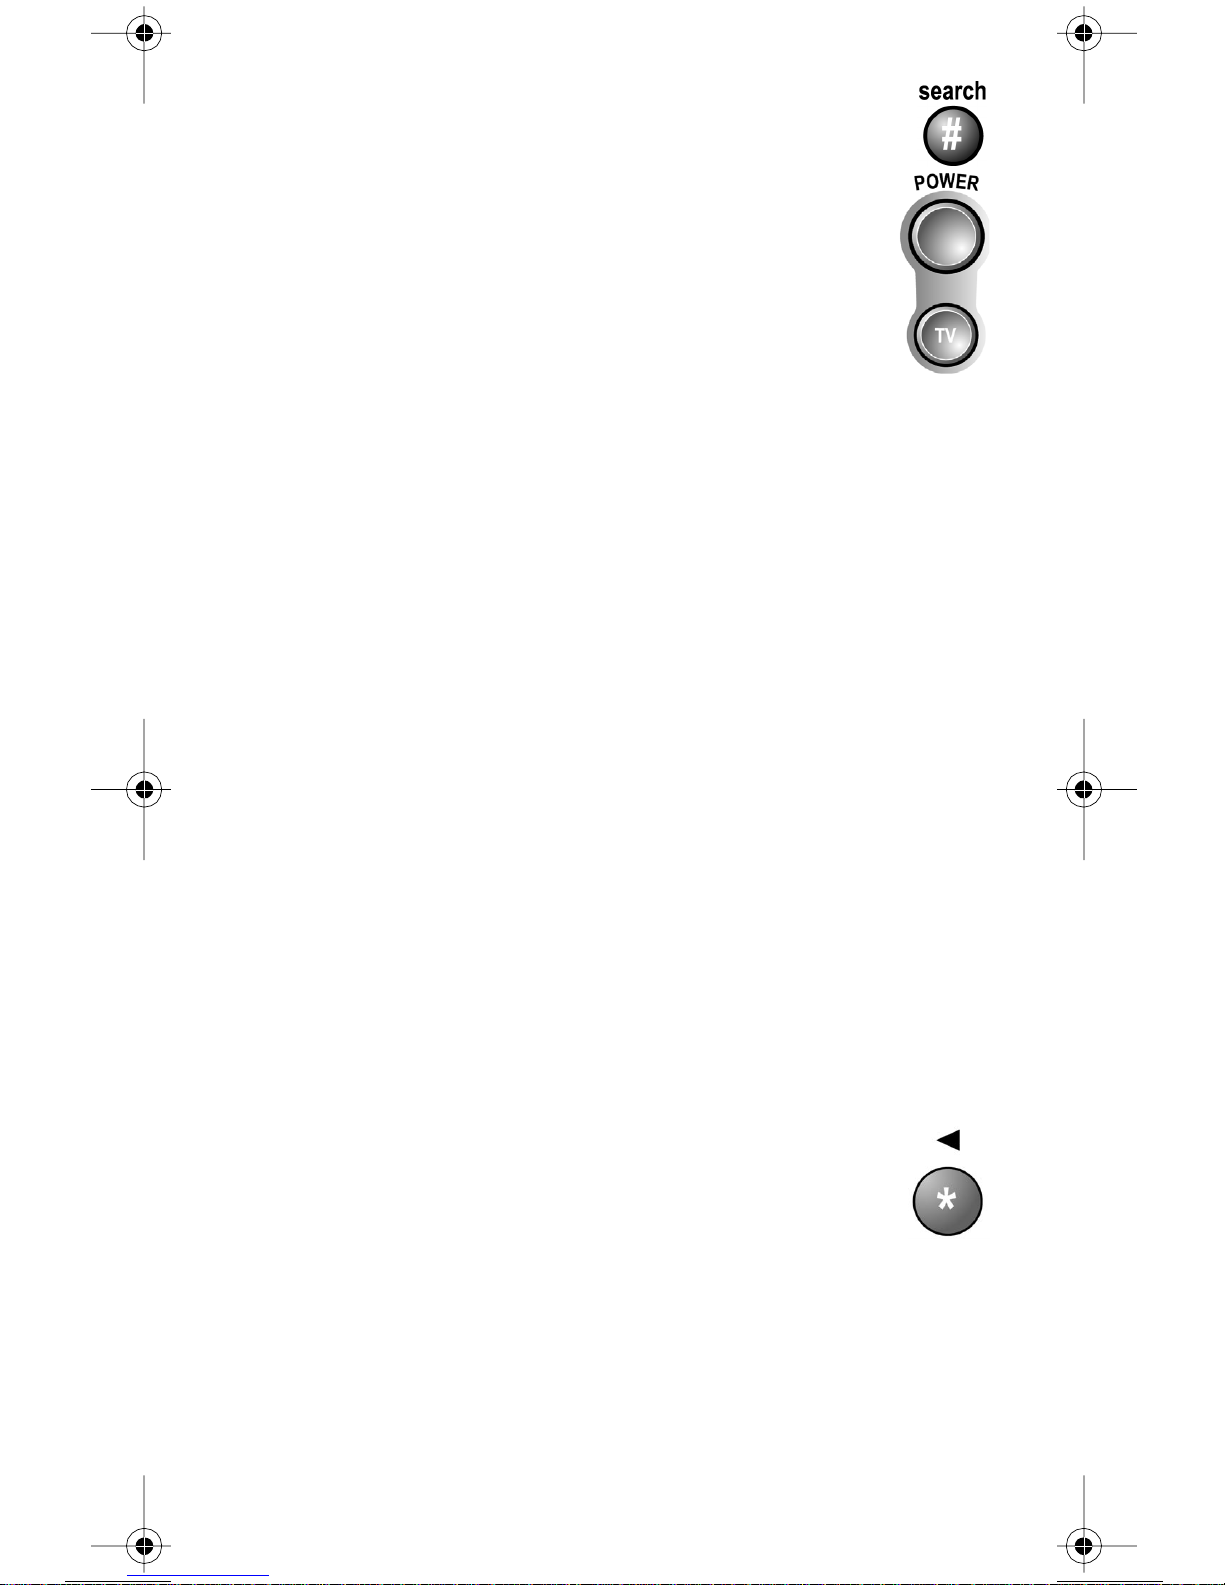
7. Press the POUND(#) butt on. If you entered the code
correctly, the mode button flashes three times.
8. Press the blank POWER button to test if the code
works for the device. If it does, the device should
turn off.
9. Turn the devi ce back on and t ry some other buttons
to make sure they work. Sometimes, the blank POWER button
works when other buttons don’t. If the code works for other
buttons, stop here.
10.If the code you entereddoesn’twork, do steps 3 through9 again
with another device code from the tables.
11.If you cannot find a code that works, try Scan forDevice Codes
below.
SCAN FOR DEVICE CODES
If the code for your d evice is not listed in the tables starting on page 26,
use this procedure to scan the remote control’s memory for the device
code. Here’s what to do:
1. Use the device’s buttons or its remote control to turn the
device on.
2. Press and hold the mode button for the device you want the
remote to control, for about three seconds. When al l the other
mode buttons l ight up, letgo of the mode button - that mode
button should now be flashing.
For example, hold the TV mode button for a TV untilall of the
other m ode buttons light. When you let go,the TV mode light
will flash.
3. Only for the AUX mode , use the number buttons
to enter 0 for a second TV, 1 for a second VCR,
or 2 for a tuner, amplifier, or cable box. Then press
the STAR (*) button.
For any other mode, skip to step 4.
121716 7
Page 10
4. Press the blank POWER button.
5. Press the UPor DOWN ARROW button until
the device turns off. You will have to do this
repeatedly to scan through all codes.
Note: Do notpress the ARROW buttons too
quickly because you could skip over the code
for your device.
Note: The mode button for the device will flash rapidly eight
times when you’ve scanned all the codes for that device.
6. If the remote reachesthe correct code, the device
turns off. When this happens, press the POUND (#)
button to store the code in the remote.
7. Press the blank POWER button to turn the device
back on.
8. Try s ome other buttons to make sure they work.
Sometimes, the blank POWER button works
when other buttons don’t.
CHECK THE DEVICE CODES
You can find out what device code you’ve set for each remote control
mode. Here’s what to do:
1. Press and hold the mode button for the device you w ant the
remote to control, for about three seconds. When al l the other
mode buttons l ight up, letgo of the mode button - that mode
button should now be flashing.
For example, hold the TV mode button for a TV untilall of the
other m ode buttons light. When you let go,the TV mode light
will flash.
2. Press the POUND(#) butt on twice. The mode button
flashesthe number for each digit of the device code,
with a pause between the groups of flashes. A quick
flash is for zero. For example, if the code is 570, the
mode button flashes five times, pauses, flashes seven times,
pauses, and flashes once quickly.
8 121716
Page 11
For AUX mode, the first group of fl ashes tells you what the
AUX m ode controls. A quick flash (zero) before the three-digit
code is for a TV; one regular flash is for a VCR; and two flashes
is for a tuner, amplifi er, or cable box. Forexample, if the TV
code is 570, the AUX mode buttonflashesonce quickly, pauses,
flashesfive times, pauses, flashes seven times, pauses, and
flashesonce quickly.
CHANGE THE ADDRESS
Because UHF signals travel l ong distances and go through walls,
a neighbor’s remote may control your r eceiver by mistake. To handle
this problem, you can change the remote control and receiveraddress.
1. Open the Important System Information screen.
Press the receiver’s front panel SYSTEM INFO
button.
The Important System Information screen shows
a Remot e Address.
Write down this number:
2. Press and hold the SAT mode button about three
seconds, until all the mode buttons light up,
and then let go of the SAT button. The SATmode
button will blink.
3. Use the number buttons to enter any number
from1to16,butnot the one you found in step 1. The SAT
mode button goes out after you enter each digit, and then lights
up again.
Write down the number you entered:
4. Press the POUND(#) butt on.
If you entered the address correctl y, the SATmode
button will flash three times.
5. Press the RECORD button.
6. Make sure the Remote Address on the Important
System Information screen now is the same as the
one you entered in step 3. If it isn’t, the remote can’t
control the receiver.
7. To check the remote control address, press and hold
the SAT m ode button for three seconds. Then, let go
of the SAT button, and press the POUND (#)button
twice.TheSATmode button flashes the same number
of times as the address you entered in step 3.
121716 9
Page 12
8. Press the SELECT button to close the
Important System Informationscreen.
SWITCH BETWEEN TV AND DEVICE VOLUME CONTROL
When you set up the remote t o control a TV, the MUTEand VOLUME
buttonscontrol the TV volume. However, if you want to use the AUX
mode to control a tuner or amplifier and the device has a volume
setting, you can set up the remote to c ontrol the device’s volume
instead of the TV volume.
To set the remote to control the device’s volume:
1. Press and hold the AUXmode button
for threeseconds,and then let go of it. The AUX mode
button will blink.
2. Press the POUND(#) butt on.
3. Press the plus (+) side of the VOLUME
button.
4. Press the 0 number button.
5. Press the POUND(#) butt on.
The AUX mode button flashes three t imes.
6. Press the SAT mode button.
7. Press the plus (+) and minus (-) sides of the VOLUME
button.
The device’s volume changes and the AUXmode
button lights instead of the TV mode button.
To set the remote back to control the TV volume:
1. Press and hold the TVmode button
for three seconds, and then let go of it. The TVmode
button will blink.
2. Press the POUND(#) butt on.
3. Press the plus (+) side of the VOLUME
button.
10 121716
Page 13
4. Press the 0 number button.
5. Press the POUND(#) butt on.
The TV mode button flashes three times.
6. Press the SAT mode button.
7. Press the plus (+) and minus (-) sides of the VOLUME
button.
The TV’ s volume changes and the TV mode button lights
instead of the AUX mode button.
REMOTE CONTROL BUTTONS
CONTROL THE RECEIVER
SAT MODE BUTTON
Press this button to set the remote to SAT (“satellite”) mode to control
the receiver. The SAT mode button’s back light stays lit for about two
seconds to show you’ve set the remote to SAT mode. Make sure you
keep the remote in SAT mode to use the but tons described here.
TV/VIDEO BUTTON
Ifyou connectthe receiver withits back panelTV ANTENNA/CABLE
IN and TV SET OUT ports, use this button to switch the receiver
between the satellite signal(connect it to t he SATELLITE INport) and
anothervideo signal like a cable orbroadcast TV antenna input
(connect it to the receiver’s TV ANTENNA/CABLE IN input).
Note: If you connect the receiver to other devices with the phono
(RCA) jacks or t he S-VIDEO output, you must use the TV
menus t o change the input from local broadcast TV to satellite
TV.
121716 11
Page 14
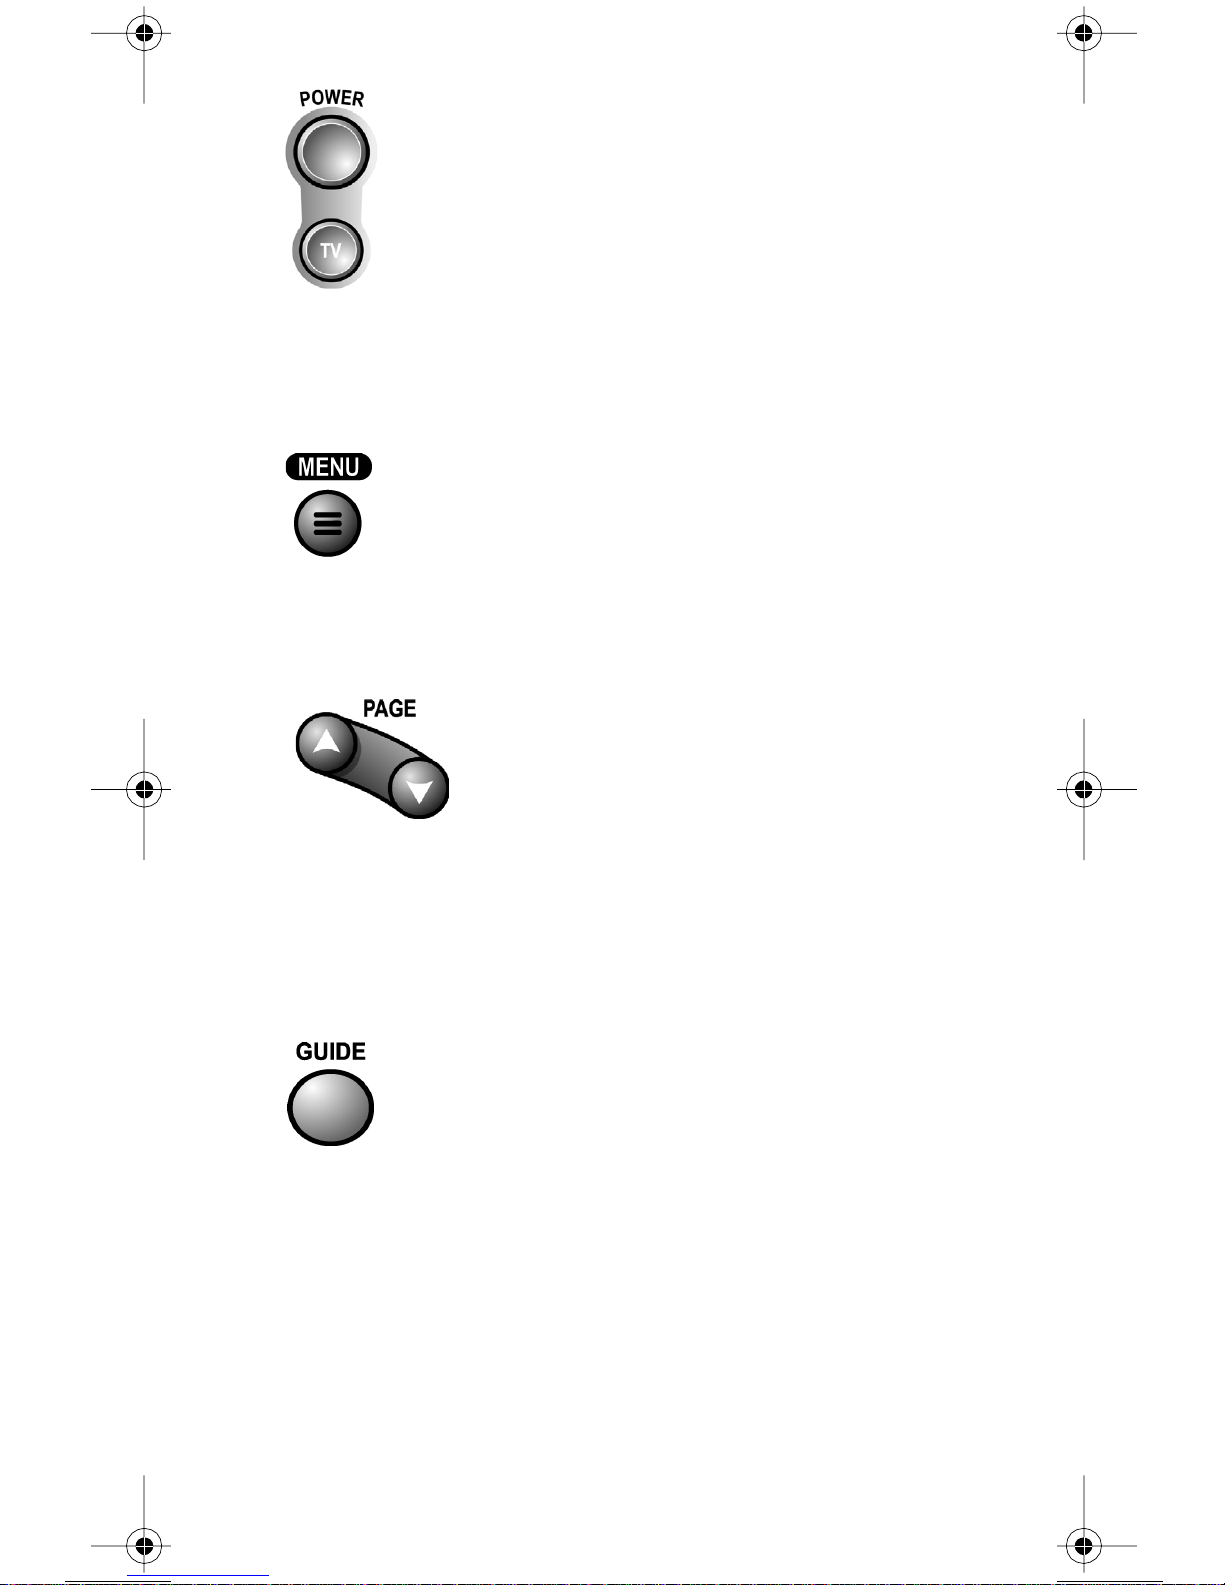
P
OWER BUTTONS
Press the blank POWER button to turn the receiver on or off. The
POWER light on the receiver’s front panel turns on to show the
receiver is on, and turns off to show it’s off.
MENU BUTTON
Press this button to open the Ma in Menu.
PAGE UP AND PAGE DOWN BUTTONS
Press the PAGE UP button or the PAGE DOWN button to scan, page
by page, through the Program Guide,aThemes list, a Favorite
List,anEvent Timers list, or a list of channels.
Note: An “event” is any satellite program.
GUIDE BUTTON
Press this button to open the Program Guide. When you have the
Program Guid e open, press this button to change between your
Favorite Lists.
12 121716
Page 15
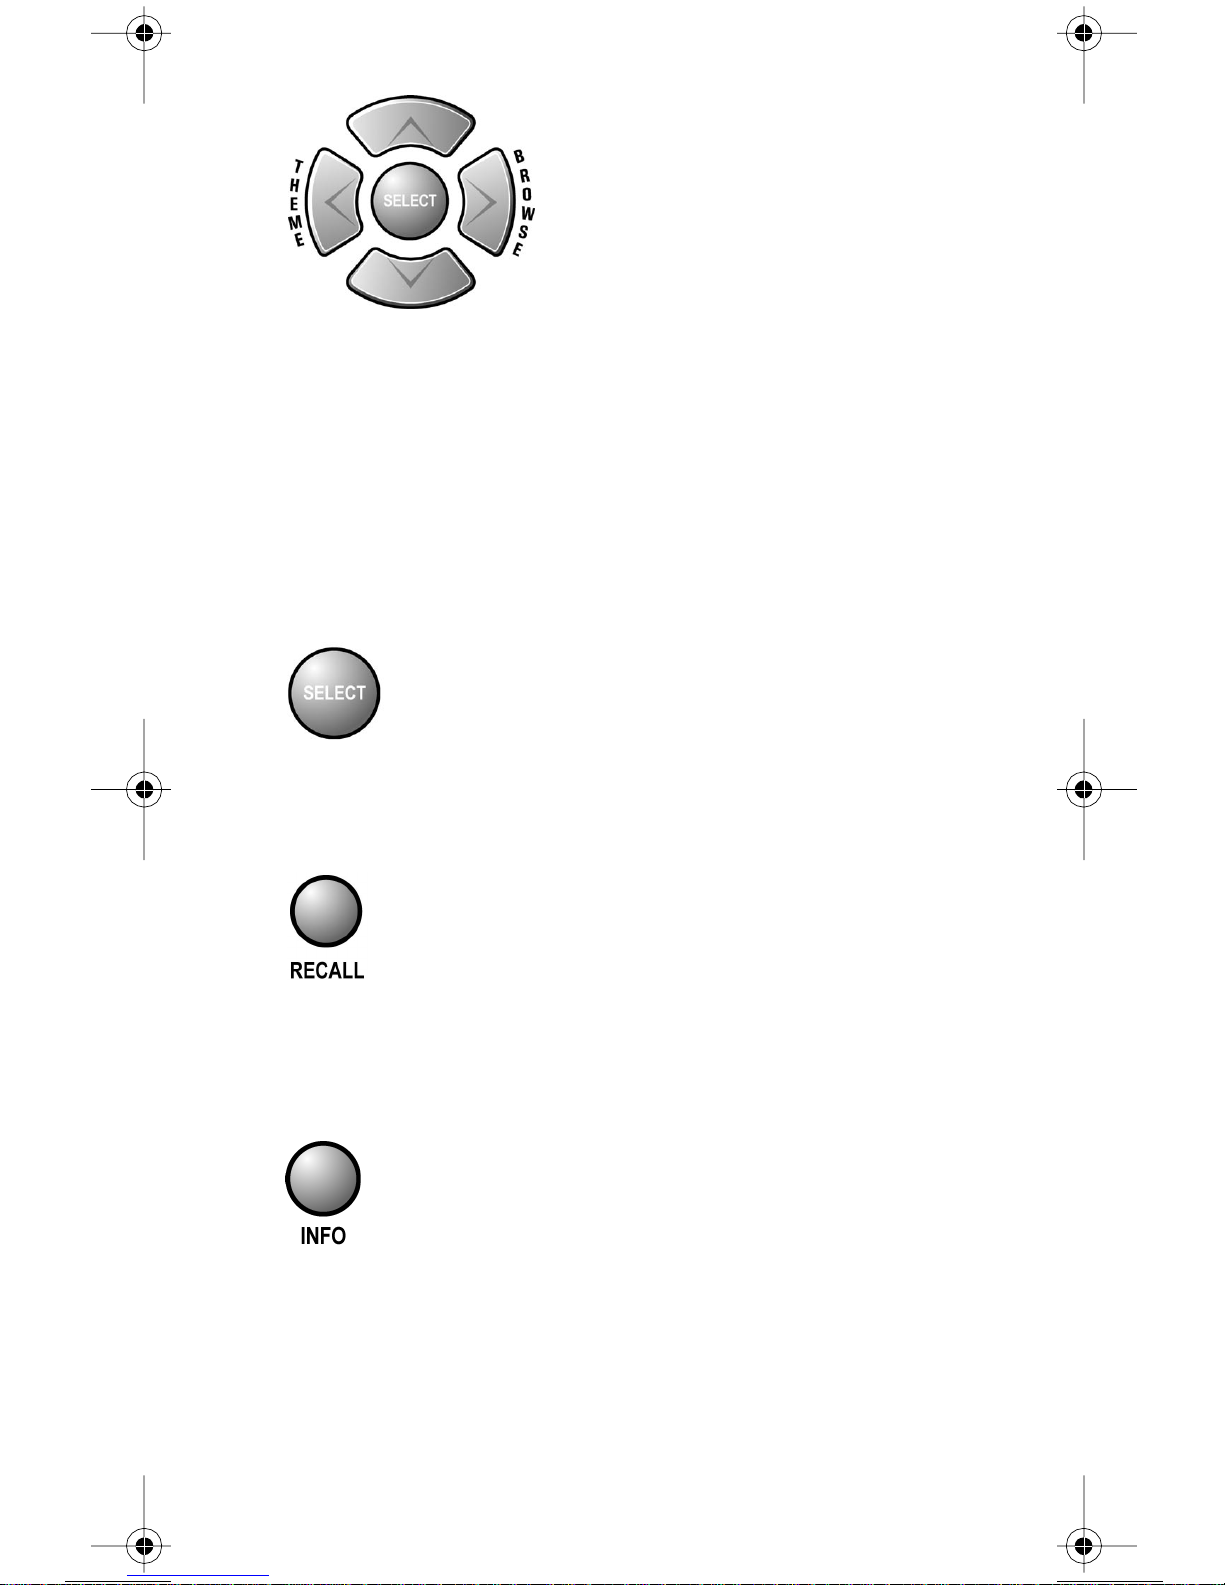
A
RROW BUTTONS
• Change channels - Press the UP or DOWN arrow button to
change channels.
• Open the Browse Banner -PresstheRIGHT arrow button.
• Show Themes-PresstheLEFT arrow button.
• M ove around withinthe Program Guide,menus,andBrowse
Banner -PresstheUP, DOWN, LEFT,andRIGHT arrow
buttons.
SELECT BUTTON
Press this button to select the option you highlight i n a menu.
RECALL BUTTON
Press this button to go back to the last receiver channel you watched.
Press it again to switch between the last two receiver channels you
watched.
INFO BUTTON
• Program information - Press the INFO button formore
information when you watch a program, or when you have the
Program Guide, Browse Banner,orThemes list open.
• Help - Press the INFO button to see help information when a
Helpbutton appears in a menu.
121716 13
Page 16
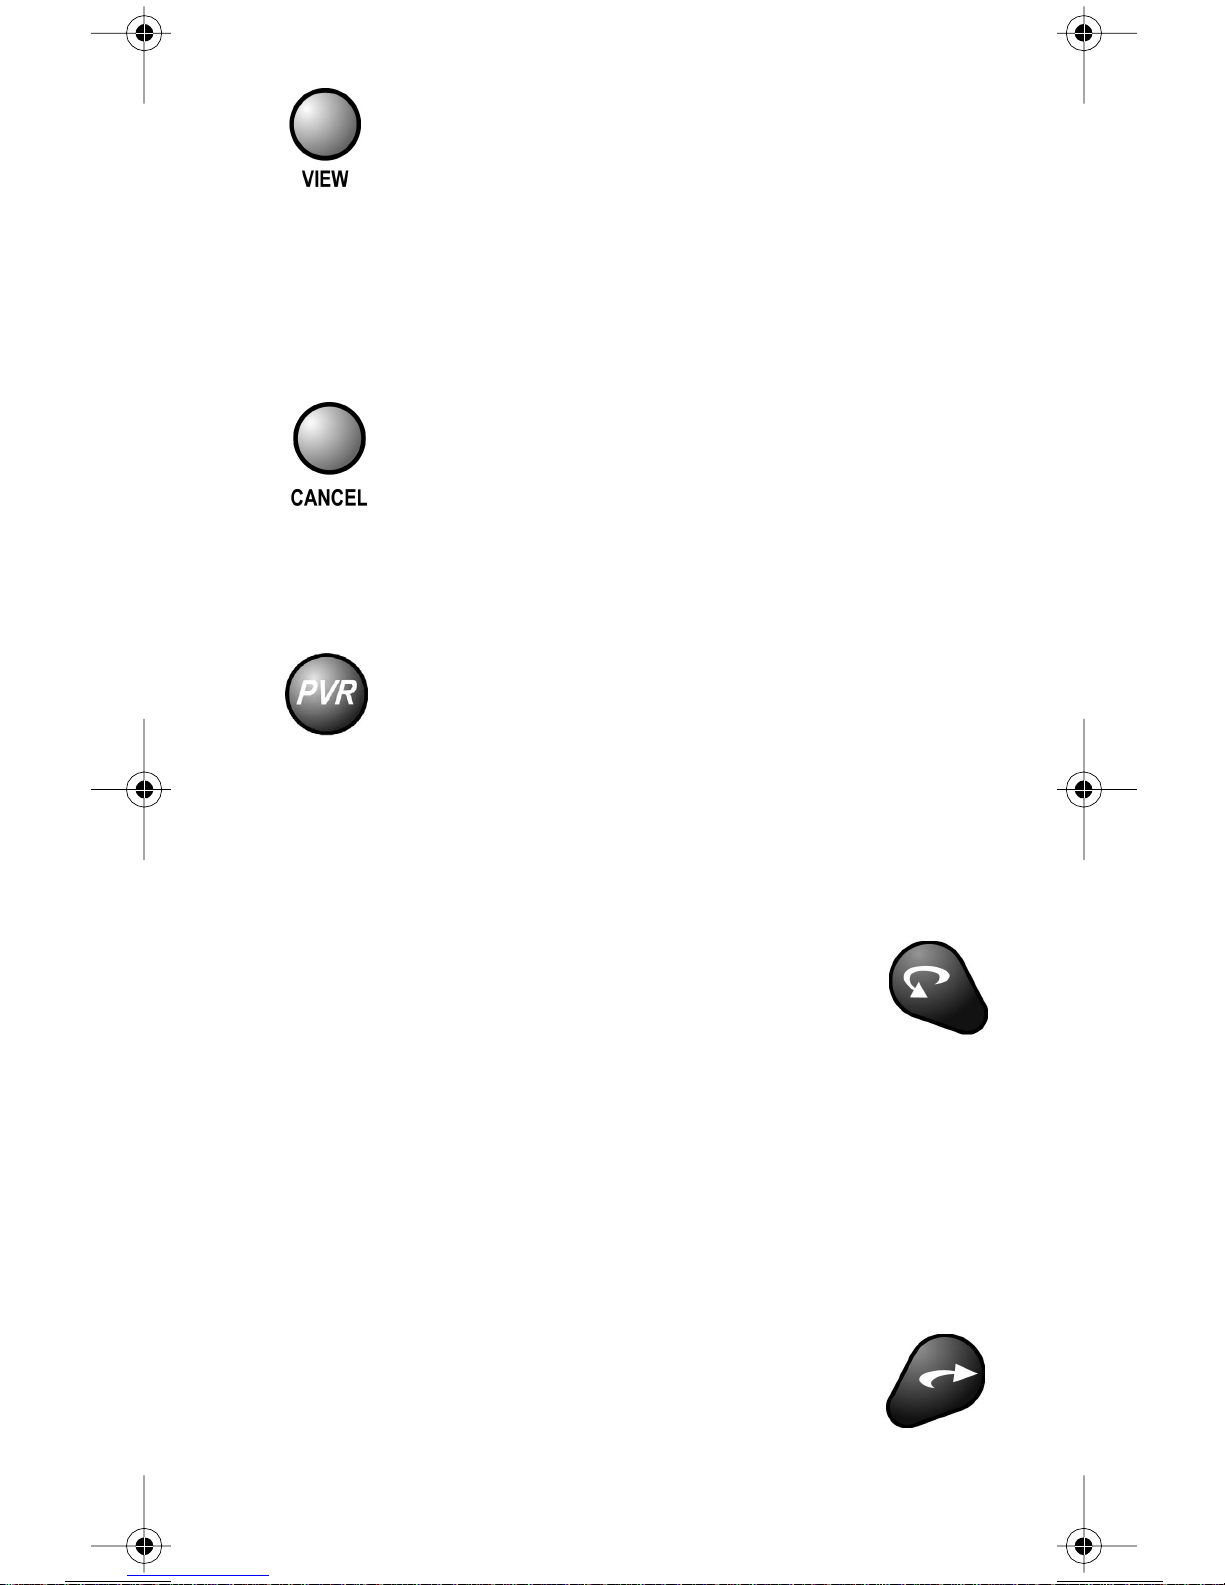
V
IEW BUTTON
• W hen you watch a program, press this button to briefly display
the Program Banner.
• W hen you use a menu, press this button to cancel
and go back to watch a program.
CANCEL BUTTON
Press this button to cancel and go back to the previous menu or to
watch a program.
DISHPVR BUTTONS
Use these buttons to record or play back a program.
• Pr ess the PVR buttontoopentheDishPVR
Recorded Events menu.
• Pr ess the SKIP BACK button to:
• Skip back about ten seconds in a program. Press
thisbuttonagaintoskipbackagain.
• Use the frame reverse feature. Press the PAUSE
button and then press the SKIP BACKbutton to
reverse the recording one frame at a time.
• Skip back one day at a time in the Electronic Program Guide
(EPG).
Note:TheSKIP BACKbutton will not skip back the EPG
beyond the current date.
• Pr ess the SKIP AHEAD button to:
• Skip ahead about 30 seconds in a program. Press
this button again to skip ahead again.
14 121716
Page 17
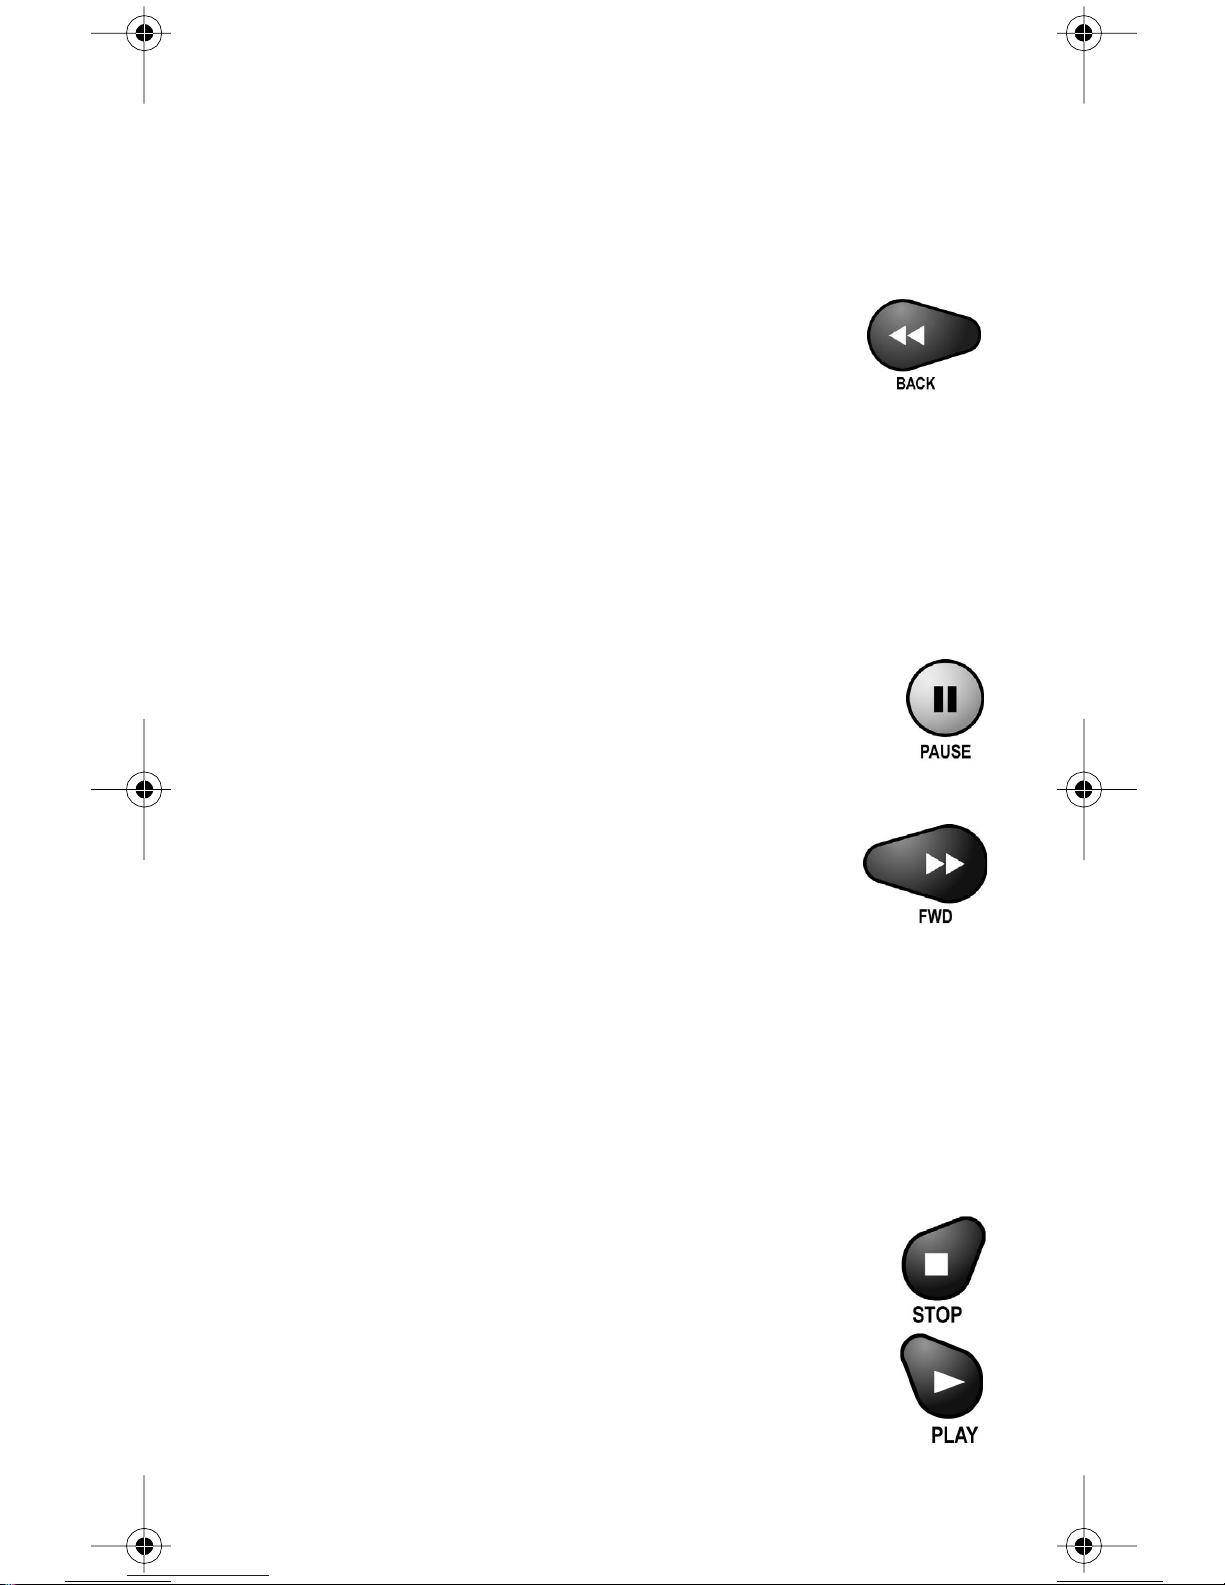
• Use the frame advance feature. Press the PAUSEbutton and
thenpress the SKIP AHEADbutton to advance the recording
oneframeatatime.
• SkipaheadonedayatatimeintheEPG.
• Pr ess the BACK button to:
• Move back through a program four times as
fast as normal play . Press this button twice to
move back at 15 times, three times to move
back at 60 times, and four times to move back
at 300 times as fast as normal play.
• Use the slow m otion feature. Press the PAUSEbutton and
then press the BACKbutton to reverse the program in slow
motion. Press the BACK button once to reverse the program
1/4 the speed as normal play. Press the BACKbutton twice to
revers e at normal speed.
• Pr ess the PAUSE button to pause a program.
Press this button again to go back to watching
the program.
• Pr ess the FWD (“forward”) button to:
• Move ahead through a program four times as
fast as normal play . Press this button twice to
move ahead at 15 ti mes, three times to move
aheadat60times,andfour times to move
aheadat300timesasfastasnormalplay.
• Use the slow m otion feature. Press the PAUSE button and
then press the FWD button to forward the program i n slow
motion. When you press the FWD button once the program
advances at 1/15 the speed of normal play. Press the FW D
buttontwiceto forward at 1/4 as fast as normal play. Press the
FWDbuttonthreetimestoplaytheprogram.
• Pr ess the STOP button to stop recording a program or
to stop playing a recorded program.
• Pr ess the PLAY button to watch a program. Also,
press this button to switch from forward or reverse
back to watch the program at normal speed.
121716 15
Page 18
• Pr ess the RECORD button to start recording a
program.
Note: You also use this button if you change
theremotecontroladdress.Seepage9.
DISH BUTTON
Press the dish button to go to Dish Home for receivers that support
Dish Home .
NUMBER BUTTONS
• Change the channel - Use the NUMBER buttons to enter a
channelnumber to change the channel. If you have the Program
Guideopen, use the NUMBER buttons to jump to the channel
listing on the Program Guide.
• Scroll through the Program Guide by time - When you have
the Program Guide open, enter a number of hours using these
buttons,and then press the RIGHT or LEFTarrowbuttontoskip
the Program Guide forward or backward that many hours.
Enter menu options - For an option with a number, you can press
the number for that opt ion instead of highlighting and selecting
the option.
• Ent er numbers in a blank - Highlight the place where you need to
enter the number. Press a number button(s) (or, you can use the
UP/DOWN arrow buttons to enter the number).
16 121716
Page 19
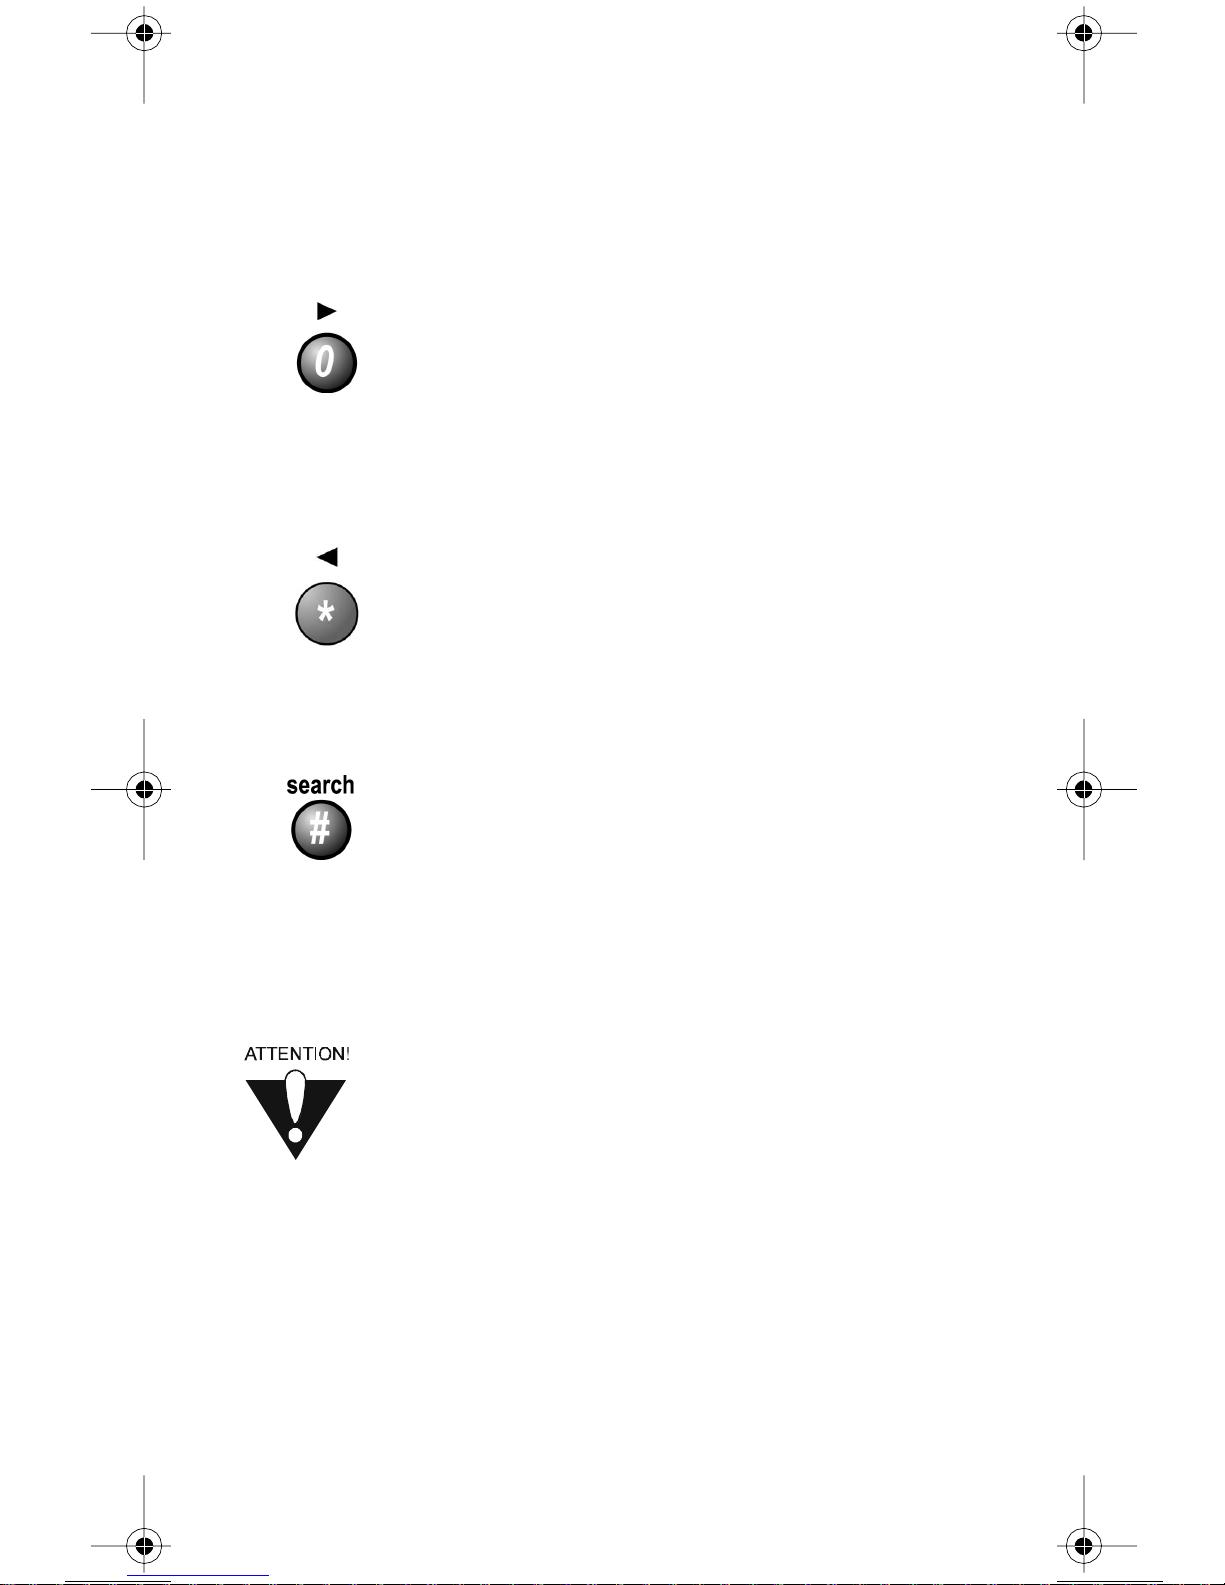
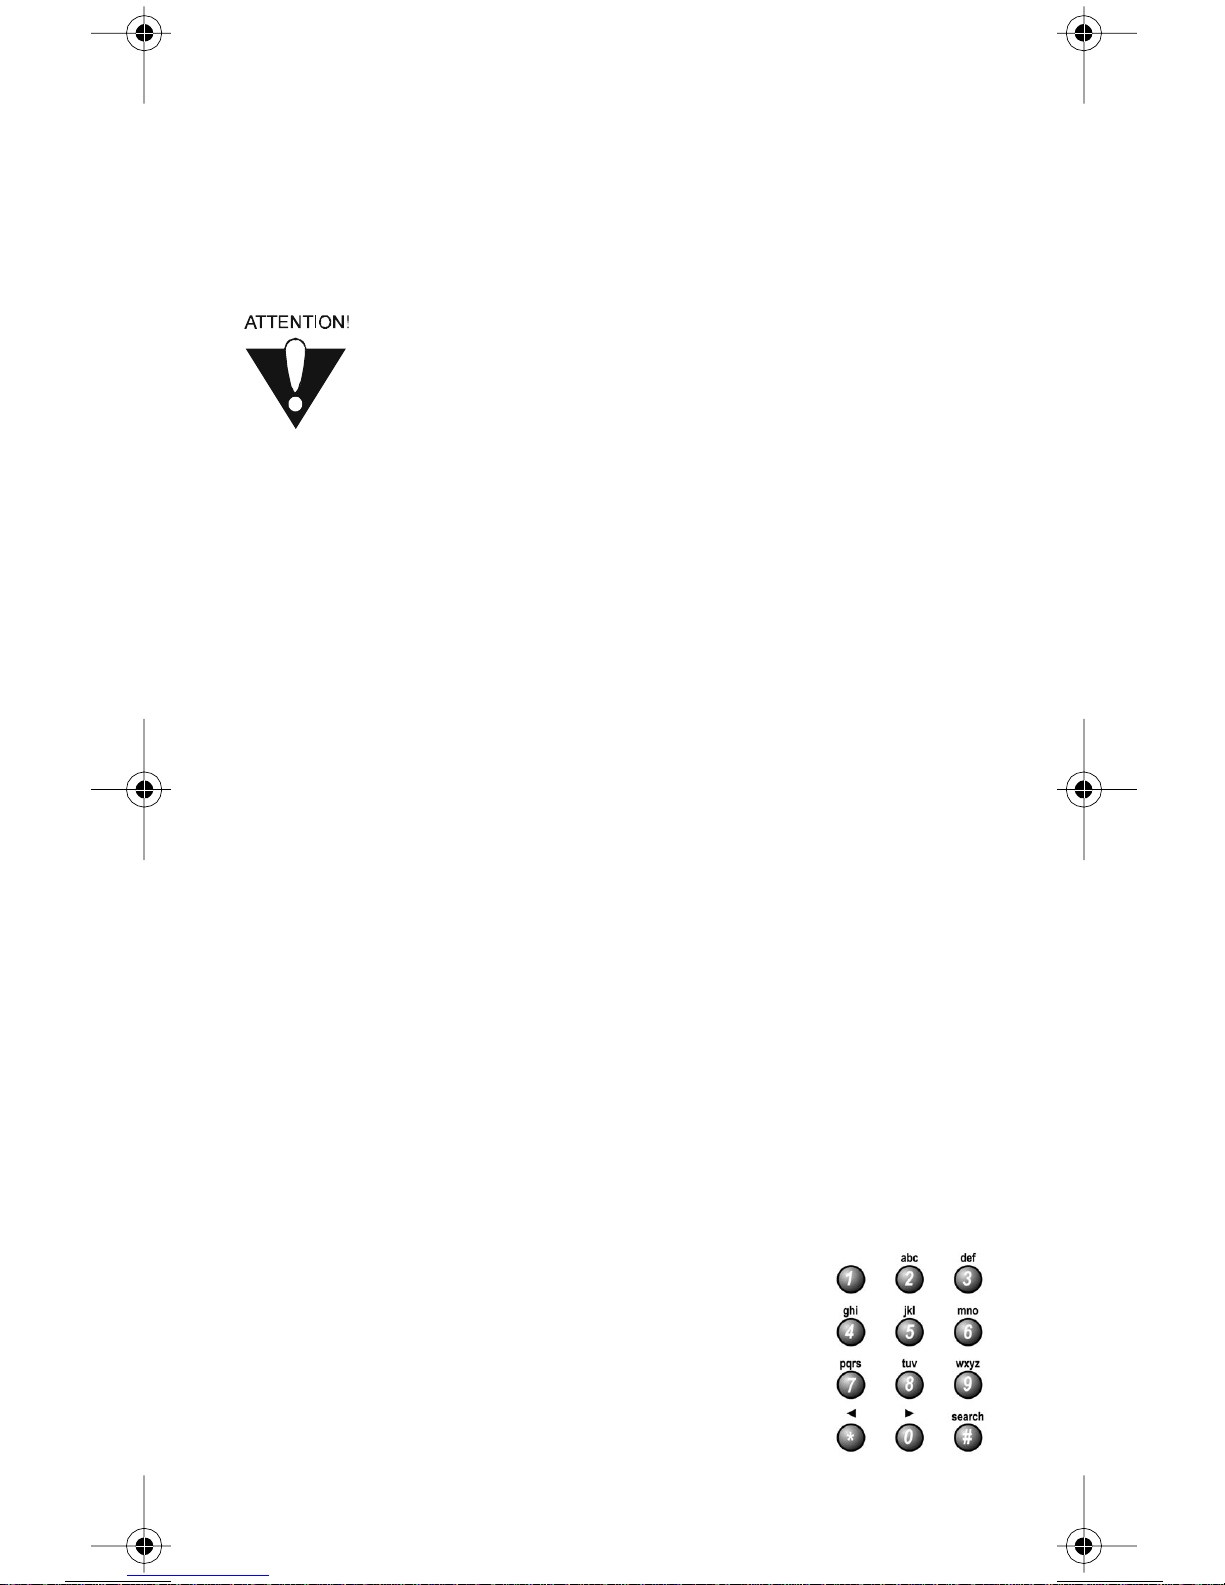
• Search - Use the letters above the NUMBER but tons while in the
Search menu. For example, when looking for the channel and
times to watch Rudy Fremmel Presents, you press 7 three times
for an R, 8 two times for a U, 3 one time for a D,and9 three
times for a Y to spell the word “Rudy” (see your receiver’s User
Guidefor m ore information).
ZERO BUTTON
Press this button to forward space while using the search function of
your receiver.
STAR (*) BUTTON
Press this button to back space while using the search function of your
receiver.
POUND (#) BUTTON
Press this button to display the Search screen. Also, you use this
button in several proceduresin thi s User Guide.
CONTROL A TV (OR A SECOND TV)
Only the buttons we tellyou about here control a
TV. Some of the buttons we tell you about here
may not control your TV. See your TV user’s manual for
information about the TV’s features.
You can set up the remote to control a second TV
in AUX mo de, the same way it controls the first TV
in TV mode. See Set Up the Remote Control
on page 6.
121716 17
Page 20
TV M
You must first set up the remote to control the TV. See Set Up the
Remote Control on page 6. Then press the TV mode button to set the
remote to TV mode. The TV mode button will stay lit for two seconds
to show you’ve set the remote to TV mode.Make sure you keep t he
remote in TV mode to use the buttons we te ll you about here.
ODE BUTTON
POWER BUTTONS
Press either POWER but ton to turn the TV on or off.
Note:IfyousetuptheremotetocontroloneTVinTV mode and an
additional TV in AUX mode, pressing the TV POWER button controls
only the TV you set up in TV mode.
TV/VIDEO BUTTON
If the TV has video input opt ions, use this button to switch the TV
video input.
MUTE BUTTON
PressthisbuttontoturntheTVsoundonoroff.
VOLUME BUTTON
Press this button to raise (+) or lower (-) the TV sound volume.
18 121716
Page 21
U
P/DOWN ARROW BUTTONS
Use these buttons to change channels on the TV.
Note: These buttons do not change the channels on the TV if the
remote control is in limited mode.
SELECT BUTTON
The SELECT button works as the ENTER button for a TV.
RECALL BUTTON
Press this button to go back to the last TV channel you watched. Press
it again to switch between the last two TV channels you watched.
Use these buttons t o directly enter a different channel.
Note: These buttons do not change the channels on the TV if the
remote control is in limited mode.
121716 19
NUMBER BUTTONS
Page 22
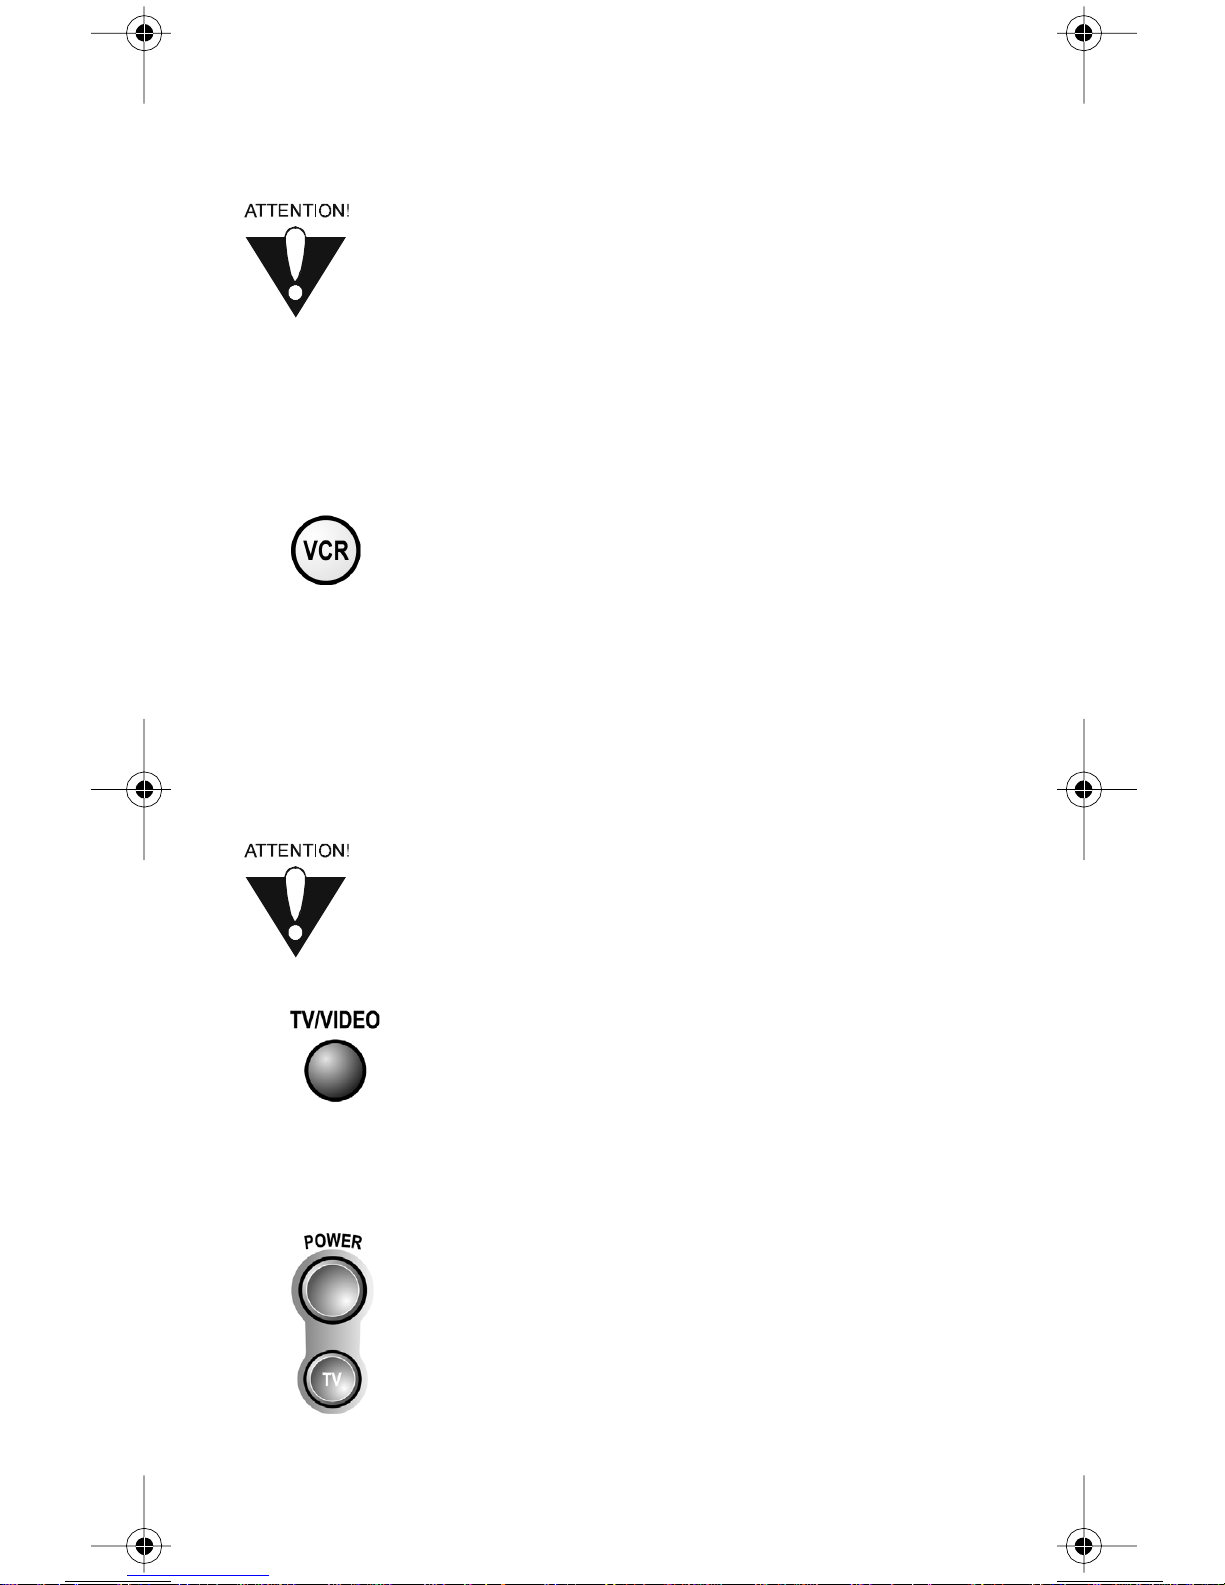
CONTROL A VCR (OR A SECOND VCR OR A DVD
PLAYER)
Only the buttons we tellyou about here control a
VCR or DVD.Some of the buttons we tell you about here
may not control your VCR. See your VCR’s
user’s manual for information about the VCR’s features.
You can set up the remote to control a second VCR
in AUX mo de, the same way it controls the first VCR
in VCR mo de. See Set Up the Remote Control
on page 6.
VCR MODE BUTTON
You must first set up the remote to control the VCR. See Set Up the
Remote Control on page 6. Then press the VCR mode button to set the
remote to VCR mode. The VCR mode button will stay lit for two
seconds to show you’ve set the remote to VCR mode.Makesureyou
keep the remote in VCR mode to use the buttons we tell you about
here.
You must put the remote in VCR mode to set it up to
control a DVD player.Later, you must putthe remote in
VCR mode to use it to control a DVD player
.
TV/VIDEO BUTTON
Use this button to switch the VCR b etween its TV mod e and its VCR
mode (see your VCR user’s manual for information).
POWER BUTT O N
Press the blank POWER button to turn the VCR on or off. Press the
TV POWER button to turn the TV on or off.
20 121716
Page 23
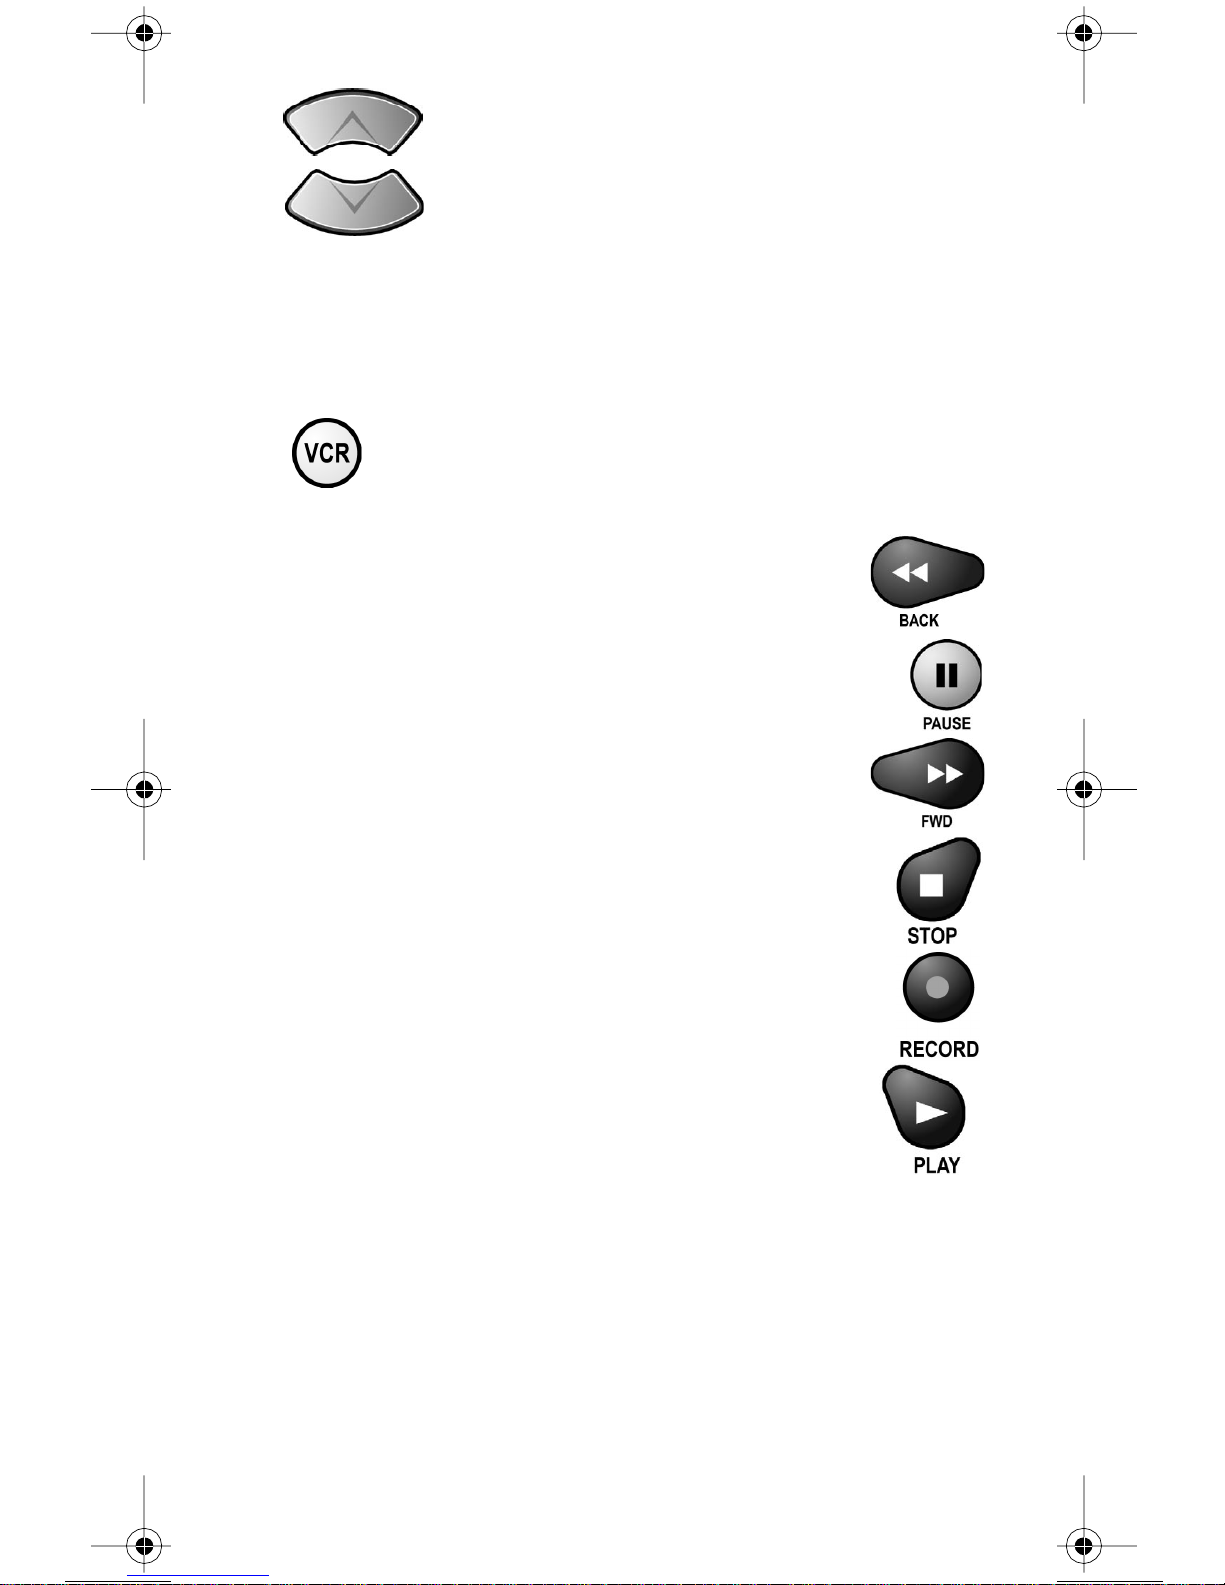
U
P/DOWN ARROW BUTTONS
Use these buttons to change channels on the VCR.
Note: If you are using the remote control in Limited Mode, the TV
will not change channel s.
VCR BUTTONS
• Pr ess the BACK button t o rewind a videotape.
• Pr ess the PAUSE button to pause a videotape.
Press this button or the PLAYbutton to play the tape.
• Pr ess the FWD (“forward”) button
to forward a videotape.
• Pr ess the STOP button to stop playing
or recording on a videotape.
• Pr ess the RECORD button to record
on a videotape.
• Pr ess the PLAY buttontoplayavideotape.
121716 21
Page 24
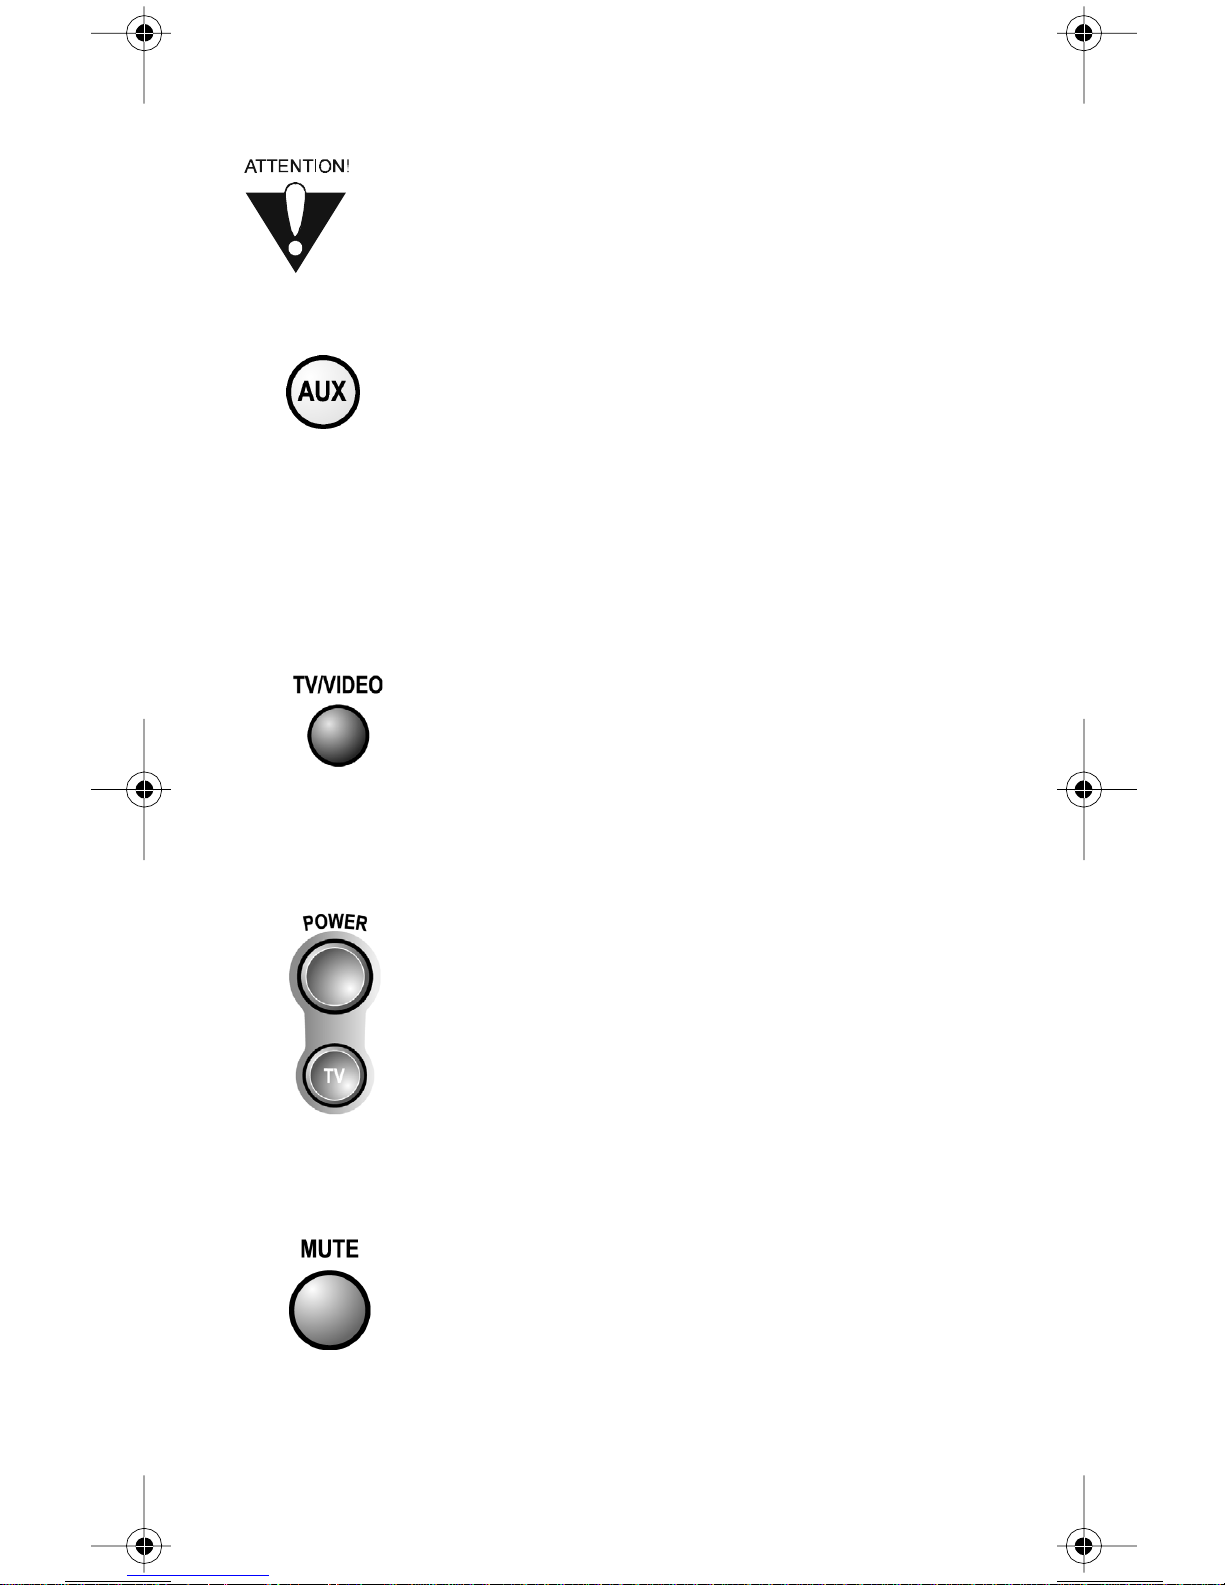
CONTROL A CABLE TV BOX
Only the buttons we tellyou about here control a
cable TV box. Some of the buttons we tell you
about here may not control your cable TV box.
See your cable box user’s manual for information
about the box’s features.
AUX MODE BUTTON
You must first set up the remote to control the cable TV box. See Set
UptheRemoteControlon page 6.Then press t he AUXmode button to
set the remote to AUX mode. The AUXmode button will stay lit for
two secondsto showyou’ve set the remote to AUXmode. Make sure to
keep the remote in AUX mode to use the buttons we tell you about
here.
TV/VIDEO BUTTON
Use this button to switch the cable box between its TV mode and its
video m ode.
POWER BUTTON
Press the blank POWER button to turn the cable box on oroff. Press
the TV POWERbutton to turn the TV on or off.
MUTE BUTTON
Press this button to turn on or off the sound from the cable box.
Note:Programtheremotetocontrolthedevice’svolumebyfollowing
the instructions on page 10.
22 121716
Page 25
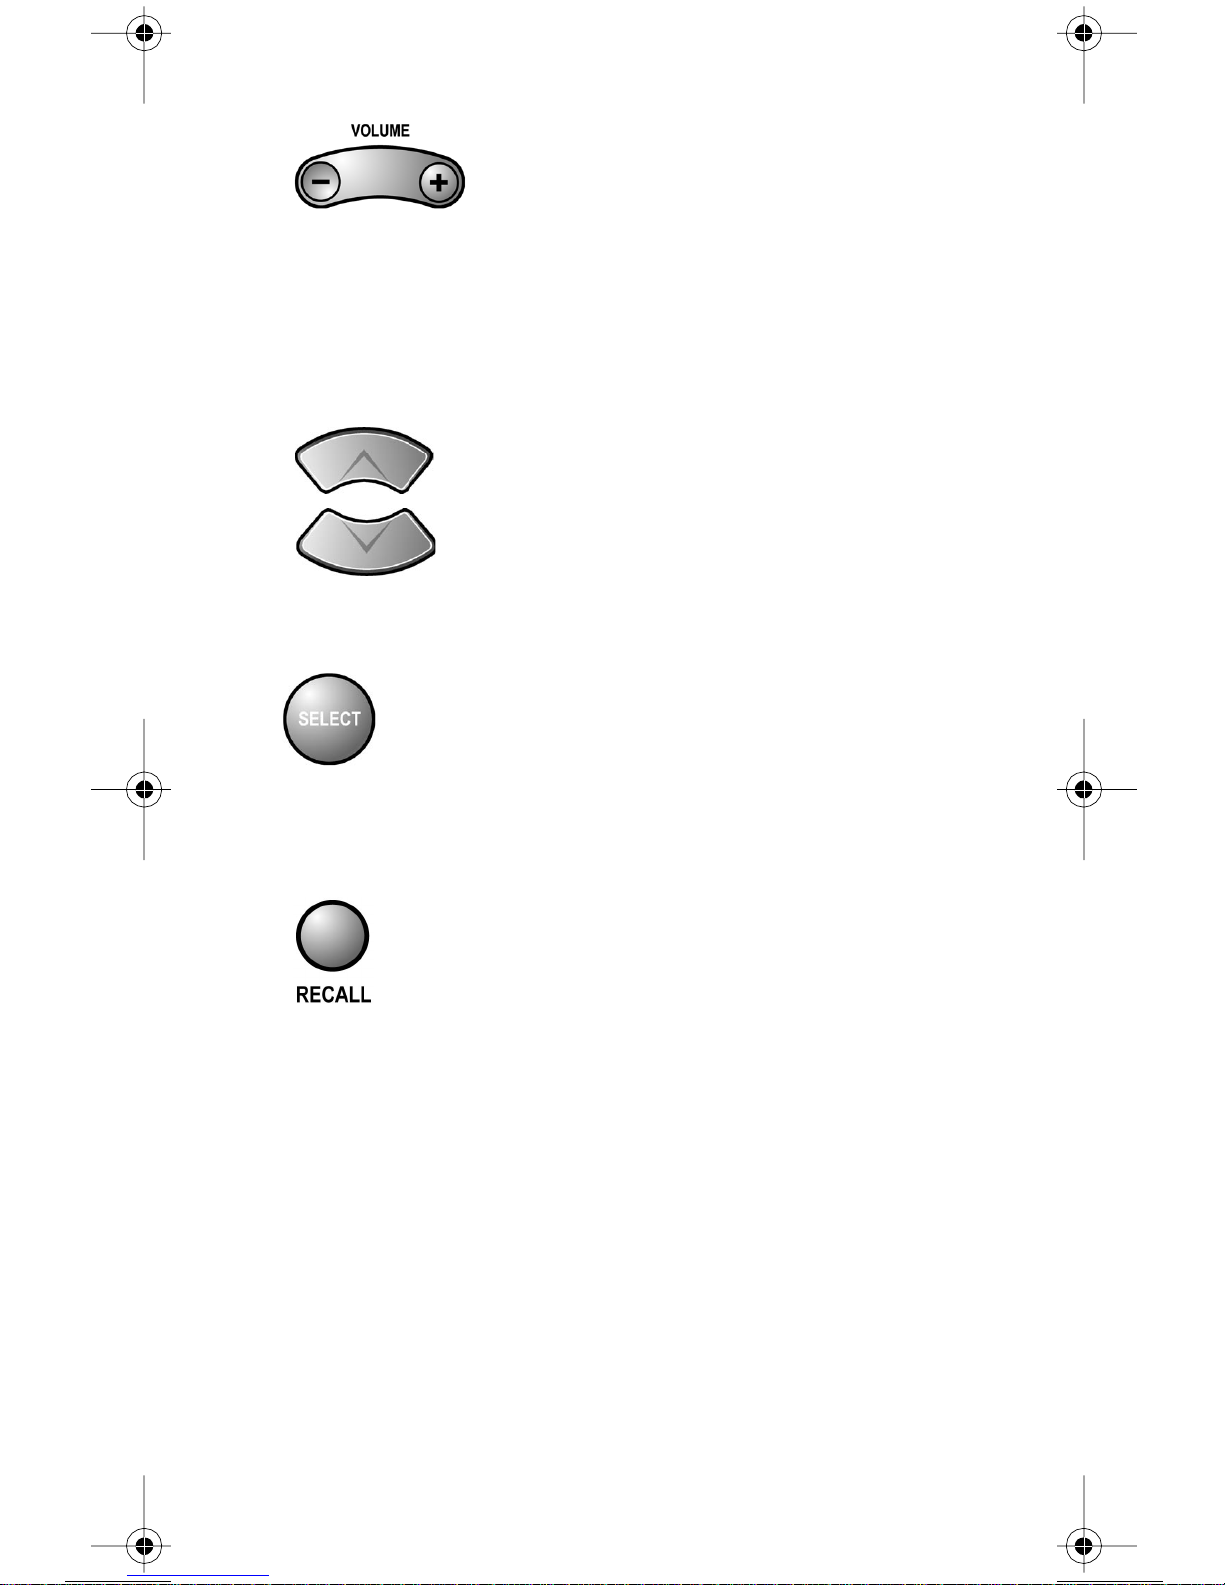
V
OLUME BUTTON
Pressthisbuttontoraise(+)orlower(-) the sound volume from t he
cable box.
Note:Programtheremotetocontrolthedevice’svolumebyfollowing
the instructions on page 10.
UP/DOWN ARROW BUTTONS
Use these buttons to change channels on the cable box.
SELECT BUTTON
Press the SELECT button in place of the ENTER button for the
cable box.
RECALL BUTTON
Press this button to go back to the last cable box channel you used.
Press it again to switch between the last two cable box channels you
used.
121716 23
Page 26
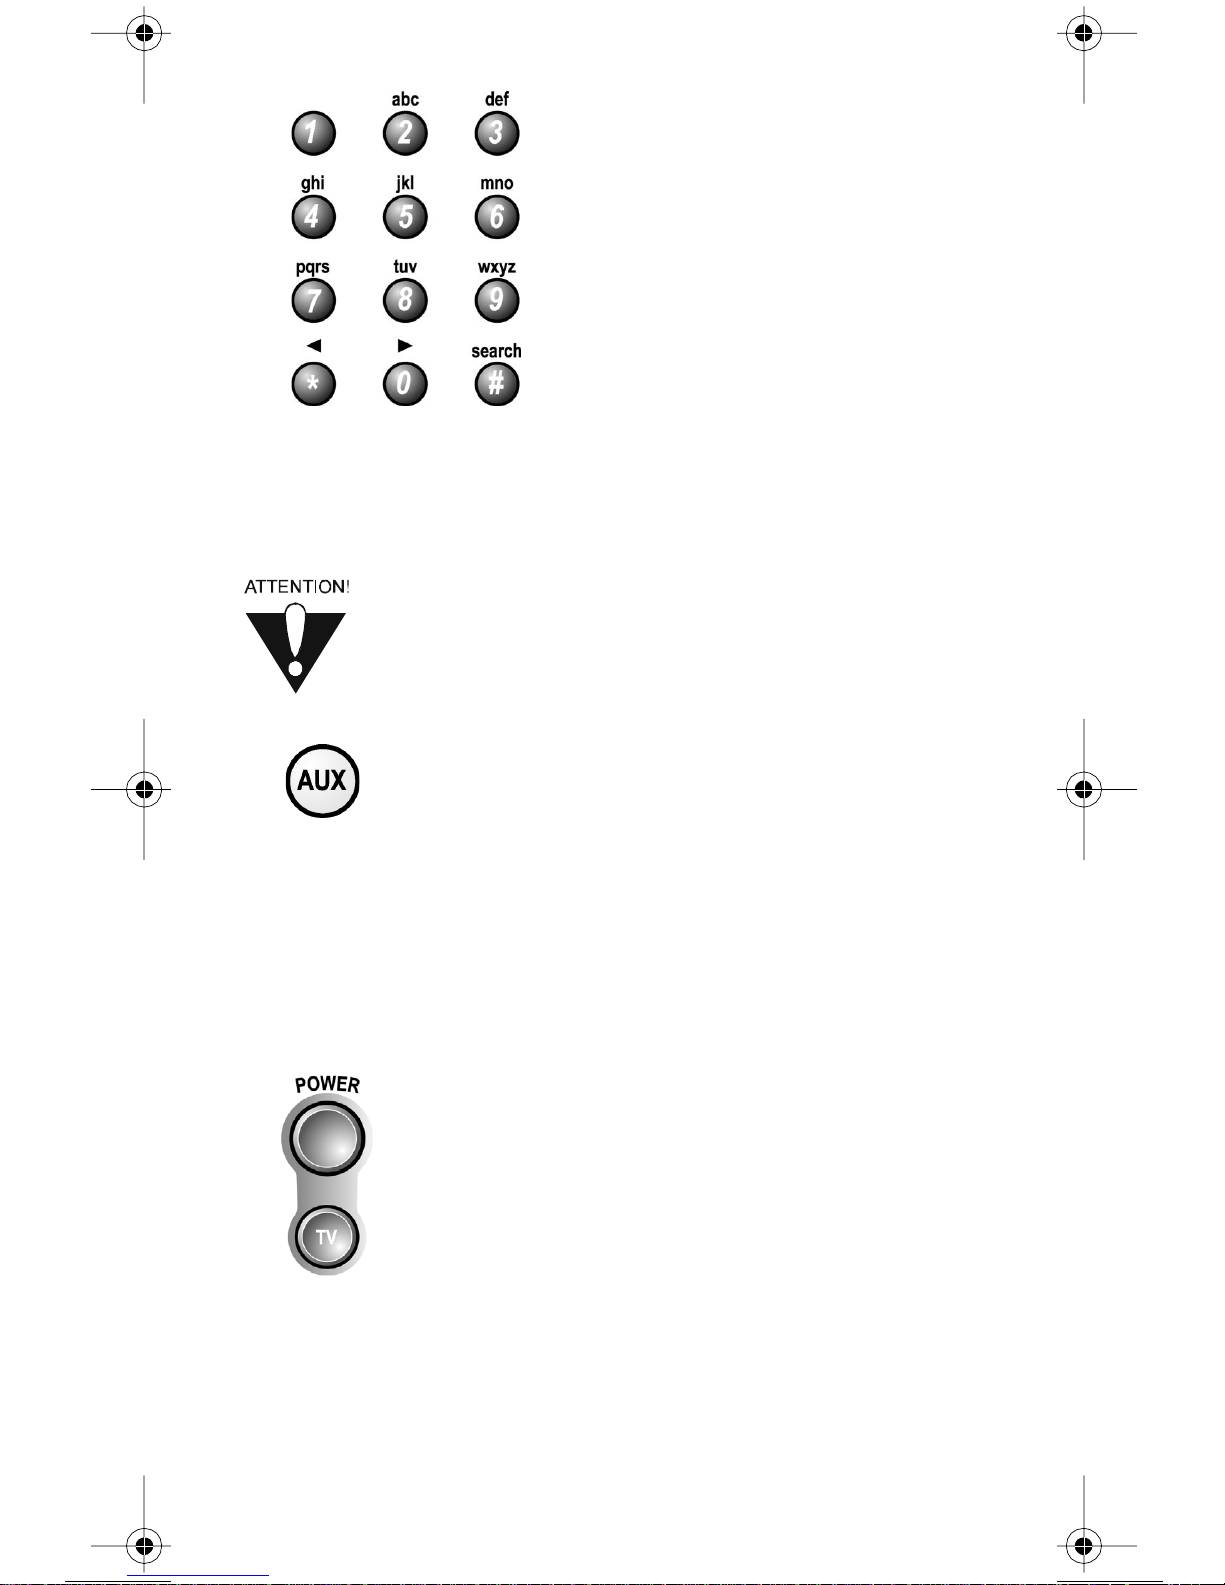
UMBER BUTTONS
N
Use these buttons to enter channel numbers.
CONTROL A TUNER OR AMPLIFIER
Only the buttons described here control a tuner or
amplifier. Some of the buttons described here may not
control your tuner or amplifier. See the device user’s
manual for information.
AUX MODE BUTTON
You must first set up the remote to control the device. See Set Up the
Remote Control on page 6. Then pressthe AUX mode button to set the
remote to AUX mode. The AUX mode button will stay lit for two
seconds to show you’ve set the remote to AUX mode. M ake sure to
keep the remote in AUX mode to use the buttons we tell you about
here.
POWER BUTT O N
Pressthe blank POWER button to turn the tuner or am plifieron or off.
Press the TV POWERbutton to turn the TV on or off.
24 121716
Page 27
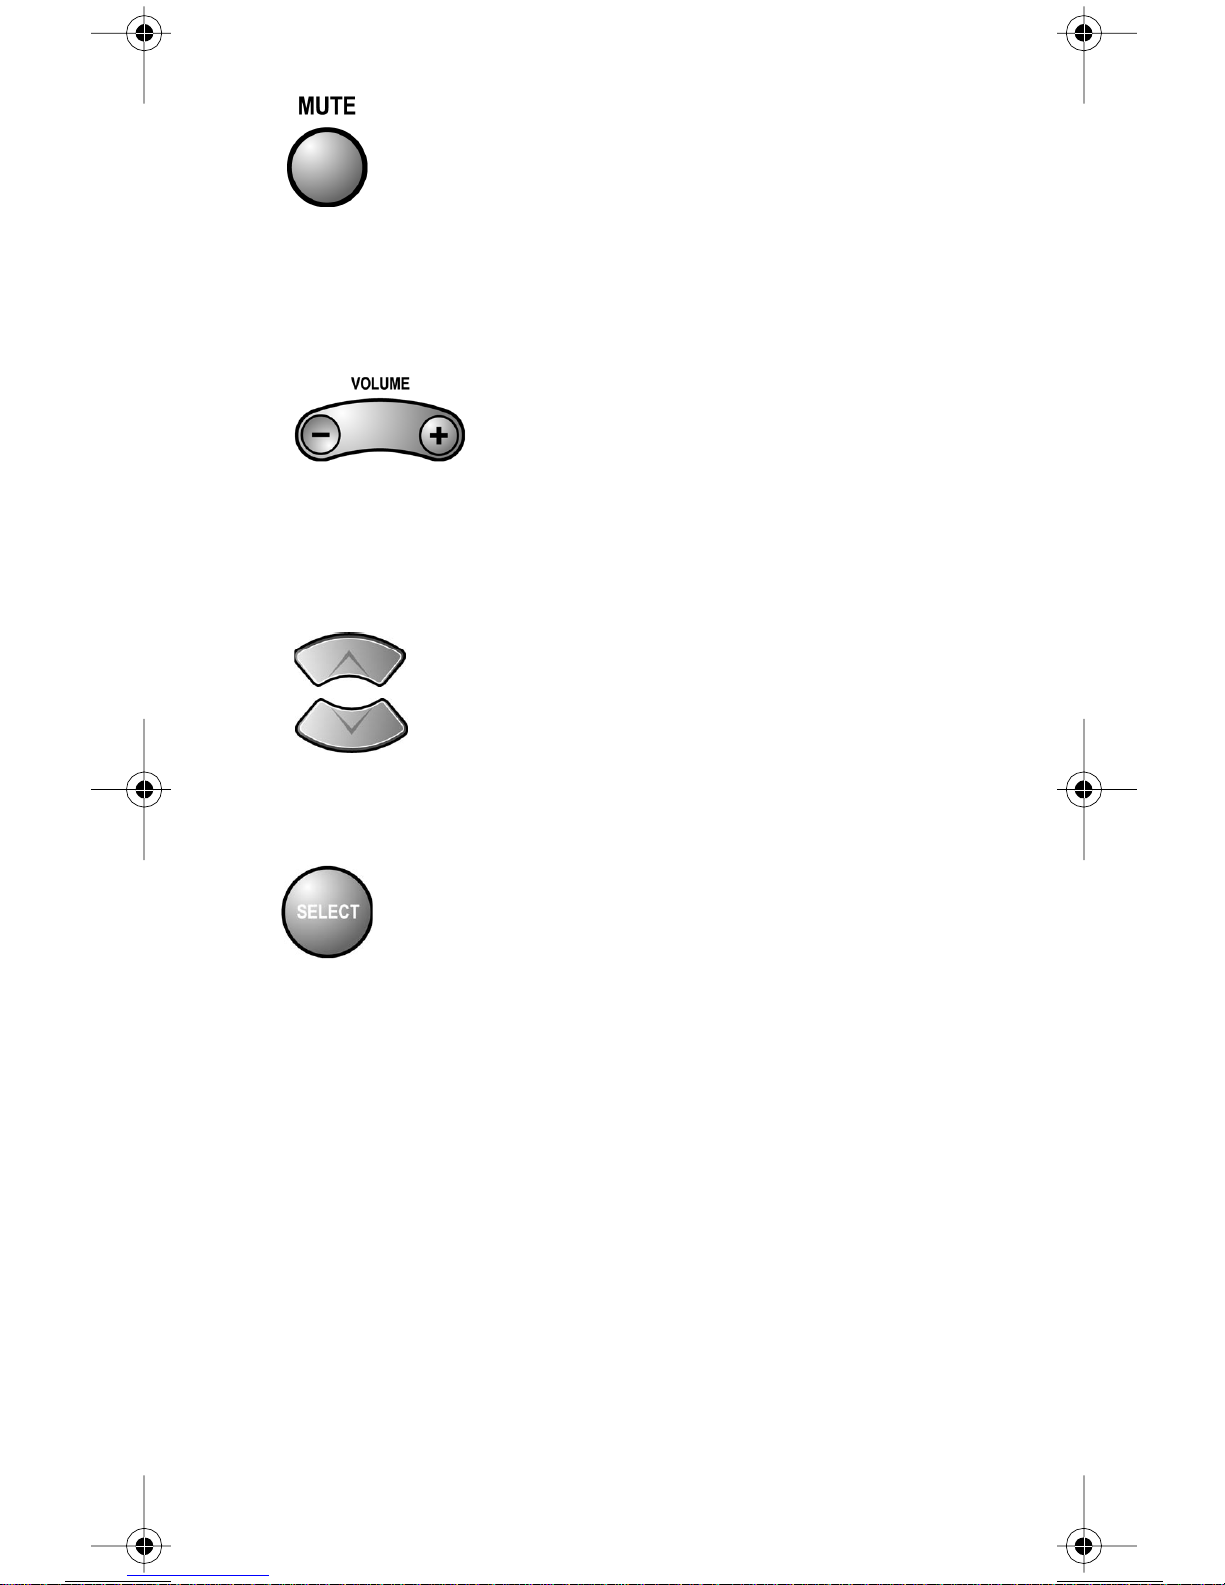
M
UTE BUTTON
Press this button to turn on or off the sound.
Note:Programtheremotetocontrolthedevice’svolumebyfollowing
the instructions on page 10.
VOLUME BUTTON
Pressthisbuttontoraise(+)orlower(-) the sound volume.
Note:Programtheremotetocontrolthedevice’svolumebyfollowing
the instructions on page 10.
UP/DOWN ARROW BUTTONS
Use these buttons to change channels on the tuner or amplifier.
SELECT BUTTON
This button works as the INPUT SELECT button for the tuner or
amplifier.
121716 25
Page 28
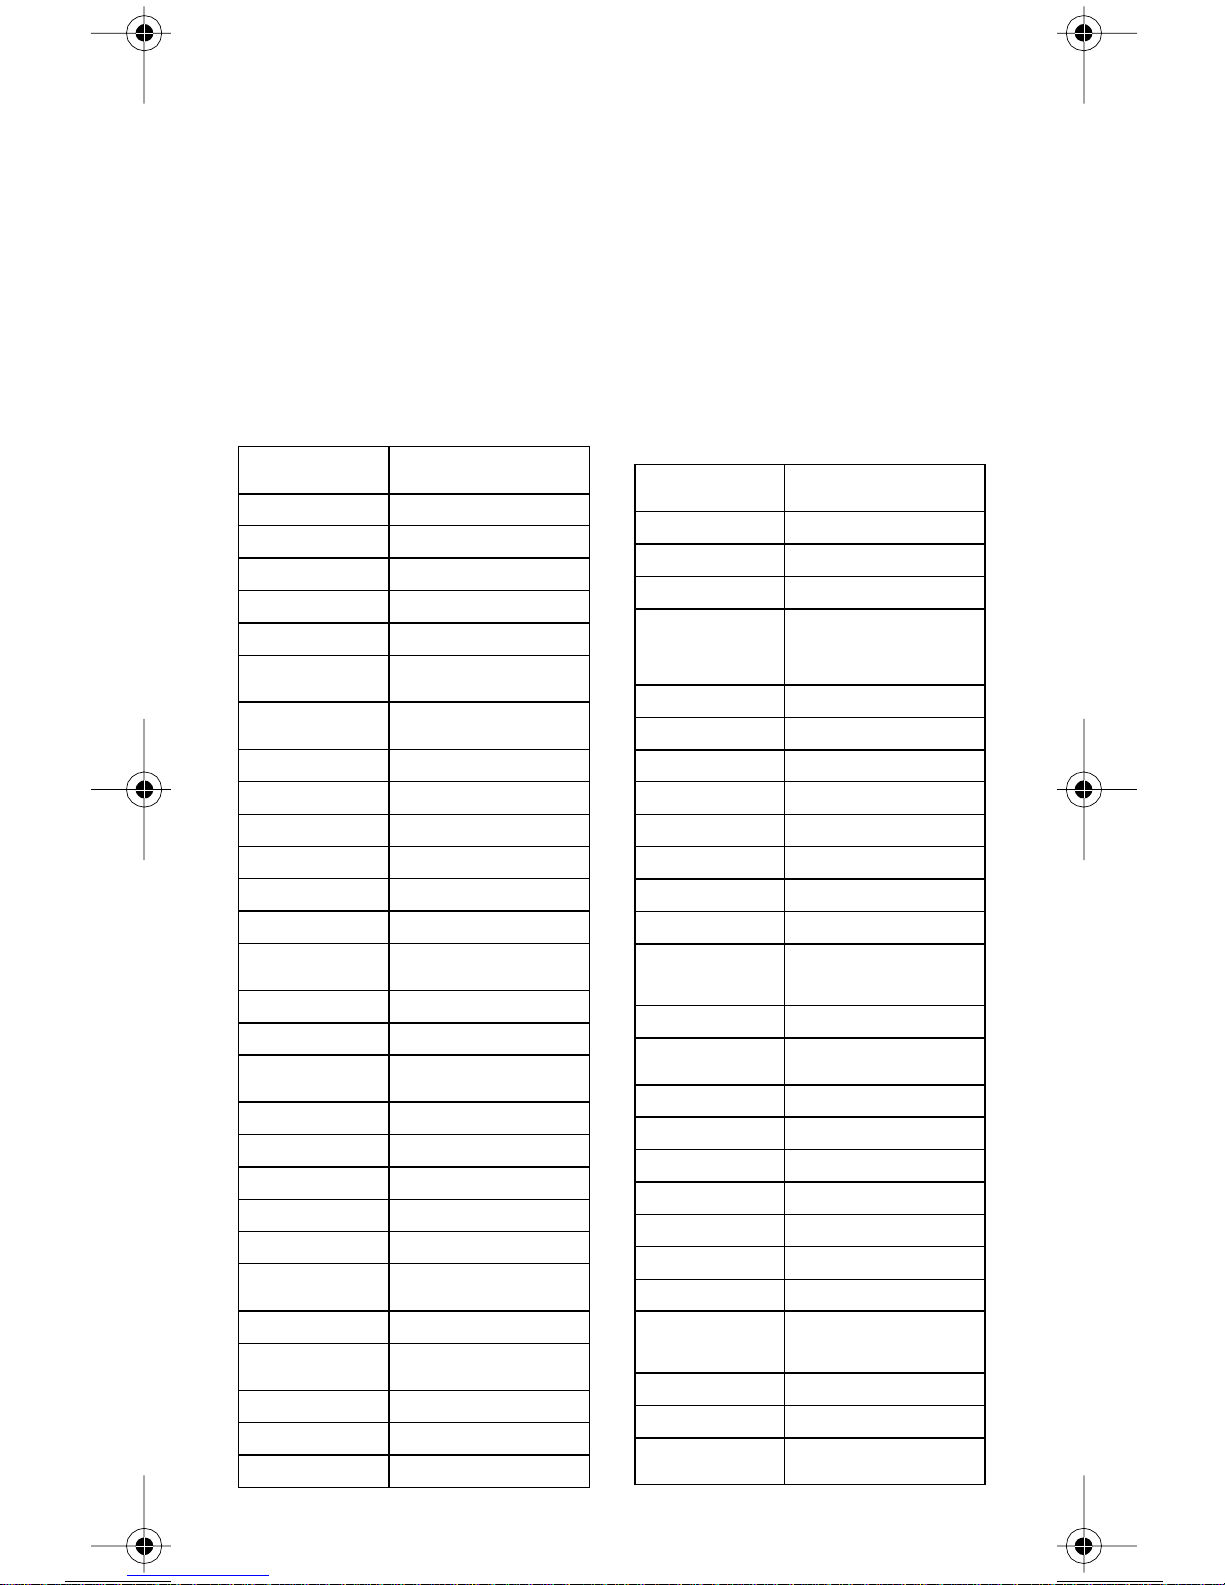
DEVICE CODES
These tables contain the manufacturer codes for programming the
remote to control your TV, a VCR, DVD player, cable box, or audio
amplifier. Every attempt has been made to include all codes. If your
device brand is not listed or if the codes to not work, the remote may
not control your device. In some cases codesmay operate some but not
all buttons shown in this guide.
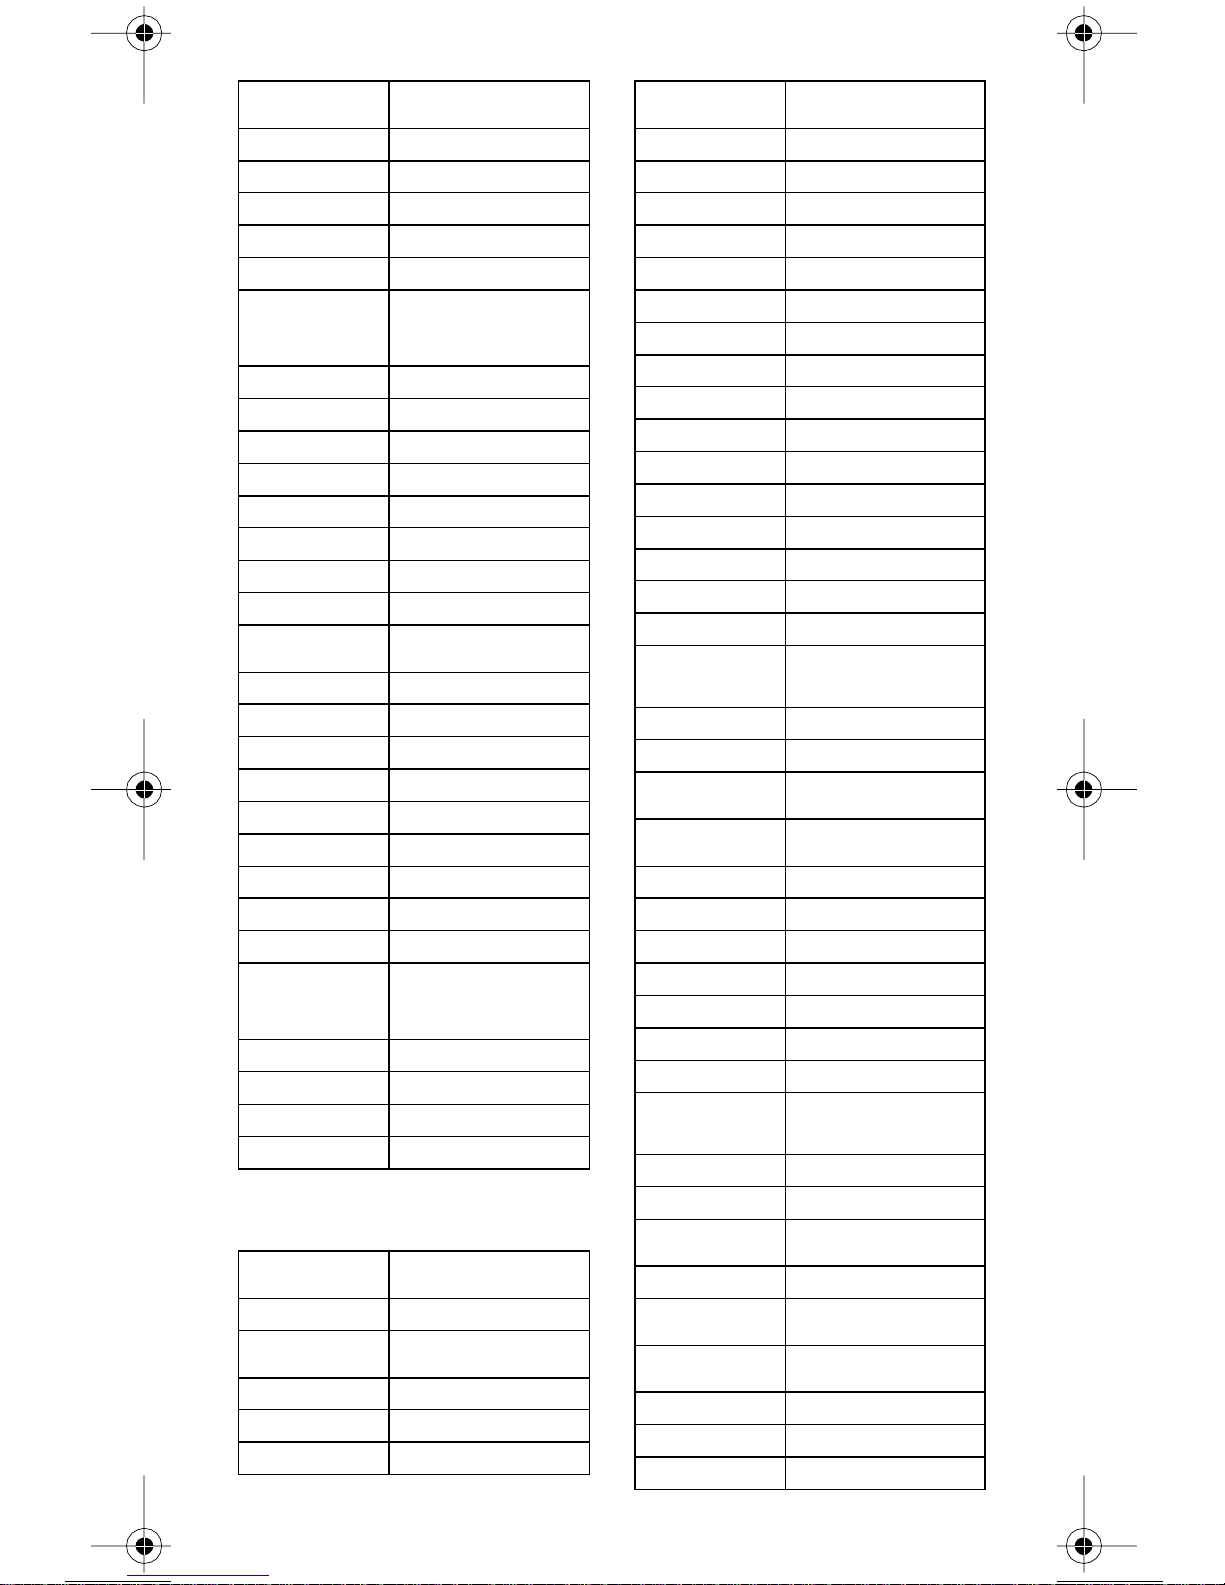
TV CODES
TELEVISION CODES
Admiral 514, 521
Akai 532,570, 573
Alba 613
A-Mark 6 20
Amstrad 533
Anam 509, 541, 620, 621,
AOC 505,506, 519, 520,620,
Archer 620
Audiovox 620
Bauer 611
Baycraft 536
Brockwood 695
Broksonic 562,691
Candle 506, 522,523, 525, 536,
Capehart 519,695
Circuit City 695
Citizen 506,516, 522, 523, 524,
Colortyme 573, 695
Concerto 523
Contec 527, 528,541, 591, 691
Craig 536,541, 691, 694
Crown 526, 536
Curtis Mathes 506,516, 526, 573,703,
CXC 541, 691
Daewoo 505,524, 526,529, 530,
Daytron 526, 695
Dixi 532, 588, 620
Dumont 695
691,698
695,712
691,695, 712
525,526, 691, 712
712,708
531,532, 698, 712,719
TELEVISION CODES
EchoStar 722
Electrohome 526, 573, 709, 713
Elta 532
Emerson 526,527, 528,533, 534,
Envision 506, 712
Etron 532
Fisher 542, 590
Formenti 611
Fortress 573,605
Fujitsu 534, 694
Funai 534, 541, 691, 694
Futuretech 541,691, 694
General Electric
(GE)
Genexxa 613
Goldstar 505, 523, 526, 545,546,
Granada 695, 711
Grand 695
Grandiente 711
Grundig 547
Hallmark 695
Harmon Kardon 561
Hinari 534
Hitachi 523,526, 548, 549, 550,
Infinity 566
JBL 566
JC Penney 503,505, 506,516, 526,
535,536, 537, 538,539,
540,541, 573,622,691,
692,695, 696, 699,720,
503,508, 509, 515,540,
543,544, 630, 695,698,
701,714, 715, 716
573,588, 693, 712
551,552, 553, 554,555,
585,597, 626, 702,718
531,543, 596, 701,714
26 121716
Page 29
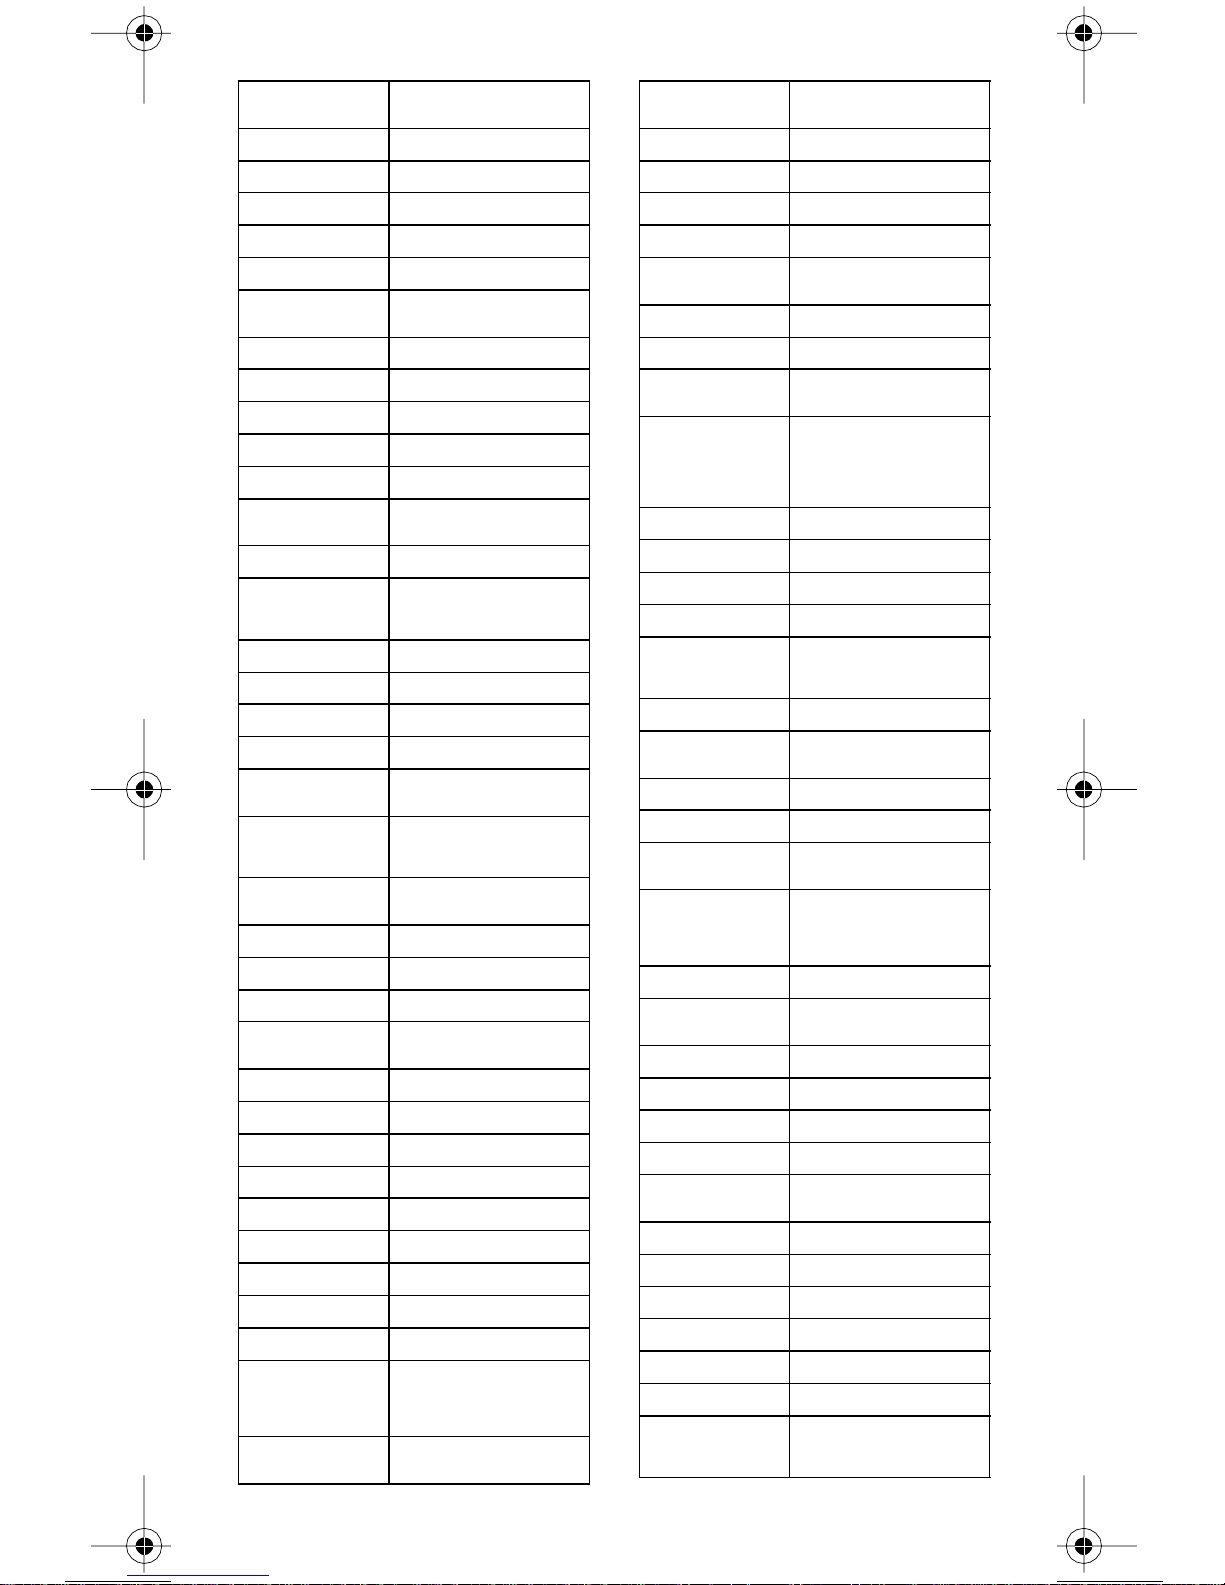
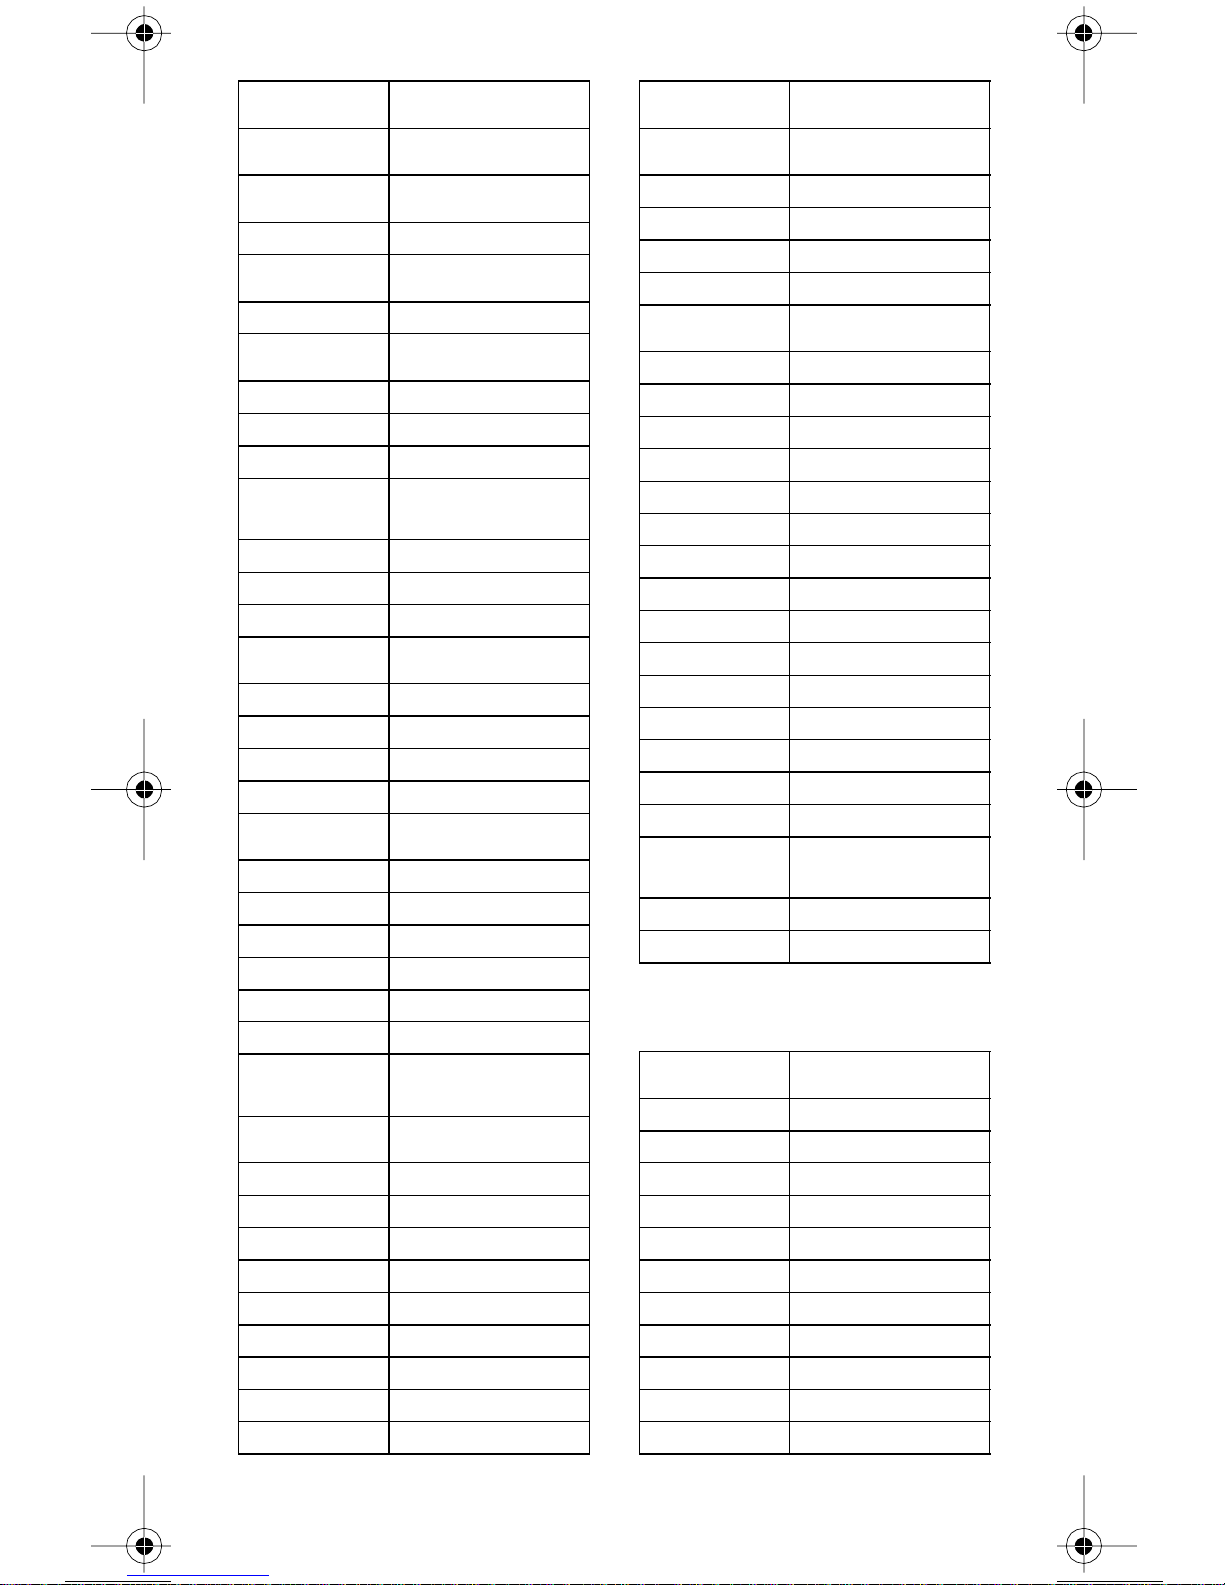
TELEVISION CODES
TELEVISION CODES
Jenson 556,573
JVC 557, 558, 559, 560
Kawasho 548, 561, 712
Kenwood 506,573, 712
Kloss 522, 561, 610, 698
KTV 526,539,540,541,691,
Lloyds 695
Lloytron 526
Loewe 588
Logik 518
Luxman 523
LXI 503,563, 566,590, 595,
Magnasonic 573
Magnavox 506,520, 525, 536, 564,
Marantz 506, 566, 573, 588, 712
Matsui 532,609
Megatron 695
Memorex 518,532,590,695,720
MGA 504, 505, 506, 571,
Mitsubishi 504,505, 570,571, 572,
MTC 505,506,516,523,531,
NAD 502, 617, 695
National 509, 697,698
National Quenties 697
NEC 505,506,507,517,523,
Nikkai 612, 613, 618
Nordmende 551
Normandic 717
Novabeam 561, 698
Nyon 701
Onwa 541, 691
Optonica 605,607
Orion 694
Osaki 612
Panasonic 508, 509, 510,511,512,
Philco 505,506, 525, 536,564,
696,712
617,625, 701
565,566, 567, 568,569,
573,575, 610, 710,712
573,695
597,623, 695, 705,707,
712
695,712
573,627, 712
566,574, 685,
686,687,689, 697, 698,
700,706, 714, 716
565,568, 573, 610,712
Philips 566, 588
Pioneer 502,548,551, 576,708
Portland 505,526, 712
Proscan 503
Proton 513,519, 526, 536,585,
Pulsar 501
Quasar 508,509,577, 698,700
RadioShack 526,541, 607, 612,691,
RCA 503, 505, 515,548, 579,
Realistic 590
Saba 551
Saisho 532,533, 609
Sampo 506, 519, 698
Samsung 505, 506, 516, 523, 526,
Samwon 620
Sanyo 542, 589, 590, 591, 592,
SBR 588
Schneider 588
Scott 526, 534, 537, 541, 593,
Sears 503, 523, 534, 542, 563,
Seimitsu 695
Sharp 526, 585, 591, 605, 606,
Siemens 591
Signature 518
Silver 573
Solavox 612
Sony 500,578,609, 619,622,
Soundesign 525,536, 541, 691,695
Spectricon 520, 620
Squareview 694
SSS 505, 541, 573, 691,712
Supra 523
Supre-Macy 522
Sylvania 506, 525,536, 564, 565,
624,695
698
580,581, 582, 583,584,
586,587, 625, 633,634,
691,698, 701, 708,714,
715,716
532,588, 612, 695,704,
712,721
609
600,691,696, 701
589,590, 594, 595,596,
598,599, 601, 602,603,
604,617, 695, 703
607,608, 628, 629
690
566,568, 573, 575,600,
610,611, 712
121716 27
Page 30
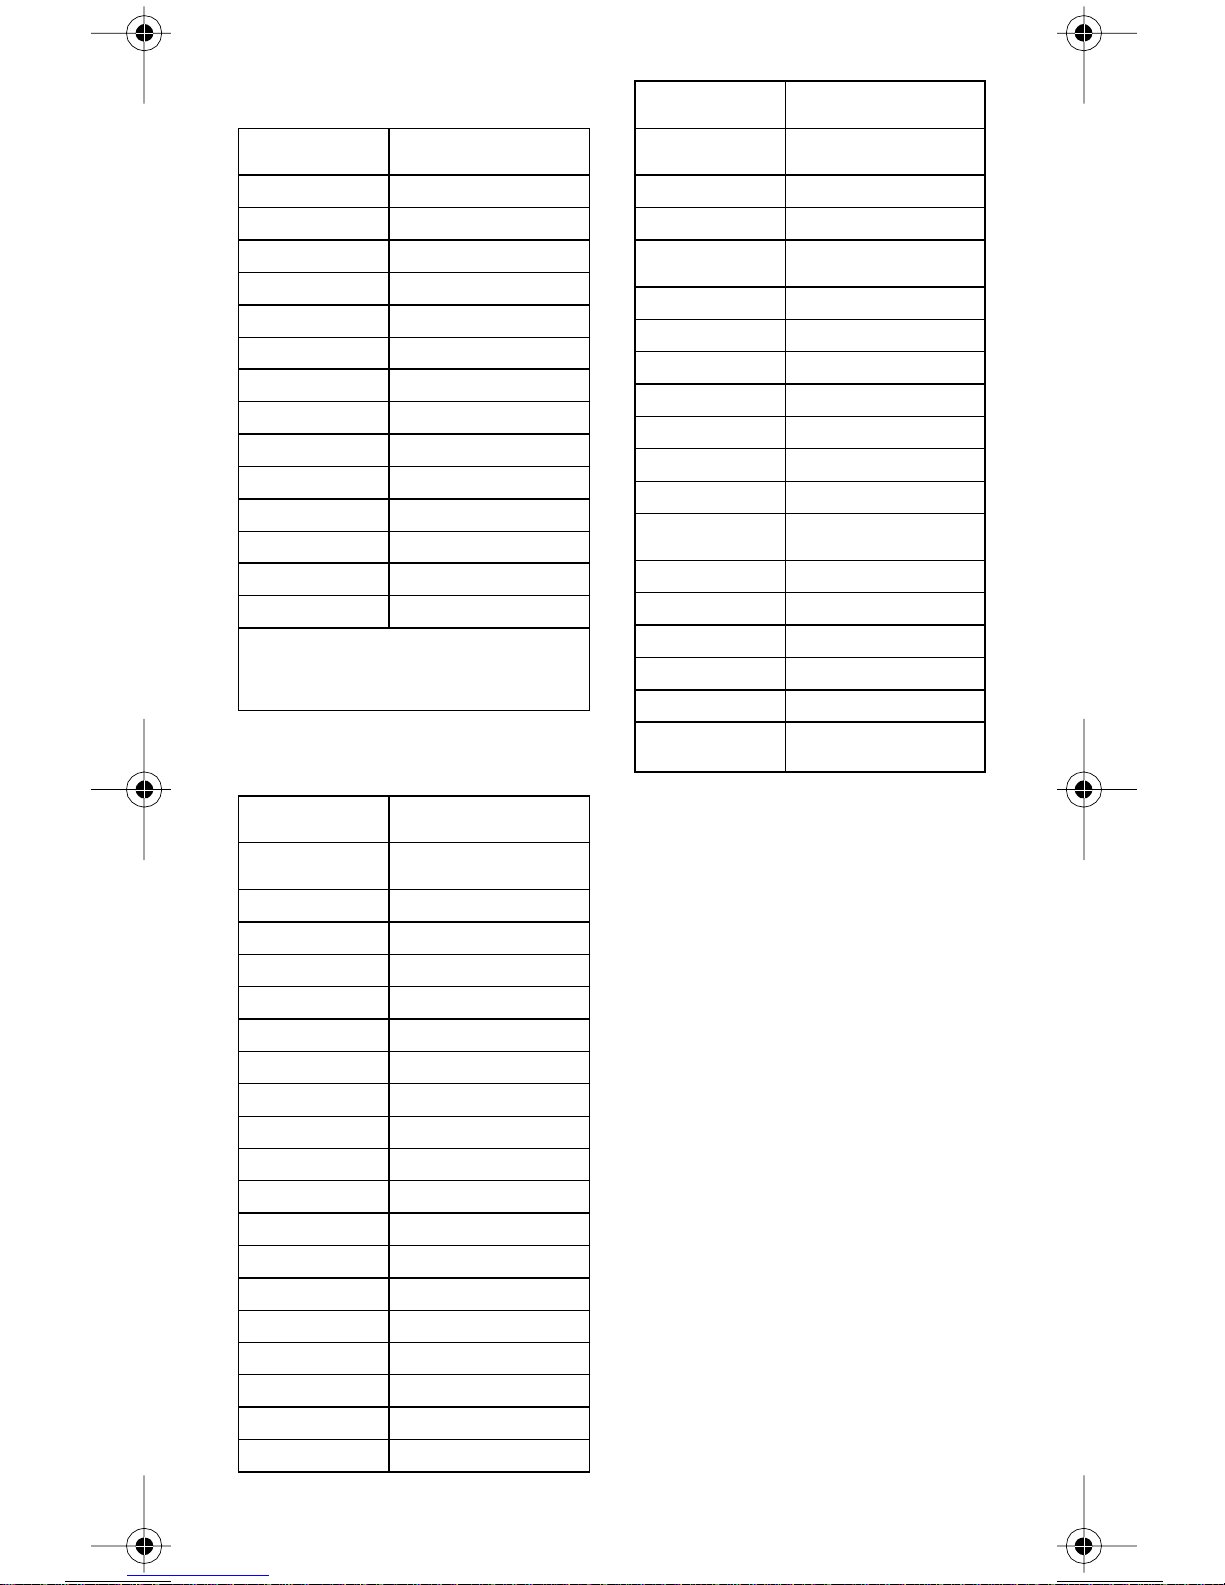
TELEVISION CODES
VCR CODES
Symphonic 632, 692, 694
Tandy 605, 613
Tatung 509, 698
Technics 508
Techwood 523,573
Teknika 504,505,516,518,522,
Teleavia 551
Telefunken 551
Teletech 532
Tera 513
Thomas 695
Thompson 709
Thomson 551, 616
TMK 523, 573, 695
Toshiba 516,590,596,617,618,
Tosonic 528
Totevision 526
Toyomenko 695
Universal 543
Vector Research 506
Victor 557
Video Concepts 570, 691
Vidtech 505, 695, 712
Viking 522
Wards 505,506,515,518,534,
Yamaha 505, 506,712
York 695
Zenith 501, 518, 693
Zonda 620
VCR C
ODES
523,524, 525, 526,534,
536,541, 614, 615,686,
691,712
631,688
536,543, 564, 565,567,
568,607, 619, 712,714,
715
VCR CODES
Aiwa 588, 622,623, 624
Akai 513, 514, 515,516, 517,
Alba 546
Amstrad 588
ASA 565
518,519, 520, 568,
AudioDynamics 594, 600
Broksonic 559
Bush 589
Candle 580, 592, 593
Canon 542, 553,554
Capehart 543, 546
Citizen 591,592, 593
Craig 591, 608
Croslex 553
Curtis Mathes 554, 592,605
Daewoo 534, 545, 546,547, 593
Daytron 546
DBX 594, 600
Dumont 549
Dynatech 588
Electrohome 609
Emerson 505, 506,507, 508, 509,
Finlandia 549
Finlux 549, 565,588
Fisher 548,549, 584,588, 608,
General Electric
(GE)
Goldstar 530, 555,592, 612, 613
Goodmans 585, 589
Go Video 557 558, 620
Granada 549, 581
Grundig 565
Harmon Kardon 530, 569
Hinari 589
Hitachi 536,537, 538,539, 540,
Instant Replay 553
ITT 518
JC Penney 530, 554, 580, 591, 594,
Jenson 560
JVC 561, 562, 563, 564, 592,
Kenwood 562, 581, 592,594, 600,
Lloyd 588
Logik 589
Luxor 518
510, 511, 512, 559, 568,
588, 590,609, 618
610
550, 551,552, 554,572,
591, 605
541, 553,588, 595,596,
597
600, 601
594, 600, 601
601
28 121716
Page 31
VCR CODES
VCR CODES
Magnavox 527,553,554, 556,565,
Marantz 530,554, 565, 585, 592,
MEI 554
Memorex 533,549, 554, 566,581,
MGA 567,568, 609
Mitsubishi 562,567, 568,569, 570,
MTC 544,580, 588
Multitech 588, 589, 591
NAD 573
NEC 530, 531, 532,562, 592,
Olympic 553
Optonica 585
Orion 506, 507
Panasonic 521, 522, 523,524, 526,
Pentax 537, 592
Perdio 588
Philco 553, 554, 611
Philips 553, 554,565, 585
Pioneer 553,562,573, 574,575,
Portland 546,593
Proscan 553, 605
Pulsar 533
Quartz 581
Quasar 553,554,577, 578
RadioShack 607,608, 609, 610
RCA 525, 526, 527,528, 529,
Realistic 549,554, 580,581, 584,
Ricoh 502
Saisho 506,507
Salora 567, 581
Samsung 517, 534, 579, 580, 591
Sansui 532,544, 562,600, 621
Sanyo 549,581, 582,583, 608
SBR 565
Schneider 589
Scott 508, 559,590
611
594,600, 601, 603
585,588, 608
571,609
594,599, 600, 601,602,
603,604
553,554, 598, 614,628
576,600
537,553, 591, 605,606,
615,630, 631
585,588
Sears 548,549, 581, 584,608,
Sentra 546
Sharp 585, 607,609, 625
Shintom 589
Sony 500,501,502, 503,504
Sylvania 553, 554,556, 567, 588,
Symphonic 588,594
Tandy 588
Tashiko 588
Tatung 586, 594,601
Teac 588,594, 601
Technics 553, 554
Teknika 554, 587, 588
TMK 506
Toshiba 534,535, 567, 590
Totevision 580, 591
Unitech 580
Vector Reaserch 530,600
Victor 561,562, 600
Video Concepts 568,600
Videosonic 591
Wards 527,554, 580, 585,588,
Yamaha 530, 592,594, 600, 601
Zenith 500,501, 533
610,
611
589,590, 591, 607,608,
609
CABLE TV BOX CODES
Cable Boxes Codes
Eastern 649
CI/Tocom 640
Jerrold 635, 636
Memorex 637
Oak 646
Panasonic 637, 644, 645
Paragon 637
Pioneer 642,643
Regency 649
Scientific America 638,639. 647, 648,650
Zenith 641
121716 29
Page 32
DVD P
LAYER CODES
Tuner/Amplifier Codes
DVD Players Codes
Aiwa 634
Hitachi 632, 635
JVC 636
Konka 637, 638
Magnavox 626
Mitsubishi 629
Panasonic 639
Philips 640, 641, 642
Pioneer 619
RCA 627
Sanyo 643
Sony 617,644,645
Toshiba 616, 646, 647
Zenith 648
Note: You mustput the remote control
inVCRmodetosetituptocontrolaDVD
player. Later,you must putthe remote control
in VCR mode to use it to control a DVD player.
TUNER/AMPLIFIER CODES
Onkyo 660, 662, 678, 689, 699,
Optimus 664, 697
Panasonic 652, 707
Pioneer 658, 661,667,668, 675,
Proton 654, 705
Quasar 652, 707
RCA 655, 704, 729
Realistic 665, 666
Scott 659, 701
Sharp 712, 713, 714, 715
Sherwood 670, 695
Sony 673, 680,687,693, 730,
Symphonic 666
Teac 684
Technics 652, 658, 707
Toshiba 710
Victor 657, 703
Yamaha 663, 682, 685,698, 732,
700
679, 688,692, 702
731
733
Tuner/Amplifier Codes
Aiwa 656, 680,687, 718, 719,
Carver 653, 706
Citizen 709
Denon 674
Fisher 653, 706
GE 665,711
Goldstar 677, 690
HarmonKardon 672
Hitachi 717
JVC 657,683,703, 727
Kenwood 676, 691,728
Luxman 681,686
LXI 665
Magnavox 705
Marantz 708,651
Memorex 675,692
NAD 669, 696
Nakamichi 671, 694
NEC 716
720,723, 724, 725,726
30 121716
Page 33
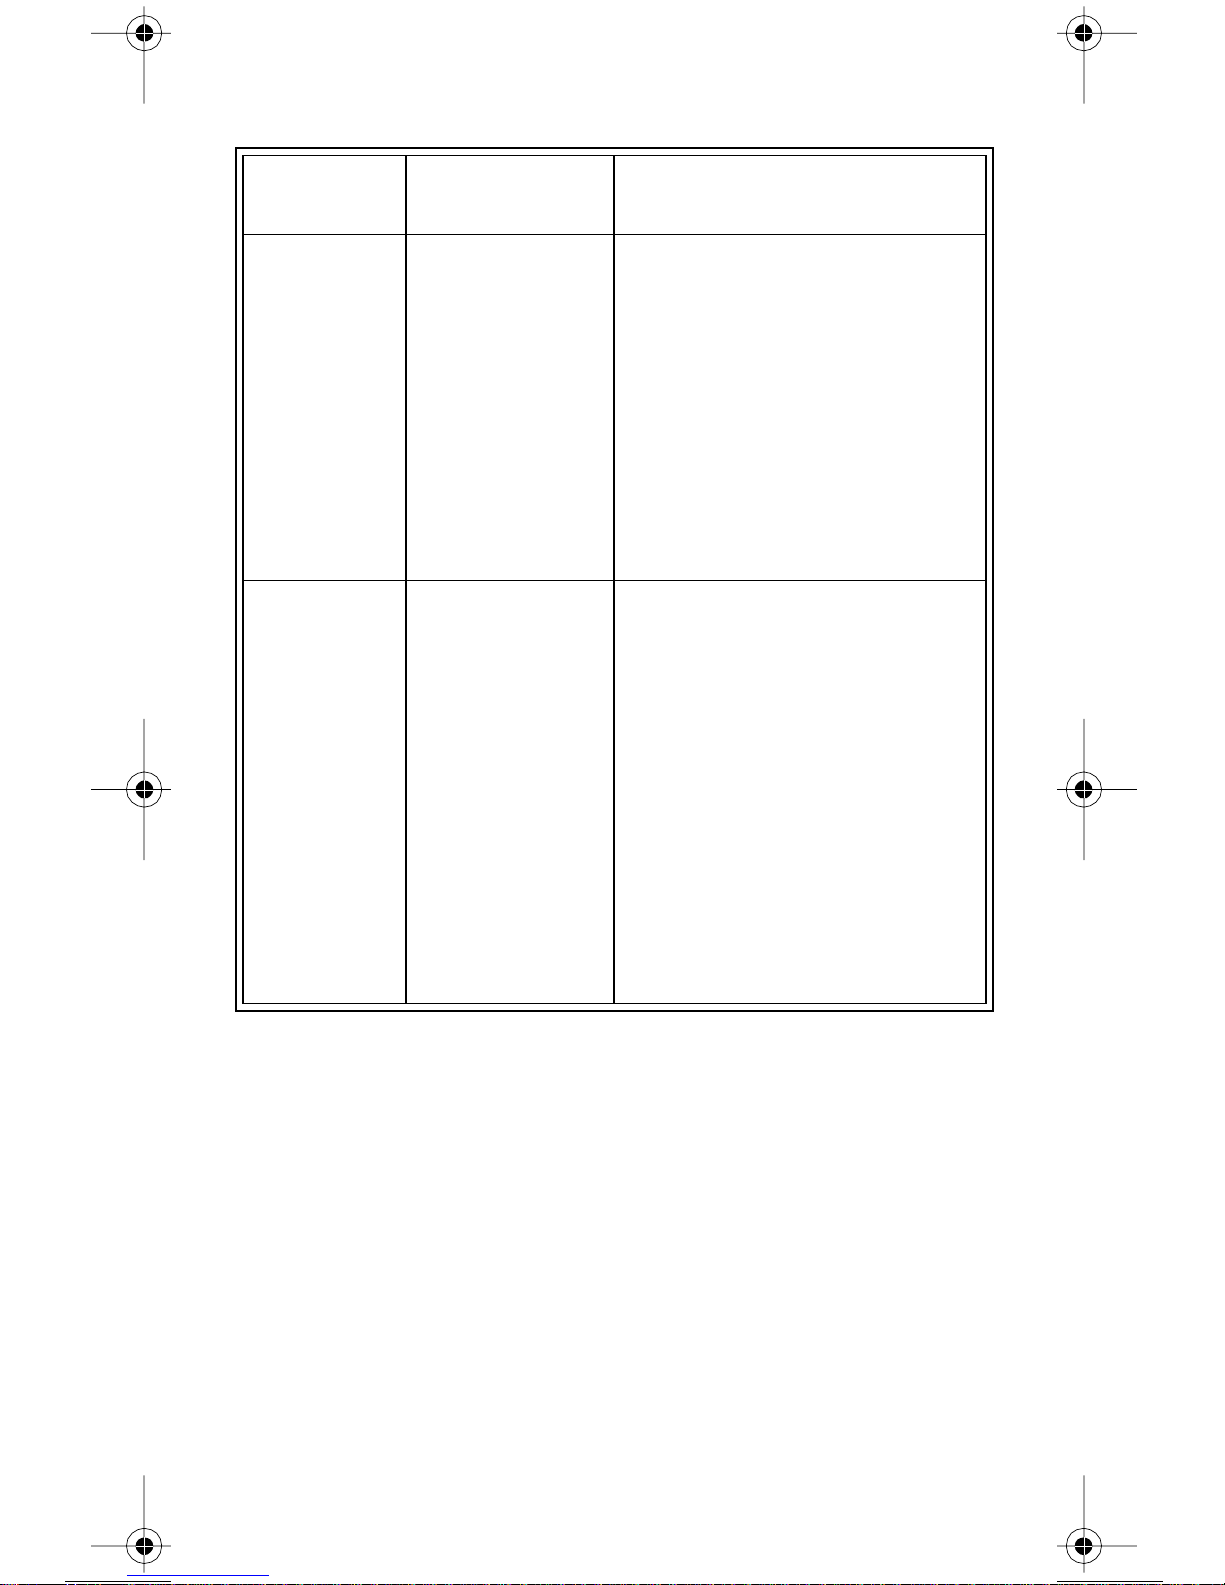
TROUBLESHOOT THE REMOTE CONTROL
What’s
Happening
While you do
a remote
procedure,the
remotecontrol
“times out.”
When you
press the
remotecontrol
Power button
to turn the
receiver on,
the receiver’s
front panel
Power light
doesn’t turn
on.
What’s Wrong What You Can Do
• Ifyou don’tpress
any button
for 20 seconds in
a programming
sequence,
the remote
“times out.”
• If you hold a
button longer
than two
minutes, the
remote control
stops
transmitting to
save battery life.
• Maybe the
batteries are
weak or dead.
• Maybe you didn’t
plug the receiver
power cord into a
poweroutlet, or
maybe there’s a
problem with the
power.
• Maybe the
remote isn’t in
SAT mode.
• Maybe the
remote and the
receiver have
different
addresses.
Start over again.
• Replace the remote batteries with
fresh ones.
• Make sure the receiver power cord
is plugged into a power outlet.
• Press SATto setthe remote to SAT
mode to control the receiver.
• Make sure the remote and the
receiver have the same address.
See Change the Address on
page 9.
121716 31
Page 34
What’s
Happening
What’s Wrong What You Can Do
When you
press a button
on the remote
control, the
devicedoesn’t
do what you
expect.
• Maybe you’re
trying to controla
device and
you’re not
pointing the
remote control
rightatit.
• Maybe the
remotecontrolis
missing
batteries, maybe
you put the
batteries i n the
remote the
wrong way, or
maybe the
batteries are
weak or dead.
• Maybe you didn’t
settheremoteto
the mode for the
device you want
to control.
• Maybe you didn’t
setuptheremote
to control the
device.
• UHFsignalsfrom
a neighbor’s
remote may be
blocking signals
from your
remote.
• Remember,theremotecontroluses
IR signals to control all devices
except for the receiver (when using
the UHF antenna). IR signals travel
only 40 feet or less, and can’t go
through walls or other solid objects.
You must point the remote control
rightat the device,withnoobjectsto
block the signal path.
• If the batteries are missing or dead,
put in fr esh AAA-size batteries. If
the remote has fresh batteries,
check whether you put them in the
right way. If you didn’t, take them
out andput themin as describedon
page 2.
• Press the correctmodebuttontoset
the remote to the mode for the
device you want
to control.
• Make sure you set up the remote
to control all the devices you want
to use. See Remote Control Setup
on page 6.
• Put a UHF attenuator on the
receiver’s UHF Remote Antenna
input. This will help keep stray
signals from blocking your remote’s
signals, but also cut down how far
away you can use the remote.
Change your receiver’s address
(see Change the Address on
page 9).
When you
press the
remotecontrol
Mute or
Volum e
button,
nothing
happens.
32 121716
• Maybe you have
not set up the
remote control.
• Maybe you’re
trying to c o ntrol
TV volume but
you set up the
remote
to control a tuner
or amplifier in
AUX mode.
• Maybe you’re
trying to c o ntrol
tuner or amplifier
volume but you
setuptheremote
to control a TV
in AUX mode.
•SeeRemote Control Setup on
page 6.
• Set up the remote to control either
TV volume or tuner/amplifier
volume, whichever you want.
Page 35
LIMITED WARRANTY
This Limite d Warranty is a legal document. Keep it in a
safe place. Remember to keep your Sales Receipt for
warranty service. We will consider
anyitemsyoureturnwithoutacopyofthe
Proof of Purchase to be out of warranty.
This warranty extends only to the original user of the DISH Network
remote control (“you,” “your”) and is limited to the purchase price of the remote
control. EchoStar Communications Corporation and its affiliated companies
(“we,” “our,” “us”) warrant this remote control against defects in mat erials or
workmanship as follows.
For one year from the originaldate of purchase, if we find the remote control is
defective subject to the limits of this warranty, we will replace the remote at no
charge for parts or labor. We warrant any such work done against defects in
materials or workmanship for the remaining part of the original warranty
period.
This warranty does not cover installation of the DISH Network System;
consumer instruction; physical set up or adjustment of any consumer electronic
device;remote control batteries; signal reception problems; loss of use of the
equipment; unused programming charges due to equipment malfunction;
cosmetic damage; damage due to lightning,electrical or telephone line surges,
fire, flood, or o ther acts of Nature; accident; misuse; abuse; repair or alteration
by other than our factory service; negligence; commercial or institutional use;
improper or neglected maintenance; equipment sold AS IS or WITH AL L
FAUL TS; equipment removal or reinstallation; shipping damage if the
equipment was not packed and shipped in the manner we prescribe;nor
equipment purchased, serviced,or operated outside the contiguous
United States of America.
REPLACEMENT AS PROVIDED UNDE R THIS WARRANTY IS YOUR
EXCLUSIVE REMEDY. WE SHALL NOT BE HELD LIABLE FOR ANY
INCIDENTAL ORCONSEQUENTIAL DAMAGES FOR BREAC H OF ANY
EXPRESSED OR IMPLIED WARRANTY ON THIS DEVICE, NOR FOR
ANY INCIDENTALOR CONSEQUENTIAL DAMAGE RESULTING FROM
THE USE OF, OR INABILITY TO USE, THIS DEVICE. UNDER NO
CIRCUMSTANCES SHALL OUR LIABILITY, IF ANY, EXCEED THE
PURCHASE PRICE PAID FOR THIS DEVICE. EXCEPT TO THE EXTENT
PROHIBITED BY APPLICABLE LAW, ANY IM PLIED WARRANTY OF
MERCHANTABILITY OR FITNESS FOR A PARTICULAR PURPOSE ON
THIS DEVICE IS LIMITED IN DUR ATION TO THE DURATION OF THIS
WARRANTY. WE RESERVE THE RIGHT TO RE FUSE TO HONOR THIS
WARRANTY IF WE DETERMINE ANY OF THE ABOVE EXCEPTIONS
TO HAVE CAUSED THIS DEVICE NOT TO HAVE PERFORMED
PROPERLY. THIS WARRANTY SHALL BE VOID IF ANY FACTORYAPPLIED IDENTIFICATION MARK, INCLUDING BUT NOT LIMITED TO
121716 33
Page 36

SERIAL OR CONDITIONAL ACCESS NUMBERS, HAS BEEN ALTERED
OR REMOVED. THIS WARRANTY SHALL ALS O BE VOID IF THE
DEVICE HAS BEEN OPENED BY AN UNAUTHORIZED PERSON (with
the exception of opening the battery cover).
Thiswarrantygives you specific legal rightswhich may vary from state to state.
Some states do not allow the exclusion or limitations of incidental or
consequential damages, or allow limitations on the duration of an implied
warranty, so those limitations may not apply to you.
ADVANCE EXCHANGE PROGRAM
The Advance Exchange Program allows you to have replacement equipment
shippedimmediately to you (depending upon where you live, it couldtake three
to five business days). Al ong with replacement equipment, you will receive a
prepaid shipping label and instructions on how to return the defective
equipment.
The shipping charge, for receiving replacement equipment and returning the
defective equipment, is a one time fee based on EchoStar's competitive bulk
shipping rates (additional charges may apply outside of the continental US).
This fee will be charged to your billing account or your valid credit card.
If you do not ship the defective equipment to EchoStar within ten days after
receiving the replacement, your billing account or credit card will be charged
the market price of the replacement. If you return the defective equipment after
ten d ays, you will receive a full refund less an administrative fee.
If your equipment is out of warrantyand can be repaired your billing accountor
credit card will be charged the standard repair fee for the replacement. If
damage to the defective equipment is found, which EchoStar in its sole
discretion determines has voided the warranty, or makes the equipment
unrepairable, your billing account or credit card will be charged the market
price of the replacement.
POST RECEIPT EXCHANGE PROGRAM
You may choose to ship the equipment to us at your cost. To provide faster
service, upon receipt of your equipment you will be shipped a replacement.
Your originalequipmentwill not be available for return.
The equipment you return will be checked to verify whether it is covered under
this warranty. If the defective equipment is covered under this warranty, it will
be replaced and shipped back to you at no additional cost (additional charges
may apply outside of the continental US).
If your equipment is out of warrantyand can be repaired your billing accountor
credit card will be charged the standard repair fee for the replacement. If
damage to the defective equipment is found, which EchoStar in its sole
discretion determines has voided the warranty, or makes the equipment
unrepairable, your billing account or credit card will be charged the market
price of the replacement.
34 121716
Page 37
ACCESSORY WARRANTY
An accessory is any DISH Network branded equipment, displaying the DISH
Network logo, excluding the receiver, Smart Card, cables and hookups, and
non-mechanical components. A one-year warranty becomeseffective upon the
activation of the DISH system or date of purchase,if bought separately. A proof
of purchase is required to verify the purchase date. If an accessory has an
expired warranty, no exchange will be issued. You may purchase replacement
accessories from DISH Network or your local retailer.
IF YOU NEED HELP
1. Review this User Guide.
2. See Troubleshoot t he Remote starting on page 31.
3. Call the Customer Service Center at 1-800-333-DISH (3474).
Have the date of purchase a nd your customer account number
ready.
4. A Representative will help you.
5. If the Representative findsyou should returnthe remotecontrol,
you’llget a telephone number to call for a Return Authorization
(RA) number. Before shipping any equipment to us, you must
get a Return Authorization number.
6. You must package returned equipment the right way.Follow the
instructions the Representative gives you.
7. Write the RA number in large, clearly visible characters on the
outside of the shipping box used t o return the equipment.
To avoid confusion and misunderstandings,we will return
shipments without an RA number clearly visible on the outside
of the box to you at your cost.
8. We will:
• Check the remote control, including whether it is covered
under the warranty.
• Replace any remote we find is defective with a new or
refurbished remote, if the defectiveremote is covered under
the warranty. We will ship the replacement remote at our
expense.
• If a defective remote i s not covered under the warranty,
we will tell you. We may assess you a flat rate charge for a
replacem ent remote, including shipping and insurance.
121716 35
Page 38

INDEX
A
Address, Change the 9
Amplifier Codes 30
Amplifier, Control an 24
Antenna, Remote Control, Attach the
3
Attenuator, Install an 4
B
Batteries, Remote Control 2
Buttons, Remote Control 11
C
Cable TV Box Codes 29
Cable TV Box, Control a 22
Change the Address 9
Check the Device Codes 8
Customer Service 35
D
Device Codes 26
Amplifier Codes 30
Cable TV Box Codes 29
Tuner and Amplifier Codes 30
Tuner Codes 30
TV Codes 26
VCR Codes 28
Device Codes, Check the 8
Device Codes, S can for 7
DishPVR 2
DishPVR Buttons 14
DVD Player, Control a 20
Remote Control Signals - UHF
and IR 3
Remote Control Batteries 2
Remote Control Buttons 11
Amplifier, Control an 24
Cable TV Box, Control a 22
DishPVR Buttons 1 4
DVD Player, Control a 20
Receiver, Control the 11
Second TV, Control a 17
Second VCR,Control a 20
TunerorAmplifier,Controla
24
TV, Control a 17
VCR, Control a 20
Remote Control Modes 5
Remote Control Setup 6
Change the Address 9
Check the Device Codes 8
Installan Attenuator 4
Scan for Device Codes 7
Set Up the Remote Control 6
TVandDeviceVolumeControl
10
S
Scan for Device Codes 7
Second TV, Control a 17
Second VCR,Control a 20
Set Up the Remote Control 6
Setup,Remote Control 6
Switch Between TV and Device Volume Control 10
I
If You Need Help 35
Installan Attenuator 4
IR Signals, Remote Control 3
M
Modes, Remote Control 5
R
Receiver, Control the 11
Remote Control Basics 2
DishPVR 2
Remote Control Batteries 2
Remote Control Modes 5
36 121716
T
Troubleshoot the Remote Control 31
Tuner Codes 30
TunerorAmplifier,Controla24
TV Codes 26
TV, Control a 17
U
UHF Signals, RemoteControl 3
V
VCR Codes 28
VCR, Control a 20
Volume Control, Switch Between TV
and Device 10
Page 39

Copyright © 2003
EchoStar Technologies Corporation
Englewood, Colorado 80112
All rights reserved.
The information in this Guide m ay change without notice.
We may issue revisions to tell you about such changes.
Send any comments or questions to:
EchoStar Technologies Corporation,
TechnicalPublications, 94 I nverness Terrace East,
Englewood,Colorado 80112
Part Number: 121716
Printed in the United Statesof America.
DISH Network is a registered trademark of EchoStar Technologies
Corporation. For information about DISH Network, visit our website
at www.dishnetwork.com.
Page 40
 Loading...