

Disgo 8100 User Manual

Tablet 8100
Android 2.3
10.1” Touch screen
User Manual

1
Thank you for choosing the disgo Tablet 8100
The Tablet 8100 is fully equipped to offer you the complete browsing and
multimedia experience.
Android Gingerbread (2.3) Operating System
10.1” capacitive touch screen with 1024x600 resolution
Built-in camera with still image and video recording
3 axis Motion Sensor for automatic orientation
HD video playback
IMPORTANT
1) Please charge the Tablet 8100 continuously for 4 hours before use.
For further details on charging the device, please see section 2.2
2) For information on inserting/removing the Micro SD card, please
refer to section 4 – Using Micro SD card. Failure to do so may result
in damage to the memory card.
3) Some applications run in full screen mode. Icons will not be
displayed on the toolbar. Please use the Menu button on the
tablet to display the relevant menu options or home button to
return to the previous screen.
4) Please do not save/transfer personal/media files to the onboard
storage as this may slow down the operation of the device.

2
1. Accessories
2. Getting Started
2.1 Appearance
2.2 Charging the Tablet
2.3 Using the tablet
2.4 Toolbar
2.5 Using standard applications
3. Settings
3.1 Wireless & networks
3.2 Sound & display
3.3 Location & security
3.4 Applications
3.5 Accounts & sync
3.6 Privacy
3.7 Storage
3.8 Search
3.9 Language & keyboard
3.10 Date & time
3.11 Touch screen Calibration
3.12 G sensor calibration
3.13 About Device
Contents

3
4. Using a MicroSD Card
5. Installing apps
5.1 Installing apps from online app stores
5.2 Installing apps from MicroSD card
6. Transferring media files to the disgo Tablet 8100
7. Using external devices
8. Using the HDMI feature
9. Troubleshooting
10. Technical Specification
11. Recycling
12. Battery Statement
Please visit www.mydisgo.com for further information and support on the
Tablet 8100 product.
1. Accessories
Inside the disgo Tablet 8100 packaging, you will find:
1 x Tablet PC
1 x Power adapter
1 x User manual
1 x USB to mini USB cable
4
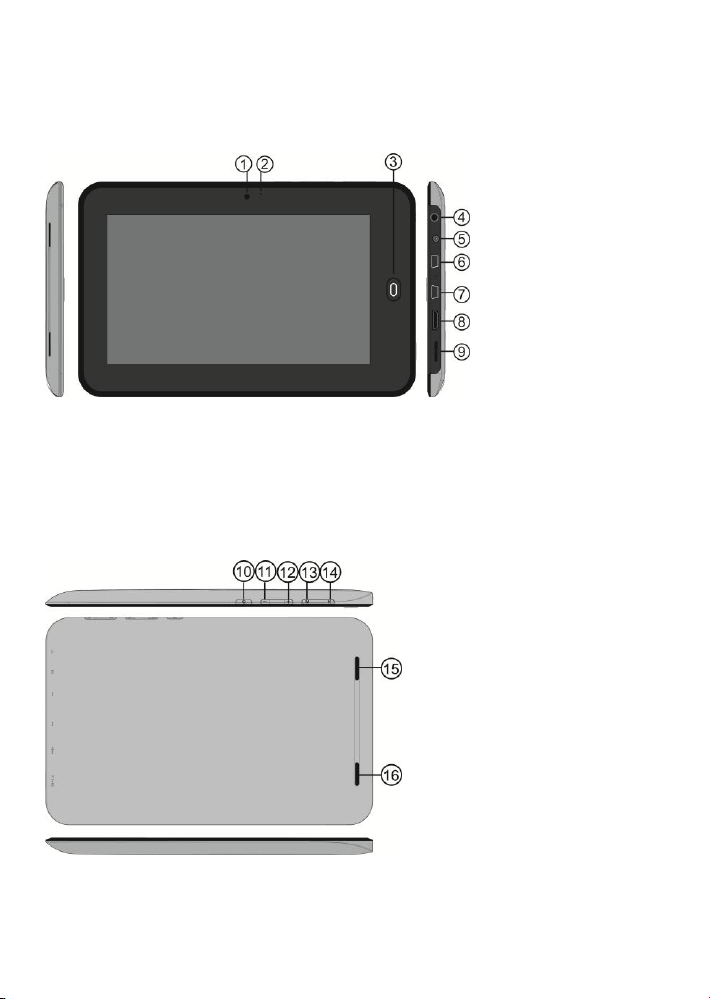
2. Getting Started
1 Camera
2 Microphone
3 Home button
front
4 Earphone jack
5 DC Jack
6 USB host port
7 USB OTG port
8 Mini HDMI port
9 MicroSD card slot
10 Power button
11 Volume up
12 Volume down
13 Menu button
14 Home button
15 Speaker left
16 Speaker right
2.1 Appearance
Fig 2.1.1
Fig 2.1.2
5
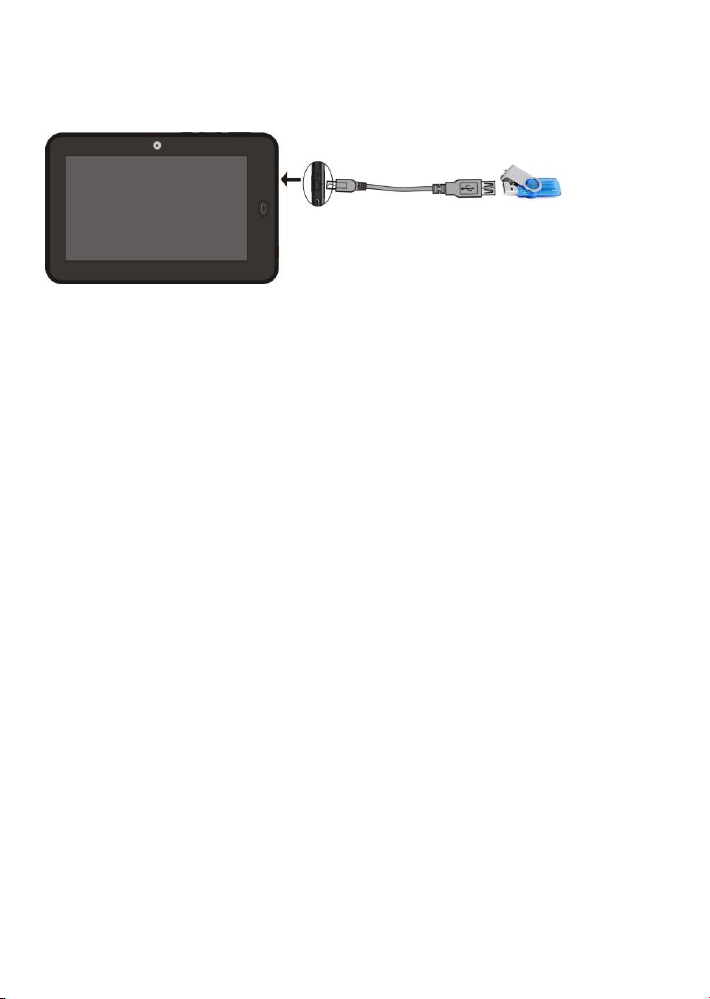
External storage devices can be connected to the Tablet using the USB host
Home button (14)
Returns user to desktop
Power
When the tablet is switched off, press and hold
this button to turn it on. When the tablet is
turned on, press and hold this button to
activate the shut-down window.
VOL +
Increase the volume.
VOL -
Decrease the volume.
Menu
Displays menu bar options for current screen
Home button on
front of tablet
Returns user to the previous screen.
port and the USB cable provided.
Fig 2.1.3
Button descriptions
2.2 Charging the tablet
Plug the adapter to the mains and the DC connector into the DC-in
jack as shown in figure 2.1.1, (connection 5). A full charge takes
up to 4 hours.

6
2.3 Using the tablet
Power on the device
Press and hold the Power button for 2 seconds in order to turn on
the device.
When the tablet is turned on for the first time, you may need to
calibrate the touch screen. Please follow the instructions on the
screen to complete this process. To manually calibrate the device,
please open the Settings menu, choose Touch screen calibrate and
follow the onscreen instructions.
Using pre-installed apps
To open and use the pre-installed apps, simply touch the relevant
icon/app.
Personalising your desktop
To add an app to the home/desktop screen, access the applications
screen (Fig 2.3.2). Touch and hold the app you would want on the
desktop. The desktop will appear behind the icon. Move the
icon to the desired area of the desktop and release the icon to
confirm the placement.
Deleting an icon from the desktop
Touch and hold an icon until a dustbin icon appears on the Right
Hand Side of the screen. Drag the icon to the dustbin in order to
delete the icon. Please note that this icon will still be accessible
from the applications screen.
Using Widgets on your desktop
You can also add and delete widgets to/from the Home screen by
using the procedures outlined in the previous two sections.

7
Sleep mode
Pressing the Power button will activate/deactivate sleep mode
when the device is turned on.
Powering off the device
Press and hold the Power button for 2 seconds to activate the
power-off screen. Please note, you can also access the Silent
Mode option from this screen.
Tip: For further assistance and tips for personalizing your desktop, please
see the Android assistant on the home screen
The widget desktop (Fig 2.3.1).
 Loading...