

Disgo 8000 User Manual

Tablet 8000
Android 2.2
10.1” Capacitive Touch screen
User Manual

Thank you for choosing the disgo Tablet 8000.
The Tablet 8000 is fully equipped to offer you the complete browsing
and multimedia experience.
10.1” capacitive touch screen with 1024 x 600 resolution
Built-in web cam with still image and video recording
3D Motion Sensor for automatic orientation
Dual MicroSD and USB for added connectivity
HD video playback
IMPORTANT
1) Please charge the Tablet 8000 continuously for 4 hours
before use. For further details on charging the device,
please see section 2.3.
2) For information on inserting/removing the Micro SD card,
please refer to section 4 – Using Micro SD card. Failure to
do so may result in damage to the memory card.
3) Some applications run in a full screen mode. The icons on
the toolbar will not be displayed. Please use the back
button on the tablet to display the menu options.

1. Accessories
2. Getting Started
2.1 Appearance
2.2 Using the tablet
2.3 Charging the tablet
2.4 Toolbar
2.5 Manage your desktop
2.6 Using basic applications
3. Settings
3.1 Wireless & networks
3.2 Ethernet Configuration
3.3 Sound & display
3.4 Location & security
3.5 Applications
3.6 Accounts & sync.
3.7 Privacy
3.8 SD card & device storage
3.9 Search
3.10 Language & keyboard
3.11 Date & time
3.12 Touch screen calibrate
Contents

3.13 Upgrade system
3.14 About Device
4. Using MicroSD Card
5. Using HDMI
6. Technical features
7. Recycling
8. Troubleshooting
9. Battery Statement
1. Accessories
Inside the disgo Tablet 8000 packaging, you will find:
1 x 10.1” Tablet
1 x dual-power adapter
1 x User manual
1x 2GB MicroSD card (Inserted into ‘SD1’)
2. Getting started
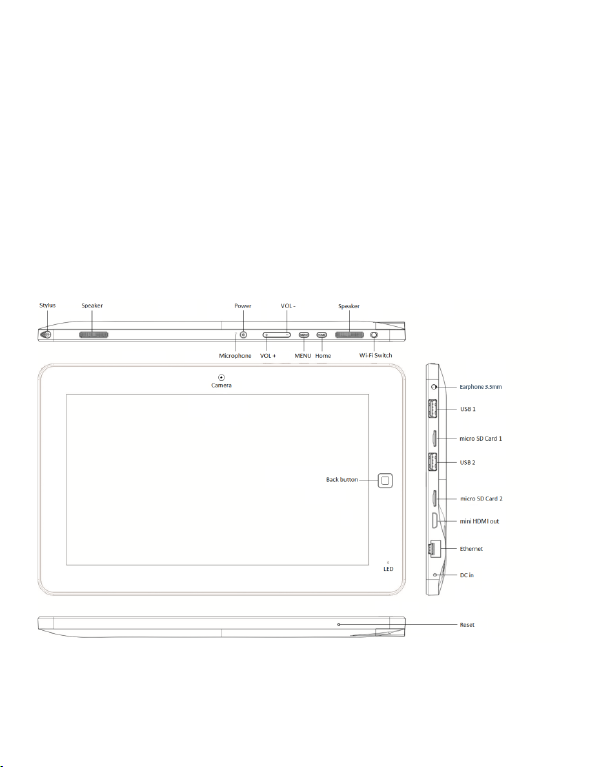
2.1 Appearance
Fig 2.1

Power
On/Off
When the tablet is switched off, press
and hold this button to turn it on. To
power off the tablet, press and hold
this button to activate the shut-down
window.
VOL +
Increase the volume.
VOL -
Decrease the volume.
Menu
Several options are listed in this
Menu. Press this button to display
the menu bar.
Home
Returns user to desktop
Wi-Fi
Switch
Activate/deactivate Wi-Fi connection
Back
Returns user to previous screen
Reset
Use this button to force a shutdown of
the device. If the device freezes it
may require a reset.
Button descriptions
2.2 Using the tablet
Press and hold the Power button for 2 seconds
in order to turn on the device.
When the tablet is turned on for the first time,
you will need to calibrate the touch screen.
Please follow the procedures on the screen to
complete this process.
To use the pre-installed apps, simply touch the
relevant icon.
Pressing the Power button will
activate/deactivate sleep mode when the
device is turned on.
Press and hold the Power button to activate
the power-off screen.
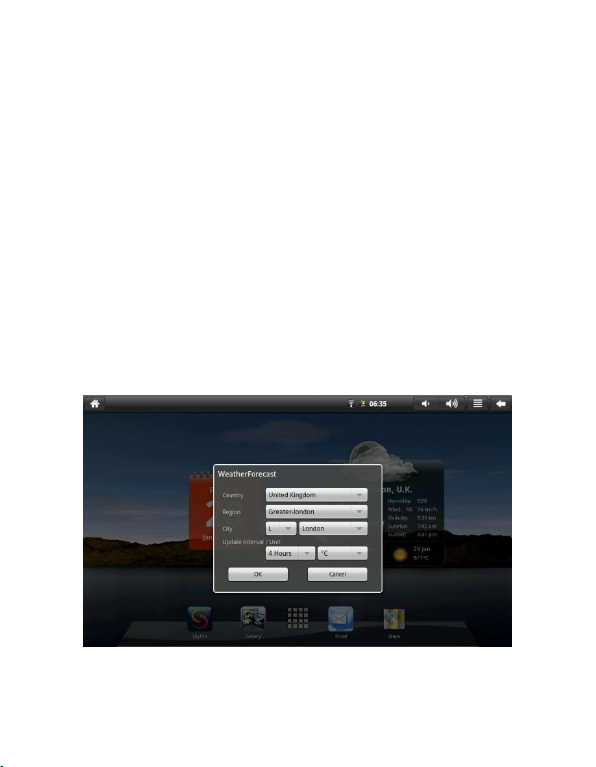
The widget desktop (Fig 2.2.1).
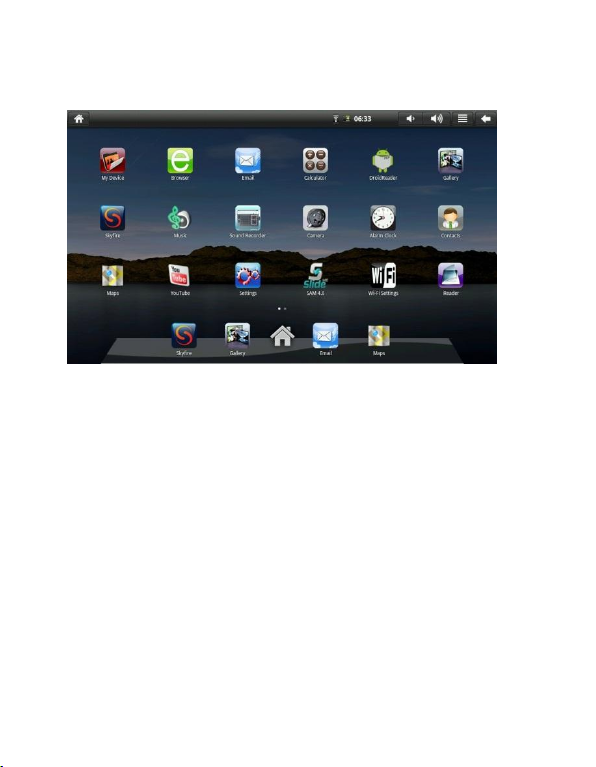
The applications desktop (Fig 2.2.2).
2.3 Charging the tablet
Plug the adapter to the mains and the DC
connector into the DC-in jack as shown in figure
2.1. A full charge takes up to 4 hours. When
charging the tablet, the LED indicator will be
red.

2.4 Toolbar.
Home
Touch the Home icon to return to the
desktop. This action will not close
the applications that are open.
SD card
indicator
Displays the status of the MicroSD
card upon insertion or removal.
Please refer to details in section 4.
Wi-Fi
indicator
Displays the connection status of the
Wi-Fi.
Battery
indicator
Shows the charge status of the
battery
Time
Shows current time.
Vol. -
Decreases volume.
Vol. +
Increases volume.
Menu
Shows application options on the
bottom of the screen.
Back
Returns to previously viewed screen
(See Fig 2.4 for more information)
 Loading...