

Page 1
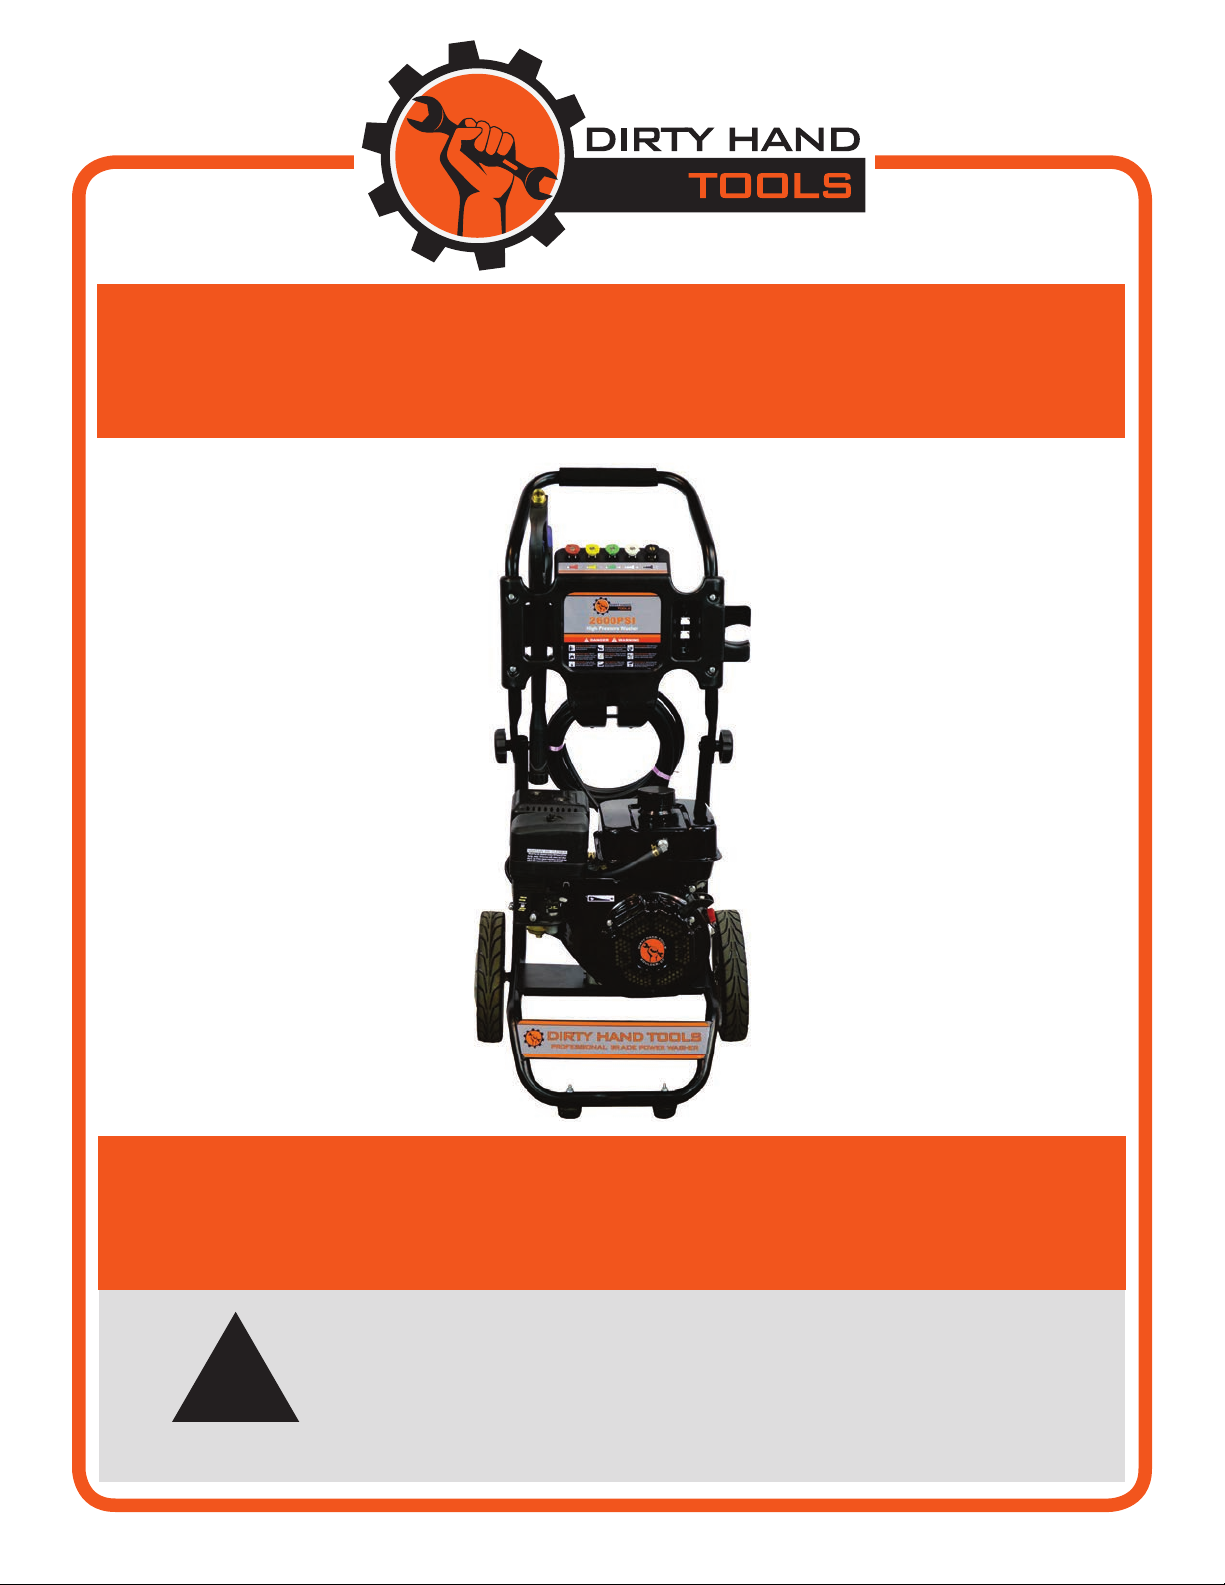
2600psi Pressure Washer
7HP/196cc Engine
!
MODEL # 101087
Operation Manual
is safety alert symbol identies important safety messages in
this manual. Failure to follow this important safety information
may result in serious injury or death.
Part # 101376 Rev A
Page 2

For Service or Questions
Call 1-877-487-8275
720-287-5182
www.dirtyhandtools.com
Dirty Hand Tools® is a brand of
1100 W 120th Ave, Suite 600
Westminster, CO 80234 • 720-287-5182
Page 3

Table of Contents
Important Safety Information .....................................................4
Unpacking and Setup .....................................................................7
Setup and Assembly .......................................................................9
Operation Precautions ....................................................................9
Hose Connection .........................................................................11
Filling with Gasoline and Oil .......................................................12
Operation Precautions ..................................................................13
Operation .....................................................................................14
Maintenance .................................................................................16
Troubleshooting ...........................................................................19
Storage .........................................................................................21
Warranty and Specifications .......................................... Back Cover
3
Page 4
Important Safety Information
!
WARNING
WARNING: Read and thoroughly understand all instructions
and safety information before operating this pressure washer.
Failure to do so may cause serious injury or death. Do not allow
anyone to operate this pressure washer who has not read this
manual. As with all power equipment, a pressure washer can be
dangerous if used improperly. Do not operate this pressure washer
if you have doubts or questions concerning safe operation.
Call our customer service department at 720-287-5182,
1-877-487-8275, or visit www.dirtyhandtools.com if you have any
questions or concerns about the safe operation of this equipment.
!
Intended Use
Do Not Use the pressure washer for any purpose other than for
which it was designed. Any other use is unauthorized and may
result in serious injury or death.
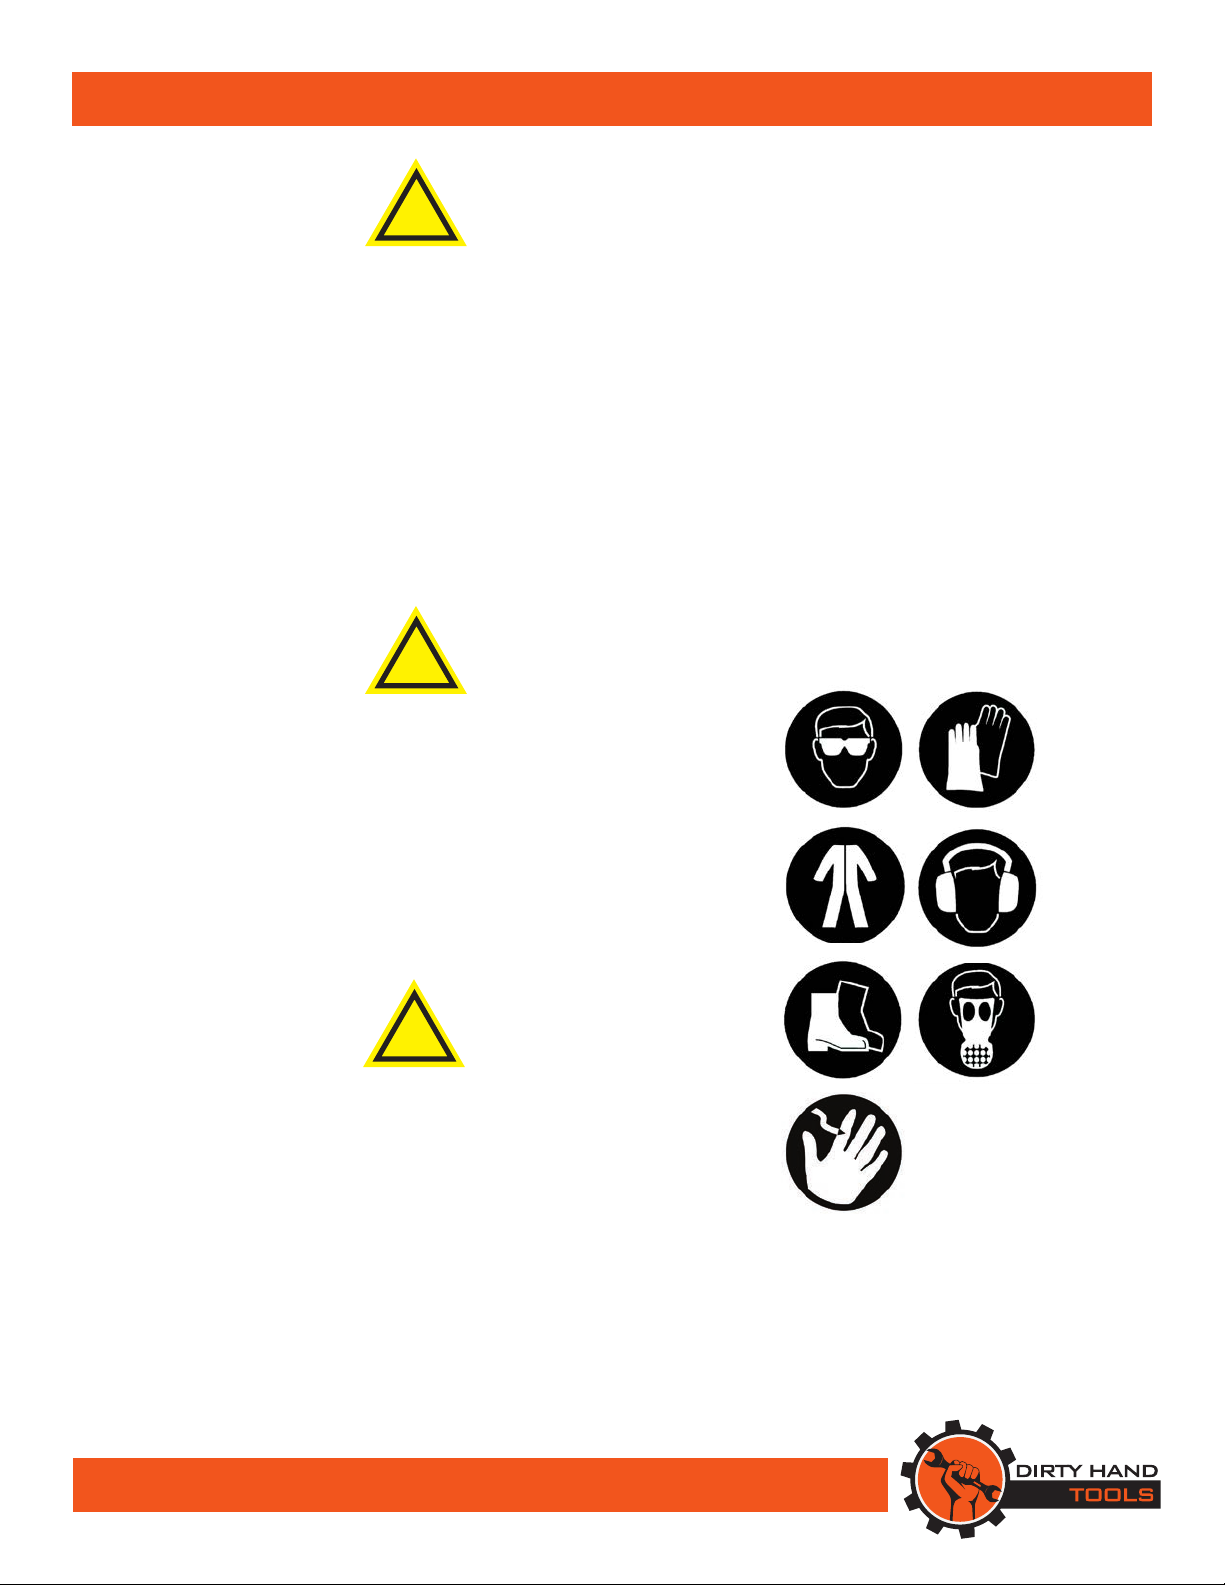
Personal Protective Equipment
Wear ANSI-approved safety goggles, heavy-duty work gloves,
protective clothing, appropriate footwear, and dust mask/respirator
during operation. Wear ear plugs or noise deafening headphones
when operating.
DANGER
!
CAUTION
Injection Hazard.
e high pressure water jet produced by this tool can cut skin or
cause injury to hands or eyes. Do not allow spray to strike you and
do not spray toward people or animals. Do not spray the tool itself
or any electrical wiring/receptacle.
People with pacemakers should consult their physician(s) before
use. Electromagnetic fields in close proximity to a heart pacemaker
could cause pacemaker interference or pacemaker failure. Caution
is necessary when near the engine’s magneto or recoil starter.
4
Page 5
Important Safety Information
General Safety
Failure to follow warnings, cautions, assembly and operation
instructions in the Operation Manual may result in serious injury
or death.
!
DANGER
READ THE OPERATION MANUAL BEFORE
OPERATION.
• Do not permit children to operate this equipment at any time.
Do not permit others that have not read and understood the
complete Operation Manual to operate this equipment.
• Do not operate the pressure washer when under the influence of
alcohol, drugs or medication.
• Do not allow a person who is tired or otherwise impaired or not
completely alert to operate the pressure washer.
!
DANGER
NEVER place ngers, hands, or body near the pressure washer
when it is running. Never spray towards people or animals.
• Keep all people a minimum of six feet from the pressure washer
during operation.
• Do not carry the spray handle with your finger on the trigger.
• Use this equipment with both hands only. Using equipment with
only one hand can result in loss of control.
• Do not leave the pressure washer unattended when it is running.
Turn off the engine before leaving the area.
• Never run the pressure washer in an enclosed area or without
proper ventilation. e exhaust from the engine contains carbon
monoxide, which is an odorless, tasteless, and deadly poisonous.
• Fill the gasoline tank outdoors with the engine off and allow the
engine to cool completely.
• Do not operate the engine with the air cleaner or cover over the
carburetor air-intake removed, except for adjustment. Removal of
such parts could create a fire hazard.
• e muer and engine become very hot with use and can cause
a severe burn; do not touch. Allow the engine to cool before
refueling, doing maintenance, or making adjustments.
• Only use cold water or pressure washer detergent in this tool.
Do not use caustic materials, solvents, ammable materials, or
detergents not designed for pressure washers.
5
Page 6
Important Safety Information
To prevent serious injury:
O p eration of this eq uip ment may c reate
sp arks that c an start fires around dry
vegetation or flammab le materials.
A sp ark arrestor may b e req uired.
O p erator should c ontac t loc al fire
agenc ies for laws and regulations
regarding fire p revention req uirements.
CAUTION
H O T M U F F L E R !
T O P R E V E N T B U R N S ,
D O N O T TO U C H M U F F L E R
O R O T H E R E X H A U S T
C O M P O N E N T S .
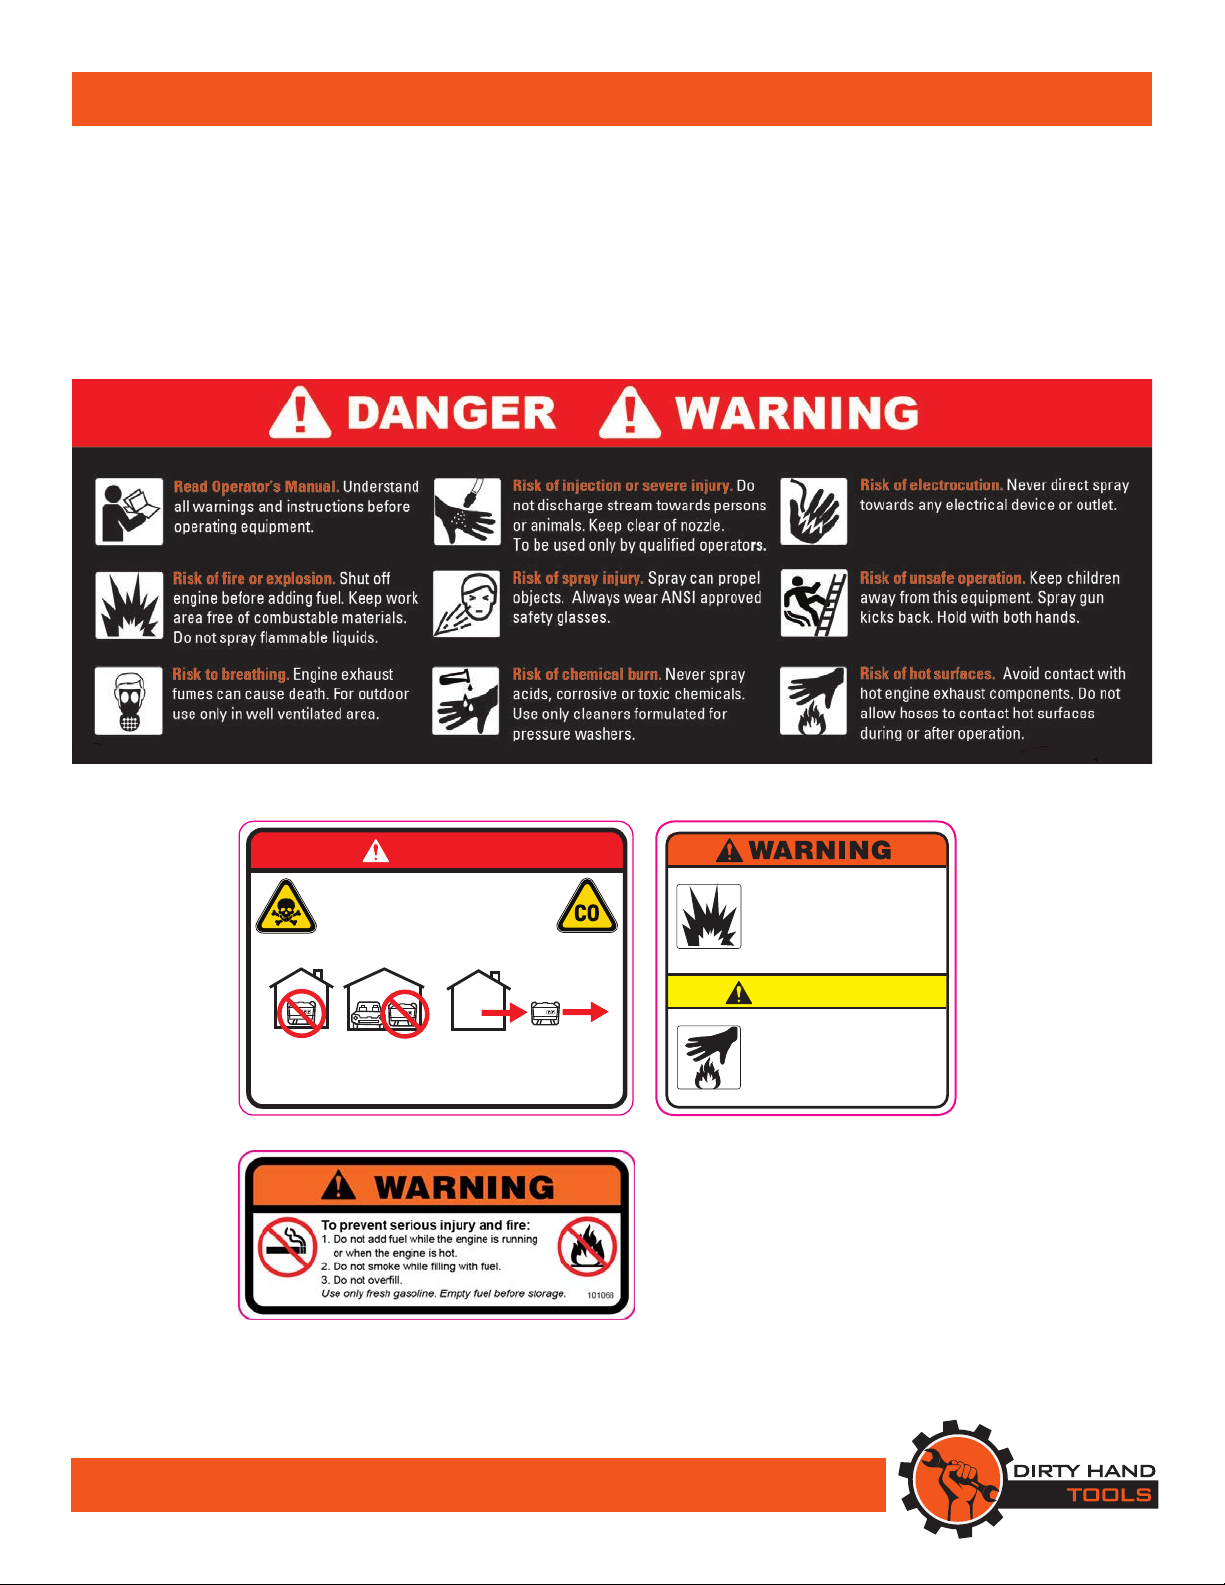
Safety Decals
Safety labels on the pressure washer are to remind you of
important information while you are operating the unit.
Make sure all safety warning decals are attached and in
readable condition. Replace missing or defaced decals. Contact
Dirty Hand Tools at 1-877-487-8275 for replacement decals.
or g arag e even w ith doors
DANGER
U S I N G A N E N G I N E I N D O O R S
C A N K I L L Y O U I N M I N U TE S
E x haust c ontains c arb on monox ide
whic h is a poison
that y ou c annot see or smell.
N ever use inside a h ouse
and w indow s open!
U se onl y outside aw ay
from w indow s,
doors and vents!
6
Page 7
3 FT.
INDUSTRIAL
SPRAY GUN
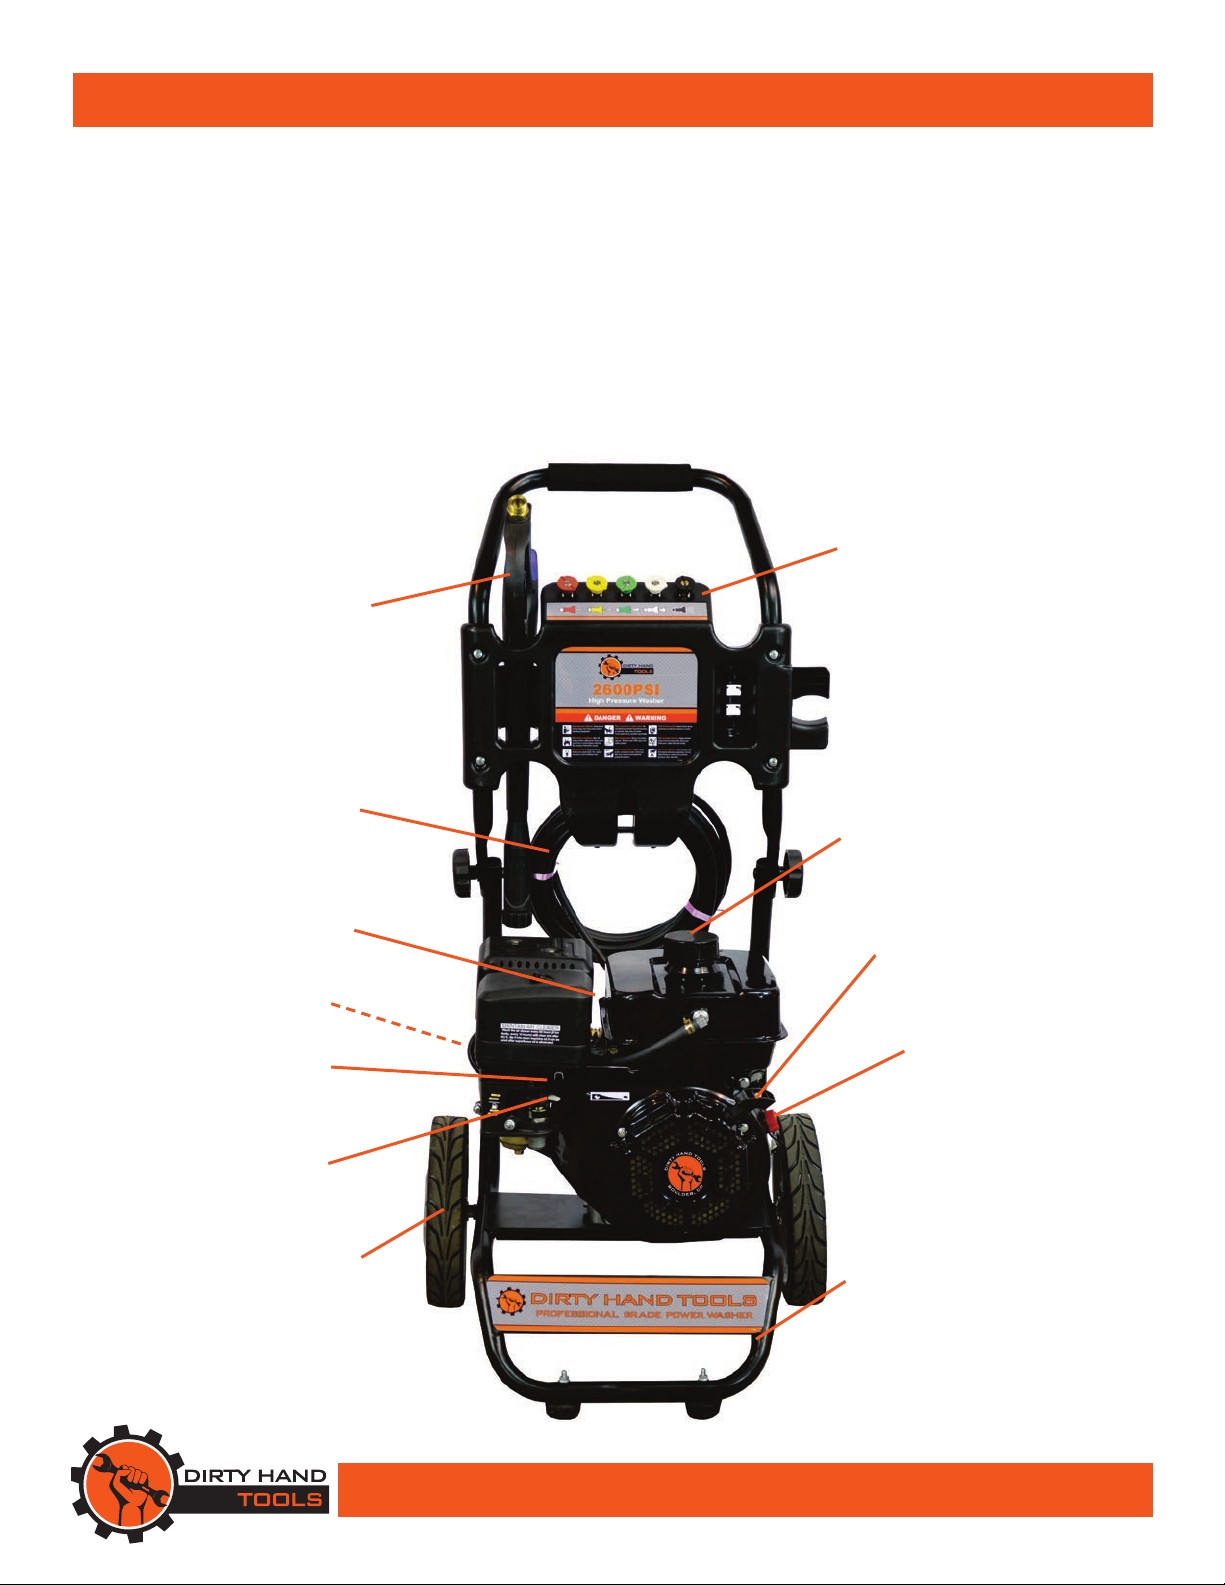
Unpacking and Setup
Your pressure washer is shipped with the handle bar unattached,
the spray nozzles, the high pressure hose, spray lance and spray
gun in separate packaging. Save the packing materials and box for
future use as a storage container. Carefully follow the assembly
instructions to attach the handlebar, high pressure hose, spray lance
and spray gun. COMPLETELY READ AND UNDERSTAND
THE OPERATOR’S MANUAL BEFORE ATTEMPTING
TO OPERATE THE PRESSURE WASHER.
QUICK
CONNECT
NOZZLES
6 FT HIGH
PRESSURE
HOSE
7HP/196CC
ENGINE
WATER
INLET
CHOKE
FUEL
VALVE
PNEUMATIC
TIRES
FUEL
FILL
RECOIL
STARTER
FUEL SHUT
OFF VALVE
HEAVY DUTY
FRAME
7
Page 8
Unpacking and Setup
Unpacking
1. Remove the power washer, the handlebar, high pressure
hose, spray gun, lance and color-coded nozzles from the
shipping container. If you are missing any items, please call
Dirty Hand Tools Customer Service at 1-720-287-5182.
2. Fill out and send in enclosed registration card. Write the
model number, serial number & date of purchase to ensure
warranty registration and keep a copy for your records.
Assembly
Read entire operator’s manual before you attempt to assemble
or operate the power washer.
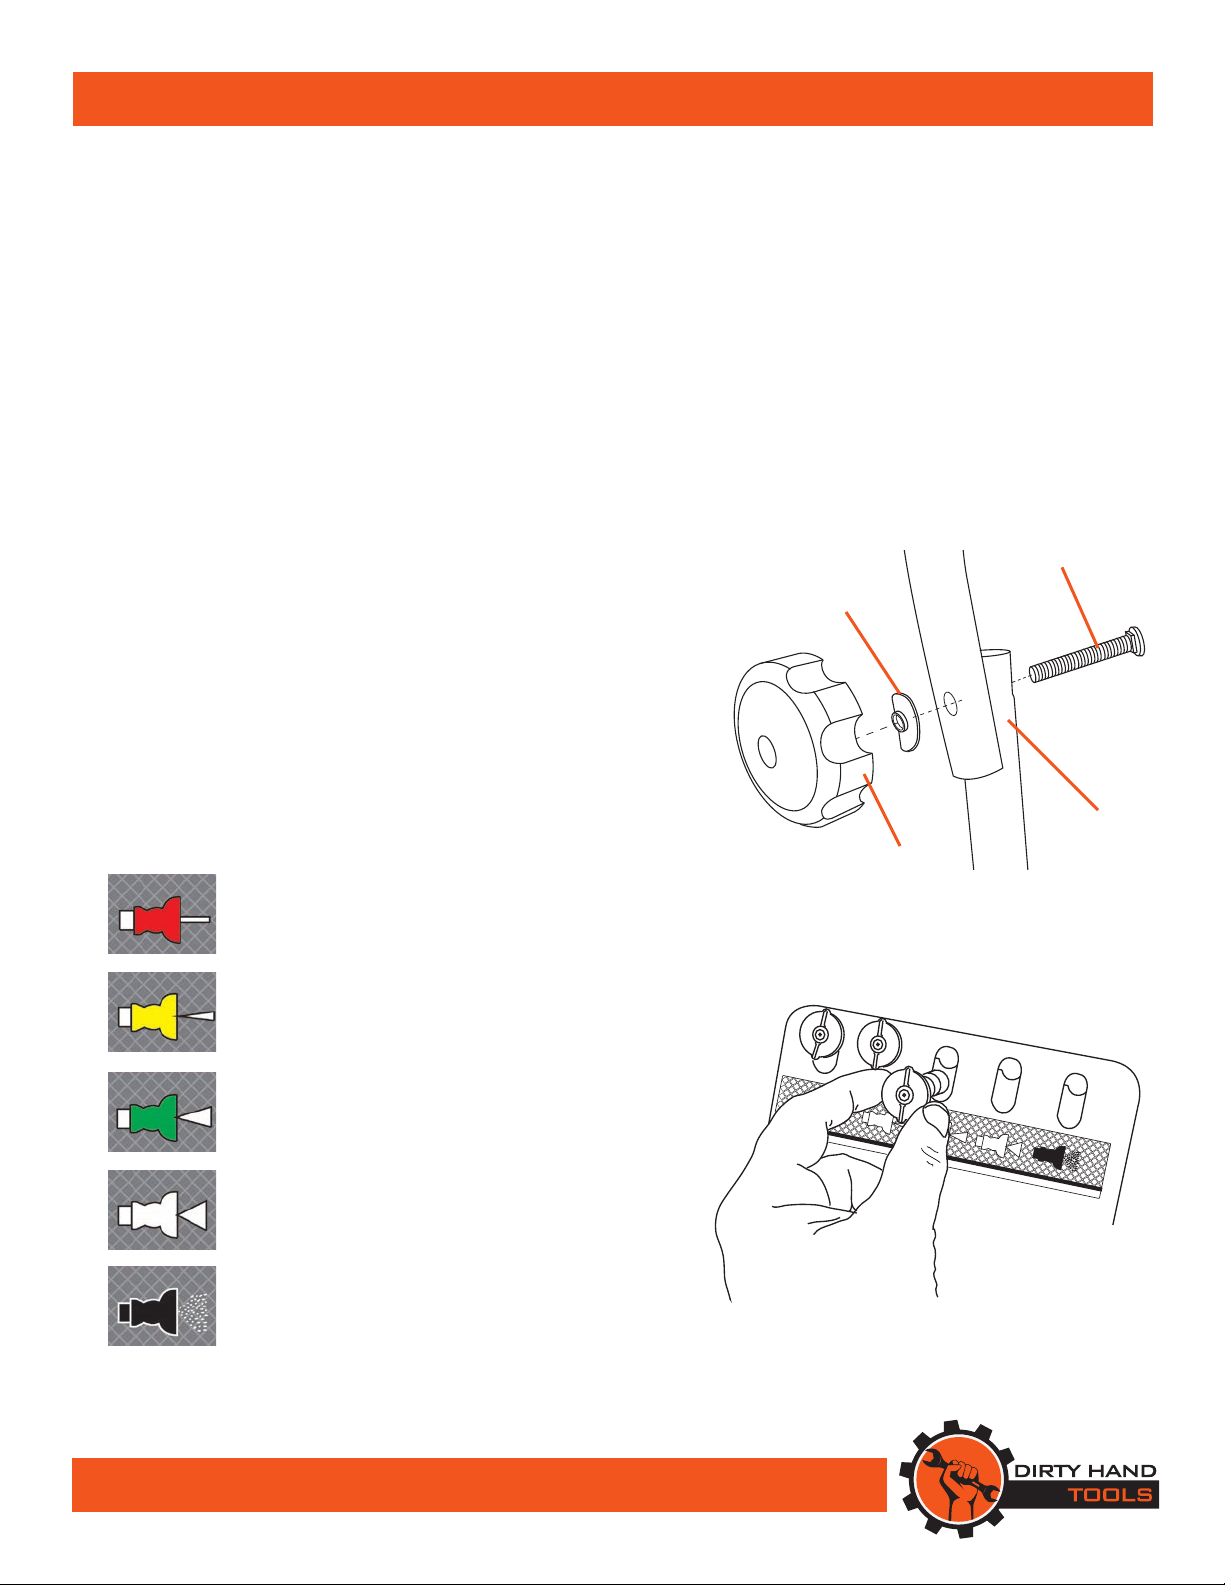
Attaching the Handlebar
1. Place handlebar onto handlebar supports. Align the holes
and push the carriage bolt through both the support and
the handlebar then add the curved retaining washer and
thread on the knob and tighten. Repeat for both sides of the
handlebar with the knobs to the outside.
CARRIAGE
BOLT
RETAINING
BOLT
Inserting the Color Coded Nozzles
1. Align the appropriate color coded nozzle with the matching
color receptacle and push into place on the nozzle holder
assembly attached to the upper handlebars.
Red Nozzle - High Pressure Straight Stream
0° angle of spray from center of nozzle
Yellow Nozzle - Medium to High Pressure
15° angle of spray from center of nozzle
Green Nozzle - Medium Pressure
25° angle of spray from center of nozzle
White Nozzle - Low Pressure
40° angle of spray from center of nozzle
Black Nozzle - Low Pressure
Wide broadcast spray for detergent
HANDLEBAR
KNOB
HANDLEBAR
SUPPORT
8
Page 9

Setup and Assembly
Attaching the spray wand to the spray gun.
1. Carefully thread the spray wand on to the spray gun and tighten
by hand only. Never tighten with pliers or wrench as extra pressure
may cause the fittings to crack or break.
Attaching the high pressure hose to the spray gun.
1. Carefully thread the high pressure hose onto the spray gun and
tighten by hand only. Never tighten with pliers or wrench as extra
pressure may cause the fittings to crack or break.
SPRAY
WAND
SPRAY
GUN
SPRAY
TRIGGER
TRIGGER
LOCK
HIGH PRESSURE
HOSE COUPLING
!
DANGER
e high pressure water stream can cut through skin
and underlying tissues, leading to serious injury.
Always use caution in operating a high pressure washer, making
sure that the spray gun, wand, spray nozzle and all connecting
hoses are correctly attached, tightened and secure.
9
Page 10

Setup and Assembly
Attaching the Spray Nozzle to the Wand
e quick–connect on the nozzle wand allows you to switch
between different nozzles. Nozzles can be changed while
power washer is running once spray gun trigger is locked in
the safety position. e nozzles vary the pressure and spray
pattern as shown on page 8.
Align the nozzle with the spray wand and firmly press into
position. Do not twist the nozzle while spraying.
!
DANGER
NEVER exchange nozzles without the trigger lock being
engaged on the spray gun.
• For most effective cleaning, keep nozzle from 8 to 24 inches
away from cleaning surface.
• Using the wand and spray nozzle too close to the object you
are cleaning may result in damaging the surface of the object.
Be especially carefull when using the high pressure nozzle
attachments (the red and yellow coded nozzles).
QUICK
CONNECT
COLLAR
Changing the Spray Nozzle on the Wand
1. Engage the trigger lock on the spray gun. Pull back collar
on the quick–connect and pull current nozzle off. Store
nozzles in holder provided on the accessory storage.
2. Select desired nozzle according to color code and
application.
3. Pull back on collar, insert new nozzle and release collar. Tug
on nozzle to make sure it is secured in position.
Nozzle Selection
• For delicate rinse use the low pressure white nozzle. is is
ideal gor gentle cleaning of autos, trucks, boats, RV’s, patio
furniture, lawn equipment, etc.
• For general rinsing use the medium pressure green or
yellow nozzle. Good for all purpose cleaning, house siding,
patios, decks, driveways, sidewalks, garage floors, etc.
• For maximum rinsing power use the high pressure red
nozzle. Use for paint removal, oil stains, rust stains, tar, gum,
grease, wax and removal of other similar materials.
• Use the black nozzle when applying detergent. Use only
recommended power washing detwergent to avoid clogging.
TRIGGER
LOCK
ENGAGED
POSITION
10
Page 11

Hose Connection
Attaching the Hoses
1. Run water through a 3/4 inch garden hose for 30 seconds to
clean out any debris.
2. Before connecting the garden hose to the water inlet, inspect and
clean screen if it contains debris or replace if damaged.
3. Connect the garden hose (50 feet or less in length) to the water
inlet. Tighten by hand. Do not use a connection to hot water.
4. Uncoil and connect the high pressure hose to the pump inlet.
Tighten by hand.
Note: Never tighten hose connections with pliers or wrench as
extra pressure may cause the fittings to crack or break.
DETERGENT
SIPHON
WATER
INLET
PUMP
INLET
GARDEN
HOSE
HIGH PRESSURE
HOSE
11
Page 12

Filling with Gasoline and Oil
!
WARNING
FUEL IS HIGHLY FLAMMABLE AND POISONOUS
ALWAYS FILL THE TANK WITH
ENGINE OFF AND COOL.
ALWAYS CHECK THE FUEL LEVEL
BEFORE OPERATING.
Allow the engine to cool for at least two minutes before
removing the fuel cap.
To prevent serious injury and fire:
1. Do not add fuel while the engine
is hot or running.
2. Do not smoke while filling with fuel.
3. Do not overfill.
Empty fuel before storage.
101127
1. Place the pressure washer on a level surface. Set up outdoors in
a well-ventilated area.
2. e fuel tank holds approximately 0.90 gallon of fuel. 87+
octane unleaded gasoline is recommended. Do not fill above
the top of the fuel filter. Replace the fuel cap securely and wipe
any excess from the fuel tank before starting the generator.
!
WARNING
DO NOT REFUEL INDOORS OR NEAR ANY SOURCE
OF POSSIBLE COMBUSTION.
DO NOT SMOKE WHILE FUELING.
DO NOT OVERFILL.
THE PRESSURE WASHER IS SHIPPED WITHOUT
FLUIDS. YOU MUST ADD OIL BEFORE STARTING
THE ENGINE.
WARNING
GASOLINE
FUEL ONLY!
DO NOT USE
DIESEL FUEL
OIL
DIPSTICK
101120
3. Add engine oil to the upper level of the oil filler hole. SAE
10/30 motor oil is recommended for most environmental
conditions. e oil capacity is 0.50 quarts (0.5).
Note: Do not thread the dipstick in when checking the oil level.
12
1 0 1 0 7 1
Page 13

Operation Precautions
!
DANGER
CARBON MONOXIDE HAZARD
USING AN ENGINE INDOORS
CAN KILL YOU IN MINUTES.
Engine exhaust contains carbon monoxide.
is is a poison you cannot see or smell.
DANGER
U S I N G A N E N G I N E I N D O O R S
C A N K I L L Y O U I N M I N U TE S
E x haust c ontains c arb on monox ide
whic h is a poison
that y ou c annot see or smell.
N ever use inside a h ouse
or g arag e even w ith doors
and w indow s open!
U se onl y outside aw ay
from w indow s,
doors and vents!
1. Keep all safety guards in place and in proper working order at
all times, including covers for the air cleaner and muffler.
2. NEVER place fingers, hands, or body near the pressure washer
when it is running.
3. Keep all people a minimum of ten feet from the pressure
washer during operation. Never point spray gun at a person or
animal.
4. Never transport the pressure washer with hand on the spray
gun trigger.
5. Do not leave the pressure washer unattended when it is
running. Turn off the engine before leaving the area.
6. Do not operate in explosive atmospheres, such as in the
presence of flammable liquids, gases, or dust. Gasolinepowered engines may ignite the dust or fumes.
7. Do not use this piece of equipment while tired or under the
influence of drugs, alcohol or medication.
8. Parts, especially exhaust system components, get very hot
during use. Stay clear of hot parts. Do not touch the muffler.
9. Do not cover the pressure washer during operation.
10. Wear appropriate clothing, footware, gloves and eye goggles
protection during operation. Spray can splash back or propel
objects.
13
Page 14

Operation
!
CAUTION
ALWAYS CHECK ALL CONNECTIONS AND
OIL /FUEL LEVELS
BEFORE STARTING THE ENGINE.
Do not run the engine without engine oil, or with low engine
oil, which will permanently damage the engine.
DO NOT OPERATE without the water supply connected
and turned on. Running the pressure washer without water will
damage the pump.
Starting the Engine
1. To start a cold engine, move the choke to the CHOKE
position (to the left). To restart a warm engine, leave the
Choke in the RUN position (to the right).
2. Open the fuel valve by sliding switch to the right.
3. Slide the throttle 1/3 of the way to the right.
4. Turn the engine switch on.
5. Grip the recoil starter handle and pull slowly several times to
allow the gasoline to flow into the engine’s carburetor. en
pull the recoil starter handle gently until resistance is felt.
Allow cable to retract fully and then pull it quickly. Repeat
until the engine starts.
6. Allow the engine to run for several seconds. en move the
choke lever slowly to its RUN position (to the right). Moving
the choke lever too fast could stall the engine.
7. Adjust the throttle as needed.
THROTTLE
CHOKE
FUEL VALVE
IMPORTANT: Allow the engine to run for a few minutes
before operating the pressure washer to allow the engine to
stabilize.
Break-in Period
Breaking-in the engine will help ensure longer engine life and
proper equipment operation. After about 20 hours of use, the
maintenance break-in period, change the engine oil. Failure
to change the oil regularly may damage the engine and void
the warranty. Under normal operating conditions follow the
maintenance schedule (see page 16).
14
ENGINE
ON/OFF
SWITCH
Page 15

Operation
!
CAUTION
Running the engine on the power washer for 3-5 minutes
without pressing the trigger on the spray gun, can cause water
to reach temperatures above 125°F.
Carefully discharge warm water onto the ground.
!
DANGER
Spray gun traps high water pressure, even when engine is
stopped and water is disconnected, which can cause injury.
Stopping the Engine
1. Release the spray gun trigger.
2. To stop the engine in an emergency, turn the engine switch off.
3. Under normal conditions, slide the throttle to the right and
turn the engine switch to the off position.
4. ALWAYS point spray gun in a safe direction, and squeeze
spray gun trigger to release retained high water pressure.
Engage trigger lock when not in use.
5. Turn OFF water supply.
6. Keep high pressure hose connected to pump and spray gun
while system is pressurized.
7. ALWAYS engage trigger lock when not in use.
Cleaning Recommendations
1. Before cleaning any object, select a small test area to determine
distance of wand from object and nozzle size.
2. Prerinse object to be cleaned with fresh water and garden hose
before using the pressure washer.
3. Keep the spray nozzle at least 8 inches away from object being
cleaned. e high pressure nozzle may remove finishes.
4. For best results use the pressure washer from top to bottom,
from left to right using a sweeping, overlapping motion.
5. Limit the work area to about 6 linear feet or 25 square feet.
6. If using a detergent do not allow it to dry on the surface being
cleaned. Allow detergent to remain on surface for about 3
minutes before rinsing with water.
15
Page 16

Maintenance
!
WARNING
BEFORE PERFORMING ANY MAINTENANCE
PROCEDURE STOP THE ENGINE, WAIT FIVE 5
MINUTES TO ALLOW ALL PARTS TO COOL.
Turn the engine switch to the OFF position.
Regular maintenance is the way to ensure the best performance
and long life of your machine. Please refer to this manual and the
engine manufacturer’s owner’s manual for maintenance procedures.
Maintenance Checklist
Maintenance Before Monthly/ Every 6 Mo./ Annually/
Procedure Each Use 20 Hours 50 Hours
100 Hours
Clean Exterior Surfaces X X X X
Remove Accumulated Debris X X X X
Check Engine Oil Level X X X X
Change Engine Oil* X X X
Check /Clean Water Inlet Screen X X X X
Check High Pressure Hose X X X X
Check Detergent Siphoning Hose/Filter X X X X
Check Spray Gun & Hose Connections X X X X
Check/Clean Air Filter** X X
Check Muffler and Spark Arrestor X X
Clean/Replace Spark Plug X
* Change engine oil after the first 5 hours of operation as break-in period
** Change/clean air filter more frequently if in dusty environment
• e pump is pre-lubricated and factory sealed requiring no additional
maintenance for the life of the pump.
• Keep area around muffler free from any combustible debris.
• Air slots and openings on the power washer must be clean and unobstructed.
• Power washer parts should be clean to reduce overheating or ignition of debris.
16
Page 17

Maintenance
!
WARNING
To prevent serious injury from accidental starting turn the
power switch on the engine to its “OFF” position.
To eliminate pressure discharge the spray gun by pressing the
trigger then moving it into the locked position. Wait for the
engine to cool before performing any maintenance procedure.
• DO NOT insert any objects through cooling slots.
• Use a soft bristle brush to loosen caked on dirt, oil, etc.
• Use a vacuum cleaner to pick up loose dirt and debris.
Intake Screen
Examine the screen on the pump’s water inlet. Clean it if the
screen is clogged or replace it if screen is damaged.
Check High Pressure Hose
High pressure hoses can develop leaks from wear and kinking.
Inspect hoses each time before use. Never repair the high
pressure hose. Replace the hose immediately with a suitable hose
that meets or exceeds the original rating.
Changing /Cleaning the Air Filter
1. Loosen wing nut and remove cover. Carefully remove filter
assembly. Remove foam filter. Clean cartridge by gently tapping
on a flat surface. Reinstall the foam filter, then reinstall clean or
new cartridge assembly. Install cover and tighten wing nut.
Detergent Siphoning Tube
Examine the filter on the detergent tube and clean if clogged.
e tube should fit tightly on the barbed fitting. Replace the
filter or tube if damaged.
Spray Gun
Examine the hose connection to the spray gun and make sure
it is secure. Test by pressing the trigger, if it “springs back” into
place when you release it, replace the spray gun immediately.
Nozzles
A pulsing sensation felt while squeezing the spray gun trigger
indicates excessive pump pressure caused by a clogged nozzle.
Clean the nozzle with a paper clip or stick pin to free debris.
Spray Wand
Remove nozzle from the wand. Remove the wand from the spray
gun assembly and flush with a garden hose for 30 - 60 seconds.
Reinstall wand onto the spray gun and test with nozzle attached.
17
Page 18

Maintenance
Spark Plug Maintenance:
1. Disconnect spark plug wire from the end of plug. Clean out
debris from around the spark plug.
2. Using a spark plug wrench, remove the spark plug. If the spark
plug is oily, clean it with a dry rag. If the electrode has deposits
on it, polish it using emery paper. If the white insulator is
cracked or chipped, replace the spark plug.
3. When installing a new spark plug, adjust the plug’s gap to the
specification on the technical specification chart. Do not pry
against the electrode or the insulator, the spark plug can be
damaged.
4. Install the new spark plug or the cleaned spark plug into the
engine. Gasket style spark plugs should be finger-tightened
until the gasket contacts the cylinder head, then turned about
1/2 to 2/3 more rotation. Non-gasket-style spark plugs should
be finger-tightened until the plug contacts the head, then
about 1/16 turn more.
!
WARNING
Oil is very hot during operation and can
cause burns. Wait for engine to cool before changing oil.
Do not run the engine with too little oil.
e engine will be permanently damaged.
Changing the engine oil
1. Make sure the engine is stopped and is level.
2. Close the fuel valve.
3. Place a drain pan underneath the crankcase’s drain plug.
4. Remove the drain plug and, if possible, tilt the crankcase
slightly to help drain the oil out.
5. Replace the drain plug and tighten it.
6. Clean the top of the dipstick and the area around it. Remove
the dipstick by threading it counterclockwise, and wipe it off
with a clean lint free rag.
Note: Do not thread the dipstick in when checking the oil level.
SAE VISCOSITY GRADES
30W
10W - 30W
5W - 30W
-20 0 20 40 60 80 100°F
AVERAGE OUTSIDE TEMPERATURE
7. Add the appropriate type of oil until the oil level is at the full
level. SAE 10W-30 oil is recommended for general use for
temperatures above 32°F. Use SAE 5W-30 for temperatures
consistently below 32°F.
8. read the dipstick back in clockwise.
18
1 0 1 0 7 1
Page 19

Engine Troubleshooting
!
WARNING
BEFORE PERFORMING ANY MAINTENANCE
PROCEDURE STOP THE ENGINE, WAIT FIVE 5
MINUTES TO ALLOW ALL PARTS TO COOL.
Disconnect the spark plug wire, keeping it away from the spark plug.
PROBLEM SOLUTION
e engine will not start.
• No fuel in tank or fuel valve closed. • Add fuel and open fuel valve.
• Choke not in start position. • Place choke in START position and pull recoil starter.
• Low quality or deteriorated, old gasoline. • Drain fuel. Add fresh 87+ octane unleaded gasoline.
• Dirty fuel passageways blocking fuel flow. • Clean out fuel passageways using fuel additive.
• Carburetor needle stuck. Smell of fuel in air. • Gently tap side of carburetor with screwdriver handle.
• Too much fuel in chamber. • Turn choke to RUN position.
• Spark plug wire not connected securely. • Connect spark plug wire securely to spark plug.
• Spark plug electrode wet or dirty. • Remove and clean spark plug. Reinstall spark plug and restart.
• Incorrect spark plug gap. • Reset spark plug gap according to specifications.
• Spark plug wire or spark plug broken. • Replace spark plug and/or spark plug wire.
• Cylinder not lubricated after long storage. • Remove spark plug. Pour tablespoon of oil into spark plug hole.
Replace spark plug. Crank engine a few times and try to start.
• Clogged fuel filter. • Replace fuel filter.
• If the engine still will not start, visit our web site at www.
dirtyhandtools.com or call 1-877-487-8275 for assistance.
Engine misres, backres or knocks.
• Spark plug wire loose. • Tighten spark plug wire.
• Incorrect spark plug gap. • Reset spark plug gap according to specifications.
• Spark plug wire or spark plug broken. • Replace spark plug and/or spark plug wire.
• Low quality or deteriorated, old gasoline. • Drain fuel. Add new fresh 87+ octane unleaded gasoline.
• Engine too cold. • Use cold weather fuel and oil additives.
• Engine knocks. • Engine overloaded, do not exceed recommended load rating.
Engine stops suddenly.
• Low quality or deteriorated, old gasoline. • Drain fuel. Add fresh 87+ octane unleaded gasoline.
• Defective fuel cap creates vacuum. • Test and replace fuel cap.
• Improper idle speed. • Move choke to RUN position.
• Incorrect timing, deposit buildup, worn • Requires qualified technician.
engine or other mechanical problem.
19
Page 20

Pressure Washer Troubleshooting
PROBLEM SOLUTION
No pressure, low or inconsistent pressure. • Replace low pressure nozzle with high pressure nozzle.
• Clear water inlet.
• Provide adequate water flow.
• Check for kinking, straighten inlet hose, repair any leak.
• Check and clean inlet hose screen.
• Inlet hose too small, use 3/4 inch diameter garden hose.
• Turn inlet (garden hose) tap on to full pressure.
• Water supply over 100°F, connect to cooler water supply.
• Clear blockage in outlet hose or replace hose.
• Replace spray gun if it is leaking.
• Clean obstructed nozzle.
• Contact service facility to check faulty pump.
Detergent does not mix with spray. • Submerge detergent siphoning tube into detergent.
• Clean or replace filter/detergent siphoning tube.
• Replace with high pressure nozzle with low pressure nozzle.
• Dilute detergent that is too thick.
Nozzle clogged. • Engage trigger lock, remove nozzle and clean nozzle with a
paper clip, needle or stick pin. Replace nozzle.
• Engage trigger lock, remove nozzle and wand from spray
gun. Flush wand for 30-60 seconds with garden hose.
Replace wand and nozzle.
Spray wand leaks. • Tightem all fittings.
• Replace worn o-ring.
• Flush wand for 30-60 seconds with garden hose.
Pump is noisy. • Turn engine off. Remove all hose connections, check for
debris or obstruction, clean and replace all hoses making sure
that connections are tight.
• Make sure that washers are present and in good condition.
• Turn off engine. Purge air from pump by squeezing trigger
until steady water stream is present.
20
Page 21

Storage
!
WARNING
MUFFLER
AIR FILTER
COVER
SPARK
PLUG
WIRE
DRAIN
PLUG
BOLT
CYLINDER
ASSEMBLY
Drain the fuel tank in a well-ventilated area
away from ignition sources. If the engine is
hot from use, shut the engine o and wait
for it to cool before draining fuel.
Do not smoke near the fuel tank.
1. Turn off engine. Squeeze spray gun trigger until all
pressure is removed. Remove all hose connections. Turn
on machine for a few seconds to release all water in
system.
2. Wait for the engine to cool, then clean the engine with a
clean cloth.
3. When the pressure washer is to be stored for longer than
20 days, prepare the engine for storage by emptying the
fuel tank and draining all fuel lines.
4. Remove the drain bolt from the bottom of the carburetor
bowl and allow the fuel to drain.
5. Clean out area around spark plug and remove. Pour
one tablespoon of engine oil into the cylinder through
the spark plug hole. Reinstall the spark plug, but leave
the spark plug wire disconnected. Pull recoil starter
handle to distribute oil in the cylinder. Stop after one
or two revolutions when you feel the piston start the
compression stroke (when you start to feel resistance).
6. Apply a thin coat of rust preventive oil to all uncoated
metal parts.
7. Cover and store in a dry, well-ventilated area that does
not reach freezing temperatures,out of reach of children
and away from water heaters, clothes dryers, furnaces and
other ignition sources.
21
Page 22

Notes
22
Page 23

Notes
23
Page 24

Warranty & Specications
IMPORTANT NOTICE
We, the manufacturer, reserve the right to change the product and/
or specifications in this manual without notification. e manual is for
information usage only and the pictures and drawings depicted herein are
for reference only.
Warranty Repair and Service
Do not return this product to the store for warranty issues or repair. Call
our customer service department at 720-287-5182, 1-877-487-8275, or
visit www.dirtyhandtools.com for the location of the nearest service center.
Record the information below for future reference.
Model No.
Serial No.
Date of Purchase
Place of Purchase
Specications
SKU/Part No. 101087
Description 2600psi Pressure Washer
Engine 7 HP 196CC*, EPA/CARB Approved
Flow 2.3 Gallons/minute
Nozzles 5 Quick Connect: 40°, 25°, 15°, 0° and Detergent
Hose 6 ft.
Coupler Size 3/8”
Gun Industrial rear entry with 3 foot lance
Oriface Size 3.5
Max. Inlet Water Temp. 140°F
Max. Output Water Temp. 140°F
Chemical Injector Yes
Adjustable Pressure Ye s
Dimensions 21”L x 19”W x 41”H
Weight 68.3 Lbs.
*As rated by engine manufacturer
Dirty Hand Tools® is a brand of
1100 W 120th Ave., Suite 600
Westminster, CO 80234 • 720-287-5182
For Service or Questions
Call 1-877-487-8275
720-287-5182
www.dirtyhandtools.com
 Loading...