

Page 1
OWNER’S MANUAL
Operating and Servicing Instructions
Find GENUINE Replacement Parts at www.dirtdevil.com
• Please read these instructions
carefully before using your product.
• Let us help you put your product
together or answer any questions,
call:
1-800-321-1134
(USA & Canada)
www.dirtdevil.com
WARNING:
Product assembly may include small parts.
Small parts can present a choking hazard.
Warranty Registration
• Online at: www.dirtdevil.com
•
Call: 1-800-321-1134 to register by phone.
Hint: Attach your sales receipt to this Owner’s manual.
Verification of date of purchase may be required for
warranty service of your Dirt Devil® product.
For quick reference, please record your
product information below.
Model #:
Mfg. Code:
(Mfg. code located on the back or bottom of product)
©2010 All rights reserved #961127005 R0
6/10
Page 2

THIS PRODUCT IS INTENDED FOR HOUSEHOLD USE ONLY.
IMPORTANT SAFETY INSTRUCTIONS
When you use this product, basic precautions should always be followed,
including the following:
•READALLINSTRUCTIONSBEFOREUSINGTHISPRODUCT.
•ALWAYSFOLLOWTHESESAFETYINSTRUCTIONS.
WARNING: TO REDUCE THE RISK OF FIRE,
ELECTRIC SHOCK OR INJURY:
• Know your tool
Read and understand the owners manual and labels affixed to the tool. Learn its
application and limitations as well as its specific potential hazards.
• Keep guards in place.
Keep in good working order, properly adjusted and aligned.
• Don’t force tool.
It will do the job better and safer at the rate for which it was designed.
• Wear proper apparel.
Do not wear loose clothing, gloves, neckties or jewelry (rings, watch) which may
get caught in moving parts. Non-slip footwear is recommended. Wear protective
hair covering to contain long hair. Roll up long sleeves above the elbows.
• Always wear safety glasses.
Also use a face or dust mask if cutting operation is dusty. Always wear safety
glasses (ansi z87.1). Everyday eyeglasses only have impact resistant lenses, they
are not safety glasses.
• Don’t overreach.
Keep proper footing and balance at all times.
• Maintain tool with care.
Keep tools sharp and clean for best and safest performance. Follow instructions
for lubricating and changing accessories.
• Disconnect tools.
Before servicing, when changing accessories or attachments.
• Avoid accidental starting.
Make sure the swich is in the ‘’off’’ position before plugging in.
• Check damaged parts.
Before further use of the tool, a guard or other parts that are damaged should
be carefully checked to ensure that they will operate properly and perform their
intended function. Check for alignment of moving parts, binding of moving parts,
breakage of parts, mounting, and any other conditions that may affect its operation. A guard or other parts that are damaged should be properly repaired or
replaced.
• Never leave machine running unattended. Turn power off. Don’t leave any tool
running until it comes to a complete stop.
• Do not operate power tools in explosive atmospheres, such as in the presence
of flammable liquids, gases, or dust. Power tools create sparks which may ignite
the dust or fumes.
2
Page 3

• Avoid body contact with grounded surfaces such as pipes, radiators, ranges, and
refrigerators. There is an increased risk of electric shock if your body is grounded.
• Don’t expose power tools to rain or wet conditions. Water entering a power tool
will increase the risk of electric shock.
• Do not handle plug or tool with wet hands.
• Use outdoor extension cords marked W-A, W, SW-A, SOW-A, STW-A, STOW-A,
SJW-A, SJTW-A, or SJTOW-A. These cords are rated for outdoor use and reduce
the risk of electric shock.
• Never allow children to operate the equipment. Never allow adults to operate the
equipment without proper instruction.
• Always use face or dust mask if operation is dusty.
• Use extra care when cleaning on stairs.
• Do not leave appliance plugged in. Unplug from outlet when not in use and
before servicing.
• Do not expose to rain, store indoors.
• Use only as described in this manual. Use only manufacturer’s recommended
attachments.
• Keep hair, loose clothing, fingers, and all body parts away from openings and
moving parts.
• Do not operate the equipment while barefoot or when wearing sandals or similar
lightweight footwear. Wear protective footwear that will protect your feet and
improve your footing on slippery surfaces.
• Do not use on steps, a ladder, roof top, tree, or other unstable support. Stable
footing on a solid surface enables better control of the blower/vac in unexpected
situations.
• Keep firm footing and balance. Do not overreach. Overreaching can result in loss
of balance.
• Turn off all controls before unplugging.
• Do not allow to be used as a toy. Close attention is necessary when used by or
near children.
• Avoid accidental starting. Be sure the power switch is not on before plugging in.
Turn off power switch before unplugging.
• Do not use tool if switch does not turn it on or off. Any tool that cannot be controlled with the switch is dangerous and must be repaired.
• Do not leave the tool when plugged in. unplug from the power outlet when not in
use, before servicing, and before storing the tool. Such preventative safety measures reduce the risk of starting the tool accidentally.
• Keep all bystanders, children, and pets at least 50 ft away.
• Do not operate this unit when you are tired, ill, upset, or under the influence of
alcohol, drugs, or medication.
• Do not operate in poor lighting.
• Keep all parts of your body away from any moving parts and all hot surfaces of
the unit.
• Check the work area before each use. Remove all objects such as rocks, broken
glass, nails, wire, or string which can be thrown of become entangled in the
machine.
• Never use blower/vac near fires, fireplaces, hot ashes, barbecue pits, etc., which
may cause fire to spread.
3
Page 4

• Do not pick up flammable or combustible liquids such as gasoline or use in areas
where they may be present.
• Do not pick up anything that is burning or smoking such as cigarette matches or
hot ashes.
• Do not put any object into openings. Do not use with any opening blocked; keep
free of dust, lint, hair, and anything that may reduce air flow.
• Use only identical manufacturer’s replacement parts and accessories. Use of any
other parts may create a hazard or cause product damage.
• Do not use with damaged cord or plug. If appliance is not working as it should,
has been dropped, damaged, left outdoors, or dropped into water, return it to a
service center.
• In a double insulated appliance, two systems of insulation are provided instead
of grounding. No grounding means is provided on a double insulated appliance,
nor should a means for grounding be added to the appliance. Servicing a double
insulated appliance requires extreme care and knowledge of the system and
should be done only by qualified service personnel. Replacement parts for a
double insulated appliance must be identical to the parts they replace.
• For household use only.
SPECIFIC SAFETY RULES
Make sure your extension cord is in good condition. When using an extention
cord, be sure to use one heavy enough to carry the current your product will
draw. A wire gauge size (A.W.G.) of at least 14 is recommended for an extension cord 50’ (15m) or less in length. If in doubt, use the next heavier gauge. The
smaller the gauge number, the heavier the cord. An undersized cord will cause a
drop in line voltage, resulting in loss of power and overheating.
• Do not point the blower nozzle in the direction of people, children or pets.
• When used as a blower, always install the blower tubes. When used as a vacuum, always install the vacuum tubes and vacuum bag. Make sure the vacuum
bag is completely zipped when the unit is running to avoid flying debris
• When not in use, blower should be stored indoors in a dry, in a secure location
out of the reach of children.
• Maintain tool with care. Keep fan area clean for best and safest performance.
Follow instructions for proper maintenance.
• Do not attempt to clear clogs from tool without first unplugging it.
• Do not pull or carry by cord, use cord as a handle, or pull cord around sharp
edges or corners. Keep cord away from heated surfaces.
• Do not unplug by pulling on cord. To unplug, grasp the plug, not the cord.
• To reduce risk of electric shock, do not expose to rain, do not use on wet surfaces. Store indoors.
• Be sure to secure the unit while transporting.
• Store the unit in a dry area, locked up to prevent unauthorized use or damage,
and stored in a high place, out of the reach of children.
• Never douse or squirt the unit with water or any other liquid. Keep handles dry,
clean and free of debris. Clean after each use. See Maintenance instructions.
WHILEOPERATINGASABLOWER
Never point the blower in the direction of people, children or pets, or in the
direction of windows. Use extra caution when blowing debris near solid
GENERAL MAINTENANCE
WARNING: For your own safety, turn switch “OFF” and remove extension cord plug
from power source outlet before maintaining your blower/vacuum/mulcher.
COLLECTIONBAG
CAUTION: NEVER UNZIP THE COLLECTION BAG WITHOUT FIRST TURNING OFF AND
UNPLUGGING THE VACUUM/MULCHER.
NOTE: If the suction decreases and the bag is not full, the vacuum collection tube is
probably clogged with debris. Turn off and unplug the vacuum/mulcher and clear the
collection tube before continuing.
CLEANING AND STORAGE- TURN OFF AND UNPLUG TOOL! (Unplug extension cord
at power source.)
Use only mild soap and a damp cloth to clean the tool. Clean out any clippings which
may have accumulated inside the blower/vacuum/mulcher. When used properly with
dry leaves the impeller housing should remain clean. If damp earth and debris are
vacuumed, some of the particles may build up on the inside of the impeller housing.
If this happens, the performance of the unit will decrease. This area can be cleaned
out by gently wiping out with a damp rag after disconnecting from the power source.
Your blower/vacuum/mulcher should be stored in a dry place.
WARNING: Certain cleaning agents and solvents can damage plastic parts. Some of
these are: gasoline, carbon tetrachloride, chlorinated cleaning solvents, ammonia and
household detergents which contain ammonia. Avoiding use of these and other types
of cleaning agents will minimize the possibility of damage.
CAUTION: DO NOT POUR OR SPRAY WATER ON THE TOOL IN AN ATTEMPT TO
CLEAN. Never let any liquid get inside the tool; never immerse any part of the tool into
a liquid. Do not store the tool on or adjacent to fertilizers or chemicals. Such storage
can cause rapid corrosion of the metal parts.
TROUBLESHOOTINGGUIDE
WARNING: TO REDUCE RISK OF PERSONAL INJURY - UNPLUG CLEANER BEFORE SERVICING
PROBLEM POSSIBLEREASON POSSIBLESOLUTION
Motor fails to
start when switch
is turned on.
Power cord is not plugged in or
connection is loose.
Household circuit breaker is tripped.
Plug in the power cord.
Check circuit breaker.
ANYOTHERSERVICINGSHOULDBEDONEBYANAUTHORIZEDSERVICEREPRESENTATIVE
CUSTOMER SERVICE (1-800-321-1134)
In the event that further assistance is required, see your Yellow Pages for an authorized Royal® Dealer. Costs of any
transportation to and from any place of repair are to be paid by the owner. The service parts used in this unit are
easily replaced and readily available from an authorized Royal® Dealer or retailer. Always identify your product by
the model number and manufacturing code when requesting information or ordering replacement parts. (The model
number appears on the bottom of the cleaner.)
4 13
Page 5

HOW TO OPERATE
FIGURE 8
STARTING AND STOPPING
Refer to the Electrical Information page for the installation and connection of the
power cord.
Warning! To avoid serious personal injury, always wear safety glasses. Wear a facial
mask in dusty locations and wear appropriate clothing such as boots, gloves, long
pants and long-sleeved shirt.
In either blower mode or vacuum/mulcher mode, move the On/Off switch (A) Fig.6
to the On position to turn blower on. Move the On/Off switch to the Off position to
turn blower off.
VARIABLESPEEDDIAL
This blower/vacuum/mulcher comes with a variable speed dial (A) Fig.7 which con-
trols the amount of air ow during use (blower or vacuum/mulcher mode). Fig.7
shows which direction to turn the variable speed dial to increase or decrease the
air ow when in blower mode. In vacuum/mulcher mode, it is the opposite.
HOLDINGTHEBLOWER/VACUUM/MULCHER
InBlowerMode- Hold the blower tube approximately 7” above the ground and turn
the switch to the On position to start. In a sweeping motion, move the blower sideto-side, advancing slowing keeping the leaves, grass etc. in front of you. Once all
debris is in a pile, you can now convert your blower to vacuum/mulcher mode to
collect the debris for disposal.
In Vacuum/Mulcher Mode- Tilt the vacuum/
mulcher tube slightly and use a sweeping motion, move the vacuum/mulcher tube side-to-side
and turn the switch to the On position to start.
Small debris will ow into and through the vaccum tube into the collection bag. Larger debris
such as leaves and small twigs will be mulched
as they pass through the impeller housing.
Once the collection bag gets full, the suction
power will decrease, to avoid this, turn off vacuum/mulcher and unplug the extension cord.
Unzip the collection bag and empty its contents
before continuing to operate.
CAUTION: NEVER UNZIP THE COLLECTION BAG
WITHOUT FIRST TURNING OFF AND UNPLUGGING
THE VACUUM/MULCHER.
NOTE: If the suction decreases and the bag is
not full, the vacuum collection tube is probably
clogged with debris. Turn off and unplug the
vacuum/mulcher and clear the collection tube
before continuing.
Figure 6
Figure 7
objects such as trees, automobiles and walls.
WHILE OPERATING AS A VACUUM/MULCHER
• Avoid situations that could catch the bag on fire. Do not operate near an open
flame. Do not mulch warm ash from fireplaces, barbecue pits, brush piles, etc.
Do not mulch discarded cigars or cigarettes unless the cinders are completely
cool.
• The unit is designed to pick up dry material such as leaves, grass, small twigs,
and bits of paper. Do not attempt to mulch wet debris and/or standing water,
because this may result in damage. To avoid severe damage to the impeller,
do not mulch metal, rocks or broken glass.
• Do not operate vacuum without vacuum bag installed; flying debris could cause
serious injury. Always close vacuum bag completely before operating.
• Rotating impeller blades can cause severe injury. Stop the engine before opening the vacuum door or installing/changing tubes. Do not put hands or any other
object into the vacuum tubes while they are installed on the unit.
• If the power supply cord is damaged, it must be replaced only by the manufacturer or by an authorized service center to avoid risk.
• Protect your lungs. Wear a face or dust mask if the operation is dusty. Following
this rule will reduce the risk of serious personal injury.
• Save these instructions. Refer to them frequently and use them to instruct others who may use this power tool. If you loan someone this power tool, loan them
these instructions also.
ELECTRICAL CONNECTION
This product has a precision-built electric motor. It should be connected to a power
supply that is 120 volts, AC only (normal household current), 60 Hz. Do not operate this product on direct current (DC). A substantial voltage drop will cause a loss of
power and the motor will overheat. If your product does not operate when plugged into
an outlet, double-check the power supply.
GFCI Ground Fault Circuit Interrupter (GFCI) protection should be provided on the
circuit(s) or outlet(s) to be used for the product. Receptacles are available having builtin GFCI protection and may be used for this measure of safety.
WARNING:
To reduce the risk of electric shock, this appliance has a polarized plug (one blade is wider
than the other). This plug will fit in a polarized outlet only one way. If the plug does not fit
fully in the outlet, reverse the plug. If it still does not fit, contact a qualified electrician to
install the proper outlet. Do not change the plug in any way.
USE PROPER EXTENSION CORD
Make sure the extension cord is in good condition. When using an extension cord, be
sure to use one heavy enough to carry the current your tool will draw. An undersized
cord will cause a drop in line voltage resulting in loss of power and overheating. See
Fig.1 for table showing correct size to use depending on the cord length and the
nameplate amperage rating. If in doubt, use the next heavier gauge. The smaller the
gauge number, the heavier the cord. Always use U.L. or CSA listed extension cords.
512
Page 6

ELECTRICAL CONNECTION CONT.
HOWTOASSEMBLECONT.
Tool’s
Amperage
Rating
3-6
6-8
8-10
10-12
12-16
Cord Size in A.W.G.
Cord Length in Feet
25 50 100 150
18 16 16 14
18 16 14 12
18 16 14 12
18 16 14 12
14 12 - -
Figure 1
WARNING:
Keep the extension cord clear of the working area. Position the cord so that it will not get
caught on lumber, tools, or other obstructions while you are working with a power tool.
Failure to do so can result in serious personal injury.
WARNING:
Check extension cords before each use. If damaged replace immediately. Never use product with a damaged cord since touching the damaged area could cause electrical shock
resulting in serious injury.
• When working outdoors with a product, use an extension cord that is designed
for outside use. This type of cord is designated with “W-A” or “W” on the cord’s
jacket. Before using any extension cord, inspect it for loose or exposed wires and
cut or worn insulation.
CONNECTING THE POWER CORD TO THE
EXTENSION CORD
Secure the extension cord (A) Fig.2 to the
extension cord lock (B) on the motor housing.
First bend the end of the extension cord and
then pass it through the cord lock opening
(C). Then slip the extension cord around the
“T” notch cord lock (B) and pull on the extension cord to get a tight fit. This will prevent
accidental unplugging of the extension cord
during use. Then plug the female end of the
extension cord into the tool’s polarized plug.
WARNING! To reduce risk of electric shock, do
not expose to rain, do not use on wet surfaces. Store indoors.
NOTE: Servicing of a product with double insu-
lation requires extreme care and knowledge
of the system and should be performed only by a qualified service technician. For
service, we suggest you return the tool to your nearest authorized service center
for repair. Always use original factory replacement parts when servicing.
6 11
Figure 2
WARNING:
Do not attempt to modify this product or create accessories not recommended for use with
this product. Any such alteration or modification is misuse and could result in a hazardous
condition leading to possible serious personal injury.
WARNING:
Do not connect to power supply until assembly is complete. Failure to comply could result
in accidental starting and possible serious personal injury.
VACUUM/MULCHER MODE
WARNING! The vacuum/mulcher inlet and outlet both have a built-in limit switch
which prevents the vacuum/mulcher from starting if the main collection tube
(A) Fig.5 and the collection bag attachment (C) are not installed or not installed
properly. Make sure the vacuum/mulcher main collection tube and the collection
bag attachment are installed before attempting to use the vacuum/mulcher.
In vacuum/mulcher mode, the main collection tube (A) Fig.5, lower sectioncollec-
tion tube (B) and the collection bag attachment (C) with collection bag must be
installed. First, remove the blower inlet safety guard (A) Fig.4 (if installed). Then
install the main collection tube (A) to the vacuum/mulcher inlet, position the main
collection tube over the vacuum/mulcher inlet, rotate the collection tube approximately 90 degrees. Make sure the collection tube has engaged the vacuum/
mulcher inlet grooves, at this point you must not be able to lift the collection tube
upwards. Make sure the limit switch actuator engages the inner limit switch, then
lock the collection tube using the locking clip (refer to “B” & “C” Fig.4).
Install the lower section collection tube (B) Fig.5 to the main collection tube (A).
Align the grooves on both collection tubes and push them together until they click
into position.
Then install the collection bag and attachment (C) Fig.5 to the vacuum/mulcher
outlet (D). Align the grooves on the collection bag attachment with the grooves on
the vacuum/mulcher outlet. Push the collection bag attachment onto the vacuum/
mulcher outlet until it clicks into position. Attach the collection bag buckle to the
clip on the lower section collection tube. The vacuum/mulcher is now ready to
use, make sure you have read and understood the safety and operation instructions before using.
It is recommended to install the adjustable shoulder strap (D) Fig.3 to the vacuum/
mulcher handle (E).
Page 7

UNPACKING: This product requires assembly.
Carefully remove the product and any accessories from the box. Make sure that all
items listed in the packing list are included.
WARNING:
Do not use this product if any parts on the Packing List are already assembled to your
product when you unpack it. Parts on this list are not assembled to the product by the
manufacturer and require customer installation. Use of a product that may have been
improperly assembled could result in serious personal injury.
• Inspect the product carefully to make sure no breakage or damage occurred dur-
ing shipping.
• Do not discard the packing material until you have carefully inspected and satis-
factorily operated the product.
• If any parts are damaged or missing, please call 1-800-321-1134 for assistance.
BLOWERMODE:
Put blower attachment (A1) on blower tube (A2) so
arrows are on same side.
Align the grooves on the blower tube (A) Fig.3 with the
grooves on the blower outlet (B). Push the blower
tube onto the blower outlet until it clicks into position.
Warning! The blower inlet and outlet both have a
built-in limit switch which
prevents the blower from starting if the blower
tube (A) and the blower inlet safety guard (C) are
not installed or not installed properly. Make sure
the blower tube and blower inlet safety guard are
installed before attempting to use the blower.
To install the blower inlet safety guard (A) Fig.4 to
the blower inlet, position the blower inlet safety
guard over the blower inlet, rotate the safety guard
approximately 90 degrees. Make sure the safety
guard has engaged the blower inlet grooves, at
this point you must not be able to lift the safety
guard upwards. Make sure the limit switch actuator (B) engages the inner limit switch, then lock the
blower inlet safety guard using the locking clip (C).
The blower is now ready to use, make sure you
have read and understood the safety and operation
instructions before using.
It is recommended to install the adjustable shoulder
strap (D) Fig.3 to the blower handle (E).
2
A 1
Figure 3
Figure 4
Figure 5
SYMBOLSHOWTOASSEMBLE
Some of the following symbols may be used on this product. Please study them and learn their
meaning. Proper interpretation of these symbols will allow you to operate the product much better.
SYMBOL NAME DESIGNATION/EXPLANATION
Safety Alert
Read Operator’s Manual
Eye and Hearing Protection
Wet Conditions Alert
Keep Bystanders Away
Long Hair
Loose Clothing
V Volts Voltage
A Amperes Current
Hz Hertz Frequency (cycles per sound)
W Watt Power
min Minutes Time
Alternating Current Type of current
Direct Current Type or a characteristic of current
Class II Construction Double-insulated construction
Indicates a potential personal injury hazard.
To reduce the risk of injury, user must read and
understand operator’s manual before using this
product.
Always wear eye protection with side shields
marked to comply with ANSI Z87.1 along with
hearing protection.
Do not expose to rain or use in damp locations.
Keep all bystanders at least 50ft. away.
Failure to keep long hair away from the air inlet
could result in personal injury.
Failure to keep loose clothing from being drawn
into air intake could result in personal injury.
WARNING:
If any parts are damaged or missing do not operate this product until the parts are replaced.
Use of this product with damaged or missing parts could result in serious personal injury.
710
Page 8

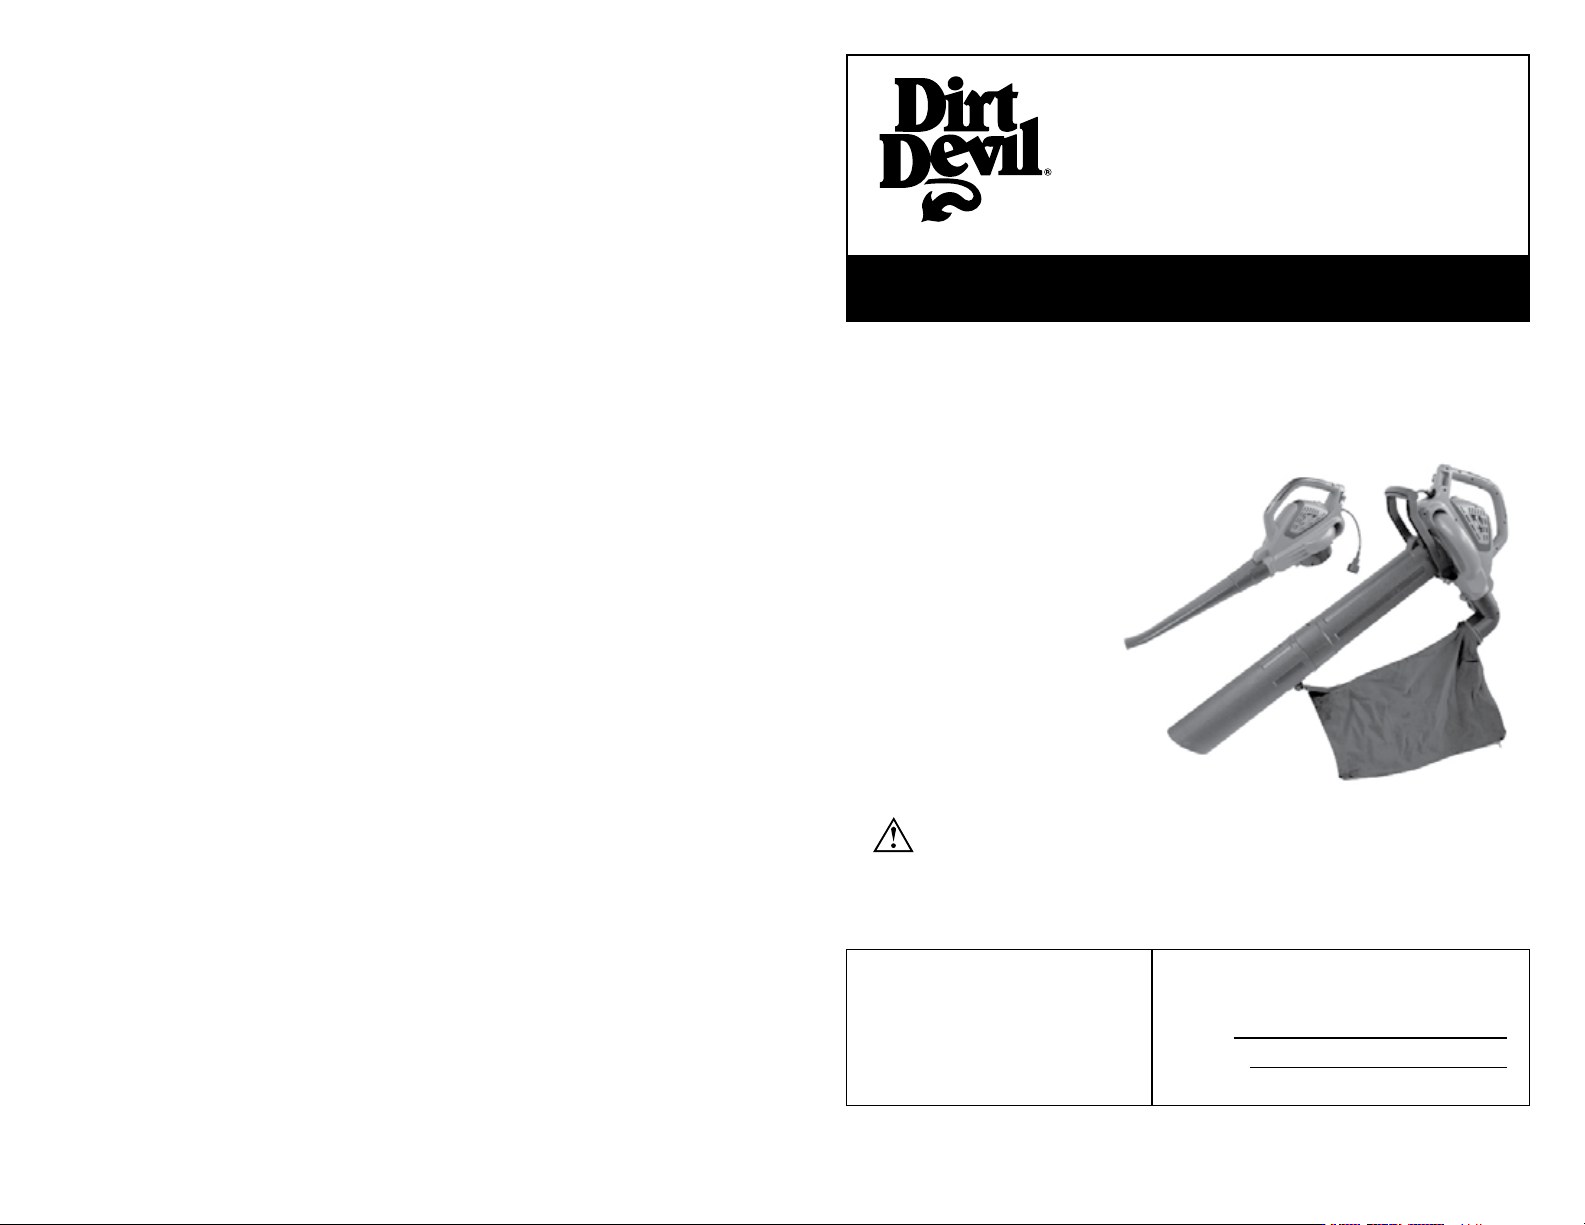
CONGRATULATIONS
You are now the proud owner of a Dirt Devil®. We trust your new purchase
will bring you many years of satisfaction.
Our company has designed and developed this product with you in mind.
We are very proud of our products and hope that you are equally satisfied
with their quality and performance.
®
Thank you for your support of Dirt Devil
products.
Visit our website at www.dirtdevil.com
TABLEOFCONTENTS
Safety Instructions .................................Page 2-5
FEATURES
3.
2.
1a.
1.
6.
7.
8.
4.
5.
12.
11.
10.
Electrical Connection . . . . . . . . . . . . . . . . . . . . . . . . . . . . . . . Page 5-6
Symbols .........................................Page 7
Features .........................................Page 9
How to Assemble ..................................Page 10-11
How To Operate ...................................Page 12
General Maintenance ...............................Page 13
Troubleshooting Guide ..............................Page 13
LIMITED WARRANTY
To the consumer, Royal Appliance Mfg. Co. warrants this product to be free of defects in material or workmanship
commencing upon the date of the original purchase. Refer to the data plate label on your product for the length
of warranty and save your original sales receipt to validate start of warranty period.
If the product should become defective within the warranty period, we will repair or replace any defective parts
free of charge. The complete machine must be delivered prepaid to any ROYAL® Authorized Sales & Warranty
Service Station. Please include complete description of the problem, day of purchase, copy of original sales
receipt and your name, address and telephone number. If you are not near a Warranty Station, call the factory
for assistance at USA & Canada: 1-800-321-1134. Use only genuine Royal® replacement parts.
The warranty does not include unusual wear, damage resulting from accident or unreasonable use of the product.
This warranty does not cover accessories or attachments. This warranty does not cover unauthorized repairs. This
warranty gives you specific legal rights and you may also have other rights (Other rights may vary from state to
state in the USA).
IMPORTANT: USE ONLY GENUINE ROYAL® REPLACEMENT PARTS.
NOTE: TO REGISTER YOUR PRODUCT, CALL: 1-800-321-1134 OR REGISTER
ONLINE AT WWW.DIRTDEVIL.COM.
8 9
9.
1. Blowertubeandattachment(1a). Gets
installed to air outlet for blower function.
2. Variable speed dial. Adjust air speed (blower
mode) or air volume (vacuum/mulcher mode).
3. Shoulder strap installation area. For
convenience, clip the shoulder strap to the
handle before operating.
4. Extension cord lock system. Prevent the
extension cord from being unplugged during
use.
5. Power cord (polarized).
6. Blowerairinletsafetyguard. To operate in
blower mode, it must be installed to the blower
air inlet.
7. Main vacuum/mulcher collection tube with
handle. To operate in vacuum/mulcher mode, it
must be installed to the blower air inlet.
8. Lower section of vacuum/mulcher collection
tube.
9. Washable leaf collection bag.
10. Leaf collection bag attachment.
11. Blower/vacuum/mulchermotor.
12. On/Off switch.
MODEL ND20500
Air speed range 112-200 mph (180-320 Km/h)
Air volume range 110-350 CFM
Mulch volume 16:1
Impeller size 4-3/4”
Collection bag capacity 45L
No load speed 15,000 RPM
Motor 12 Amp.
Voltage 120V, 1 phase, 60 Hz
Dimensions (LxWxH) 48” x 8” x 38”
Weight 9 lbs
 Loading...