

Page 1
OWNER’S MANUAL
Operating and Servicing
Instructions
©2001 All rights reserved #1-1 13040-000
10/01
•Please read these instruction
carefully before using your
Easy Steamer™.
• Let us help you put your
cleaner together or answer
any questions, call:
1-800-321-1134 (USA & Canada)
website: www.dirtdevil.com
Español - página E1
For quick reference, please record your vacuum
information below.
Model #:
Mfg. Code:
(Mfg. code located on the lower backside of cleaner)
Page 2

2
LIMITED WARRANTY
To the consumer, Royal Appliance Mfg. Co. warrants this vacuum cleaner to be free of defects in material or workmanship commencing upon the date of the original purchase. Refer to your vacuum cleaner carton for the length of warranty and save your original sales receipt to validate start of warranty period.
If the vacuum cleaner should become defective within the warranty period, we will repair or replace any defective parts free of charge. The complete machine must
be delivered prepaid to any ROYAL®Authorized Sales & Warranty Service Station. Please include complete description of the problem, day of purchase, copy of
original sales receipt and your name, address and telephone number. If you are not near a Warranty Station, call the factory for assistance in the USA & Canada:
1-800-321-1134 Use only genuine Royal®replacement parts.
The warranty does not include unusual wear, damage resulting from accident or unreasonable use of the vacuum cleaner. This warranty does not cover belts, brushes, bags, filters, bulbs or fan damage. This warranty does not cover unauthorized repairs. This warranty gives you specific legal rights and you may also have other
rights. (Other rights may vary from state to state in the USA).
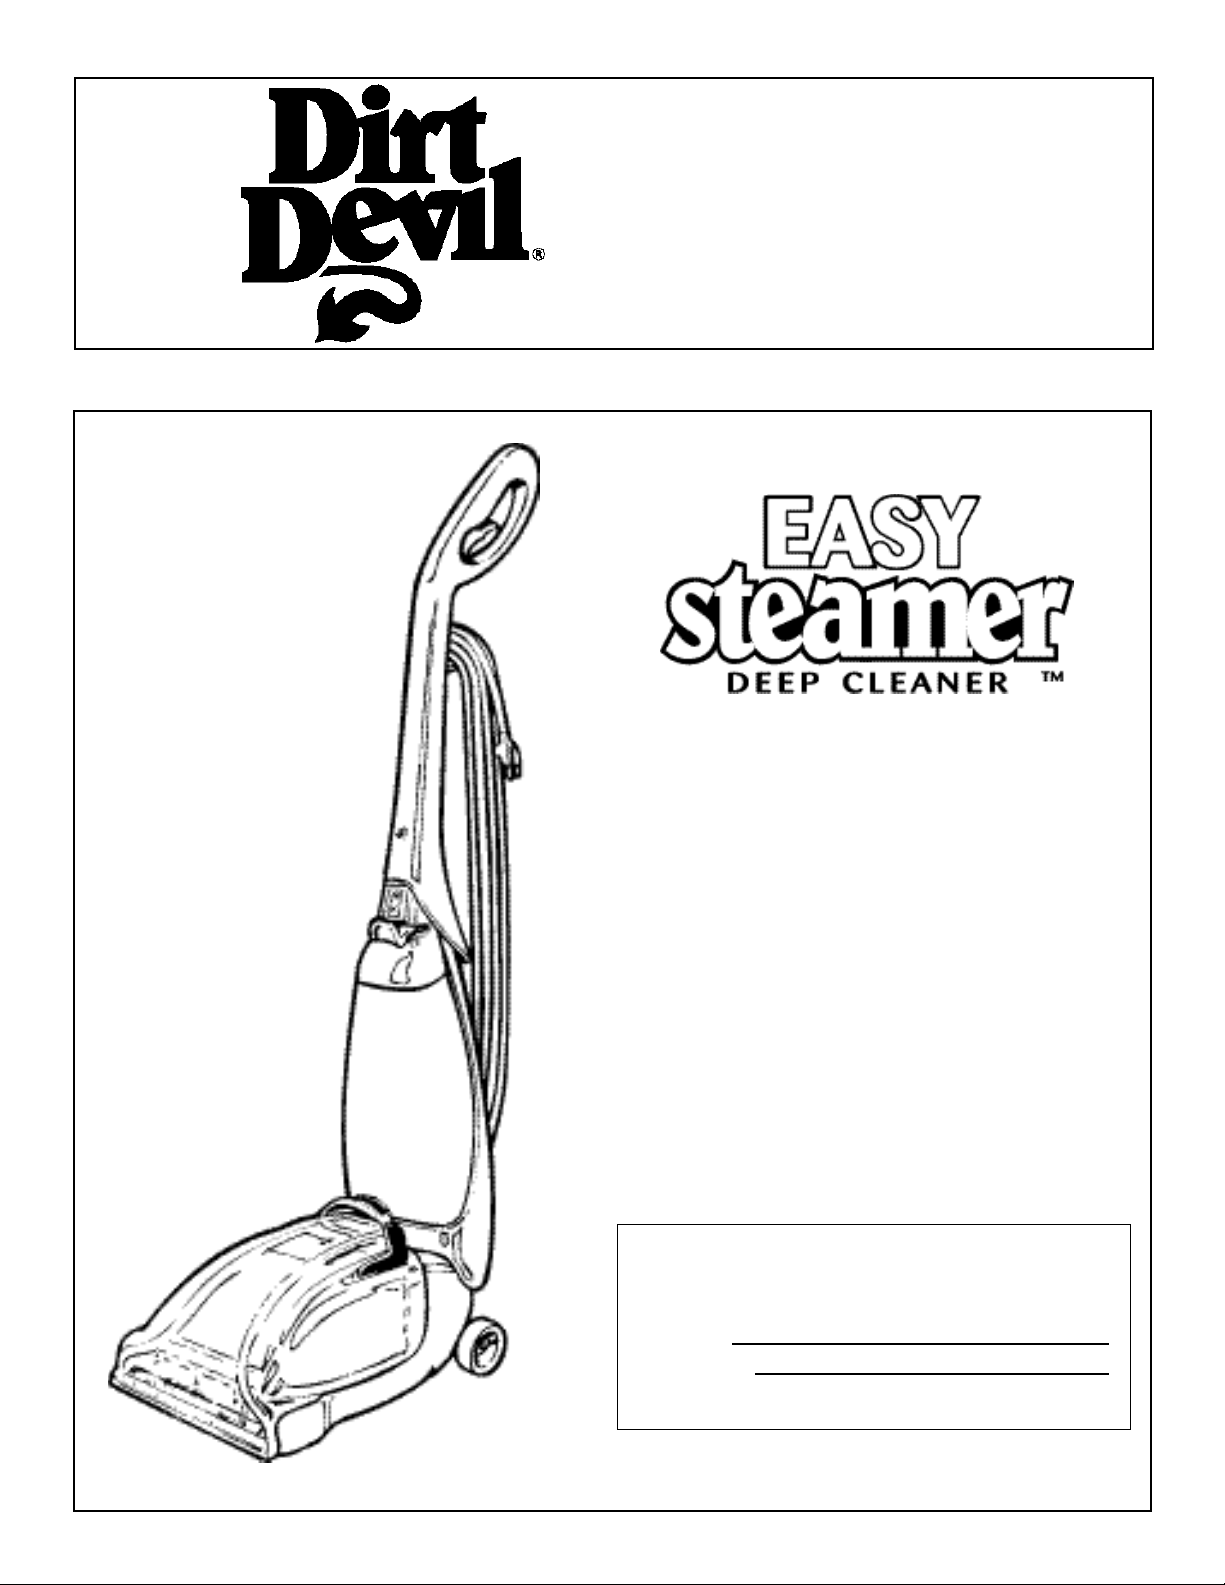
CONGRATULATIONS
You are now the proud owner of the Dirt Devil
®
Easy Steamer™Deep Cleaner. We
trust your new purchase will bring you many years of satisfaction.
Our company designed and developed this product with you in mind. The Dirt
Devil
®
Easy Steamer™Deep Cleaner is the lightest full size upright carpet cleaner
available due to its Featherlite
®
design. The large 1 gallon solution reservoir makes
cleaning easier with fewer fill-ups.
We are very pr oud of ourproducts and hope that you are equally satisfied with their
quality and performance.
Thank you for your support of Dirt Devil
®
products.
Visit our website at www.dirtdevil.com
TABLE OF CONTENTS
Safety Instructions........................................................Page 3
Feature Descriptions.....................................................Page 4
How To Assemble......................................................... Page 5
Preparing Carpet.......................................................... Page 6
How To Operate............................................................ Page 7
Remove and Replace Solution Reservoir ..........Page 7
Carpet Cleaning.................................................Page 7
Emptying and Cleaning Dirty W ater Tank....................... Page 8
Belt or Brushroll Removal and Replacement............... Page 9
Troubleshooting Guide..................................................Page 10
Page 3

3
WARNING: TO REDUCE THE RISK OF FIRE,
ELECTRIC SHOCK OR INJURY:
THIS CLEANER IS INTENDED FOR HOUSEHOLD USE ONLY
IMPORTANT SAFETY INSTRUCTIONS
When you use an appliance, basic precautions should be followed, including the following:
• READ ALL INSTRUCTIONS BEFORE USING THE APPLIANCE.
•ALWAYS FOLLOW THESE SAFETY INSTRUCTIONS.
• DO NOT LEAVE CLEANER UNATTENDED WHEN PLUGGED IN.
• OCCASIONALLY REMOVE BRUSH AND CLEAN DEBRIS FROM END CAPS TO KEEP BRUSH ROTATING SMOOTHLY.
• WARNING - FULLY ASSEMBLE CLEANER BEFORE OPERATING.
•WARNING - THE CORDS, WIRES AND/OR CABLES SUPPLIED WITH THIS PRODUCT CONTAINS CHEMICALS, INCLUDING LEAD OR LEAD COMPOUNDS, KNOWN TO THE STATE OF CALIFORNIA TO CAUSE CANCER AND BIRTH DEFECTS
OR OTHER REPRODUCTIVE HARM. WASH HANS AFTER USING).
READ ALL INSTRUCTIONS BEFORE USING THE APPLIANCE.
GROUNDING INSTRUCTIONS
This appliance must be grounded. If it should malfunction or breakdown, grounding provides a path of least
resistance for electric current to reduce the risk of electric shock. This appliance is equipped with a cord
having an equipment-grounding conductor and grounding plug. The plug must be inserted into an appropriate outlet that is properly installed and grounded in accordance with all local codes and ordinances.
WARNING
Improper connection of the equipment-grounding conductor can result in a risk of electric shock. Check with a qualified electrician or service person if
you are in doubt as to whether the outlet is properly grounded. Do not modify the plug provided with the appliance — if it will not fit the outlet, have a
proper outlet installed by a qualified electrician.
This appliance is for use on a nominal 120-volt circuit and has a grounding attachment plug that looks like the plug illustrated in the sketch.
Make sure that the appliance is connected to an outlet having the same configuration as the plug. No adapter should be used with this appliance.
• Connect to a properly grounded outlet only. See Grounding Instructions.
• Do not leave appliance when plugged in. Unplug from outlet when not in use and before servicing.
• Do not use outdoors. Electrical shock could occur.
• Do not immerse. T o reduce the risk of electric shock - use indoors only, and use only on carpet moistened by cleaning process.
• Do not allow to be used as a toy. Close attention is necessary when used by or near children.
• Use only as described in this manual.
• Do not use with damaged cord or plug. If appliance is not working as it should, has been dropped, damaged, left outdoors,
or dropped into water, return it to a service center for inspection. Call 1-800-321-1134 for the nearest service center.
• Do not pull or carry by cord, use cord as handle, close a door on cord, or pull cord around sharp edges or corners. Do
not run appliance over cord. Keep cord away from heated surfaces.
• Do not unplug by pulling on cord. To unplug, grasp the plug, not the cord.
• Do not handle plug or appliance with wet hands.
• Do not put any objects into openings. Do not use with any opening blocked; keep free of dust, lint, hair, and anything that
may reduce air flow.
• Keep hair, loose clothing, fingers, and all parts of body away from openings and moving parts.
• Do not pick up anything that is burning or smoking, such as cigarettes, matches, or hot ashes.
• Do not use without dirty water reservoir in place.
•Turn off all controls before unplugging.
• Do not use to pick up flammable or combustible liquids, such as gasoline, or use in areas where they may be present.
• Keep the Easy Steamer
™
cleaner on the floor.
• Do not use an extension cord with this Easy Steamer
™
.
• Store the Easy Steamer
™
indoors. Put the Easy Steamer™away after use to prevent tripping accidents.
• Using improper voltage may result in damage to the motor and possible injury to the user. Proper voltage is listed on the
cleaner plate.
• Use only Dirt Devil
®
Carpet & Rug Shampoo.
SAVE THESE INSTRUCTIONS
Page 4

4
Front View
1. Non-Slip Grip Handle
2. Clean Solution Reservoir Latch
3. Clean Solution Reservoir
4. Dirty Water Tank Latch
5. Dirty Water Tank Handle
6. Brushroll
7. Dirty Water Tank
8. Dirty Water Tank Lid
9. Power On/Off Switch
10. Upper Handle Screw
FEATURE DESCRIPTIONS
1
3
4
7
9
10
5
13
14
16
17
Front View
Back View
8
15
12
2
11
6
Back View
11. Power Cord
12. Carrying Handle
13. Quick Cord Release
14. Handle Release Pedal
15. Cord Hook
16. Cord Clip
17. Solution Spray Trigger
Page 5

HOW TO ASSEMBLE
HOW TO ASSEMBLE: TOOLS REQUIRED: PHILLIPS SCREWDRIVER
1. Stand base in upright position. Push midsection onto base by aligning tabs on the backside of midsection with the pockets on the
backside of base (Diagram 1).
2. Place the 2 large nuts into recesses located on the back of the left and right sides of the base. Place the 1 small nut into recess
located in the middle back of the base. While holding nut in place, insert screw through front of midsection and tighten.
NOTE: Make sure the power cord is out of the way to avoid pinching.
3. Slide upper handle down onto unit. Place nut into recess in back of upper handle. While holding nut in place, insert screw th rough
front of upper handle and tighten (Diagram 2).
4. Route cord above upper cord hook and snap into cord clip on upper handle.
5
Diagram 1
Diagram 2
Midsection
Cord
(Blown up for Detail)
Upper Handle
Upper
Cord Hook
Tabs
Base
Page 6

PREPARING THE CARPET:
IMPORTANT: DO NOT USE THE EASY STEAMER™ AS ADRY VACUUM.
1. Vacuum carpet thoroughly. Use a Dirt Devil
®
vacuum cleaner with a revolving brushroll for best results.
2. Remove as much furniture from the room as possible. If unable to remove the furniture, place plastic or foil under and around the legs
until the carpet has dried completely.
CHECK FOR COLOR FASTNESS:
Before cleaning carpet, test for color fastness. Dampen a white cloth with solution.T est a small area in a closet. Gently rub t he cloth over the
area. Check each color for color bleeding. If the cloth remains clean, it should be safe to clean the carpet.
HELPFUL HINTS FOR CLEANING CARPET:
1. Do not oversaturate carpet with cleaning solution while using Easy Steamer
™
.
2. For heavily soiled areas, additional applications may be necessary.
3. Allow plenty of time to dry carpet thoroughly.
4. Wipe cleaning solution from woodwork and wood to prevent any damage.
5. Try not to walk on carpet until it is completely dry.
6. After carpet is thoroughly dry, vacuum the carpet using a cleaner with a revolving brushroll.
7. Before cleaning, determine where you will start and end, making sure not to walk over previously cleaned areas.
AFTER CLEANING:
• Allow carpet to dry completely. Try not to walk on the carpet until it is dry.
• If you need to walk on the carpet, place white towels on the areas you want to walk.
• If the carpet is not dry and the furniture must be placed back in the room, use plastic or foil under the furniture to prevent staining
the carpet.
•Thoroughly clean the dirty water tank with hot tap water. See page 8.
6
PREPARING THE CARPET
WARNING:
DO NOT STORE EASY STEAMER™IN GARAGE OR AREA WHERE
UNIT COULD FREEZE.
Page 7

HO W TO OPERA TE
REMOVE AND REPLACE SOLUTION RESERVOIR:
1. Grasp solution reservoir under handle and press clean solution reservoir latch (Diagram 1).
2. Tilt solution reservoir away from cleaner and remove (Diagram 2).
3. Unscrew measuring cap from back side of solution reservoir (Diagram 3). Fill measuring cap with solution 2 times (approximately
4 oz.)(Diagram 4). Fill remaining solution reservoir with hot tap water (Diagram 5). Replace measuring cap.
NOTE: Use only Dirt Devil
®
Carpet & Rug Shampoo. Using other cleaning solutions may cause excessive foaming. Excessive
foam will cause the float to shut off the vacuum prematurely. Using other cleaning solutions will void your warranty.
4. Place bottom of solution reservoir into cleaner and rotate top into position until the lever snaps into place (Diagram 6).
CARPET CLEANING
NOTE: Never leave unit unattended with power on. Turn OFF when emptying and filling reservoir. Do NOT oversaturate the carpet.
IMPORTANT: FOR BEST CLEANING RESULTS USE STEADY, MODERATE FO RWARD AND BACKWARD MOTION.
1. Plug cord into electrical outlet.
2. Turn power on (Diagram 7).
3. Step on handle release pedal (Diagram 8), to put unit in cleaning position.
4. While depressing solution spray trigger, pull unit in backward motion (Diagram 9). Release trigger and push unit forward in same
path to remove dirty water and solution from carpet. (For heavily soiled areas, repeat if necessary)(See page 8).
5. When dirty water reaches the max fill line on dirty water tank, empty dirty water.
IMPORTANT: IF THE SOUND OF THE MOTOR CHANGES TO AHIGH PITCH, THIS INDICATES THE DIRTY WATER TANK IS FULL
AND MUST BE EMPTIED. A VISUAL INDICATOR IS WHEN THE BLUE FLOAT HAS RISEN TO THE TOP OF THE DIRTY WATER TANK.
HOW TO OPERATE
7
7.
8.
Diagram 3
Remove measuring cap.
Diagram 4
Fill measuring cap 2 times.
3.
4.
Diagram 2
Remove solution reservoir.
Diagram 1
Press clean solution reservoir
latch.
1.
2.
9.
Diagram 7
On/Off switch.
Diagram 8
Handle release pedal.
Diagram 9
Depress solution spray trigger and pull in
backward motion.
Power
On/Off
Diagram 6
Place bottom of solution reservoir
and latch into place.
6.
Diagram 5
Fill remaining solution reservoir with
hot tap water.
5.
Page 8

8
EMPTYING AND CLEANING DIRTY WATER TANK
EMPTYING AND CLEANING DIRTY WATER TANK:
Your Easy Steamer™Deep Cleaner is equipped with a shut off valve within your dirty water tank. When the dirty water tank becomes
full, the blue float (viewed from top of tank) will rise, shutting off the air flow thru the nozzle.
NOTE: The float in your Easy Steamer
™
is the blue piece in the dirty water tank lid, and will shut off the suction when the dirty water tank
is full. For best results, use smooth, steady motion keeping the nozzle flat against the carpeting. Tipping the cleaner and breaking the seal
of the nozzle and carpeting will cause the float to rise and shut off the suction. Once the float is activated, empty the dirty water
tank. If the dirty water tank does not appear full, turn the power switch off and wait for the float to settle and reset. If the float repeatedly
shuts off the suction, empty the dirty water tank. For best results, use only Dirt Devil
®
Carpet & Rug Shampoo. Other Solutions may generate excessive foam which will cause the float to rise prematurely and shut off the suction. Use two capfuls (4 ounces) of Dirt Devil®Carpet
& Rug Shampoo per fill up of the clean water reservoir. Ahigher concentration of shampoo may cause excessive foaming.
NOTE: You will hear a noticeable change in the pitch of the cleaner. This indicates a need to empty the dirty water tank.
WARNING: TO REDUCE THE RISK OF INJURY FROM MOVING PARTS - UNPLUG BEFORE SERVICING.
EMPTYING DIRTY WATER TANK:
1. Grasp top of dirty water tank handle and push latch to release (Diagram 1).
2. Grasp handle and pull tank out of base (Diagram 2).
3. Remove dirty water tank lid (Diagram 3).
4. To empty dirty water tank, grasp handle with one hand and nozzle with the other and empty into sink (Diagram 4).
5. Replace dirty water tank lid.0
CLEANING DIRTY WATER TANK:
1. Rinse dirty water tank and filter with hot tap water (Diagram 5).
2. Wipe and let dry thoroughly before storing to prevent mildew from forming.
NOTE: Do not use any chemicals when cleaning.
PLACING DIRTY WATER TANK IN BASE OF CLEANER:
1. Lift front base of cleaner off carpeting with one hand (Diagram 6).
2. Grasp handle and hook front of dirty water tank into base of cleaner, making sure front of dirty water tank is resting on the base
(Diagram 7). The Dirty Water Tank has 3 tabs on the underside which MUST latch into the underside of the base of the cleaner. It is
very important to lift the base of the cleaner off of the carpeting and hook the nozzle to the base so that the nozzle is flush with the
base of the cleaner ( Diagram 7a). Failure to install the Dirty Water T ank correctly (Diagram 7b), will result in poor dirty water pickup.
The Dirty Water Tank will need to be emptied once or twice per fill up of the Clean Water Tank.
3. While making sure the front of the dirty water tank is resting on the base, place the rear of the tank into the base of the c leaner.
Push handle down until it latches (Diagram 8).
NOTE: Do not store cleaner with solution in reservoir or dirty water in dirty water tank. Mineral deposits and mildew can form which will
affect the performance of your Easy Steamer
™
.
1.
Diagram 1
Depress latch to remove dirty water
tank.
Diagram 2
Pull dirty water tank out of base.
Diagram 3
Remove dirty water tank lid.
3.2.
5.
Diagram 5
Rinse off filter cage.
Diagram 6
Lift front base of cleaner off carpet.
Diagram 7
Place dirty water tank in base while holding
base of cleaner off of carpet.
7.
6.
Diagram 4
Empty dirt water.
Diagram 8
Push handle down until it latches.
8.
4.
7a.
7b.
Page 9
9
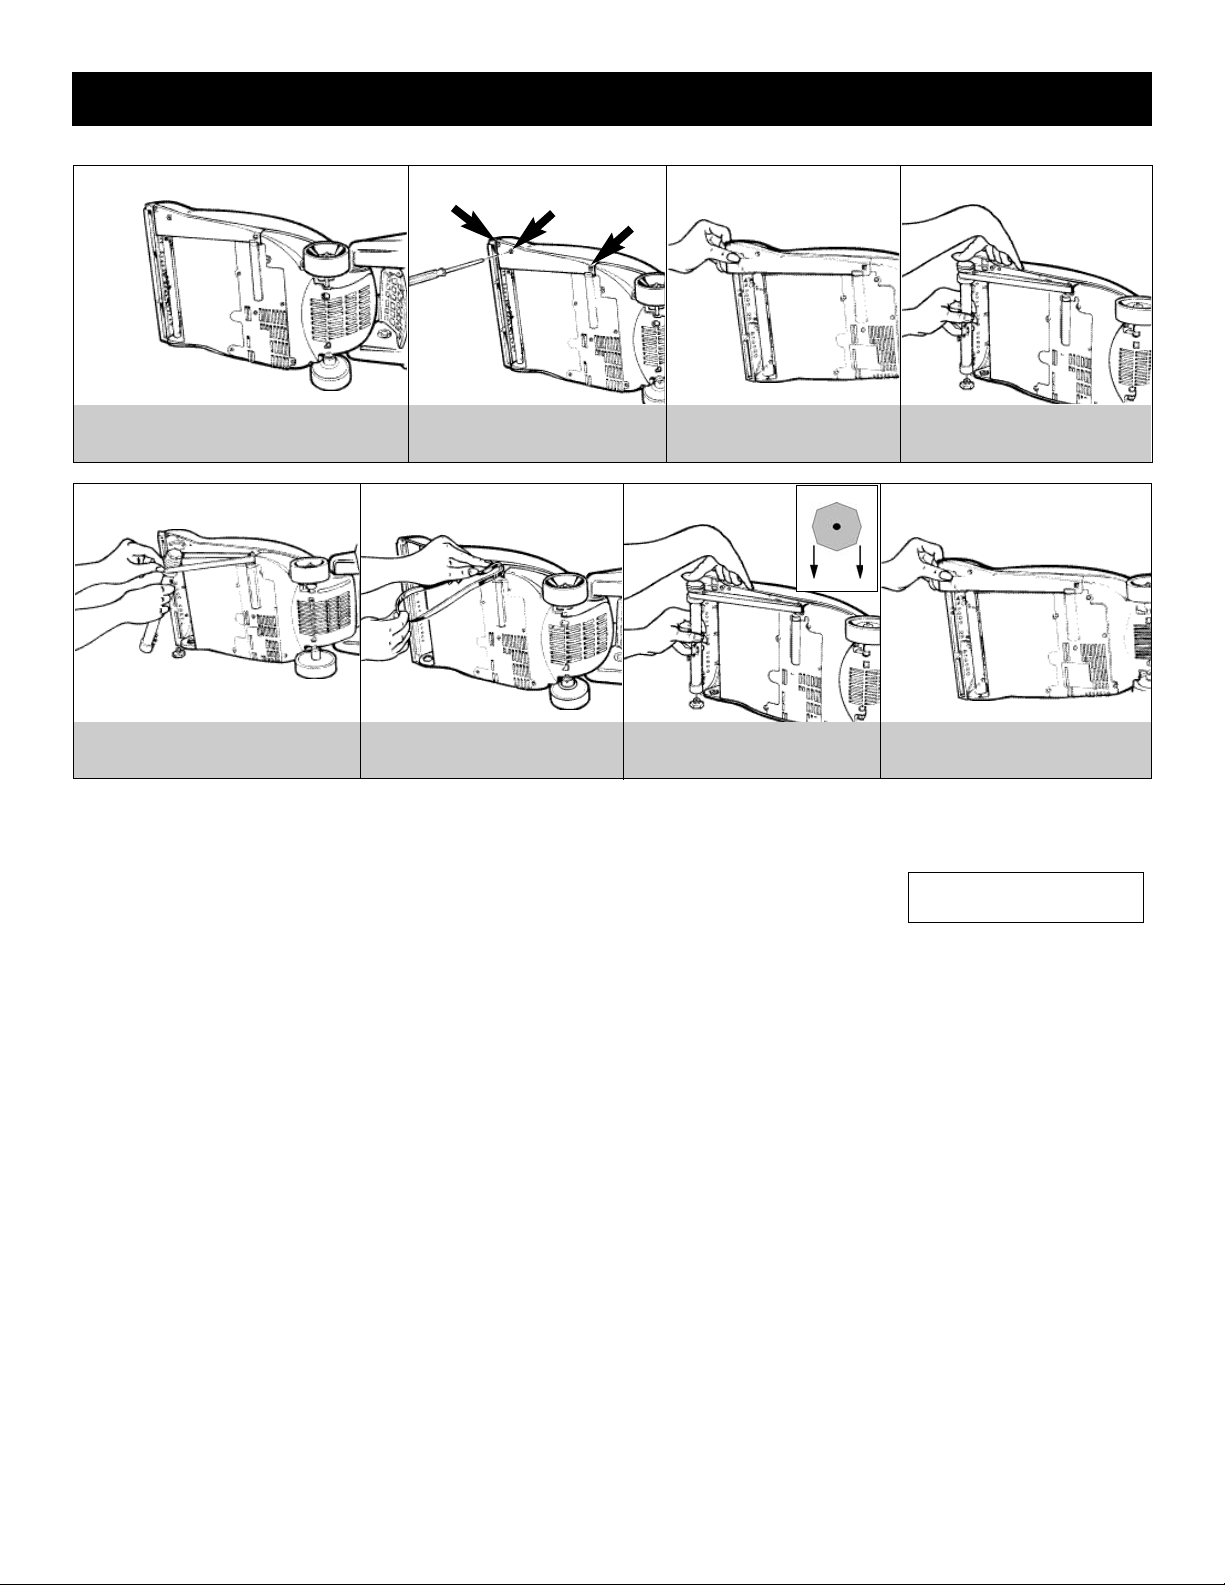
BELT OR BRUSH REMOVAL & REPLACEMENT: TOOL REQUIRED: PHILLIPS SCREWDRIVER
WARNING:
TO REDUCE THE RISK OF INJURY FROM MOVING PARTS - UNPLUG CLEANER BEFORE CHANGING BELT OR BRUSHROLL.
TO REMOVE BELT:
1. Flip cleaner on its side to expose nozzle base (Diagram 1).
2. To remove belt cover, use Phillips screwdriver to remove the two screws. Arrows (Diagram 2) show location of screws.
3. Grasp belt cover near brushroll and lift out (Diagram 3).
4. Grasp brushroll with one hand, using other hand to keep tension on belt when removing (Diagram 4).
5. Lift up when pulling out.
6. Remove belt (Diagram 5). Dispose of old belt.
NOTE: Endcaps are removable. Be sure to put back in place before reinserting brushroll.
TO REPLACE BELT:
1. Place belt on motor shaft (Diagram 6), then slip brushroll through belt. Place belt in area of brushroll without bristles.
2. With belt in place, pull and slide brushroll into nozzle (Diagram 7), making sure that the brushroll end caps are in the corr ect orientation
(Diagram 7a).
IMPORTANT: ROTATE BRUSHROLL MANUALLY TO MAKE SURE BELT IS NOT TWISTED OR PINCHED.
3. Replace belt cover by inserting end furthest from brushroll first (Diagram 8). Then place front of belt cover into position. Secure
by replacing the two screws and snapping into place.
BELT STYLE:
7
BELT OR BRUSH REMOVAL & REPLACEMENT
Diagram 1
Place nozzle base on its side.
Diagram 3
Remove belt cover.
Diagram 4
Remove brushroll.
Diagram 2
Use Phillips screwdriver to remove 3
screws.
2.
3.
4.
Diagram 6
Slide belt off motor shaft.
Diagram 7
Place belt in area of brushroll without
bristles.
Diagram 5
Remove belt from brushroll.
5. 6.
7.
Diagram 8
Replace belt cover.
8.
1.
7a.
Page 10

PLEASE PRINT CLEARLY
Name
Address
City
State Zip Code
Daytime Phone No.
USA Residents only: Make check or money order
payable to:
Royal Appliance Mfg. Co.
7005 Cochran Road
Glenwillow, O H 44139
Attn. Quick Parts
TROUBLE SHOOTING GUIDE
WARNING: TO REDUCE RISK OF PERSONAL INJURY - UNPLUG CLEANER BEFORE SERVICING
Problem Possible Reasons Possible Solutions
Cleaner won’t run 1. Power cord not firmly plugged into outlet. 1. Plug power cord in firmly.
2. Blown fuse or tripped breaker. 2. C heck fuse or breaker. Replace f use/reset breaker.
3. Needs service. 3. Take to service center or call 1-800-321-1 134.
Cleaner won’t pick-up 1. D irty water tank door not installed. 1. Insert dirty water tank door.
or low suction
2. Dirty water tank is not installed correctly. 2. Review Dirty Water Tank Removal and
Replacement-Pg. 8.
3. Dirty water tank is full. 3. Empty Dirty Water Tank-Pg. 8.
4. Brushroll worn. 4. Replace brushroll-Pg. 9.
5. Broken or worn belt. 5. Replace belt-Pg. 9.
6. Dirty water passage clogged. 6. Clean Dirty Water T ank-Pg. 8.
Water escaping from 1. Dirty water tank is full. 1. Empty Dirty Water Tank-Pg. 8.
cleaner 2. Dirty water tank is not installed correctly. 2. Review Dirty W ater Tank Removal and
Replacement-Pg. 8.
3. Solution reservoir not installed properly. 3. Review Solution Reservoir Installation-Pg. 7.
Cleaner won’t dispense 1. Solution reservoir not installed properly. 1. Review Solution Reservoir Installation-Pg. 7.
solutio n 2. Needs service. 2. Take to service center or call 1-800-321-1 134.
ANY OTHER SERVICING SHOULD BE DONE BYAN AUTHORIZED SERVICE REPRESENTATIVE
CUSTOMER SERVICE (1-800-321-1134)
In the event that further assistance is required, see your Yellow Pages for an authorized Royal
®
Dealer. Costs of any transportation to
and from any place of repair are to be paid by the owner. The service parts used in this unit are easily replaced and readily available
from an authorized Royal®Dealer or retailer. Always identify your cleaner by the model number and manufacturing code when
requesting information or ordering replacement parts. (The model number appears on the back of the cleaner.)
10
PART NUMBER DESCRIPTION QTY.
COST EACH
TOTAL
1-700912-044 64 oz. Solution 15.00
3-400615-001 Style #7 Belt 2.50
1-700320-600 Brush Roll Assembly 16.00
METHOD OF PAYMENT
_____ Check or Money Order _____ MasterCard _____ VISA _____ Discover
Card No. Expiration Date (required): ___________________________________________
Signature __________________________________________ Telephone Number ______________________ / ________________________
Daytime Evening
Subtotal
AL, AZ, CA, CO, CT, FL, GA, ID, IL, IN,
KS, MA, MD, MI, MN, MO, NE, NV, NJ,
NY, NC, OH, OK, PA, TN, TX, WA, WI
Residents Add Local Sales T ax
Shipping & Handling Add $3.00**
(**AK and HI resi dents Add $5.00)
TOTAL
Call 1-800-321-1134 with any questions about ordering parts.
 Loading...