

Page 1

Page 2
WARNING
To reduce the risk of fire or
electric shock, do not expose this
product to rain or moisture. The
apparatus shall not be exposed to
dripping or splashing and that no
objects filled with liquids, such
as vases, shall be placed on the
apparatus.
Safety & Care
Your DIRECTV® Plus DVR has been designed and manufactured to stringent quality and safety standards. You should, however, be
aware of the following important precautions for safe and optimal use of the equipment.
Meaning of symbols printed on the rear panel of the product:
This symbol indicates that dangerous voltage consisting a risk of electric shock is present within this unit.
!
This symbol indicates that there are important operating and maintenance instructions in the literature accompanying
this unit.
Important Safety Instructions
1) Read these instructions.
2) Keep these instructions.
3) Heed all warnings.
4) Follow all instructions.
5) Do not use this apparatus near water.
6) Clean only with dry cloth.
7) Do not block any ventilation openings. Install in accordance with the manufacturer’s instructions.
8) Do not install near any heat sources such as radiators, heat registers, stoves, or other apparatus (including amplifiers) that
produce heat.
9) Do not defeat the safety purpose of the polarized or grounding-type plug. A polarized plug has t wo blades with one wider than
the other. A grounding type plug has two blades and a third grounding prong. The wide blade or the third prong are provided
for your safety. If the provided plug does not fit into your outlet, consult an electrician for replacement of the obsolete outlet.
10) Protect the power cord from being walked on or pinched particularly at plugs, convenience receptacles, and the point where they
exit from the apparatus.
11) Only use attachments/accessories specified by the manufacturer.
12) Use only with the cart, stand, tripod, bracket, or table specified by the manufacturer, or sold with the apparatus. When a cart is
used, use caution when moving the cart/apparatus combination to avoid injury from tip-over.
13) Unplug this apparatus during lightning storms or when unused for long periods of time.
14) Refer all servicing to qualified service personnel. Servicing is required when the apparatus has been damaged in any way, such as
power-supply cord or plug is damaged, liquid has been spilled or objects have fallen into the apparatus, the apparatus has been
exposed to rain or moisture, does not operate normally, or has been dropped.
• CAUTION: Avoid moisture to reduce the risk of fi re or electric shock. e DIRECTV Receiver should not be used near water
(for example, kitchen sink, bathtub, pool, damp basement). Also, never spill liquid on the receiver, and do not place vases or other
vessels containing liquid on top of it.
IMPORTANT: Be sure not to place
your DIRECTV Receiver near anything WET or HOT!
POWER
GUIDE MENU REC
ACTIVE INFO
SELECT
CAUTION
RISK OF ELECTRIC SHOCK
DO NOT OPEN
CAUTION: To reduce the risk of
electric shock, do not remove
cover (or back).
No user-serviceable parts inside.
Refer servicing to qualified
service personnel.
If this product is used at 240VAC,
a suitable attachment plug should
be used.
Page 3

This reminder is provided to call your attention to articles 810 and 820 of the 2005 National Electrical Code. Refer to article 810, in particular 810-1 and 810-15, for required
grounding of the metal structure of the dish antenna. Refer also to the 810-2 which, by reference to article 820, requires that the satellite dish coaxial cable shield be
Note to Satellite Dish Installer
• Ensure proper ventilation — the vent slots on the DIRECTV Receiver must be left uncovered to allow proper airfl ow to the unit.
Blocking the airfl ow to the unit could impair performance or damage your receiver and other components.
• Do not stack electronic components or other objects on top of the DIRECTV Receiver. Also, do not stack the receiver on top of a
“hot component” such as an audio power amplifi er.
• Protect your components from power surges by connecting all the components before plugging any power cords into the wall outlet.
Use of a surge protector is also recommended.
• Don’t overload power outlets or extension cords, which can result in the risk of fi re or shock. It’s also important to use only the type
of power source indicated on the marking label or in this manual.
• Avoid audio hum or interference by inserting all cable plugs fi rmly into their jacks. A lso, place Audio/Video (A/V) cables to the sides
of the TV back panel rather than down the middle once connected. Try not to coil any twin-lead cables and keep them away from
A/V cables as much as possible.
• Never insert objects of any kind into any openings in the DIRECTV Receiver (other than the DIR ECTV® Access Card as detailed in this manual).
• Place it on a fl at, hard surface — do not operate the DIRECTV Receiver on a carpet or other padded surface.
• e mains power connector at the back of the unit or at the outlet should be accessible to allow quick shutdown in case of emergency.
• Always unplug your DIRECTV Receiver before moving it.
• Always unplug the DIRECTV Receiver, TV and other equipment before you connect or disconnect any cables.
• e only way to disconnect the the DIR ECTV Receiver from the power supply is to remove the power cord. e DIRECTV Receiver unit must therefore be installed next to the
power point which must be easily accessible.
• CAUTION: Electric Shock — never attempt to disassemble the DIRECTV Receiver yourself; always take it to a qua lifi ed service person when repair is required. Opening or
removing covers may expose dangerous voltage or other risks, and incorrect reassembly can cause shock when receiver is subsequently used. Attempted self-repair may also void
your warranty. Changes or modifi cations not expressly approved by the party responsible for compliance (by the warranty or by the manufacturer) could void the user’s authority
to operate the equipment.
• Do not drop your DIRECTV Receiver and always move it with care.
• Have your DIR ECT V Receiver professionally serviced (do not attempt to service it yourself ).
• Any changes or modifi cations in construction of this device which are not expressly approved by the party responsible for compliance could void the user’s authority to operate the
equipment.
• If you move your DIR ECTV Receiver between locations at diff erent temperatures, allow it to reach room temperature before you apply power to it.
• Do not pick up or otherwise move your DIRECTV Receiver while it is connected to the AC power supply. If you want to move your set-top box, fi rst disconnect it, then wait at
least 30 seconds before continuing
For your information:
e identifi cation sticker can be located underneath or on the back of your receiver.
e telecommunication network voltage used is the category number 3.
TIP
We highly recommend plugging the
DIRECTV Plus DVR into a surge protector
to prevent damage from fluctuations in
your power supply.
Page 4

Contents
Getting Started
Welcome ....................................................................................................................................................2
About Your DIRECTV Plus DVR .............................................................................................................2
Making the Right Connections ..................................................................................................................3
Getting Familiar ........................................................................................................................................4
What’s On
Watching TV ..........................................................................................................................................11
e Guide ...............................................................................................................................................17
e Mini Guide .......................................................................................................................................19
Recording Programs .................................................................................................................................20
Pay Per View ............................................................................................................................................23
e Playlist ..............................................................................................................................................24
The Menu
Using the Menu .......................................................................................................................................28
Settings ....................................................................................................................................................28
Audio Options .........................................................................................................................................30
Category Sort ..........................................................................................................................................32
Pay Per View ............................................................................................................................................32
Search ......................................................................................................................................................33
Favorites ..................................................................................................................................................34
Caller ID & Messages ..............................................................................................................................35
Parental Controls .....................................................................................................................................36
Menu Features for Recording ...................................................................................................................40
Page 5

DIRECTV Plus® DVR - User Guide
Other Information
Troubleshooting .......................................................................................................................................42
Limited 90-Day Warranty........................................................................................................................50
Product Info ............................................................................................................................................53
DIRECTV PROTECTION PLAN .........................................................................................................54
FCC Customer Information ....................................................................................................................56
Appendix A - Installation
Hardware Reference .................................................................................................................................60
Choose Your Setup ..................................................................................................................................62
Guided Setup & Activation .....................................................................................................................70
Programming Your Remote Control ........................................................................................................72
Index ...................................................................................... 75
Page 6

This device incorporates an anticopy process technology that is protected by U.S. patents and other intellectual property
Important
Page 7

Getting Started
Welcome 2
About Your DIRECTV Plus DVR 2
Making the Right Connections 3
Getting Familiar 4
Page 8

Getting Started
Welcome
With its astounding variety of channels and choices, crisp digital-quality picture and sound and one-of-akind sports and events… DIRECTV® service off ers everything you’d want in your television experience.
With DIRECTV Plus® you can expect more than ever before, with access to over 250 channels, including
over 30 premium movie channels, with all the convenience of DIRECTV Plus DVR service. DIRECTV
Pay Per View off ers a handy choice in recent hit movies, plus exciting live sports, concerts and specials.
ere are exclusive sports subscriptions for every taste and team. Even access to 68 XM Satellite Music
music channels!
To deliver this unique programming and enhance your entertainment experience, the DIRECTV® System
has been designed to be simple and user-friendly. You’ll fi nd that most features are self-explanatory, with
onscreen directions to lead you through them.
So, welcome to the family.
About Your DIRECTV Plus DVR
e DIRECTV Plus® DVR lets you record up to 100 hours of your favorite programs, and use pause and
other video controls on live TV*. You can select a specifi c program and set it to record once or every time
it’s on, or you can create a “fi nd” to search for and record your favorite shows with your desired name, title
or keywords. You can even record two shows at once**.
• You must subscribe to DIRECTV DVR service in order to use the recording features.
• *Actual recording capacity varies based on type of programming being recorded.
• **For full functionality, DIRECTV Plus DVR requires connection of two (2) satellite inputs from a dual LNB DIRECTV System
Important
You can find additional
info and the latest
updates at directv.com.
TIP
Page 9

DIRECTV Plus® DVR - User Guide
Making the Right Connections
Are you ready to connect your DIRECTV Plus® DVR and your other components?
Whether you’re having your system professionally installed or handling it yourself, be sure to read over the
following few pages to familiarize yourself with some important tips for safety and care.
Before You Begin
Your satellite dish antenna must be installed before you can begin following the procedures in this User
Guide. (Professional installation is highly recommended.) Your dish needs to be mounted in a position
where it has access to the satellite signals, and RG-6 coaxial cables must be run into the room(s) where your
receiver(s) will be located. If you choose to install the dish yourself, see the separate instruction manual that
came with your satellite dish antenna.
Package Contents
e following items are included with your DIRECTV Plus DVR:
A/V cables (RCA type) Access card
S-Video cable User Guide
Phone cord Remote Control & batteries
Power cord
Page 10

Getting Started
Getting Familiar
DIRECTV Plus DVR Front Panel
1) DOOR PANEL, USB PORT – For future use.
2) POWER – Turns your DIRECTV Plus DVR on or off . Your DIRECTV Plus DVR still records and
receives messages when powered off .
3) REMOTE SENSOR – e infrared sensor picks up commands from the remote control.
4) GUIDE – Displays the onscreen program guide.
5) MENU – Brings up the Menu to access settings and services.
6) RECORD – In live TV, records current program; in the Guide sets one-touch record for highlighted
program.
7) ARROWS – Move the onscreen highlight up, down, left or right.
GUIDE MENU REC
ACTIVE INFO
SELECT
POWER
2
1
4 5 6 10
11
3 7 98
Page 11

DIRECTV Plus® DVR - User Guide
8) SELECT – Selects the item highlighted.
9) ACTIVE – Displays the DIRECTV Active™ Channel—local weather and more!
10) INFO – Displays channel banner or info to a highlighted program or channel cell.
11) DOOR PANEL – e access card slot and RESET key are located behind the door panel.
Insert your DIRECTV Access Card
Locate the access card that came packed with your DIRECTV Plus DVR materials and insert the card,
facing upward, fully into the slot.
ACTIVE INFO
SELECT
Page 12

Getting Started
DIRECTV Plus DVR Rear Panel
1) SATELLITE IN – (2 inputs) Use to connect the DIRECTV Plus DVR to the satellite dish antenna.
Both inputs must be used to get the full range of DIRECTV Plus DVR features.
2) OFF-AIR IN – Connect a standard TV antenna or cable feed to the DIRECTV Plus DVR using this
jack, then connect the OUT TO TV to your TV’s antenna input. To watch from your off -air antenna
signal, turn off the DIRECTV Plus DVR. Note that you will not be able to record programs received
off the air on your DIRECTV Plus DVR.
3) OUT TO TV – Connects the DIRECTV Plus DVR to your TV or VCR using RF coaxial cable. is
jack provides the most basic connection, carrying good sound and video quality.
4) 3/4 CHANNEL SWITCH – Allows you to choose the channel that is not used in your area (3 or 4)
when the receiver is connected to TV using RF coaxial cable from the DIRECTV Plus DVR’s OUT
TO TV.
5) USB PORT – For future use.
OFF-AIR
IN
OUT
TO TV
CHANNEL
SATELLITE IN
10
6
2
1
8
4
9
7
3
5
11
Your equipment may not look exactly like the model illustrated.
Page 13

DIRECTV Plus® DVR - User Guide
6) DIGITAL AUDIO OPTICAL – Provides the best digital-quality audio signal.
7) S-VIDEO – Provides the best picture quality, better than VIDEO RCA-type or RF coaxial cable
jacks. If your TV has an S-Video jack, use it along with the audio jacks (S-Video only carries picture
information, not sound) to connect to your TV.
8) VIDEO (Yellow) – Provides better picture quality than the OUT TO TV jack. Connect the second
RCA-type composite VIDEO jack to another device, such as a VCR. You must also connect the
AUDIO cables when using the VIDEO connection.
9) AUDIO (R-Red and L-White) – Audio cables off er better sound quality than RF coaxial cables. You
can connect a second set of audio cables to another component, such as a VCR or stereo.
10) PHONE – Connects the DIRECTV Plus DVR to a telephone wall jack. We require a land-based
telephone connection to communicate periodically with your DIRECTV Plus DVR.
11) AC POWER INLET – Connects the DIRECTV Plus DVR to an electrical outlet. We recommend
you use a surge protector to safeguard your DIRECTV Plus DVR from power spikes.
Page 14

Getting Started
Page 15

What’s On
Watching TV 11
The Guide 17
The Mini Guide 19
Recording Programs 20
Pay Per View 23
The Playlist 24
Page 16

Page 17

DIRECTV Plus® DVR - User Guide
Watching TV
Now that everything’s set up, you’re ready to grab your remote and start surfi ng!
With the MODE SWITCH to the left (under the DIRECTV logo), press TV POWER ON. To access the
channel of your choice, simply key in its numbers on your remote (the channel will appear in a few seconds,
or press ENTER after the numbers and it will appear right away). You can also navigate to diff erent
channels through the Guide, covered in detail starting on page 17. Keep in mind, either way, you’ll only be
able to access those channels in your chosen DIRECTV® programming package.
Use the black keys on the left side of your remote control to adjust volume up or down (VOL) or mute the
sound ( MUTE). e black keys on the right side can take you to the next channel numerically up or down
(CHAN), or jump to the previous channel you watched (PREV).
DIRECTV Active™ Channel
e DIRECTV Active™ Channel provides a variety of interactive services, including daily and extended
weather forecasts, daily horoscopes, lottery results, pay per view and broadcast TV recommendations, and
special DIRECTV promotions.
Press the ACTIVE key to access these features.
Use the Channel Lineup
(included in your Wel-
come package) to get
familiar with our channel
numbers.
TIP
Page 18

What’s On
DIRECTV Plus® DVR Features in Live TV
Live Buff er: e DIRECTV Plus® DVR saves programs to the hard drive instantly and continuously, while
you watch. is “live buff er” lets you pause, rewind, fast forward or “instant replay.” (Note: You cannot fast
forward during live TV until you pause or rewind a program.) If you start watching a program late, even if
it is not set to record, you can back up to the beginning (up to 90 minutes) using REWIND, as long as you
haven’t changed channels since the program started.
Cruise Controls: Use the PAUSE, FFWD, REWIND, REPLAY, RECORD and ADVANCE keys to
control your viewing time. Pressing FFWD or REWIND multiple times lets you increment the speed at
which you cruise through a program. Pressing and holding PLAY shows the program in slow motion. If you
press FFWD while a program is paused, the program is displayed in frame-by-frame.
If you press PAUSE during a program, the saved portion you can access extends from 90 minutes to 4
hours, depending upon the length of the program you were watching when you pressed PAUSE. When the
program has completed, or if you change channels, you are asked if you want to save the program.
When you use Cruise Control keys, a “control bar” shows you where you are in the program, the start and
end time of the program, how much of the program has been stored and the program title.
If you are viewing a screen with a TV Window, such as the Guide or an Info screen, icons are displayed in
the window to identify the current state (e.g., playing, paused, fast forward, etc.).
R
You can record a
program that is currently
airing to watch later by
pressing the RECORD key.
TIP
R
Page 19

DIRECTV Plus® DVR - User Guide
R
Program
Title
Current Time
Marker
End Time or
Duration
Action
Icon
Record
Icon
Start Time
Bookmark
Control Bar
DIRECTV Plus DVR Features in Recorded TV
Recorded programs can be found in the My Playlist tab on the Playlist screen. To view the Playlist, press
LIST. To return to live TV, press EXIT.
Cruise Controls: e PAUSE, FFWD, REWIND, REPLAY, RECORD and ADVANCE keys work with
recorded programs just as they do with live TV. Pressing STOP while you’re watching a recorded program
stops playback and displays the My Playlist tab on the Playlist screen.
When you’ve reached the end of a recorded program, the recorder will ask if you want to delete it to make
room for new programs.
For recorded programs, the control bar shows the program duration instead of the start and end times.
For screens with a TV Window, icons are displayed in the window as they are for live TV. e color of the
portion of the control bar that indicates the stored portion of a program is orange for recorded programs,
green for live TV.
Bookmarks: “Bookmarks” are a way of keeping track of places in a program you’d like to jump to quickly.
You can set Bookmarks in a recorded program by pressing PAUSE then the GREEN key. ey can be
deleted by pressing PAUSE, then the DASH key. You can jump to Bookmarks by pressing and holding the
FFWD key to move forward, or the REWIND key to move back, or via the Menu. (See Chapter 4)
Page 20

61 2 3 4 5 7
8 9
Page 21

DIRECTV Plus
®
DVR - User Guide
The Channel Banner
Any time you tune to a channel, you’ll see the channel banner appear across the top of the screen. is
banner displays the following useful information and options:
1) Current date & time
2) DIRECTV Channel – Channel logo, number and call letters of the station you’re currently viewing.
3) Program Info – Program title, stop and start time and rating of the current program.
4) Info Panel – Displayed when you press INFO on your remote. Contains the program description and
other information. Press SELECT on the More Info button to see additional options.
5) Current Favorites – Favorite Channels list currently in use.
6) Audio options – Two states: bright and dim. If displayed brightly, alternate audio options are
available.
7) Messages – Two states: bright and dim. If displayed brightly, there are new DIRECTV messages in
Caller ID & Messages.
8) P a r e n t a l C o n t r o l s – Parental Controls lock status. ree states: Locked , unlocked and
temporarily unlocked .
9) Button Hint – Tells you that you can see the Mini Guide by pressing the BLUE key on the remote.
Your DIRECTV service includes dozens of enjoyable, continuous music channels with something for every taste. Tune to
these just as you would to any channel. You’ll see a special Channel Banner that initially displays the channel description (for
example, “The ‘60s,” “US Country”). As each song is played, its info will appear in the banner, including song title, artist and
record company.
Music Channels
TIP
The channel banner gives
you info on the channel
and show you are cur-
rently watching.
To see program details,
at any time press INFO on
your remote (press a sec-
ond time to clear). Select
More Info button to see
additional options.
Page 22

Page 23

DIRECTV Plus® DVR - User Guide
The Guide
Overview of the DIRECTV Advanced Program Guide
®
e Guide displays listings of current and upcoming programs for up to 14 days in advance. Find out
what’s on (now or later), change the channel, fi nd and purchase a pay per view movie or event, or search for
a program you’re interested in.
Icons you may see in the Guide:
– Broadcast in letterbox (16:9 or widescreen) format
– All Day Ticket pay per view showings (pay once, watch all day)
– Scheduled to record
– All episodes scheduled to record
– Program matches a Search set to autorecord
– Currently recording
Press the GUIDE key
twice to skip the Guide
Category screen.
GUIDE
TIP
Page 24

What’s On
Getting Around in the Guide
Press the GUIDE key on your remote, then choose how you want to fi lter the Guide. Select All Channels,
or channels in a specifi c category.
Moving through the Guide is simple:
e UP, DOWN, LEFT and RIGHT arrow keys move you through listings and time slots. Highlight a
program or channel cell to view its description.
Press SELECT when you’ve highlighted a channel cell (far left) to view that channel in the TV window.
Press RECORD to record the program.
Use the CHAN key up or down to scroll a full page.
Press the RED or GREEN keys to move forward or backward in time in 12-hour increments.
To tune to a program that is on now, highlight the program and press SELECT. Selecting a future
program displays program information.
Press INFO when you’ve highlighted a show in the Guide to view a more in-depth description and
options. Pressing INFO when you’ve highlighted the channel name displays the channel’s listing for up
to 14 days.
Press MENU to see Guide options, change your Favorites list, or jump to a desired date and time.
Info Screen
MENU
VOL CHAN
PAGE
INFO
BACK
EXIT
LIST
GUIDE
ACTIVE
SELECT
Page 25

DIRECTV Plus® DVR - User Guide
The Mini Guide
Program Listings While You Watch TV
e Mini Guide is a special version of the Guide that displays only one channel at a time, and
appears over full-screen TV. To display the Mini Guide, press the BLUE key on the remote while
watching TV. Just as you can with the Guide, you can scroll through channels and times, set
programs to record, access program info, and other Guide features.
Mini Guide
Page 26

What’s On
Recording Programs
An even better way to catch all your favorites
Recording is a great way to see your favorite programs on your schedule. You won’t miss your favorite series
because it moved to a diff erent day or time, or miss your team’s playoff game because you had to work late.
Just set a program to record and your DIRECTV Plus DVR will save it for you to watch later. To watch
recorded programs, use the Playlist feature. (See e Playlist on page 24.)
To schedule a program for recording with specifi c options:
1) Highlight a program that interests you and press INFO.
2) Highlight and select Record. A screen is displayed where you can set record options for that program.
Follow the onscreen instructions to set the program to record as you wish.
3) Select the Set Record button, then OK on the confi rmation screen.
You can record up to two programs at once if you’ve connected both inputs on your DIRECTV Plus DVR.
However, if a program you select to record confl icts with another recording, you will be notifi ed of the
confl ict at the time and given a choice of which recording to cancel.
Page 27
DIRECTV Plus® DVR - User Guide
One-Touch Record with Default Options
On any screen, you can press the RECORD key on a highlighted program to schedule it to record with
default options.
Pressing RECORD once schedules the highlighted program to record. A recording icon is displayed next
to the program title to let you know it is scheduled.
For a one-time only program:
• Pressing RECORD again cancels the record.
For episodic programs:
• Pressing RECORD a second time schedules all episodes of the program for recording.
• Pressing RECORD a third time cancels the recording.
Autorecord a Search
Programs that match a search (see Search, page 33) can be scheduled to autorecord. When the search
results are displayed, simply select Autorecord from the left menu, then follow the onscreen instructions to
set the record options.
Page 28

What’s On
Changing Record Options/Canceling a Record
Once you have scheduled a program to record, you can change the record options or cancel the recording
by selecting the program in the Guide or the To Do List (press LIST, then YELLOW); then, select the
Record item in the left menu, and follow the onscreen instructions to change the program’s options or
cancel recording completely.
You can change the following record options:
• For all programs, you can extend recording start and stop times (for example, start 1 minute before the
program; stop 5 minutes after the scheduled end of the program).
• For programs with multiple episodes, you can select whether to record fi rst run programs and repeats or
just fi rst runs, how many episodes to keep, and how long to save the recorded program.
Recording to VCR
To record a program on your VCR, make sure you’ve connected your VCR properly to your DIRECTV
Plus DVR, then select a recorded program from the My Playlist tab in the Playlist, set your VCR to
record, and play the selected program. See your VCR User’s Guide for information on how to set it up for
scheduled or manual recording.
To obtain optimum picture quality, make sure the receiver is connected directly to the TV. Connecting the receiver to the
TV through a VCR or DVD recorder is known to yield less than optimum picture quality, particularly when viewing copy-
Important
Page 29
DIRECTV Plus® DVR - User Guide
Pay Per View
The Latest Movies, 24 Hours a Day
You don’t have to go out for the best and biggest movies and special events! Recent hits and events like
sports, comedy and more are available 24 hours a day on DIRECTV® Pay Per View. You’ll fi nd them listed
in the Guide in the 100s, with previews on channel 100.
Tune to a pay per view program or press INFO on a highlighted pay per view program. Select a Buy option
and follow the onscreen instructions. As long as your receiver is connected to a land-based phone line, you
can use your remote to order. You’ll get a reminder onscreen a few minutes before the pay per view’s start
time.
To cancel a pay per view order, press LIST, then YELLOW to display the To Do List. Press SELECT on
the Purchase item in the left menu. Select the desired program and follow the onscreen instructions. You
may not be able to cancel your pay per view order if you have viewed—or in some cases recorded—any
portion of it.
You can also order
DIRECTV Pay Per View
movies and events on the
Internet at directv.com
or over the phone at
1-800-531-5000. Keep
in mind, though, there is
an ordering fee for those
purchases placed over
the phone.
TIP
Page 30
What’s On
The Playlist
Watching Your Recorded Programs
e Playlist displays all saved, recorded programs in the My Playlist tab. To display the Playlist screen, press
LIST on the remote. Other programs, which may include behind-the-scenes and video extras for new movie
releases, DIRECTV content packages, special off ers, free events and more, are saved in the Showcases tab.
Check the Showcases tab frequently for exclusive video content from premium programming providers.
To quickly jump to another tab, press RED or GREEN. To display the To Do list of scheduled recordings
and pay per view purchases, press YELLOW.
e time, date and channel of each recorded program are displayed to the right of the program title. Any
icon identifying program status is displayed to the left of the program title.
Highlighting a program title displays the program description, just as in the Guide.
Episodic programs appear in the list in groups. For example, if you record a weekly comedy series, that
series is shown in the list by its name, and the episodes for that series are saved in a group under that name.
You can press SELECT on the series name to display all the episodes that have been recorded. Programs
saved as the result of a Search are also saved under a group, where the name of the group is the Search
name. e number of new (not viewed) programs and total programs for each group are displayed to the
right of the group name.
If you press SELECT or INFO on a program under the My Playlist tab in the Playlist, an Info screen is
displayed for the program that lets you update how long the program will be kept or delete the program.
Page 31

DIRECTV Plus® DVR - User Guide
Disk Space Bar
e My Playlist screen displays a Disk Space bar that shows the approximate amount of space available on
your disk at any given time. e Disk Space bar shows programs you have designated Keep until I Delete in
blue, programs subject to expiration in light blue, and the remaining unused disk space that is available for
recording in black.
The more programs you
have marked as “Keep
until I delete,” the less
space you will have
available on your disk for
recording new programs.
TIP
Page 32

What’s On
Page 33

The Menu
Using the Menu 28
Settings 28
Audio Options 30
Category Sort 32
Pay Per View 32
Search 33
Favorites 34
Caller ID & Messages 35
Parental Controls 36
Menu Features for Recording 40
Page 34

The Menu
Using the Menu
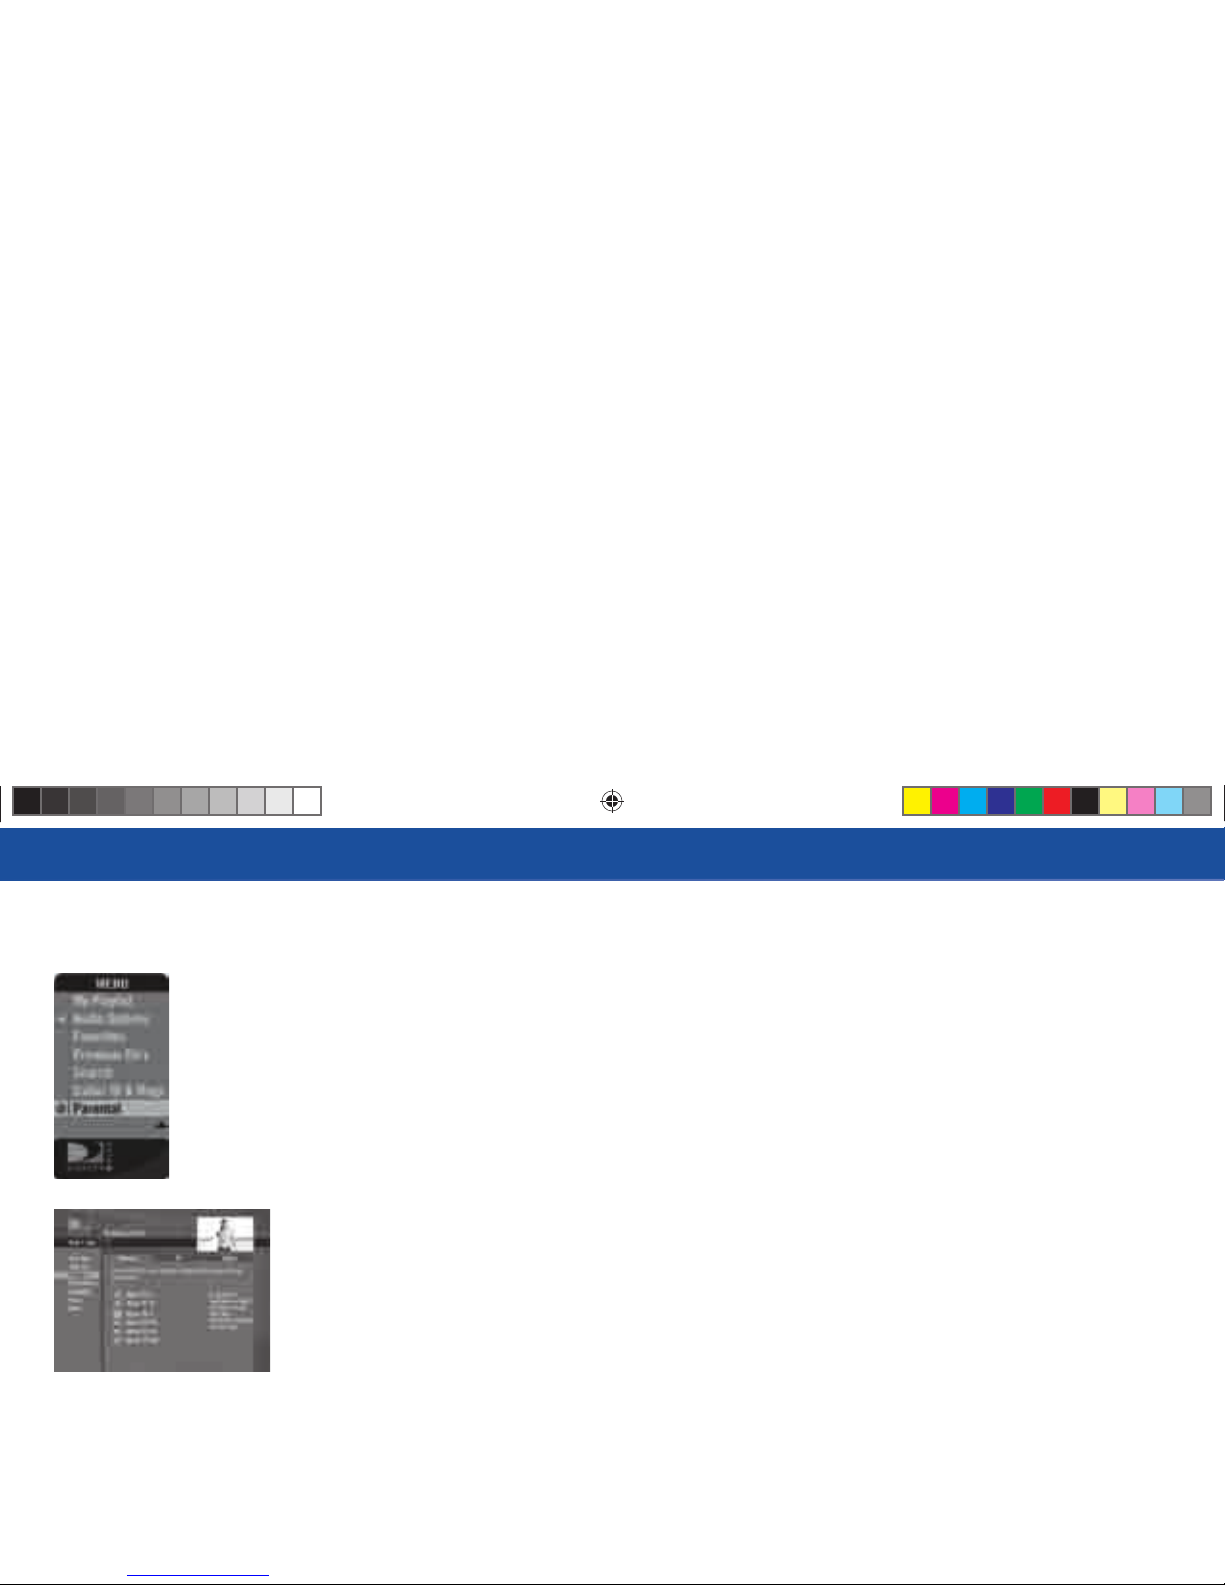
Press MENU on your remote to easily access DIRECTV Plus® service features. Once the Menu is
displayed, use the UP and DOWN arrows to highlight a desired menu item, then press SELECT to access
that item. Some menu items will display a submenu, others will take you directly to a new screen. To
remove the Menu at any time, press MENU again.
e Menu is context-sensitive, meaning it shows diff erent options depending upon where you are when you
press MENU.
Settings
Selecting Settings in the Menu displays a submenu of items that lets you customize, adjust and keep track of
your DIRECTV viewing experience.
Setup
e Setup item in the Menu displays the Setup screen, where you can access the Info & Test, Satellite
Setup, Audio Setup, Display Setup, Access Card and System Reset screens.
Info & Test: e System Info option lets you view the current system information. e System Test option
lets you run a test on the tuner, access card, receiver ID and phone line.
Remote: Use this option to setup your remote to control your TV and other equipment.
Audio: e Audio option in Setup lets you make lasting adjustments to audio settings such as language and
sound eff ects. To make temporary adjustments, use the Audio Options item in the Menu.
Page 35

DIRECTV Plus® DVR - User Guide
Display: is option lets you change display settings such the Channel Banner display time, the language
in onscreen menus, time zone (for the clock) and Guide display.
Satellite: is option is useful if your DIRECTV Plus DVR has lost signal strength, or you need to realign
your satellite dish.
Access Card: Follow the onscreen directions to replace your access card. You will need your old and new
access cards to complete this process. (Note: DIRECTV will provide new access cards and instructions
when necessary.)
Reset: From here you can reset the receiver, reset to factory defaults, or reset everything.
Scheduler
is feature gives you an overview of and access to all the programs you’ve set to record or purchase.
Favorites
Check the current status of your Favorites list(s) by clicking here, and make changes if you like. See page 34
for more details.
Parental Controls
Check the current restrictions of your Parental Controls by clicking here, and make any adjustments. See
page 36 for more details.
Page 36

The Menu
Audio Options
Some programs have alternate audio available (such as other language tracks or Dolby Digital). is option
only appears in the Menu over Live TV when the current program has alternate audio. You can set the
default so that whenever a program has alternate audio available, it automatically plays this audio, or you
can change the alternate audio temporarily for the program you are watching. In either case, press MENU
while in Live TV, then:
To change the default audio, from the Menu, select Settings, select Setup, then select Audio in the left
menu and follow the onscreen instructions.
To temporarily change the audio, from the Menu, select Audio Options, then select the audio track you
prefer. Once the program is over or you change the channel, the audio will change back to the default
setting.
Page 37

DIRECTV Plus® DVR - User Guide
Dolby® Digital 5.1
Dolby Digital 5.1 gives you fi ve discrete channels of full-range digital audio, plus one channel of lowfrequency (subwoofer) audio, for use by A/V receivers capable of decoding the 5.1-channel signal. e
audio signals are broken into left-front, center, right-front, left-rear, right-rear and low-frequency channels.
e result, when your DIRECTV Plus® DVR is connected to a compatible Dolby Digital 5.1 channel A/V
receiver and speaker setup, is an experience that gives you much of the dynamic range, 360-degree imaging
and sonic excitement of a real theater.
Not all TV programs are broadcast using Dolby Digital 5.1 for DIRECTV® programming. Programs
broadcast using this high-quality audio standard are indicated by the words Dolby Digital in the program
description in the Channel Banner (see page 15) and the Guide (see page 17).
To change the current Digital Audio format, press MENU, select Settings, then select Setup. Select Audio
in the left menu. Highlight the Dolby Digital tab and press SELECT, then follow the onscreen instructions
and select from the following options:
Dolby On (RCA) : Select this option to optimize the audio on programs with Dolby Digital Audio if you
are using the Digital Audio Out (Optical) to a digital audio receiver and the Audio/Video (RCA) cable to
your TV or stereo.
Dolby On (RF) : Select this option to optimize the audio on programs with Dolby Digital Audio if you
are using the Digital Audio Out (Optical) to a digital audio receiver and the RF coaxial output cable to
your TV or stereo.
OFF : Select this option if you are not using the Digital Audio Out (Optical).
Page 38

The Menu
Category Sort
is feature lets you temporarily arrange the Guide to list only programs in a particular category such as
Movies, Sports or News.
While in the Guide, from the Menu, select Category Sort. To further narrow your search, select the
category you want, then select a subcategory if you wish. To quickly move through the Category Search
results, use the RED or GREEN key on your remote to advance or reverse in 90-minute increments.
Press GUIDE to return to the regular Guide, or EXIT to return to live TV.
Pay Per View
is option enables you to check out DIRECTV Pay Per View listings by category.
While in the Guide, press MENU, then select Pay Per View. You will see three choices for sorting the
listings. Choose All to display all current pay per view programs. Movies will give you listings of all current
movies available. Pick Special Events to see specifi c events such as sports, comedy specials and more. e
Guide will update with matching programs.
Page 39

DIRECTV Plus® DVR - User Guide
Keep in mind, when you use Search, only those programs slated to air within the Guide’s number of days of programming
Note
Search
Would you like to locate a particular program, movie or sports event you want to see — even shows starring
a favorite actor, or games with your favorite team? Search off ers some easy ways to spot just what you want
to watch.
Press MENU, then select Search. You can fi nd a program by Title, Person, Keyword or Channel. Your searc h
will be quicker if you narrow your search by selecting subcategories; just follow the onscreen instructions.
Once you’ve found a program you’re after, all you have to do is highlight and select the title to display when
the program is on.
Recent Searches
If you’d like to repeat a previous search, select Recent Searches, then select your search to view matching
programs. In Recent Searches, you can select Mark & Delete in the Menu to delete any Search you no longer
want.
Page 40

The Menu
Date & Time
is option gives you a convenient way to look several days ahead in the Guide, without having to scroll
through pages of programs.
Favorites
Favorites allows you to set up a special, customized Guide that shows only those channels you choose. So
you can have easy access to the channels you like best, or perhaps a grouping of family channels just for the
kids.
When you’re using a Favorites list, the Guide will only display those channels you’ve
chosen — and you’ll also only see those channels when you change channels using CHAN UP/DOWN on
y o u r r e m o t e .
Keep in mind, no matter what Favorites list you’re currently using, you can still always access any channel
you receive by keying in its channel number on your remote. You can also edit or delete a list at any time.
Channels I Get
In addition to displaying all channels or creating lists of favorite channels, you can also set your DIRECTV
Plus DVR to display only the channels that are in your current subscription package.
To see the channels you receive, select Chans I Get from the left menu of the Favorites screen. To set Chans
I Get as your current channel list, select the Set Current menu item from the Favorites screen, then change
the Current Favorites option to Chans I Get.
Page 41

DIRECTV Plus® DVR - User Guide
* You must subscribe to this service through your local telephone company, and your DIRECTV Plus DVR must be
Important
The messages icon will
appear brightly on your
channel banner whenever
there’s any new or unread
message in your Inbox.
TIP
Caller ID & Messages
is feature lets you get messages from DIRECTV. If you have Caller ID service, you can also view phone
calls you’ve received or turn call notifi cation on or off .* Press MENU to display the Menu, select Caller ID
& Msgs, then select Edit Settings. Select either Caller ID or Messages from the left menu, as desired.
Caller ID
e Call Log tab displays up to 25 recent incoming calls.* Highlight and select a name to delete that listing
from your log.
e Notifi cation tab lets you turn the notifi cation feature on or off . When the Notifi cation option is on,
you’ll see a notice on your TV screen whenever a call comes in.
DIRECTV Messages
is feature lets you view a listing of current DIRECTV messages waiting for you. Simply highlight and
select a message in the list to read, then you’ll have the choice to keep or delete it.
new
messagesnomessages
Page 42
The Menu
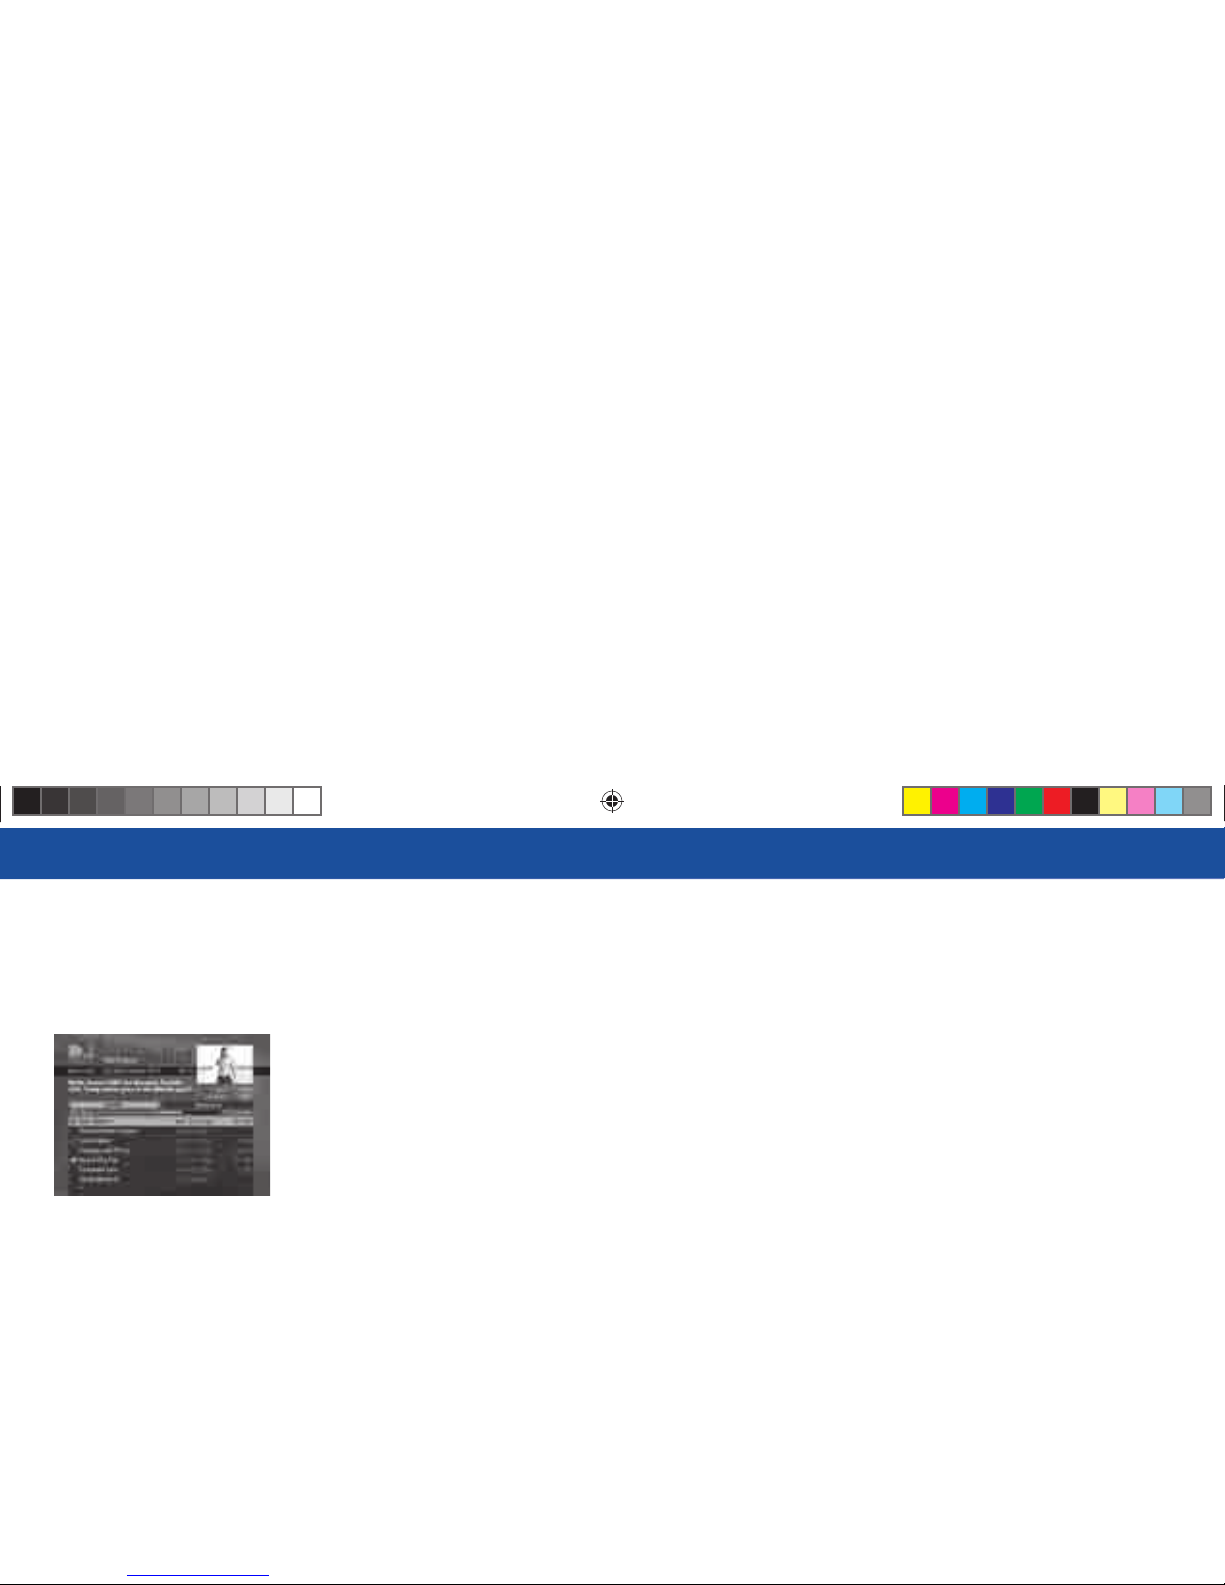
Parental Controls
Parental Controls enables parents to place certain restrictions on just who’s watching what, and require a
passcode to view restricted programming. Whether it’s for mature content or spending amounts, you’re
always able to keep limitations where you want them for the whole family.
Press MENU to display the Menu, SELECT Parental Controls, then Edit Settings, and you’ll see the current
status showing any restrictions. e system default is “unlocked” for all categories.
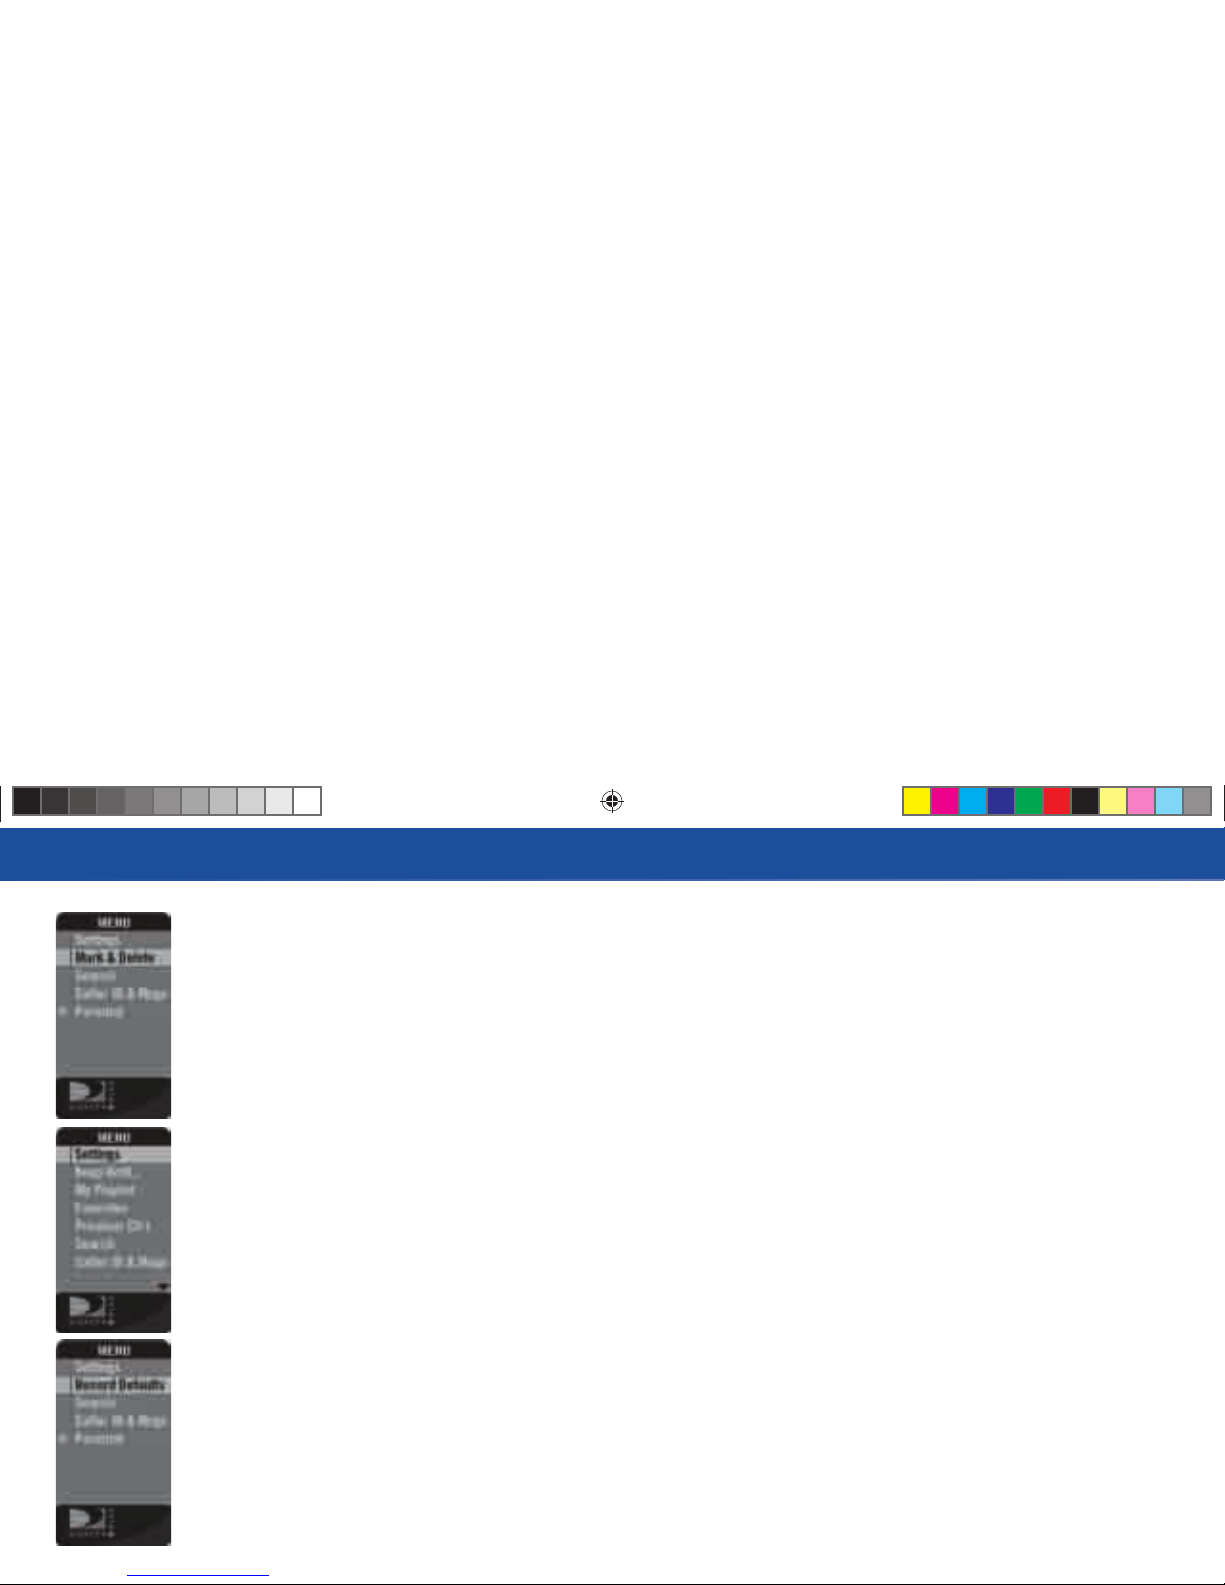
Ratings
Here you can set rating limits for Movies and TV:
S e l e c t Ratings. Move to the right to SELECT another tab. Note: You can use RED or GREEN to cycle
tabs.
Movies
Highlight and select the Movies tab, then set the overall rating limit you wish to impose. Brief descriptions
of the ratings appear for your guidance.
TV Programs
Select the TV tab, then highlight and select the TV rating you desire. You can also set ratings for particular
content (for example, Fantasy Violence, Dialogue), each of which is described when highlighted.
Page 43

DIRECTV Plus® DVR - User Guide
Other Shows
To block programming that has no rating — such as news and sports and shows with a rating of “None” —
select the Other tab.
Channel Blocks
You can block viewing of a certain channel or channels from this menu.
SELECT Chan Blocks in the left menu, then scroll down the channel list to SELECT those you wish to
block, or key in channel numbers for quicker access. Use Block All or Allow All to save time if you wish to
aff ect a large number of channels.
Spending
From the left menu, SELECT Spending, then set your preferred spending limit for any single pay per view
purchase. Simply key in the amount using the numbers on your remote.
Hours
From the left menu, SELECT Hours, then set your preferred hours during which TV can be viewed. You
can set hours based on “school nights” and weekend nights — Monday - ursday, Friday - Saturday, and
Sunday.
Page 44

The Menu
Now, lock it
Once you’ve set the restrictions you want, choose Lock Now from the left menu. You’ll be directed to create
a passcode (which you’ll want to make easy enough to remember, but hard enough that the little ones won’t
guess it!). is passcode will be your entry to unlocking and adjusting limitations in the future.
An onscreen message will appear whenever anyone tries to tune to a channel or program that has been
restricted, or attempts to spend or watch beyond limitations set. He or she will not be allowed to proceed
without the passcode. Using your passcode, you can easily override the limits.
Let me in…!
Temporarily or permanently unlocking a restriction is easy. To temporarily unlock a particular program:
1) When any controls are currently activated, Unlock Now will appear if you try to tune to a restricted
program.
2) SELECT Unlock Now and enter the password.
For more unlock options:
1 ) P r e s s M E N U , t h e n S E L E C T Parental Controls.
2) Various options for removing restrictions temporarily or permanently will appear. SELECT one and
enter your password.
Also note: If you have Parental Controls set and temporarily unlocked, turning the receiver power off will
re-lock the box. If anyone tries to unlock restrictions using an invalid passcode, there’s a time delay that’s
added with each additional attempt to discourage them.
The Parental Control
icon in the Channel
Banner will tell you if
the receiver is locked,
temporarily unlocked, or
unlocked.
TIP
Locked Unlocked Temporarily
Unlocked
Page 45

DIRECTV Plus® DVR - User Guide
To change your passcode at any time:
1 ) P r e s s M E N U , S E L E C T Parental Controls, then Edit Settings.
2) Scroll down to Passcode and press SELECT.
3) Enter your old password, then enter a new one twice to confi rm.
Page 46
The Menu
Menu Features for Recording
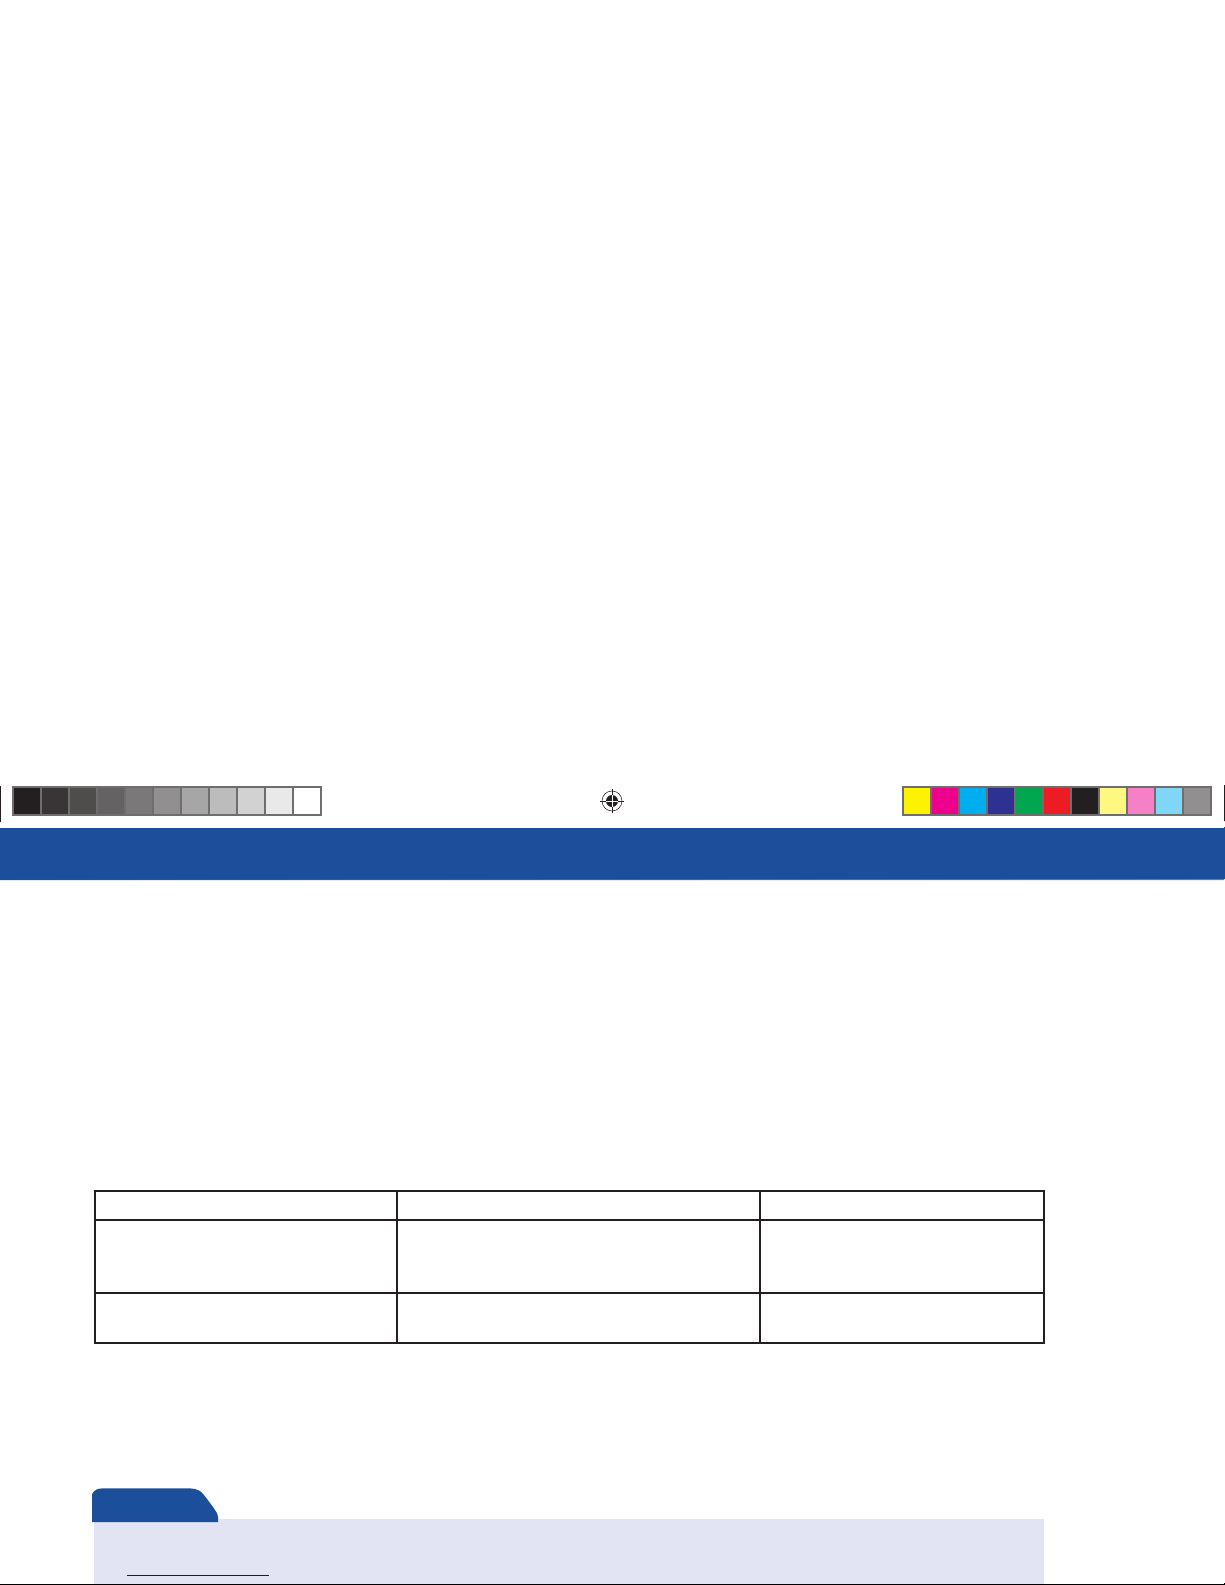
e Menu includes special recording features over certain screens.
Menu over the Playlist screen:
• List by... lets you sort how the programs appear in the list.
• Mark & Delete lets you mark programs and delete them from the My Playlist screen.
• Open/Close All lets you open and close all groups at once.
Menu over recorded TV:
• Keep... lets you change how long a recorded program will be kept on disk.
• Bookmarks lets you jump to bookmarks that have been set in a recorded program you are currently
viewing. (See page 13.)
• My Playlist lets you view a list of recorded programs, or access the My Playlist screen.
Menu over a Record Options screen:
• Record Defaults lets you set the default selections for the Start, Stop, Keep and Type options.
Page 47

Other Information
Troubleshooting 42
Limited 90-Day Warranty 50
Product Info 53
DIRECTV PROTECTION PLAN 54
FCC Customer Information 56
Page 48

Other Information
You can find
additional
troubleshooting help
at directv.com.
TIP
Troubleshooting
Many problems can be corrected by performing a simple reset of the DIRECTV Plus® DVR. If you
experience image freezes, audio freezes or blank screen, or the system won’t respond to front panel or
remote control keys, try one of these:
Press the red RESET button behind the access card panel door on the front of the
DIRECTV Plus DVR, then wait for program guide info to be acquired.
If the problems persist, try unplugging the power cord of the DIRECTV Plus DVR for 15 seconds, then
plug it in again.
Running the System Test (later in this section) can also help you diagnose and solve many common
problems.
System Upgrades
Your DIRECTV Plus DVR is able to receive upgrades or modifi cations to some of its features and
functions. ese modifi cations will occur automatically, usually at times when the receiver would likely be
turned off . If your receiver is on when an upgrade or modifi cation is sent, you may experience a disruption
in reception for a minute or two. Your reception should return to normal after the modifi cation is complete.
Your receiver must be plugged in to AC power to receive any upgrades. Do not unplug your receiver while
an upgrade is in progress. Please consult the System Info screen to check for an upgrade or modifi cation
planned by DIRECTV.
If preferred, you can have an Authorized Service Representative visit your home for a fee, to set up your digital satellite receiver
Note
Page 49

DIRECTV Plus® DVR - User Guide
DIRECTV Plus DVR or TV Problems
Wrong picture, blue screen, snow or black/blank picture
e DIRECTV Plus DVR and most TVs, VCRs and DVDs let you toggle between video sources. If you don’t see the
signal you think you should be seeing, try using these keys to toggle between the signals:
Press the TV INPUT key on the DIRECTV Remote Control.
Press the TV/VCR key on the VCR remote or on the VCR’s front panel.
Press the TV/DVD, INPUT or SOURCE key on the DVD remote.
If problems persist, turn o all equipment that is connected to your TV, wait a few minutes, then turn the DIRECTV Plus DVR back
on.
Problems with Caller ID
You must subscribe to Caller ID service through your local phone company.
Also, check to be sure your Caller ID noti cation is turned on (see page 35).
If you are plugging your receiver to a wireless phone jack, note that it typically does not transmit Caller ID information and you may
need a special wireless phone jack to use with Caller ID service. See the user’s manual that came with the wireless phone jack to see if
it transmits Caller ID information. If it doesn’t, either connect the phone line directly to a standard wall-mount phone jack or install a
wireless phone jack that transmits Caller ID information.
DIRECTV Plus DVR will not turn on
Check to make sure the power cord is plugged into the DIRECTV Plus DVR and the wall outlet.
Check the wall receptacle (or extension cord) to make sure it is “live” by plugging in something else.
Make sure the remote control is on DIRECTV mode, and press TV POWER ON.
Press TV POWER ON on remote, or POWER on front panel of receiver, then press it a second time.
Be sure remote control is pointed at remote sensor, and front of receiver is not blocked and the light above the MODE switch is seen
with each press.
Page 50

Other Information
Check batteries in remote control if the light above the MODE switch isn’t visible with each key press.
Unplug the receiver. Wait ve minutes. Plug it in again.
Turns off while playing
Electronic protection circuit may have been activated because of a power surge. Wait 30 seconds, then turn on again.
Unplug the DIRECTV Plus DVR for a few minutes, then plug back in. If this happens frequently, the voltage in your house may be
abnormally high or low.
Consider using a surge protector or line conditioner.
If your TV turns o while playing, and other lights/appliances in your house do too, you may have blown a circuit breaker or be
experiencing a power outage.
Consult an electrician if the problem is frequent or severe, especially if other household appliances or electronics are a ected.
DIRECTV Plus DVR turns on or changes channels unexpectedly
A scheduled recording may have been activated. See page 20.
You r T V ’s timer may have been activated.
Check your TV owner’s manual.
Blank screen
Press CHAN UP or DOWN to change the channel.
Check that all components connected to the input jacks of your TV are turned on.
Your DIRECTV Plus DVR may be hooked up incorrectly to the TV. Press the INFO key on the front panel of the DIRECTV Plus
DVR to see if the channel banner appears. If it does not, check the Setup and Connections section for instructions about connecting your
satellite receiver.
If the DIRECTV Plus DVR is connected to the RF input of your TV, makes sure that the TV channel matches the 3/4 RF switch on the
back panel.
Press the TV INPUT key on the remote to make sure your TV input is set to the TV input your DIRECTV Plus DVR is connected to.
Press the POWER key on the front of the DIRECTV Plus DVR.
Page 51

DIRECTV Plus® DVR - User Guide
Press the red RESET button behind the door on the front panel of the DIRECTV Plus DVR.
Temporary loss of the satellite signal or Searching for Satellite Signal message
Your satellite system may be experiencing rain fade, a temporary loss of the satellite signal due to unusually heavy rain clouds or rainfall.
Rain fade is usually brief, lasting only as long as the heavy rain cloud condition persists.
Your dish may be blocked. Check that something is not blocking the dish.
Partial programming loss/channels missing from the Guide/channel is in the Guide but can’t tune to
Your satellite dish antenna may be incorrectly con gured. Check the dish type set in your receiver’s preferences and change if necessary.
Press MENU on the remote control, then select Settings, then Setup. In the le menu, select Satellite, then Repeat Satellite Dish Setup
button. Follow the steps. From the Satellite Dish Type screen, make sure the proper dish type is selected (round, oval with a dual LNB or
oval with a triple LNB).
e channels might be excluded from the Favorites list currently in use. Enter a channel number manually, or press MENU on the
remote, select Favorites, then All Channels.
A program I tried to record does not show up in the My Playlist screen.
Someone else in your household may have prevented the recording, or erased the program a er it recorded.
e recording may have been canceled due to a con ict with another program with higher priority in the Prioritizer.
Press MENU, select Settings, then Scheduler. In the le menu, select History. You will see a list of recent programs, with their recording
status info.
I wanted to record a program, but I got an error message saying it confl icted with another scheduled record. What
do I do?
Your DIRECTV Plus DVR can record up to two programs at once, or it can record one program while you watch another. If you exceed
these limits (for example, if you try to record three programs at 8 p.m. on ursday), you will be noti ed there is a con ict. You will have
to decide which program you want to cancel.
If the overlap is just a couple of minutes (for example, some networks occasionally start programs at 8:59 instead of 9:00 p.m.), try
scheduling the recording manually (go to the Scheduler and select Manual) and change the start and end times appropriately.
Page 52

Other Information
I recorded a program, and the recording got cut off just before the end, so I missed the last bit of the program.
is problem frequently occurs as TV networks adjust the start and end times of their programming. Next time, try setting the end time
of the recording in the Record Options so the recording ends one or two minutes later (or more, if necessary). For sporting events, you
may want to try 15 minutes or more, to protect against overtime games. Some networks show program episodes several times during
a week, so if you just watched a program where the last few minutes were not recorded, try scheduling it again immediately. Note that
adding time to the beginning or end of a recording increases the likelihood of recording con icts, so use time padding sparingly. (See
previous question.)
A program I recorded was displayed in the My Playlist screen, but got deleted before I could watch it.
When you schedule a recording from an Info screen, you can select how long your recordings are kept: Until I Delete, or Until Space
Needed. When you schedule a program with one-touch record, the recording defaults to Until Space Needed. Programs that are set to be
kept Until Space Needed may be deleted as new programs are recorded. You can change this option for a completed recording by pressing
LIST to view the To Do list, then press SELECT on the desired program. When the program’s Inf o screen is displayed, select the Record
menu item and change the options as needed.
If you recorded a pay per view program, but did not watch it, the time which you are allowed to purchase may have expired. To avoid in
the future, check your pay per view recordings in the
My Playlist screen for expiration dates.
I’ve set up an episodic recording, but now I get a bunch of reruns and multiple copies of the same program.
When you schedule an episodic recording, you can set an option for program type: First Run, Repeats or Both. If you only want to
record a program the rst time it is shown, and not repeated showings, make sure you select the First Run option. is is the default
for one-touch recording, so if you want to record every occurrence of a program, you need to change it using the program’s Info screen.
Access the program’s Info screen (by pressing the INFO key when the program is highlighted in any list or the Guide), then select the
Record menu item and change the options as needed.
My video and audio are out of sync.
Try changing channels.
Press LIST, then EXIT.
If neither of those work, restart your DIRECTV Plus DVR. Press MENU, press SELECT on Settings, then SELECT Setup. Select the
Reset item from the le menu and follow the onscreen instructions.
Page 53

DIRECTV Plus® DVR - User Guide
My DIRECTV Plus DVR is “frozen” on a single frame of a TV picture.
If you are on a pay per view channel, watching the free portion of a program, the free portion may be completed. You must buy the
program to continue watching.
Your DIRECTV Plus DVR may be paused. Press the PLAY key.
If that doesn’t work, restart your DIRECTV Plus DVR. Press MENU, press SELECT on Settings, then SELECT Setup. Select the Reset
item from the le menu and follow the onscreen instructions.
When I am watching a recorded program, and the DIRECTV Plus DVR starts to record another program, my image
quality deteriorates.
Press PAUSE, then PLAY.
Press EXIT to return to live TV, then press LIST. SELECT the program you were watching from the
My Playlist screen and press
PLAY. (You may have to fast forward back to the point where you were.
I want to watch a program, but all I get is a black screen. When I go to the Guide or another screen, the TV window
is black.
If you schedule two programs to record at the same time (using the time-based Manual recording feature), you cannot watch either of
them while they are being recorded. Cancel one of the recordings, or wait until a recording is complete.
Remote Control Problems
Problems with the remote control
Check that nothing is between the remote control and the remote sensor.
Make sure the remote control is in DIRECTV mode. Slide the MODE switch to the DIRECTV position so the remote will control the
DIRECTV Plus DVR.
Check the batteries in the remote control. ey may be weak, dead or installed incorrectly. Try replacing batteries.
If you’re entering a channel number that is less than four digits long, the receiver might wait two seconds before tuning to the channel.
Press ENTER a er entering a channel number to tune immediately.
Page 54

Other Information
If your TV is connected with just coaxial cables, you must tune to Channel 3 or 4, as set with the 3/4 switch on the back of your DIRECTV Plus
DVR.
Important
If you are trying to operate a device other than the DIRECTV Plus DVR that you have programmed the remote to control, make sure
you rst slide the input switch to the corresponding device (DVD player, VCR, etc.). e indicator light for the component you’re
trying to control should light up when you press a valid key for that component. If it doesn’t, make sure the input switch is clicked into
the correct position.
A remote control indicator light starts fl ashing.
e batteries in the remote control are running low and should be replaced soon. (Note that when you replace the batteries, you may
have to reprogram your remote to control other devices.)
Fine-Tuning the Signal
If you self-installed your satellite dish antenna, you may have already used Guided Setup to fi nd the dish-pointing
coordinates, acquire and fi ne-tune the signal and run a system test. If you need to run Guided Setup again, select Settings
from the Menu, then select Guided Setup. Next, press SELECT on Satellite, then select Repeat Satellite Setup.
Page 55

DIRECTV Plus® DVR - User Guide
Running the System Test
e System Test allows you to run a basic diagnostics check on your DIRECTV Plus DVR. If you are experiencing any
trouble with your receiver, run the system test. It will also allow you to get your access card and receiver ID numbers or
to initiate diagnostic procedures on your digital satellite receiver.
First make sure that:
All connections — jacks, cables, etc. — are in place correctly (see Chapter Two,
Getting Connected, for more info)
ere are batteries in the remote control, and they are working correctly
e access card is installed in the DIRECTV Plus DVR.
Follow these steps to run the diagnostics system test on your DIRECTV Plus DVR.
1) Turn on your TV and the DIRECTV Plus DVR.
2) Slide the mode switch to the DIRECTV position to put the remote control in satellite receiver-controlling mode, then press
MENU to bring up the Menu.
3) Select Settings.
4) Select S e t u p , then Info & Test.
5) Use arrow keys to highlight the System Test tab, then press SELECT on Run Test.
6) If your system does not pass the system test, check any of these potential trouble areas: cabling, pointing the satellite dish, phone
connection and access card.
7) If you continue to have problems, call DIRECTV Customer Service at 1-800-DIRECTV.
You should run a system test several times before concluding that there is a problem. Occasional fl uctuations in the phone
line or satellite signal can give temporary false readings.
Page 56

Other Information
Limited 90-Day Warranty
DIRECTV warrants your DIRECTV Plus DVR (Model Number: R16) and any included accessories against defects in material or
workmanship for a period of ninety (90) days after the date of acquisition.
Who is Covered?
You must have proof of acquisition to receive warranty service. A receipt or other document showing that you acquired the product
is considered proof of acquisition. THIS LIMITED WARRANTY EXTENDS ONLY TO THE ORIGINAL CONSUMER
ACQUIRER OR ANY PERSON RECEIVING THE DIRECTV PLUS DVR AS A GIFT FROM THE ORIGINAL CONSUMER
ACQUIRER AND TO NO OTHER ACQUIRER OR TRANSFEREE. THIS WARRANTY DOES NOT EXTEND TO
COMMERCIAL USERS. THIS PRODUCT IS NOT AUTHORIZED FOR USE OUTSIDE THE UNITED STATES AND
ANY SUCH USE VOIDS THIS WARRANTY.
What is Covered?
Warranty coverage begins the day you acquire the product. For ninety (90) days from the acquisition date, at the option of
DIRECTV, the DIRECTV Plus DVR will be repaired or replaced with a new, repaired, refurbished or comparable product
(whichever is deemed necessary) if it becomes defective or inoperative. is exchange is done without charge to you for parts and
labor. You will be responsible for the cost of shipping to and from the location designated by DIRECTV. If DIRECTV cannot
reasonably repair or replace the Receiver then DIRECTV may, at its sole discretion, refund the price you paid for the product or the
current retail price of the product.
All products, including replacement products, are covered only for the original warranty period. When the warranty on the original
product expires, the warranty on the replacement product also expires. After ninety (90) days from the date of acquisition, you pay for
the replacement of all parts, and for all labor charges.
SOME STATES DO NOT ALLOW LIMITATIONS ON HOW LONG AN IMPLIED WARR ANTY LASTS, SO THE ABOVE
LIMITATION MAY NOT APPLY TO YOU.
Page 57

DIRECTV Plus® DVR - User Guide
What is Excluded?
Your warranty does NOT cover:
Labor charges for installation or setup of the product.
Installation, performance of, or repair of: audio/video cabling, telephone line, or accessory attachments used with the product.
Product replacement because of misuse, accident, lightning damage, unauthorized repair, or other cause not within the control of
DIRECTV.
Incidental or consequential damages resulting from the product. SOME STATES DO NOT ALLOW THE EXCLUSION OF
INCIDENTAL OR CONSEQUENTIAL DAMAGES, SO THE ABOVE EXCLUSION MAY NOT APPLY TO YOU.
Any modi cations or other changes to the product, including but not limited to so ware or hardware modi cation in any way other
than as expressly authorized by DIRECTV will void this limited warranty. Except in the case of hardware or so ware provided by
DIRECTV, installing so ware modi cations, “hacks” or utilizing service access or “back doors” will void this limited warranty.
Reception transmission problems caused by signal conditions, telephone line, or cable or antenna systems outside the unit.
A product that has been modi ed or adapted to enable it to operate in any country other than the country for which it was designed,
manufactured, approved and/or authorized, or repair of products damaged by these modi cations.
A product used for commercial or institutional purposes.
DIRECTV makes no warranty that the access connection will be a local (not long distance) phone call.
e continued provisioning of any of the programming and other services delivered through the Receiver including but not limited to
television programming, show info, program guide data, and scheduling info.
Make Sure You Keep...
Please keep your receipt or other document showing proof of acquisition. Attach it to this User Guide and keep both nearby. Also
keep the original box and packing material in case you need to return your product.
Page 58

Other Information
Before Requesting Repair Service...
Please check the troubleshooting section of this guide. is may save you a call to DIRECTV Customer Care.
To Get Warranty Service...
Warranty service will be provided by DIRECTV. If you believe you need service for your Receiver, contact DIRECTV at 1-800DIRECTV. A representative will go through a diagnostic checklist with you. If it is determined that the product needs to be returned
for service or exchanged, you will receive a return authorization number. e representative will give you complete shipping details.
To Get Out-of-Warranty Service...
To obtain out-of- warranty service contact DIRECTV at 1-800-DIRECTV for information on the possibility of and any costs for
repair or replacement of out-of- warranty products.
ALL WARRANTIES IMPLIED BY LAW, INCLUDING ANY IMPLIED WARR ANTIES OF MERCHANTABILITY AND
FITNESS FOR A PARTICULAR PURPOSE ARE EXPRESSLY LIMITED TO THE DURATION OF THIS EXPRESS
LIMITED WARRANTY.
WITH THE EXCEPTION OF ANY WARRANTIES IMPLIED BY THE LAW OF ANY STATE OF THE U.S.A., THIS
EXPRESS LIMITED WARRANTY IS EXCLUSIVE AND IN LIEU OF ALL OTHER WARRANTIES, GUARANTEES,
AGREEMENTS AND SIMILAR OBLIGATIONS OF DIRECTV. REPAIR OR REPLACEMENT AS PROVIDED IN THIS
LIMITED WARRANTY IS THE EXCLUSIVE REMEDY UNDER THIS LIMITED WARR ANTY. IN NO EVENT WILL
DIRECTV BE LIABLE FOR ANY AMOUNT GREATER THAN THE RETAIL PRICE OF THE DIR ECTV RECEIVER.
DIRECTV SHALL NOT BE LIABLE FOR ANY INCIDENTAL OR CONSEQUENTIAL DAMAGES FOR BREACH OF ANY
EXPRESS OR IMPLIED WARRANTY ON THE DIRECTV RECEIVER.
Page 59

DIRECTV Plus® DVR - User Guide
SOME STATES DO NOT ALLOW LIMITATIONS ON WARRANTIES, SO THE ABOVE LIMITATIONS MAY NOT APPLY
TO YOU. THIS WARR ANTY GIVES YOU SPECIFIC LEGAL RIGHTS. YOU MAY HAVE OTHER RIGHTS WHICH VARY
FROM STATE TO STATE.
DIRECTV, Inc.
2230 E. Imperial Hwy
El Segundo, CA 90245
1-8 00-DI RE CTV
Product Info
Keep your receipt to obtain warranty parts and service and for proof of acquisition. Attach it here and record the serial
and model numbers in case you need them. ese numbers are located on the product.
Model No. ________________________________________________________
Serial No. _________________________________________________________
Acquisition Date: ___________________________________________________
Dealer/Address/Phone: ______________________________________________
Access Card: _______________________________________________________
Receiver ID: _______________________________________________________
Page 60
Other Information
DIRECTV PROTECTION PLAN
Protect your DIRECTV® System with the DIRECTV PROTECTION PLAN. For a low monthly fee, the DIRECTV
PROTECTION PLAN covers the components of your DIRECTV System, giving you peace of mind and
comprehensive support to ensure that you and your family enjoy nonstop DIRECTV® entertainment.
DIRECTV PROTECTION PLAN Benefits
Your DIRECTV Limited Warranty provides certain remedies for this receiver during the stated coverage term. e
DIRECTV PROTECTION PLAN provides comprehensive coverage for your DIRECTV System, including:
In-home service calls when needed 24-hour Technical Support Power surge related repairs
Dish antenna realignments Cables, switches, and associated wiring
throughout home
Replacement of defective
equipment (if problem can not be
resolved over the phone)*
Defective remote control
replacements
All parts and labor for repair
Get ALL THAT FOR JUST $5.99 a month all receiver models. is one low monthly fee covers every DIRECTV
component and receiver on your account.
*A fee of $55 for standard IRD equipment, $200 for DIRECTV Plus DVR, DIRECTV Receiver or Ultimate TV equipment, $240 for HD equipment,
or $470 for DIRECTV HD DVR equipment will be charged to your DIRECTV bill if the defective equipment that we are replacing for you is not
returned within 30 calendar days. The plan will provide a return box for the defective equipment and even pick up the shipping costs. You’ll receive
Important
Page 61

DIRECTV Plus® DVR - User Guide
Sign up for the DIRECTV PROTECTION PLAN Today
If you have standard DIRECTV Receiver(s), visit directv.com and SIGN IN using the simple steps below or call 1-800DIRECTV.
1. SIGN IN with your user name and password, or click on the “Register now” link and go through the easy steps, then continue
with Step 2.
2. SELECT Option B, and then click the “Next” button at the bottom of the page.
3. SCROLL down to Step 3 (Add Additional Services) and SELECT “DIRECTV PROTECTION PLAN,” then CLICK on the
“Next” button.
4. REVIEW your change and CLICK on the “Accept ese Changes” button.
If you have a DIRECTV Plus DVR, DIRECTV HD Receiver, DIRECTV Plus HD DVR or DIRECTV Receiver with
UltimateTV Service, please call 1-800-DIRECTV to sign up.
e DIRECTV PROTECTION PLAN is o ered by AIG Warranty Guard and underwritten by New Hampshire Insurance
Company on behalf of DIRECTV where authorized by law. Certain limitations apply. Pricing, terms and conditions of the
DIRECTV PROTECTION PLAN are subject to change. Full terms and conditions will be mailed to you prior to service billing
and are available at directv.com. (Note: Annual payment option no longer available.)
Page 62

Other Information
FCC Customer Information
is device complies with Part 15 of the FCC Rules. Operation is subject to the following two conditions: (1) this device
may not cause harmful interference, and (2) this device must accept any interference received, including interference that
may cause undesired operation.
Responsible Party:
DIRECTV, Inc.
2230 E. Imperial Hwy
El Segundo, CA 90245
1-8 00-DI RE CTV
Trade Name: DIRECTV
Type of Equipment: DIRECTV Satellite Receiver
Model Number: R16
Federal Communications Commission (FCC): is equipment complies with both Part 15 and Part 68 of the FCC rules.
is equipment has been tested and found to comply with the limits of a Class B digital device, pursuant to part 15 of the FCC Rules.
ese limits are designed to provide reasonable protection against harmful interference in a residential installation.
is equipment generates, uses, and can radiate radio frequency energy and, if not installed and used in accordance with the
instructions, may cause harmful interference to radio communications. However there is no guarantee that interference will not
occur in a particular installation. If this equipment does cause harmful interference to radio or television reception, which can be
determined by removing and applying power to the equipment, the user is encouraged to try to correct the interference by one or
more of the following measures:
Reorient or relocate the receiving satellite dish antenna.
Increase the separation between the equipment and the DIRECTV Plus DVR.
Page 63

DIRECTV Plus® DVR - User Guide
Connect the equipment into an outlet on a circuit di erent from that to which the DIRECTV Plus DVR is connected.
Consult the dealer or an experienced radio/TV technician for help.
CAUTION: Changes or modi cations not expressly approved by the manufacturer responsible for compliance could void the user’s
authority to operate the equipment.
e user may fi nd the following booklet, prepared by the Federal Communications Commission, helpful: “How to Identify and
Resolve Radio and TV Interference Problems.” is booklet is available from the U.S. Government Printing Offi ce, Washington,
DC. To meet FCC requirements, only peripherals (computer input/output devices, terminals, printers, etc.) certifi ed to comply with
Class B limits may be attached to this device. Operation with non-certifi ed peripherals is likely to result in interference to radio and
TV reception. To meet FCC requirements, shielded cables are required to connect the device to a personal computer, peripheral, or
other Class B certifi ed device.
is equipment complies with Part 68 of the FCC Rules and the requirements adopted by ACTA. On the back of this equipment is
a label that contains a product identifi er in the format US:AAAEQ##TXXXX. If requested, this information must be provided to
your telephone company. is equipment uses the following USOC Jack: RJ11C. A plug and jack used to connect this equipment to
the premises wiring and telephone network must comply with the applicable FCC Part 68 rules and requirements adopted by ACTA.
A compliant telephone cord and modular plug is provided with this product. It is designed to be connected to a compatible modular
jack that is also compliant. See installation instructions for details.
e REN is used to determine the number of devices that may connect to a telephone line. Excessive RENs on a telephone line may
result in the devices not ringing in response to an incoming call. In most but not all areas, the sum of the RENs should not exceed
fi ve (5.0).
To be certain of the number of devices that may be connected to a line, as determined by the total RENs, contact your local telephone
company. e R EN for this product is part of the product identifi er that has the format US: AAAEQ##TXXXX. e digits
represented by ## are the REN without the decimal point (e.g., 03 is a REN of 0.3).
If this DIRECTV Plus DVR causes harm to the telephone network, the telephone company will notify you in advance that temporary
discontinuance of service may be required. But if advance notice isn’t practical, the telephone company will notify the customer as
soon as possible. Also, you will be advised of your right to fi le a complaint with the FCC if you believe it is necessary.
Page 64

Other Information
e telephone company may make changes in its facilities, equipment, operations or procedures that could aff ect the proper
functioning of your equipment. If they do, you will be notifi ed in advance in order for you to make necessary modifi cations to
maintain uninterrupted service. Connection to party line service is subject to state tariff s. Contact the state public utility commission,
public service commission or corporation commission for information.
If trouble is experienced with this unit, for repair or warranty information, please contact DIR ECTV Customer Care at the address
and phone number listed below. If the equipment is causing harm to the network, the telephone company may request that you
disconnect the equipment until the problem is resolved.
DIRECTV, Inc.
2230 E. Imperial Hwy
El Segundo, CA 90245
1-8 00-DI RE CTV
If your home has specially wired alarm equipment connected to the telephone line, ensure the installation of this DIRECTV Satellite
Receiver does not disable your alarm equipment. If you have questions about what will disable alarm equipment, consult your alarm
company, telephone company or a qualifi ed installer.
DO NOT DISASSEMBLE THIS EQUIPMENT. It does not contain any user-serviceable components.
We recommend the installation of an AC surge arrester in the AC outlet to which this equipment is connected. Telephone companies
report that electrical surges, typically lightning transients, are very destructive to customer terminal equipment connected to AC
power sources.
Page 65

Appendix A - Installation
Hardware Reference 60
Choose Your Setup 62
Guided Setup & Activation 70
Programming Your Remote Control 72
Page 66

Appendix A - Installation
Hardware Reference
General
Satellite Dish Antenna
is is your “dish” and related hardware, affi xed to your roof or other surface, which picks up the broadcast
signals from our satellites.
DIRECTV Plus DVR (or Satellite Receiver)
Your DIRECTV Plus DVR picks up the signal from your satellite dish antenna and translates it into
v i e w a b l e T V p r o g r a m m i n g .
Access Card
Contains info about your DIRECTV® service. It must be properly inserted for your receiver to work and to
a c t i v a t e y o u r p r o g r a m m i n g .
Cables & Connections
Best Video: S-Video Jack and Cable
S-Video jacks and cables provide the best picture quality. You will still need to connect the left and right
audio cables to the TV, or optical audio cable to your stereo, because the S-Video cable only carries the
picture signal, not sound.
S-Video Jack
GUIDE MENU REC
ACTIVE INFO
SELECT
POWER
Page 67

DIRECTV Plus® DVR - User Guide
Audio/Video (A/V) Jack and Cable
Audio/Video (A/V) cables provide very good picture quality and stereo sound, and should be used if your
TV does not have S-Video jacks. e DIRECTV Plus DVR’s A/V jacks are color coded (yellow for video,
red for right audio and white for left audio). If your TV has only one input for audio (mono), connect it to
the left (white) audio jack on the DIRECTV Plus DVR.
Best Audio: Digital Audio Optical Jack and Cable
e Digital Audio Optical cable provides the best quality audio. e jack and cable use light to send digital
audio data to A/V receivers equipped to receive and interpret it. e jack and cable (cable not included)
must be aligned before plugging in, and may be covered by protective caps, which must be removed before
making connections.
RF Jack and Coaxial Cable (F-type)
RF jacks and coaxial cables provide good picture and mono sound quality. ey should be used if A/V
connections are not available on your TV. RF jacks are used to connect to your TV and satellite dish, off -air
antenna and cable feed connections. e RF jacks on the receiver are labeled SATELLITE IN, OFF-AIR
IN and OUT TO TV. Note: Be sure to use RG-6 coaxial cable when connecting from the satellite dish to
the DIRECTV Plus DVR.
Telephone Jack and Cord
e telephone line cord is required to connect your DIRECTV Plus DVR to a land-based telephone line
if you choose to subscribe to DIRECTV programming. e phone line connection is used to periodically
call DIRECTV. You will need an RJ11-type modulator jack (the most common type of phone jack). Note:
Do not connect your receiver to a digital PBX phone system — doing so may permanently damage your
equipment and void your warranty.
Note: Not all cables
come with your digital
satellite receiver; you
may need to purchase
additional cables
depending on your
setup.
RF Jack
Phone
Jack
Digital Audio
L
R
R
Video
Page 68

Appendix A - Installation
Choose Your Setup
ere are several ways to connect your receiver to match your particular equipment setup and to gain
optimum signal quality. e basic steps are as follows:
• Connect the satellite dish cable to your receiver.
• Connect the receiver audio and video to your TV or VCR.
• If you connected the receiver to a VCR, connect the VCR to your TV.
• Connect the receiver to a telephone line.
• Plug in all power cords.
e following pages give detailed instructions on the types of connections you can make, depending on the
equipment you have, in order to get the best picture and sound quality. Note that the back panels of your
TV and other equipment may not exactly match those illustrated.
Connecting Your DIRECTV Plus DVR to the Satellite Dish
Connect the RG-6 RF coaxial cable(s) from your satellite dish to the jack(s) labeled SATELLITE IN on the
DIRECTV Plus DVR. Note that in order to take full advantage of your DIRECTV Plus DVR’s features,
you should connect a coaxial cable to each of the two SATELLITE IN connectors.
To obtain optimum picture quality, make sure the receiver is connected directly to the TV. Connecting the receiver to the TV
Important
Page 69

DIRECTV Plus® DVR - User Guide
Connecting Your DIRECTV Plus DVR to your TV or VCR
Depending on the connections on the back of your TV or VCR, you have the following options:
• S-Video & Digital Optical (or A/V Audio) Connection (Best Quality)
• A/V Connection (Better Quality)
• RF Coaxial Connection (Good Quality)
ese connections are described on the following pages.
Page 70

Appendix A - Installation
When working with
cables, be sure to
connect corresponding
outputs and inputs
(Video OUT to Video IN,
Right Audio OUT to Right
Audio IN, etc.). Never
connect an IN to an IN or
an OUT to an OUT.
All A/V jacks and inputs
are color coded. Always
match the color of the
plug to the same color of
the jack.
OUT IN
S-Video & Digital Optical (or A/V Audio) Connection (Best Quality)
Using the S-Video cable, connect one end to the S-VIDEO output jack on the DIRECTV Plus DVR and
the other end to the S-Video input jack on the TV.
If your TV has a Digital Optical input, connect it to your DIRECTV Plus DVR using a digital optical
cable. (Note: is cable is not included with your DIRECTV Plus DVR.)
Otherwise, using the A/V cable, connect the white and red plugs from one end of the A/V cable to the
AUDIO L (white) and R (red) jacks on the back of the DIRECTV Plus DVR. Connect the plugs from
other end of the A/V cable to the corresponding audio input jacks on your TV or VCR. Do not plug the
video (yellow) into either the DIRECTV Plus DVR or the TV.
If hooking up a VCR, use another A/V cable to connect the white and red plugs from one end of the
A/V cable to the audio L (white) and R (red) and video (yellow) Output jacks on the back of the VCR.
Connect the plugs from the other end of the A/V cable to the corresponding input jacks on your TV. en,
use another A/V cable to connect the white and red plugs from one end of the A/V cable to the AUDIO
L (white) and R (red) and VIDEO (yellow) OUTPUT jacks on the back of the DIRECTV Plus DVR.
Connect the plugs from other end of the A/V cable to the corresponding input jacks on your VCR.
Now, continue on page 72, “Connecting Your DIRECTV Plus DVR to Your Telephone Line.”
Page 71

DIRECTV Plus® DVR - User Guide
BEST QUALITY CONNECTION – S-Video & A/ V or Digital Optical Audio
The back panels of your equipment may not look exactly like those illustrated.
OFF-AIR
IN
OUT
TO TV
CHANNEL
SATELLITE IN
DIRECTV Plus Receiver
OR
T elevisio n
Page 72

Appendix A - Installation
A/V Connection (Better Quality)
Using the A/V cable, connect the white, red and yellow plugs from one end of the A/V cable to the AUDIO
L (white) and R (red) and VIDEO (yellow) output jacks on the back of the DIRECTV Plus DVR. Connect
the other end of the A/V cable to the corresponding A/V input jacks on your TV.
If hooking up a VCR, using another A/V cable, connect the white, red and yellow plugs from one end of
the A/V cable to the AUDIO L (white) and R (red) and VIDEO (yellow) output jacks on the back of the
DIRECTV Plus DVR. Connect the other end of the A/V cable to the corresponding input jacks on your
VCR.
en, run an A/V cable from the VCR’s A/V output to the TV’s A/V inputs. is will allow you to watch
videotapes. NOTE: If your TV only has one set of A/V input jacks, this connection can also be made by
running a RF cable from the VCR’s out to TV jack to the TV’s antenna in jack.
Now, continue on page 68, “Connecting Your DIRECTV Plus DVR to Your Telephone Line.”
To switch between
watching your VCR
and watching video
from your receiver, you
may need to program
the INPUT key on your
DIRECTV Remote. (See
page 72 for info.) Some
TVs also have a menu
button that allows
you to change the
video source using an
onscreen menu. If you
have trouble changing
the video source, refer
to the instructions that
came with your TV.
TIP
If your TV only has one audio input jack use AUDIO L (white) jack on the back of the DIRECTV Plus DVR to make the connection.
Important
Page 73

DIRECTV Plus® DVR - User Guide
VERY GOOD QUALITY CONNECTION – A/V
The back panels of your equipment may not look exactly like those illustrated.
Television
OFF-AIR
IN
OUT
TO TV
CHANNEL
SATELLITE IN
DIRECTV Plus Receiver
Page 74

Appendix A - Installation
RF Coaxial Connection (Good Quality)
Using an RF coaxial cable, connect one end to the OUT TO TV jack on the DIRECTV Plus DVR and
the other end to the antenna in jack on the TV.
Set the 3/4 switch on the back of the DIRECTV Plus DVR to the “blank” local channel for in your area.
For example, if you have a local Channel 3 in your area, then move the 3/4 switch to Channel 4. If you
have a local Channel 4, then set the switch to Channel 3. To watch DIRECTV programming, tune your
TV to Channel 3 or 4 (depending on the position of the 3/4 switch in step 3 above).
Connecting Your DIRECTV Plus DVR to Your Telephone Line
Plug one end of the telephone cord into a phone jack on your wall (or into a phone splitter that is plugged
into a phone jack) and the other end into the PHONE JACK on the back of the DIRECTV Plus DVR.
Completing the Connections
Plug all power cords into electrical sockets.
Now, turn to page 70 to learn about Guided Setup and Activation.
To switch between
watching your VCR
and watching video
from your receiver, you
may need to program
the INPUT key on your
DIRECTV Remote. (See
page 72 for info.) Some
TVs also have a MENU
button that allows
you to change the
video source using an
onscreen menu. If you
have trouble changing
the video source, refer
to the instructions that
came with your TV.
TIP
This connection can also be made using A/V cables if your VCR has A/V inputs. To connect using the A/V cables, connect the
audio L (white), R (red) and video (yellow) plugs from one end of the A/V cable to the AUDIO 1 L and R and VIDEO 1 jacks on
Note
Page 75

DIRECTV Plus® DVR - User Guide
GOOD QUALITY CONNECTION – RF Coaxial
The back panels of your equipment may not look exactly like those illustrated.
Television
DIRECTV Plus Receiver
OFF-AIR
IN
OUT
TO TV
CHANNEL
SATELLITE IN
Page 76

Appendix A - Installation
Guided Setup & Activation
Now that your receiver and equipment are all hooked up and plugged in, you’re ready to
fi nish all the details to begin receiving your DIRECTV service.
1) Make sure the MODE SWITCH on the remote control is set to DIRECTV.
2) Press TV POWER ON. e DIRECTV Plus DVR will turn on.
3) e fi rst screen will allow you to select a language. Using the arrow keys on the remote control, move
to the language you prefer and press SELECT.
4) You will see a Welcome screen.
Now, let us lead the way…
Simply follow the onscreen directions to complete your setup functions. If you’ve installed your satellite
dish and system yourself, you’ll be guided though various functions for optimizing your signal and setup —
including positioning your dish and a system test. If, like most people, you had your system professionally
installed, these functions already have been completed.
After these setup procedures are complete, you’ll see the Satellite Data Acquisition screen, as the receiver
gathers information from the satellite for the onscreen program guide.
Next, you’ll be given the opportunity to set up your phone connection, as well as program your remote to
control other equipment such as your TV and/or DVD player. Just follow the screen instructions and you’ll
be ready to watch in no time!
You may decide to set
up, change or adjust
some of the settings
later. When you’re
ready, press MENU
on your remote, press
SELECT on Settings
then select Setup.
TIP
SELECT
MENU
Page 77
DIRECTV Plus® DVR - User Guide
Activate Your DIRECTV Service
Once all the setup processes are complete, all that’s left to do is activate your DIRECTV service. Before
you make the call, be sure to:
Tune to Channel 100 and be sure you’re picking up a satellite signal (DIRECTV channel).
Have on hand your service address, social security number and a valid major credit card.
Note your access card and receiver ID numbers (fi nd these by pressing MENU, then go to Settings and
press SELECT). en go to Setup and press SELECT. Highlight Info & Test and press SELECT.
When you’re ready, just call 1-800-DI R ECTV (1-800-347-3288) and pick the programming package that’s
right for you. Easy!
In order to protect your TV screen from burn-in (a side-effect caused when a stationary image is displayed for too long), the
DIRECTV Plus DVR interface automatically goes into screen saver mode, and displays a black screen with a moving logo when
no key is pressed for 5 minutes or more while a stationary image is displayed on the TV. To dismiss the screen saver and return to
what you were doing, press any key on the remote. Burn-in may cause permanent damage to your TV and DIRECTV is not liable
Important
Page 78

Appendix A - Installation
Programming Your Remote Control
You can program the DIRECTV Remote Control to operate your TV power, volume and mute, additional
equipment such as a DVD, VCR, stereo, or second TV or DIRECTV Plus DVR.
1) Press MENU to display the Menu.
2) Highlight Settings and press SELECT.
3) Highlight Setup and press SELECT.
4) Press SELECT on Remote in the left menu.
5) Follow the onscreen instructions to program your remote for your TV or additional equipment (AV1
and AV2).
Once your remote is programmed to work with your TV, the VOL and MUTE key control the TV
regardless of the slide switch position. If you would like to change the VOL and MUTE to work with
another component, you can. Simply set up your remote to work with the component, and then move the
slide switch to the position you would like to lock the VOL and MUTE keys to. Point the remote away
from your DIRECTV Plus DVR and press and hold MUTE and SELECT until the light near the slide
switch blinks twice (about 5 seconds). Enter 9-9-3. e light will blink twice, indicating the VOL and
MUTE are now locked to the chosen component, no matter what position the slide switch is in.
Page 79

DIRECTV Plus® DVR - User Guide
Factory Defaults
To reset all the functions of the remote control to the factory defaults, follow these steps:
1) Point the remote away from your DIRECTV Plus DVR and components. Press and hold MUTE and
SELECT until the light above the slide switch on the remote fl ashes twice (about 5 seconds).
2) Enter 9-8-1. e light on the remote will fl ash twice, indicating you have cleared AV1, AV2 and TV
modes.
Page 80

Appendix A - Installation
Page 81

DIRECTV Plus® DVR - User Guide
Index
A
Access card iii, 5, 28, 29, 49, 53, 60
ARROW keys 4
Audio options 15, 30
Dolby® Digital 5.1 31
B
Back panel 44, 65, 67, 69
Batteries 44, 47, 49, Back Cover
Bookmarks 13, 40
C
Cables iii, 7, 44, 49, 60, 61, 64, 66,
68
Caller ID
notifi cation 35
problems 43
Category Sort 32
Channel banner 5, 15, 35, 44
Channel list 37
Connections 44, 49, 60, 61
D
Date & Time 33
Digital audio 61
DIRECTV Active™ 11
DIRECTV mode 43, 47
DIRECTV PROTECTION PLAN
54
DIRECTV Receiver Problems 43
Dish-pointing coordinates 48
Dolby® Digital 5.1 31
E
EXIT Back Cover
EXIT key 32
F
Favorites 15, 34, 45
FCC Customer Information 56
Find by 33
Fine-Tuning the Signal 50
FORMAT Back Cover
G
Guide 4, 15, 18, 32, Back Cover
Guided Setup 48, 68, 70
GUIDE key 4, Back Cover
I
INFO key 15, 18, 44, Back Cover
J
Jacks iii, 7, 44, 49, 60, 61, 64, 66,
68
L
Language 70
Lock 38
Locking the system 38
Page 82

Index
M
Menu 4, 28, 36, 48, 49
MENU key 4, 28, 32, 33, 38, 39,
45, 49, 68, 70, Back Cover
Messages 15, 35
Mini Guide 19
MODE switch 47, Back Cover
remote control 47, 49
Movie ratings 36
MUTE key 11
My Playlist 13, 22, 24, 25, 40, 45
N
Notifi cation (Caller ID) 35
O
One-Touch Record 21
P
Parental Controls 15, 29, 36, 38, 39
channel blocks 15, 29, 36, 38, 39
ratings 15, 29, 36, 38, 39
spending limits 15, 29, 36, 38, 39
unlocking 15, 29, 36, 38, 39
unrated programs 15, 29, 36, 38,
39
viewing hours 15, 29, 36, 38, 39
Passcode 38, 39
Pay Per View 2, 17, 23, 32, 37
Playlist 13, 24, 40, 46, 47
Power surge 44
Previous channel 11, 44
Program details 15
Program guide 15, 42, 51, 70, Back
Cover
date & time 42, 51, 70
quick menu 42, 51, 70
scrolling 42, 51, 70
sorting 42, 51, 70
tuning to a program 42, 51, 70
using 42, 51, 70
Programming 2, 4, 11, 33, 37, 45,
51, 60, 61, 68
ordering 2, 4, 11, 33, 37, 45, 51,
60, 61, 68
remote control 72
tuning to 2, 4, 11, 33, 37, 45, 51,
60, 61, 68
Purchases 23
R
Ratings 36
Rear panel ii, 6
Recent Finds 33
Record a program 12, 18, 20, 21,
22, 45, 46
Remote control 4, 11, 15, 18, 23,
28, 34, 37, 42, 43, 44, 45,
47, 48, 49, 66, 68, 70
keys 4, 11, 15, 18, 23, 28, 34, 37,
42, 43, 44, 45, 47, 48, 49,
66, 68, 70
modes 4, 11, 15, 18, 23, 28, 34,
37, 42, 43, 44, 45, 47, 48,
49, 66, 68, 70
problems 4, 11, 15, 18, 23, 28,
34, 37, 42, 43, 44, 45, 47,
48, 49, 66, 68, 70
programming 4, 11, 15, 18, 23,
28, 34, 37, 42, 43, 44, 45,
47, 48, 49, 66, 68, 70, 72
RESET 42, 45
Resolution Back Cover
Page 83

DIRECTV Plus® DVR - User Guide
S
Satellite Data Acquisition 70
Satellite Setup 48
Scheduler 29
Search 17
Settings 39, 49, 70
Setup 44, 45, 48, 49, 62, 68, 70
Showings 17
Spending limit 37
System Test 42, 49
T
Temporarily unlock 38
Timer 44
To Do List 22, 23, 24
Troubleshooting 42
Tuning to a program 47
TV ratings 36
U
Unlock a particular program 38
W
Warranty iii, 51, 52, 53, 61
Page 84

ACTIVATION OF PROGRAMMING MAY BE SUBJECT TO CREDIT APPROVAL. PREPAYMENT MAY BE R EQUIRED. CREDIT CARD REQURED
(except in MA & PA). DIRECTV prog ramming available separately. Programming subject to change. DIRECTV services not ava ilable outside the U.S . DIRECT V pro-
gramming is sold separately and independently of DIRECTV System hardware. A valid programming subscription is required to operate DIRECTV System hardware.
Activate your DIRECTV programming today at 1-800-DIRECTV (1-800-347-3288). Dolby and the double-D symbols are trademarks of Dolby Laboratories. ©2007
DIRECTV, Inc. DIR ECTV and the Cyclone Design logo, DIRECTV Plus, the DIRECTV Plus logo, DIRECTV Active and ADVANCED PROGR AM GUIDE are
trademarks of DIRECTV, Inc.
is product incorporates copyright protection technology that is protected by U.S. patents and other intellectual property rights. Use of this copyright protection
technology must be authorized by Macrovision Corporation, and is intended for home and other limited viewing uses only unless otherwise authorized by Macrovision.
Reverse engineering or disassembly is prohibited.
Due to restrictions imposed by copyright holders, certain programming may include content protection measures that may restrict viewing in high de nition and/or
recording with certain consumer electronics equipment attached to the receiver. Please contact the manufacturer of such equipment for additional information.
Rev. 1.2 — R16.071029
Page 85

Icon Reference
Arrow Icons
Indicate that a show’s start or end time is earlier or
later than is visible in the Guide program cell.
LEFT and RIGHT arrows on the remote o er special
functionality.
Objects are scrollable above or below the visible
window.
UP and DOWN arrows on the receiver front panel
o er special functionality.
Scheduler Icons
Shows a Record has been set for a future program.
Indicates a Record has been set for all episodes of an
ongoing program.
Indicates a program is currently recording.
Shows an Record has been set for matching programs
in a Search.
Indicates a present or future pay per view program has
been scheduled for purchase.
Other Icons
Denotes one or more alternate audio tracks available
for a program.
Denotes that no alternate audio tracks available.
Indicates one or more new messages are in the Inbox.
Indicates no new messages are in the Inbox.
Shows that Parental Control limits are currently
“locked.”
Shows that limits are temporarily unlocked.
Shows that there are no current limits imposed.
Indicates a rating level or channel that is blocked via
Parental Controls.
Indicates a pay per view program is available as an All
Day Ticket replay.
Indicates program shown in letterbox format.
Denotes an error condition has occurred.
Page 86

To program your remote control:
1. See “Programming Your Remote Control” on
page 72.
To place batteries in your remote control:
1. Slide the battery compartment cover
downward to remove it.
2. Insert 2 AA batteries, matching the positive (+)
and negative (–) marks in the compartment.
3. Slide the cover back on.
DIRECTV Remote Control Layout
A good way to begin learning about your DIRECTV
®
System is to familiarize yourself with the
remote control. You’ll fi nd further details throughout the User Guide relating to specifi c functions.
Navigating 101
You’ll fi nd you can get around nearly all onscreen menus the same simple way.
Highlight… a menu or button by using the ARROW keys (up, down, left and right). •
Choose it… by pressing SELECT while the item is highlighted.•
Note: Don’t worry about getting stuck in a menu. You can always press EXIT to return to video.
MODE SWITCH
Changes remote to control other equipment, for
example, a DVD
TV INPUT
Changes the “source” — the piece of equipment
whose signal is displayed on your TV
FORMAT
Cycles through HD resolution and screen format
options (not used with DIRECTV Plus DVR)
STOP
In recorded TV, stops playback and displays the
My Playlist™ tab in the Playlist
REPLAY
Jumps back 6 seconds and plays video from that
location
PAUSE
Pauses current video
GUIDE
Displays the onscreen program Guide
ACTIVE
Access the DIRECTV Active™ Channel — local
weather and more!
SELECT
Selects any highlighted item
BACK
Takes you to the screen you visited previously
RED
In Guide, jumps 12 hours back; other functions
vary — look for onscreen hints
MENU
Displays a compact menu of settings and services
GREEN
In Guide, jumps 12 hours forward; other functions
vary — look for hints onscreen
VOLUME & MUTE
NUMB ER KE YS & DA SH
Tune to a channel directly; also input numbers
when needed in onscreen menus;
Press DASH twice to delete a show in the Playlist
DIREC TV & T V POWER ON /OFF
Turns your TV and DIRECTV Plus DVR on and off
POW ER
Turns your DIRECTV Plus DVR and other equipment
on and off, as selected with MODE switch
ADVANCE
Jumps ahead in a recording
FFWD & RE WIND
Press up to four times to fast forward or rewind at
increasing speeds (recorded or live-stored video
only); press PLAY to return to normal play
PLAY
Play current video; press and hold for slow motion
RECORD
In Live TV, records current program; in the Guide,
sets one-touch record for highlighted program
EXIT
Exits any menu and returns to last channel viewed
LIST
Displays the My Playlist screen
ARROWS
Move highlight to items in whatever direction
needed
INFO
Displays info for a highlighted or fullscreen program
BLUE
In live TV, displays the Mini Guide; other functions
vary — look for onscreen hints
YELLOW
In fullscreen TV, cycles through alternate audio
tracks; other functions vary — look for onscreen
hints
CHAN /PAGE
In live TV, changes channel up or down; in a menu,
such as the Guide, scrolls page up or down
PREV
Tunes to last channel viewed
ENTER
Activates channel number entries quickly
Keys in the shaded areas below operate your DIRECTV Plus DVR, or can be programmed to function with
your VCR, DVD player or stand-alone DVR unit.
 Loading...