

Page 1

DIRECTV FIELD SERVICES TRAINING
DIRECTV FIELD SERVICES TRAINING
GenieGO Installation Guide
Gen 1
Gen 2
Page 2

Comparison of Generations 3
Installation Requirements 4
LED Table 6
Gen 2 �������������������������������������������������������������� 6
Gen 1
�������������������������������������������������������������� 7
Installation and Activation 8
Out-of-Home Streaming 13
Interacting with the Customer 14
Demonstrating GenieGO ��������������������������������������� 14
Router Conguration
������������������������������������������� 16
Things to Remember 21
Troubleshooting 22
Installation ������������������������������������������������������� 22
Troubleshooting 23
Reset Button ����������������������������������������������������� 23
Activation
��������������������������������������������������������� 24
DVR Management
����������������������������������������������� 29
Transcoding
������������������������������������������������������ 31
Downloading
����������������������������������������������������� 32
Streaming
�������������������������������������������������������� 33
2
GenieGO
Agenda / Table of Contents
Page 3
3TM3
Comparison of Generations
Remember, the GenieGO allows customers to take
programs from their HD-DVRs and make them available
on their PCs, MACs or other mobile clients. It does so by
connecting to the customer’s broadband-connected or
WiFi-capable home network, a network which has HD-DVRs
included in it.
As part of your professional installation, only PC and Mac
clients will be supported, because, as you know, during the
Out-of-Home Streaming setup, accessing the customer’s
router configuration is required.
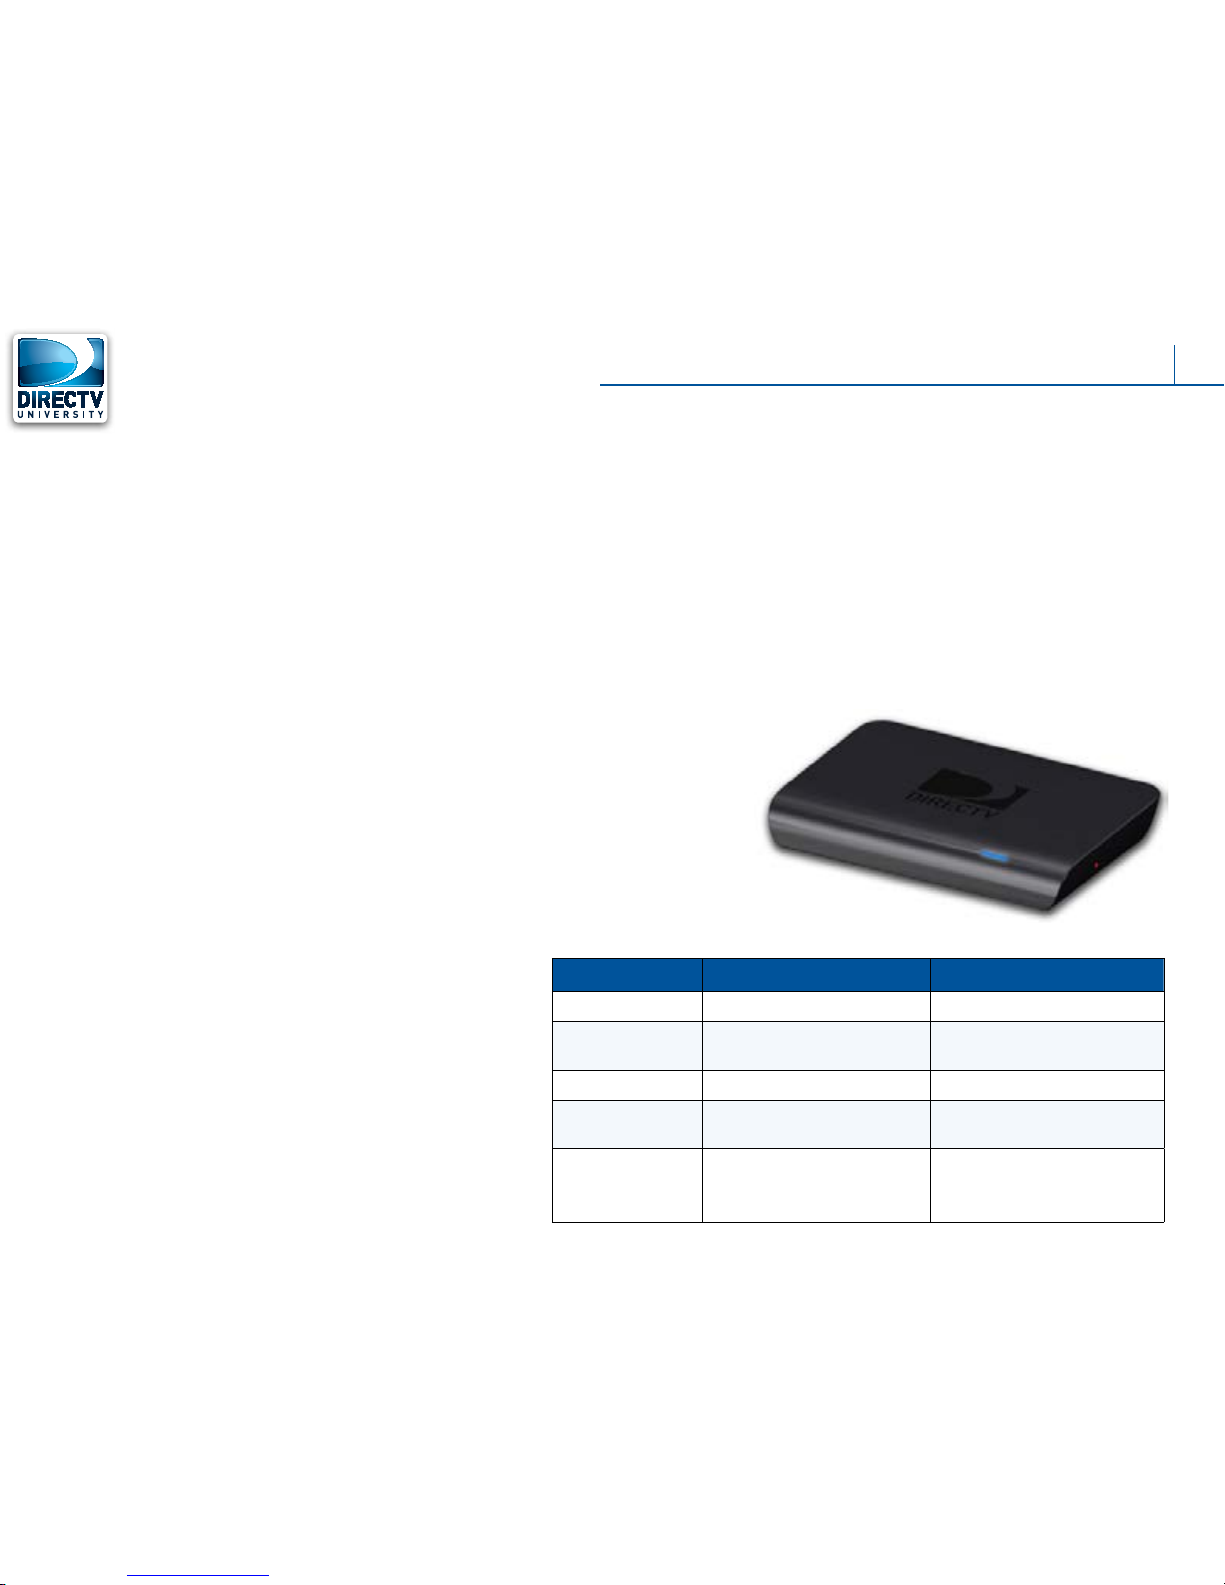
Similarities and Differences from Gen 1 to Gen 2
The next generation GenieGO device is very similar to the
first gen GenieGO. The main differences are the number of
LEDs and the rear panel connections.
GenieGO Gen 2 Specifications
∎ Has a built in MoCA interface, making it capable of
connecting to the customer’s DIRECTV MoCA network
(preferred connection)
∎ Uses the standardized DIRECTV EPS-10 external power
supply (used by other DIRECTV devices)
GenieGO Specifications (common to both generations)
∎ Has 16GB of Flash Memory available for processing
video
∎ One external drive can be used on the GenieGO
connected to the USB port.
∎ The external drives must be USB 2.0 compliant.
∎ The GenieGO will format the external drive(s) prior to use.
The user will be prompted to confirm before the hard drive is
formatted.
∎ If an external drive is used on a GenieGO, that hard drive is
“married” to the GenieGO device.
∎ You cannot move an external hard drive between GenieGOs.
∎ The maximum operating temperature is 50°C/122°F.
∎ The GenieGO has one IEEE Ethernet port.
∎ The back of the GenieGO has an external power cord port
labeled 12V 1.5A.
TABLE 1. GenieGO Differences
Features GenieGO (1st Gen) GenieGO (2nd Gen)
Number of LEDs 3 1
Coax Networking
Capability
No Yes
USB Port(s) Yes (2ea) Yes (1ea)
Power Supply Genesis GTi10-30003 (or
equivalent)
EPS10
Installation Types Ethernet to Router
Ethernet to CCK-W
MoCA (Preferred Professional
Installation method)
Ethernet to Router
DIRECTV GenieGO
Page 4

4TM4
Installation Requirements
Installation Requirements
DIRECTV customers will need to meet the following minimum
requirements in order to use GenieGO:
∎ DIRECTV Model HR2x/R22, HR34 and/or HR44 HD-DVR
∎ The HD-DVR must be connected to the same network as
GenieGO.
∎ DIRECTV HD-DVR Service and HD access
∎ GenieGO Mobile HD-DVR service. This service is added
automatically by the billing system, the agents do not need
to add it manually.
∎ Wireless Router with an available Ethernet port (GenieGo
gen 1 only) (no hotspot or community-based WiFi)
∎ Router must support UPnP multicast and port forwarding
between the user’s local area network and the wide area
network (for Out-of-Home streaming).
∎ Multilple routers are not supported.
∎ DIRECTV.com account login (username and password)
∎ Compatible client(s) (computer, iPad, iPhone etc.)
∎ The network supporting the GenieGO and the HD-DVR
should be at least 12 Mbps and 1.5 Mbps between the
GenieGO and the Client when used for in-home streaming.
∎ Clients must be on the same home network as the GenieGO
and the HD-DVR (for the In-Home streaming and Download
and Go features).
∎ Out-Of-Home Streaming requires minimum network
throughput or upload speed outside of the home to be at
least 256 kbps.
Broadband Connectivity
The GenieGO requires Internet access to confirm
authorization and to check for updates at all times. The
GenieGO client is required to check in with the headend over
the Internet every 30 days from activation; otherwise, it will
disallow access to its interface.
DIRECTV GenieGO
Page 5

5TM5
Installation Requirements
Compatible Devices
The following is a list of hardware requirements the GenieGO
must have to operate normally:
PC
∎ Video Card: 32 MB minimum (128 MB recommended)
∎ Windows OS
∎ XP SP3 and higher
∎ Vista
∎ Windows 7
∎ Windows 8 (non-touch screen)
∎ CPU: 1.2GHz or faster (dual or quad core recommended)
∎ RAM: 2GB minimum
∎ .NET Framework version 4.0 (available from Microsoft at
no charge)
∎ Windows Installer 4.5 - GenieGO client software is 350
MB, download time is based on customers network and
ISP speed
Check www.directv.com/technology/geniego for current
compatibility specifications for the GenieGO.
MAC
∎ Video Card: 32 MB minimum
∎ OS X v.10.7 and higher
∎ CPU: 1.8 GHz or faster
∎ RAM: 2 GB
iOS
∎ iOS 5.0 and higher
Android
∎ Operating System v2.3.4 or higher
∎ All Android supported devices
Be Aware
The GenieGO will not work on a “jail broken” or “rooted” device.
DIRECTV GenieGO
Page 6
6TM6
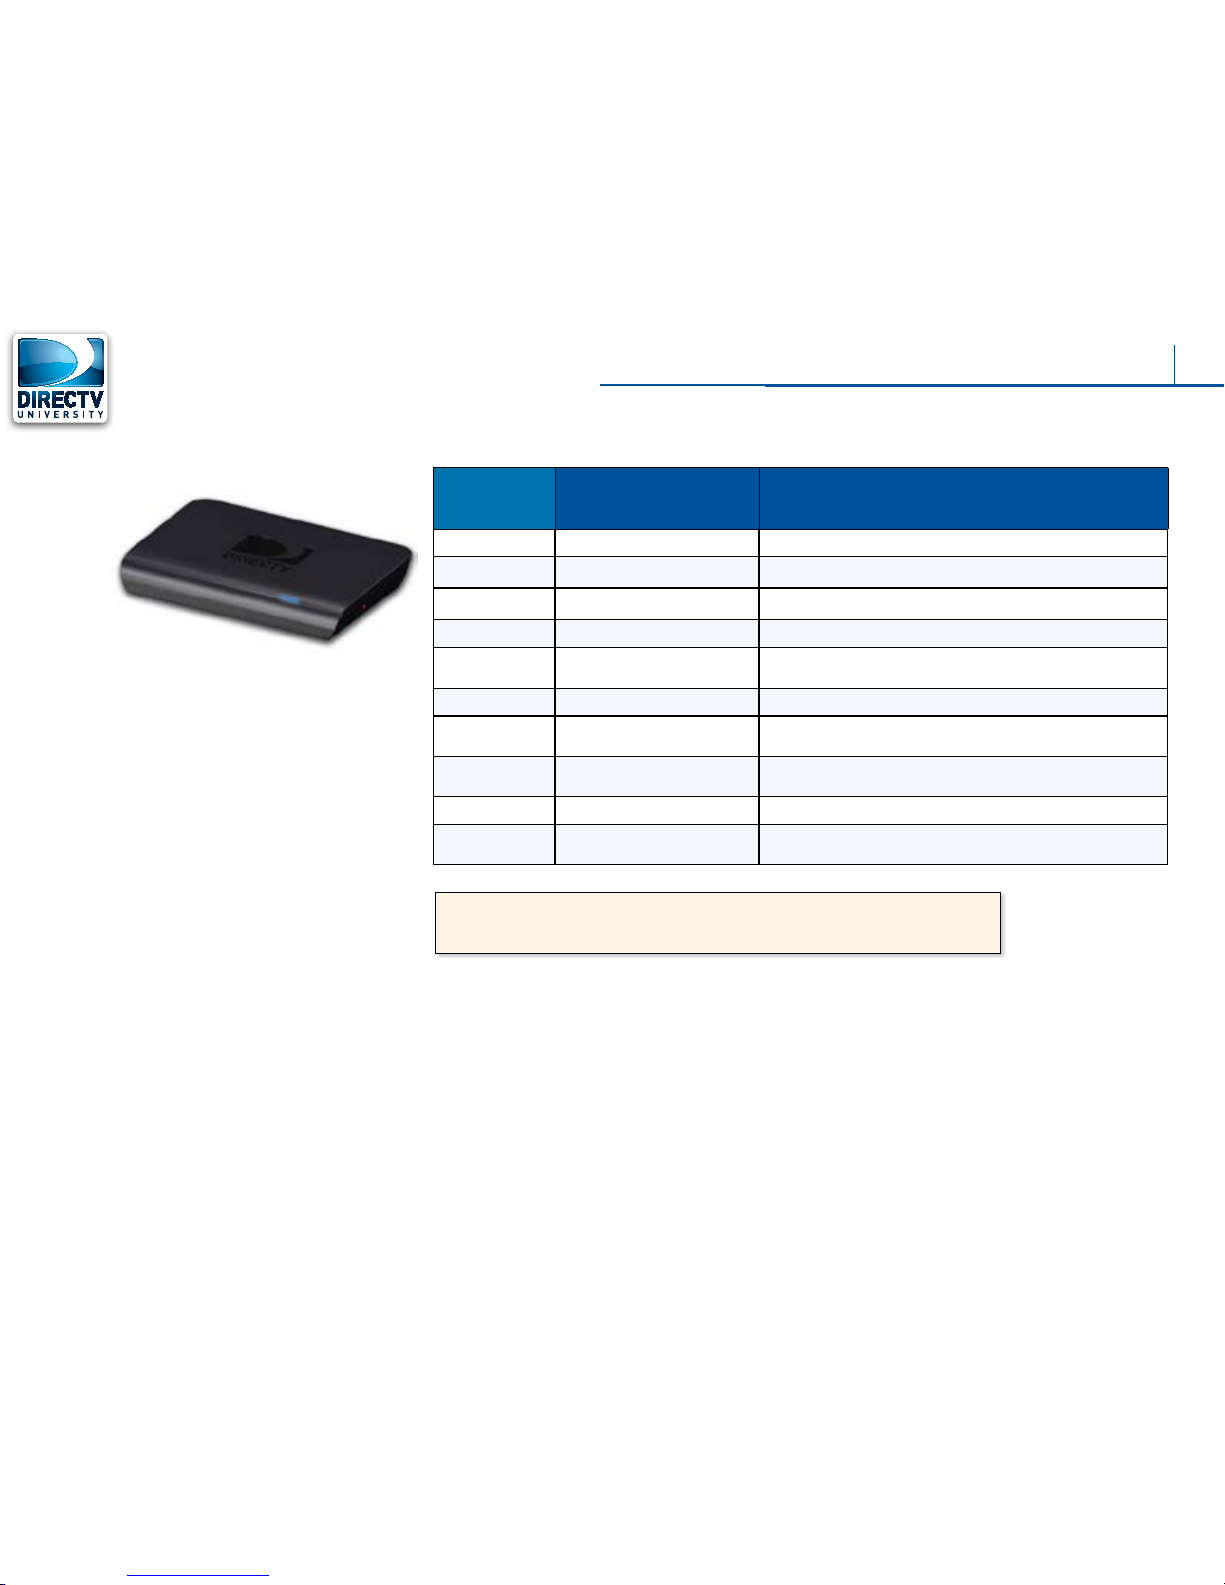
GenieGO (gen 2) LED Table
GenieGO Gen2
Issue Action
Single LED
Off No Power Check the power connection�
Slow Blinking blue Bootup sequence This is the bootup sequence� No action required�
Fast Blinking blue Bootup sequence This is the bootup sequence� No action required�
Red Defective unit The customer needs to replace GenieGO�
White Firmware update * GenieGO is getting a firmware update. No Action required. Let the
GenieGO complete the Update.
Amber Network/Headend connection issue Internet connection issue� Verify network connections�
Blinking Amber Network/Headwend (NS)
Communication Issue
Internet connection issue� Verify network connections
Purple No HD-DVRs detected Verify network connections and installation (this includes GenieGO and
HD-DVRs)�
Blue Normal Operation No action required�
Green Restoring factory defaults Warning period before restoring factory defaults (press reset button > 10
seconds)
* Firmware Update
The GenieGO (gen 2) LED turns white when the firmware update is in process.
LED Table
DIRECTV GenieGO
Gen 2
Page 7

7TM7
GenieGO (gen 1) LED Table
GenieGO Gen1
Issue Action
Status LED Network LED Activity LED
Off Off Off No Power Check the power connection�
Off Blue Blue Firmware update Possible rmware update. Let the GenieGO complete the update.
Off Blue Blinking Blue Firmware update Possible rmware update. Let the GenieGO complete the update.
Blinking White Blue Blue Bootup sequence No action required�
White
Off Off
Bootup sequence No action required�
Red Any Any Defective unit� Defective unit� The customer needs to replace GenieGO
Blinking Amber Any Any Firmware update * GenieGO is getting a firmware update. No Action required. Let the
GenieGO complete the Update.
Amber Off Off Network/Head end Connection
Issue�
Internet connection issue� Verify network connections�
Amber Off Blinking Blue Network/Head end Connection
Issue�
Internet connection issue� Verify network connections�
Amber Off Blue Network/Head end (NS)
Communication Issue�
Internet connection issue� Verify network connections�
Amber Blue Off No HD-DVRs detected Verify network connections and installation (this includes GenieGO
and HD-DVRs)�
Blue Blue Blue, Blinking
Blue
Normal operation No action required�
Blinking Blue Blue Blue, Blinking
Blue
Normal operation No action required�
Pulsating Blue Blue Blue, Blinking
Blue
Normal operation No action required�
Solid Green Any Any Warning period before
restoring factory defaults
Press reset button > 10 seconds
Blinking Green Any Any Firmware log uploading No action required�
* Firmware Update
The GenieGO (gen 1) Status LED light blinks amber when the firmware update is in process.
LED Table
DIRECTV GenieGO
Gen 1
Page 8

8TM8
Installation and Activation
Step 1: Connecting the GenieGO
Remember the GenieGO second generation has a coax
receptacle for MoCA connection. This is the preferred
connection method. The first generation does not have this
capability and therefore can only be connected via Ethernet
cable.
DIRECTV System Connection Sequence
When installing a GenieGO on a new DIRECTV install, connect
and activate all HD-DVRs first. Make sure all HD-DVRs are
connected to broadband Internet. Then and only then should
you proceed with the GenieGO installation.
Power On and LED States
1. Plug one end of the GenieGO power cord adapter into the
port labeled “12V 1.5A” on the back of the GenieGO and
the other end into the nearest electrical outlet.
2. A green LED on the back of the GenieGO confirms the
proper connection.
3. Verify connections. If all connections were made correctly,
the following LED colors display on the GenieGO device:
∎ The LED status light will flash blue during the bootup
sequence.
∎ Once the GenieGO has booted up and is ready, the
flashing blue light will turn to a steady blue.
∎ The bootup process can take 2-3 minutes.
Firmware Update
The GenieGO will always perform a check for the latest
firmware, and if a newer version is found, will initiate the
download. The LED sequence, in the event of a firmware
download, is as follows:
∎ The LED status light will turn a steady white*.
∎ Once the firmware update is complete and the
GenieGO is ready, the LED status light will turn from
white to blue.
* Status LED blinking amber for the GenieGO (gen 1)
Quick Tip
It’s a good idea to record a short segment (2 or 3 min.) of
programming as soon as possible on a connected HD-DVR. This will
be used during the customer demonstration of the GenieGO.
DIRECTV GenieGO
Page 9

9
TM
Installation and Activation
There are 2 connection types:
∎ Type 1 (preferred) – via MoCA (GenieGO 2nd gen only)
FIGURE 1. With no DECA
FIGURE 2. With DECA
∎ Type 2 – via Ethernet cable to the Router
FIGURE 3. Ethernet Cable to Router
DIRECTV GenieGO
Page 10

10TM10
Installation and Activation
Step 2: Verify the HD-DVR Configurations
1. Verify if the HD-DVR is connected to the home network
(Internet) by selecting the DASH (-) button on the remote
control, or repeat Sat Setup to verify code 88.
2. Verify Share Playlist Function is set to Yes .
3. Verify the External Device Function is set to Allow.
4. Run System Test to verify there are no current errors.
If any error codes are reported, they must be resolved before
continuing with the GenieGO installation.
Step 3: Download the GenieGO Application
Go to www.directv.com/technology/GenieGO
1. After you have physically connected the GenieGO hardware
and verified it has completed its firmware update, inform the
customer that you can now proceed with the client software
download.
2. Ask the customer to log in to their account at DIRECTV.com
on their computer (PC or Mac only), and advise the customer
that you will step away so that the customer can enter their
login information in private. Ask the customer to let you know
when they have successfully logged in.
3. Once you have confirmed that the customer is logged in
to their account, walk the customer through the software
download and installation process.
4. If the customer prefers that you install the GenieGO software,
or asks you to assist in the installation, then you must advise
the customer to log in and enter their password on their own
at every instance where applicable. NEVER volunteer to enter
a password or other login information for the customer, and
respectfully decline if the customer offers to give you their
login information for you to enter.
5. The software download steps are listed in the popup window
on the DIRECTV website. Scroll down to find the appropriate
link for the type of client you are using. Click on the Download
app link.
.NET Framework for PC installation
6. The GenieGO for PC requires Microsoft .NET Framework 4.0.
This is part of the GenieGO PC Client application installation.
During the PC Client application installation, you or the
customer may be prompted about this requirement and given
the option to initiate the install.
If the Microsoft .NET Framework 4.0 is already installed (which is
most likely), skip to Step 8.
DIRECTV GenieGO
Page 11

11TM11
Installation and Activation
7. The Install Shield provides the customer with options to select
a Complete or Custom setup type. The Complete option
should always be chosen.
8. When trying to launch the GenieGO application, if you cancel
or did not complete the .NET Framework installation, you will
be prompted again to download the .NET Framework.
9. The GenieGO installation wizard continues (or begins if the
computer is a Mac or .NET framework is already installed).
10. Once the installation is complete, you can move on to the
Activation process.
Step 4: Activation
Once the application has been downloaded, activating the
GenieGO is the next step. The activation process activates the
GenieGO and PC, Mac or mobile client. A GenieGO device
cannot be activated without a PC or Mac.
Sign in
1. The sign-in screen uses the same customer’s login
information when they set up their account on DIRECTV.
com. The customer should enter their DIRECTV e-mail and
password and click Sign in.
2. The customer is then prompted to name their device. Click
Add Device when complete.
3. The GenieGO then proceeds through the activation
sequence.
4. The client initiates a search for a GenieGO unit on the
network. Before the application activation proceeds, a
GenieGO unit must be discovered on the same network as
the client.
5. Once the GenieGO application is activated, the GenieGO
begins loading content.
The system will automatically create a (default) location to
save the video; however, the customer can click the Browse
button from the Tools icon to choose another location to save
programming content on their computer.
6. Once a storage location has been selected, from the
Configuration screen click Get Started.
DIRECTV GenieGO
Page 12

12TM12
Installation and Activation
Step 5: GenieGO HD-DVR Search
Once the system finds the GenieGO device, the client is
activated and the GenieGO is registered. The final step is for the
GenieGO to search for HD-DVR’s.
1. Once all searches are successful, the playlist from all
connected HD-DVR’s appear.
Installation is now complete and the user can start using the
GenieGO.
Using the GenieGO
GenieGO is easy to use following four simple steps:
1. Open the application on your computer or mobile device
(client).
2. Select a program from the available list.
3. Download the program – this will prepare a mobile copy of
the program (a one-to-one transfer time).
4. Play the program.
In Home Streaming
In Home Streaming allows a selected program to be streamed
to the GenieGO device and then played on the connected
device as soon as it appears in the GenieGO playlist.
∎ Streaming requires a program to be prepared; however,
unlike preparing to download, the streaming occurs
instantly.
∎ The streamed program will not be downloaded to the user’s
device(s). Streaming does not leave a copy of the program
on the GenieGO device for future viewing.
∎ Streaming suspends any downloading of other programs
until the streaming is complete or halted.
Streaming begins as soon as the user selects Watch Now on
the chosen program.
The In-Home Streaming feature is only available when in the
customer’s home wireless network.
Take some time now and practice these steps on the system in
the classroom� Make sure each technician gets an opportunity to
practice�
DIRECTV GenieGO
Page 13

13
TM
Router Setup
Customer chooses to Start Setup from the Out-of-Home Access
setup screen.
The following steps automatically happen next:
1. The router database downloads – up to 10 seconds. If the
router is a known router type, the wizard will attempt to
configure the router automatically. If the router cannot be
identified or the router cannot be automatically configured,
the customer selects their router from the list and manually
enters the router’s login information.
2. If the customer’s router is found and recognized, the
automatic setup process then continues to “testing remote
access”.
3. If successful, a completion screen displays. Click Done.
4. The customer can now view content remotely on a selected
device once they log in to their home network.
Router Configuration Failure
If the router configuration wizard has failed, follow these steps to
try and resolve the problem:
1. Read through and follow the onscreen instructions. Make
sure the router and network don’t have any issues then select
Try Again.
2. Once Try Again is selected, the ports are incremented and
the configuration is attempted again.
3. If the same failure screen appears, you should call ISS
and the customer should select the www.directv.com/
technology/GenieGO link for further guidance.
Out-of-Home Streaming
Once the Activation process completes, the GenieGO then
checks to see if the customer’s wireless router is configured for
Out-of-Home Streaming. If the router requires configuration,
there is a wizard that continues through the setup.
This wizard is only available on the PC and Mac client. If the
customer does not have a PC or Mac, the other mobile clients
will direct the user to the manual configuration tool on the directv.
com website.
The client will then automatically proceed to verify if the
customer’s router is already configured to allow the out-of-home
feature. If the router is not properly configured or cannot be
verified to support out-of-home streaming, the next screen will
request if they wish to set up the out-of-home streaming.
Out-of-Home Streaming
DIRECTV GenieGO
Page 14

1414
GenieGO Demonstration
Generally, it is recommended you educate the customer on the major functionality of the GenieGO itself – the Sync and GO
(transcode/download) function and the Streaming function. When you are demonstrating the HD-DVR functionality to the customer,
think ahead to demonstrating their new GenieGO features; once activation is complete, record 3 minutes of one program, and start
another recording and let it run. That way, when you begin the GenieGO demo, you will have 2 things available on the playlist.
Demonstrating GenieGO
1. Pick the 3 minute content and show the customer how to
select it to download to their PC.
“Remember that short segment of programming I recorded back
when I was showing you how your HD-DVR records? Well, now
let’s see how that can be downloaded onto your computer with the
GenieGO”
2. Have the customer select the program from within the Poster
or List view on the GenieGO application on their computer.
“Okay, there is the short segment that I recorded earlier. Doubleclick (or single-click if on Mac) on that thumbnail. This brings up
the Program Details popup.”
3. With the Program Details showing, have them select
Download.
“Now, see the Download link? Click on that and the program will
start to download to your GenieGO.”
... continue to explain to the customer as they perform each step
of the download.
Interacting with the Customer
DIRECTV GenieGO
Page 15

1515
GenieGO Demonstration, cont’d
As the short program starts to download, go to the second recording and show the customer how they can select Watch Now to
stream the content – even while it is still recording. Explain that as soon as the first program is downloaded to the computer, it will
be available for viewing on their client, but that the content that they selected to stream will not be “moved” or copied to the their
computer. However, it will remain available on their HD-DVR for watching or downloading to their client at another time.
Demonstrating GenieGO
1. Go to the second recording you began when setting up their
HD-DVR. Explain how it shows up in the HD-DVR Playlist and
the GenieGO Poster or List view. There may be a few seconds
delay as the GenieGO updates content on the HD-DVR
playlist every 30 seconds or so.
“Now, if I could have you go back to the Poster or List view and
find that other recording I started back when I was showing you
how to use your HD-DVR recording functions. Select it so we get
the Program Details popup again.”
2. Have the customer select that recorded program to get to the
Program Details popup and select Watch Now.
“This time I’m going to have you select Watch Now. This will
stream the program straight to your computer. You can start
watching it right away!”
3. Make sure the customer clearly understands the difference
between the Watch Now and Download selections from the
Program Details popup.
“The program is not downloaded to your computer though. This
means once you’re done watching it, a copy won’t remain on your
computer. You’ll have to go through the download steps we just
went over to do this.”
... continue to explain to the customer as they perform each step
of watch now.
Interacting with the Customer
DIRECTV GenieGO
Page 16

1616
Interacting with the Customer
Out-of-Home Streaming requires an open port on the customers wireless router. You will need to be sure to ask the customer to read
the disclaimer and select Start Setup if they would like to have you proceed with enabling the Out-of-Home Streaming function. You
should never approve this configuration for the customer. If the customer selects Start Setup, the auto configuration function should
happen rather quickly. If the router requires a manual reconfiguration, you should discuss the process with the customer, and confirm
that the customer wants you to proceed before moving forward. Again, you should also let the customer know that they can perform
the configuration themselves, and you can help walk them through it. If the customer wants you to proceed, you should first contact
ISS to have them look up the router make and model, and make sure that the wizard contains instructions for manually reconfiguring
that particular router.
Router Configuration
1. As either a part of a new installation or after the customer
receives the Out-of-Home Streaming client update, upon
launching the GenieGO client, they will be presented with a
splash screen announcing the out-of-home streaming feature.
“Here is the Out-of-Home Streaming decision screen. You can
select Skip or Start Setup. Selecting Skip will leave the Out-ofHome Streaming feature unavailable to you at this time. All other
features of the GenieGO will be available to you as we’ve already
gone over. You can always go back later and set up Out-of-Home
Streaming if you choose to.”
2. Once the customer chooses to Start Setup from the Out-ofHome Access setup screen, the client will verify if it is running
within the home network.
“Okay, now that you’ve chosen to start the Out-of-Home streaming
setup, the GenieGO is going to take a look at your wireless router
and seen if it can connect.”
DIRECTV GenieGO
Page 17

1717
Ask the customer to log in to their router with their SSID and password. Again, never watch as the customer enters this information.
Once logged in, reconfigure the settings so that the feature can be enabled. If on any occasion the router is not supported by the
wizard or if at any time the customer expresses concern or a desire to not reconfigure their router, let the customer know that he or
she can continue with the installation without enabling this feature (the customer can always go back in and enable Out-of-Home
Streaming at a later date). Or, if the customer prefers, you can remove the GenieGO from the order, and return it for the customer.
Interacting with the Customer
Router Configuration
3. This next step is the router database download and router
discovery – this can take up to 10 seconds. If the router is
a known router type, the wizard will attempt to configure the
router automatically.
“This will take a few seconds for your GenieGO to gather your
wireless router information.”
“Now that your GenieGO has found your wireless router, it is
automatically setting it up for Out-of-Home Access. This takes a
few minutes.”
DIRECTV GenieGO
Page 18

1818
4. If the router is identified, the automatic setup process
continues to “testing remote access.”,
“Once the setup is complete the GenieGO then begins testing the
Out-of-Home Access. Again, this may take a few minutes.”
Interacting with the Customer
Router Configuration
5. If successful, the following screen displays.
“If everything passes, you will get this screen. You can now start
using the Out-of-Home Streaming feature of your GenieGO!”
DIRECTV GenieGO
Page 19

1919
6. If the setup fails for any reason, the appropriate screen should
appear. For example, if the router cannot be identified or the
router cannot be automatically configured, the customer will
be presented with a list of routers to choose from and will be
prompted for the router’s login information.
“So, it looks like the GenieGO couldn’t identify or automatically
configure your router. This means we will have to manually set up
your router. Like we did with the software download, I can do this
for you, but you will need to enter your login information when it
asks for it.
Or you can do the steps yourself, and I can help you out where you
may have questions.”
Interacting with the Customer
Router Configuration
DIRECTV GenieGO
Page 20

2020
7. Instructions for resolving the issue will be included in the
popup. If, after several retries, you and/or the customer are
unable to resolve the issue, the customer should select the
www.directv.com/technology/GenieGO link.
“This popup indicates that your GenieGO was not able to connect
to your receiver for Out-of-Home Access. Let’s go take a look
at your home network connections and make sure everything is
correct. Then let’s click on Repeat Setup. If that doesn’t fix it, we’ll
call Customer Service.”
Interacting with the Customer
Router Configuration
DIRECTV GenieGO
Page 21

TM
21
Things to Remember
Here are some things to keep in mind when installing the
GenieGO.
Quick Tip
Any HD-DVR’s the customer wishes to share content with the
GenieGO, must be connected to the same network (for Ethernet
connections only).
Quick Tip
In some cases, the customer’s firewall settings may prevent
the software download. If this occurs, inform the customer they
must resolve this firewall issue before you can continue.
Otherwise, you will not be able to continue with the installation.
Be Aware
At no time should you observe the customer entering their login
information into their computer.
Learn More
If a customer deletes a device for any reason, they cannot add or
reactivate that same device for 30 days.
Quick Tip
The customer must have administrator rights to the PC or Mac
that will be connected to the GenieGO. At various points during
the installation, it may be necessary for the customer to gain
access to programs that are behind this gateway.
Remember
GenieGO allows customers to take programs from their HDDVRs and make them available on their PCs, MACs or other
mobile clients. It does so by connecting to the customer’s
broadband-connected or WiFi-capable home network, a network
that has HD-DVRs included in it. For professional installation,
only PC and Mac clients are supported.
Things to Remember
Remember
For any troubleshooting issues or questions you should always
call ISS for resolutions.
DIRECTV GenieGO
Page 22

22TM22
Troubleshooting
Troubleshooting Guidelines
Troubleshooting for GenieGO is categorized into seven sections:
1. Installation
2. Activation
3. DVR Management (ability to maintain playlist from authorized
DVRs after activation)
4. Transcoding/Preparing (Sync and Go)
5. Downloading (Sync and Go)
6. In Home Streaming
7. Out-of-Home Streaming
Installation
During the power-up process, the GenieGO device LEDs will
transition from powering up, establish a network connection (IP
address), update firmware and discover DVRs. Refer to the LED
tables in the previous section of this document.
If the LED turns red, the GenieGO is defective and must be
replaced*.
Make sure the customer has met all the prerequisites listed In the
Installation Requirements.
* At this time, swapping out a GenieGO unit with one from your truck
is not permitted. There is currently no systemic support for GenieGO
replacement. If it is determined through the troubleshooting steps that
a GenieGO is defective and requires replacement, you should instruct
the customer to call Customer Care and request a replacement due
to technician-validated equipment failure. Each GenieGO is tied to
a customer’s account via an outside headend server as soon as it is
activated. Only one GenieGO can be tied to an account at any given
time. The only way to sever the relationship of the existing unit from
the customer’s account requires manual intervention by a specialized
Engineering team. While no process currently exists to allow us to do
this from the field, we have requested an enhancement and hope that
this will be supported via the handheld in the future.
Installation Requirements
■
The customer must have an active and operational HD-DVR before
installing GenieGO with external access set to “allow”.
■
HD-DVR must be connected to the same network as GenieGO.
■
The customer must have a Directv.com login (username and
password) before installing GenieGO.
■
The customer must have at least one supported GenieGO client
device with supported OS version.
■
The customer must know the router’s administrator login
(username and password) even if they were never changed from
default.
■
The customer must have a wireless router (no hotspot or
community-based WiFi).
■
Multiple routers are not supported.
DIRECTV GenieGO
Installation
Page 23

Troubleshooting
23
GenieGO
Pressing the red button to reset the GenieGO can resolve some issues that are pointed out in the Troubleshooting steps on the
following pages. These flow diagrams illustrate what a reset does depending on the length of time the button is depressed.
Reset Button
Page 24

24TM24
Troubleshooting
Activation
Once GenieGO/GenieGO2 is displaying blue LED(s) “Normal
Operation” client software download (application installation) can
begin.
The following represent some symptoms that could be
experienced during client activation:
User login fails after launching client application for the first time.
∎ Verify customer can log in to their DIRECTV online account
using the client device itself, e.g. iPhone, Android, PC. (This
ensures the device is connected to the Internet and the
customer can log in to their account.)
∎ Attempt to resolve by changing password on DIRECTV.com
(possibly related to account credential mismatch).
∎ If these steps fail:
∎ Technician escalates to ISS who escalates to Incident/
Problem Management
∎ Agents escalate to Incident/Problem Management
Error message: “Unable to activate. Your GenieGO cannot be
found”
∎ Verify LEDs are blue.
∎ Verify the GenieGO, Client device and HD-DVRs are
connected to the same network (customer’s home network
and not a guest network or other local area network). All
of these devices should have the same IP scheme except
the last set of number, e.g. 192.168.1.xxx where the xxx will
always be unique.
∎ Try manually entering GenieGO serial number.
∎ Customer may have advanced networking components
or settings, i.e. switches or firewalls. If this is the case, the
customer will need to ensure GenieGO has access to all
HD-DVR’s and DIRECTV backend systems by using the
Network Assistant.
∎ Run Network Assistant* using a PC or MAC. If any of the
6 green network indicators are missing, follow existing
troubleshooting.
Error message and codes:
PC:
∎ Message: Unable to connect to a DIRECTV GenieGO
device (5-33-0)
Other:
∎ Message: Your DIRECTV GenieGO cannot be found on your
home network. Please Try Again or visit www.directv.com/
GenieGO for more information. (8-27-0)
Learn More
* The Network Assistant can be accessed via
Help>System Info>Diagnostic
DIRECTV GenieGO
Activation
Page 25

25
TM
Troubleshooting
Activation
Error message: “Unable to add your device, missing one or more
system requirements”
∎ Verify LEDs are blue.
∎ Verify the GenieGO, Client device, and HD-DVRs are
connected to the same network.
∎ Verify the integrity of the installation and MoCA network
∎ On the most advanced HD-DVR (e.g., HR44) run System
Test and troubleshoot for any errors.
∎ Run Network Assistant using a PC or MAC (if any of the 6 green
network indicators are missing, follow existing troubleshooting).
∎ If these steps fail:
∎ Technician escalates to ISS who escalates to Incident/
Problem Management.
∎ Agents escalate to Incident/Problem Management.
Error message and codes:
PC:
∎ Message: Unable to activate client, one or more requirements
are missing to activate your device. Please retry or visit www.
directv.com/GenieGO for more information. (2-0-1)
Other:
∎ Message: Unable To Activate Device. You are missing one or
more system requirements to activate your Device. Please refer
to the Quick Start Guide, Owner’s Manual, or visit www.directv.
com/GenieGO for more information. (AR/1000)
Error message: “There are no recordings at this time”
∎ Playlist has not populated. If this occurs after initially
installing the GenieGO app, it can take up to 10 minutes to
populate the playlist from all the HD-DVR’s.
∎ Possible issue with HD-DVR missing required plugins
(attempt double reboot)
∎ Reboot HD-DVR and wait for video to display then reboot
again.
∎ HD-DVR may be hidden.
∎ Open GenieGO Client application and verify the HD-DVR
is set to Enable DVR
∎ Possible Software issue:
∎ Before escalating, the following minimum information is
required:
∎ On GenieGO, go to Help and select Send Error Report
∎ GenieGO serial number
∎ User dotcom e-mail address
∎ Technician escalates to ISS who escalates to Incident/
Problem Management.
∎ Agents escalate to Incident/Problem Management.
DIRECTV GenieGO
Page 26

26
TM
Troubleshooting
Activation
Error message: “No DVRs configured”
∎ Verify external access set to allow on all HD-DVR’s
∎ Close and relaunch application.
∎ Uninstall application or restore application to defaults and
reactivate client.
∎ If these steps fail, escalate as follows:
∎ Before escalating, the following minimum information is
required:
∎ On GenieGO, go to Help and select Send Error Report
∎ GenieGO serial number
∎ User dotcom e-mail address
∎ Technician escalates to ISS who escalates to Incident/
Problem Management.
∎ Agents escalate to Incident/Problem Management.
Error message and codes:
PC:
∎ Message: Your DIRECTV GenieGO cannot access the
playlist of one or more HD-DVR receivers on your home
network. Please make sure that Share Playlist is set to
Yes and External Access is set to allow in System Setup:
Whole-Home or visit www.directv.com/GenieGO for more
information. (8-54-0)
Others:
∎ Message: An HD-DVR has not been found. No HD-DVR
has been found or the HD-DVR that has been found does
not match our records. Please visit www.directv.com/
GenieGO for more information. (AR/4005)
DIRECTV GenieGO
Page 27

27
TM
Troubleshooting
Activation
The following are symptoms that could be encountered during
the setup of Once Out-of-Home:
Error message: “Router could not be found”
∎ Verify the client is on the same network as the GenieGO and
HD-DVR’s.
∎ Verify the correct router is selected in the dropdown list and
reattempt.
∎ Verify the customer has only one router.
∎ Attempt to use the online tool to manually configure the
router.
∎ The customer can verify the proper router ports are open for
GenieGO by using canyouseeme.org.
∎ If these steps fail, escalate as follows:
∎ Before escalating, the following minimum information is
required:
∎ On GenieGO, go to Help and select Send Error Report
∎ GenieGO serial number
∎ User dotcom e-mail address
∎ If these steps fail, escalate as follows:
∎ Technician escalates to ISS who escalates to Incident/
Problem Management
∎ Agents escalate to Incident/Problem Management
Error message: ‘Out-of-Home failed to setup’
∎ Verify the client is on the same network as the GenieGO and
HD-DVR’s.
∎ Verify the customer has a router (no hotspot or modem only
setup).
∎ Verify the customer does not have multiple routers in their
network. (More than one router is not supported. If the
customer insists, advanced instructions are offered on
DIRECTV FAQs, and DIRECTV will not troubleshoot any
further.)
∎ Verify the router make/model is listed in the wizard (If not,
refer to DIRECTV.com FAQs).
∎ Have the customer verify the router has UPnP enabled.
∎ Have the customer verify the router has current firmware.
∎ Have the customer verify ISP is not blocking ports being
used by GenieGO (canyouseeme.org).
∎ Verify Internet Explorer has JavaScript enabled (if using
Internet Explorer).
∎ Apple routers only: Have the customer verify NAT PMP is
enabled. Customer must download Airport Utility if they are
using a PC.
∎ Before escalating, power cycle the router and reset the
GenieGO and client being used to configure GenieGO.
∎ If these steps fail, escalate as follows:
∎ Before escalating, the following minimum information is
required:
∎ On GenieGO, go to Help and select Send Error Report
∎ GenieGO serial number
∎ User dotcom e-mail address
∎ Technician escalates to ISS who escalates to Incident/
Problem Management
∎ Agents escalate to Incident/Problem Management
DIRECTV GenieGO
Page 28

28
TM
Troubleshooting
Activation
Symptom: Setup complete, but Out-of-Home still fails:
Note: Out-of-Home streaming can only be setup using a PC or
Mac.
∎ Relaunch client and re-run test.
∎ Verify the customer does not have multiple routers in their
network. (More than one router is not supported. If the
customer insists, advanced instructions are offered on
DIRECTV FAQs and DIRECTV cannot troubleshoot any
further.)
∎ Have the customer verify the router has current firmware.
∎ Have the customer verify ISP is not blocking ports being
used by GenieGO (canyouseeme.org).
If these steps fail, escalate as follows:
∎ Before escalating, the following minimum information is
required:
∎ On GenieGO, go to Help and select Send Error Report
∎ GenieGO serial number
∎ User dotcom e-mail address
∎ Technician escalates to ISS who escalates to Incident/
Problem Management
∎ Agents escalate to Incident/Problem Management
DIRECTV GenieGO
Page 29

29
TM
Troubleshooting
DVR Management
The following errors or symptoms can occur after activation but
during normal operation:
Error message: “There are no recordings at this time”
∎ Open GenieGO Client application and verify the HD-DVR is set
to “Enable DVR”.
∎ Possible issue with HD-DVR missing required plugins (attempt
double reboot).
∎ Reboot HD-DVR and wait for video to display then reboot
again.
∎ If these steps fail, escalate as follows:
∎ Before escalating, the following minimum information is
required:
∎ On GenieGO, go to Help and select Send Error Report
∎ GenieGO serial number
∎ User dotcom e-mail address
∎ Technician escalates to ISS who escalates to Incident/
Problem Management.
∎ Agents escalate to Incident/Problem Management.
Error message: “No DVRs configured”
∎ Verify External device setting in HD-DVR Whole Home Sub
menu is set to “allow”.
∎ If these steps fail, escalate as follows:
∎ Before escalating, the following minimum information is
required:
∎ On GenieGO, go to Help and select Send Error
Report
∎ GenieGO serial number
∎ User dotcom e-mail address
∎ Technician escalates to ISS who escalates to Incident/
Problem Management.
∎ Agents escalate to Incident/Problem Management.
DIRECTV GenieGO
Page 30

30
TM
Troubleshooting
DVR Management
Error message: “GenieGO cannot see the playlist from one or
more of your DVRs”
∎ Verify External device setting in HD-DVR Whole Home Sub
menu is set to “allow”.
∎ Verify HD-DVR is connected to same network.
∎ If these steps fail, escalate as follows:
∎ Before escalating, the following minimum information is
required:
∎ On GenieGO, go to Help and select Send Error Report
∎ GenieGO serial number
∎ User dotcom e-mail address
∎ Technician escalates to ISS who escalates to Incident/
Problem Management.
∎ Agents escalate to Incident/Problem Management.
Error message and codes:
PC:
∎ Message: Your DIRECTV GenieGO cannot access the playlist
of one or more HD-DVR receivers on your home network.
Please make sure that Share Playlist is set to Yes and External
Access is set to allow in System Setup: Whole-Home or visit
www.directv.com/GenieGO for more information. (8-54-0)
Others:
∎ Message: HD-DVR Error Your DIRECTV GenieGO cannot
access one or more HD-DVRs. Please make sure that Share
Playlist is set to Yes and External Access is set to allow in
System Setup: Whole-Home. (8-54-0)
Error message: “Your DVR is currently busy and can’t
support streaming at this time”
∎ Verify an MRV session is not taking place (this includes
streaming to another mobile device.
∎ Reboot GenieGO.
∎ Relaunch client and verify playlist is available.
∎ Reattempt to stream.
∎ If these steps fail, escalate as follows:
∎ Before escalating, the following minimum information is
required:
∎ On GenieGO, go to Help and select Send Error
Report
∎ GenieGO serial number
∎ User dotcom e-mail address
∎ Technician escalates to ISS who escalates to Incident/
Problem Management.
∎ Agents escalate to Incident/Problem Management.
Error message and codes:
PC:
∎ Message: Your HD-DVR is currently busy and cannot
support streaming. Please try again later. (8-72-0)
Others:
∎ Message: Unable to Stream. Your HD-DVR is currently
busy and cannot support streaming. Please try again later.
(HTTP/400)
DIRECTV GenieGO
Page 31

31
TM
Troubleshooting
Transcoding
The following symptoms could occur when trying to download
(transcode) a program from the HD-DVR to the GenieGO:
Content stuck “waiting to prepare”
∎ Verify HD-DVR connection to Internet.
∎ Verify GenieGO connection to MoCA.
∎ On the most advanced HD-DVR (e.g., HR44), run System
Test and troubleshoot for any errors.
∎ Verify GenieGO LEDs are blue.
∎ Verify MRV is operational (if applicable)
∎ Reboot router GenieGO, the client running the GenieGO app
and the HD-DVR.
∎ Try the same content on a different client.
∎ If these steps fail, escalate as follows:
Before escalating, the following minimum information is required:
∎ On GenieGO, go to Help and select Send Error Report
∎ GenieGO serial number
∎ User dotcom e-mail address
∎ Technician escalates to ISS who escalates to Incident/
Problem Management.
∎ Agents escalate to Incident/Problem Management.
Content restarting or taking too long
∎ Possibly due to MRV stream or streaming to another
GenieGO client while preparing took place. When an MRV
session starts, a download to the GenieGO is paused. This
will postpone the download process.
∎ If these steps fail, escalate as follows:
Before escalating, the following minimum information is required:
∎ On GenieGO, go to Help and select Send Error Report
∎ GenieGO serial number
∎ User dotcom e-mail address
∎ Technician escalates to ISS who escalates to Incident/
Problem Management.
∎ Agents escalate to Incident/Problem Management.
DIRECTV GenieGO
Page 32

32
TM
Troubleshooting
Downloading
The following symptoms could occur when trying to download a
program from the GenieGO to the client (e.g., iPhone, PC):
Content stuck “waiting to download”
∎ Verify physical HDD space on the client.
∎ Verify client device is on the home network and has good
adequate wifi signal. (Verify the device is not switching
networks frequently).
∎ Force close and relaunch the client and try again.
∎ Restore client defaults and reactivate.
∎ If these steps fail, escalate as follows:
Before escalating, the following minimum information is required:
∎ On GenieGO, go to Help and select Send Error Report
∎ GenieGO serial number
∎ User dotcom e-mail address
∎ Technician escalates to ISS who escalates to Incident/Problem
Management.
∎ Agents escalate to Incident/Problem Management.
Quick Tip
Content can only be downloaded to a client after being fully
downloaded to the GenieGO from the HD-DVR.
Quick Tip
The GenieGO client must remain open (not in Standby) during
this download step.
Poor Audio/Video quality
∎ Verify the program recorded on the HD-DVR does not have
the same issues at the same place in the program where
poor audio/video quality was seen on GenieGO.
∎ Delete content and re-download.
∎ If these steps fail, escalate as follows:
Before escalating, the following minimum information is
required:
∎ On GenieGO, go to Help and select Send Error Report
∎ GenieGO serial number
∎ User dotcom e-mail address
∎ Technician escalates to ISS who escalates to Incident/
Problem Management.
∎ Agents escalate to Incident/Problem Management.
DIRECTV GenieGO
Page 33

33
TM
Troubleshooting
Streaming
In Home Streaming
The following symptoms could occur during In Home Streaming
(the streaming of a program recorded on an HD-DVR when the
client is on the home network):
Poor Audio/Video quality
∎ Verify the program recorded on the HD-DVR does not have
the same issues at the same place in the program where
poor audio/video quality was seen on GenieGO.
∎ Verify client device has adequate wifi signal. (Verify the
device is not switching networks frequently.)
∎ Verify content can playback on HD-DVR. (attempt MRV
stream if possible).
∎ If these steps fail, escalate as follows:
Before escalating, the following minimum information is required:
∎ On GenieGO, go to Help and select Send Error Report
∎ GenieGO serial number
∎ User dotcom e-mail address
∎ Technician escalates to ISS who escalates to Incident/
Problem Management.
∎ Agents escalate to Incident/Problem Management.
Error message: “Your DVR is currently busy and can’t support
streaming at this time”
∎ Verify an MRV session is not taking place (this includes
streaming to another mobile device.)
∎ Reboot GenieGO, GenieGO client and HD-DVR.
∎ Relaunch client and verify playlist is available.
∎ Reattempt to stream.
∎ If these steps fail, escalate as follows:
Before escalating, the following minimum information is required:
∎ On GenieGO, go to Help and select Send Error Report
∎ GenieGO serial number
∎ User dotcom e-mail address
∎ Technician escalates to ISS who escalates to Incident/
Problem Management.
∎ Agents escalate to Incident/Problem Management.
Error message and codes:
PC:
∎ Message: Your HD-DVR is currently busy and cannot support
streaming. Please try again later. (8-72-0)
Others:
∎ Message: Unable to Stream. Your HD-DVR is currently
busy and cannot support streaming. Please try again later.
(HTTP/400)
DIRECTV GenieGO
Page 34

Troubleshooting
Streaming
DIRECTV GenieGO
3434
Out-of-Home Streaming
The following symptoms could occur when using Out-of-Home
Streaming:
Error message: “Out-of-Home is not setup” (generic error
message)
∎ Access point blocking access (security settings enabled on
the network being used at that time).
Error message: “Your DVR is currently busy and can’t support
streaming at this time”
∎ Verify an MRV session is not taking place (this includes
streaming to another mobile device).
∎ If these steps fail, escalate as follows:
Before escalating, the following minimum information is required:
∎ On GenieGO, go to Help and select Send Error Report
∎ GenieGO serial number
∎ User dotcom e-mail address
∎ Technician escalates to ISS who escalates to Incident/
Problem Management.
∎ Agents escalate to Incident/Problem Management.
Error message and codes:
PC:
∎ Message: Your HD-DVR is currently busy and cannot support
streaming. Please try again later. (8-72-0)
Others:
∎ Message: Unable to Stream. Your HD-DVR is currently
busy and cannot support streaming. Please try again later.
(HTTP/400)
∎ Android transition from 4G to 3G or to other service can
interrupt streaming and cause buffering and skipping
∎ Cellular (Poor Bandwidth) can cause buffering and
skipping
 Loading...