

Direct Supply ATLAS Owner's Manual

®
Direct Supply
ATL AS
SIT-TO-STAND
LIFT
Owner’s Manual
Please keep and refer to this Owner’s Manual.
Thank you for purchasing a Direct Supply® Atlas Sit-to-Stand Lift from Direct Supply Equipment & Furnishings®. Please read
this entire guide carefully and keep it for future reference. This guide will provide you with instructions, warnings, warranty
information and other important information about your lift. Share this information with your housekeeping, nursing and
maintenance staff to help ensure the lift is cared for properly.
1-800-634-7328 DirectSupply.com

2 3
1-800-634-7328 DirectSupply.com
IntroductionTable of Contents
Introduction ......................................................................................................................3
Important Safeguards .........................................................................................................3
Definitions & Symbols ........................................................................................................3
Safety ............................................................................................................................4 - 7
Operating Guidelines ..........................................................................................................4
Positioning & Pinch Points ..................................................................................................4
Lift Assembly ......................................................................................................................5
Lift Operation ......................................................................................................................5
Using the Sling ...................................................................................................................5
Lifting the Resident ............................................................................................................6
Transferring the Resident ....................................................................................................6
Performing Maintenance ....................................................................................................6
Electrical & Grounding ........................................................................................................7
Disposal ..............................................................................................................................7
Radio Frequency Interference.............................................................................................7
Product Labeling ...............................................................................................................8
Assembly ....................................................................................................................9 - 13
Unpacking ...........................................................................................................................9
Assembly Instructions ................................................................................................. 9 - 12
Mounting the Battery Charger .......................................................................................... 13
Operation .................................................................................................................14 - 17
Hand Control Buttons .......................................................................................................14
Raising/Lowering the Boom .............................................................................................14
Opening/Closing the Legs ................................................................................................ 14
Activating a Mechanical Emergency Release ...................................................................15
Performing an Emergency Stop ........................................................................................16
Charging the Battery .................................................................................................. 16 - 17
Lifting The Resident ................................................................................................. 18 - 21
Positioning the Sit-to-Stand Resident Lift .........................................................................18
Attaching a Sling ...............................................................................................................19
Lifting/Moving the Resident ......................................................................................19 - 21
Transferring the Resident ........................................................................................22 - 23
Transferring to a Commode Chair .....................................................................................22
Transferring to a Wheelchair .............................................................................................22
Transferring to a Bed .........................................................................................................23
Troubleshooting ..............................................................................................................24
Maintenance ............................................................................................................25 - 28
Safety Inspection Checklist ..............................................................................................25
Lift Lubrication ..................................................................................................................25
Detecting Wear & Damage ...............................................................................................26
Cleaning the Sling & Lift ...................................................................................................26
Replacing the Boom Actuator ...........................................................................................26
Checking & Tightening Mast Pivot Bolt.............................................................................26
Replacing Boom/Lift Arm ..................................................................................................27
Adjusting Knee Pad Height ...............................................................................................27
Base Adjustment ..............................................................................................................28
Caster Replacement .........................................................................................................28
Technical Data .................................................................................................................29
Limited Warranty ............................................................................................................30
Customer Service ...........................................................................................................31
Definitions & Symbols
NOTE: Indicates a tip.
CAUTION: Indicates correct operating or maintenance procedures in order to prevent damage to
or destruction of the equipment or other property.
WARNING: Calls attention to a potential danger that requires correct procedures or practices in
order to prevent personal injury.
DEVICE: Atlas Sit-to-Stand Lift.
YOU and YOUR: The facility, community or other entity that has purchased the device.
WE, US and OUR: Direct Supply Manufacturing, Inc.
Attention. Read the instructions.
Important Safeguards
WARNING: When using battery-operated mechanical products, especially when children are
present, basic safety precautions should always be followed. Read all instructions before using and
save for future reference. Important information is highlighted by these terms:
WARNING: This device is intended for indoor use under the supervision of licensed healthcare
professionals. Use this device only as instructed. May not be appropriate for all individuals.
4 5
1-800-634-7328 DirectSupply.com
Safety
WARNING: Do not install, assemble or operate this equipment without fi rst reading and
understanding the instruction manual. If you are unable to understand the warnings, cautions or
instructions, contact a healthcare professional, dealer or technical personnel before attempting to use
this equipment. Otherwise, damage or injury could occur.
THE INFORMATION CONTAINED IN THIS DOCUMENT IS SUBJECT TO CHANGE WITHOUT NOTICE.
WARNING: Before using this product, check all parts for shipping damage. If the product is
damaged, do not attempt to use it. Contact the provider for guidance.
Operating Guidelines
WARNING: This lift is not intended to transport a resident. It is intended only to transfer the
resident from one surface to another, such as from a bed to a commode. Injury or damage may occur
if not used as intended.
WARNING: Do not attempt to transfer a resident without prior approval from medical professional.
Do not install, assemble or operate this equipment without fi rst reading and understanding the
instruction manual and observing trained specialists perform a lift.
WARNING: People with disabilities must be watched closely when lifted.
CAUTION: Only slings and accessories specifi cally designed for use with Direct Supply resident
lifts should be used. Use of other manufacturers’ components or accessories may compromise the
operation of this resident lift.
WARNING: If the resident lift becomes wet or exposed to extreme temperature or humidity prior
to use, ensure handgrips do not twist on resident lift handle. Damage or injury could occur.
Positioning & Pinch Points
WARNING: A pinch point is a place where it’s possible for a body part to be caught either
between moving mechanical parts or between moving and stationary parts of the product. Pinch
points exist on this product between the mast and boom connect. When operating the lift, be aware
of the pinch points. Injury could occur.
These instructions are a basic guide for how to use the Atlas Sit-to-Stand Lift and is not a substitute
for having the lift being operated by a trained professional.Residents using this lift must be able to
support at least 60% of their own weight and have head and neck control. The resident should be
able to bend at the hips, knees and ankles.
WARNING: Always be aware of the location of the lift arm – injury to the resident and/or the
caregiver/assistant may occur.
Lift Assembly
WARNING: DO NOT overtighten mounting hardware. This will damage mounting brackets.
Lift Operation
WARNING: Before attempting to transfer, the user must be assessed by a qualifi ed professional.
WARNING: The lift must be used by a caregiver with proper training to work with the person
being transferred.
WARNING: Only trained and qualifi ed caregivers should transfer a person. Do not attempt to use
the lift if you have not been properly trained to do so.
WARNING: Do not store the lift in a shower, bath or other area with high humidity.
WARNING: Keep all lift components clean and dry, and ensure electrical and mechanical safety.
WARNING: Always maneuver the lift with the handle provided.
WARNING: More than one assistant is recommended for all resident lift activities.
WARNING: When mounting the battery on the charger, listen for an audible click to confi rm proper
mounting. Otherwise, damage or injury could occur.
WARNING: DO NOT exceed 400 lb. maximum weight limitation.
WARNING: Keep clear of moving parts to avoid injury.
Using the Sling
WARNING: For proper comfort and safety, use only a sling made for this resident lift and
recommended by a medical professional.
WARNING: DO NOT use any type of material between the resident and sling that may cause the
resident to slide out of the sling during transfer.
WARNING: DO NOT modify slings in any way. Before each use, check sling attachments to ensure
proper connection.
WARNING: If the resident is in a wheelchair, activate wheel locks to prevent the chair from
moving during transfers.
WARNING: After each use or wash, inspect sling(s) for wear, tear and loose stitching. Bleached,
torn, cut, frayed or broken slings are unsafe and could result in injury. Discard and replace
immediately.
WARNING: When connecting slings equipped with color-coded straps to the resident lift, the
shortest straps MUST be at the back for proper support. The loops of the sling are color-coded and
can be used to help place the resident in various positions. The colors make it easier for you to
connect both sides of the sling equally. Always ensure the resident’s head is properly supported
during lifts.
WARNING: always be aware
of the footrest, especially
the resident’s position on the
footrest. Injury to the resident
and/or assistant may occur.

6 7
1-800-634-7328 DirectSupply.com
Lifting the Resident
WARNING: Before lifting the resident, ensure legs on adjustable base lift are in the full
open/locked position.
WARNING: After elevating the resident a few inches above a stationary object, ensure the sling
and all attachments are secure and properly connected. If any attachments are not properly in
place, lower the resident back onto the stationary object and correct this problem. Adjustments for
safety and comfort should be made before moving the resident. Be sure the resident’s arms are
inside the straps.
WARNING: Use of other manufacturers’ components or accessories may compromise the
operation and are not to be utilized as a component of this resident lift system. The warranty will
be voided.
WARNING: During transfers with the resident suspended in a sling attached to the lift, DO NOT
roll caster base over uneven surfaces that could cause the resident lift to tip over. Use steering
handle on the mast at all times to push or pull the resident lift.
WARNING: When lifting a resident, DO NOT lock the rear casters. Doing so could cause the lift
to tip and could injure the resident or assistants. The rear casters should be left unlocked during lifts
to allow the resident lift to stabilize itself when the resident is initially lifted from a chair, bed or any
stationary object.
Transferring the Resident
WARNING: After elevating the resident a few inches above a stationary object, ensure the sling
and all attachments are secure and properly connected. If any attachments are not properly in place,
lower the resident back onto the stationary object and correct this problem.
WARNING: Before lowering resident into a wheelchair, be sure wheel locks are in a locked position.
WARNING: Before transferring, ensure the resident’s weight does not exceed the 400 lb. weight
capacity of the resident lift. In addition, ensure the legs of the lift are in the maximum open position
for ideal safety and stability. If it is necessary to maneuver through a narrow opening, close the legs
of the lift for only the time it takes to move through it, and open again to maximum open position.
WARNING: Be sure to check the sling attachments each time the sling is removed and replaced to
ensure it is properly attached before the resident is lifted from the bed or chair.
WARNING: Ensure mast is securely fastened for safety. All resident lift nuts, bolts and other
attachments must be checked at least every six months in conjunction with periodic maintenance.
Performing Maintenance
WARNING: Maintenance MUST be performed ONLY by qualifi ed personnel.
WARNING: Ensure proper resident lift operation by performing regular maintenance. DO NOT
overtighten hardware. Product damage may occur. After the fi rst 12 months of operation, inspect all
pivot points and fasteners for wear. If the metal is worn, the parts MUST be replaced. Inspect these
parts every six months thereafter.
WARNING: Casters and axle bolts must be inspected every six months to check for tightness
and wear.
WARNING: Never use a lift if you suspect any portion of it is damaged or worn.
Electrical & Grounding
Grounding Instructions
WARNING: The included battery charger should always be properly grounded to ensure resident
and assistant safety. For this reason, this device is equipped with a three-prong grounding plug to
prevent possible shock hazards.
WARNING: DO NOT alter, cut or remove the round grounding prong from this product. If a two-
prong wall receptacle is encountered, the receptacle must be replaced by a qualifi ed electrician with
a properly grounded three-prong wall receptacle in accordance with the National Electrical Code
and all local codes. If you must use an extension cord, use ONLY a three-wire extension cord having
the same or higher electrical rating as the device being connected and verify the extension cord is
permitted in your community.
WARNING: Red warning tags are located on the device. DO NOT remove these tags. Carefully
read battery and battery charger information prior to installing, servicing or operating your resident lift.
Disposal
WARNING: This product has been supplied from an environmentally aware manufacturer that
complies with the Waste Electrical and Electronic Equipment (WEEE) Directive 2002/96/CE.
WARNING: This device contains lead acid batteries. DO NOT dispose of batteries in normal
household waste. They MUST be taken to a proper disposal site. Contact your local waste
management company for information. This product may contain substances that could be harmful to
the environment if disposed of in places (landfi lls) that are not appropriate according to legislation.
Radio Frequency Interference
WARNING: Most electronic equipment is infl uenced by Radio Frequency Interference (RFI).
CAUTION should be exercised with regard to the use of portable communication equipment in
the area around such equipment. If RFI causes erratic behavior, PUSH the red power switch OFF
IMMEDIATELY. DO NOT turn the power switch ON while transmission is in progress.
Safety (cont.)

8 9
1-800-634-7328 DirectSupply.com
Product Labeling
WARNING: Use only Direct Supply parts in the assembly of this resident lift.
Unpacking the Resident Lift
Remove all the parts from the carton and place on the fl oor, taking care to protect the painted fi nish
from damage.
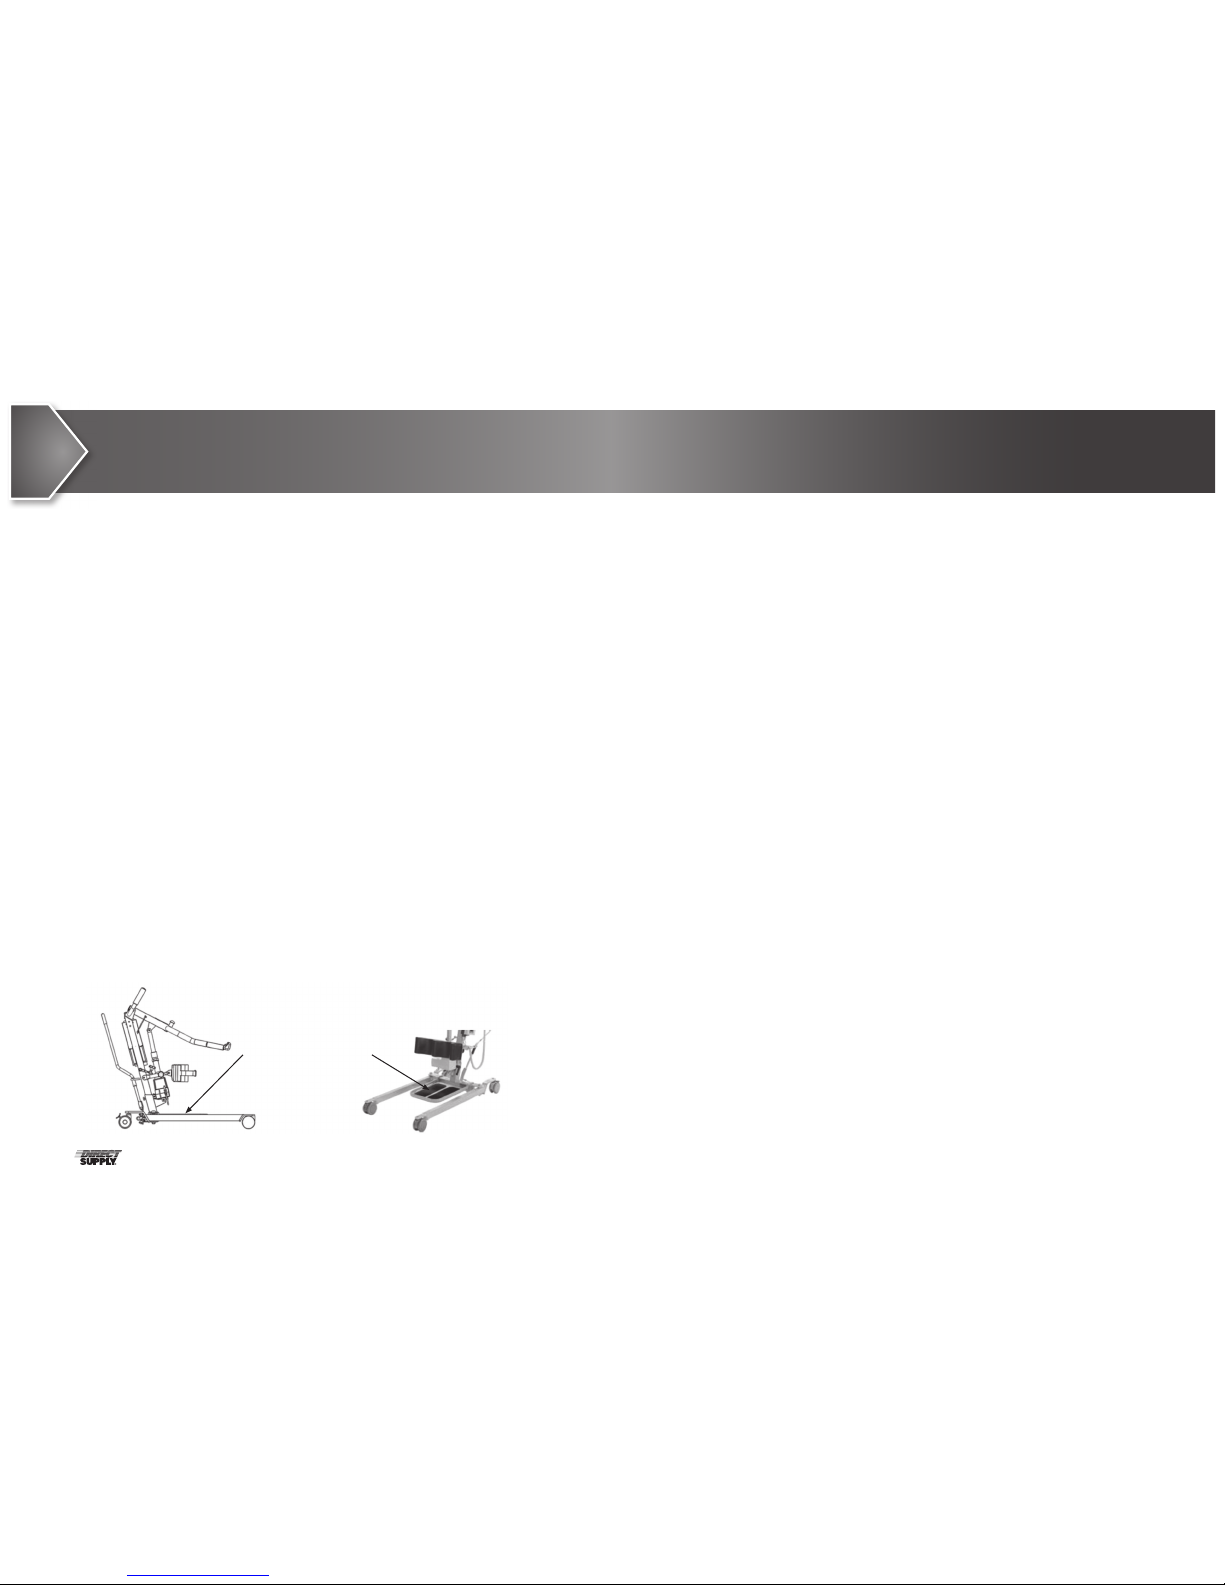
Assembly Instructions:
a) Place the base in a clear open space and apply the rear brakes. Attach the footplate to the base.
b) Fit the mast and boom assembly into the base socket. Tighten the mast assembly with the
bolt provided.
Assembly
Tighten bolt.
10 11
1-800-634-7328 DirectSupply.com
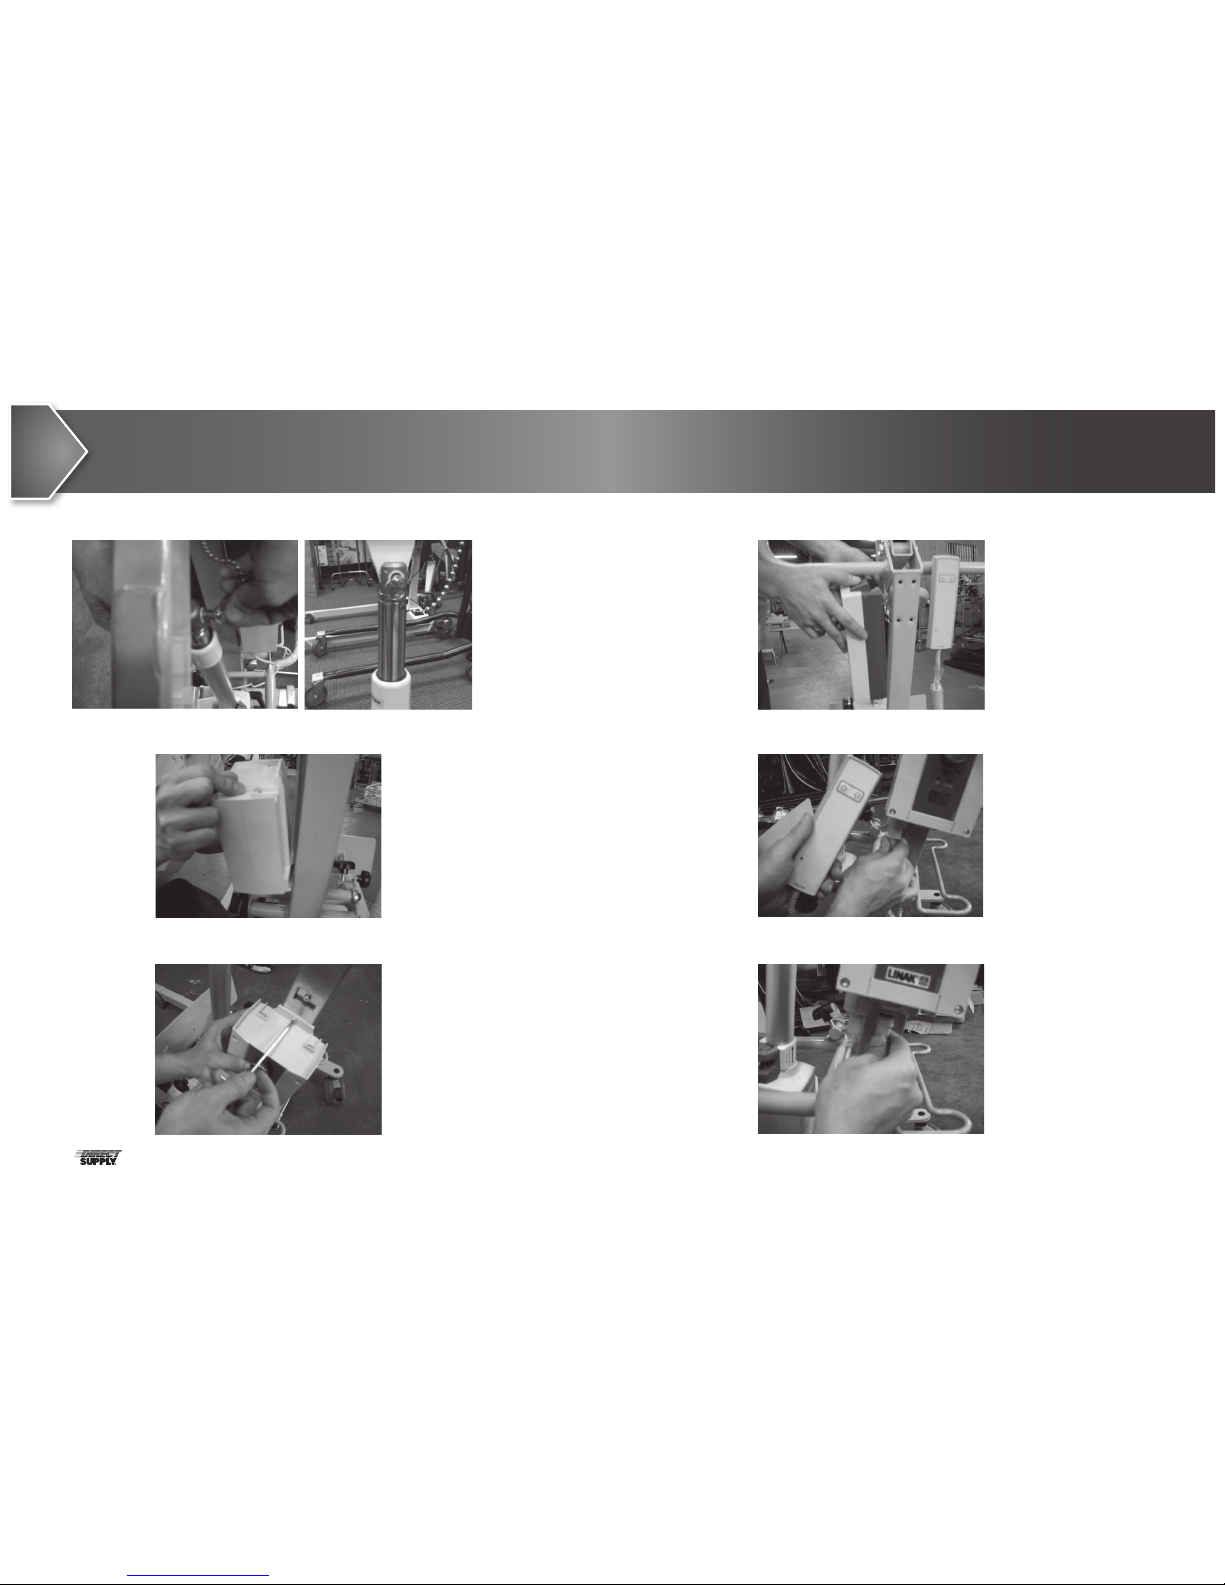
c) Install top actuator pin chain through lift and actuator.
d) Install control box onto mounting bracket located on the mast.
e) Tighten control box mounting screws.
f) Install battery on top of control box.
g) Plug the hand control into the socket located on the bottom left side of control box.
h) Plug the actuator into the bottom middle socket of control box.
Assembly (cont.)
 Loading...