

Direct National Smart-Pad Operation Manual
1 | P a g e
Smart-Pad Operation Manual
Direct National’s:
Smart-Pad Interactive Touch Screen Operation
Manual

2 | P a g e
Smart-Pad Operation Manual
CONTENTS
Security warning
3
MENU
INTRODUCTION
5
Operations Instructions
16
Main Monitor
6
Power On
17
Accessories
6
Power Off
17
Installation Notice
7
How to choose source/channel
18-20
INSTALLATION INSTRUCTION
8
Introduction of menu
21
CONTROL PANEL
11
Source menu
21
Interface panel
Picture Menu
22
Back ports
11
Sound Menu
23
REMOTE CONTROLLER SPECIFICATIONS
13
Channel Menu
23
Remote controller user methods
14
Set Menu
24
Remote Introduction
15
FORMAT MODES
25
CONNECTION DIAGRAM
16
FAQ GUIDE
26-30

3 | P a g e
Smart-Pad Operation Manual
SECURITY WARNING
Product components of input voltage which is higher than safety voltage should be installed or
placed out of children’s reach.
Please use this product’s standard power cable instead of other types to avoid burning the monitor
and cause security risk.
In case of electric shock, the back cover should not be opened by non-professional maintenance
staff.
Before operation, please make sure there is compatibility between the local voltage value and the
monitor’s rated voltage value. In circumstances where the monitor will not be used for a long time,
the user should pull out the plug from the power socket.
Please use a three-phase power supply socket and make sure the earth wire is well connected.
Do not install or put the machine on places with heat source such as hot stoves, heat-transfer tubes,
power amplifiers, sources of direct strong light, dust, high humidity and places with mechanical
vibration. In order to achieve better performance, please keep the monitor away from high voltage
distribution networks, large metal objects, radar station etc.
When abnormal sound and smell appear, cut off the power supply and unplug the device
immediately. Stop using it and ask professional staff to resolve the problems until they are fixed.
If the monitor will not be used for a long time, please unplug the power cable for safety.
Avoid liquid and metals getting into the machine. If any liquid or metal fall into the machine, please
shut the monitor down and cut off the power supply immediately and contact professional
maintenance personnel to repair.
Do not use chemical reagent to wipe the machine. Solvent may cause the cover’s deterioration or
damage to the paint surface. Disconnect the power supply and wipe it with a warm wrung cloth if
there is dust or dirt. Use a clean soft cloth to wipe the screen part gently.
Do not switch off/on machine frequently in a short period, as it will affect the lifetime of the
interactive touch monitor. After the normal shutdown, please wait about three minutes or longer
before turning the machine back on.
In order to extend the service life of the LCD screen, please do not set display brightness and
contrast to the maximum value for a long time.
Do not place the interactive touch monitor on unstable stands, brackets or tables, as the interactive
touch monitor may fall down and cause damage.

4 | P a g e
Smart-Pad Operation Manual
You should be careful when moving the interactive touch monitor to avoid it being hit, squeezed etc.
Pay particular attention to the protection of the screen part to avoid glass breaking and causing
damage.
You should follow the manufacturer's instructions and use the manufacturer’s recommended
installation accessories when you install the machine.
The wall mounting installation is available in normal cement wall, solid wall and wood wall which can
withstand three times the weight or more. Please ensure good ventilation conditions.
For the mounting on special walls (such as: steel structure wall, hollow structure, glass, marble, etc.),
it is recommended that you evaluate the force bearing of the wall first in case of emergency.
Avoid the interactive touch monitor being exposed to direct sunlight, as this will accelerate the
interactive touch monitor aging and may cause malfunctions in the touch device.
Do not use hard objects to write on the touch screen monitor in case of scratching the glass and
affecting the display.

5 | P a g e
Smart-Pad Operation Manual
INTRODUCTION
Our interactive touch monitor is a multi-functional teaching resource. It contains functions of
interactive teaching, digital presentation, multimedia presentation, touch control type operation,
handwritten input, etc.
From design to manufacturing we have embraced the design and functionality of the Smart-pad and
incorporated characteristics for educational facilities. With easy and intuitive operation our SmartPad has digital and intelligent control; write, modify, delete, arbitrary functions by using a finger or
any nontransparent object.
SMART-PAD: Customised for teaching, meetings and conference systems.
Equipped with high brightness, high contrast screen display, the Smart-Pad screen is still clearly
visible under strong light within an indoor and outdoor environment.
When in need of low brightness display, you can choose to enter the automatic energy saving mode,
reduce the backlight brightness, to achieve energy saving and environmental protection purpose.
The touch monitor uses advanced infrared touch sensor, HID without drive, plug and play.
Simulated mouse operation.
Supports multi-touch - up to ten points of touch.
6 | P a g e
Smart-Pad Operation Manual
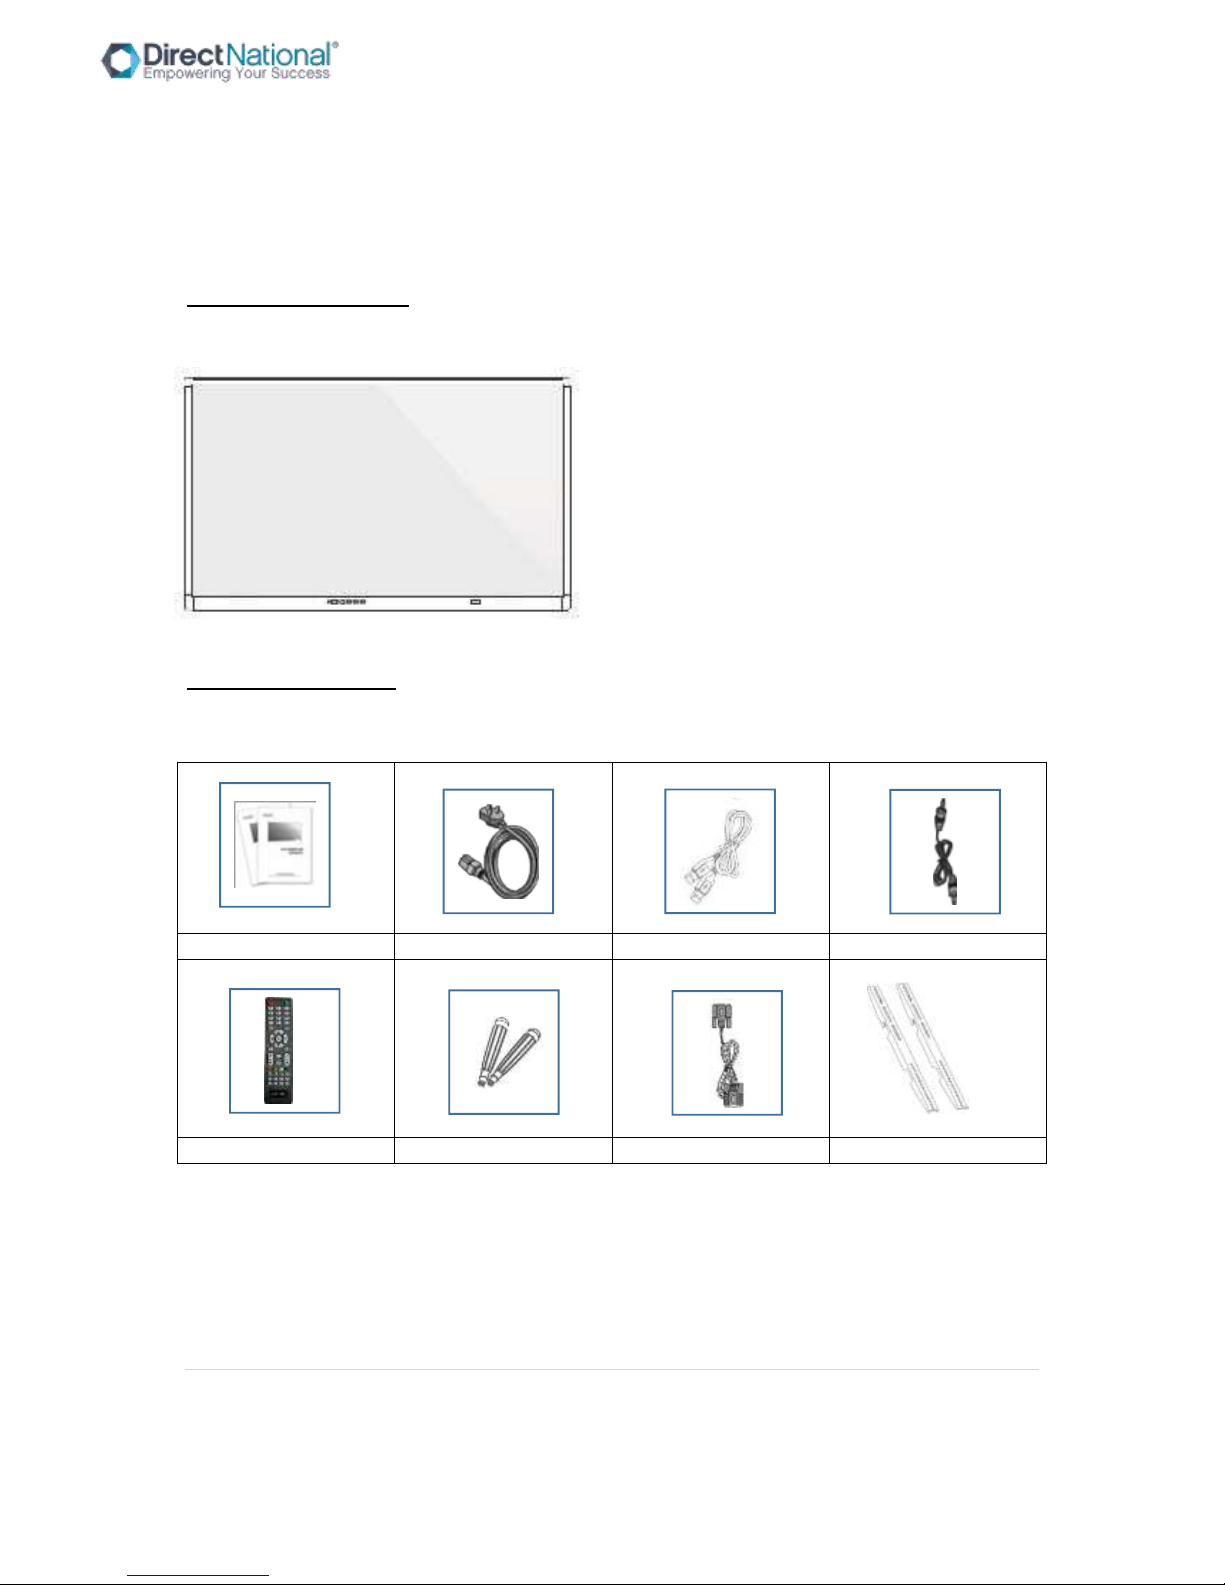
MAIN VIEW OF MONITOR
ACCESSORIES INCLUDED
USER MANUAL
POWER CABLE
TOUCH USB CABLE
AUDIO CABLE
REMOTE
TOUCH PENS
VGA CABLE
WALL MOUNT KIT
7 | P a g e
Smart-Pad Operation Manual
INSTALLATION NOTICE
BEARING: Use the rack or mount that is designated by the manufacturer. If the mounting bracket is
not from the manufacturer, the bearing capacity should not be less than 4 times its actual bearing
weight. The bearing capacity of the supporting disk for bearing the rack should not be less than 4
times its actual bearing weight, and make sure the interactive monitor is stable.
The mounting surface bearing the interactive monitor should be firm with enough bearing capacity
and should not be less than 4 times its actual bearing weight. When the mounting surface is the wall
or rooftop of buildings, it must be solid brick, concrete or other strength equivalent mounting
surface. If the mounting surface is made of loose materials (old building brick wall, woodiness, solid
brick wall, metal or non-metal structures, or the decoration layer of the mounting surface is too
thick, the strength of surface is obviously deficient and corresponding reinforcement and support
measures should be taken to avoid safety hazard.
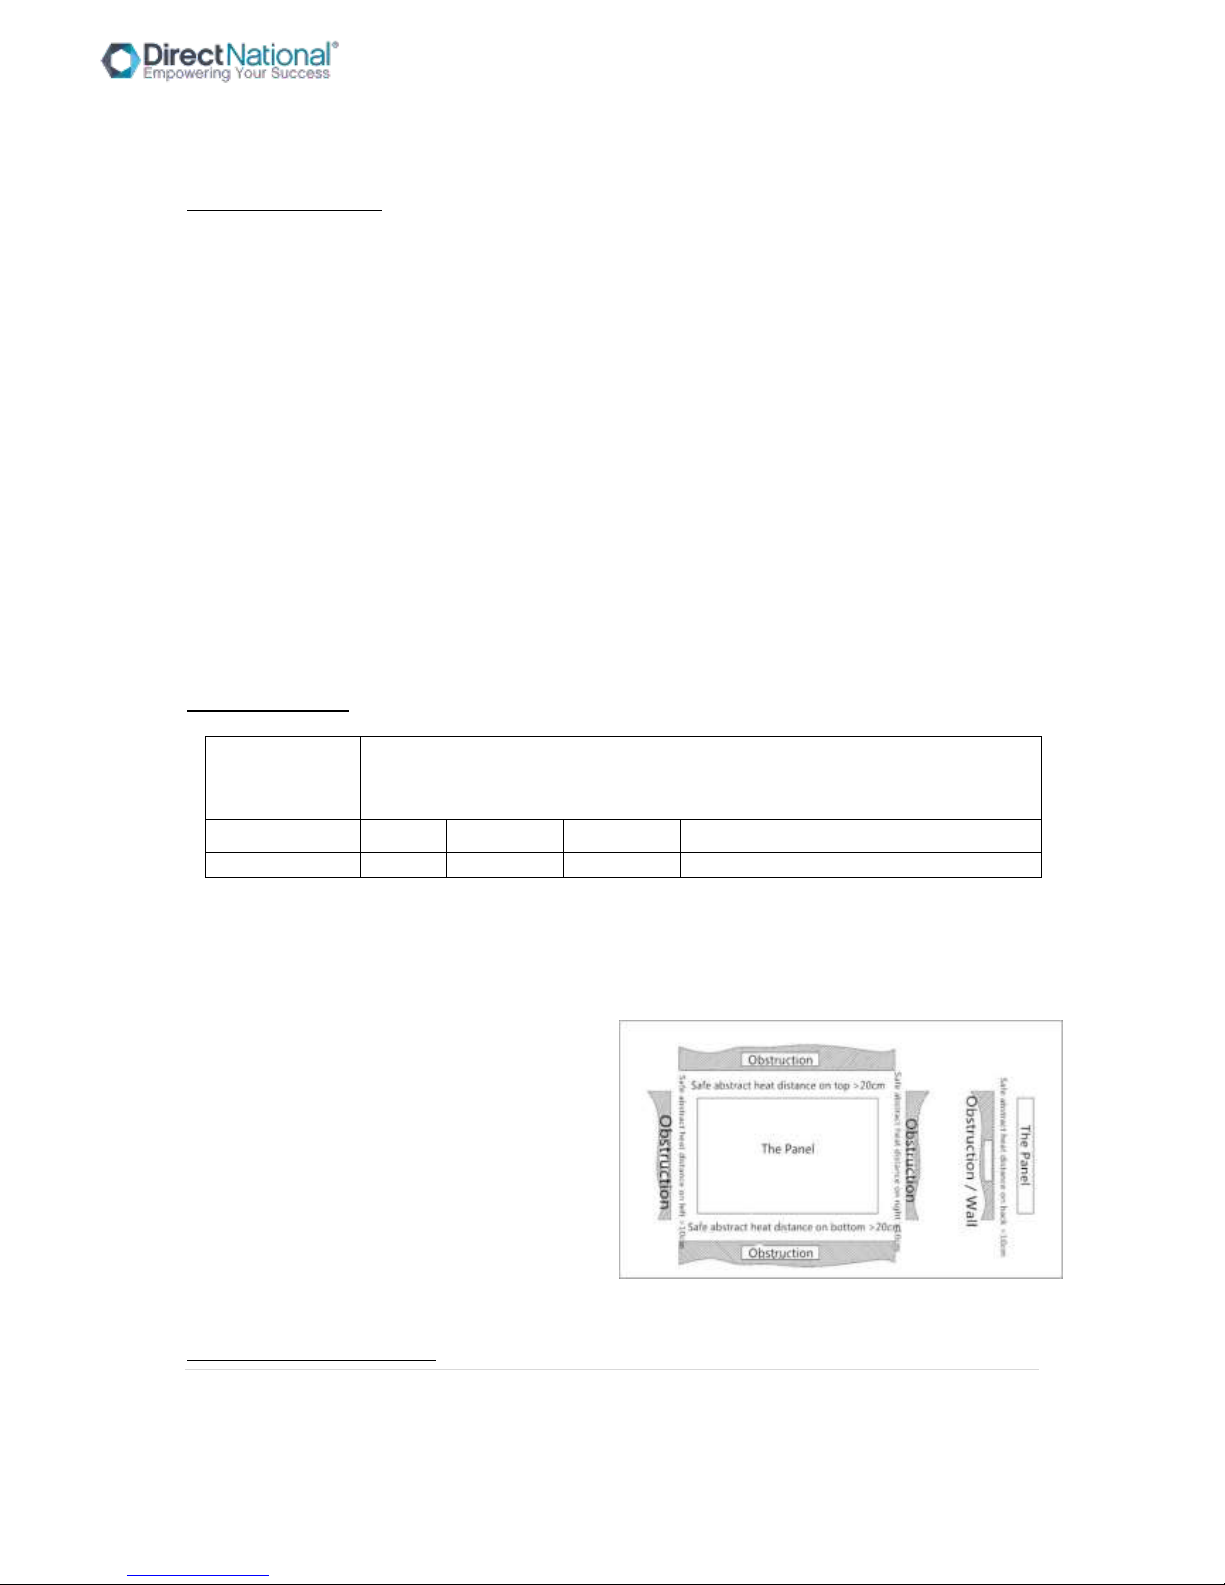
HEAT DISSIPATION
COOLING
VENTILATION
Requirements
Distance to mounting surface(cm)
Nominal output
Left/right
Top
Bottom
Back
Above 100W
10
20
20 10
Notes: When the monitor inlay wall or box, the vent area of bottom/flank/top sides should be no
less than 50% of packing surface and air circulation need to be kept well.
Diagram: * Refer to CAS 132-2006 Standard
INSTALLATION INSTRUCTION

8 | P a g e
Smart-Pad Operation Manual
STEP ONE: Install the holder onto the back of the mount
STEP TWO: Install the wall holder parts to the wall
STEP THREE: Install interactive Smart-Pad panel to mount and secure with bolts
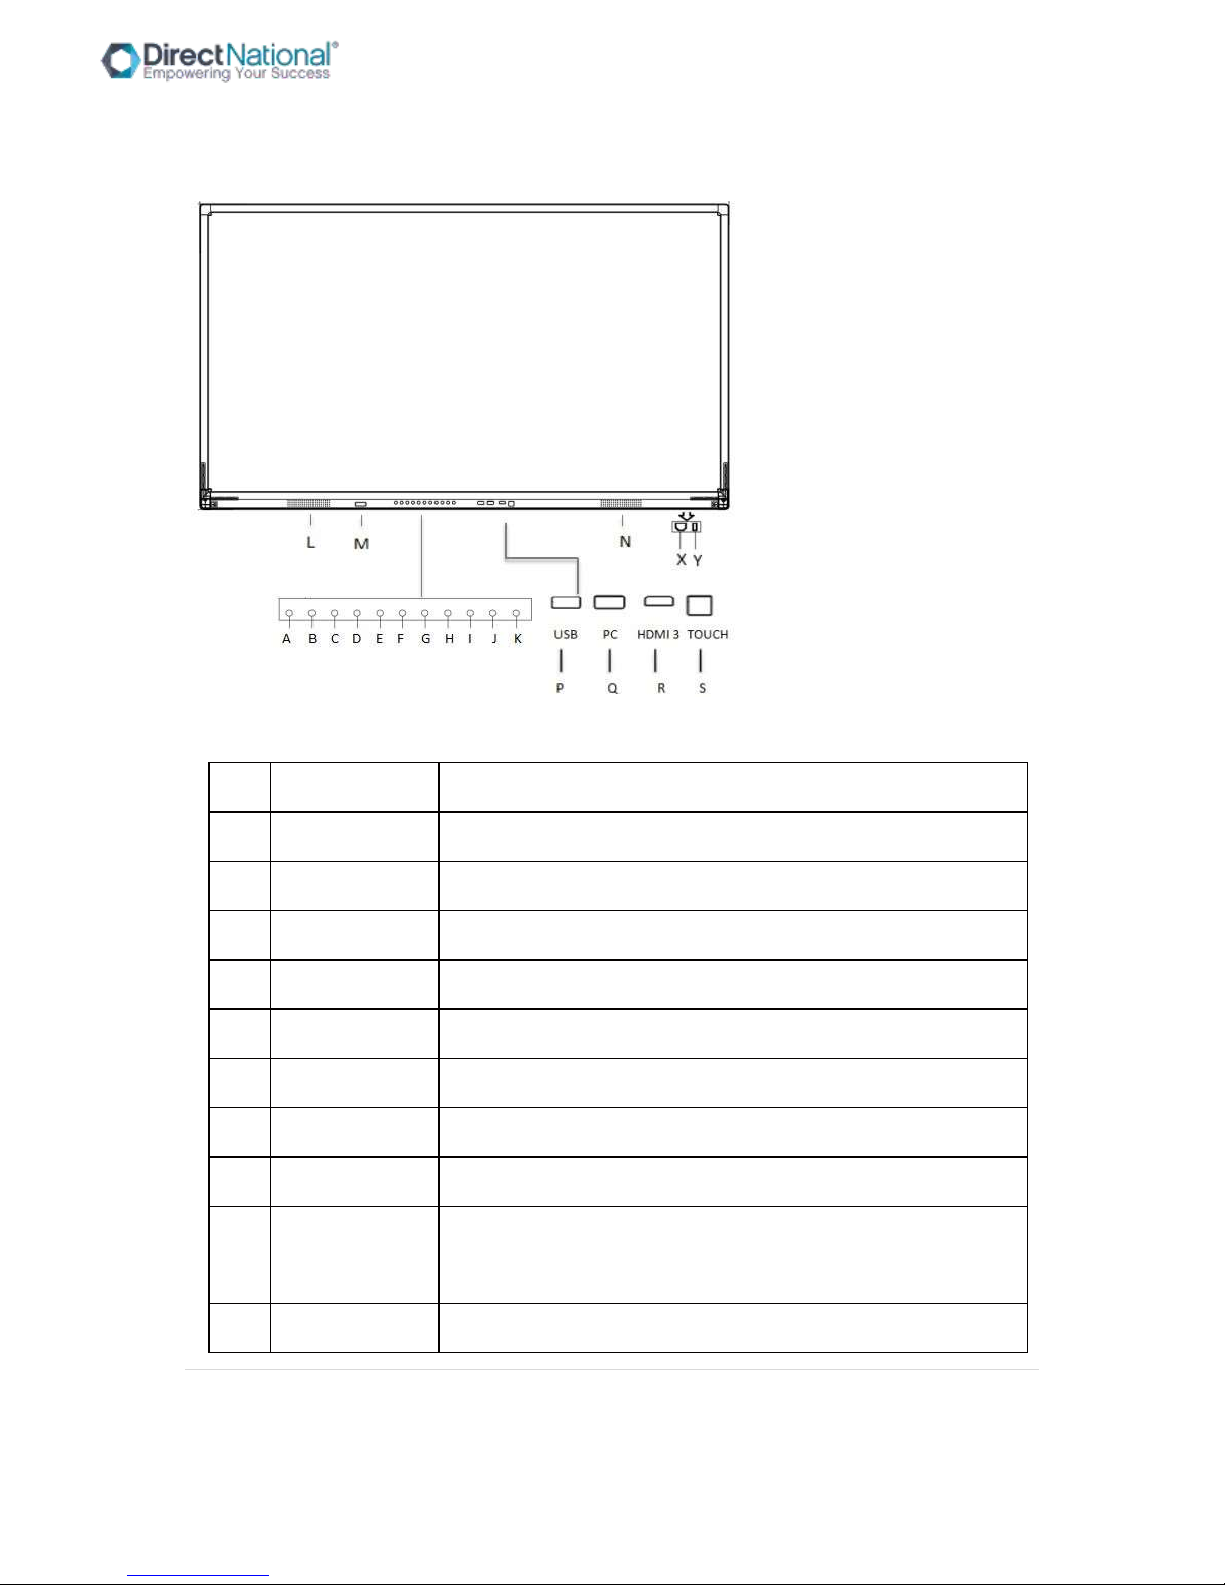
CONTROL PANEL
9 | P a g e
Smart-Pad Operation Manual
Note: Front panel picture for reference only may differ from actual product
S/N
ITEM
Description
A
POWER
Turn on/off the panel
B
Source
Go to the source menu
C
Menu
Display/exit(back to previous level) OSD menu
D
VOL+
Increase the volume
E
VOL-
Decrease the volume
F
CH+
Choosing the next channel
G
CH-
Choosing the previous channel
H
PC
Built-in OPS power on/off key(If no OPS,no functions)
I
ES
Turn ON/off Energy-saving mode, in this mode, sound is
keeping, display will turned off
J
Enter
Confirm the choice
 Loading...