

DirectConnect Reel View DC84FS16x9, Reel View DC100FS16x9, Reel View DC112FS16x9, Reel View DC92FS16x9, Reel View DC120FS16x9 User Manual
...
User’s Guide for 112” and 120”
Reel View Reference Studio Fixed Frame Screens
9cm (3 1/2”) velvet wrapped aluminum frame— 112” and 120”
Beveled frame design
120° viewing angle
HD studio grade material: White 1.0 gain, high contrast
16:9 viewing format
Perfect for home theaters, media rooms and conference rooms
Easy installation and setup
2
Dear Customer
Thank you for purchasing our Reference line of fixed frame screens. For optimum performance and safety, please read these instructions carefully before
assembling or adjusting this product. Please keep this manual for future reference.
Safety Warning
1. Safety gear and proper tools must be used. Failure to use safety gear can
result in property damage, serious injury or death
2. Assembly requires two people and open floor space greater than the size
of the screen
3. Make sure the workspace is clean and free of debris
4. Keep screen fabric away from high temperatures to avoid permanent material deformation
5. Make sure that the proper mounting anchors are used to support the
weight of the screen
6. To clean the screen, use a soft cloth with warm water to remove any
marks.
7. Never use any solutions, chemicals or abrasive cleaners
8. To avoid damage to the screen, avoid touching it with your fingers, tools
or any other sharp or abrasive objects
9. This product contains small items that could be a choking hazard if swallowed. Keep these items away from young children
Table of Contents
Section Topic Page
1.0 Reel View Screen Specifications.………………..……….. 3
2.0 Hardware List………..………………..………………………….. 4
3.0 Required Tools………………………………..………………….. 4
4.0 Installation Guide………………………………………………… 5
9
Fig 8
Once the previous steps have been completed, lift up the screen
ATTENTION: When lifting the screen off the floor, use 2 people to hold
both sides of the screen and gently tilt the screen upright
Use a level and mark the locations on the surface where the screen will
be placed
Place the screen on the wall and enjoy the movie

8
Place the screen material (1) over the back of the frame and begin to tension the material over the screen material tension tabs ( C) as shown in
(Fig 7)
The order of placing the screen material (1) into the material tension tabs
( C) are UP, DOWN, LEFT, RIGHT
Move along the frame and attached the screen material (1) into every
screen material tension tab ( C) as shown in (Fig 7)
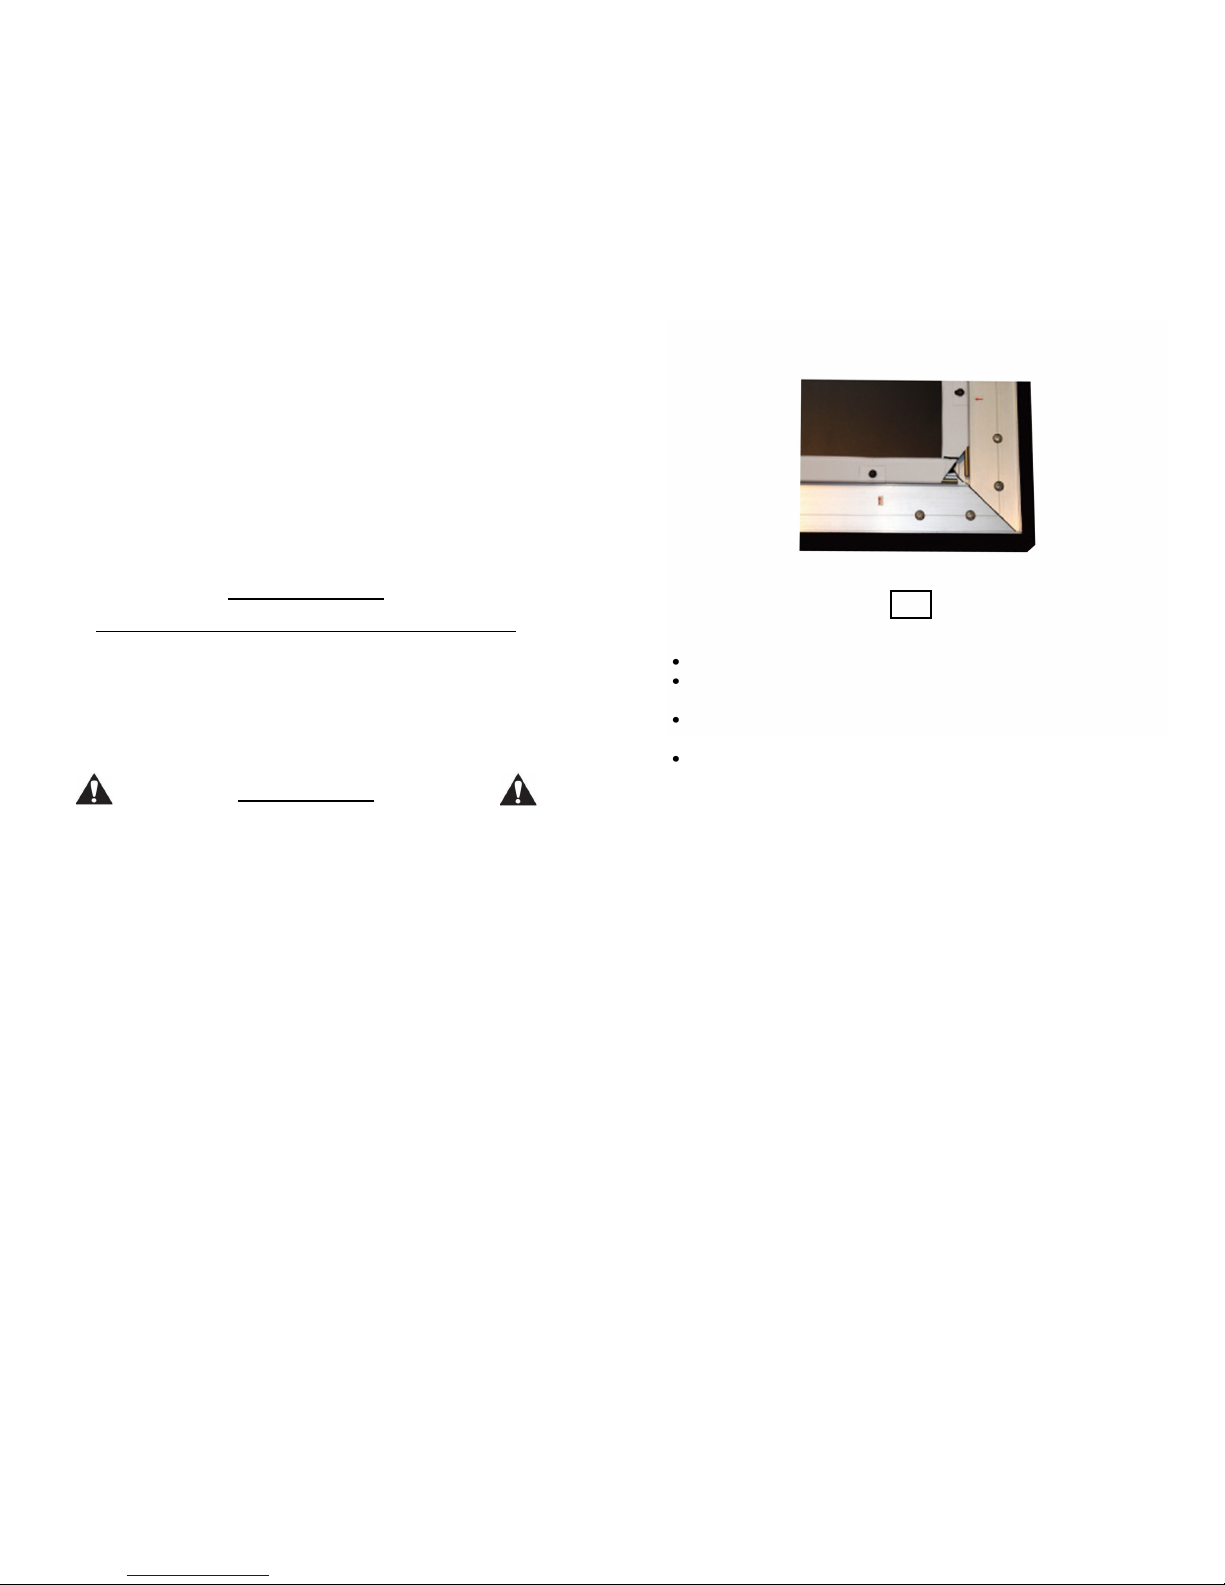
The last few may require hard pulling to ensure that the screen (1) is perfectly flat in the frame (2,3)
Once completed it will look like the picture in (Fig 8)
If there are some ripples in the screen material (1) adjust the L Brackets
(B) until the ripples disappear
Fig 7
3
1.0 Reel View Screen Specifications

4
2.0 Hardware List
(Actual parts, appearance and quantity may differ from illustration)
3.0 Required Tools
(Tools not included)
Phillips Screwdriver
Level for hanging the screen
ID
Quantity Description
ID
Quantity Description
1 1 Screen A 2 Hanging Bracket
2 2 Top / Bottom Frame B 4 L Bracket
3 2 Left / Right Frame C 14
Material Tension
Tabs
4 2
Top / Bottom Screen
Rods
D 2 Hanging Screw
5 2
Left / Right Screen
Rods
E 16 L Bracket Screw
F 16 L Bracket Washer
7
Fig 5
Unroll the screen material (1) and gently place it on the ground (viewing
side down). Make sure the ground is clear of debris and dirt
Thread the metal rods (4,5) into each pocket located on the screen material (1). Insert the two short rods (5) into the short side of the screen
material (1) and the longer rods (4) into the long side of the screen material (1) as shown in (Fig 6)
Fig 6

6
Connect the short frame (3) with the L Bracket to the long frame (2) as
seen in (Fig 3)
Slide the hanging brackets (2) into place on the long frame (2) as shown
in (Fig 4)
Slide the short frame (3) and the long frame (2) together. Make sure to
place the L Bracket washers (F) onto the L Bracket screws (E) before
screwing the frames (2,3) together (Fig 5)
Fig 3
Fig 4
5
4.0 Installation Guide
Unpack the screen and check that all parts are present
Have two people present to assemble and install the screen
Assembly requires a clean area with adequate space to assemble screen
Unwrap the screen rails (2,3)
Lay screen rails out (upside down)
Slide the material tension tabs (C) into the frame according to the arrow
which marks their spot (Fig 1)
Slide the L Bracket (B) into the ends of the two shorter frame pieces (3)
as seen in (Fig 2)
Fig 1
Fig 2
 Loading...