

DiO MVR-40-10RF, MVR-60-10RF, MVR-60-50RF, MVR-60-20RF User guide
www.getdio.com
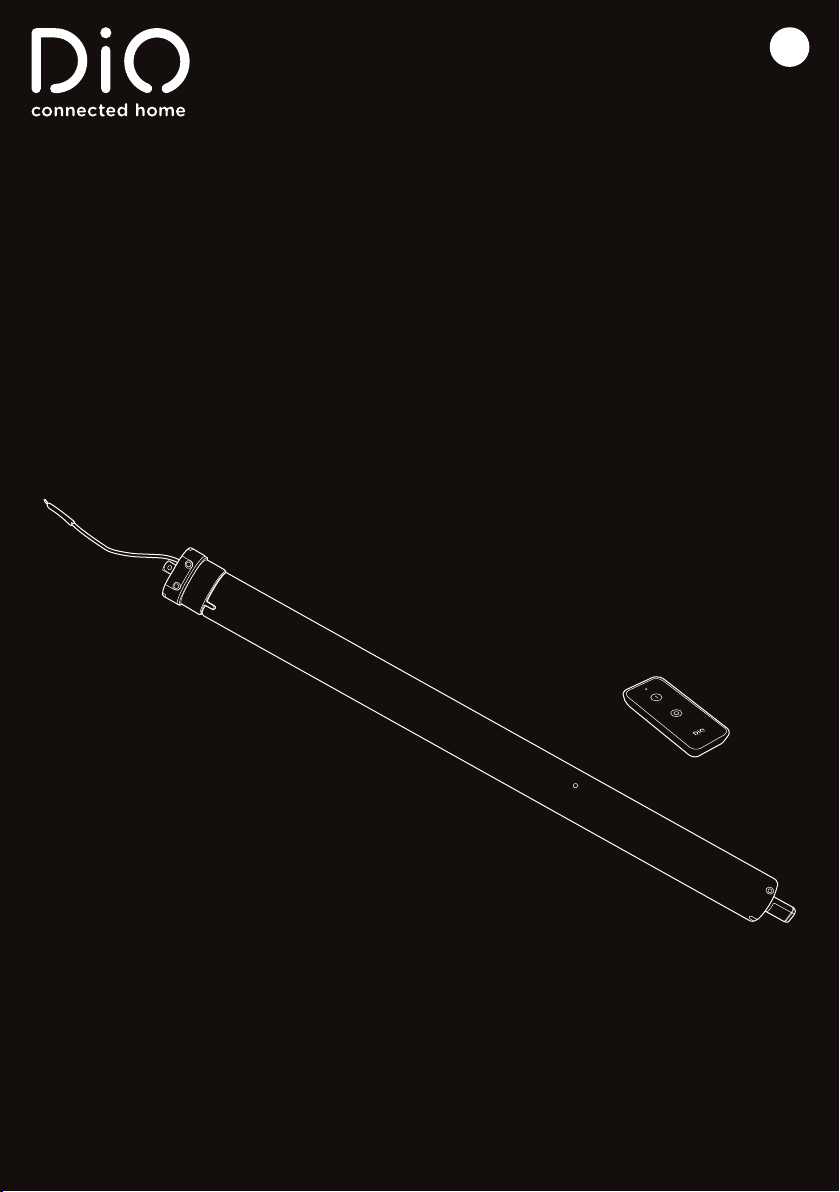
Motorised wireless and remote controlled roller shutter
EN
INSTRUCTION MANUAL
MVR-40-10RF / MVR-60-10RF / MVR-60-20RF / MVR-60-50RF
EN | 1

www.getdio.com
Important safety warning
Thank you for purchasing a DiO product.
Before installing this product, please read these instructions for use carefully and ensure that
you follow the instructions to ensure the safety of persons. In the event of non-compliance with
these instructions, liability and the warranty of the motor will no longer be valid. Please contact a
professional if in doubt.
An installation which has not been carried out in accordance with the instructions may result in
serious accidents and damage to both people and property.
Keep this manual after installation in case of possible future system modifications or maintenance.
If in doubt or in the event of a problem, please contact the dealer where you purchased the
product, or DiO customer service:
• Via our web site: www.getDiO.com
• By telephone on: Belgium 0900 51 100 (National rate €0.45/minute)
France 01 57 32 48 12 (Local call rate)
Important instructions regarding the safety of users:
• Keep the control units out of the reach of children.
• Keep an eye on the shutter while it is in motion and keep children and animals away from it
until it is completely closed.
• Check the equipment regularly and do not use the motor if it needs adjusting or repair.
• Do not operate the shutters or blinds when maintenance is being carried out, such as when
cleaning the windows, for example.
Important instructions regarding the safety of the equipment:
• These motors are intended exclusively for motorising wooden, PVC or aluminium shutters
or blinds. Any other use will void the warranty and the manufacturer accepts no liability for
damage caused in the event of non-compliance with these instructions.
• When installing, use only the accessories provided in the kit.
• Fitting the motor and its accessories may be carried out by an unqualied person provided
that the instructions in this manual are strictly observed. Connection to the electricity supply
must be carried out by a qualied electrician.
• The motor is tted with a thermal protection device that will stop the motor automatically to
enable it to return to its normal operating temperature. If this occurs, please wait for about 20
minutes; the motor will then function as normal.
• The unit may become warm in the event of prolonged use or with no load. Caution – risk of
burning.
Before installation
• Check that the motor is suitable for the shutter to be automated. The torque, the coupling ring
and the operating time must be compatible with the characteristics of the driven components.
Follow the manufacturer’s specifications when defining the load to be applied to the motor.
• Ensure that you disconnect the power supply to the system before carrying out any installation
or maintenance.
• Avoid pulling on the power cable excessively.
• Avoid shocks or blows to the motor.
• Do not allow it to come into contact with liquids or any source of heat.
EN | 2
www.getdio.com
• Do not disassemble the product. Do not insert sharp objects into the motor.
• Fit the power cable inside waterproof protective tubing if it is to be installed externally in
order to avoid any possible ingress of water into the motor.
• Do not use the motor if the power cable is damaged, and contact customer service or the
dealer immediately.
• Do not make holes in the motor and pay particular attention to the length of the retaining
screws of the roller of the shutter or blind.
• Please refer also to the shutter or blind instruction manual for additional safety instructions.
Note for the warranty:
Important! No warranty is accepted for the product in the event of faults or problems due to non-
compliance with the standards for installation.
Contents
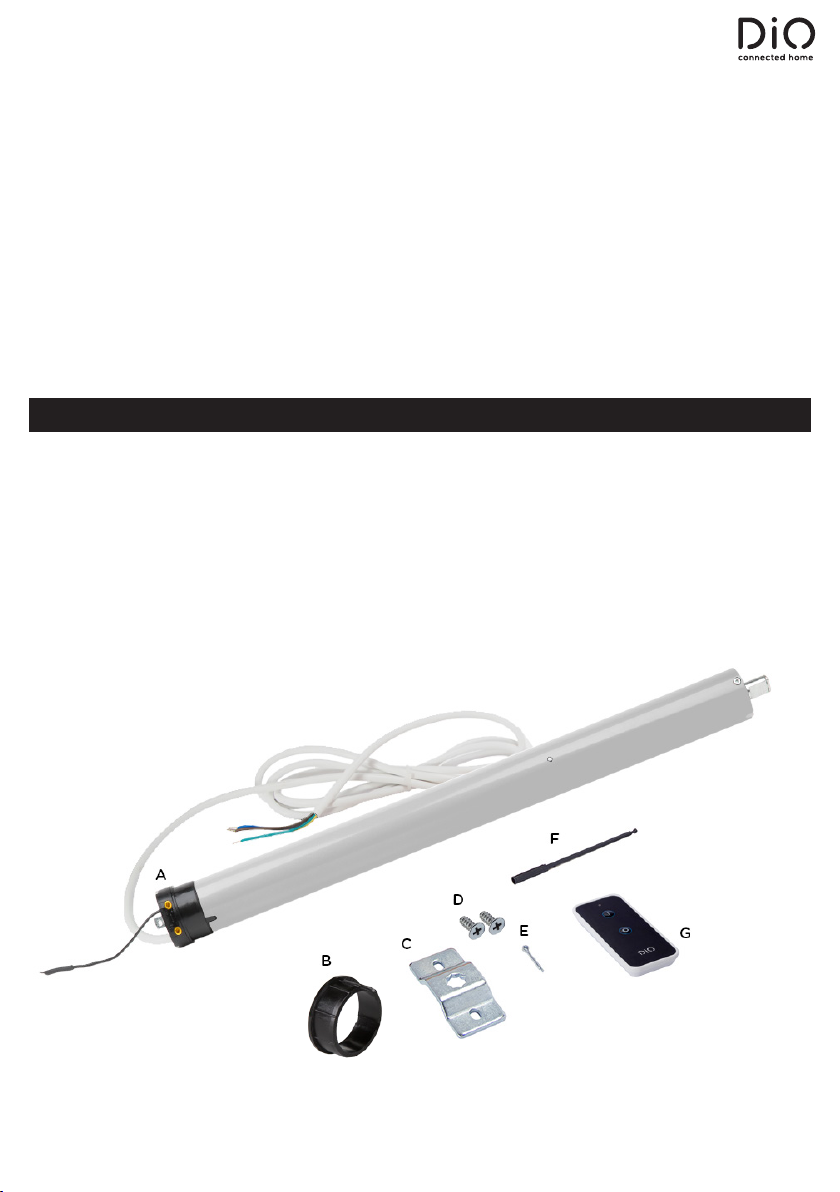
This kit contains:
A tubular motor 45mm in diameter (35mm for Ref.: MVR-40-10RF)
A.
with a 60mm diameter drive wheel (40mm for Ref.: MVR-40-10RF)
A 60mm diameter octagonal ring (40mm for Ref.: MVR-40-10RF)
B.
A retaining bracket
C.
Retaining screws
D.
Retaining pin
E.
An end stop adjustment tool
F.
A one channel DIO 1.0 remote control unit
G.
EN | 3
www.getdio.com
Installation
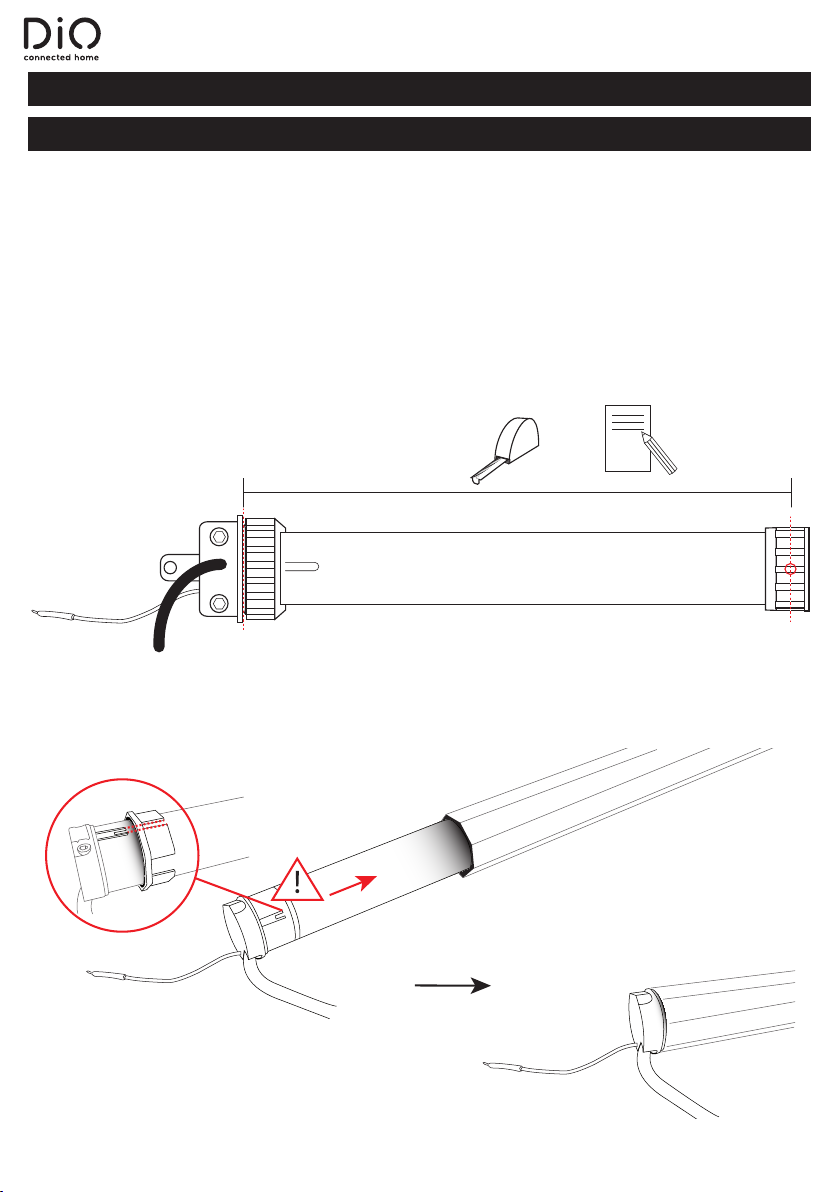
I. Installing the motor
Please follow the instructions for your shutter or blind to remove it and gain access to the roller.
Warning, before installing the motorised unit, make sure you block o the existing wired switch
if you had an electrical installation or remove any equipment which is not needed for a motorised
operation such as the strap or the hand crank.
Warning, before installing, check that the motor is suitable for the shutter to be automated (see
product box).
1 Measure the exact distance between the following two points (see diagram):
+
2 Insert the motor into the shutter roller, taking care to align the octagonal ring mark with the
adjustment line located on the head of the motor. Only the head of the motor may extend
beyond the roller.
EN | 4
 Loading...