

Dinsafer DHW01O, DMC01O, DYK01O User Manual
Smart Alarm System & App
Designed for home and business security.
Easy to setup and use with App.
Security Products User Manual
Perfectly match all Android® and iOS smart phones.
World famous expert of smart alarm system
User Manual
Meet the New Great Smart Alarm System.
We make things different.

2
P3
P6
P9
P23
P24
P25
P28
Get Ready and Power On
Work with the Main Panel
App Manual [Setting by Smartphone]
FAQ
Appendix 1 : Accessory Installing
Appendix 2 : Smart Camera Settings
Appendix 3 : Product Specification Lists
MENU
The screenshots and texts might be different from the version you’re using. Please refer to the latest one.
●
●
●
●
●
●
●
3
Get Ready and Power On 1/3
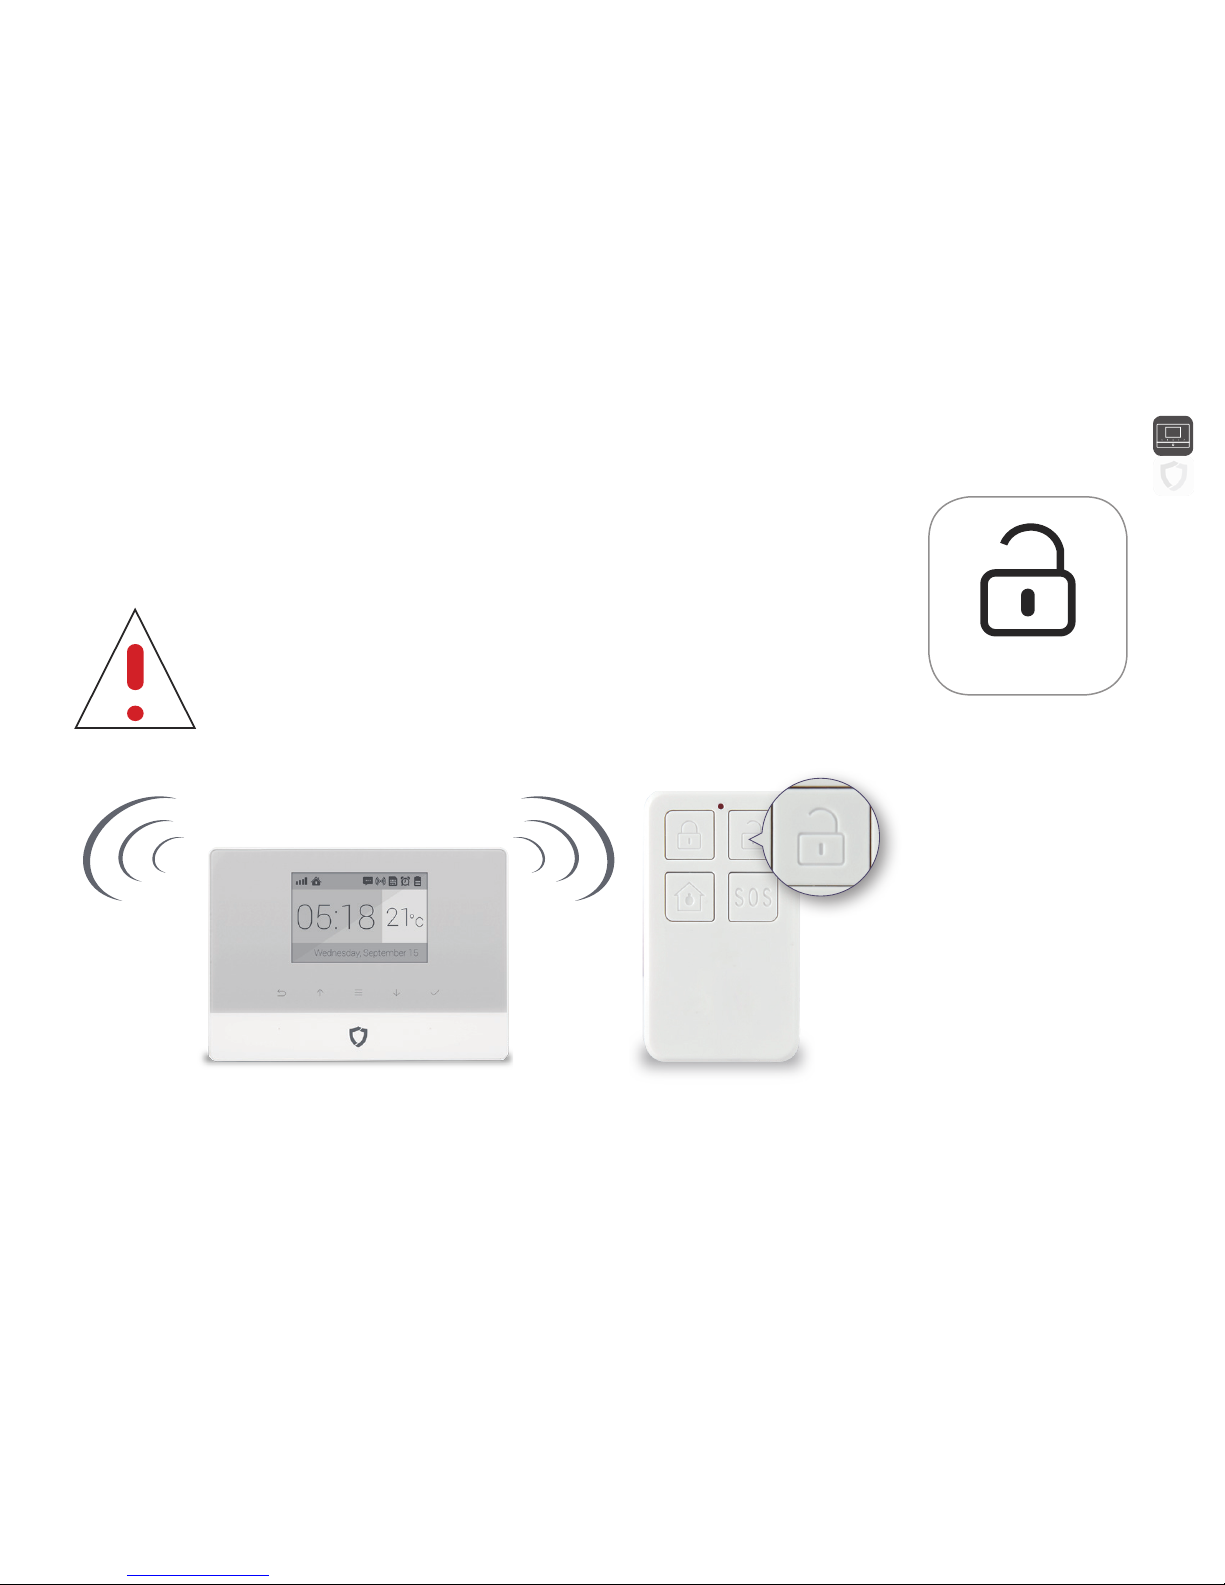
• When alarm is triggered, users can cancel the alarm by pressing down the DISARM button on the remote
controller, or by sending SMS commands via the mobile App.
• It’s recommended to pair the remote controller with the system first so users could test the system easily.
During the installation of the alarm system, you might trigger the alarm by
accident. If the remote controller has been paired with the system, you can
press the DISARM button on right top (with the unlock icon) to disarm the
system and cancel the alarm.
Main Panel Remote Controller
DISARM
4
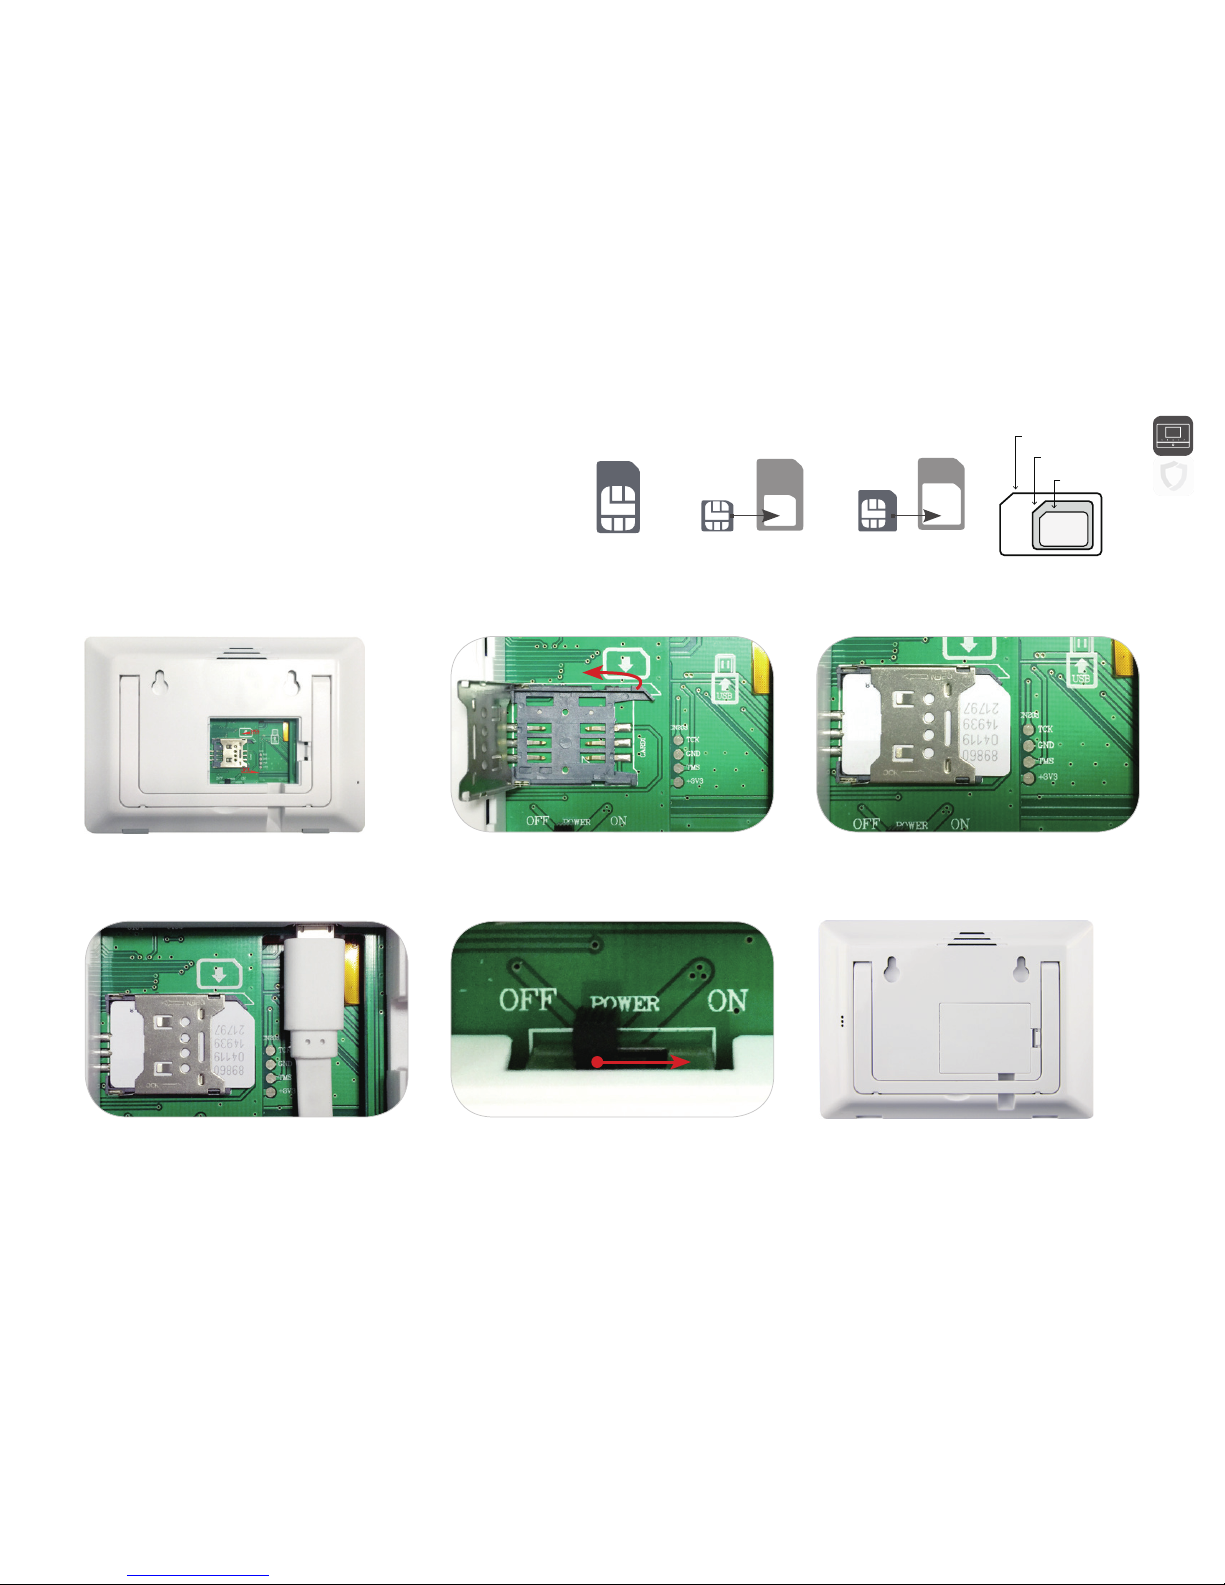
Get Ready and Power On 2/3
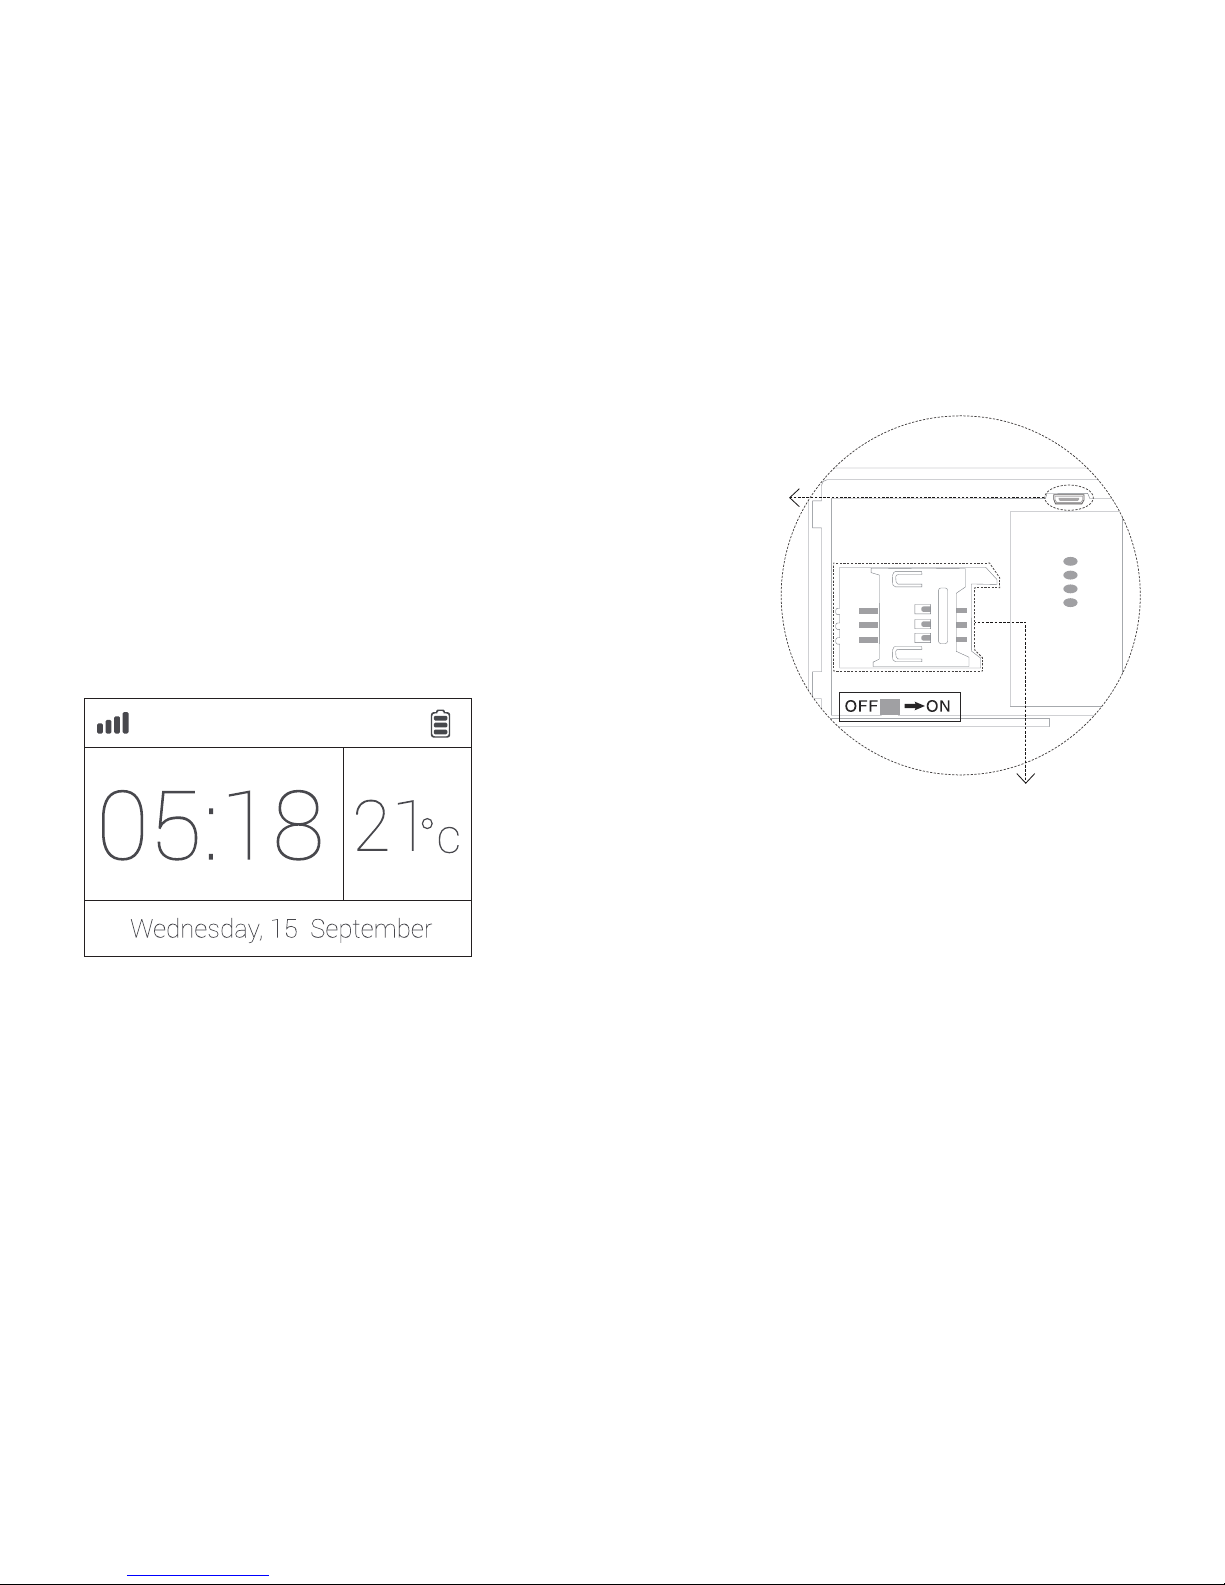
Connect the power cable and insert sim card
Power ON
• Remove the battery cover on the back of the panel. Insert the power cable to the
power outlet first. Then open the SIM card slot to insert the SIM card.
For those micro or nano SIM cards, please use sim adapter to fit the card slot.
PLEASE REMEMBER TO INSERT THE POWER CABLE FOR THE FIRST TIME USING.
• Flip the switch on the back of the panel to the ON position. Replace the battery cover.
Wait 20 seconds as the system runs a start-up diagnostic with a welcome screen.
• You will hear a confirmation when the test is complete.
When you see the main screen ( left ) the system is ready.
• The main panel uses GSM based SIM cards to send text messages and make phone calls.
It might be incompatible with some WCDMA or LTE sim card.
• Make sure PIN-codes and voicemail are de-activated on the SIM before using with the panel.
• Make a note of the SIM telephone number, you will need it for setup.
Power Outlet
SIM Card Slot
5
Get Ready and Power On 3/3
Appendix: step by step guiding.
• Please use the Mini-SIM card (Standard-SIM card) for the alarm system.
Card adapter is required when using nano or micro SIM card.
1. Open the back cover 2. Slide the cover of the SIM slot to the left to
open it.
3. Insert the SIM card and align it (notch on right
top), slide the cover to the right to close it.
5. Turn on the power switch by move the button
to the right.
6. Put the cover back and close it.4. Insert the power cable (USB cable),
make sure the narrow edge is facing down.
OR
=
Mini-SIM
Nano-SIM Micro-SIM
Standard SIM Card
Micro SIM Card
Nano SIM Card
6
Work with the Main Panel 1/3
• The system uses MicroUSB as the power cable interface
.
• You can easily recharge it via any MicroUSB cable. Please make sure the recharger is 5V/2A as our official one.
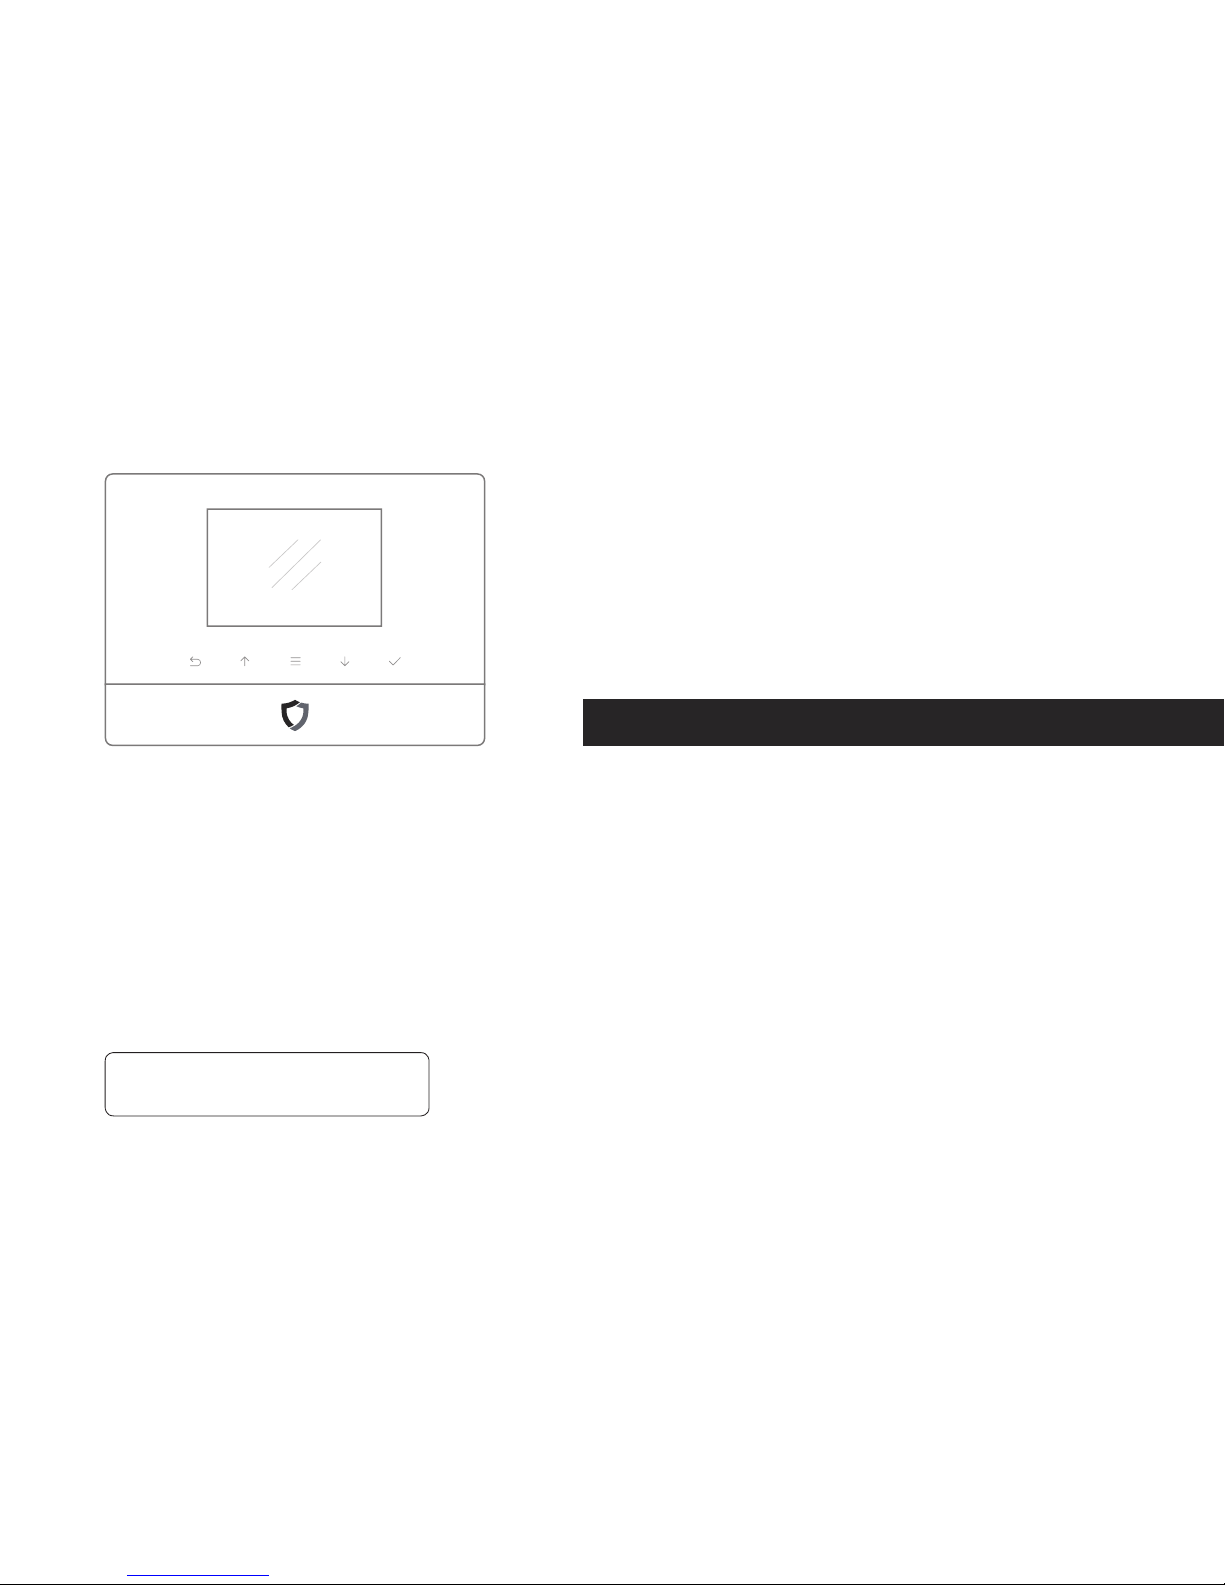
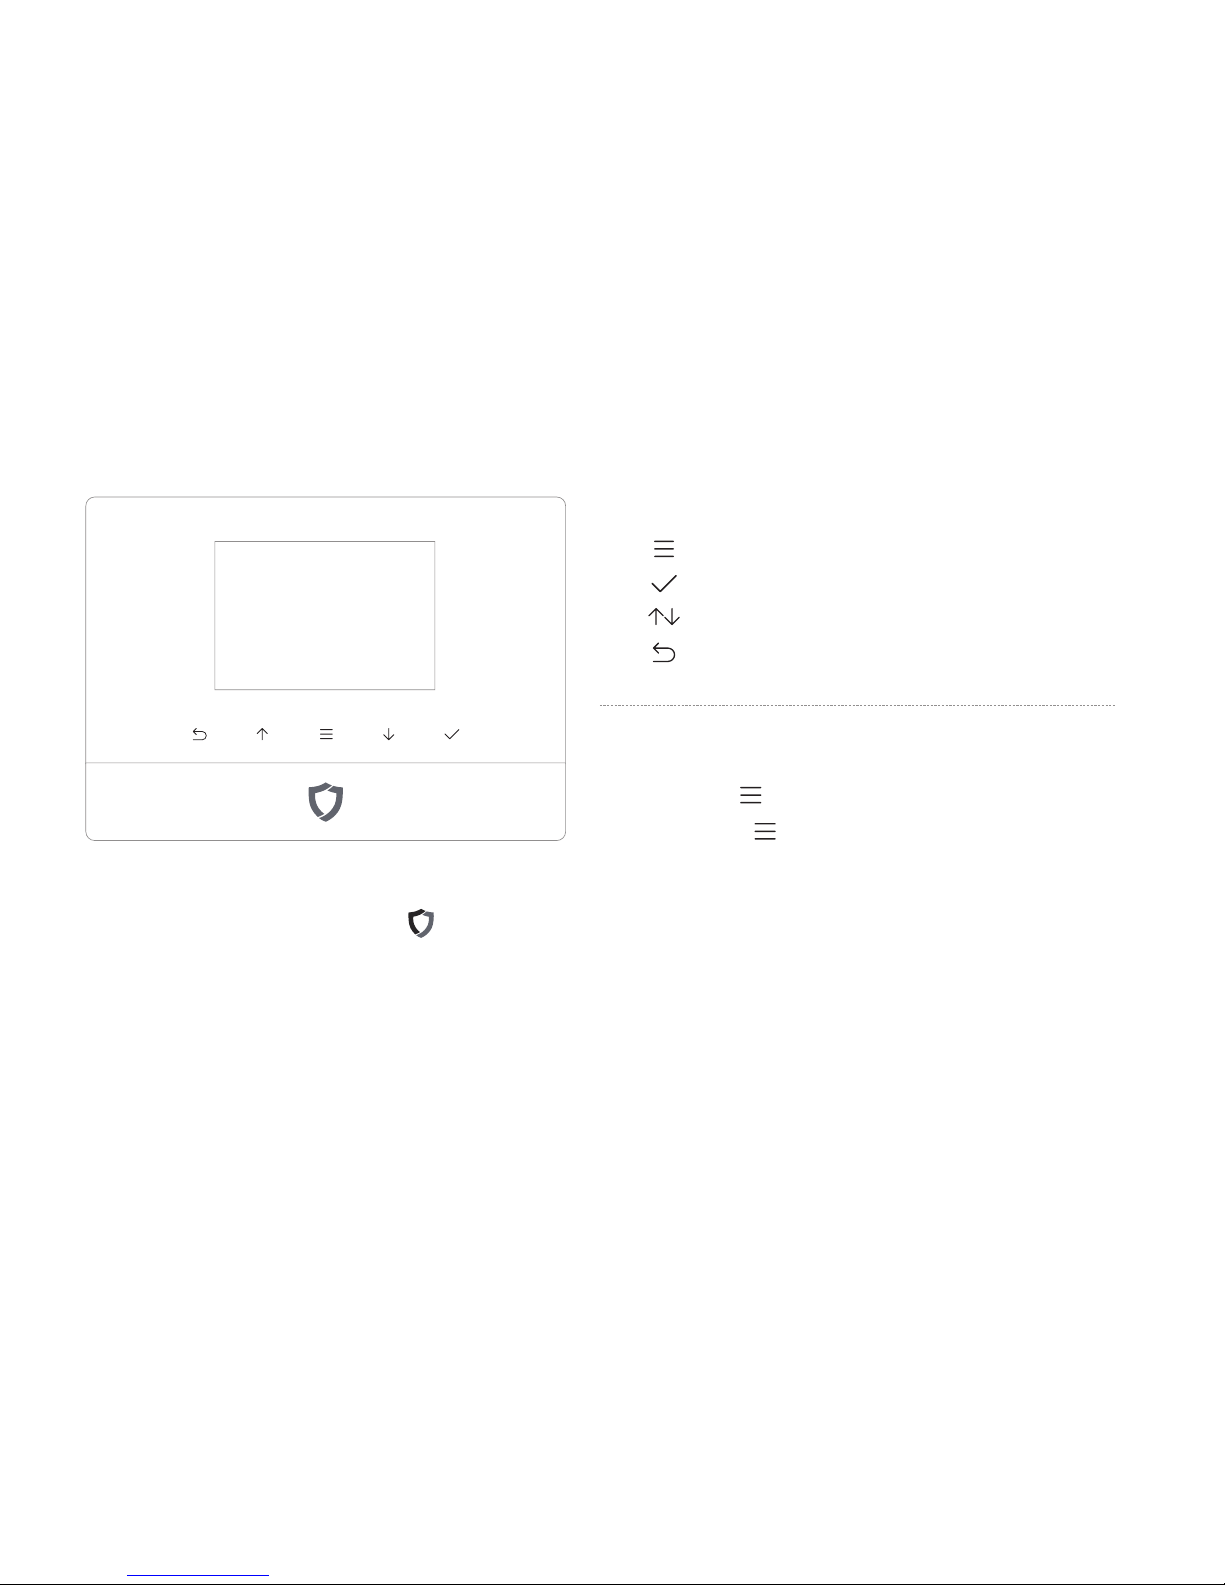
LCD Monitor
Control Button
Press to enter the settings menu.
Press to select.
Press to navigate.
Press to go back.
Child Lock
Lock:
Long-press for 6 seconds until the lock icon shows on screen.
Unlock:
Long-press for 6 seconds until the lock icon disappears.
Power Light & Exit Delay Button
Power Light with logo.
Long-press to arm the system.
The system supports Exit Delay feature. It means the system would wait few seconds before going into ARM status.
It allows you to leave your home without triggering the alarm. The delay time can be adjusted in App.
7
Work with the Main Panel 2/3
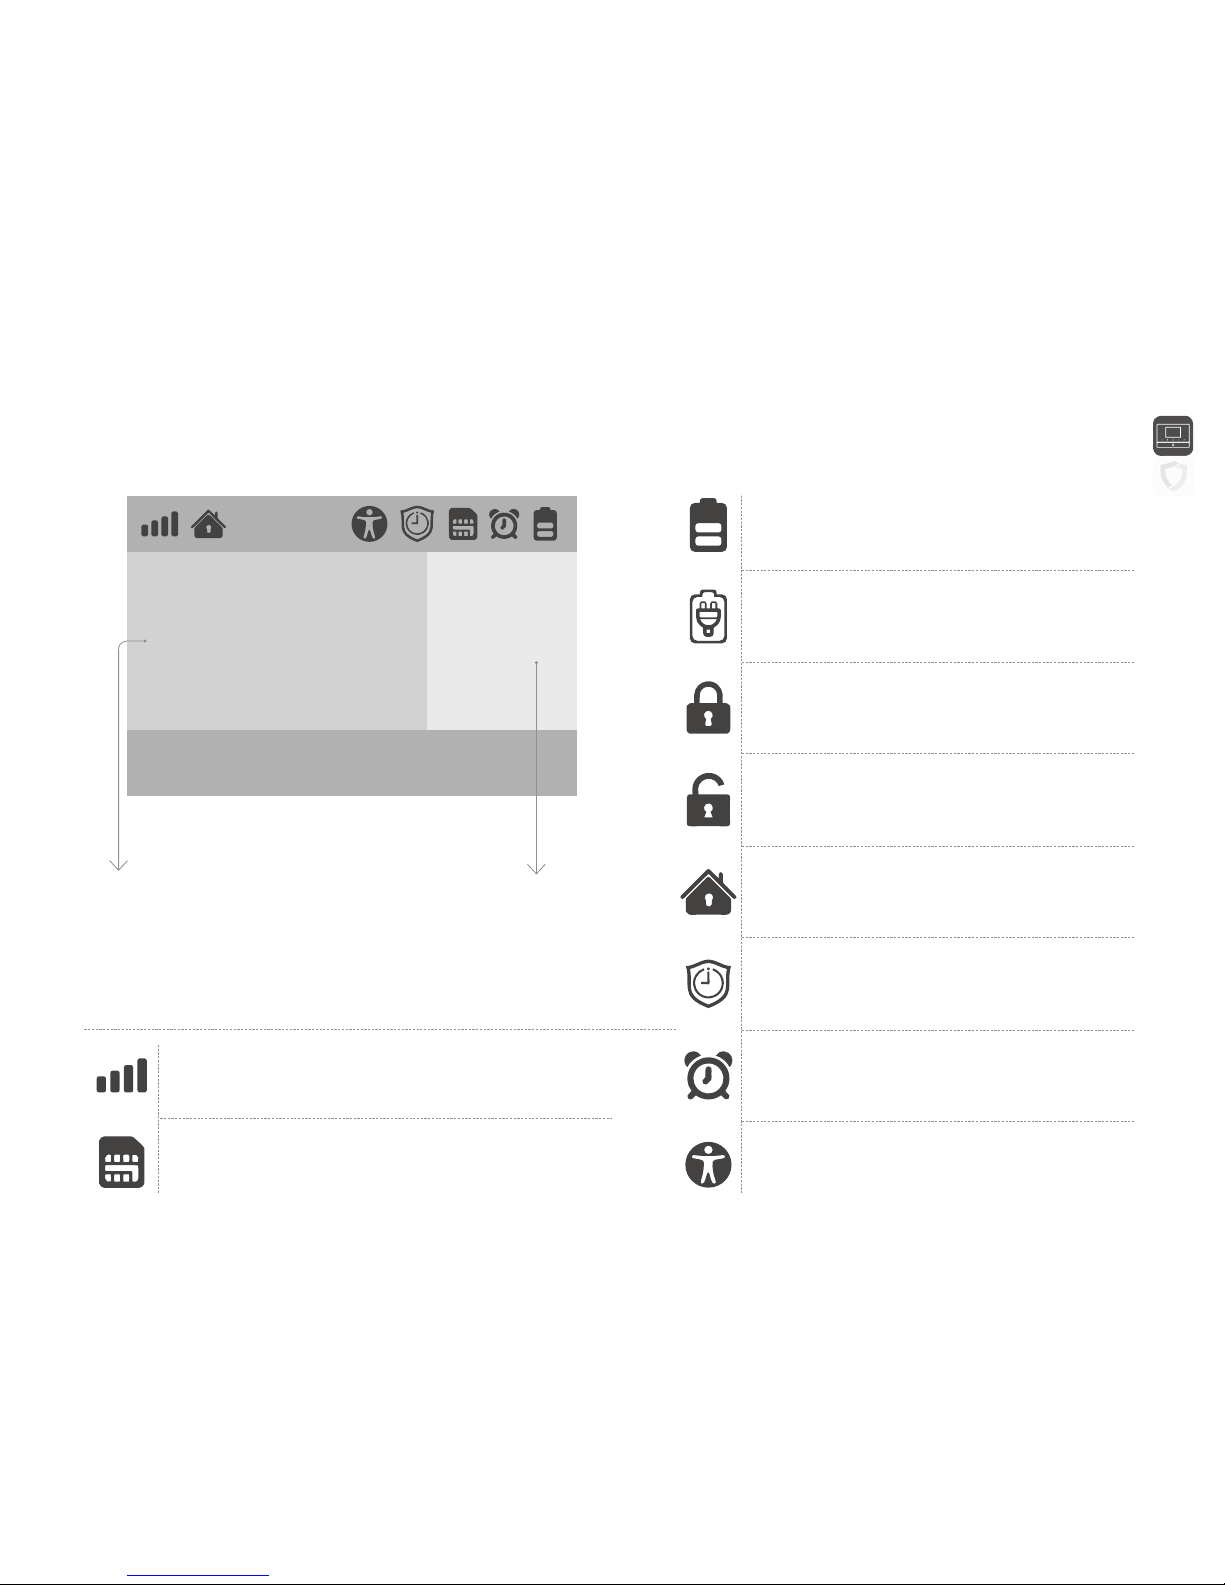
08:18
18
°c
Wednesday, September 15
Signal Bars
Indicate the GSM signal strength.
Battery Life
Indicatethe remain battery lifewhen AC power is OFF.
Arm
All active sensors can trigger alarm.
Home Arm
Only those on Homemode stop trigger alarm.
Alarm Clock Status
Indicate one or more Alarm Clock has been set.
Real-time Temperature
The temperature surrounding main panel.
Users can change ºC or ºF in settings.
Clock
After initializing process, the time will
synchronize with your phone’s.
SIM Card Status
Flashing when starting up or SIM card error.
AC Power
External power is available.
Disarm
Stop trigger alarm, except those on 24-hours mode.
Arming Schedule
Indicate the Arm Schedule has been set.
Child Lock
Indicate the Child Lock is active.
8
Work with the Main Panel 3/3
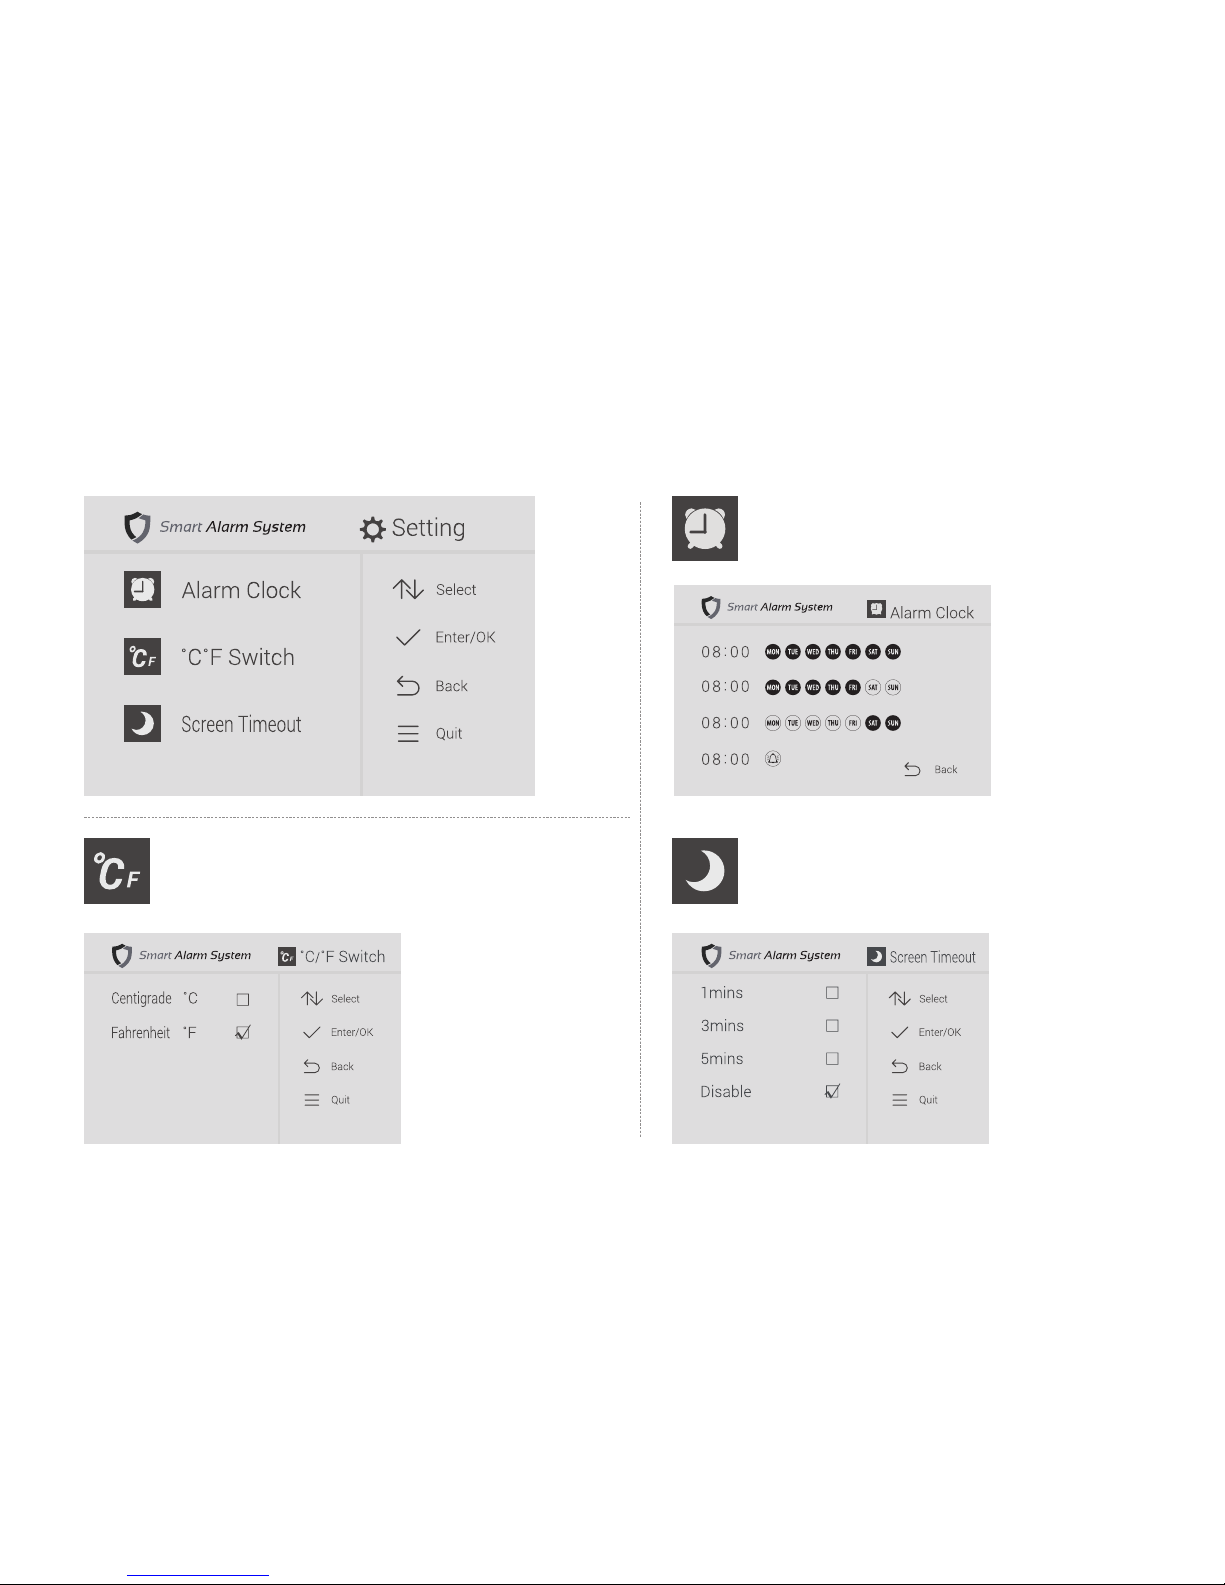
Alarm Clock
Check all working alarm clocks set by App.
ºC/ ºF Switch
Switch the temperature scale between Fahrenheit and Celsius.
Screen Timeout
Set the screen saving time.
9
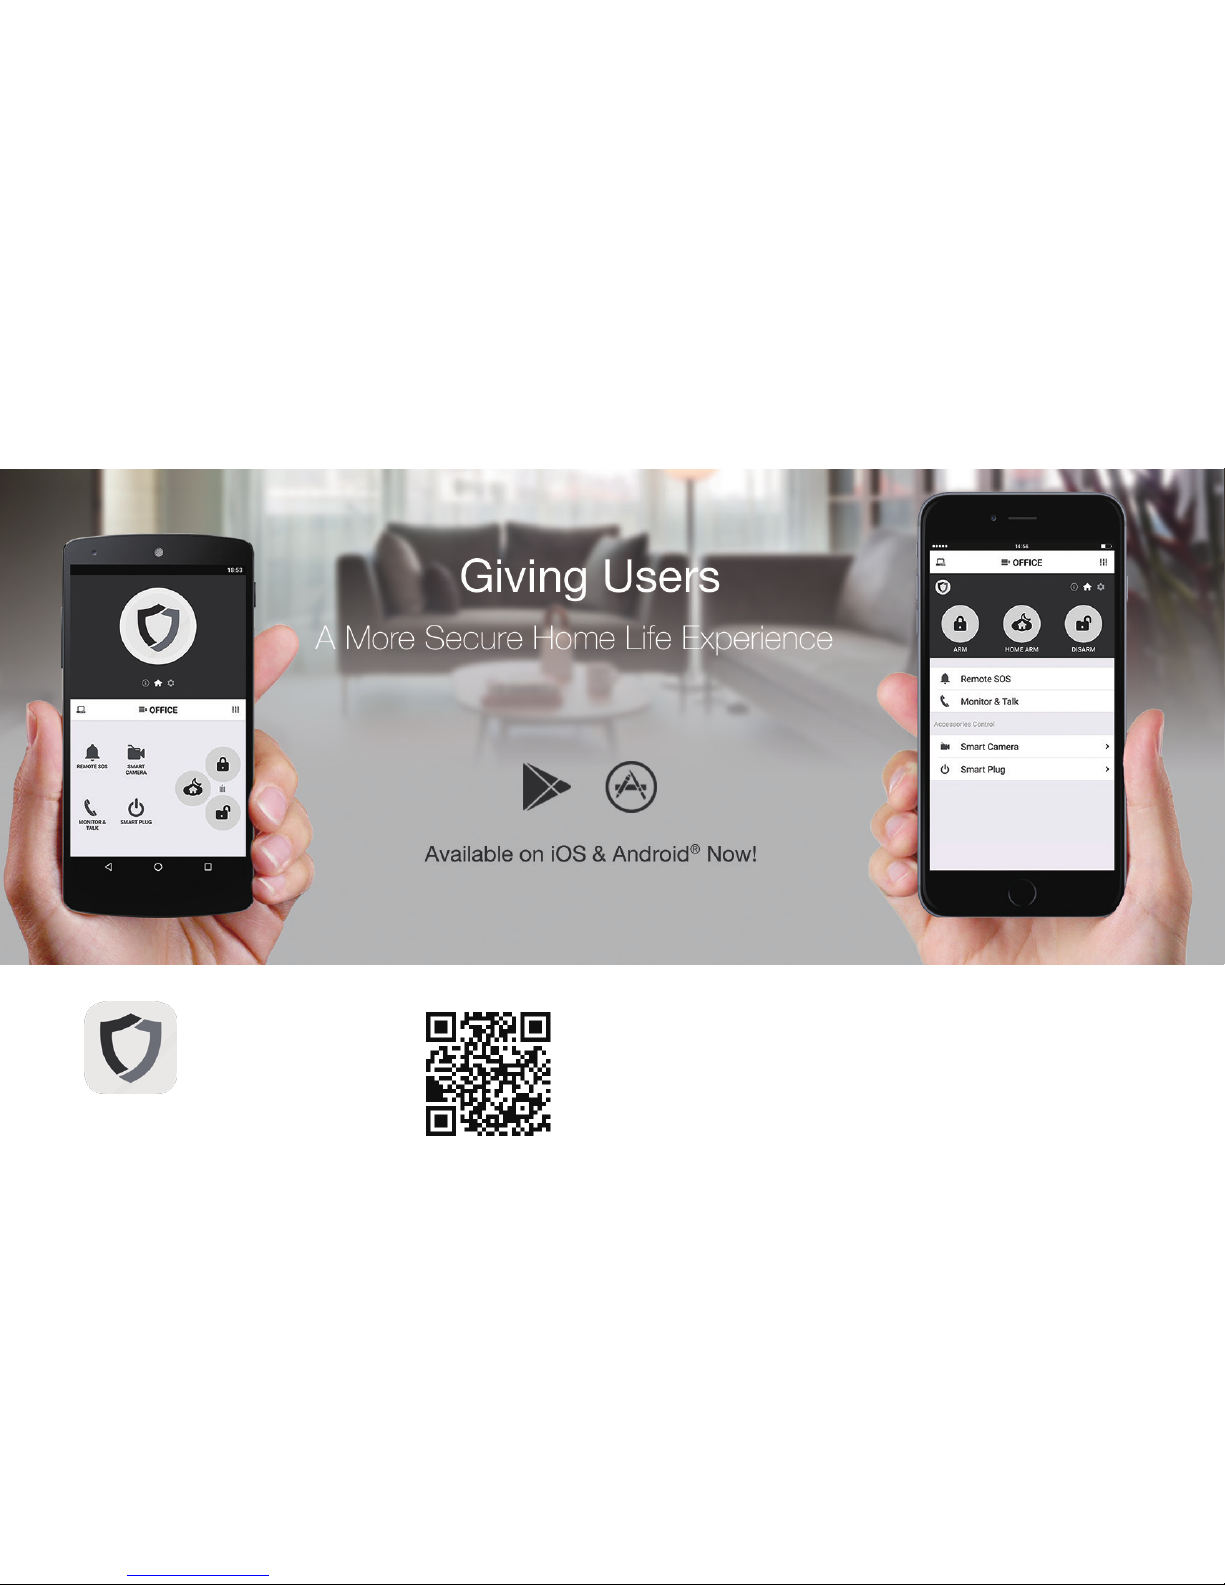
App User Manual
Setting by smartphone
10
Initializing by App
• Scan the QRCode or visit the website from your phone to download the
latest App for both Android and iOS phones.
• All operations and settings of the system could be easily done via App.
• App comes with multi-languages, you can easily change it in App.
Power to the people
Smart Alarm System

11
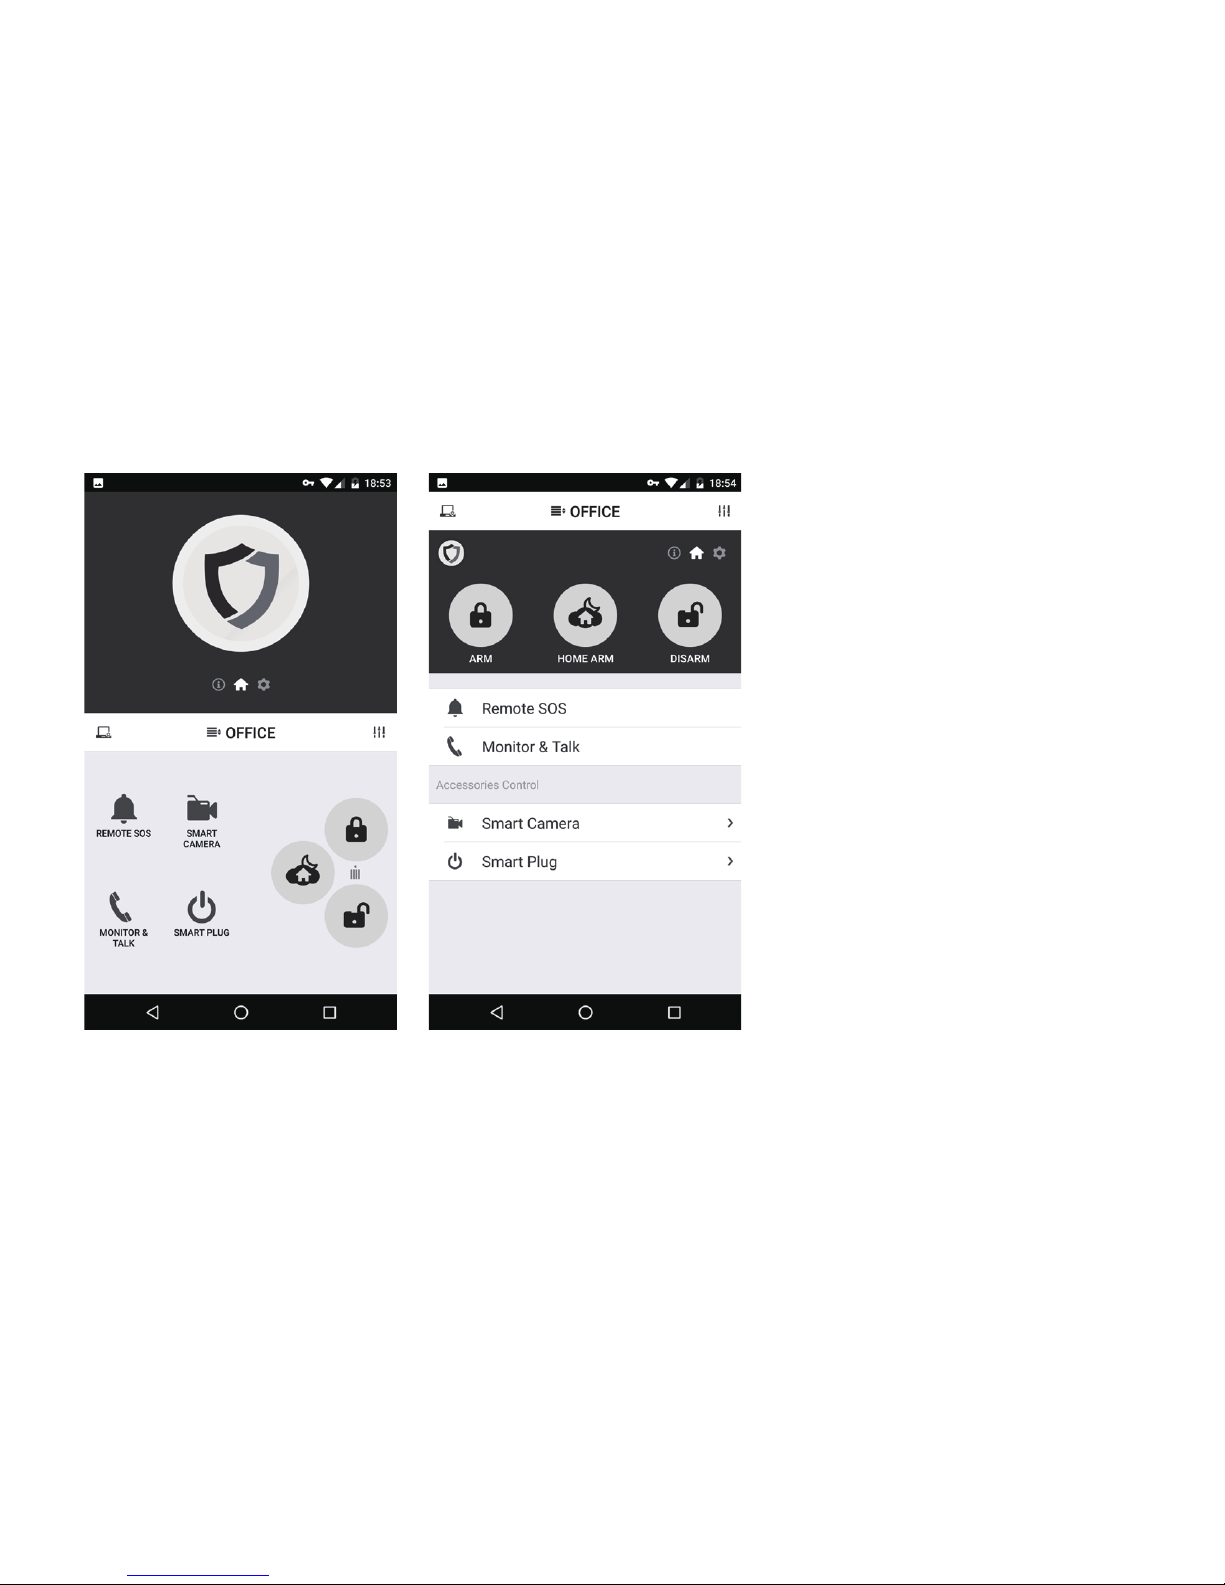
Add a New Main Panel
• The App is a great tool to control main panel. main panel should be added to App before using, which we call binding.
One App can handle more than one main panel. The phone number of main panel and the password would be asked during binding. Different
role has its default password.
Administrator:
General operations and advanced settings are available.
User:
General operations only.
• The beginners will get kindly reminder, which could help them through the settings step by step.
• The App supports renaming for the main panel, which is especially useful when managing multiple devices.
• Users without having a main panel may experience the products in the demo mode of App.
• Some carriers might ask you to remove the 0 at the start of the mobile number when country code is selected.
• The password would be saved to encrypt all outgoing SMS commands. You can change it in the device management menu.
SAVE
12
Switch Between One/Two Hands Mode
One/two hands mode
• There are different sizes of smart phones with
Android or iOS systems, which bring operational inconvenience for users.
• We bring convenience by offering one/two
hands modes for both small sizes phones (3.5
inches including under) and big sizes phones
and tablet PC (4 inches including above)
• It’s one good case to show our principle:
make every effort to minimum users’ operative
difficulty.
Two hands mode only works on Android
®
phone now.
One Hand Mode Two Hands Mode
 Loading...