

Dino-Lite AMK4012T-D15, AMK4012ZT-D15, AMK4012TL-D15 User Manual

www.dino-lite.eu
EN Manual
FR Manuel d’utilisation
DE Bedienungsanleitung
ES Manual de usuario
NL Handleiding
Digital Video Recorder with
Dino-Lite digital microscope
AMK4012T-D15
AMK4012TL-D15
AMK4012ZT-D15

AMK4012T/ZT/TL-D15
OPERATION MANUAL
EN Manual
2
DE Bedienungsanleitung
11
FR Manuel d’utilisation
22
ES Manual de usuario
34
NL Handleiding
45

Page 2 AMK4012-D15 manual

AMK4012T/ZT/TL-D15
OPERATION MANUAL
Digital Video Recorder with Dino-Lite digital microscope
Operating instructions
Before operating the unit, please read this manual thoroughly, and
retain it for future reference.
Thank you for purchasing a Dino-Lite with mobile recorder.
Important safety information
• Avoid touching the lens with your finger to protect the product from
electrostatic damage.
• Do not drop
• Keep dry
• Do not use it in high temperature, high humidity environment,
0~40℃ is the best working temperature for this product
• Please insert or pull out the SD card or the Dino-Lite when the power
is off. The product or the SD card could be damaged.
Please check www.dino-lite.eu for updated information or if you have
any questions.
AMK4012-D15 manual Page 3
Basic Information
• Display: 5-inch HD screen (800X480pix).
• Channel Switch: Supports manual & automatic switch between 8
channels.
• Recording: Supports seamless cycle and continuous video from the
Dino-Lite digital microscope
• Photo: Supports function of taking pictures either from the Dino-Lite
digital microscope
• AV IN: TV-IN [NTSC/PAL].
• AV OUT: NTSC/PAL].
• Battery:Built-in 3200mAh high capacity Li-battery, continuous
record over 10 hours.
• Speaker: Built-in speaker of 1W.
• Storage: Supports up to 32GB TF card, 4GB SD card supplied.
• Language: Supports English/ French/German/Spanish/Dutch.
• Power-saving Mode:Automatic shutdown, automatic screen off.
• Firmware update: Supports firmware update from SD card.
Page 4 AMK4012-D15 manual

Connecting the Dino-Lite digital microscope
With the recorder power set to off, connect the plug on the Dino-Lite to the
AV-IN connector on the recorder.
Note:
The AMK4012 Dino-Lite is not supported for use on other devices with
2,5 mm AV connector.
How to Charge
Please make sure to charge the battery fully before first usage. Only use the
charger supplied with the product or charge on a PC USB port.
Charge 4~6 hours for a full charge. Do not unplug the charger until the
battery status is full. For the first time charge, please charge for more than 6
but less than 10 hours. A new battery will reach best performance after a few
times full charge and discharge. If the recorder is not used for a longer period,
please recharge every 2-3 months.
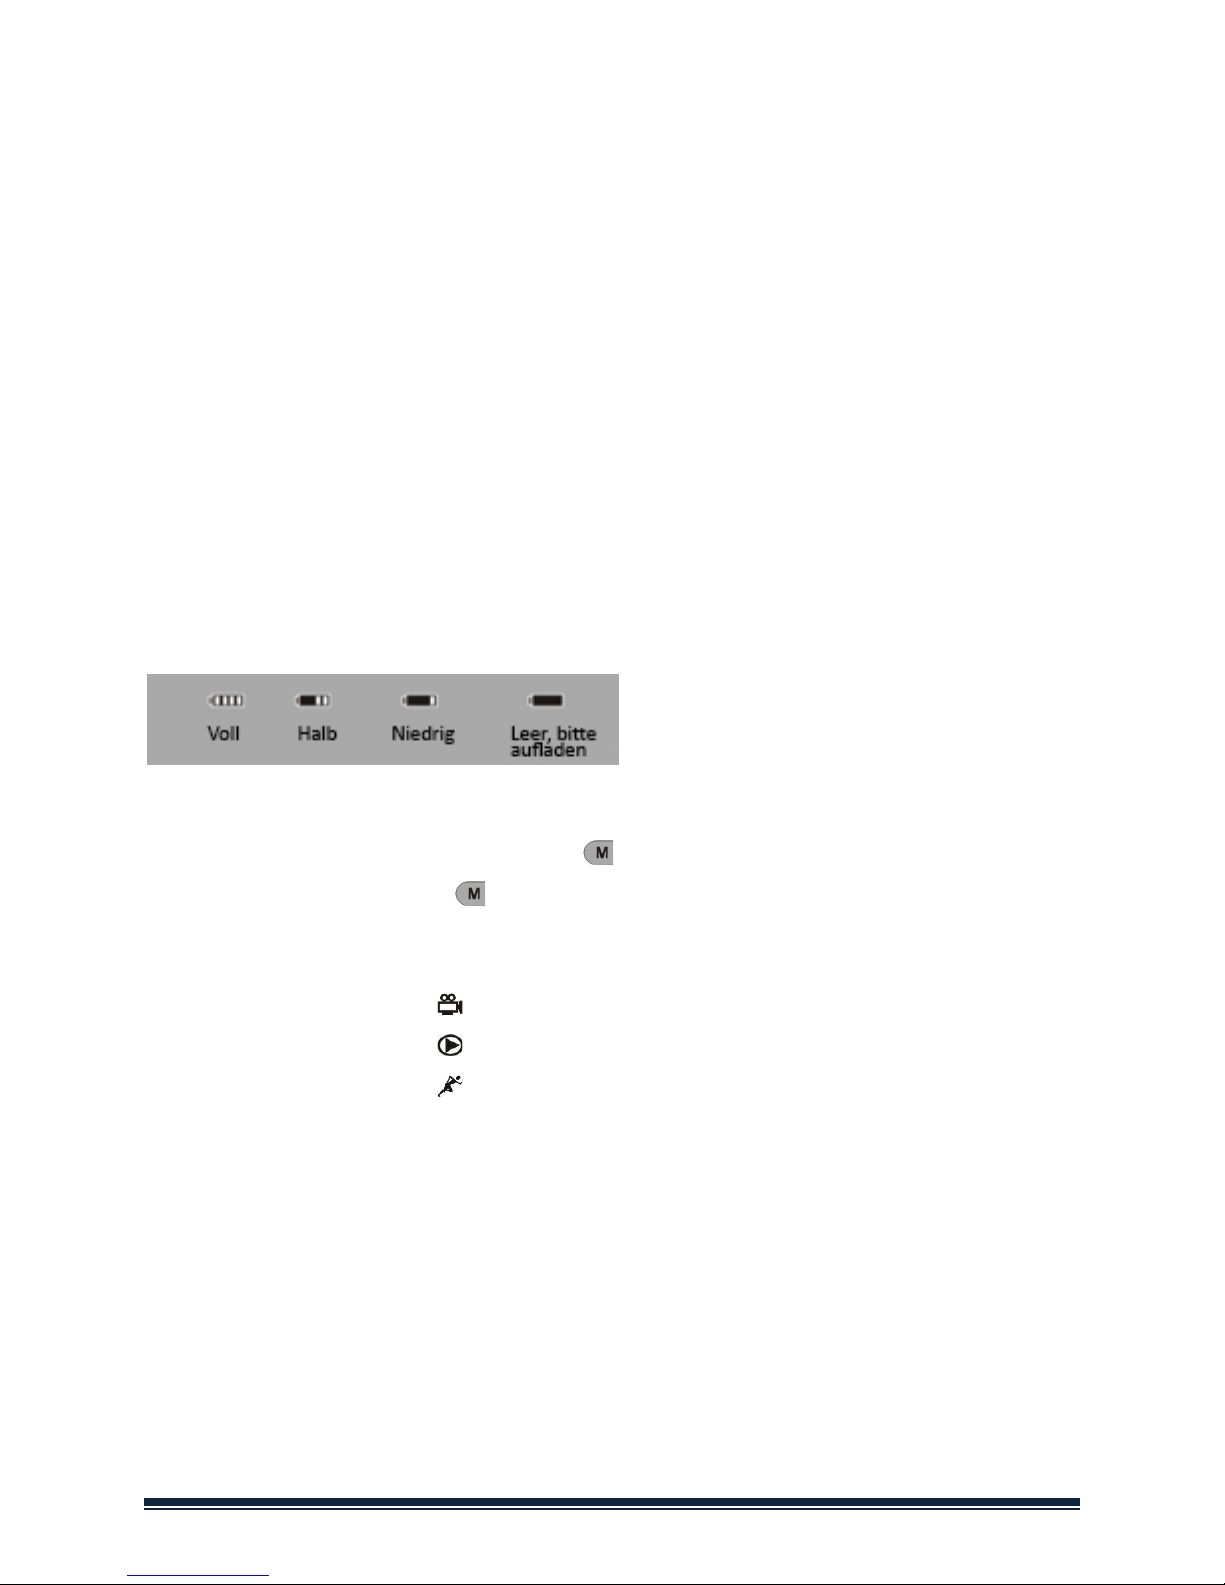
Battery capacity symbols:
Basic Operation
1. Power On/Off:Press “ ” to power on, DVR is in working state; press “
”for several seconds to power it off.
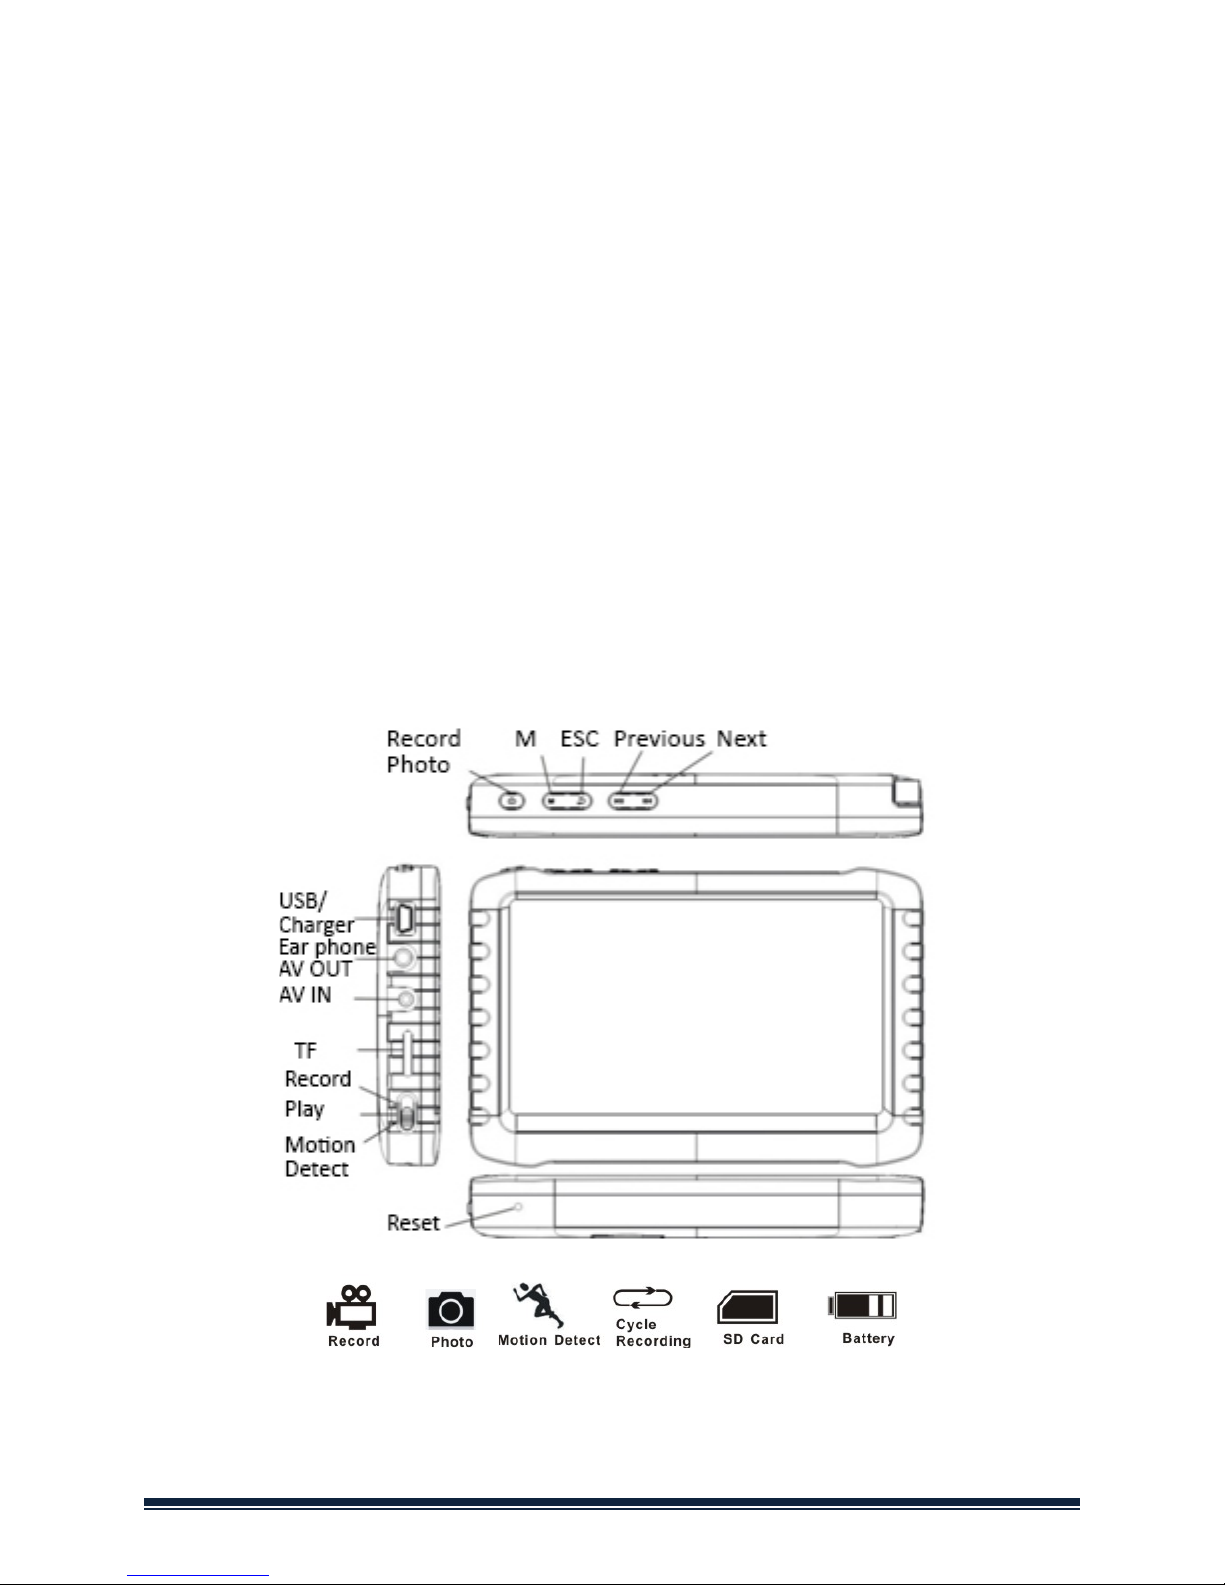
2. Working mode switch(switch located at the left corner):
When the switch is on “ ”, DVR is in state of receiving/record/photo;
When the switch is on “ ”, DVR is in playback;
When the switch is on “ ”, DVR is in the state of motion detection.
3. External Storage card
Tis DVR can only recordphoto or video is a storage card has been plugged in.
The screen will show symbol of SD card & its freecapacity.
4. Working as a disk
Connect DVR to computer and power it on, it will work as a disk. Open the
removable disk in the computer, you’ll find the videos and photos in
“RECORD” and “ PHOTO” files under “DICM” directory.
AMK4012-D15 manual Page 5

Record & Photo
Power DVR on, and select working mode “ ” for recording/photo mode.
1. Photo: In “ ” mode, press “ ” once, symbol “ ” flashes once, and one
picture is made.
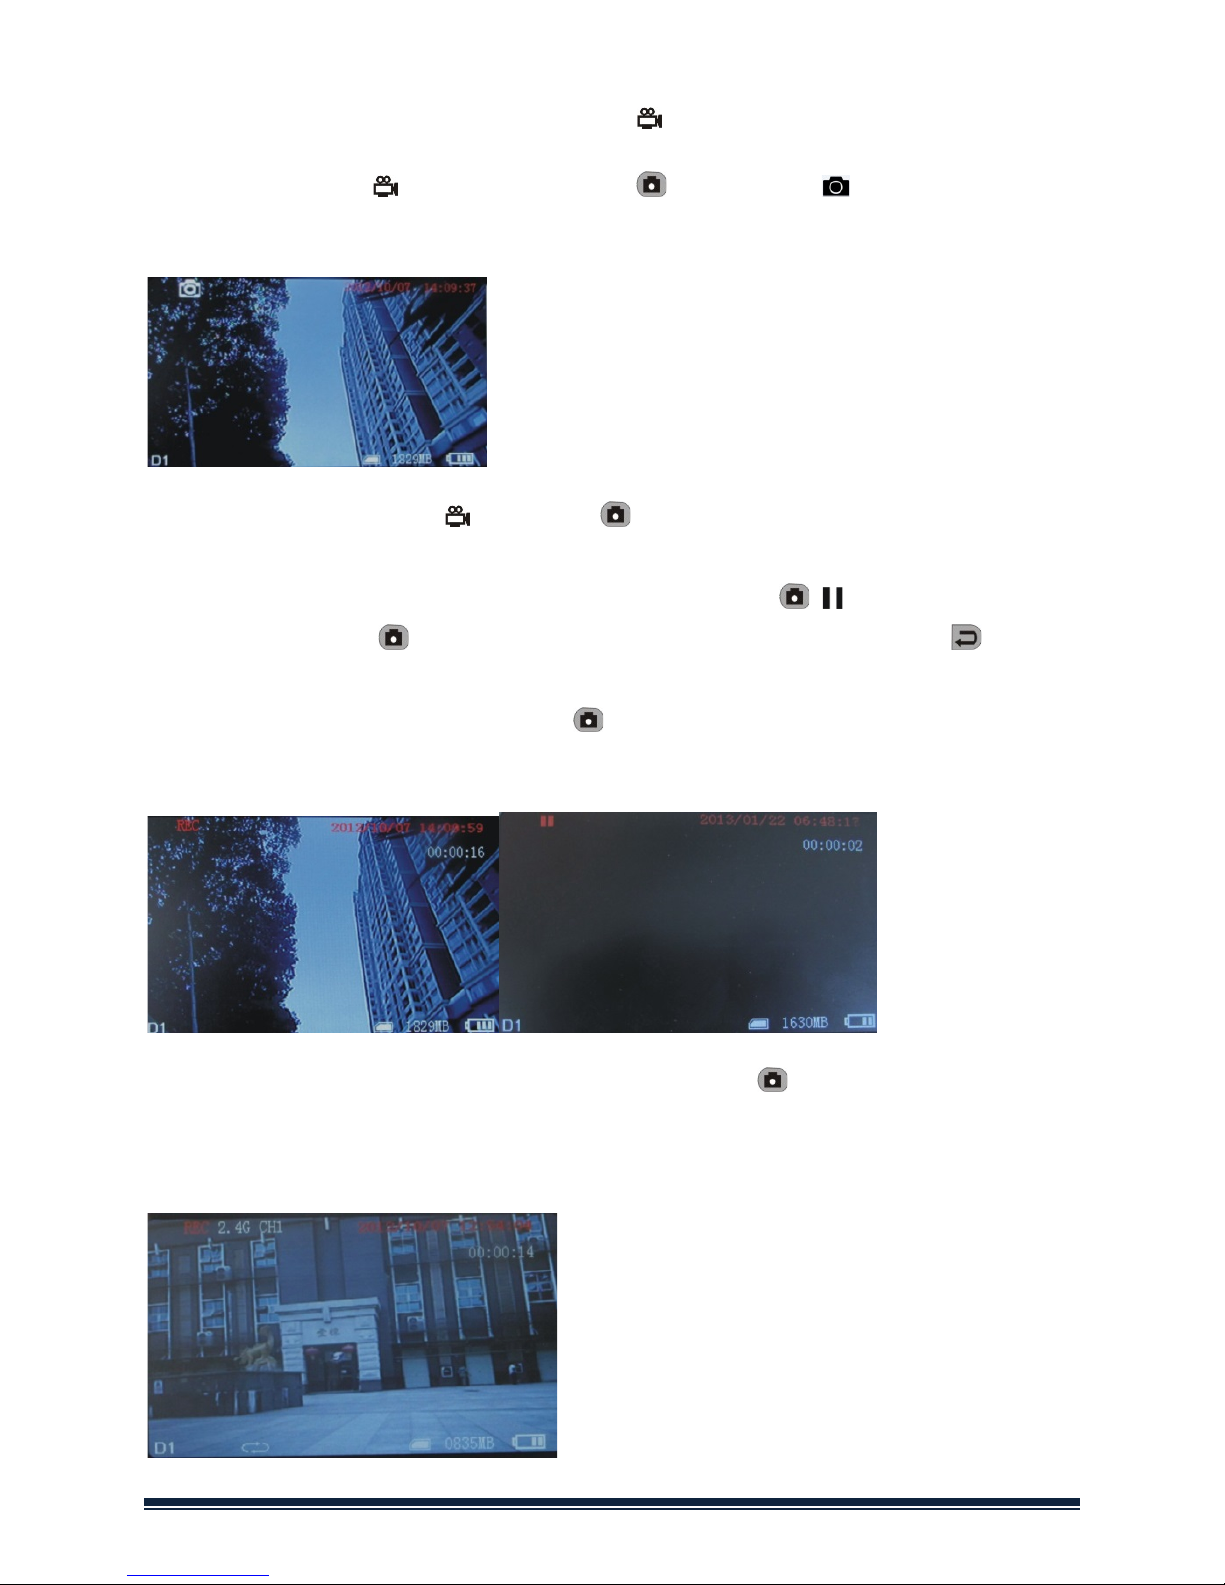
2. Record: In “ ” mode, press “ ” for 3 seconds, the DVR will start to record
and the screen shows “REC”. Press “ ”again to pause, screen shows “ ”;
press “ ” one more time, to resume recording. Press “ ” to end, it will save
automatically and exit. If you do not press “ ”, the system will automatically
save video in segments until the storage card is full. If “Overwrite” is turned
on and the card is full, it will overwrite the earliest recording and save the
latest one.
3.Mute: In “ ” mode, press “ ” to enter state of mute. Screen displays
“MUTE”. Speaker gives no sound; press “ ” again to recover sound.
Note: Mute setting will not affect earphone volume.
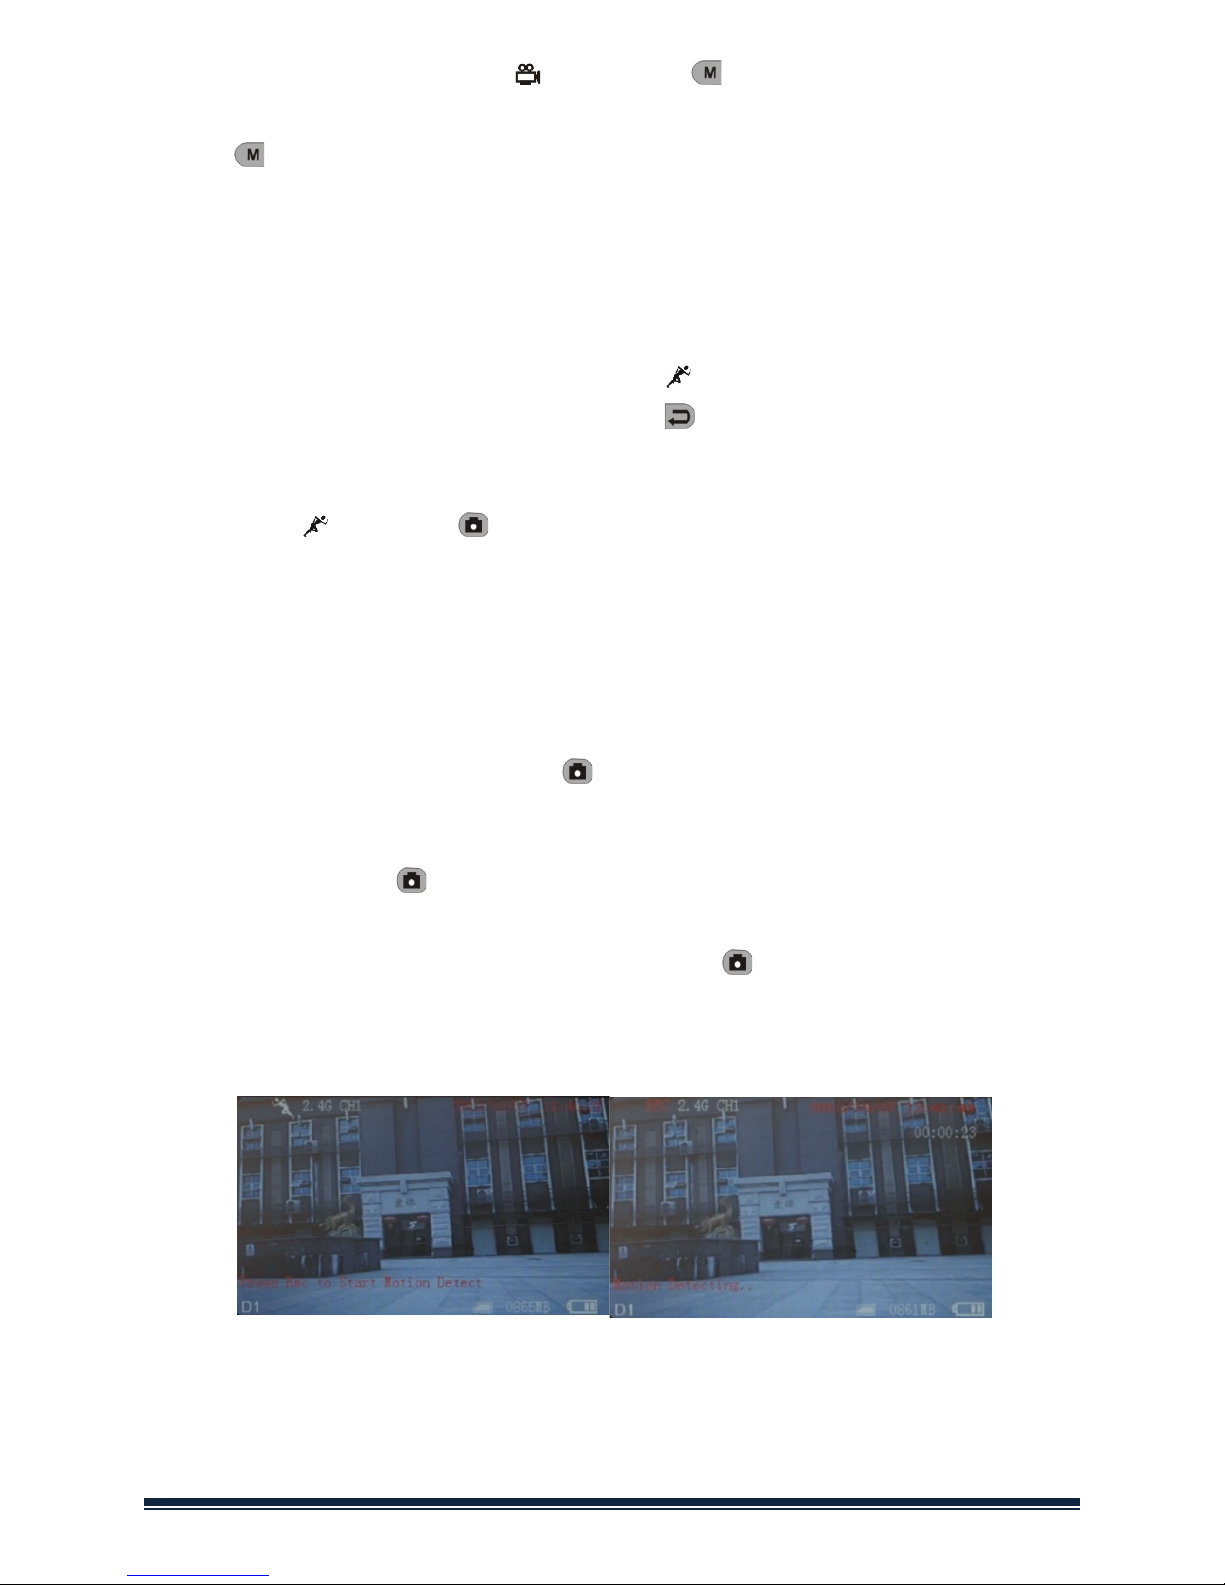
Motion Detect
1.Power DVR on, and select working mode to “ , for motion detect mode.
Press “ ” to exit and go back to system/function menu.
2.In “ ” mode, press “ ” for 3 seconds to enter into motion
detectrecording. When moving objects appear, system will automatically
start to record, and screen will show “REC”. After 10 seconds without moving
objects, system will automatically end recording and save to exit, waiting for
next motion. To end motion detect recording, press “ ”, it will save
automatically and exit.
3. If you do not press “ ”, the system will automatically save video in
segments until the storage card is full. If “Overwrite” is turned on and the
card is full, it will overwrite the earliest recording and save the latest one.
Page 6 AMK4012-D15 manual
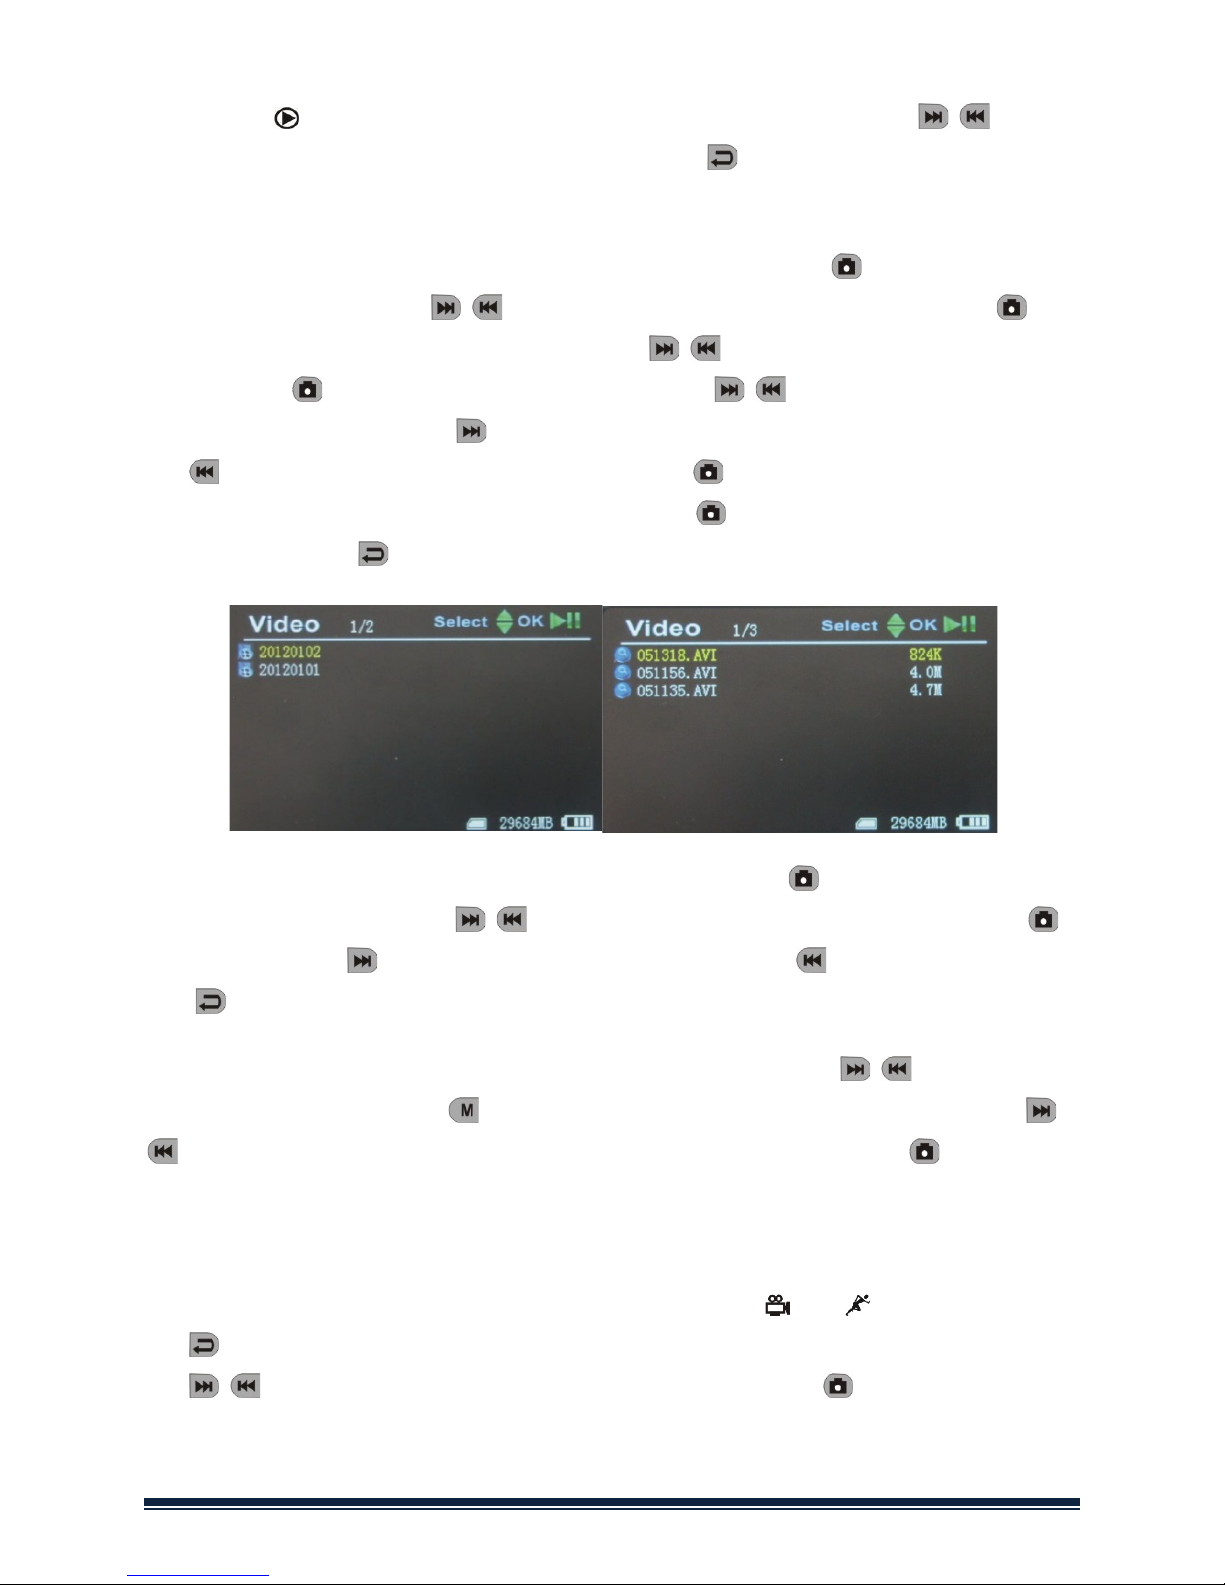
Play Video/Photo
When the working mode is set to “ ” you can playback video & photo. Press
“ ”/“ ” to select “Photo” or “Video”. Press “ ” to exit and go back to
main menu.
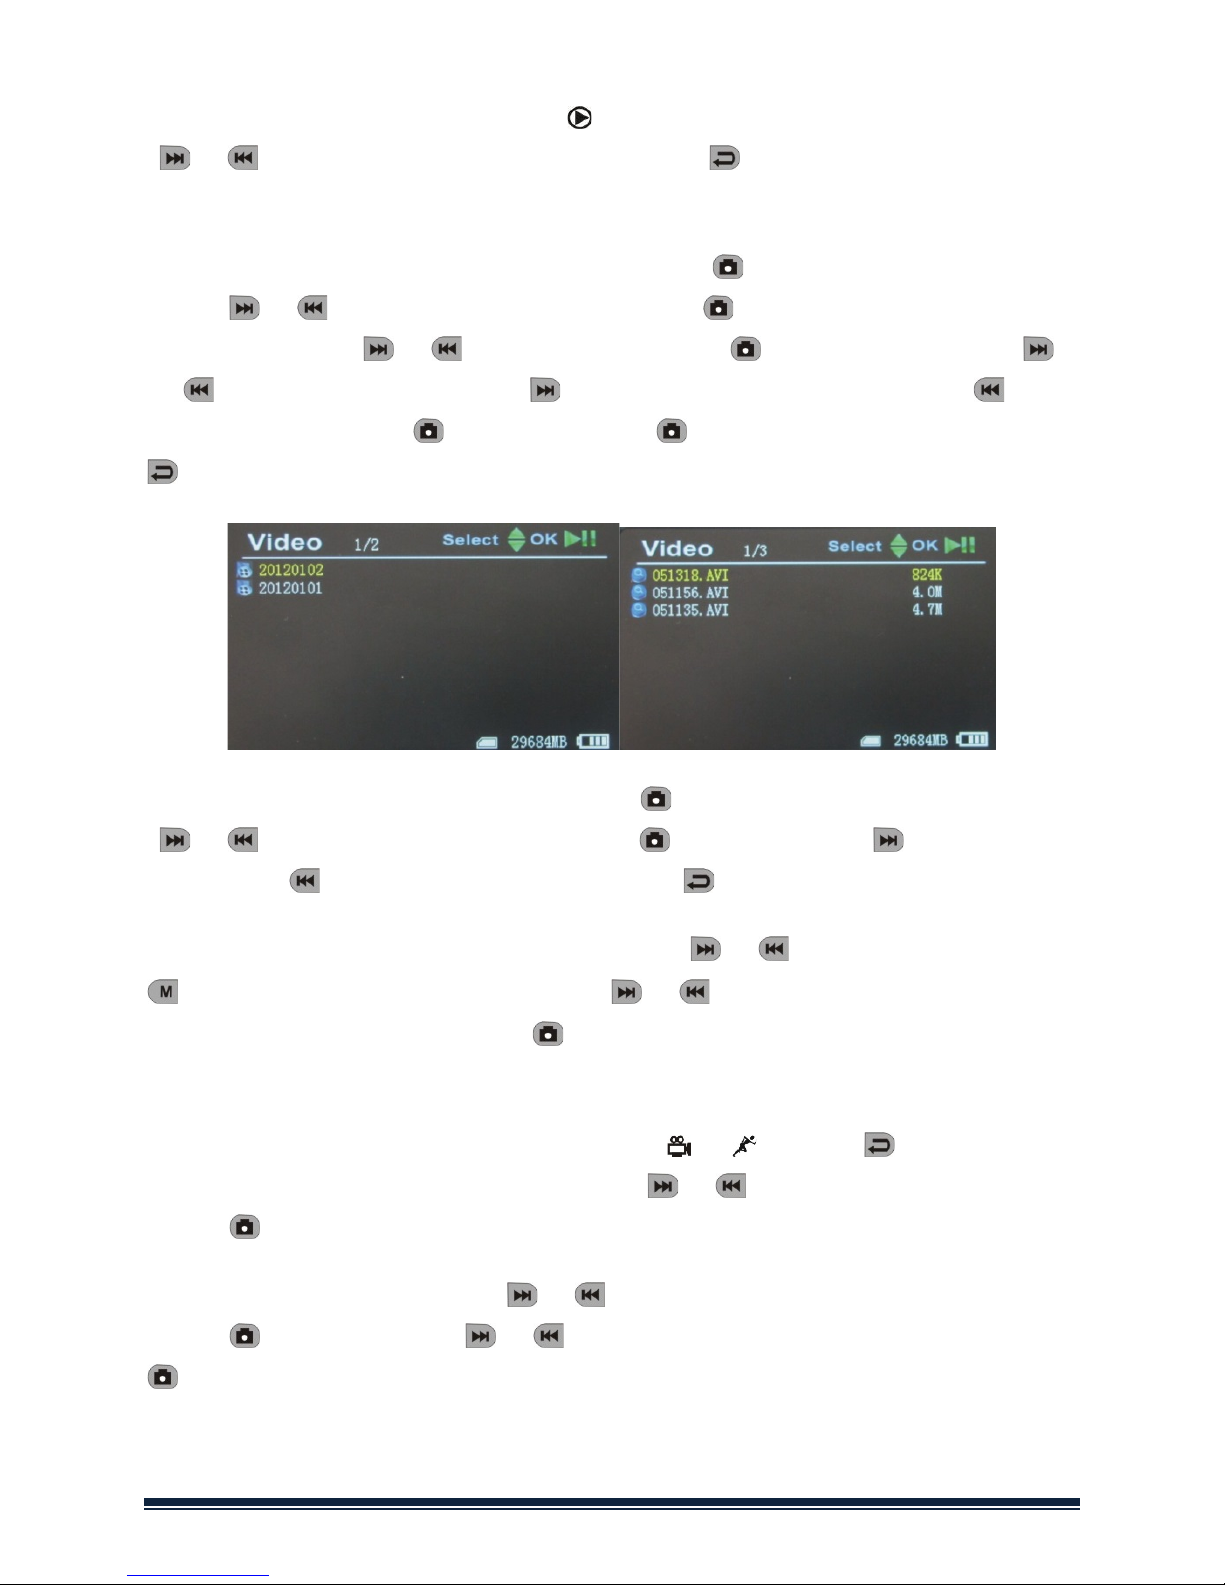
1. Play Video: When you select “Video”, press “ ” to enter into date folder.
Press “ ”/“ ” to select the date, and press “ ” to enter into the list of
video files. Press “ ”/“ ” to select, and press “ ” to play video. Press“
”/“ ” to adjust volume. Press “ ” long time to fast forward; press “ ” long
time to rewind; press“ ” to pause; press“ ” again to release pause; press “
” to exit.
2. Play Photos: Select “Photo”and press “ ” to enter into photo folder. Press
“ ”/“ ” to select pictures, then press “ ” to view. Press “ ” to view next
one; press “ ” to view previous one. Press “ ” to exit.
3. Delete Photo & Video: In list mode, press “ ”/” ” to select files. Press “
”to get the delete dialogue. Press ” ”/” ” to select
“All”/”Current”/“Cancel”.Press “ ” to confirm.
Function Settings
Power DVR on, working mode switched to “ ”/“ ”, press “ ” to enter into
function and system setting menu. Press “ ”/“ ” to select “Function”, then
press “ ” to enter into function menu.
1.Recorder Resolution: Press“ ”/“ ” to select “Recorder Resolution” and
press “ ” toenter. Press “ ”/“ ” to select “720X576” / “720X480”. Press “
” to confirm and exit.
AMK4012-D15 manual Page 7

2. Frame Rate: Press“ ”/“ ” to select “Frame Rate” and press “ ” to
enter. Press“ ”/“ ”to select “30 FPS”/“25 FPS”, and press “ ” to confirm
& exit.
3. Video Segment Sizes: Press “ ”/“ ” to select “Video Segment Sizes”,
then press “ ” to enter. Press “ ”/“ ” to select “10 MIN”/“30MIN”/“60
MIN”. Press “ ” to confirm & exit.
4. Overwrite: Press “ ”/“ ” to select “ Overwrite”, and press “ ” to enter.
Press “ ”/“ ” to select “Off”/ “On”, and press “ ” to confirm & exit. If
“Overwrite” is on, DVR will cycle record, and save the latest video.
5. Time Stamp: Press “ ”/“ ” to select “Time Stamp”, and press “ ” to
enter. Press “ ”/“ ” to select “Off”/ “On”, and press “ ” to confirm &
exit. If it’s on, video will be saved with synchronous time.
6. Information Display:Press “ ”/“ ” to select “Information Display”, and
press “ ” to enter. Press “ ”/“ ” to select “Off”/ “On”, and press “ ” to
confirm & exit. If it’s on, screen will display information of working frequency,
channel, audio state, date & time, etc. If you select “Off”, no information will
be displayed.
7. Video Setting: Press “ ”/“ ” to select “Video Setting”, and press “ ” to
enter. Press “ ”/“ ” to select “Brightness” or “Contrast”; then press “ ”
to enter; then press “ ”/“ ” to adjust brightness or contrast. Press “ ” to
exit
System Settings
Power DVR on, working mode switched to “ ”/“ ”, press “ ” to enter into
function & system setting. Press “ ”/“ ” to select “System”; then press “
” to enter into system menu.
1. Date time: Press “ ”/“ ” to select “Date Time”, and press “ ” to enter.
Press “ ” again to move the cursor, and press “ ”/“ ” to adjust date &
time. Press “ ” to exit.
Page 8 AMK4012-D15 manual

2. Language: Press “ ”/“ ” to select “Language”, and press “ ” to enter.
Press “ ”/“ ” to choose your language. And press “ ” to confirm and exit.
3. AV Out: Press “ ”/“ ” to choose “AV Out”, and press “ ” to enter.
Press“ ”/“ ” to choose “PAL/NTSC”, press “ ” to confirm video displayed
on TV screen. Pull out AV cable, video will show on DVR screen.
4. Format: To format the SD card, press “ ”/“ ” to select “Format”, and
press “ ” to enter. Press “ ”/“ ” to choose “Yes”. Press “ ” to confirm &
exit.
5. Power Save: Press “ ”/“ ” to select “Power Save”, and press “ ” to
enter:
a) Auto LCD Off: Press “ ”/“ ” to select “ Auto LCD Off”, and press “ ” to
enter. Press “ ”/“ ” to select “1 MIN”/“5 MIN”/“Off”, and press “ ” to
confirm & exit. If “Auto LCD Off” is on, the LCD screen will automatically shut
off when the set time is due. Press any key to recover screen display.
b)Auto Power Off: Press “ ”/“ ” to select “Auto Power Off”and press “ ”
to enter.Press “ ”/“ ” to select “ 5 MIN”/“10 MIN”/“Off”, and press “ ”
to confirm & exit. If you turn on “Auto Power Off”, the DVR will automatically
shut off when the set time is due.
6. Firmware Update: Press “ ”/“ ” to select “Firmware Update”, and press
“ ” to enter. Press “ ”/“ ” to select “Yes”, and press“ ” to start
update. Please remember to save the update file “
zburnT_C11.run.elf
” at the
root directory of the SD card.
7. Default Setup: Press “ ”/“ ” to select “Default Setup”and press “ ” to
enter. Press “ ”/“ ” to select “Yes” and press “ ” to confirm. Press “ ”
to exit.
8. Memory Info: Press“ ”/“ ” to select “Memory Info”, and press “ ” to
view capacity of SD card. Press “ ” to exit.
9. Version: Press“ ”/“ ” to select “Version”and press “ ” to view version
information. Press “ ” to exit.
AMK4012-D15 manual Page 9

10.Display Mode: Press“ ”/“ ” to choose “Display Mode”. Press “ ”/“
” to choose “16:9/4:3”. Then press “ ” to confirm.
Press “ ” to exit.
Troubleshooting
1. The recorder does not power on: maybe the battery is empty, try to
recharge.
2. The Dino-Lite is connected but there is no image: check if the plug is
in the AV-in port and properly inserted. If this does not work, try to
change the settings or return to Default Setup.
3. System halted: Press the RESET key to turn on player again.
4. File cannot play: Maybe the format of video file is not supported by
this DVR, please convert it into the supported format.
5. The text is in messy code: make sure the correct language is selected.
6. It can’t upload / download files or can’t find the disk in PC: Replace
USB cable/USB port.
7. It cannot save a file: there is no SD card in theDVR, please insert SD
card; or SD card memory is full, please delete some files to release
memory; or there is damaged area in memory, please format it.
Package Content
The following items are in the package.
Dino-Lite AMK digital microscope
1x
MSD15 recorder
1x
Clip
1x
User manual
1x
USB Cable
1x
AV Cable
1x
AC adapter(with EU/UK/US plug)
1x
4GB Micro SD Card
1x
Page 10 AMK4012-D15 manual

Specifications
AV IN
TV system
NTSC / PAL
Output voltage
3.6-4.2 V
AV OUT
TV system
NTSC/PAL
HD 5-inch
LCD screen
Active area
108mm(W) X 64.8mm(H)
Resolution
800 x 480 Pixel
Luminance for LCM
200 cd/㎡
Video
Resolution
720*576 / 720*480
Video compression
MPEG-AVI 30fps
Play format
MPEG-AVI
Audio
Frequency
20Hzz-20KHz stereo
Earphone Output
Left 20 mW+ right 20mW [16O](suit to
largest volume)
Speaker
1W
Photo
Format
JPG/JPEG, 720*576
Storage
Micro SD card
Micro SD Card 4GB (support up to
32GB)
4GB recording time
2-4 hours
2GB photos
30000pcs
Operating
system
PC
Windows & Mac OS
Port
USB 2.0
Language
English/French/German/Spanish/Dutch
Power
Voltage
DC 5V
Current(recording
mode)
450 mA
Current(recording
with screen off
mode)
230 mA
AC adapter
DC 5V 2A
Built-in battery
Li-battery 3200Mah
Wired record
≥14hours(off-screen);
≥7hours(on-screen)
Size (L x W x H)
131mm x 86mm x 18mm
Weight(g)
200g
AMK4012-D15 manual Page 11

AMK4012T/ZT/TL-D15
BEDIENUNGSANLEITUNG
Digitaler Videorekorder mit Dino-Lite Digitalmikroskop
Bedienungsanleitung
Lesen Sie bitte vor dem Betrieb des Geräts diese Anleitungen
aufmerksam durch und bewahren Sie sie für späteres Nachschlagen
auf.
Vielen Dank, dass Sie sich für ein Dino-Lite mit mobilem Rekorder entschieden
haben.
Wichtige Sicherheitshinweise
• Berühren Sie nicht das Objektiv, um das Gerät vor elektrostatischen
Schäden zu bewahren.
• Lassen Sie das Gerät nicht fallen.
• Halten Sie das Gerät trocken.
• Benutzen Sie das Gerät nicht bei hohen Temperaturen und hoher
Luftfeuchtigkeit; 0~40 °C ist die beste Arbeitstemperatur.
• Zur Vermeidung von Schäden SD-Karte oder das Dino-Lite nur
anschließen oder abtrennen, wenn das Gerät ausgeschaltet ist.
Auf www.dino-lite.eu finden Sie aktuelle Informationen und
Antworten auf Ihre Fragen.
Page 12 AMK4012-D15 manual

Allgemeine Informationen
• Display: 5-Zoll HD-Bildschirm (800x480 Pixel).
• Kanalumschaltung: Unterstützt manuelle und automatische
Umschaltung zwischen 8 Kanälen.
• Aufnahme: Unterstützt Endlosaufnahme und kontinuierliches Video
vom Dino-Lite Digitalmikroskop
• Foto: Unterstützt Bildaufnahme vom Dino-Lite Digitalmikroskop.
• AV-Eingang: TV-IN [NTSC/PAL].
• AV-Ausgang:[NTSC/PAL].
• Akku:Integrierter 3200 mAh Lithium-Akku mit hoher Kapazität für
kontinuierliche Aufnahmedauer von mehr als 10 Stunden.
• Lautsprecher: Eingebauter Lautsprecher 1 W.
• Speicherkapazität: Unterstützt bis zu 32 GB TF-Karte, 4 GB SD-Karte
gehört zum Lieferumfang.
• Sprachen: Unterstützt Englisch/Französisch/Deutsch/Spanisch/
Niederländisch.
• Energiesparmodus:Automatische Abschaltung, automatische
Bildschirmabschaltung.
• Firmware-Update: Unterstützt Firmware-Update von SD-Karte.
AMK4012-D15 manual Page 13
Dino-Lite Digitalmikroskop anschließen
Schließen Sie das Dino-Lite bei ausgeschaltetem Rekorder am Anschluss AV-IN
des Rekorders an.
Hinweis:
Das AMK4012 Dino-Lite unterstützt nicht die Benutzung anderer
Geräte mit 2,5 mm AV-Anschluss.
Laden
Der Akku muss vor Erstgebrauch geladen werden. Benutzen Sie nur das
mitgelieferte Ladegerät oder laden Sie über PC USB-Port.
Ein Ladezyklus dauert 4 bis 6 Stunden. Trennen Sie das Ladegerät nicht ab,
bevor der Ladezyklus abgeschlossen ist. Der erste Ladezyklus dauert 6 bis 10
Stunden. Ein neuer Akku erreicht seine volle Leistung erst nach mehreren
Ladezyklen. Bei längerer Nichtbenutzung laden Sie den Akku alle 2-3 Monate.
Symbole Akkukapazität:
Allgemeine Bedienungshinweise
1. Ein- und ausschalten: Drücken Sie zum Einschalten, der DVR ist
betriebsbereit; halten Sie für einige Sekunden zum Ausschalten gedrückt.
2. Umschalter Betriebsmodus (linke Seite):
Mit Schalterstellung auf ist der DVR im Empfangs-/Aufnahme-/Fotomodus.
Mit Schalterstellung auf ist der DVR im Wiedergabemodus.
Mit Schalterstellung auf ist der DVR im Bewegungserkennungsmodus.
3. Speicherkarte
Der DVR kann nur Fotos oder Videos aufzeichnen, wenn eine Speicherkarte
eingesteckt ist. Das Symbol für die SD-Karte und die freie Speicherkapazität
werden angezeigt.
4. Externes Laufwerk
Bei Anschluss des DVR am Computer arbeitet er als Massenspeichergerät.
Öffnen Sie das Laufwerk im Computer, um die Video- und Fotodateien in den
Ordnern „RECORD“ und „PHOTO“ im Verzeichnis „DICM“ anzuzeigen.
Page 14 AMK4012-D15 manual
Aufnahme und Foto
Schalten Sie den DVR ein und wählen Sie als Aufnahme-/Fotomodus.
1. Foto: Im Modus drücken Sie einmal , das Symbol blinkt einmal und
ein Foto wir aufgenommen.
2. Aufnahme: Im Modus halten Sie für 3 Sekunden gedrückt, der DVR
startet die Aufnahme und auf dem Bildschirm wird „REC“ angezeigt. Drücken
Sie zur Unterbrechung der Aufnahme (Pause) erneut , wird angezeigt;
drücken Sie erneut , um die Aufnahme fortzusetzen. Drücken Sie , um
die Aufnahme zu beenden, automatisch zu speichern und die Funktion zu
verlassen. Drücken Sie nicht erneut , so speichert das System das Video
automatisch in Segmenten, bis die Speicherkarte voll ist.
Ist „Überschreiben“ aktiviert und Sie drücken nicht , um die Aufnahme zu
beenden, so speichert das System das Videoautomatisch in Segmenten.
Wenn die Karte voll ist, werden die ältesten Segmente jeweils überschrieben.
AMK4012-D15 manual Page 15
3.Stummschaltung: Im Modus drücken Sie , um das Gerät
stummzuschalten. Auf dem Bildschirm wird „STUMM“ angezeigt. Drücken Sie
erneut , um die Stummschaltung wieder aufzuheben.
Hinweis: Die Stummschaltung hat keine Auswirkung auf die
Lautstärkeeinstellung der Ohrhörer.
Bewegungserkennung
1. Schalten Sie den DVR ein und wählen Sie als
Bewegungserkennungsmodus. Drücken Sie zum Verlassen der Funktion
und Rückkehr in das System-/Funktionsmenü.
2. Im Modus halten Sie für 3 Sekunden zum Aufrufen der Aufnahme mit
Bewegungserkennung gedrückt. Erkennt das System nun Bewegung, so
startet es automatisch die Aufnahme und auf dem Bildschirm wird „REC“
angezeigt. Nach 10 Sekunden ohne Bewegungserkennung beendet das
System die Aufnahme wieder automatisch und speichert; auf die nächste
Bewegungserkennung wird gewartet. Zur Beendigung der Aufnahme mit
Bewegungserkennung drücken Sie , die Aufnahme wird automatisch
gespeichert und die Funktion wird verlassen.
3. Drücken Sie nicht zum Beenden der Aufnahme, so speichert das System
das Video automatisch in Segmenten, bis die Speicherkarte voll ist. Ist
„Überschreiben“ aktiviert und Sie drücken nicht , um die Aufnahme zu
beenden, so speichert das System das Videoautomatisch in Segmenten.
Wenn die Karte voll ist, werden die ältesten Segmente jeweils überschrieben.
Page 16 AMK4012-D15 manual
Video/Foto wiedergeben
Im Modus können Sie Videos und Foto abspielen. Drücken Sie / zur
Auswahl von „Foto“ oder „Video“. Drücken Sie zum Verlassen der Funktion
und Rückkehr in das Hauptmenü.
1. Video abspielen: Bei Auswahl von „Video“ drücken Sie zum Aufrufen
des Datumordners. Mit / wählen Sie das Datum, dann drücken Sie zur
Anzeige einer Liste von Videodateien. Mit / wählen Sie aus, dann
drücken Sie zur Wiedergabe des Videos. Mit / stellen Sie die
Lautstärke ein. Halten Sie für den schnellen Vorlauf gedrückt und halten
Sie für den Rücklauf gedrückt. Drücken Sie , um die Wiedergabe zu
unterbrechen (Pause) und drücken Sie erneut , um die Wiedergabe
fortzusetzen. Mit verlassen Sie die Funktion.
2. Fotos anzeigen: Wählen Sie „Foto“ unddrücken Sie zum Aufrufen des
Fotoordners. Drücken Sie / zur Auswahl des Bildes, dann drücken Sie
zur Anzeige. Mit zeigen Sie das nächste Bild an, mit das vorherige Bild.
Mit verlassen Sie die Funktion.
3. Fotos und Videos löschen: Im Listenmodus drücken Sie / zur Auswahl
der Dateien. Drücken Sie , um den Löschdialog aufzurufen. Drücken Sie /
zur Auswahl von „Alle“/„Aktuell“/„Annullieren“. Drücken Sie zur
Bestätigung.
Funktionen einstellen
Schalten Sie den DVR ein und wählen Sie als Modus oder , dann drücken
Sie zum Aufrufen des Funktions- und Systemeinstellungsmenüs. Drücken
Sie / zur Auswahl von „Funktion“, dann drücken Sie zum Aufrufen des
Funktionsmenüs.
AMK4012-D15 manual Page 17
 Loading...