

Dino-Lite AM313, AM313T, Dino-Lite AM-311S, Dino-Lite AM311-ST User Manual

Dino-Lite Handheld Digital Microscope
AM313/AM313T
User’s Manual
Thank you for choosing Dino-Lite Handheld Digital Microscope!
Dino-Lite Handheld Digital Microscope has a wide scope of applications, such as,
1. Skin Check
2. Scalp Check
3. Industrial Inspection e.g. Printing Circuit Board(PCB)inspection, electronics
device inspection
4. Visual Assistance
5. Printing Inspection
6. Textile Inspection
7. Jewelry Inspection
8. Science Learning
9. ….. etc.
Please read this manual carefully before using Dino-Lite Handheld Digital
Microscope.
Dino-Lite Handheld Digital Microscope User’s Manual
1

Contents
Product Specifications.............................................................. 3
Safety Precautions ................................................................. 3
Contents and Name of Parts ..................................................... 4
Connecting to PC .................................................................... 4
System Requirements.............................................................................................4
Driver Installation Procedure.................................................................................5
Windows XP ................................................................................................5
Windows 2000 .............................................................................................9
Windows 98se ............................................................................................12
Connecting Procedure..........................................................................................18
Operate Dino-Lite Handheld Digital Microscope ..............................................18
DinoCapture Application Software......................................................................19
Picture / Video Folder..................................................................................21
Menu Function List......................................................................................24
Open The Picture .........................................................................................28
Open The V ideo Or Time Lapsed Video......................................................29
Q&A .................................................................................... 29
Copyright............................................................................. 31
Certification ......................................................................... 31
Limited Liability .................................................................... 31
Dino-Lite Handheld Digital Microscope User’s Manual
2

Product Specifications
1. Resolution:640*480 VGA.
2. Built-in 1 optical lens.
3. Magnification power:10x~200x.
4. Measurement function (via software)
5. Microtouch function (AM313T only)
6. Built-in LED light, with LED software switch
7. Frame rate: up to 30 FPS
8. Interface:USB (PC)
Remarks: The magnification power is the ratio of the real size of the an observe
object vs. the image show on a 15” monitor
Safety Precautions
1. Avoid touching the lens with finger to protect the product from
electrostatic damage.
2. Do not attempt to service this product yourself. Opening the covers may
expose you to dangerous voltage points or other risks.
3. When hands are wet, do not plug in or remove the adaptor or other
connectors.
4. Using or storing Dino-Lite Handheld Digital Microscope, do not plug in any
other cables, not belong to Dino Digital Microscope.
5. Do not use any detergent or volatile solution, which will damage the
camera case, painted surfaces & lens. Only use a soft cleaning cloth.
6. If the lens is dirty, please use a kens brush on soft cloth to wipe clean.
Avoid touching them with your fingers. Exercise care to avoid scratching
the lens.
7. Without protection, do not put
the lens damaged by high temperature or humidity.
8. Using and storing Dino Digital Microscope at Temp: 0
45%~85%.
Dino Digital Microscope outdoor to avoid
o
C~ 40oC, Humidity:
9. If water has entered
stage, immediately turn the power off and remove the USB cable. Do not
use dryer neither.
10. Using or storing Dino-Lite Handheld Digital Microscope, need to watch all
Dino-Lite Handheld Digital Microscope User’s Manual
Dino Digital Microscope device and the inspection
3
cables to avoid trip over or Dino-Lite Handheld Microscope fall down.
11. To avoid electric shock, remove all electricity source before moving PC or
TV.
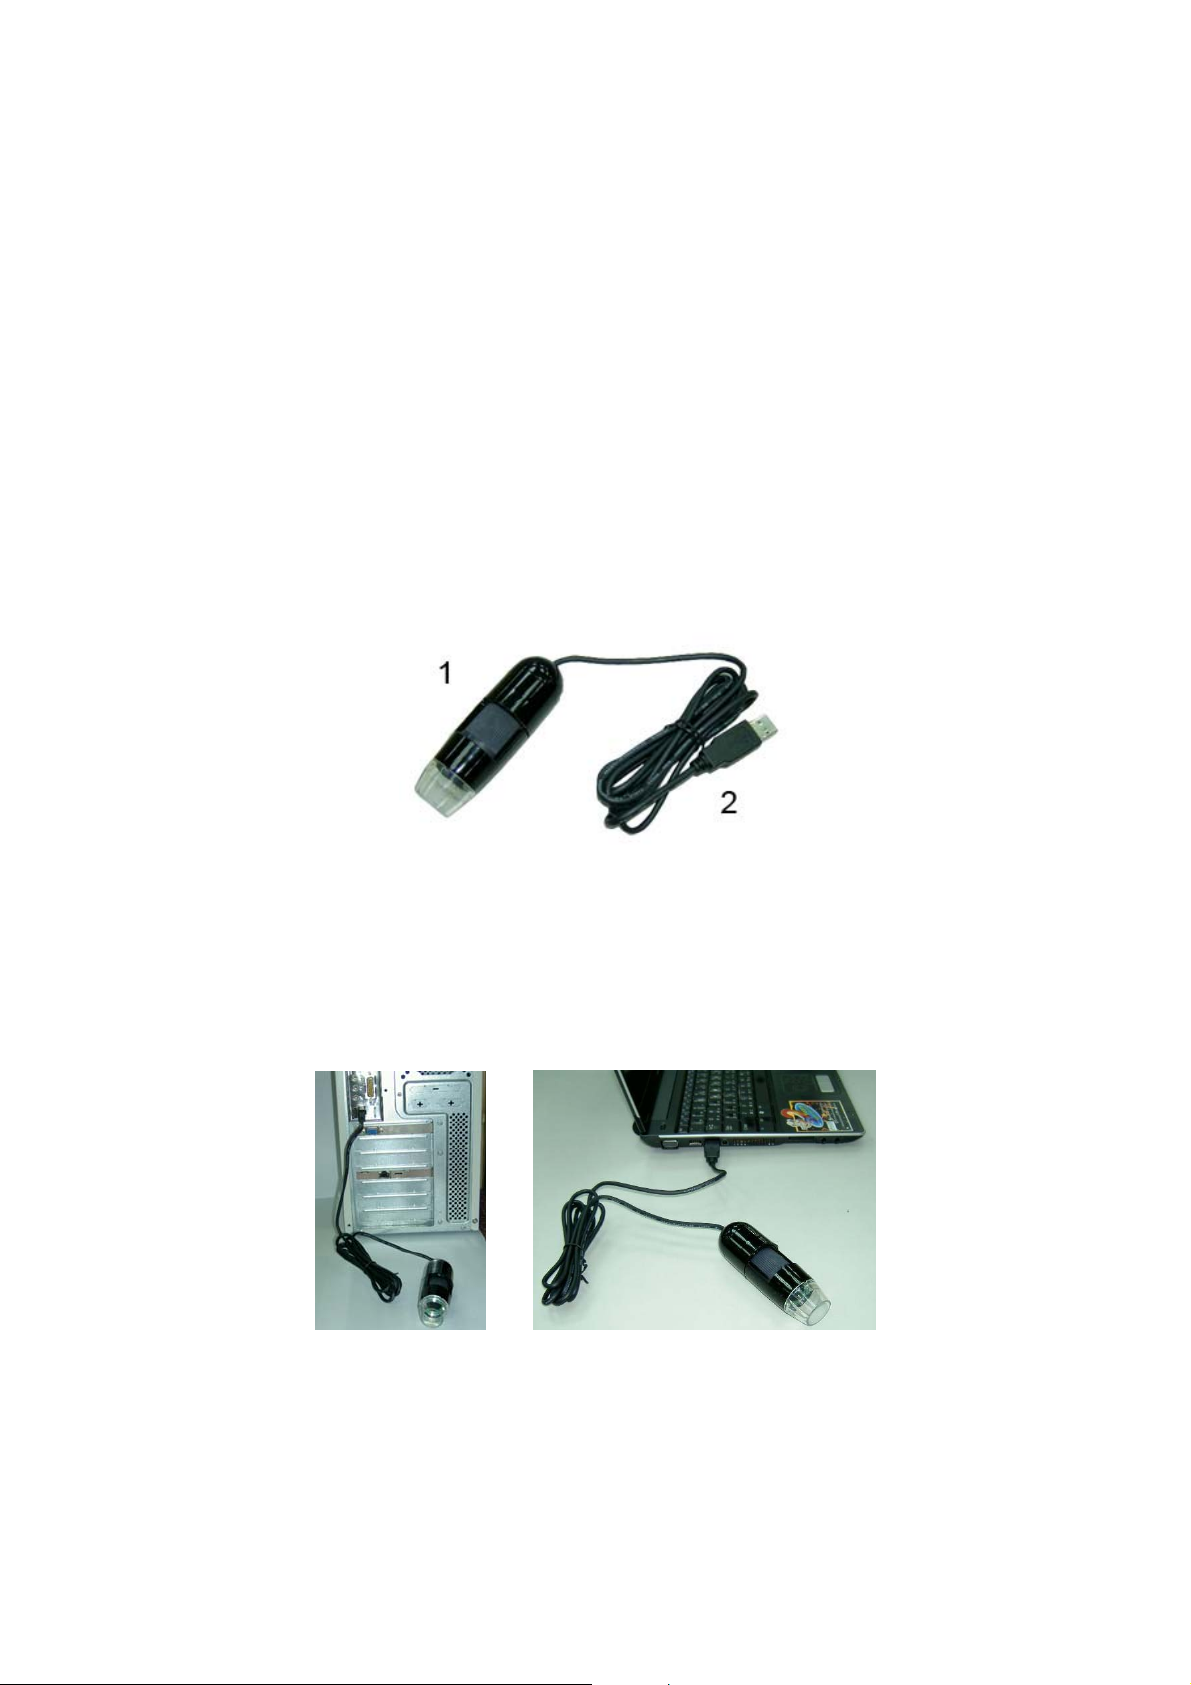
Contents and Name of Parts
1. Dino-Lite Handheld Digital Microscope Device
2. CD (user’s manual included)
3. USB Cable《USB2.0 / 1.1》 (1.8m)
4. Dock
Connecting to PC
System Requirements
● PC’s system requirements:
9 OS: Windows 98se, 2000, XP
9 CPU: Pentium IV 1.5G, Celeron, AMD Athlon or above
Dino-Lite Handheld Digital Microscope User’s Manual
4
9 Memory: 128MB
9 HDD storage space: at least 150MB
( for driver and application software installation)
9 Graphic card: 16-bit or above
9 CD-ROM driver
9 USB2.0 / 1.1 port
Driver Installation Procedure
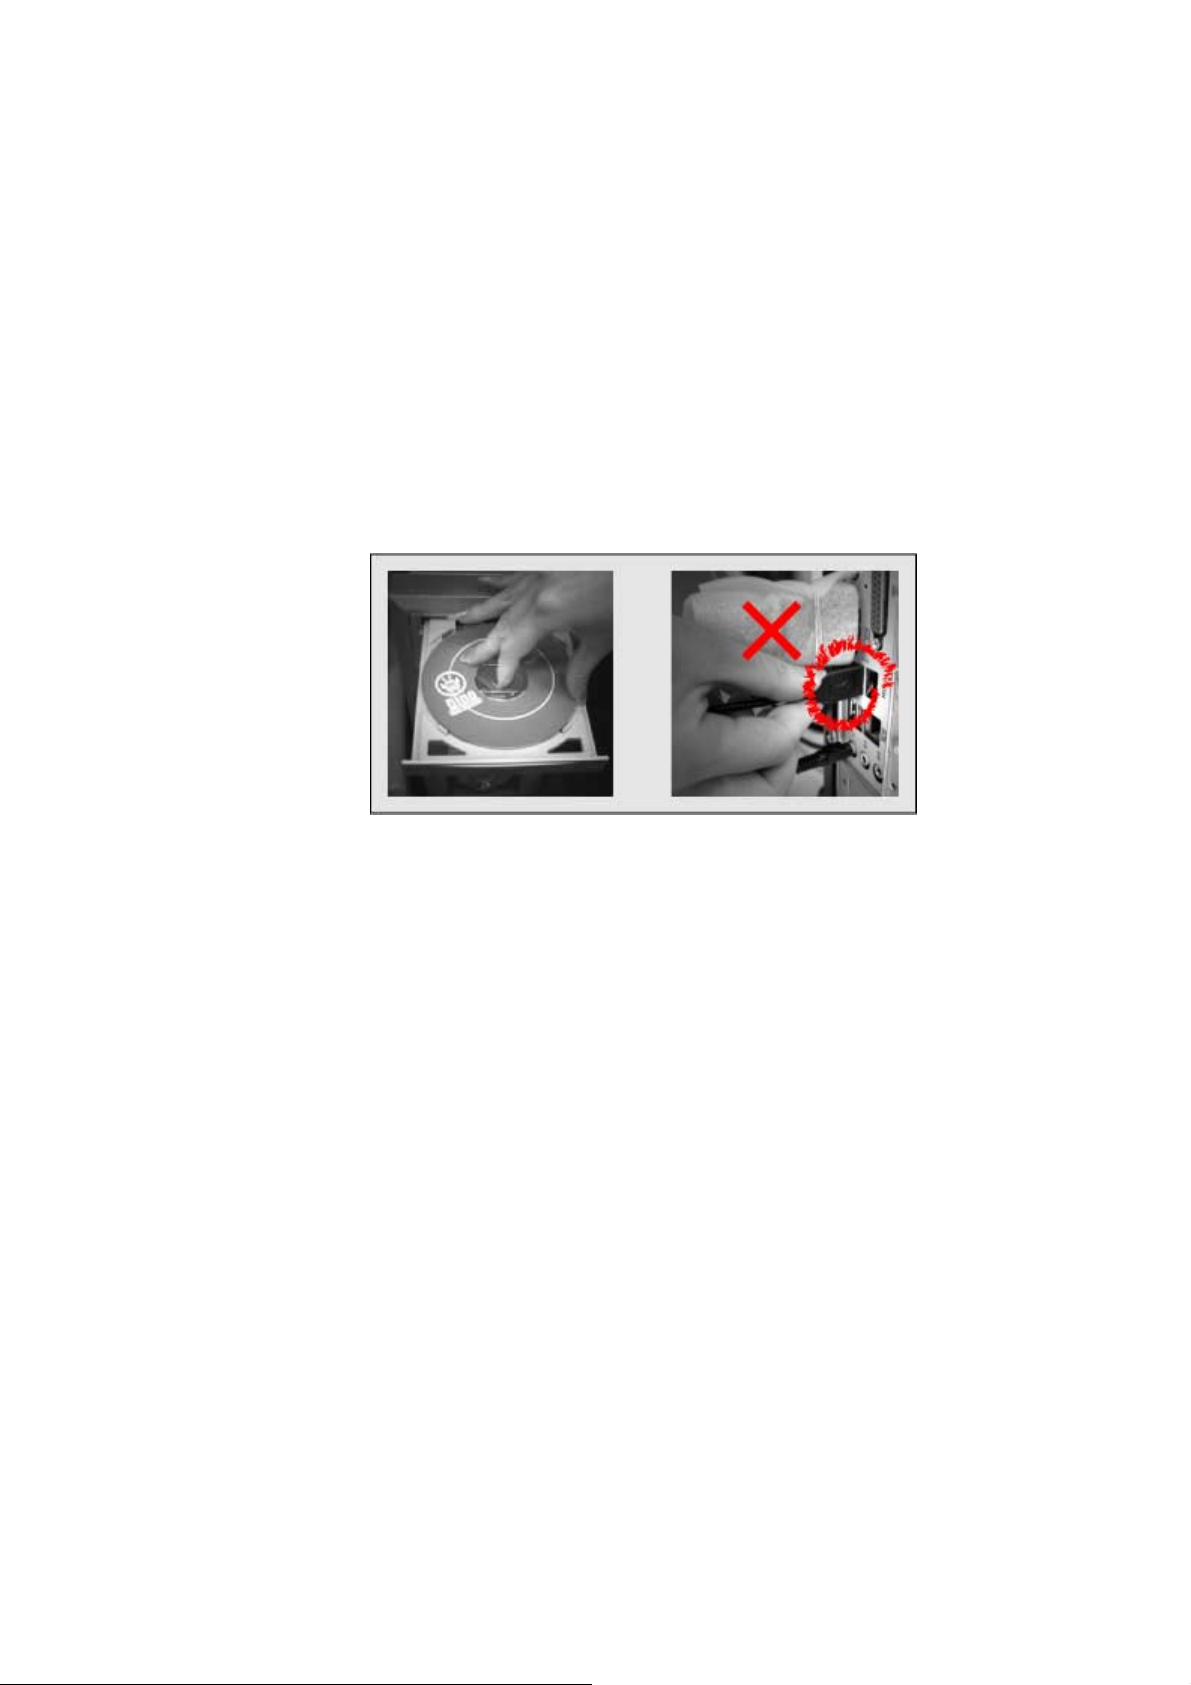
■ Power on PC and place installation CD into CD-ROM driver, do not connect
USB Cable from Dino-Lite Handheld Digital Microscope to PC before driver
installation.
■ Select driver installation, and follow the instructions to complete installation.
■ As driver installation completed, and if system asking for re-start, please
re-start the Windows OS.
Note: The driver needs to be installed only once for each computer.
Windows XP
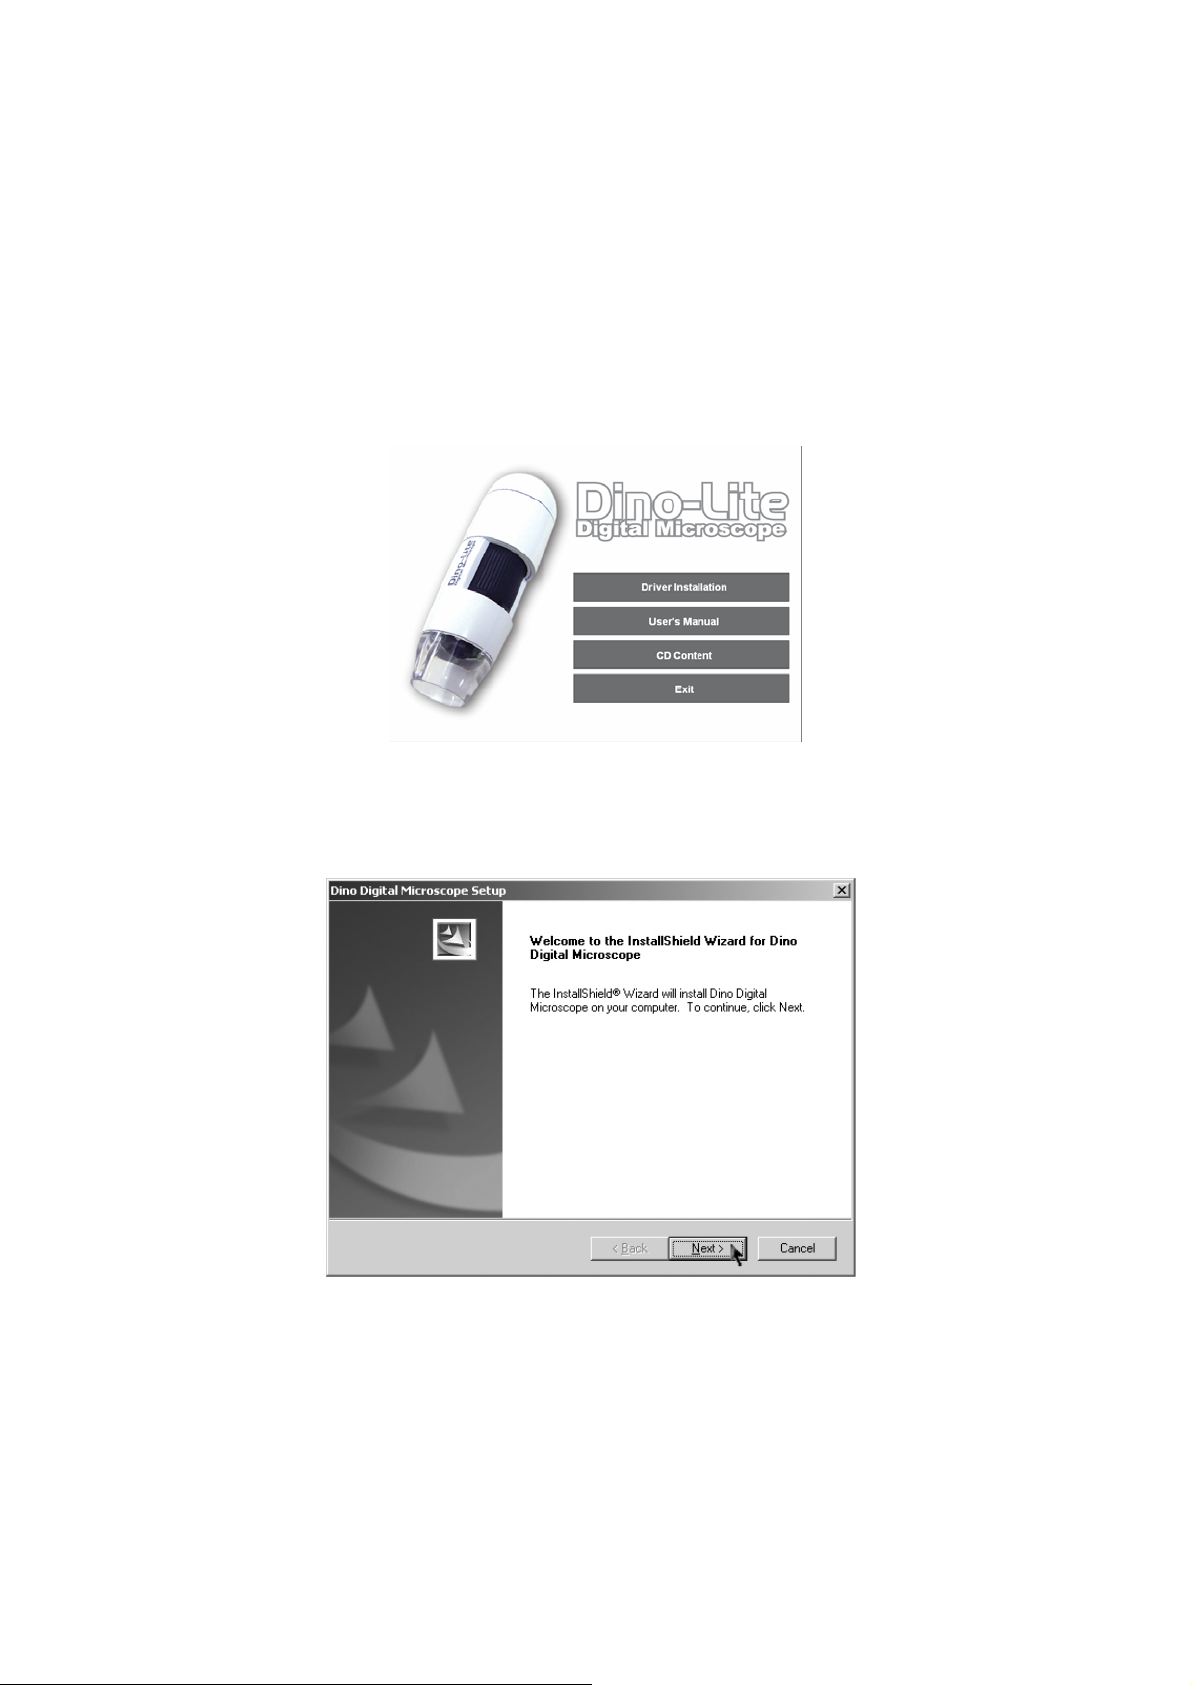
1. Place the installation CD into CD-ROM driver, the installation program should be
started automatically. Otherwise, please execute the AUTORUN.EXE directly
from the CD.
2. Select “Driver Installation” from Dino-Lite Handheld digital Microscope
Installation menu screen as shown.
Dino-Lite Handheld Digital Microscope User’s Manual
5

3. Click “Next” to continue, as shown.
Dino-Lite Handheld Digital Microscope User’s Manual
6
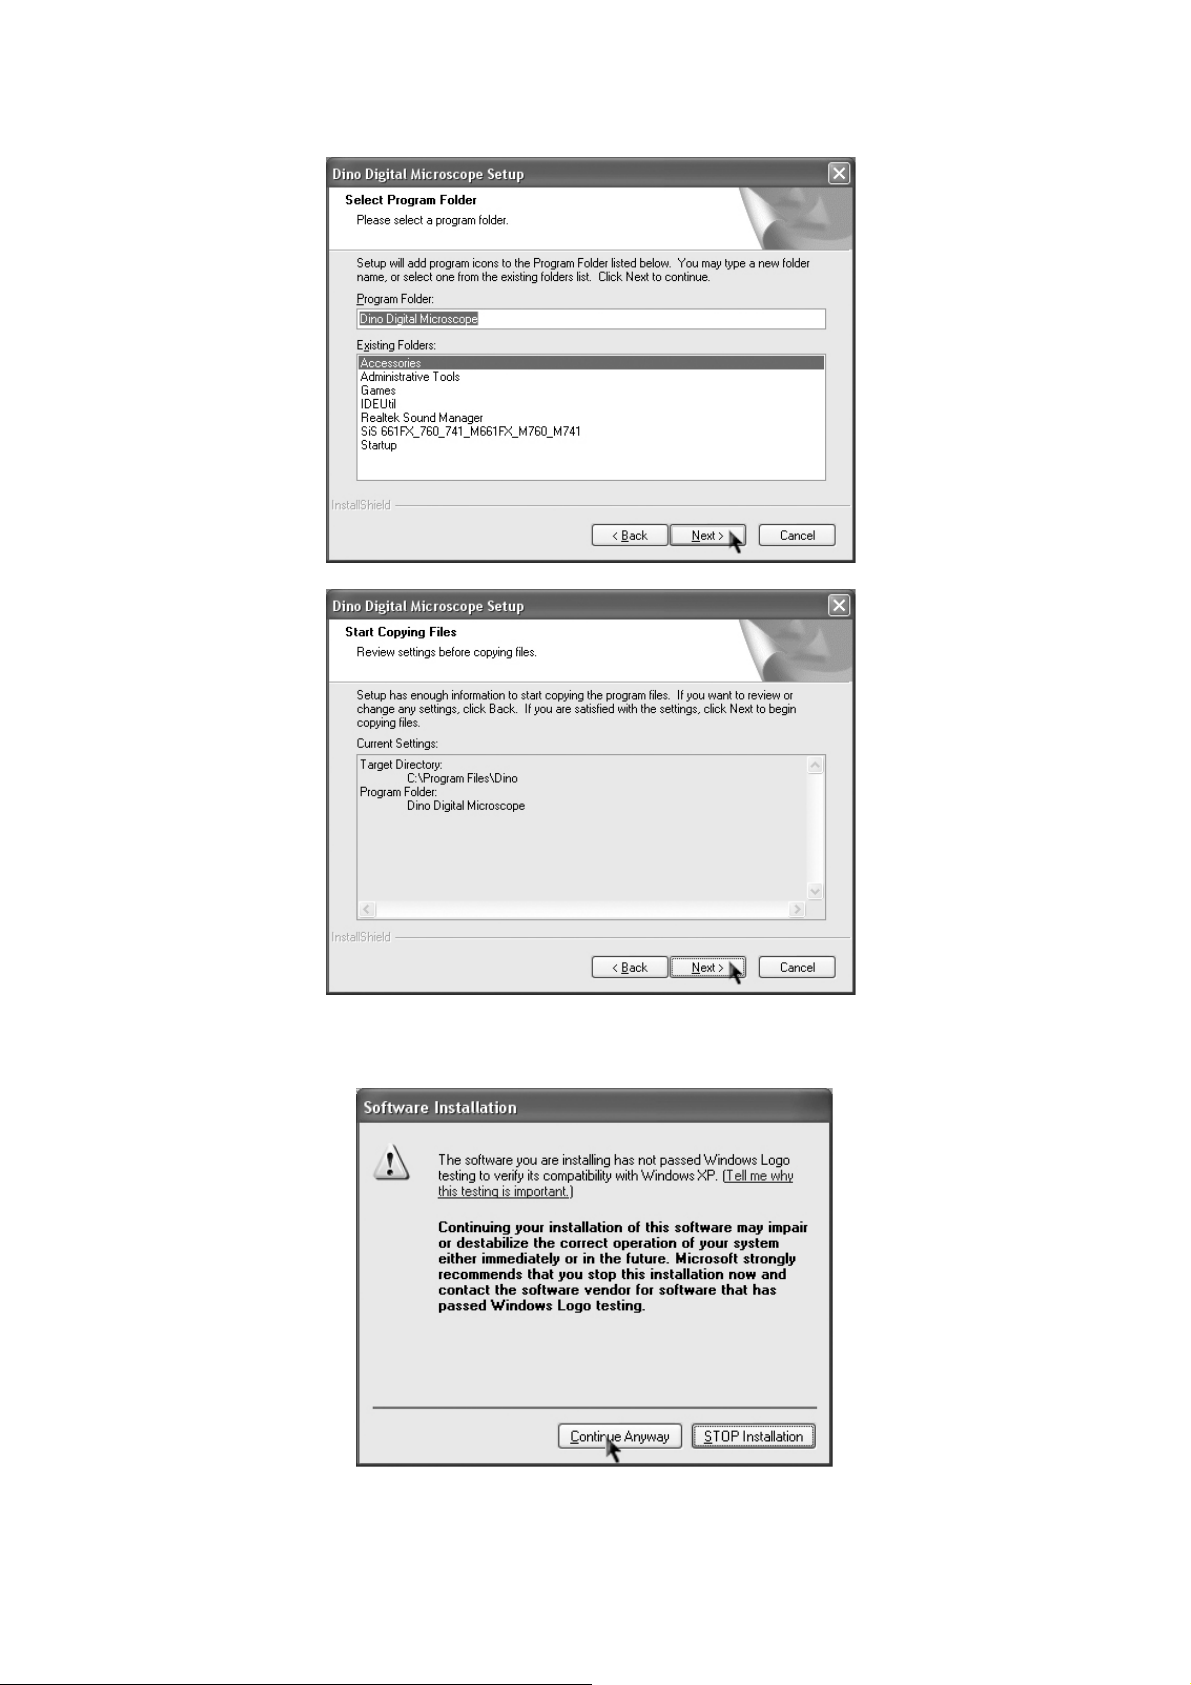
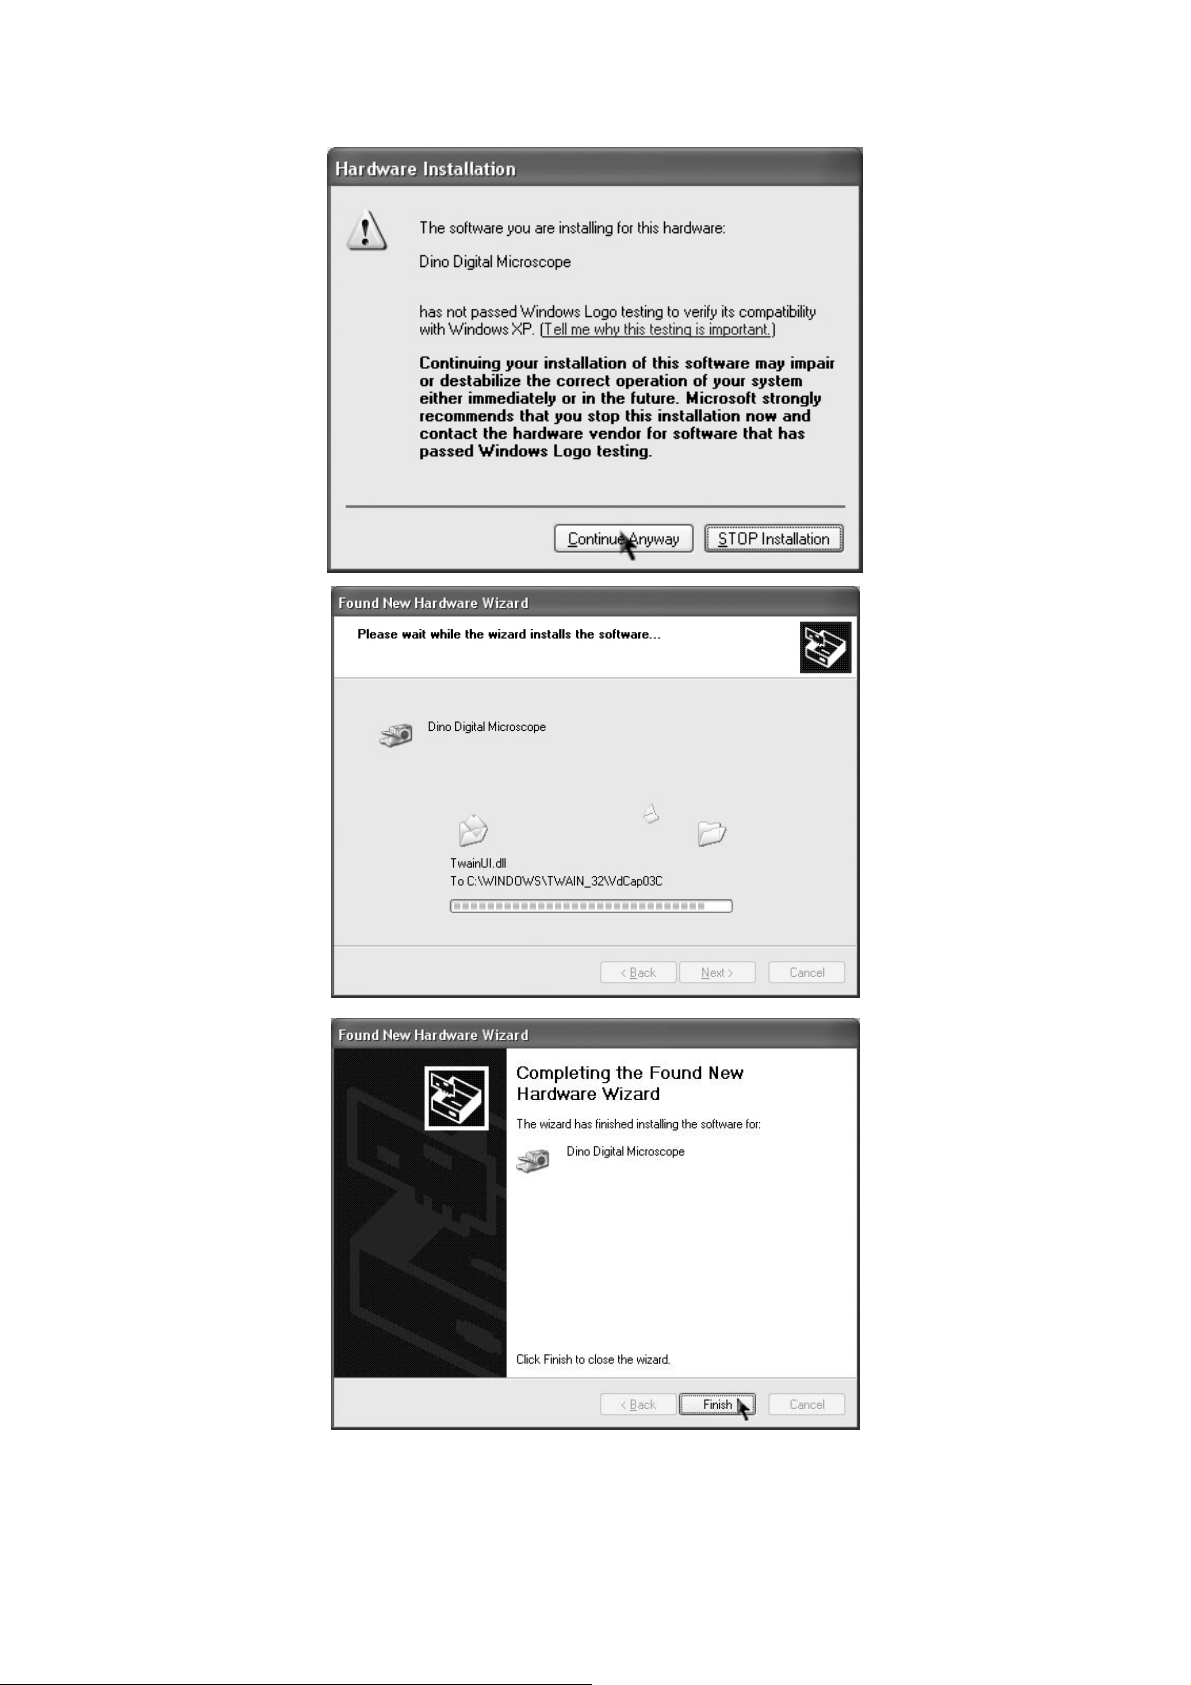
4. When the “Software Installation” warning message appears, click “Continue
Anyway”.
5. Click “Finish” to complete the installation.
Dino-Lite Handheld Digital Microscope User’s Manual
7
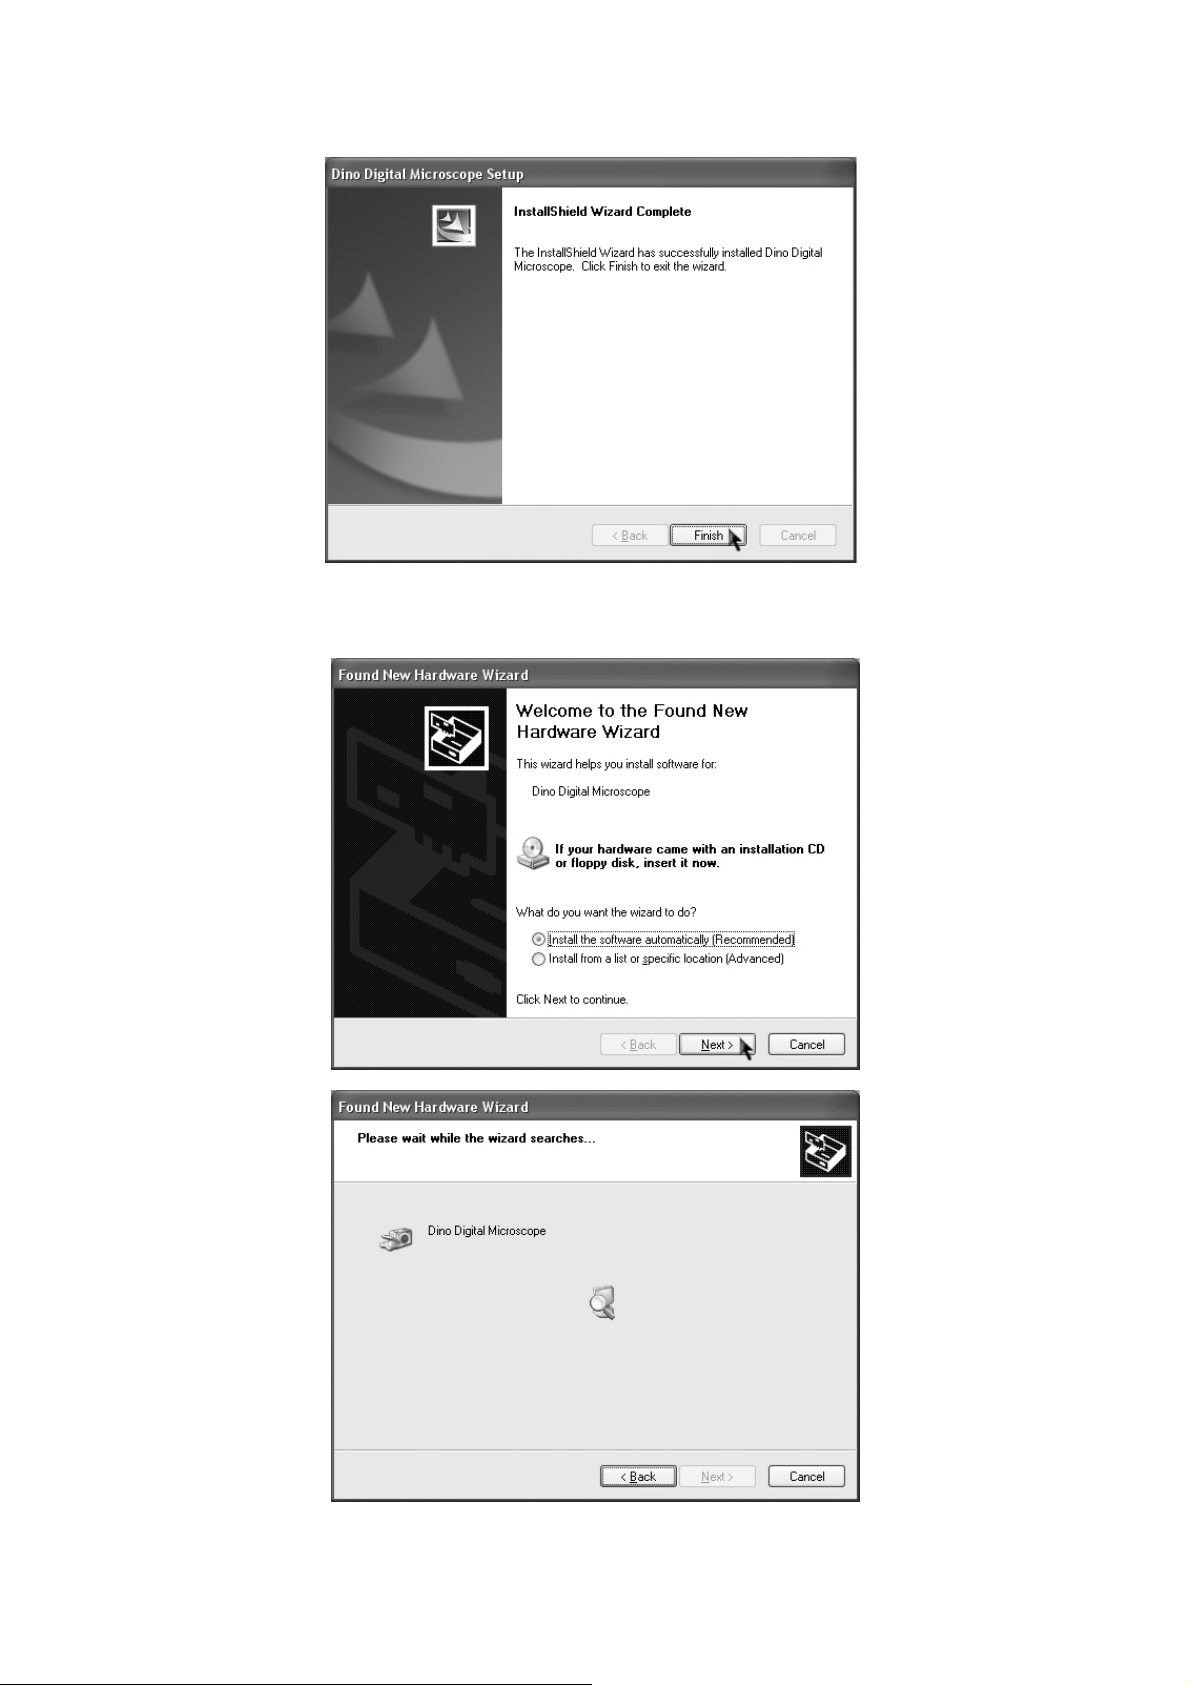
6. Plug USB Cable to Dino-Lite Handheld Digital Microscope to connect with PC, a
“Found New Hardware Wizard” will then appear. Click “Next” to continue.
Dino-Lite Handheld Digital Microscope User’s Manual
8
Dino-Lite Handheld Digital Microscope User’s Manual
9
Windows 2000
1. Place the installation CD into CD-ROM driver, the installation program should be
started automatically. Otherwise, please execute the AUTORUN.EXE directly
from the CD.
2. Select “Driver Installation” from Dino-Lite Handheld digital Microscope
Installation menu screen as shown.
3. Click “Next” to continue, as shown.
Dino-Lite Handheld Digital Microscope User’s Manual
10
 Loading...