

Dinkle D-Thermo TMP-002 Instruction Manual

TMP-002
Thermal Transfer
Printer
CONTENTS
Printer1 001
1.1 001Box Content
1.2 002Getting to Know Your Printer
Printer Setup2 004
2.1 004Loading the Ribbon
2.2 007Installing the Fixture
2.3 008Loading Material
2.4 010Connecting the Printer to the Host Computer
2.5 011Installing Dinkle Label
Installing Seagull Driver
2.6 014
Printer Setting and Control3 016
3.1 016Operation Panel
3.2 017LCD Interface Introduction
3.3 022LCD Interface Function
3.4 028Error Alerts
3.5 030USB Host
Maintenance and Adjustment4 032
4.1 032Cleaning the thermal print head
4.2 033Adjusting the balance and print head tension
4.3 034Ribbon shield settings
4.4 035Troubleshooting
Introduction
System Requirements
Start Dinkle Label
Description
Edit Markinh plate
Copy Markinh plate
Functional area

TMP-002
Thermal Transfer
Printer
CONTENTS
Operating
Add/Save Marking Plate
Add Marking Plate
Save Marking Plate
Open Marking Plate File
Setting
Output Interface
Other Settings
Material Setting
Material Selection
Add graphics
Advanced Function
Date and Time Settings
Set Date and Time for Printer
Insert Date and Time
Change Date and Time format
Database Connecting
How to Connect the Database
Use the Database
Oracle
SQL Server
TEXT
Network Connection
Set the printer IP address acquisition method
Get the Printer IP Address
Download Objects to the Printer
Download Fonts
Download Marking Plate Files
5.3.5 Delete the Printer Files
Appendix

TMP-002
Thermal Transfer
Printer
This equipment must be earthed.
The power plug must be connected to a properly wired earth ground socket outlet.An improperly
wired socket outlet could place hazardous voltages on accessible metal parts.
* Suggest to use Arial 12pt or above for better user experience.
* it's recommended to warm up the device 5~10 mins which comes a better effect of printing job.
* Equipment for use in locations where it is unlikely that children will be present.

TMP-002
Thermal Transfer
Printer
SAFETY INSTRUCTIONS
Please read the following instructions carefully.
1. Keep the equipment away from humidity.
2. Before you connect the equipment to the power outlet, please
check the voltage of the power source.
3. Make sure the printer is off before plugging the power connector
into the power jack.
4. It is recommended that you connect the printer to a surge
protector to prevent possible transient overvoltage damage.
5. Be careful not to get liquid on the equipment to avoid electrical
shock.
6. For safety and warranty reasons, ONLY qualified service personnel
should open the equipment.
7. Do not repair or adjust energized equipment under any
circumstances.
Caution
* Danger of explosion if battery is incorrectly replaced. Replace only with the equivalent
type recommended by the manufacturer.
** Only use with designated power supply adapter model.
Specifications are subject to change without notice.

TMP-002
Thermal Transfer
Printer
CONTENTS
Printer1 001
1.1 001Box Content
1.2 002Getting to Know Your Printer
Printer Setup2 004
2.1 004Loading the Ribbon
2.2 007Installing the Fixture
2.3 008Loading Material
2.4 010Connecting the Printer to the Host Computer
2.5 011Installing Dinkle Label
Installing Seagull Driver
2.6 014
Printer Setting and Control3 016
3.1 016Operation Panel
3.2 017LCD Interface Introduction
3.3 022LCD Interface Function
3.4 028Error Alerts
3.5 030USB Host
Maintenance and Adjustment4 032
4.1 032Cleaning the thermal print head
4.2 033Adjusting the balance and print head tension
4.3 034Ribbon shield settings
4.4 035Troubleshooting
Introduction
System Requirements
Start Dinkle Label
Description
Edit Markinh plate
Copy Markinh plate
Functional area

TMP-002
Thermal Transfer
Printer
CONTENTS
Operating
Add/Save Marking Plate
Add Marking Plate
Save Marking Plate
Open Marking Plate File
Setting
Output Interface
Other Settings
Material Setting
Material Selection
Add graphics
Advanced Function
Date and Time Settings
Set Date and Time for Printer
Insert Date and Time
Change Date and Time format
Database Connecting
How to Connect the Database
Use the Database
Oracle
SQL Server
TEXT
Network Connection
Set the printer IP address acquisition method
Get the Printer IP Address
Download Objects to the Printer
Download Fonts
Download Marking Plate Files
5.3.5 Delete the Printer Files
Appendix

TMP-002
Thermal Transfer
Printer
This equipment must be earthed.
The power plug must be connected to a properly wired earth ground socket outlet.An improperly
wired socket outlet could place hazardous voltages on accessible metal parts.
* Suggest to use Arial 12pt or above for better user experience.
* it's recommended to warm up the device 5~10 mins which comes a better effect of printing job.
* Equipment for use in locations where it is unlikely that children will be present.

TMP-002
Thermal Transfer
Printer
SAFETY INSTRUCTIONS
Please read the following instructions carefully.
1. Keep the equipment away from humidity.
2. Before you connect the equipment to the power outlet, please
check the voltage of the power source.
3. Make sure the printer is off before plugging the power connector
into the power jack.
4. It is recommended that you connect the printer to a surge
protector to prevent possible transient overvoltage damage.
5. Be careful not to get liquid on the equipment to avoid electrical
shock.
6. For safety and warranty reasons, ONLY qualified service personnel
should open the equipment.
7. Do not repair or adjust energized equipment under any
circumstances.
Caution
* Danger of explosion if battery is incorrectly replaced. Replace only with the equivalent
type recommended by the manufacturer.
** Only use with designated power supply adapter model.
Specifications are subject to change without notice.
Printer
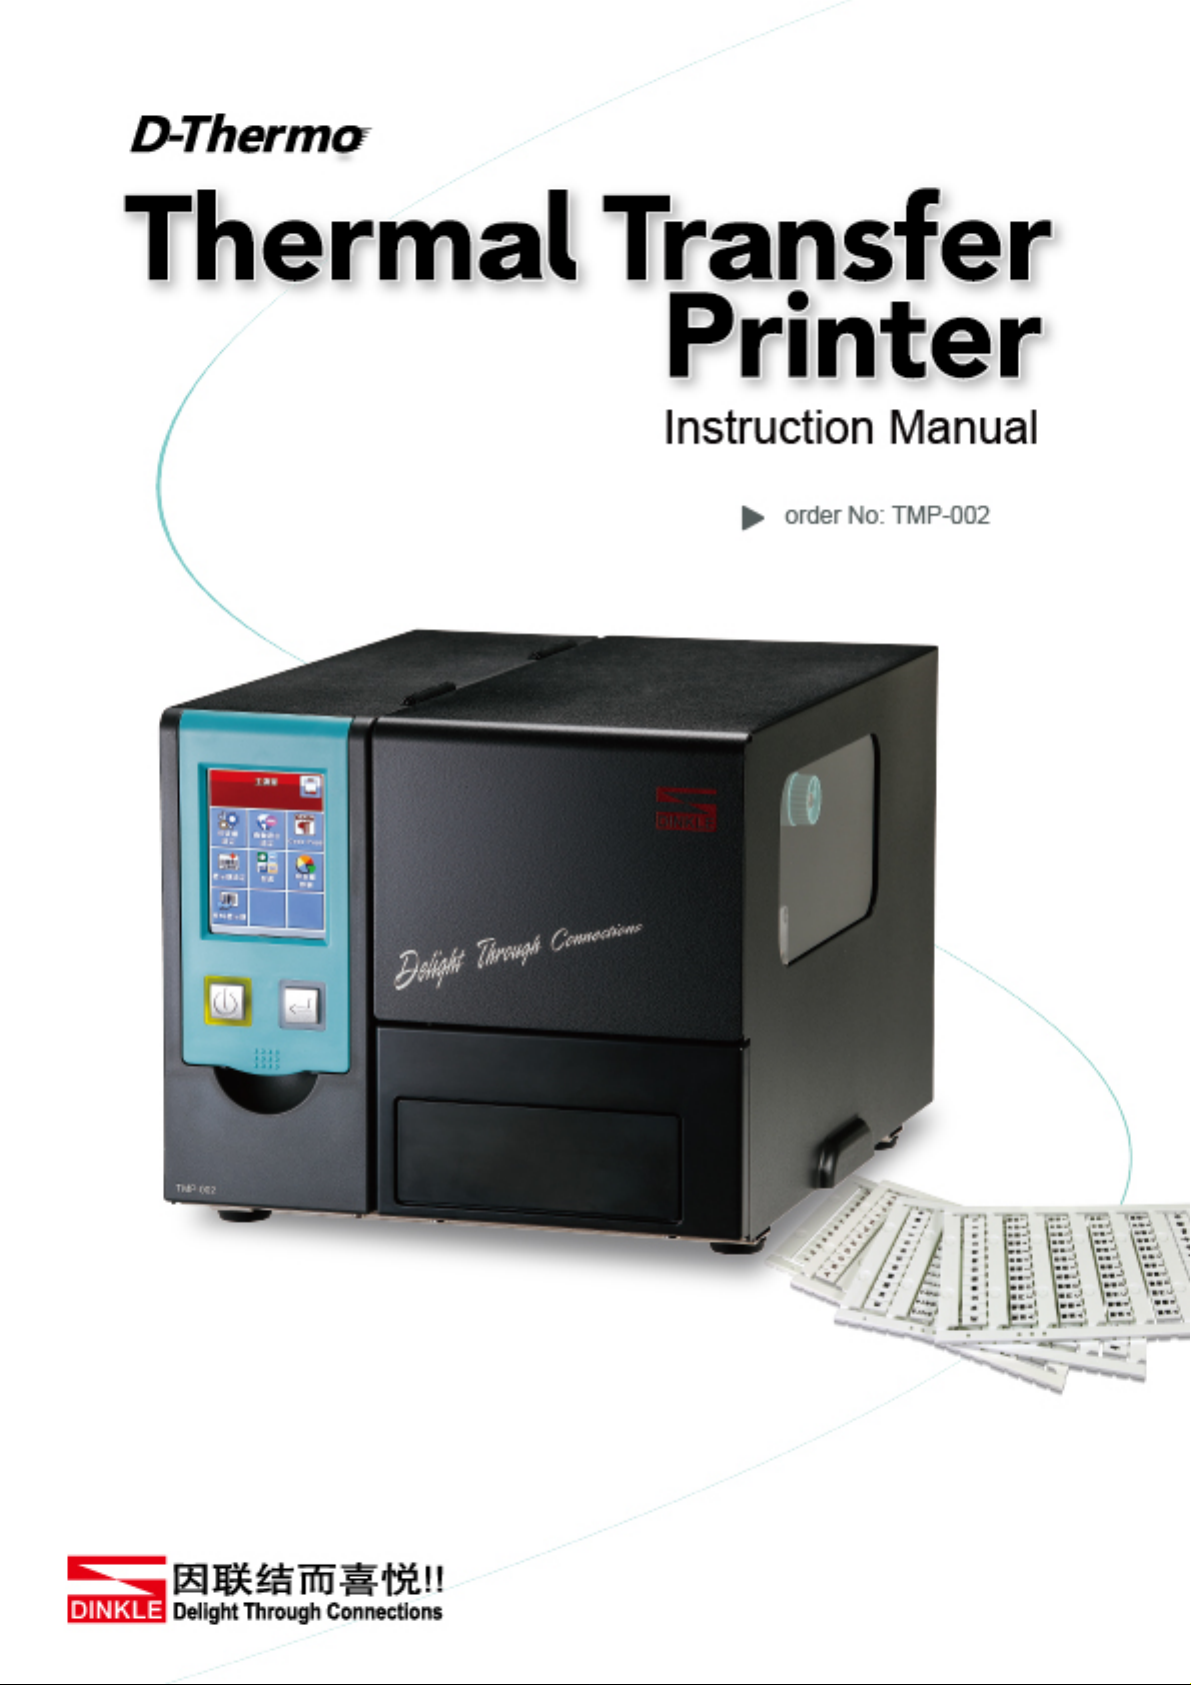
Box Content
After opening the box, please check all the equipment and check if there is any damage caused
by the transportation. Please keep all packaging materials in case you need to return the goods for future
delivery.
Thermal Transfer Printer
Ribbon&Empty Ribbon Core
Marking Plate Fixture Product CD Cleaning Pen
Power Cord USB Cable
Contains Dinkle Label, Driver, User Manual
Printer
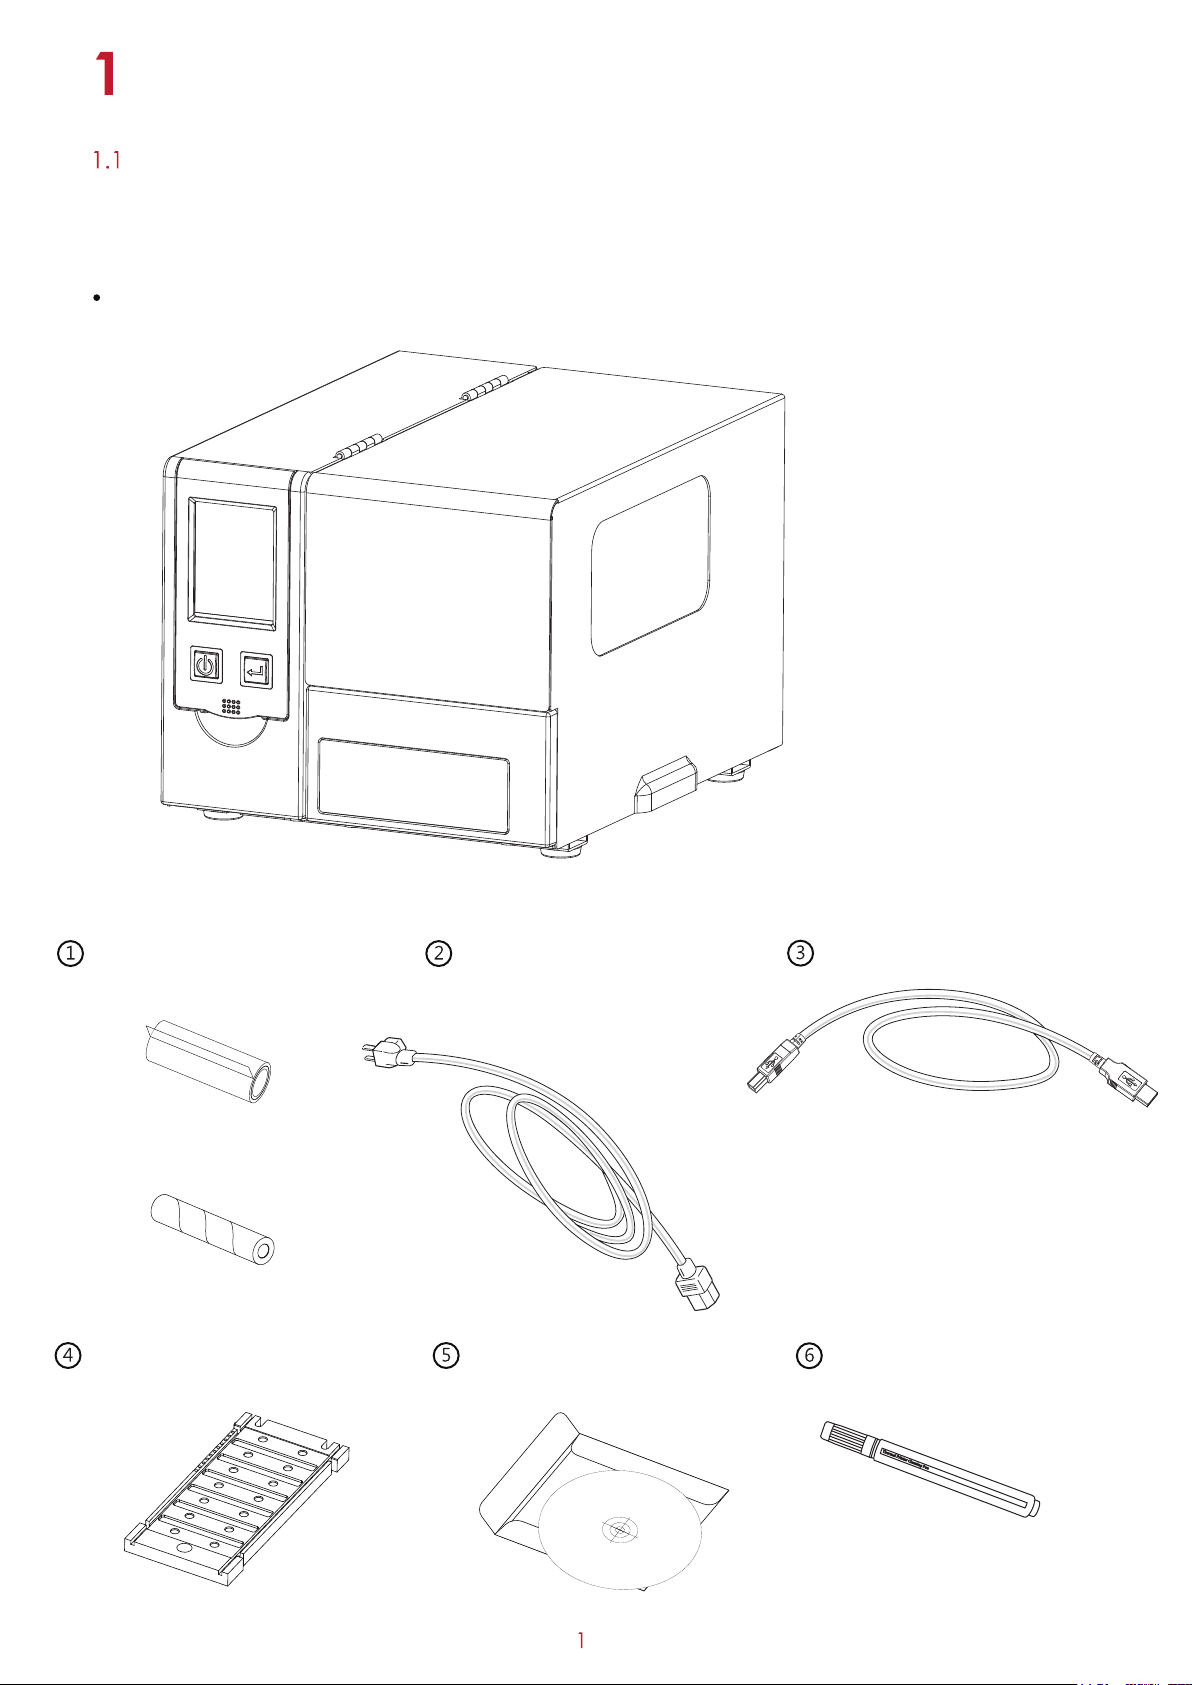
Getting to Know Your Printer
Device Overview
Front View
Top Cover
Touch Panel
Power Button
Eject/Retract Button
Rear View
Observation Window
Ethernet Connection Port
RS-232 Port
USB Port
USB Host
Power Jack
Printer
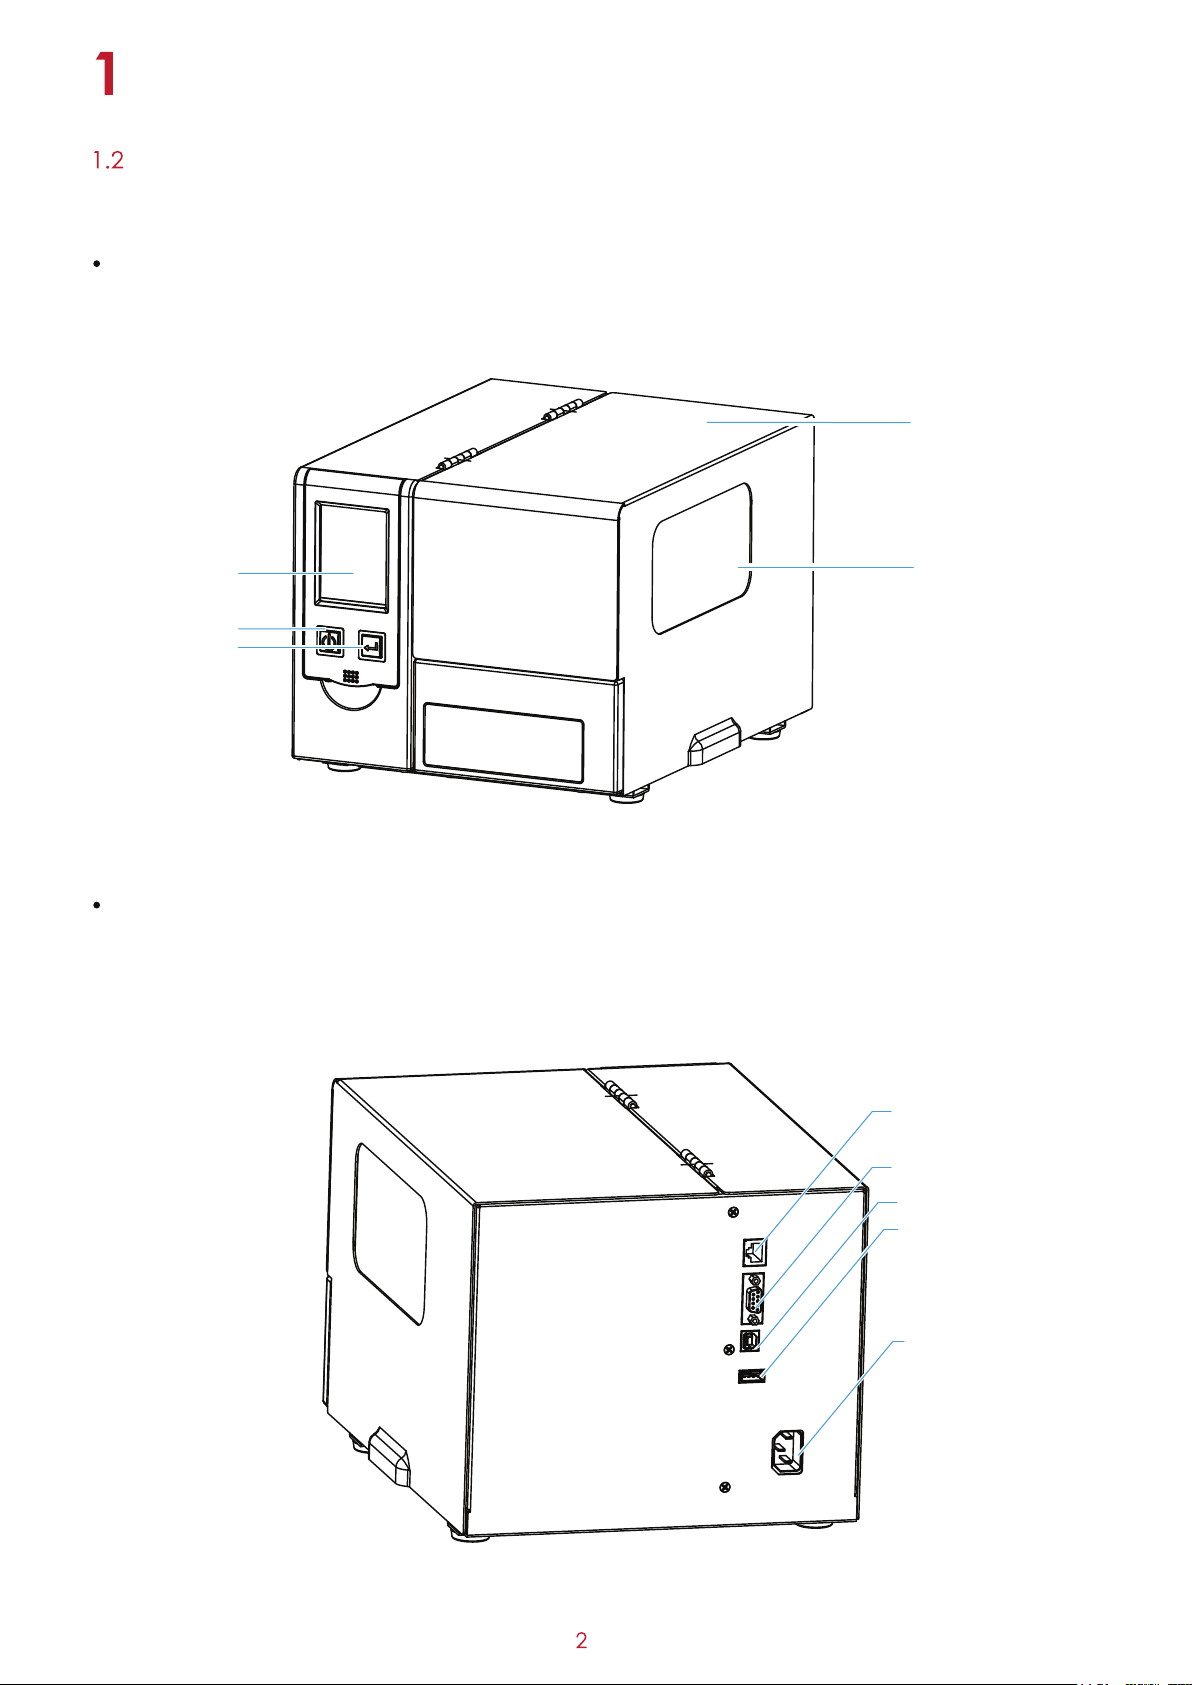
Inside View
Top Cover
Ribbon Supply Hub
Ribbon Rewind Hub
Print Mechanism
Marking Plate Fixture
Slide rail

Printer Setup
Loading the Ribbon
Printing Method:
Thermal transfer:When printing, the ribbon must be used to transfer the content to the Marking plate.
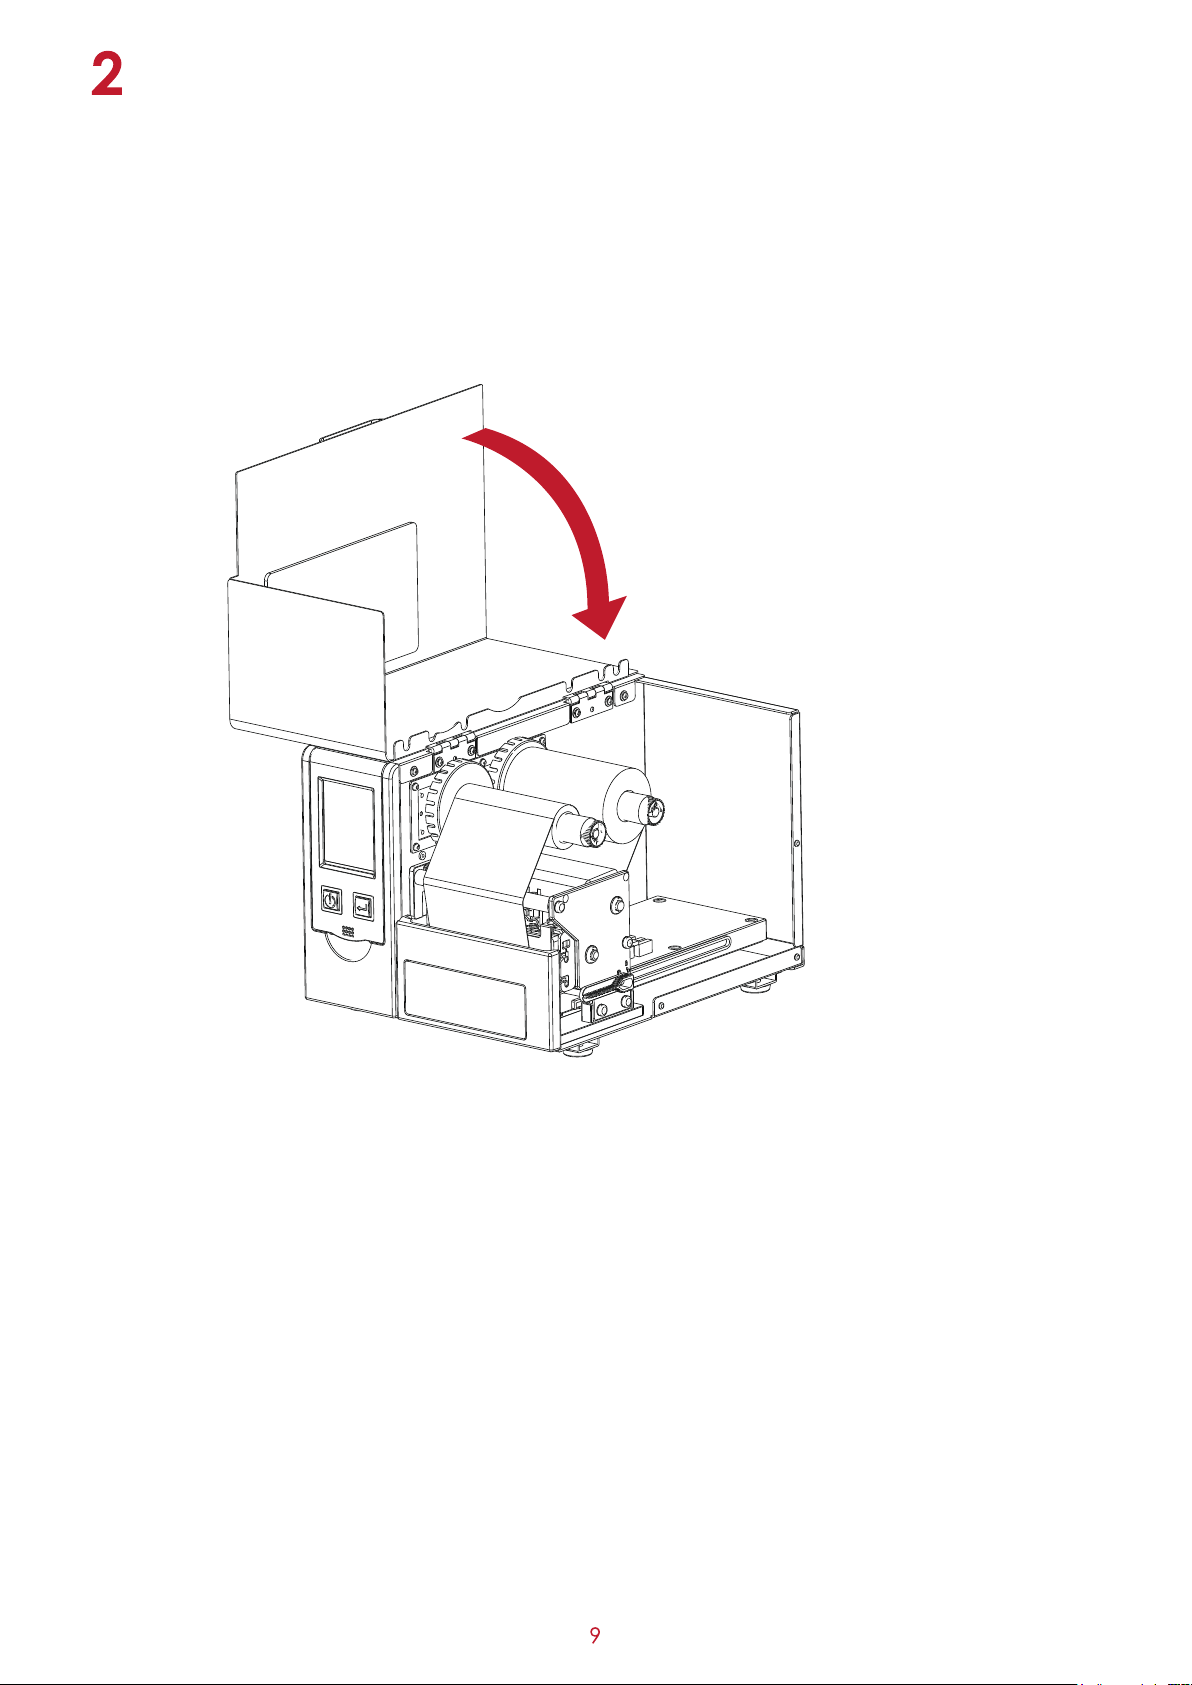
Place the thermal transfer printer on a
flat surface and open the top cover.
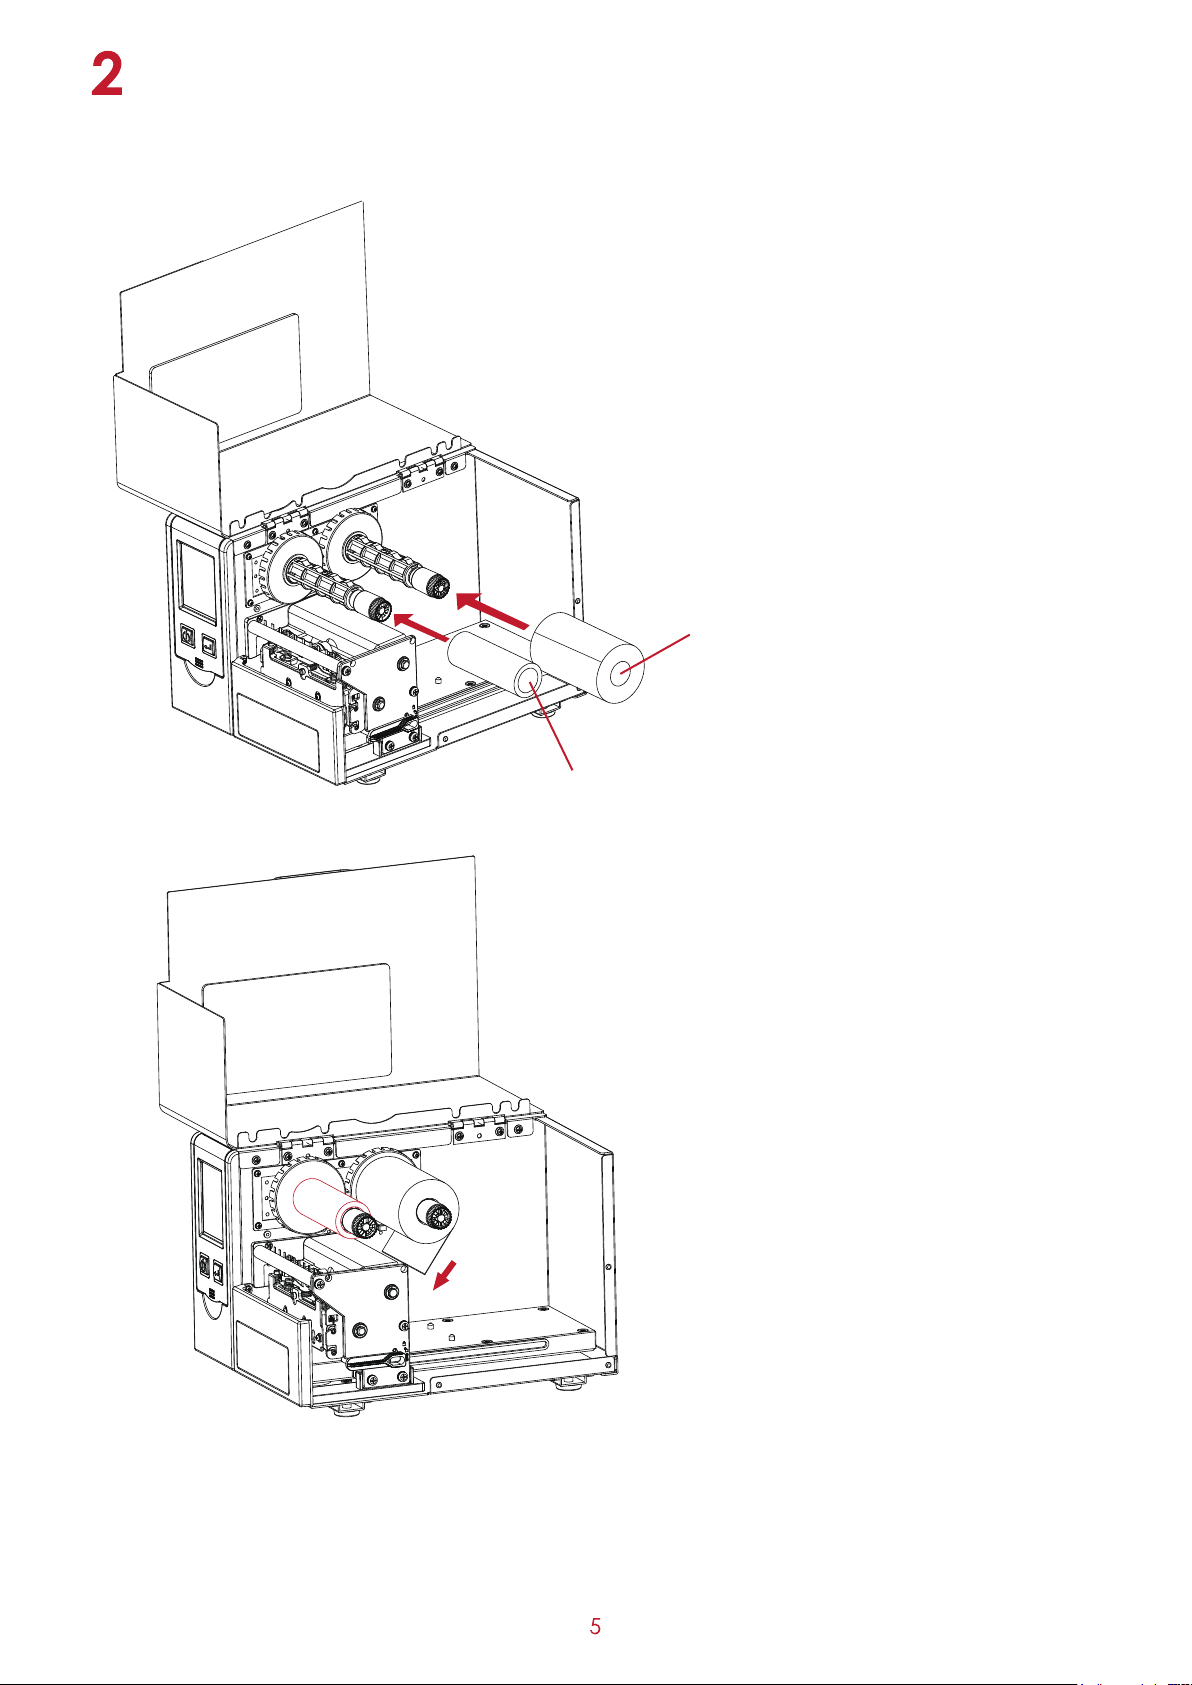
Printer Setup
Assemble the ribbon on the ribbon supply hub
Assemble the ribbon axis to the ribbon rewind hub
Pull the ribbon down through the underside
of print mechanism, to fix it to the ribbon axis.
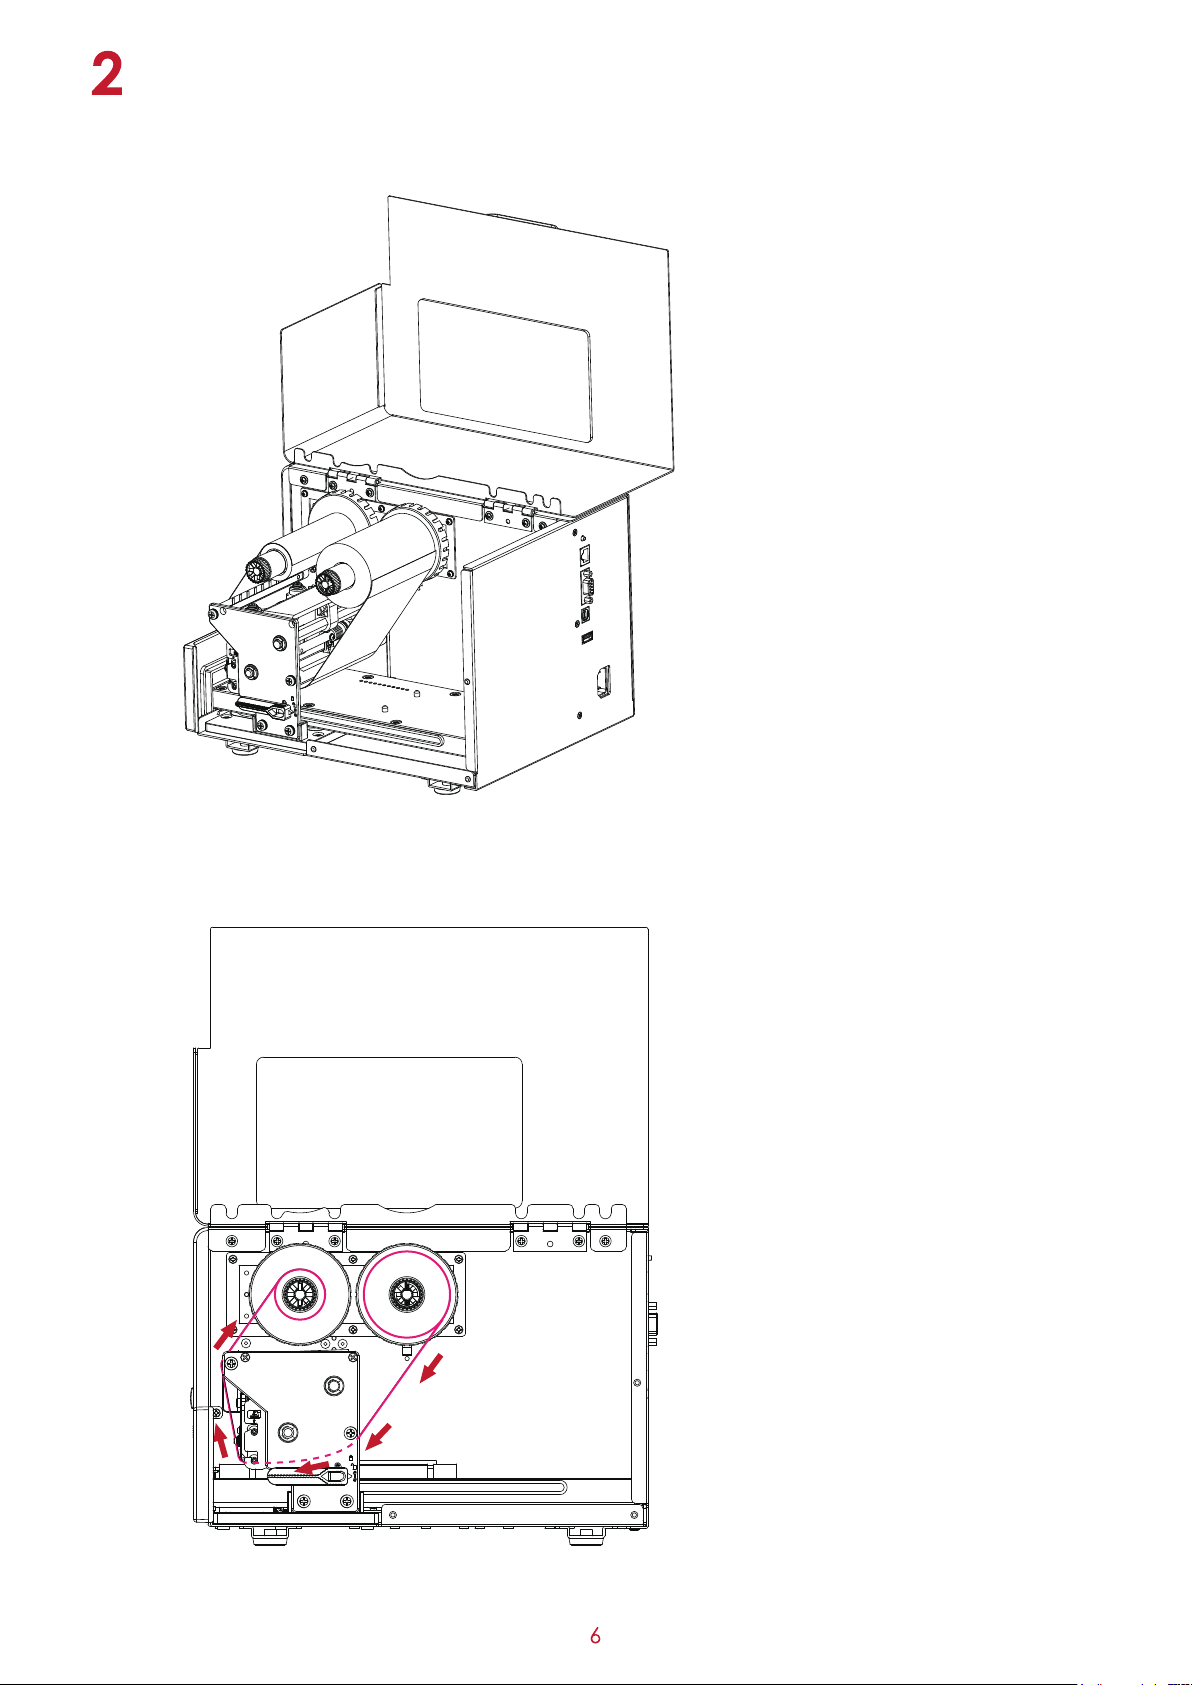
Printer Setup
Fix the ribbon.
※Schematic diagram
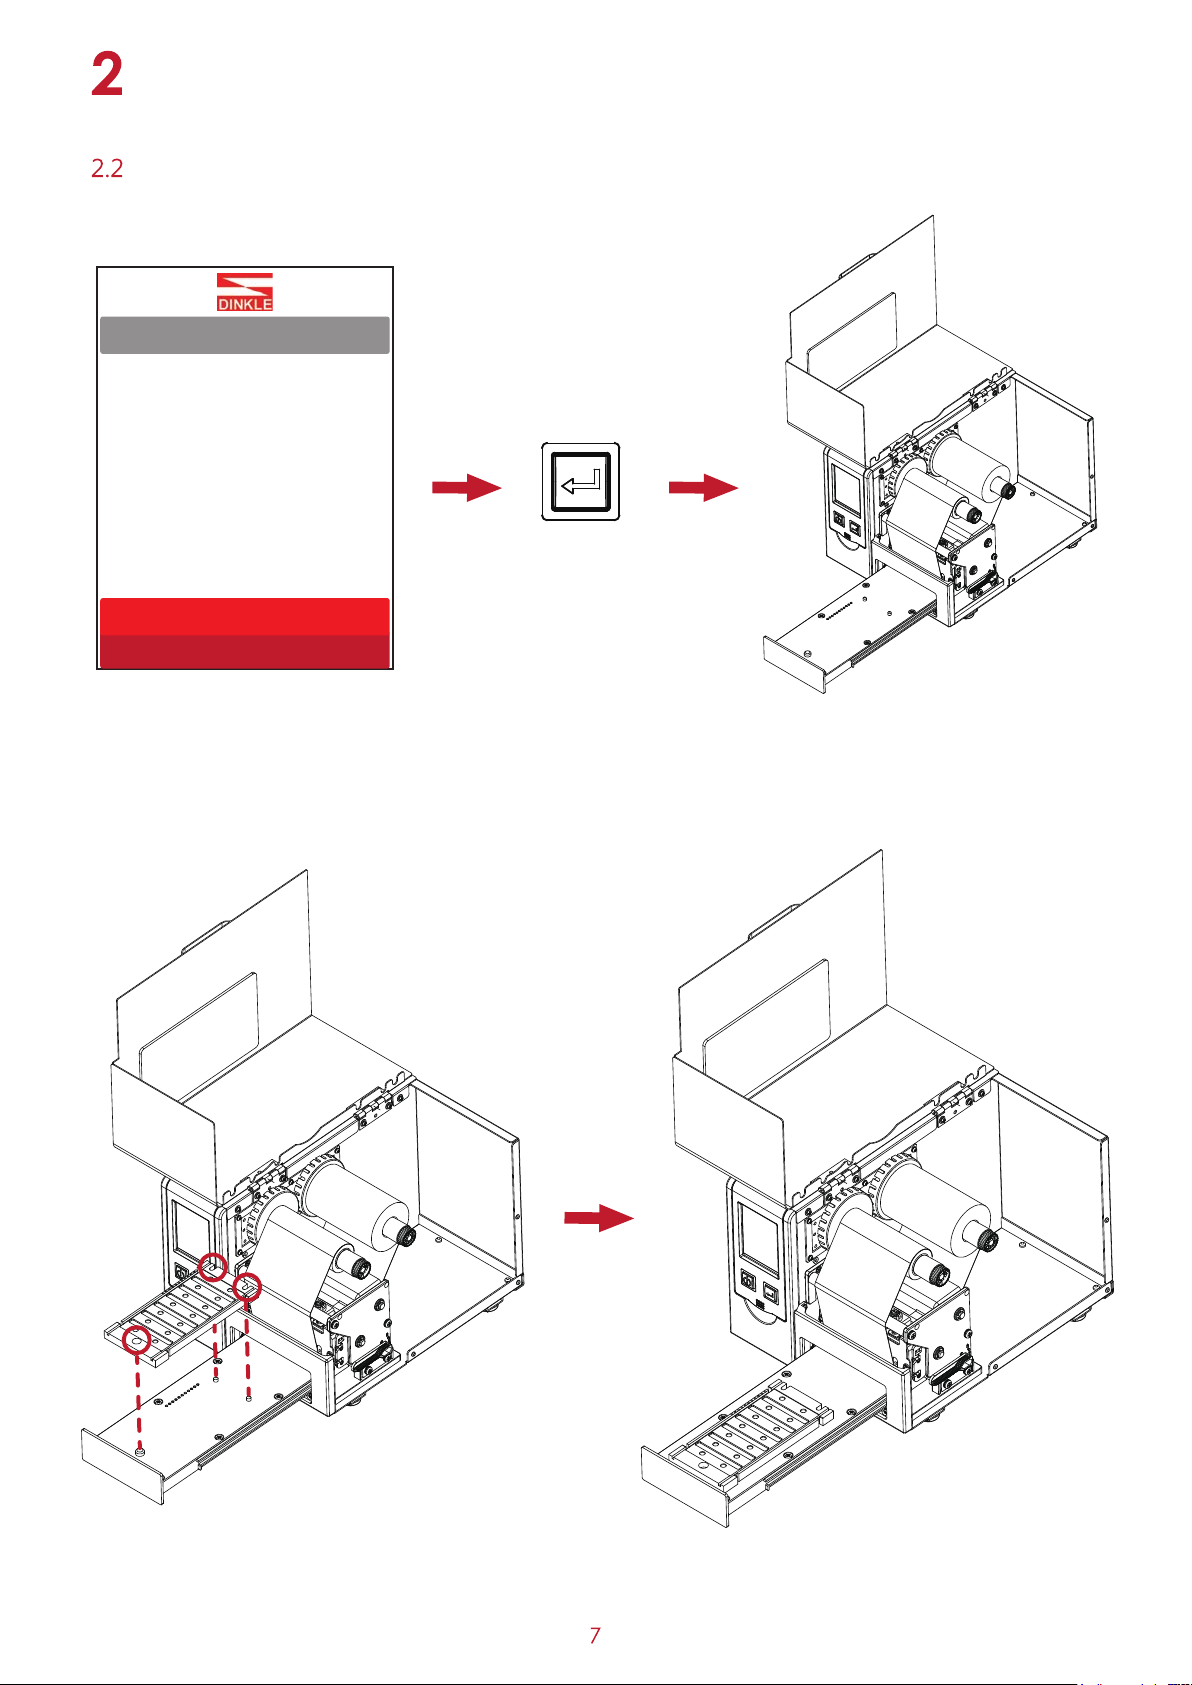
Printer Setup
Installing the Fixture
Ready
The LCD displays the "Ready" state and presses the “Eject/Retract” Button to eject the slide rail.
Align the fixture with the three bumps on the rail to place it smoothly.
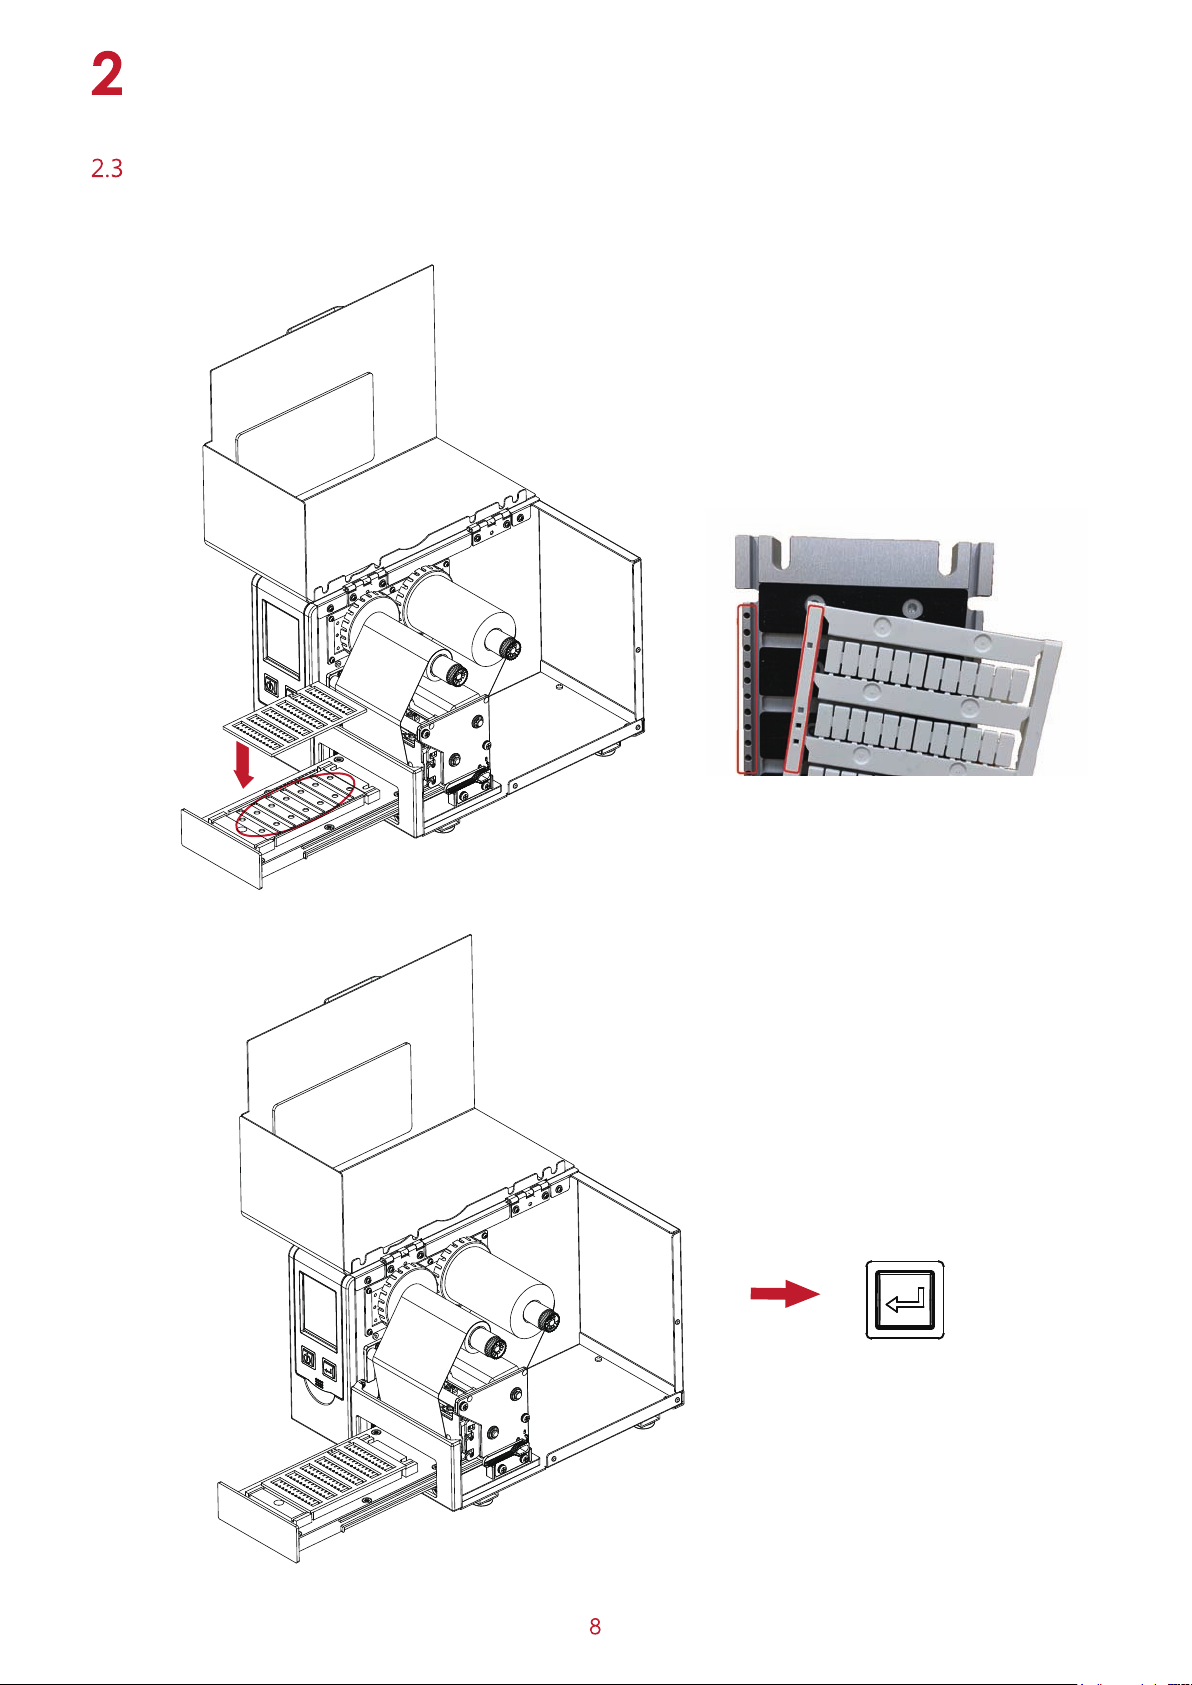
Printer Setup
Load the Marking Label
Align the bump of the Marking Label into the circular groove on the fixture and place it.
(only one at a time)
On the marking label, the square hole needs
to be on the same side as the small round hole
on the fixture to be placed effectively.
Press the “
Eject/Retract” Button to retract the slide rail.
Printer Setup
Close the top cover.
Printer Setup
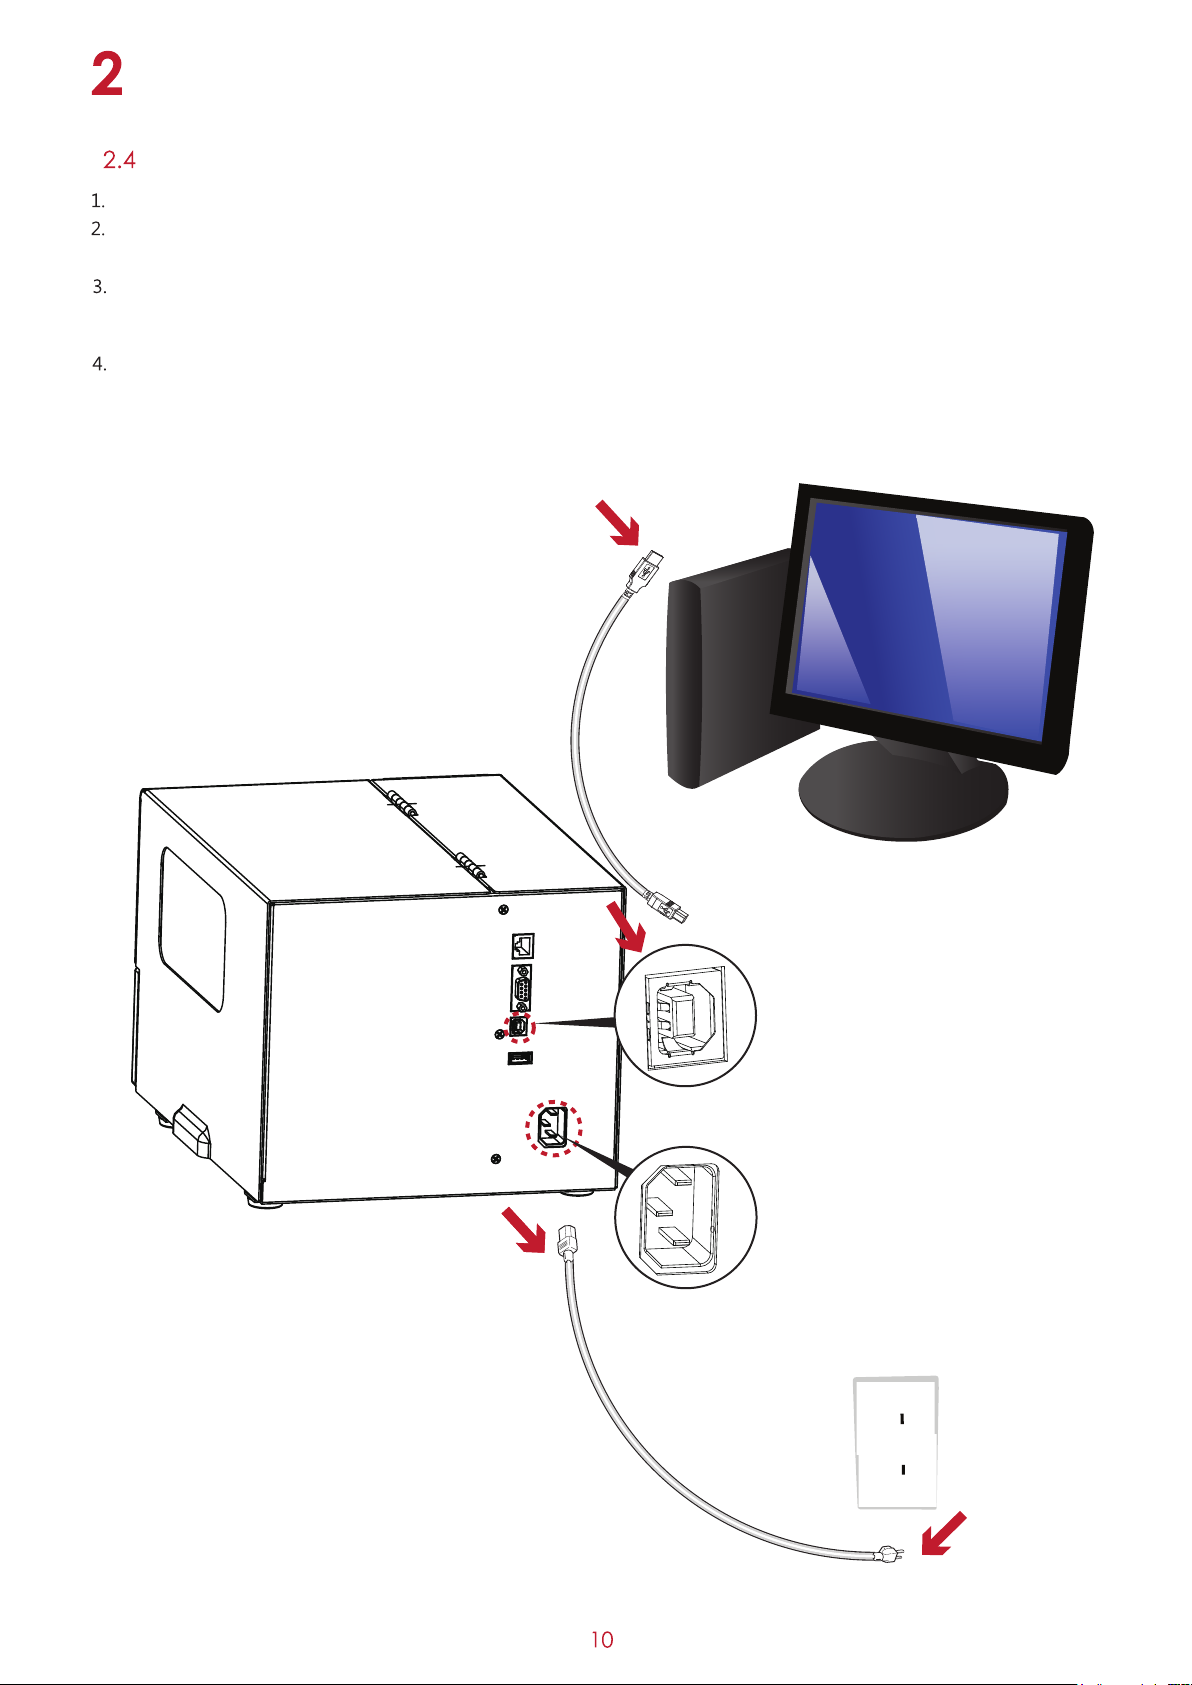
Connecting the Printer to the Host Computer
Confirm that the thermal transfer printer power switch is off.
Connect one end of the power cord to the general household power supply and the other end to the
power socket of the thermal transfer printer.
One end of the transmission line is connected to the transmission port of the thermal transfer printer, and
the other end is connected to the computer. The type of transmission line varies depending on the
equipment purchased. Please install it according to the actual accessories.
Turn on the thermal transfer printer when the ribbon is installed, and wait for the power indicator of the
heat transfer machine to light.
Printer Setup
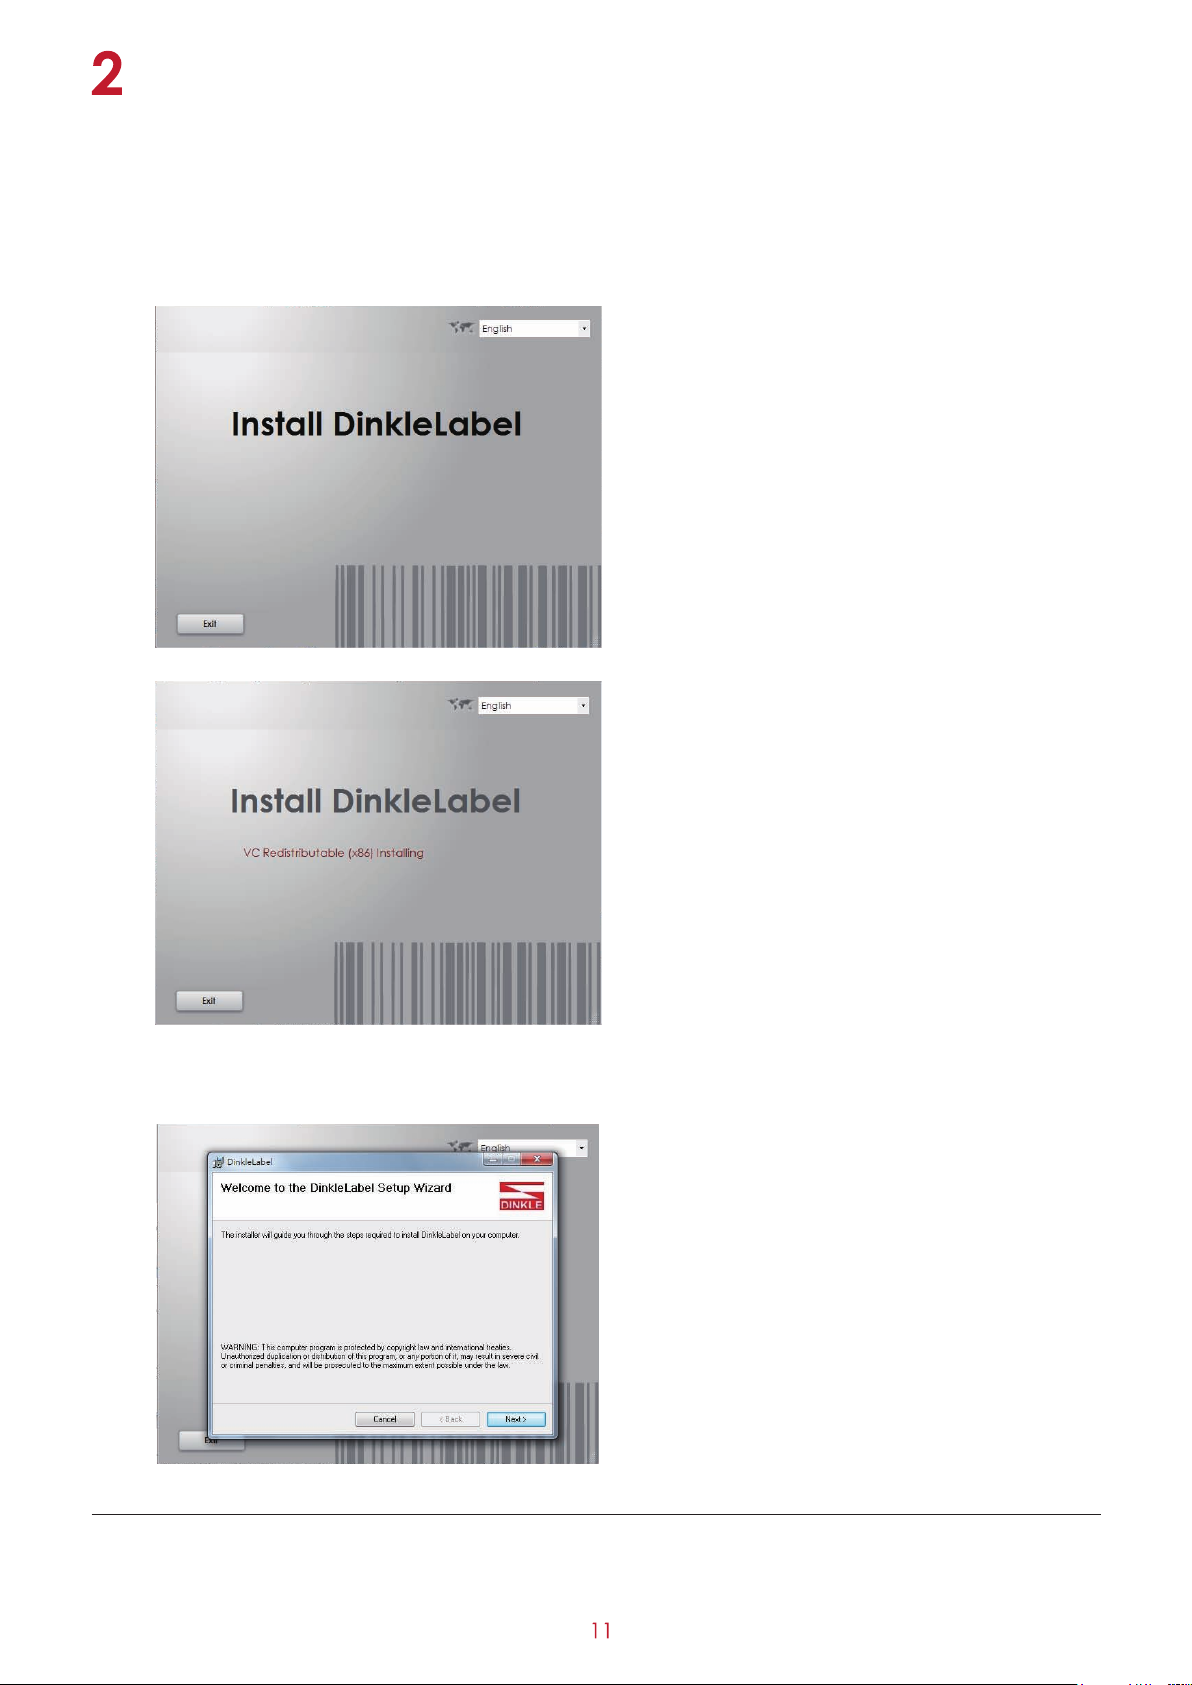
2.5 Installing Printer Driver and Dinkle Label with Super
Please enable the "AutoPlay"setting of the CD player if the program is not automatically executed after placing the
product disc into the CD player;or click on the CD icon to start the CD program.
2. Before starting the installation, the screen will prompt you to start installing the Dinkle Label software automatically.
After confirming, press the “Next” button to start the installation.
Note
* After the product disc is inserted into the CD player, if the program is not automatically executed.
Please enable the "AutoPlay" setting of the CD player; or click the icon of the CD to start the CD program.

Printer Setup
3. During the automatic installation of the driver and Dinkle Label software, the screen will display the installation
progress column. When the progress bar download is completed and “Next” is automatically displayed , This
means the installation is complete.
Printer Setup
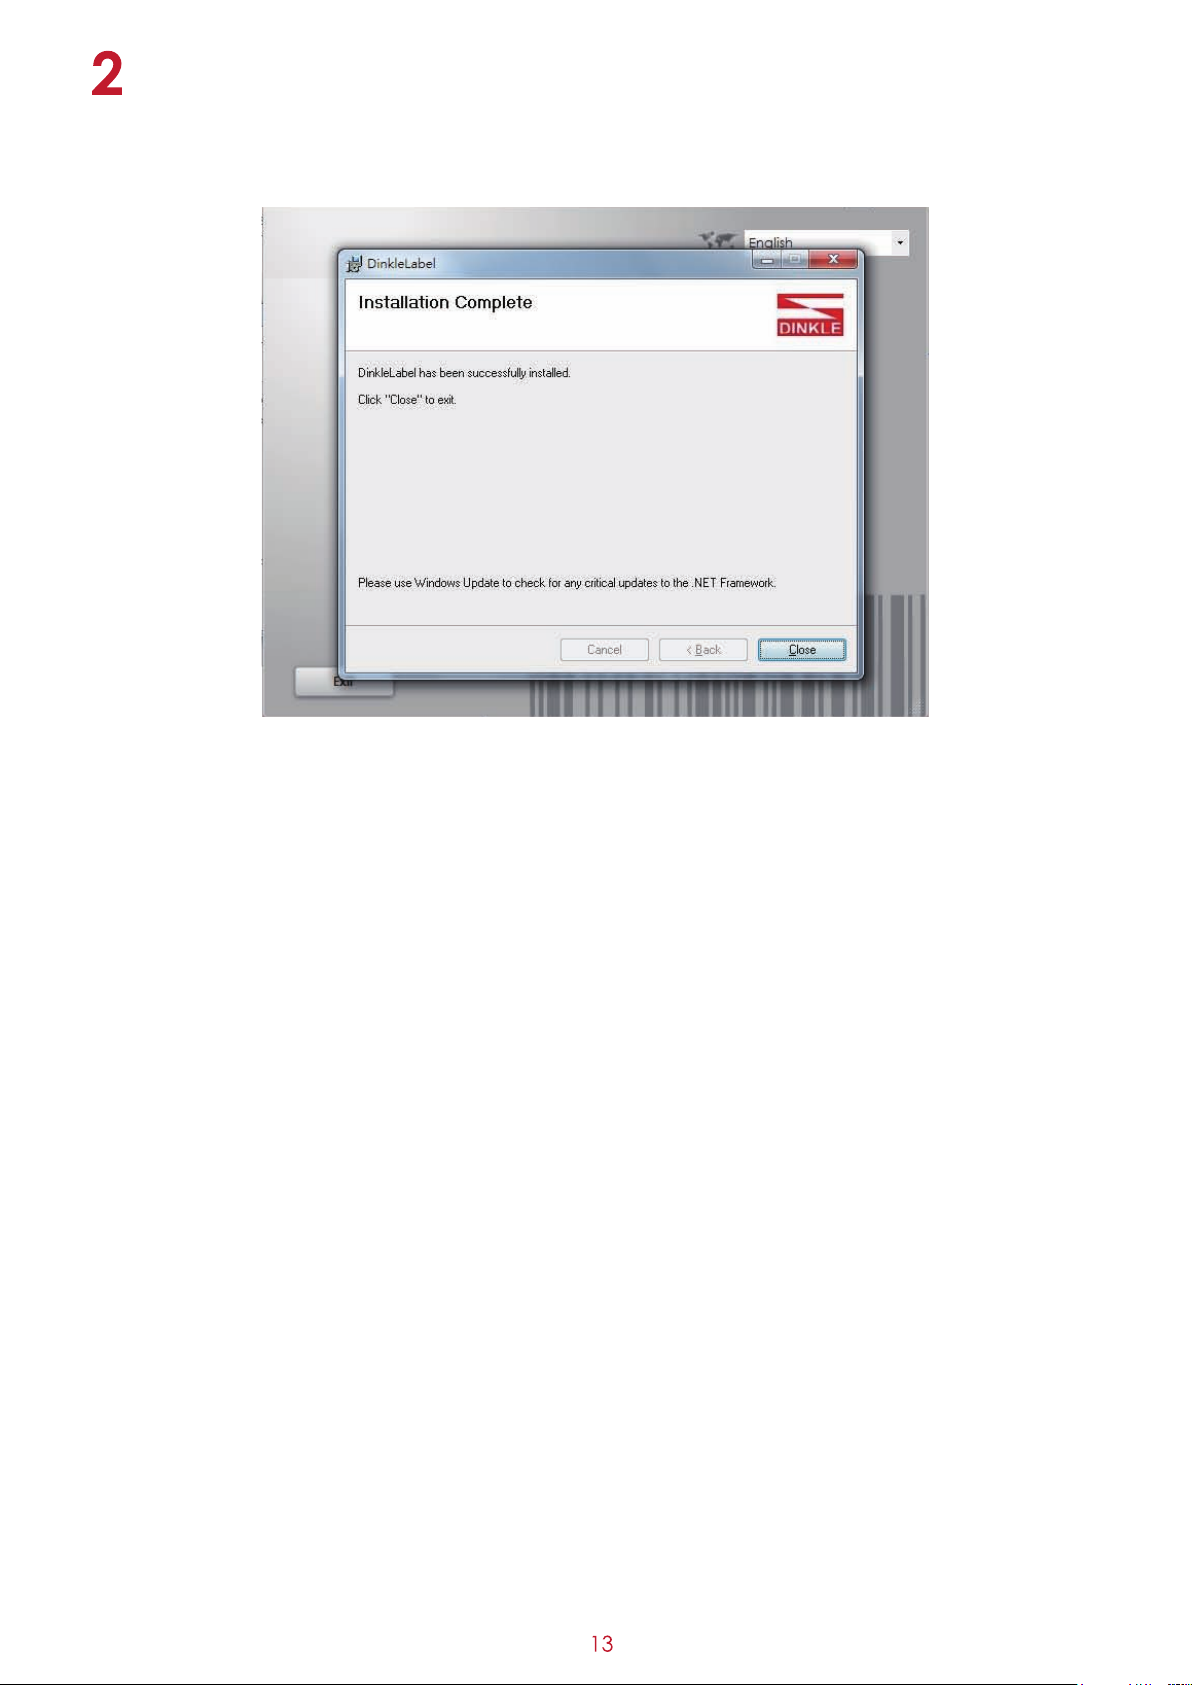
4. After the automatic installation is completed, the screen will display the installation. After pressing “End”,
you can use the Dinkle Label software for file creation, editing and printing.
 Loading...