

Operating Instructions for the Telephone Remote Switch TFS
r
manual
switching
1
1
2
3
2
4
4
3
Line
9V AC
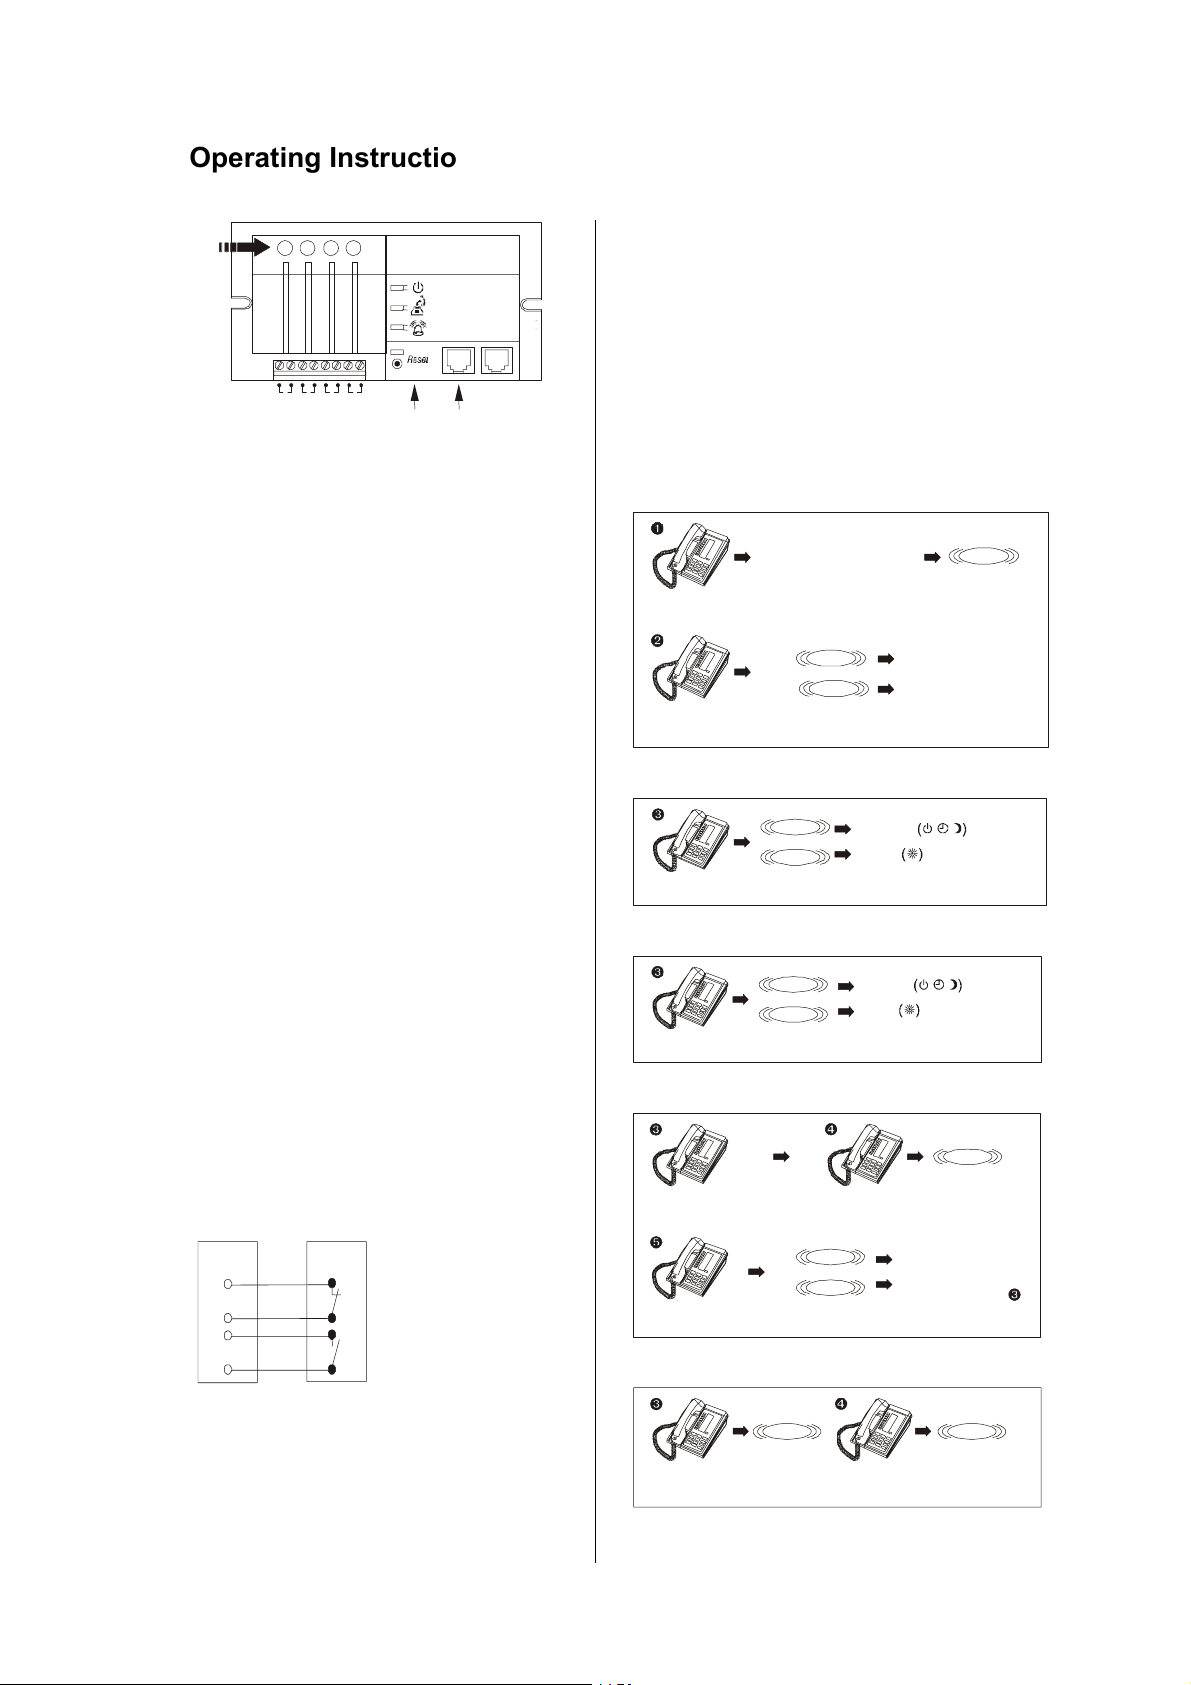
The Telephone Remote Switch is capable of
remotely controlling heating regulators or room
thermostats which have an appropriate entry
port. The devices switch from reduced mode
C) to heating mode (B), as soon as the
(
respective terminals detect a short circuit (see
heating regulator’s instructions).
1. Connection
E All devices which are connected to the
telephone network must be in accordance
with the respective prevailing national
regulations.
Contents
• Telephone Remote Switch TFS
• Power plug
• Connecting cable
1. Install the TFS on a wall close to the
telephone jack
2. Connect the "Line" slot on the TFS with the
slot for additional devices on your
telephone jack. For this use the enclosed
connecting cable and the appropriate
adapter plug.
3. Connect the exit terminals (1 to 4) with the
appropriate terminals on your heating
regulator/thermostat.
1.1 Regulator-/Thermostat connection
In both cases, an LED below the key shows
that the TFS is in the ”heating“ mode (the relay
contact is closed).
Default setting is that the TFS accepts a call
after 4 rings and expects the access code
"1234". These settings can be altered, see 2.4
and 2.5.
*
Please note that the TFS breaks off the
telephone connection automatically after
30 sec. if no entries are made in this time.
2.1 Entering the access code
The TFS expects 4 rings
(Changi ng the number o f rings
see 2.5)
Dial your
telephone number
Enter the 4-digit
Code number (1 2 3 4)
To change the code No. see 2.4
2.2 Status request , , or
Press “1 ”, “2”, “3” or “4” to s elect t he respective exit port
and to check the current switch position of this port
Beeep
Beep-Beep
2.3 Changing the status
Beeep
Beep-Beep
Press “∗” to change the switch position
of the exit port selected in 2.2
2.4 Changing the access code
Beep Beep
Beeep
Automatic
Heating
Automatic
Heating
Code ok
Code incorrect
Beep-Beep
Beep Beep
TFS picks up
To connect the regulator or thermostat please
follow the respective operating instructions.
Regulator
TFS
Heati ng
1
Operati on according to
2
program switch posi tion
D
2. Switching by telephone
It is possible to switch the status of the exit
relay (and thus the type of operation at the
connected regulator/thermostat) either by
telephone or by pressing the key ”manual
switching“ on the TFS.
Press “# 8” Enter your new
To confirm, please enter
your code again.
4-digit access code
Beep-Beep
Beeep
Your ne w code numbe
has be en ac cepte d
Code incorrect
please start again with
2.5 Number of rings until pick-up
Beep-Beep
Press “# 9” Enter the desired number
of rings (1-9) until the
TFS picks up
Beepx
number
4
4
CTY TNHH THIẾT BỊ NHIỆT ĐÌNH HẢI-DHE
VP: 189 Lý Thường Kiệt, P.6, Q.Tân Bình, TP HCM, VIỆT NAM
Tel: +84 (08) 3863 7722 # Fax: +84 (08) 3865 1859
URL: www.dinhhai.com - Email: info@dinhhai.com
2.6 Completion
To complete progamming press . You can
also simply hang up. The TFS will
automatically break off the connection after
30 sec..
To end the connection
press “# 0”
3. Manual switching
The switch position of the relay, and thus the
type of operation of the connected
regulator/thermostat, can be changed manually
by pressing the key "manual switching". This is
not possible as long as there is a telephone
connection.
manual
switching
6. Display
The TFS has 8 display LEDs for diagnosing
the system.
Power on.
Blinks by incoming call.
Blinks three times after
Manual Displays the switch position,
switching: lights up when the regulator is in
manual
switching
TFS is occupying the telephone
line.
successful reset
heating operation (contact
closed).
1 2 3 4
4. Loading default values
By pressing the reset key (e.g. with a paper
clip) it is possible to return the TFS to the
factory settings. The control light blinks three
times to show that the TFS was loaded with
the following default values:
1) Number of rings: 4
2) Access code: 1234
3) Relay contacts: open
5. Operation with an answering
machine
If you use the TFS together with an answering
machine, please proceed as follows to
establish a connection to the TFS.
1. Make sure the TFS is without power,
otherwise the alteration will not be
effective.
2. Put the switch on the back of the TFS into
the "on" position.
3. Make sure that the number of rings to pick
up the line is higher for the TFS than for
your answering machine.
4. Dial your telephone number and hang up
after the first ring.
1 2 3 4
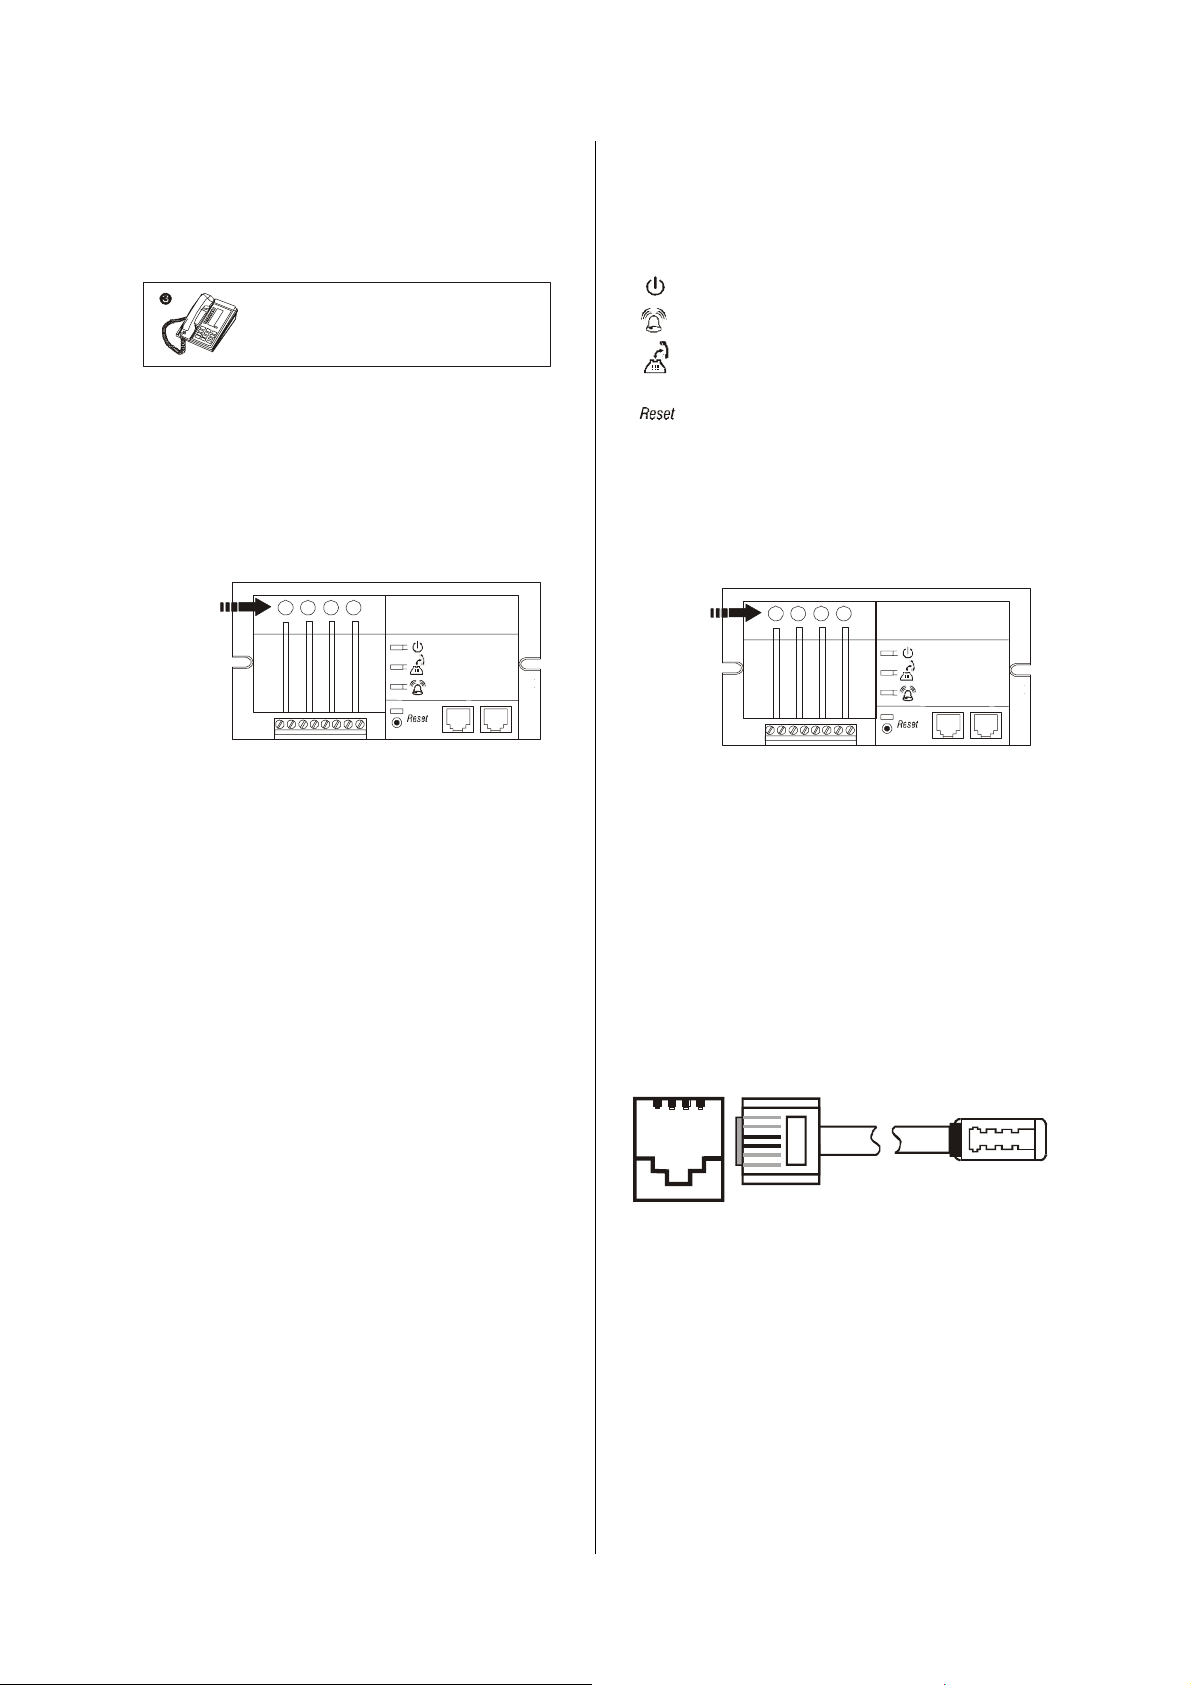
7. Telephone connection
The TFS has two 6-pole RJ11 (Western)
telephone slots. However, for the connection of
the TFS only the slot marked "Line" is needed.
This slot is connected to the slot for additional
devices on the telephone jack by means of the
enclosed connecting cable and the adapter
plug.
Please make sure that your telephone jack has
a slot for additional devices (Germany NFN
code), so that you can use your telephone and
the TFS at one jack.
3
4
Line
at theTFS
6
5
3
2
1
RJ11
Connecting cable
Ada pt er plug
1 2 3
TAE (D)
TST (A)
8. Technical details
Power supply: Power plug 9V~, 0,2A
Switching power: 10(5) A, 30V
Protection class III (low voltage protection)
5. Wait 10 sec. (max. 30 sec.) and call again.
6. If the call back takes place within max.
30 sec. the TFS will pick up after the first
ring.
CC/V 0903 6.6701.413-01 Printed in Germany Rights reserved to make alterations
 Loading...