

Page 1
Sunningdale
Opti-V Stove
Model : SNG20
Instructions
EN
EN : This product is only suitable for well insulated rooms or occasional use. DE : Dieses Produkt ist nur für gut isolierte Bereiche oder gelegentliche Verwendung geeignet. FR : Ce produit convient uniquement à des endroits bien isolés ou pour un usage occasionnel. IT : Questo prodotto è
adatto solo per spazi ben isolati o per uso occasionale. ES : Este producto sólo es adecuado para espacios bien aislados o un uso ocasional. NL :
Dit product is uitsluitend geschikt voor goed geïsoleerde ruimten of voor sporadisch gebruik. PL : Produkt ten jest odpowiedni wyłącznie do dobrze
odizolowanych miejsc lub do okazjonalnego użytku. NO : Dette produktet egner seg kun for godt isolerte rom eller sporadisk bruk. RO : Acest
produs este adecvat exclusiv spaţiilor bine ventilate sau utilizării ocazionale. CZ : Tento výrobek je vhodný pouze do dobře izolovaných prostor
nebo k příležitostnému použití. DK : Dette produkt er kun egnet til velisolerede rum eller lejlighedsvis brug. PT : Este produto somente é adequado
para espaços bem isolados ou uso ocasional. SE : Denna produkt är endast avsedd för välisolerade utrymmen eller tillfällig användning. FI : Tämä
tuote soveltuu ainoastaan hyvin eristettyihin tiloihin tai satunnaiseen käyttöön. SK : Tento výrobok je vhodný len pre dobre izolované priestory alebo
na občasné použitie. SI : Ta izdelek je primeren le za dobro izolirane prostore ali za občasno uporabo. HR : Ovaj proizvod je pogodan samo za
dobro izolirane prostore ili povremenu upotrebu. HU : Ez a termék csak jól szigetelt terekhez vagy eseti használatra alkalmas.
The product complies with the European Safety Standards EN60335-2-30 & EN60065 and the European Standard Electromagnetic
Compatibility (EMC) EN55014-1, EN55014-2, EN61000-3-2, EN61000-3-3, EN60555-2 and EN60555-3. These cover the essential
requirements of EEC Directives 2006/95/EC and 2004/108/EC
NL FR
IT
DE
PL
ES
08/53152/0 Issue 1
Page 2

Page 3

EN ................................................................................................ 1
NL ................................................................................................. 5
FR ................................................................................................ 9
IT ................................................................................................ 13
DE .............................................................................................. 17
PL ............................................................................................... 21
ES ............................................................................................... 25
Page 4
Dimplex SNG20
Introduction
Please read this information guide carefully to be able to safely install, use and maintain your product.
Important Safety Advice
EN
When using electrical appliances, basic precautions should always be followed to reduce the
risk of re, electrical shock and injury to persons, including the following:
If the appliance is damaged, check with the supplier before installation and operation.
Do not use outdoors.
Do not use in the immediate surroundings of a bath, shower or swimming pool.
Do not locate the appliance immediately below a xed socket outlet or connection box.
This appliance can be used by children aged from 8 years and above and persons with reduced
physical, sensory or mental capabilities or lack of experience and knowledge if they have been
given supervision or instruction concerning use of the appliance in a safe way and understand
the hazards involved. Children shall not play with the appliance. Cleaning and user maintenance
shall not be made by children without supervision.
Children of less than 3 years should be kept away unless continuously supervised.
Children aged from 3 years and less than 8 years shall only switch on/off the appliance provided
that it has been placed or installed in its intended normal operating position and they have been
given supervision or instruction concerning use of the appliance in a safe way and understand
the hazards involved. Children aged from 3 years and less than 8 years shall not plug in,
regulate and clean the appliance or perform user maintenance.
CAUTION: Some parts of this product can become very hot and cause burns. Particular attention
has to be given where children and vulnerable people are present.
Do not use this appliance in series with a thermal control, a program controller, a timer or any
other device that switches on the heat automatically, since a re risk exists when the heater is
accidentally covered or displaced.
Ensure that furniture, curtains or other combustible materials are positioned no closer than 1
meter from the appliance.
In the event of a fault unplug the appliance.
Unplug the appliance when not required for long periods.
Although this appliance complies with safety standards, we do not recommend its use on deep
pile carpets or on long hair type of rugs.
The appliance must be positioned so that the plug is accessible.
If the supply cord is damaged it must be replaced by the manufacturer or service agent or a
similarly qualied person in order to avoid a hazard.
Keep the supply cord away from the front of the appliance.
WARNING: In order to avoid overheating, do not cover the appliance. Do not place material or
garments on the appliance, or obstruct the air circulation around the appliance.
The appliance carries a ‘DO NOT COVER’ warning label.
In order to avoid a hazard due to inadvertent resetting of the thermal cut-out, this appliance must
1
Page 5
not be supplied through an external switching device, such as a timer, or connected to a circuit
that is regularly switched on and off by the utility.
This appliance is not equipped with a device to control the room temperature. Do not use this
appliance in small rooms when they are occupied by persons not capable of leaving the room
on their own, unless constant supervision is provided.
Warning - No naked ame sources, such as candles, should be placed on this apparatus.
Warning - The appliance shall not be exposed to dripping or splashing and that no objects lled
with liquid, such as vases, shall be placed on the apparatus.
Warning - this appliance is of Class I construction and must be connected to a mains outlet with
protective earthing connection.
Technical Information
Model No: SNG20
Rating : 230-240V~50Hz
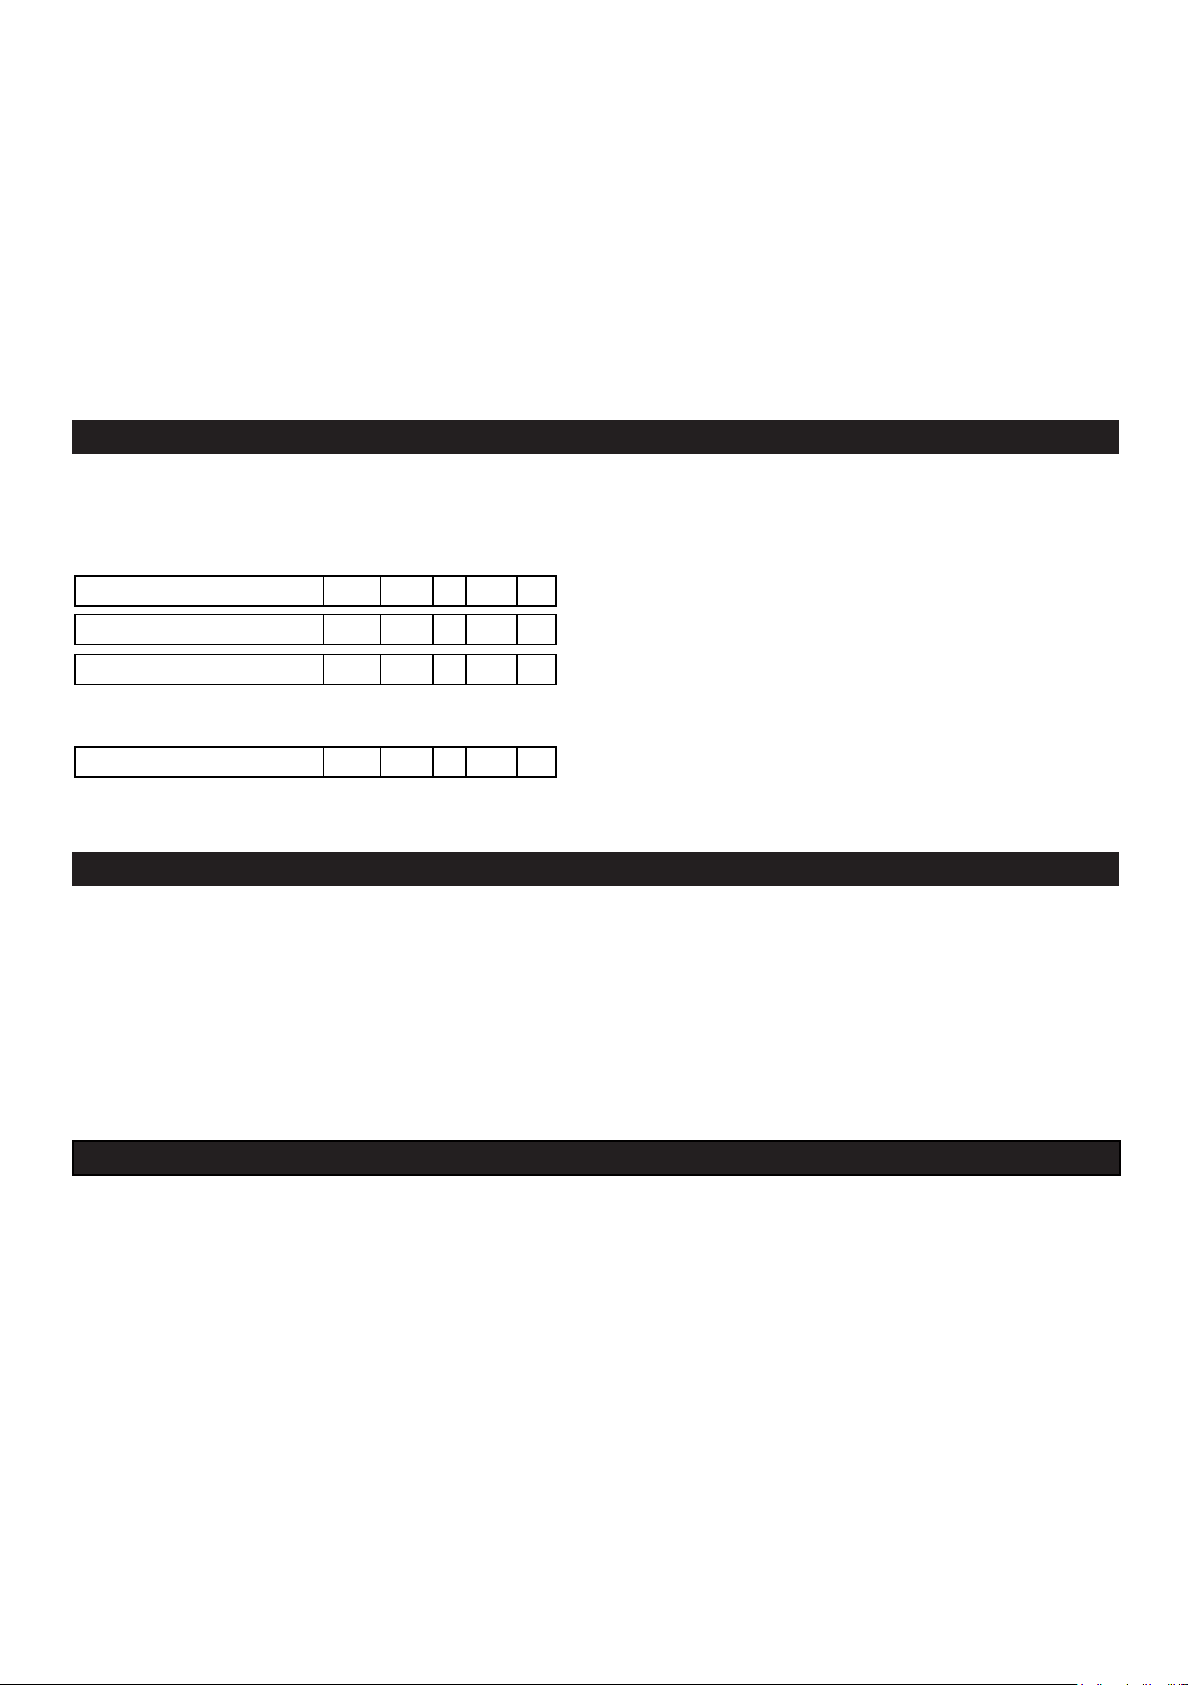
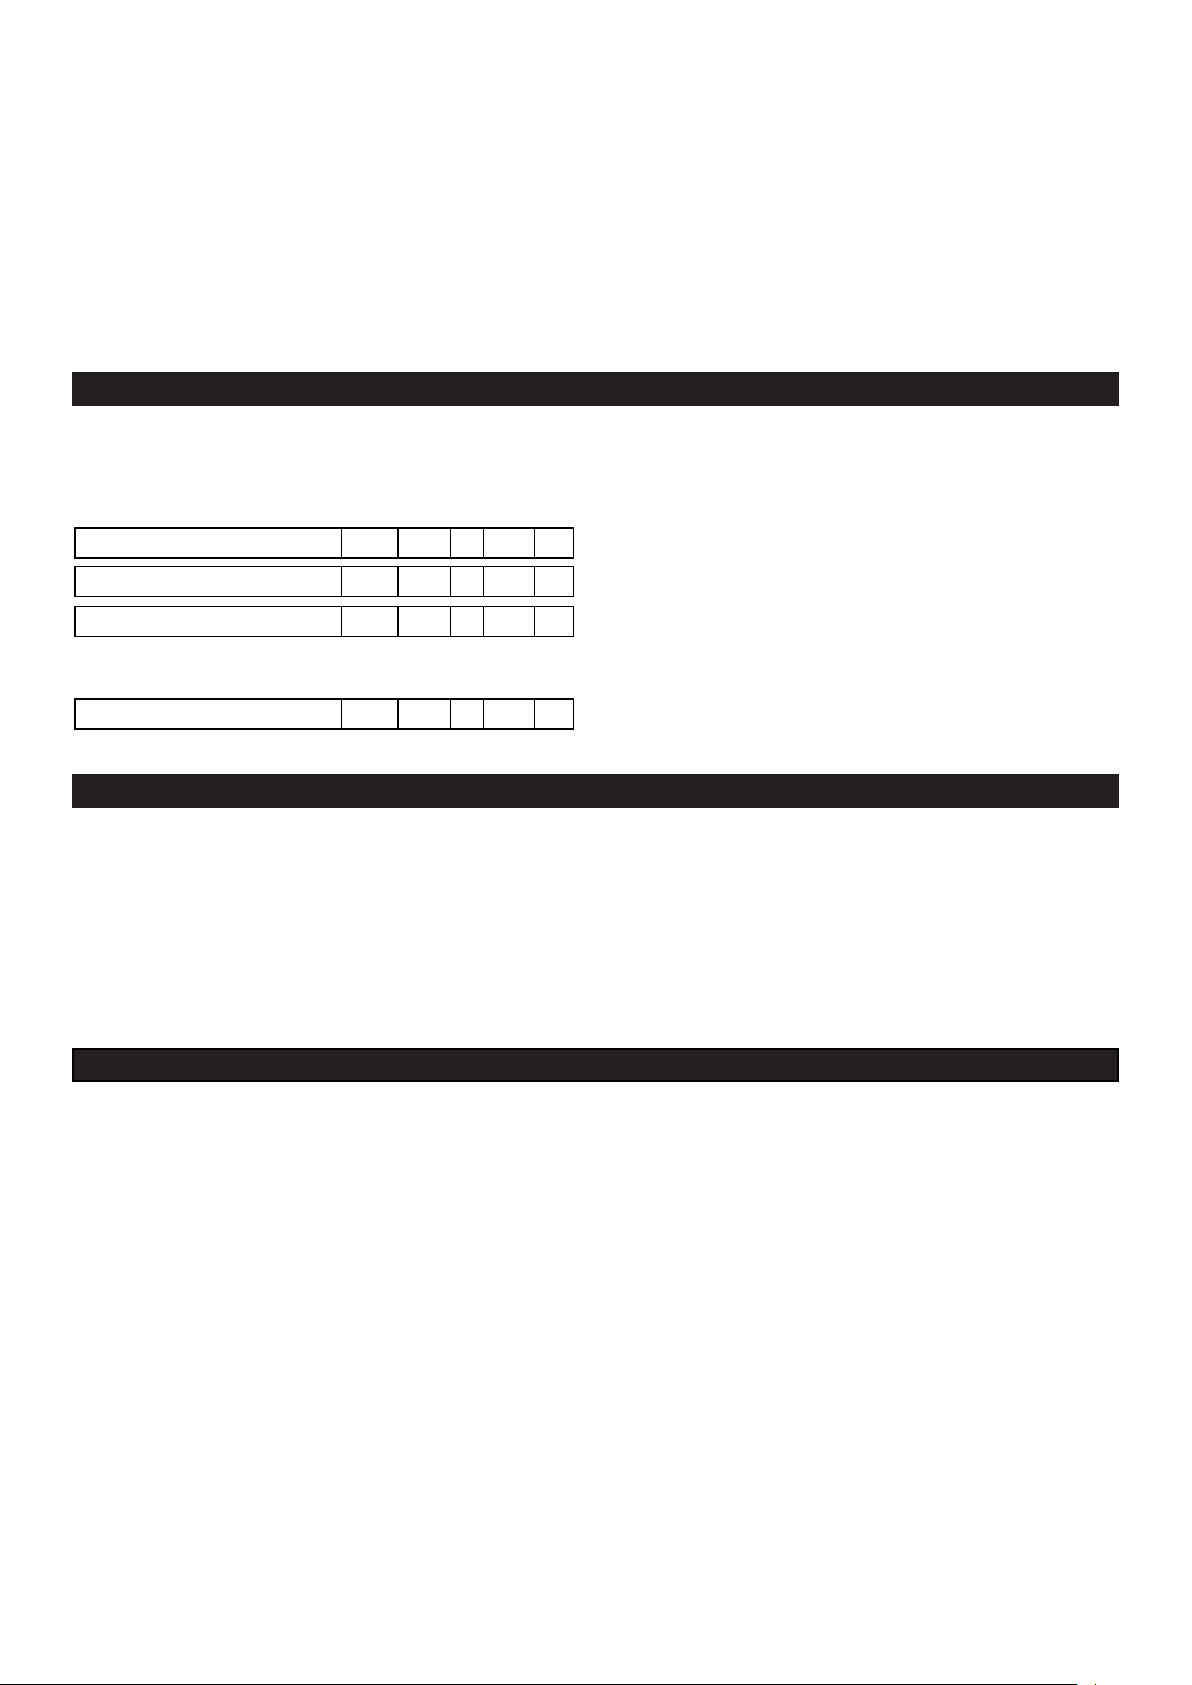
Heat Output 230V 240V
Nominal Heat Output P
Minimum Heat Output P
Maximum Continous Heat Output P
Auxiliary Electricity Consumption
In Standby mode el
1.8 - 1.9 kW
Nom
0.9 - 0.9 kW
min
1.8 - 1.9 kW
max,c
3.5 - 3.5 W
SB
with electronic room temperature control.
General Information
Unpack the heater carefully and retain the packaging for possible future use, in the event of moving or returning the re
to your supplier.
The re incorporates a ame effect, which can be used with or without heating, so that the comforting effect may be
enjoyed at any time of the year. Using the ame effect on its own only requires little electricity (25W).
Before connecting the heater check that the supply voltage is the same as that stated on the heater.
Please note: Used in an environment where background noise is very low, it may be possible to hear a sound when the
heat function is selected. This is normal and should not be a cause for concern.
Before You Start
Ensure that all packing items are removed (read any warning labels carefully) and retain all packing for possible future
use.
Before connecting the appliance, check that the supply voltage is the same as that stated on the appliance.
Contents of Carton
Opti-V Stove Model SNG20
Remote control
Power Cable
Instruction Manual
Product Features
Volume Control
Brightness control
Half/Full Heat with electronic thermostat
Remote/Manual operation
Red light indication of standby mode
2
Page 6
Electrical Connection
WARNING – THIS APPLIANCE MUST BE EARTHED
This heater must be used on an AC ~ supply only and the voltage marked on the heater must correspond to the supply
voltage.
Connect the power cable to the power connector at the back of the re. Place the stove against the wall(ensuring a
60mm gap, see * Fig. 1). Connect the plug to mains supply.
Before switching on, please read the safety warnings and operating instructions
Installation
Before installing this appliance in an existing chimney, we recommend that;
You have your chimney cleaned by a competent chimney sweep.
You block off the chimney ue.
This procedure is important for the efcient operation of the heating unit and will also reduce heat loss up the
chimney.
Positioning the Stove :
The Opti-V Stove uses an illusionary reection technique and is designed to work best when ambient light levels are low.
There is an LED above the Logs which is controlled by a dimmer, that allows the brightness of the logs to be adjusted,
to create the perfect ame effect to suit your environment or in areas where the ambient light levels are normal.
A minimum gap of 60mm, at the back of the product (see * Fig.1), should be maintained in order for the electronic
thermostat to have optimum effect.
Operating the Stove
This section describes how to activate your Stove using either the remote control or manual controls.
The mains switch (Fig. 3a) controls the electricity supply to the Stove.
Note: The mains switch must be in the on ( I ) position for the Stove to operate either with or without heat.
The switch is located on the front panel behind the door. Open the door to access the switch - see Fig. 3.
When activated the logbed will light up and after approximately 7 seconds the ame picture will appear.
The user may notice a blank screen for approximately 2-3 seconds, every 30 minutes. This is normal and should not be
a cause for concern.
Remote Control :
To activate the remote control, remove the battery clear, plastic strip, which is used to ensure the remote is fully charged
before use - see Fig. 2.
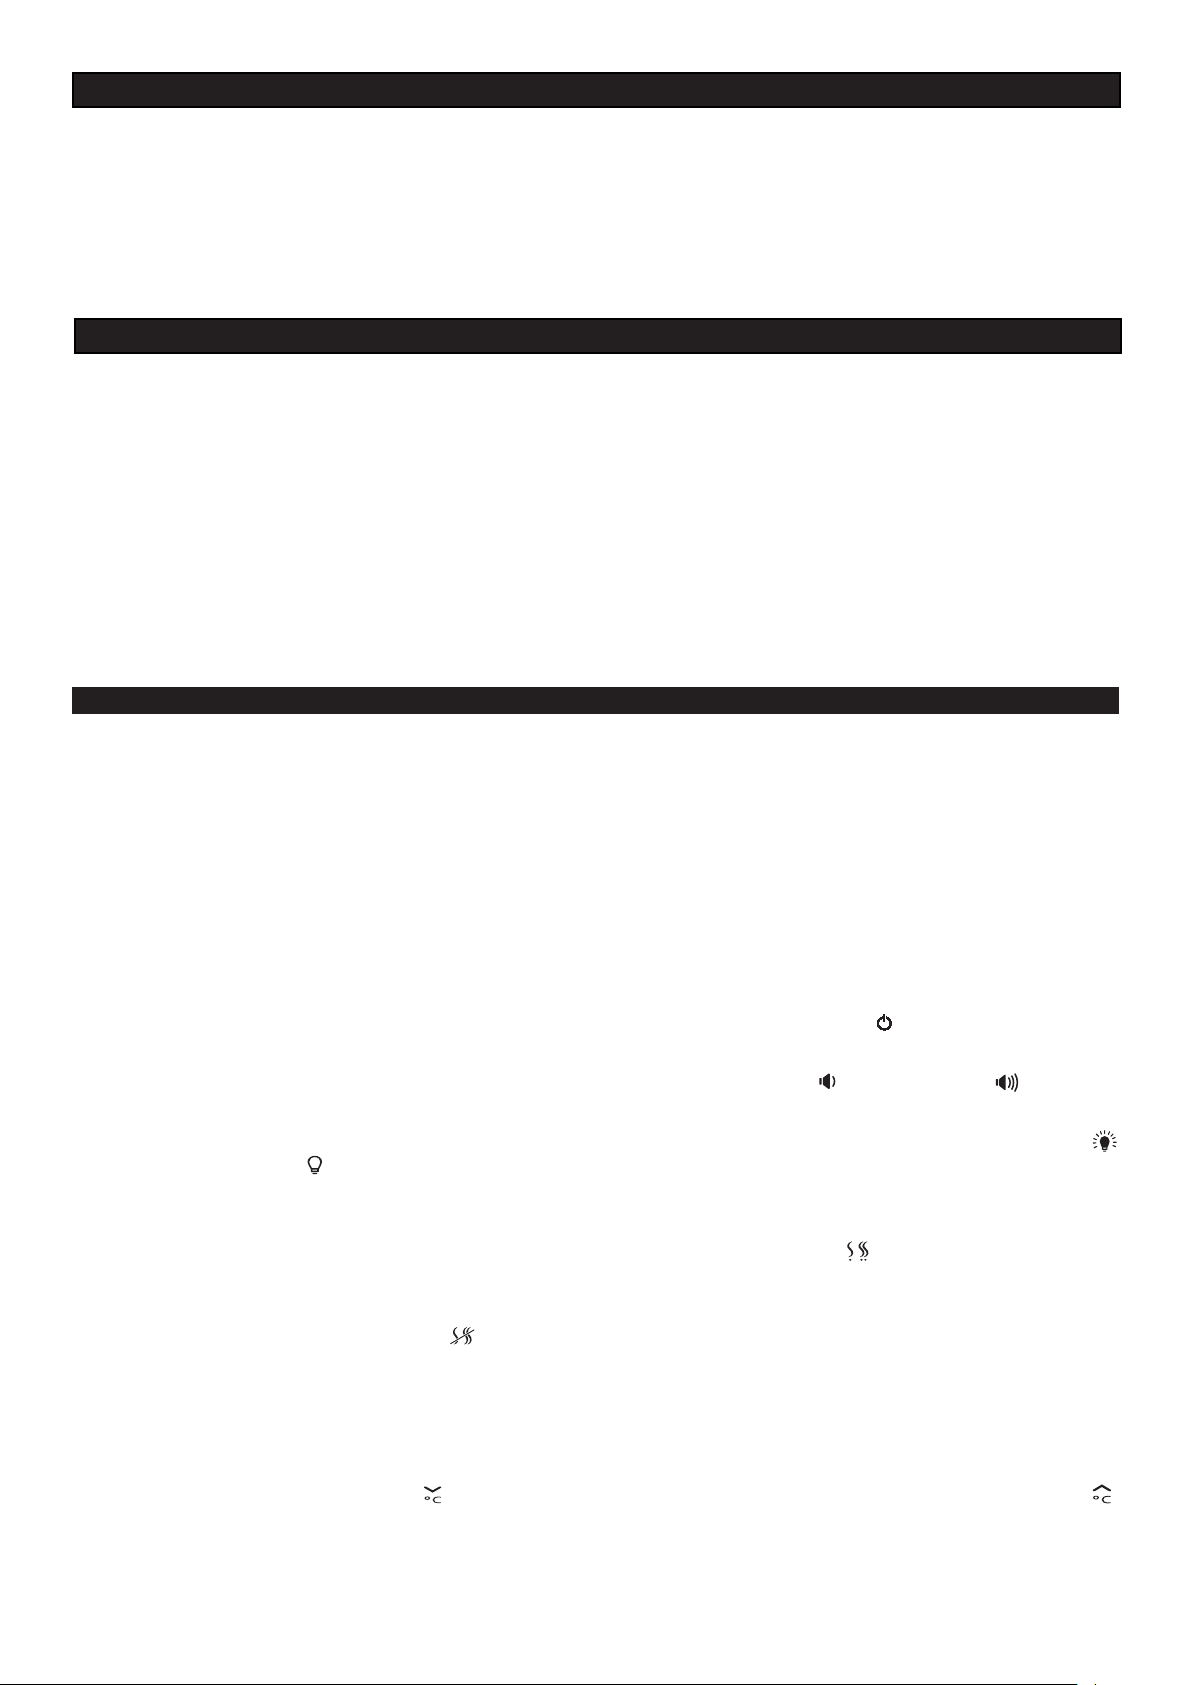
To operate, aim the remote control to the front of the appliance. Press the standby button ( ) on the remote control to
leave the Stove in standby mode - indicted by a red light. Press the standby button to activate ame effect and /or heat.
The audio volume (re sound) may be adjusted by pressing the volume control buttons : volume down and volume up.
Logbed Ambience :
The Stove has an LED that brightens the logbed. For your preference, the brightness can be adjusted by pressing
button to brighten and the button to dim/turn off the LED. An audio ‘beep’ can be heard with each press and will stop
when maximum or minimum is reached.
Heating :
To activate the heating, (ensure stove is not in standby mode) press the heat on button ( ) once for half heat (900W) indicated by 2 audio ‘beeps’. For full heat (1800W) press again - indicated by 3 audio ‘beeps’. Eeach press of this button
activates half heat or full heat - 2 audio ‘beeps’ for half heat and 3 audio ‘beeps’ for full heat.
To turn the heat off press the heat off button ( ) - indicated by one audio ‘beep’. (The fan continues to run for approximately
10 seconds).
Electronic Thermostat :
The heating is controlled by the electronic thermostat. The default setting is ‘22’ - see Fig. 3b. When the heat is activated,
the heating will turn off, when the thermostat senses the temperature is at ‘22’. The heating will be activated again,
when the thermostat senses that the temperature is less than ‘22’. This (room temperature) gure can be changed by
pressing the temperature down button ( ) to reduce the room temperature (min 15) or the temperature up button ( )
to increase the room temperature (max 30). An audio ‘beep’ can be heard with each press and will stop when maximum
or minimum is reached.
Note : the heating will only operate when the mains switch (Fig. 3a) is in the on (I) position and the room temperature is
lower than the electronic set temperature.
3
Page 7
For battery replacment refer to the embossed diagram on the back of the remote control.
NOTE - Use Lithium batteries only - CR2025
Attention should be drawn to the environmental aspects of battery disposal.
Manual Control :
The manual controls are located on the lower front panel behind the door of the stove - see Fig. 2.
The button functions are as remote control, described below;
Standby
Volume down
Volume up
Heat off
Heat on (half/full)
Logbed ambience dim
Logbed ambience brighten
Temperature down
Temperature up
Cleaning
Warning – Always press the mains switch to the ‘OFF’ (0) position - see Fig.3a and disconnect from the power supply
before cleaning the re.
For general cleaning use a soft clean duster – never use abrasive cleaners.
Additional Information
AFTER SALES SERVICE
Your product is guaranteed for one year from the date of purchase. Within this period, we undertake to repair or exchange
this product free of charge, provided it has been installed and operated in accordance with these instructions. Your rights
under this guarantee are additional to your statutory rights, which in turn are not affected by this guarantee.
Should you require after sales information or assistance with this product please go to www.dimplex.co.uk and select
“Customer Support” or ring our help desk on 0844 879 3588 (UK) or 01 842 4833 (R. O. I.). Spare parts are also
available on the web site. Please retain your receipt as proof of purchase.
RECYCLING
For electrical products sold within the European Community - At the end of the electrical products useful life
it should not be disposed of with household waste. Please recycle where facilities exist. Check with your Local
Authority or retailer for recycling advice in your country.
Troubleshooting
Product not working :
Check mains lead ‘kettle’ connection.
Check mains switch is on.
Check socket switch is on.
Flame Picture stops:
Switch appliance to standby and switch back on.
Picture will resume after approx 7 seconds.
Heat not working:
Check room temperature setting is not below actual room temperature.
Refer to ‘Electronic Thermostat’ section.
4
Page 8

Dimplex SNG20
Introductie
Lees deze informatiehandleiding zorgvuldig door voor het veilig installeren, gebruiken en onderhouden van
uw product.
Belangrijke veiligheidsmededeling
NL
Bij gebruik van elektrische apparaten dienen basisvoorzorgmaatregelen altijd in acht genomen
te worden om het risico op brand, elektrische schokken en verwondingen bij personen te
voorkomen, inclusief:
Neem als het apparaat beschadigd is voor installatie en gebruik contact op met de leverancier.
Niet buiten gebruiken.
Niet in de direct omgeving van een bad, douche of zwembad gebruiken.
Het apparaat niet rechtstreeks onder een vast stopcontact of aansluitdoos plaatsen.
Dit apparaat kan worden bediend door kinderen van 8 jaar en ouder en door personen met
verminderde fysieke, zintuiglijke of geestelijke capaciteiten of gebrek aan ervaring en kennis als
zij onder supervisie staan of instructies krijgen ten aanzien van het veilige gebruik van het
apparaat en begrijpen welke gevaren zich kunnen voordoen. Kinderen mogen niet met het
apparaat spelen. Reinigen en onderhoudswerkzaamheden mogen niet door kinderen zonder
supervisie uitgevoerd worden.
Kinderen van 3 jaar of jonger moeten uit te buurt gehouden worden behalve bij constante
supervisie.
Kinderen vanaf 3 jaar maar jonger dan 8 jaar mogen het apparaat alleen aan/uit zetten op
voorwaarde dat deze in de normale functioneringspositie is geplaatst of geïnstalleerd en
ze begeleiding of instructie hebben gekregen ten aanzien van het veilige gebruik van het
apparaat en de betreffende gevaren begrijpen. Kinderen ouder dan 3 en jonger dan 8 jaar
mogen de stekker van het apparaat niet in het stopcontact steken, hem instellen en reinigen of
onderhoudswerkzaamheden uitvoeren.
OPGELET: Sommige onderdelen van dit product kunnen heel heet worden en brandwonden
veroorzaken. Let extra goed op als er kinderen en kwetsbare personen in de buurt zijn.
Gebruik dit apparaat niet in serie geschakeld met een thermische bediening, een
programmabediening, aangezien er risico op brand bestaat als de verwarming per ongeluk
wordt afgedekt of verplaatst.
Zorg ervoor dat meubelen, gordijnen en ander brandbaar materiaal zich op meer dan 1 meter
van het apparaat bevinden.
Haal in het geval van een storing de stekker van het apparaat uit het stopcontact.
Haal de stekker van het apparaat uit het stopcontact als hij langere tijd niet wordt gebruikt.
Hoewel het apparaat aan de veiligheidsnormen voldoet, raden wij het gebruik op hoogpolig
tapijt of langharige kleden af.
Het apparaat moet zodanig gepositioneerd worden dat de stekker bereikbaar is.
Als het snoer beschadigd is, moet hij vervangen worden door de fabrikant of servicedienst of
een vergelijkbaar gekwaliceerd persoon om gevaar te vermijden.
Houd het snoer uit de buurt van de voorkant van het apparaat.
WAARSCHUWING: Het apparaat niet afdekken om oververhitting te voorkomen. Geen materiaal
of kleding op het apparaat leggen of de luchtcirculatie rondom het apparaat belemmeren.
Op het apparaat is een waarschuwingssticker “NIET AFDEKKEN” geplaatst.
Dit apparaat mag niet via een extern schakelapparaat, zoals een timer, worden gevoed of
aangesloten worden op een circuit dat regelmatig door de nutsvoorziening aan en uit wordt gezet,
om risico te vermijden door het per ongeluk resetten van de thermische afsluiting.
5
Page 9
Dit apparaat is niet uitgerust met een inrichting om de kamertemperatuur te controleren. Gebruik
dit apparaat niet in kleine ruimtes als ze worden gebruikt door mensen die niet zelfstandig de
ruimte kunnen verlaten, behalve als er constante supervisie aanwezig is.
Waarschuwing - Er mogen geen bronnen van open vlammen, zoals kaarsen, op dit apparaat
gezet worden.
Waarschuwing - Het apparaat mag niet blootgesteld worden aan druppels of spetters en er
mogen geen objecten gevuld met water, zoals een vaas, op het apparaat worden gezet.with
liquid, such as vases, shall be placed on the apparatus.
Waarschuwing - dit apparaat is van Categorie I constructie en moet op een geaard stopcontact
worden aangesloten.
Technische informatie
Modelnr: SNG20
Beoordeling: 230-240 V~50 Hz
Warmte-uitvoer 230 V 240 V
Nominale warmte-uitvoer P
Minimale warmte-uitvoer P
Maximum constante warmteafgifte P
Hulp Elektriciteitsverbruik
In standby-modus el
1,8 - 1,9 kW
Nom
0,9 - 0,9 kW
min
1,8 - 1,9 kW
max,c
3.5 - 3.5 W
SB
met elektronische kamertemperatuurregeling.
Algemene informatie
Verwijder de kachel voorzichtig uit de verpakking en bewaar deze voor mogelijk gebruik in de toekomst voor verhuizingen
of het terugbrengen van de kachel naar de verkoper.
De haard heeft een vlameffect die met of zonder warmte gebruikt kan worden, zodat op elk moment van het jaar genoten
kan worden van de gezelligheid die het biedt. Voor gebruik van alleen het vlameffect is maar een klein beetje elektriciteit
(25 W) nodig.
Alvorens de kachel aan te sluiten, controleren of het voltage hetzelfde is als aangegeven voor de kachel.
Opgelet: Bij gebruik in omgeving met weinig achtergrondgeluid kan een geluid hoorbaar zijn als de warmtefunctie wordt
geselecteerd. Dit is normaal en is niet iets waar zorgen om gemaakt hoeft te worden.
Voordat u aan de slag gaat
Zorg ervoor dat alle verpakkingen verwijderd zijn (lees waarschuwingslabels zorgvuldig) en bewaar al het
verpakkingsmateriaal voor mogelijk gebruik in de toekomst.
Controleer alvorens de stekker van het apparaat in het stopcontact te steken of het voltage hetzelfde is als aangegeven
voor het apparaat.
Inhoud van de doos
Opti-V Kachel Model SNG20
Afstandsbediening
Elektriciteitskabel
Instructiehandleiding
Productkenmerken
Volumeregeling
Helderheidregeling
Halve/volledige warmte met elektronische thermostaat
Afstands-/handmatige bediening
Rood lampje geeft standbymodus aan
6
Page 10
Elektrische aansluiting
WAARSCHUWING - DIT APPARAAT MOET GEAARD WORDEN
Deze kachel mag alleen gevoed worden met wisselstroom en het voltage aangegeven op kachel moet overeenkomen
met het voltage van de stroomtoevoer.
Sluit de voedingskabel aan op het contactpunt aan de achterkant van de kachel. Plaats de kachel tegen de muur (zorg
voor een ruimte van 60 mm, zie * Fig. 1). Doe de stekker in het stopcontact.
Lees de veiligheidswaarschuwingen en instructies voor de bediening alvorens de kachel aan te zetten
Installatie
Wij raden u aan om voordat u dit apparaat op een bestaand rookkanaal aansluit:
Uw schoorsteen te laten vegen door een erkend schoorsteenveger.
Het rookkanaal af te sluiten.
Deze procedure is belangrijk voor een efciënte werking van de verwarmingseenheid en zal ook warmteverlies via
de schoorsteen voorkomen.
Plaatsen van de kachel:
De Opti-V Kachel maakt gebruik van een illusoire reectietechniek en is zodanig ontworpen dat het het beste werkt in
een omgeving met weinig licht. Er bevindt zich een LED boven de Logs die door een dimmer wordt geregeld waarmee
de felheid van de logs aangepast kan worden zodat het perfecte vlameffect ontstaat die goed past in uw omgeving of in
ruimtes waar het lichtniveau normaal is.
Zorg voor minimaal 60 mm ruimte aan de achterkant van het product (zie * Fig. 1) zodat de elektronische thermostaat
optimaal kan werken.
Het bedienen van de kachel
Dit gedeelte omschrijft hoe u uw Kachel ofwel met de afstandsbediening of handmatig kunt bedienen.
De hoofdschakelaar (Fig. 3a) zorgt voor de elektriciteitstoevoer van de Kachel.
Opmerking: De hoofdschakelaar moet op de aan (I) positie staan zodat de Kachel zowel met of zonder warmte kan
werken.
De schakelaar bevindt zich op het voorpaneel achter de deur. Open de deur voor toegang tot de schakelaar - zie Fig. 3.
Als ingeschakeld licht het logbed op en na ongeveer 7 seconden verschijnt de afbeelding van een vlam.
De gebruiker zal elke 30 minuten ongeveer 2-3 seconden een leeg scherm zien. Dit is normaal en is niet iets waar zorgen
om gemaakt hoeft te worden.
Afstandsbediening:
Verwijder de doorzichtige, plastic batterijklep die wordt gebruikt om ervoor te zorgen dat de afstandsbediening volledig
is opgeladen voor gebruik, om de afstandsbediening te activeren - zie Fig. 2.
Richt de afstandsbediening op de voorkant van het apparaat om hem te gebruiken. Druk op de standby-knop ( ) op
de afstandsbediening om de Kachel in de standby-modus te zetten - aangegeven door een rood lampje. Druk op de
standby-knop om het vlameffect en/of warmte te activeren.
Het audiovolume (geluid van vuur) kan worden aangepast door op de volumeknoppen te drukken volume down en
volume up.
Logbedomgeving:
De Kachel beschikt over een LED die het logbed oplicht. De helderheid kan aan uw wens worden aangepast door te
drukken op knop voor helder en de knop om de LED te dimmen/uit te schakelen. Er klinkt een ‘piepje’ elke keer
als een knop ingedrukt worden en stopt als het maximum of minimum wordt bereikt.
Verwarmen:
Druk om de verwarmfunctie te activeren (zorg ervoor dat de kachel niet in de standby-modus staat) de warmte aan-knop
( ) eenmaal voor halve warmte (900 W) - aangegeven door 2 ‘piepjes’. Druk nogmaals voor volledige warmte (1800 W) aangegeven door 3 ‘piepjes’. Elke keer als deze knop wordt ingedrukt, wordt halve of volledige warmte geactiveerd 2 ‘piepjes’ voor halve warmte en 3 ‘piepjes’ voor volledige warmte.
Druk om de warmte uit te schakelen op de warmte uit-knop ( ) - aangegeven met een ‘piepje’. (De fan blijft nog
ongeveer 10 seconden draaien).
Elektronische thermostaat:
De warmte wordt geregeld door de elektronische thermostaat. De standaardinstelling is ‘22’. - zie Fig. 3b. Als de warmte
is ingeschakeld, wordt de warmte uitgeschakeld als de thermostaat volt dat de temperatuur ‘2’2’ is. De warmte wordt
weer geactiveerd als de thermostaat voelt dat de temperatuur lager is dan ‘22’. Dit (kamertemperatuur) getal kan worden
aangepast door de temperatuur naar beneden-knop ( ) om de kamertemperatuur te verlagen (min 15) of de temperatuur
omhoog-knop ( ) om de kamertemperatuur te verhogen (max 30). Er klinkt een ‘piepje’ elke keer als een knop ingedrukt
worden en stopt als het maximum of minimum wordt bereikt.
7
Page 11
Opmerking: de warmte werkt alleen als de hoofdschakelaar (Fig. 3a) op (I) positie staat en de kamertemperatuur lager
is dan de elektronisch ingestelde temperatuur.
Zie voor het vervangen van de batterij de ingegraveerde afbeelding op de achterkant van de afstandsbediening.
OPMERKING - Gebruik alleen lithiumbatterijen - CR2025
Verwerk lege batterijen op een milieuvriendelijke manier.
Handmatige bediening
De handmatige bedieningsknoppen bevinden zich op het onderste voorpaneel achter het deurtje van de kachel - zie Fig. 2.
De functies van de knoppen zijn als op de afstandsbediening, zoals hieronder beschreven;
Standby
Volume down
Volume up
Warmte uit
Warmte aan (half/volledig)
Logbedomgeving dim
Logbedomgeving helder
Temperatuur omlaag
Temperatuur omhoog
Reinigen
Opgelet: – Zet de toevoerschakelaar altijd op ‘OFF’ (0) - zie Fig 3a en haal de stekker uit het stopcontact alvorens de
kachel te reinigen.
Gebruik voor normaal reinigen een zachte, schone stofdoek - gebruik nooit schuurmiddelen.
Aanvullende informatie
AFTERSALES SERVICE
Uw product heeft een garantie van een jaar vanaf de datum van aankoop. Binnen deze periode repareren of nemen wij
het product gratis terug, op voorwaarde dat hij volgens deze instructies is geïnstalleerd en gebruikt. Uw rechten volgens
deze garantie zijn een aanvulling op uw statutaire rechten die op hun beurt niet door deze garantie worden beïnvloed.
Heeft u aftersales informatie of assistentie nodig voor dit product, ga dan naar www.dimplex.co.uk en kies “Customer
Support” of bel onze helpdesk via 0844 879 3588 (UK) of 01 842 4833 (R. O. I.). Reserveonderdelen zijn ook beschikbaar
via de website. Bewaar de kassabon als aankoopbewijs.
RECYCLEN
Voor elektrische producten verkocht binnen de Europese Gemeenschap - Aan het einde van de levensduur
van elektrische producten mogen ze niet met het huishoudvuil weg worden gegooid. Recylce waar faciliteiten
aanwezig zijn. Raadpleeg uw plaatselijke autoriteit of winkelier voor de recyclerichtlijnen in uw land.
Probleemoplossen
Product werkt niet:
Controleer de aansluiting.
Controleer of de schakelaar aan staat.
Controleer of de stopcontactschakelaar aan staat.
Vlamafbeelding stopt:
Zet apparaat op standby en schakel weer aan.
Afbeelding verschijnt na ongeveer 7 seconden.
Warmte werkt niet:
Controleer of de ingestelde kamertemperatuur niet lager is dan de daadwerkelijke kamertemperatuur.
Zie ‘Elektronische thermostaat’.
8
Page 12

Dimplex SNG20
Introduction
Veuillez lire soigneusement ce guide d'informations pour pouvoir installer, utiliser et entretenir votre produit
en toute sécurité.
Avis de sécurité important
FR
Toujours observer des précautions de base en cas d'utilisation d'appareils électriques, an de
réduire le risque d'incendie, de chocs électriques et de blessures personnelles, notamment :
Si l'appareil est endommagé, vérier auprès du fournisseur avant son installation et fonctionnement.
Ne pas utiliser à l'extérieur.
Ne pas utiliser à proximité immédiate d'une baignoire, douche ou piscine.
Ne pas situer l'appareil immédiatement en dessous d'une prise xe ou d'un boîtier de raccordement.
Cet appareil peut être utilisé par les enfants d'au moins 8 ans et par les personnes ayant
des capacités physiques, sensorielles ou mentales réduites ou faisant preuve de manque
d'expérience et de connaissances uniquement si elles font l'objet d'une supervision ou ont
reçu des instructions concernant l'usage de l'appareil de manière sûre, et si elles comprennent
les dangers que cela implique. Les enfants ne doivent pas jouer avec l'appareil. Le nettoyage
et l'entretien ne doivent pas être effectués par des enfants sans supervision.
Les enfants de moins de 3 ans doivent être tenus éloignés, à moins d'être continuellement
supervisés.
Les enfants âgés entre 3 ans et 8 ans n'allumeront/n'éteindront l'appareil que s'il a été placé
ou installé dans une position de fonctionnement normal prévue et qu'ils font l'objet d'une
supervision ou ont reçu des instructions concernant l'utilisation de l'appareil, de manière sûre,
et comprennent les dangers que cela implique. Les enfants âgés entre 3 et 8 ans ne doivent
pas brancher, régler et nettoyer l'appareil ou effectuer son entretien.
ATTENTION : Certains éléments de ce produit peuvent devenir très chauds et provoquer des
brûlures. Il faut payer une attention particulière lorsque des enfants et personnes vulnérables
sont présentes.
Ne pas utiliser cet appareil en série avec une commande thermique, un contrôleur de programme,
un minuteur ou tout autre dispositif qui allume le chauffage automatiquement, puisqu'il existe un
risque d'incendie lorsque le radiateur est couvert ou déplacé accidentellement.
Veiller à ce que les meubles, rideaux ou autres matériaux combustibles soient placés au plus
près à 1 mètre de l'appareil.
En cas de panne, débrancher l'appareil.
Débrancher l'appareil s'il n'est pas utilisé sur de longues périodes.
Bien que l'appareil soit conforme aux normes de sécurité, nous ne recommandons pas de l'utiliser
sur des moquettes épaisses ou des tapis à poils longs.
L'appareil doit être placé de manière à pouvoir accéder à la prise.
Si le cordon d'alimentation est endommagé, il doit être remplacé par le fabricant ou l'agent
de service, ou par une personne pareillement qualiée an d'éviter tout danger.
Tenir le cordon d'alimentation éloigné de la façade de l'appareil.
AVERTISSEMENT : An d'éviter la surchauffe, ne pas couvrir l'appareil. Ne pas placer
d'équipement ou de vêtements sur l'appareil ni obstruer la circulation d'air autour de l'appareil.
L'appareil porte une étiquette d'avertissement « NE PAS COUVRIR ».
An d'éviter tout danger lié à une réinitialisation accidentelle du coupe-circuit thermique,
cet appareil ne soit pas être alimenté par un dispositif de commutation externe (un minuteur par
exemple) ou raccordé à un circuit qui est allumé et éteint régulièrement par le service.
9
Page 13

Cet appareil n'est pas équipé d'un dispositif pour contrôler la température ambiante. Ne pas
utiliser cet appareil dans des pièces exiguës lorsque des personnes s'y trouvant ne sont pas en
mesure de quitter la pièce sans aide, à moins qu'une supervision constante soit offerte.
Avertissement - Aucune source de amme nue (des bougies par exemple) ne doit être placée
sur cet appareil.
Avertissement - L'appareil doit être gardé à l'abri des gouttes ou éclaboussements et aucun objet
rempli de liquide (des vases par exemple) ne doit être placé dessus.
Avertissement - Cet appareil appartient à la Classe 1 de construction et doit être raccordé à une
prise secteur protégée par une mise à la terre.
Fiche technique
Réf. modèle : SNG20
Courant nominal : 230-240 V~50 Hz
Puissance calorique 230 V 240 V
Puissance calorique nominale P
Puissance calorique minimale P
Puissance calorique continue maximale P
Consommation électrique auxiliaire
En mode veille el
1,8 - 1,9 kW
Nom
0,9 - 0,9 kW
min
1,8 - 1,9 kW
max,c
3.5 - 3.5 W
SB
avec la commande électronique de température ambiante.
Informations générales
Déballer le radiateur soigneusement et conserver l'emballage pour un éventuel usage futur, en cas de déménagement
ou de renvoi du foyer à votre fournisseur.
Le foyer est composé d'un effet de amme, qui peut être utilisé avec ou sans chauffage, de sorte que la sensation apaisante
peut être appréciée tout au long de l'année. L'usage de l'effet de amme seul ne nécessite que peu d'électricité (25 W).
Avant de raccorder l'appareil de chauffage vérier que la tension d'alimentation est la même que celle indiquée sur le chauffage.
Veuiller noter : En cas d'utilisation dans un environnement où le bruit de fond est très faible, il peut être possible d'entendre
un bruit lorsque la fonction de chauffage est sélectionnée. C'est normal et cela ne doit pas susciter d'inquiétudes.
Avant de démarrer
S'assurer que tous les éléments d'emballage sont retirés (lire toute étiquette d'avertissement avec soin) et conserver
tout l'emballage pour une éventuelle utilisation future.
Avant de raccorder l'appareil, vérier que la tension d'alimentation est la même que celle indiquée sur l'appareil.
Contenu du carton
Modèle de poêle Opti-V SNG20
Télécommande
Câble d'alimentation
Manuel d'instructions
Caractéristiques du produit
Commande du volume
Commande de la luminosité
Mi-chauffage/Chauffage complet avec thermostat électronique
Fonctionnement avec télécommande/manuel
Lumière rouge témoin de mode veille
10
Page 14

Branchement électrique
AVERTISSEMENT : CET APPAREIL DOIT ÊTRE MIS À LA TERRE
Ce radiateur doit être utilisé sur une alimentation CA uniquement et la tension indiquée sur l'appareil de chauffage doit
correspondre à la tension d'alimentation.
Brancher le câble d'alimentation sur le connecteur d'alimentation à l'arrière du foyer. Placer le poêle contre le mur
(en s'assurant qu'il y ait un dégagement de 60 mm, voir * Fig. 1). Brancher la prise sur l'alimentation électrique.
Avant d'allumer, veuillez lire les avertissements de sécurité et les instructions d'utilisation
Installation
Avant d'installer cet appareil sur une cheminée existante, nous vous recommandons de :
faire nettoyer votre cheminée par un ramoneur compétent ;
bloquer le conduit de cheminée.
Cette procédure est importante pour le fonctionnement efcace de l'unité de chauffage et réduira aussi la perte de
chaleur par la cheminée.
Placement du poêle :
Le poêle Opti-V utilise une technique d'illusion de rééchissement et est conçu pour un fonctionnement optimal lorsque
les niveaux d'éclairage ambiants sont bas. Une LED est située au dessus des bûches, laquelle est contrôlée par un
variateur. Cela permet de régler la luminosité des bûches pour créer l'effet de amme idéal pour votre environnement
ou adapté à des endroits où les niveaux d'éclairage ambiants sont normaux.
Un dégagement minimum de 60 mm, à l'arrière du produit (voir * Fig.1) doit être maintenu pour que le thermostat
électronique ait un effet optimal.
Fonctionnement du poêle
Cette section décrit comment activer votre poêle en utilisant soit la télécommande ou les commandes manuelles.
L' interrupteur d'alimentation (Fig. 3a) contrôle l'alimentation électrique du poêle.
Remarque : L'interrupteur d'alimentation doit être mis en position allumée ( I ) pour que le poêle fonctionne avec ou sans
chauffage.
L'interrupteur est situé sur le panneau avant derrière la porte. Ouvrir la porte pour accéder à l'interrupteur - voir Fig. 3.
Une fois activé, le lit de bûches s'allume et après 7 secondes l'image de la amme apparaît.
L'utilisateur peut remarquer que l'écran est écran vide pendant environ 2 à 3 secondes toutes les 30 30 minutes. C'est
normal et cela ne doit pas susciter d'inquiétudes.
Télécommande :
Pour activer la télécommande, retirer la bande transparente en plastique de la pile servant à vérier que la télécommande
est complètement chargée avant utilisation - voir Fig. 2.
Pour l'utiliser, pointer la télécommande sur l'avant de l'appareil. Appuyer sur le bouton de veille ( ) de la télécommande
pour laisser le poêle en mode veille - c'est indiqué par une lumière rouge. Appuyer sur le bouton de veille pour activer
l'effet de amme et/ou le chauffage.
Le volume sonore (son de feu) peut être réglé en appuyant sur les boutons de contrôle du volume : volume - et volume +.
Ambiance lit de bûches :
Le poêle dispose d'une LED qui éclaire le lit de bûches. En fonction de vos préférences, la luminosité peut être réglée
en appuyant sur le bouton pour augmenter la clarté et le bouton pour réduire la clarté/éteindre la LED. Un « bip »
sonore est audible à chaque pression et s'arrêtera lorsque le seuil maximum ou minimum est atteint.
Chauffage :
Pour activer le chauffage, (s'assurer que le poêle est en mode veille) appuyer sur le bouton de marche du chauffage
( ) une fois pour un mi-chauffage (900 W) - indiqué par 2 « bips ». Pour un chauffage complet (1800 W) appuyer de
nouveau : c'est indiqué par 3 « bips ». Chaque pression de ce bouton active le mi-chauffage ou le chauffage complet 2 « bips » pour un mi-chauffage et 3 pour un chauffage complet.
Pour éteindre le chauffage, appuyer sur le bouton d'arrêt du chauffage ( ) - c'est indiqué par un seul « bip » sonore.
(Le ventilateur continue de fonctionner environ 10 secondes).
Thermostat électronique :
Le chauffage est contrôlé par le thermostat électronique. Le réglage par défaut est « 22 » - voir Fig. 3b. Lorsque le
chauffage est allumé, il s'éteint lorsque le thermostat détecte que la température a atteint « 22 ». Le chauffage se remet
en marche quand le thermostat détecte que la température est inférieure à « 22 ». Ce chiffre (température ambiante) peut
être changé en appuyant sur le bouton de réduction de température ( ) pour réduire la température ambiante (min. 15)
ou le bouton d'augmentation de température ( ) pour augmenter la température ambiante (max. 30). Un « bip » sonore
est audible à chaque pression et s'arrêtera lorsque le seuil maximum ou minimum est atteint.
11
Page 15

Remarque : le chauffage fonctionnera uniquement lorsque l'interrupteur d'alimentation (Fig. 3a) est en position allumée
(I) et que la température ambiante est inférieure à la température réglée électroniquement.
Pour remplacer la pile, se référer au diagramme en relief sur l'arrière de la télécommande.
REMARQUE - Utilisez les batteries au lithium uniquement - CR2025
Il convient d'observer les aspects environnementaux de la mise au rebut de la pile.
Commande manuelle :
Les commandes manuelles sont situées sur le panneau avant inférieur derrière la porte du poêle - voir Fig. 2.
Les fonctions des boutons sont identiques à la télécommande, comme indiqué ci-dessous ;
Veille
Volume Volume +
Arrêt chauffage
Mise en marche du (mi-chauffage/complet)
Réduction de l'ambiance « lit de bûches »
Ravivement de l'ambiance « lit de bûches »
Réduction de la température
Augmentation de la température
Nettoyage
Avertissement – Toujours appuyer sur « ÉTEINT » sur l'interrupteur d'alimentation (0) - voir Fig.3a et déconnecter
de l'alimentation électrique avant de nettoyer le foyer.
Pour un nettoyage général, utiliser un chiffon de dépoussiérage propre. Ne jamais utiliser de produits nettoyants abrasifs.
Informations supplémentaires
SERVICE APRÈS-VENTE
Votre produit est garanti un an à compter de la date d'achat. Au cours de cette période, nous nous engageons à réparer
ou échanger ce produit sans frais, à condition d'avoir été installé et utilisé conformément aux présentes instructions.
Vos droits en vertu de la présente garantie sont complémentaires à vos droits statutaires, lesquels ne sont pas affectés
par la présente garantie.
Si vous avez besoin d'informations après-vente ou d'aide avec ce produit, veuillez vous rendre sur le site web
www.dimplex.co.uk et sélectionner « Service clientèle » ou appelez notre centre d'aide au 0844 879 3588 (R.-U.) ou
01 842 4833 (Irlande). Les pièces de rechange sont aussi disponibles sur le site web. Veuillez conserver votre reçu
comme preuve d'achat.
RECYCLAGE
Concernant les produits électriques vendus au sein de la Communauté européenne - À la n de la vie utile
des produits électriques Ils ne doivent pas être mis au rebus avec les déchets domestiques. Veuillez recycler
dans les centres existants. Vériez auprès de votre autorité locale ou distributeur pour les recommandations de
recyclage dans votre pays.
Dépannage
Le produit ne fonctionne pas :
Vérier le branchement du câble électrique.
Vérier que l'interrupteur d'alimentation est mis en position de marche.
Vérier que la prise est mise en position de marche.
L'image de amme s'arrête :
Mettre l'appareil en position de veille et rallumer.
L'image reviendra après environ 7 secondes.
Le chauffage ne fonctionne pas :
Vérier que le réglage de la température ambiante n'est pas inférieur à la température ambiante réelle.
Se reporter à la section « Thermostat électronique ».
12
Page 16

Dimplex SNG20
Introduzione
Leggere attentamente le informazioni riportate in questa guida al ne di installare, utilizzare e mantenere il
prodotto in modo sicuro.
Importanti informazioni sulla sicurezza
IT
Quando si utilizzano apparecchiature elettriche, è necessario attenersi sempre alle precauzioni
fondamentali per ridurre i rischi di incendio, scossa elettrica e lesioni personali, compreso
quanto segue:
Se l’apparecchiatura è danneggiata, consultare il fornitore prima dell’installazione e l’utilizzo.
Non utilizzare all’esterno.
Non utilizzare nelle immediate vicinanze di bagno, doccia o piscina.
Non collocare l’apparecchiatura immediatamente sotto una presa di rete o scatola di connessione.
Questa apparecchiatura può essere utilizzata dai bambini a partire dagli 8 anni di età e dalle
persone con abilità siche, sensoriali o mentali ridotte o prive di esperienza e conoscenze se
supervisionati o istruiti sull’uso sicuro dell’apparecchiatura e consapevoli dei pericoli connessi.
I bambini non devono giocare con l’apparecchiatura. La pulizia e la manutenzione da parte
dell’utente non devono essere svolte dai bambini senza supervisione.
I bambini di età inferiore ai 3 anni devono essere tenuti lontani, salvo se supervisionati
costantemente.
I bambini di età compresa tra i 3 e gli 8 anni possono soltanto accendere/spegnere
l’apparecchiatura a condizione che siano supervisionati o che gli siano state fornite le istruzioni
riguardanti l’uso sicuro dell’apparecchiatura e siano consapevoli dei pericoli connessi e che
l’apparecchiatura sia collocata o installata nella posizione di esercizio prevista. I bambini di età
compresa tra 3 e 8 anni non devono collegare, regolare e pulire l’apparecchiatura o eseguire la
manutenzione da parte dell’utente.
ATTENZIONE: Alcune parti di questo prodotto possono diventare molto calde e causare ustioni.
È necessario prestare particolare attenzione in caso di presenza di bambini o persone vulnerabili.
Non utilizzare questa apparecchiatura collegata in serie con un dispositivo di controllo termico,
un controllore programmabile un temporizzatore o qualsiasi altro dispositivo che accenda
il riscaldamento in modo automatico, poiché sussiste il pericolo d’incendio nel caso in cui il
riscaldatore sia accidentalmente coperto o collocato erroneamente.
Accertarsi che mobili, tende o altro materiale inammabile non sia posizionato a una distanza
inferiore a 1 metro dall’apparecchiatura.
In caso di guasto, scollegare l’apparecchiatura dalla presa di rete.
Scollegare l’apparecchiatura se non utilizzata per lunghi periodi.
Sebbene questa apparecchiatura sia conforme agli standard di sicurezza, se ne sconsiglia
l’utilizzo sopra una pila di tappeti o su tappeti a pelo lungo.
Questa apparecchiatura deve essere posizionata in modo tale che la presa di rete risulti
accessibile.
Se il cavo di alimentazione è danneggiato, deve essere sostituito dal produttore o dall’addetto
di assistenza o personale qualicato al ne di evitare qualsiasi pericolo.
Tenere il cavo di alimentazione lontano dalla parte anteriore dell’apparecchiatura.
AVVERTENZA: Onde evitare il surriscaldamento, non coprire l’apparecchiatura. Non
collocare materiale o vestiti sull’apparecchiatura né ostruire la circolazione dell’aria attorno
all’apparecchiatura.
13
Page 17

L’apparecchiatura riporta un’etichetta con la dicitura NON COPRIRE.
Al ne di evitare un pericolo dovuto alla reimpostazione involontaria dell’esclusione termica,
questa apparecchiatura non deve essere alimentata attraverso un dispositivo di commutazione
esterno, quale un temporizzatore, né connessa a un circuito che sia regolarmente attivato/
disattivato dall’utenza.
Questa apparecchiatura non è dotata di dispositivo di controllo della temperatura ambiente. Non
utilizzare questa apparecchiatura in locali di piccole dimensione quando occupati da persone
non in grado di lasciare il locale autonomamente, salvo non sia prevista la costante supervisione.
Avvertenza: non collocare alcuna fonte di amme libere, quali candele, su questa apparecchiatura.
Avvertenza: l’apparecchiatura non deve essere esposta a gocciolamenti o spuzzi d’acqua e non
deve essere collocato alcun oggetto contenente liquidi, quali vasi, su di essa.
Avvertenza: questa è un’apparecchiatura con costruzione di Classe I e deve essere connessa
a una presa di rete con adeguata connessione di terra di protezione.
Informazioni tecniche
Modello n.: SNG20
Valori nominali: 230-240 V~50 Hz
Potenza riscaldamento 230 V 240 V
Potenza riscaldamento nominale P
Potenza riscaldamento minima P
Potenza riscaldamento continuo max P
Consumo elettrico ausiliario
In modalità stand-by el
con controllo elettronico della temperatura ambiente.
1,8 - 1,9 kW
Nom
0,9 - 0,9 kW
min
1,8 - 1,9 kW
max,c
3.5 - 3.5 W
SB
Informazioni generali
Disimballare la stufa con attenzione e conservare la confezione per uso futuro, in caso di trasloco o di restituzione
dell’apparecchiatura al fornitore.
La stufa integra un effetto amma, che può essere utilizzato con o senza riscaldamento, al ne di poter usufruire dell’atmosfera
del fuoco in qualsiasi periodo dell’anno. L’utilizzo del solo effetto amma richiede poca energia elettrica (25 W).
Prima di collegare la stufa vericare che la tensione di rete sia quella riportata sulla stufa.
Nota: se si utilizza la stufa in un ambiente con basso rumore ambientale, è possibile avvertire un suono quando si
seleziona la funzione di riscaldamento. Ciò è una condizione normale e non deve destare preoccupazione.
Prima di iniziare
Accertarsi di aver rimosso tutti gli elementi della confezione (leggere con attenzione tutte le etichette di avvertenza)
e conservare tutta la confezione per uso futuro.
Prima do collegare l’apparecchiatura, vericare che la tensione di rete sia quella riportata sulla stufa.
Contenuto della scatola
Opti-V Stove Modello SNG20
Telecomando
Cavo di alimentazione
Manuale d’istruzioni
Caratteristiche del prodotto
Controllo volume
Controllo luminosità
Metà calore/calore completo con termostato elettronico
Funzionamento con telecomando/manuale
Spia rossa per indicare la modalità di stand-by
14
Page 18

Collegamento elettrico
AVVERTENZA: QUESTA APPARECCHIATURA DEVE ESSERE COLLEGATA A TERRA
Questa stufa deve essere utilizzata esclusivamente con alimentazione CA ~ e la tensione riportata sulla stufa deve
corrispondere a quella dell’alimentazione di rete.
Collegare il cavo di alimentazione al connettore di alimentazione posto sul retro della stufa. Collocare la stufa contro
la parete (assicurando uno spazio di 60 mm, vedere * Fig. 1). Collegare la spina alla presa di rete.
Prima di accendere la stufa, leggere attentamente le avvertenze di sicurezza e le istruzioni d’uso
Installazione
Prima di installare questa apparecchiatura in un camino esistente, si raccomanda quanto segue:
Far pulire il camino da apposito personale competente.
Bloccare la canna fumaria del camino.
Questa procedura è importante per garantire il funzionamento efciente dell’unità di riscaldamento e ridurrà altresì
la perdita di calore attraverso il camino.
Posizionamento della stufa:
La Opti-V Stove utilizza una tecnica di effetto ttizio a riessione ed è progettata per funzionare al meglio con bassi livelli
di illuminazione ambientale. Sopra i ceppi è posizionato un LED controllato da un regolatore di luminosità, che consente
di regolare la luminosità dei ceppi al ne di creare un perfetto effetto amma adeguato all’ambiente o nelle aree in cui
i livelli di illuminazione ambientale sono normali.
È necessario mantenere una distanza di 60 mm sul retro del prodotto (vedere * Fig.1), al ne del funzionamento corretto
del termostato elettronico
Utilizzo della stufa
Questa sezione descrive come attivare la stufa mediante il telecomando o i controlli manuali.
L’ interruttore principale (Fig. 3a) controlla l’alimentazione elettrica della stufa.
Nota: l’interruttore principale deve trovarsi nella posizione accesa ( I ) afnché la stufa funzioni con o senza riscaldamento.
L’interruttore è situato sul pannello anteriore dietro lo sportello. Aprire lo sportello per accedere all’interruttore - vedere
Fig. 3.
All’attivazione, la base s’illumina e dopo circa 7 secondi apparirà l’immagine del fuoco.
L’utente potrà notare una schermata vuota per circa 2-3 secondi, ogni 30 minuti. Ciò è una condizione normale e non
deve destare preoccupazione.
Telecomando:
per attivare il telecomando, rimuovere l’apposita striscia di plastica trasparente, utilizzata per assicurare che il telecomando
sia completamente carico prima dell’uso - vedere Fig. 2
Per il funzionamento, puntare il telecomando verso la parte anteriore dell’apparecchiatura. Premere il pulsante di stand-by
( ) sul telecomando per porre la stufa in modalità di stand-by mode, indicata dalla spia rossa. Premere il pulsante di
stand-by per attivare l’effetto del fuoco e/o il calore.
Il volume dell’audio (suono del fuoco) può essere regolato premendo i pulsanti di controllo del volume: volume giù
e volume su.
Atmosfera della base:
La stufa è dotata di LED che illuminano la base. È possibile regolare la luminosità a piacere, premendo il pulsante per
intensicare la luminosità e il pulsante per diminuirla o spegnere il LED. A ogni pressione dei pulsanti viene emesso
un segnale acustico, che si arresterà al raggiungimento del livello massimo o minimo.
Riscaldamento:
per attivare il riscaldamento (accertarsi che la stufa non si trovi nella modalità di stand-by) premere l’apposito pulsante ( )
una volta per metà riscaldamento (900 W) - indicato da 2 segnali acustici. Per il riscaldamento completo (1800 W) premere
nuovamente - indicato da 3 segnalo acustici. Ogni pressione del pulsante attiva metà riscaldamento o riscaldamento
completo - 2 segnali acustici per metà riscaldamento e 3 segnali acustici per riscaldamento completo.
Per disattivare il riscaldamento, premere l’apposito pulsante ( ) - indicato da un segnale acustico. (la ventola continuerà
a funzionare per circa 10 secondi).
Termostato elettronico:
il riscaldamento è controllato tramite un termostato elettronico. L’impostazione predenita è “22” - vedere Fig. 3b.
A riscaldamento attivo, questo si spegne quando il termostato rileva che la temperatura è pari a “22”. Il riscaldamento
si riattiva nuovamente quando il termostato rileva che la temperatura è inferiore a “22”. Questo valore (temperatura
ambiente) può essere modicato premendo il pulsante temperatura giù ( ) per ridurre la temperatura ambiente (min 15)
o il pulsante temperatura su ( ) per aumentare la temperatura ambiente (max 30). A ogni pressione dei pulsanti viene
emesso un segnale acustico, che si arresterà al raggiungimento del livello massimo o minimo.
15
Page 19

Nota: il riscaldamento funzionerà solo se l’interruttore principale (Fig. 3a) si trova nella posizione di accensione (I) e la
temperatura ambiente è inferiore a quella impostata elettronicamente.
Per la sostituzione della batteria fare riferimento al diagramma riportato sul retro del telecomando.
NOTA: utilizzare esclusivamente batterie al litio - CR2025
Prestare attenzione agli aspetti ambientali in merito allo smaltimento delle batterie.
Controllo manuale:
i controlli manuali sono situati sulla parte inferiore del pannello dietro lo sportello della stufa - vedere Fig. 2.
Le funzioni dei pulsanti sono le stesse del telecomando, descritte qui di seguito;
Stand-by
Volume giù
Volume su
Riscaldamento spento
Riscaldamento acceso (metà/completo)
Riduzione atmosfera della base
Aumento atmosfera della base
Temperatura giù
Temperatura su
Pulizia
Avvertenza : Premere sempre l’interruttore principale ponendolo in posizione “OFF” (0) - vedere la Fig.3a e scollegare
la stufa dalla presa di rete prima di pulire il fuoco.
Per la pulizia generale, utilizzare un panno morbido e pulito – non utilizzare mai detergenti abrasivi.
Informazioni supplementari
ASSISTENZA POST-VENDITA
Il prodotto è garantito per la durata di un anno dalla data di acquisto. Entro questo periodo, sarà nostra cura riparare o
sostituire gratuitamente il prodotto, a condizione che sia stato installato e utilizzato in accordo alle presenti istruzioni.
I diritti del cliente ai sensi della presente garanzia sono supplementari ai diritti statutari, che a loro volta non sono
interessati dalla presente garanzia.
Nel caso in cui il cliente necessiti di informazioni o assistenza post-vendita con questo prodotto, può accedere
a www.dimplex.co.uk e selezionare “Customer Support” (Assistenza clienti) o rivolgersi all’help desk al numero
+44 (0)844 879 3588 (UK) o +44 (0)1 842 4833 (R. O. I.). Sul sito web sono inoltre disponibili le parti di ricambio.
Conservare la ricevuta/scontrino come prova di acquisto.
RICICLAGGIO
Per i prodotti elettrici venduti all’interno della Comunità Europea - Al termine del ciclo di vita utile dei prodotti
elettrici questi non devono essere smaltiti insieme ai normali riuti domestici. Effettuare lo smaltimento presso le
apposite strutture. Vericare con il proprio ente locale o rivenditore come smaltire il prodotto nel proprio paese.
Risoluzione dei problemi
Prodotto non funzionante:
Vericare l’eventuale collegamento difettoso alla presa di rete.
Vericare che l’interruttore principale sia acceso.
Vericare che l’eventuale interruttore della presa sia acceso.
L’immagine della amma si arresta:
Mettere l’apparecchiatura in modalità stand-by, quindi riaccenderla.
L’immagine del fuoco riprenderà in circa 7 secondi.
Riscaldamento non funzionante:
Vericare che l’impostazione della temperatura ambiente non sia inferiore a quella effettiva.
Fare riferimento alla sezione “Termostato elettronico”.
16
Page 20

Dimplex SNG20
Einführung
Bitte lesen Sie diese Informationsbroschüre sorgfältig, damit Sie Ihr Produkt sicher installieren, benutzen
und warten zu können.
Wichtige Sicherheitshinweise
DE
Bei der Benutzung von elektrischen Anwendungen sollten stets grundlegende Sicherheitsmaßnahmen befolgt werden, um das Risiko für Feuer, Stromschlag oder die Verletzung von
Personen einschließlich Folgendem zu vermeiden:
Ist das Gerät beschädigt, sprechen Sie mit dem Zulieferer vor der Installation und Inbetriebnahme.
Nicht draußen benutzen.
Nicht in der unmittelbaren Nähe eines Bades, einer Dusche oder eines Schwimmbeckens
benutzen.
Stellen Sie das Gerät nicht direkt unter eine Steckdose oder eines Anschlusskastens.
Dieses Gerät kann von Kindern ab 8 Jahren betrieben werden sowie von Personen, die
verminderte körperliche, sensorische oder geistige Fähigkeiten haben oder keine Erfahrung oder
Wissen haben, wenn sie die Aufsicht für den sicheren Betrieb eines Gerätes oder Anweisungen
erhalten haben und die potentiellen Gefahren verstehen. Kinder dürfen nicht mit dem Gerät
spielen. Die Reinigung und Wartung darf nicht von Kindern ohne Aufsicht erfolgen.
Kinder unter 3 Jahren sollten von dem Gerät ferngehalten werden, es sei denn, sie sind stets
beaufsichtigt.
Kinder ab 3 Jahre und weniger als 8 Jahre dürfen das Gerät nur an- und ausschalten, wenn
es in seiner vorgesehenen Betriebsposition aufgestellt und installiert wurde und wenn sie die
Aufsicht für den sicheren Betrieb eines Gerätes oder Anweisungen erhalten haben und die
potentiellen Gefahren verstehen. Kinder ab 3 Jahren und unter 8 Jahren dürfen das Gerät nicht
einstecken, regulieren oder reinigen oder Wartungsarbeiten vornehmen.
VORSICHT: Einige Teile dieses Produktes können sehr heiß werden und Verbrennungen
verursachen. Besondere Vorsicht ist bei der Anwesenheit von Kindern und verletzlichen
Personen erforderlich.
Das Gerät nicht zu einer Wärmeregelung, einer Programmsteuerung, einer Zeitschaltuhr oder
einem anderen Gerät in Reihe schalten, mit dem die Wärmequelle automatisch geschaltet wird.
Bei versehentlicher Blockierung oder Verstellung des Heizgeräts besteht Brandgefahr.
Stellen Sie sicher, dass sich Möbel, Vorhänge oder andere brennbare Materialien nicht näher
als 1 Meter vom Gerät benden.
Sollte ein Fehler auftreten, bitte das Gerät ausstecken.
Gerät ausstecken, wenn es für längere Zeit nicht benutzt wird.
Obwohl dieses Gerät den Sicherheitsstandards entspricht, empfehlen wir, das Gerät nicht auf
Hochor-Teppichen zu benutzen oder auf Teppichen mit langen Fasern.
Das Gerät muss so aufgestellt werden, dass der Stecker zugänglich ist.
Wenn das Stromkabel beschädigt ist, muss es durch den Hersteller oder Dienstleister oder eine
ähnlich qualizierte Person ersetzt werden, um Gefahren zu vermeiden.
Das Stromkabel sollte so angebracht werden, dass es die Vorderseite des Geräts nicht berührt.
VORSICHT: Um ein Überhitzen zu verhindern, darf das Gerät nicht bedeckt werden. Keine
Materialien oder Textilien auf das Gerät legen oder den Luftuss um das Gerät herum
beeinträchtigen.
17
Page 21

Das Gerät trägt ein Warnetikett mit der Aufschrift: NICHT BEDECKEN.
Um Gefahren aufgrund unbeabsichtigter Zurücksetzung des Thermoauslösers zu vermeiden, darf
das Gerät nicht an ein externes Schaltgerät angeschlossen werden, wie etwa ein Zeitschaltgerät
oder an einen Stromkreis, der regelmäßig von der Stromversorgung an- und ausgeschaltet wird.
Dieses Gerät besitzt keine Raumtemperaturkontrolle. Verwenden Sie das Gerät nicht in kleinen
Räumen, wenn die Personen im Raum nicht in der Lage sind, den Raum selbst zu verlassen,
es sei denn, sie werden stets beaufsichtigt.
Vorsicht: Keine offenen Flammen, wie Kerzen, sollten auf dieses Gerät gestellt werden.
Vorsicht: Das Gerät darf keinen Wassertropfen oder Spritzern ausgesetzt werden und es dürfen
keine Behältnisse mit Flüssigkeiten, wie Vasen, auf das Gerät gestellt werden.
Vorsicht: Produkte der Fertigungsklasse I dürfen nur an einer Netzsteckdose mit geerdetem
Schutzleiter angeschlossen werden.
Technische Informationen
Modell-Nr.: SNG20
Bewertung : 230-240 V ~ 50 Hz
Wärmeleistung 230 V 240 V
Nominale Wärmeleistung P
Minimale Wärmeleistung P
Maximale kontinuierliche Wärme-
leistung
Nebenelektrizitätsverbrauch
Im Standby-Modus el
P
1,8 - 1,9 kW
Nom
0,9 - 0,9 kW
min
1,8 - 1,9 kW
max,c
3.5 - 3.5 W
SB
Mit elektronischer Raumtemperaturkontrolle.
Allgemeine Informationen
Den Heizofen vorsichtig aus der Verpackung nehmen und die Verpackung für etwaige Wiederbenutzung aufheben,
z. B. für Umzug oder Rücksendung zum Hersteller.
Das Feuer beinhaltete einen Flammeneffekt, der mit oder ohne Heizfunktion für eine gemütliche Atmosphäre das ganze
Jahr über genutzt werden kann. Wird nur der Flammeneffekt genutzt, bedarf dies nur einer geringen Strommenge (25 W).
Vor Anschluss des Heizofens prüfen Sie bitte, dass die Voltzahl der Zahl entspricht, die auf dem Heizgerät angegeben ist.
Bitte beachten: Nur in einer Umgebung betreiben, in der nur ein geringer Geräuschpegel im Hintergrund vorherrscht. Es ist
möglich, das ein Geräusch zu hören ist, wenn die Wärmefunktion ausgewählt wurde. Dies ist normal und stellt kein Problem dar.
Vor Beginn
Stellen Sie bitte sicher, dass alle Verpackungsmaterialien entfernt wurden (Warnkennzeichnungen sorgfältig lesen) und
bewahren Sie die Verpackung für mögliche Wiederverwendung auf.
Vor Anschluss des Geräts an das Stromnetz prüfen Sie bitte, dass die Voltzahl der Zahl entspricht, die auf dem Heizgerät
angegeben ist.
Verpackungsinhalte
Opti-V Heizofen Modell SNG20
Fernbedienung
Stromkabel
Benutzerhandbuch
Produkteigenschaften
Lautstärkeregler
Helligkeitsregler
Mittlere/volle Wärme mit elektronischem Thermostat
Fernbedienung/manuelle Bedienung
Rotlichtanzeige des Standby-Modus
18
Page 22

Elektrische Verbindung
WARNUNG – DIESE ANWENDUNG MUSS GEERDET WERDEN
Dieses Heizgerät darf nur über ein Wechselstromnetz betrieben werden und die auf dem Heizgerät angegebene Voltzahl
muss der Stromvoltzahl entsprechen.
Schließen Sie das Stromkabel an den Stromanschluss auf der Rückseite des Heizgeräts an. Stellen Sie den Heizofen
an die Wand (sicherstellen, dass ein 6 cm großer Abstand gehalten wird, siehe * Abb. 1) Den Netzstecker anschließen.
Vor dem Anschalten bitte die Sicherheitswarnungen und das Betriebshandbuch durchlesen.
Installation
Vor Anschluss dieser Anwendung ein einen bestehenden Kamin empfehlen wir Folgendes:
Reinigung des Kamins durch einen professionellen Kaminkehrer.
Blockierung des Kaminschachts.
Dieses Verfahren ist wichtig für den efzienten Betrieb des Heizgeräts und senkt auch den Hitzeverlust durch den
Kamin.
Positionierung des Heizofens:
Der Opti-V Heizofen benutzt eine Illusionsreflektions-Technik und wurde für beste Ergebnisse bei niedriger
Raumbeleuchtung entwickelt. Über dem Feuerholz bendet sich ein LED-Licht, welches durch einen Dimmer gesteuert
wird. Dies ermöglicht eine Anpassung der Helligkeit für einen perfekten Flammeneffekt, der zur Ihrer Umgebung passt
oder zu normalen Lichtverhältnissen.
Einen Mindestabstand von 60 mm an der Rückseite des Geräts halten (siehe * Abb. 1), sollte gewahrt werden, damit
das elektronische Thermostat optimal betrieben werden kann.
Betrieb des Heizofens
Dieser Abschnitt beschreibt, wie Ihr Heizofen mittels Fernbedienung oder manuller Steuerung betrieben wird.
Der Netzschalter (Abb. 3a) steuert die Stromversorgung des Heizofens.
Hinweis.: Der Netzschalter muss eingeschaltet sein ( Position – I – ), damit der Heizofen mit oder ohne Wärme betrieben
werden kann.
Der Schalter bendet sich auf der Vorderseite hinter der Tür. Öffnen Sie die Tür, um Zugriff auf den Schalter zu
erhalten – siehe Abb. 3.
Bei Aktivierung leuchtet das Feuerholz auf und das Flammenbild erscheint nach etwa 7 Sekunden.
Alle 30 Minuten kann es sein, dass für etwa 2 bis 3 Sekunden ein leerer Bildschirm erscheint. Dies ist normal und stellt
kein Problem dar.
Fernbedienung:
Zur Aktivierung der Fernbedienung, den klaren Plastiklm der Batterie entfernen. Dieser dient dazu sicherzustellen, dass
die Fernbedienung vor Nutzung voll geladen ist. Siehe Abb. 2
Zur Bedienung, zielen Sie mit der Fernbedienung auf die Vorderseite des Gerätes. Drücken Sie den Standby-Knopf ( )
auf der Fernbedienung, um den Heizofen in den Standby-Modus zu stellen, welcher durch ein rotes Licht angezeigt wird.
Drücken Sie den Standby-Knopf, um den Flammeneffekt zu aktivieren und/oder die Wärme einzuschalten.
Die Tonlautstärke (Feuergeräusche) können durch Drücken der Lautstärkeregler angepasst werden: höhere Lautstärke
und geringere Lautstärke.
Feuerholzatmosphäre:
Der Heizofen verfügt über ein LED, welches das Feuerholz erhellt. Die Helligkeit kann ganz nach Ihren Vorlieben angepasst
werden, indem Sie den Knopf für höhere Helligkeit und den Knopf zum verdunkeln/abschalten des LEDs drücken.
Ein Piepsen ertönt bei jedem Drücken und verstummt, wenn die Minimum- oder Maximumeinstellung erreicht ist.
Heizen:
Zur Aktivierung der Heizfunktion (stellen Sie sicher, dass der Heizofen nicht in Standby ist) drücken Sie den Knopf zur
Einschaltung der Wärme ( ) für mittlere Wärme (900 W) – wird angezeigt durch 2 Piepstöne.) für volle Wärme (1800 W) –
wird angezeigt durch 3 Piepstöne. Jeder Druck dieses Knopfs aktiviert mittlere oder volle Wärme, mit 2 Piepstönen für
mittlere Wärme und 3 Piepstönen für vole Wärme.
Zum Abschalten der Wärme, den Knopf „Wärme aus” drücken ( ) – angezeigt durch einen Piepston. (Das Gebläse
läuft noch etwa 10 Sekunden weiter).
Elektrisches Thermostat:
Die Heizfunktion wird durch das elektronische Thermostat gesteuert. Die Standardeinstellung ist „22”. – Siehe Abb. 3b.
Wenn die Heizfunktion aktiviert ist, schaltet sich die Wärme aus, sobald das Thermostat eine Temperatur von 22 misst.
Die Heizfunktion wird neu aktiviert, soblad das Thermostat eine Temperatur von weniger als 22 misst. Diese Zahl
19
Page 23

(Raumtemperatur) kann geändert werden, indem der Knopf zur Temperaturreglung nach unten gedrückt wird ( ),
um die Raumtemperatur zu senken (min. 15) oder den Knopf zur Temperaturreglung nach oben ( ) zur Steigerung
der Raumtemperatur (max. 30). Ein Piepsen ertönt bei jedem Drücken und verstummt, wenn die Minimum- oder
Maximumeinstellung erreicht ist.
Hinweis: Die Heizfunktion kann nur betrieben werden, wenn der Netzschalter (Abb. 3a) in eingeschalteter Position ( I )
ist und die Raumtemperatur weniger beträgt als die elektronisch eingestellte Temperatur.
Zum Auswechseln der Batterie bitte das eingeprägte Diagramm auf der Rückseite der Fernbedienung beachten.
HINWEIS: Nur Lithiumbatterien verwenden, CR2025
Bitte beachten Sie auch die umweltspezischen Aspekte bei der Batterieentsorgung.
Manuelle Steuerung:
Die Knöpfe zur manuellen Bedienung benden sich auf der Vorderseite unten hinter der Ofentür. Siehe Abb. 2.
Die Knopffunktionen entsprechen denen der Fernbedienung, wie unten beschrieben.
Standby
Geringere Lautstärke
Höhere Lautstärke
Wärmefunktion aus
Wärmefunktion an (mittlere Wärme/volle Wärme)
Verdunkelung Feuerholzambiente
Aufhellung Feuerholzambiente
Geringere Temperatur
Höhere Temperatur
Reinigung
Warnung – Den Netzschalter immer auf die Position „Aus” stellen (0) – Siehe Abb.3a und von der Stromversorgung
lösen, bevor das Gerät gereinigt wird.
Zur allgemeinen Reinigung ein weiches, sauberes Staubtuch verwenden. Niemals mit aggressiven Reinigern behandeln.
Zusätzliche Informationen
SERVICE NACH DEM VERKAUF
Die Produktgarantie besteht ein Jahr lang nach Kaufdatum. Innerhalb dieses Zeitraums übernehmen wir Reparatur oder
Austausch dieses Produktes kostenlos, wenn das Gerät gemäß dieser Anleitung installiert und betrieben wurde. Die
Rechte unter dieser Garantiegewährleistung verstehen sich zusätzliche zu den gesetzlichen Rechten, die wiederum
nicht durch diese Garantie beeinusst werden.
Sollten Sie Informationen oder Hilfe nach den Kauf dieses Produktes benötigen, rufen Sie bitte. www.dimpex.co.uk auf
und wählen Sie „Kundendienst” (Customer Support) oder rufen Sie den Helpdesk an unter 0844 879 3588 (UK) oder
01 842 4833 (R. O. I.). Auf der Website sind auch Einzelteile verfügbar. Bitte behalten Sie Ihre Quittung als Kaufbeleg.
RECYCLING
Für elektrische Produkte, die innerhalb der Europäischen Gemeinschaft verkauft werden – Nach Ende der
Lebensspanne des elektrischen Gerätes darf dies nicht im Haushaltsabfall entsorgt werden. Bitte bei den
entsprechenden Einrichtungen recyceln. Holen Sie sich Ratschläge zum Recyceln bei Ihren örtlichen Behörden
oder Ihrem Einzelhändler für Ihr Land ein.
Problemlösung
Produkt funktioniert nicht:
Netzkabelverbindung prüfen.
Prüfen, ob der Netzschalter eingeschaltet ist.
Prüfen, ob der Steckdosenschalter eingeschaltet ist.
Flammenbild funktioniert nicht:
Gerät in den Standby-Modus schalten und neu einschalten.
Bild wird nach etwa 7 Sekunden wieder angezeigt.
Erwärmt sich nicht:
Prüfen Sie, dass die Raumtemperatur-Einstellung nicht unter der eigentlichen Raumtemperatur liegt.
Siehe Abschnitt „Elektronisches Thermostat”.
20
Page 24

Dimplex SNG20
Wprowadzenie
Prosimy o uważne przeczytanie niniejszej Instrukcji, która ułatwi instalację, użytkowanie i konserwację
produktu.
Porada dotycząca bezpieczeństwa
PL
Podczas użytkowania urządzeń elektrycznych należy zawsze stosować środki ostrożności,
celem zmniejszenia ryzyka pożaru, porażenia lub innych urazów, opisane niżej:
W przypadku gdy urządzenie jest uszkodzone, przed przystąpieniem do instalacji i użytkowania,
należy skontaktować się z dostawcą.
Nie używać poza pomieszczeniami.
Nie wolno używać produktu w kąpieli, pod prysznicem czy na basenie.
Nie pozostawiać urządzenia bezpośrednio pod stałym gniazdkiem czy skrzynką rozdzielczą.
Urządzenie może być użytkowane przez dzieci w wieku 8 i więcej lat oraz osoby z ograniczeniami
zycznymi, sensorycznymi lub mentalnymi, nie posiadające doświadczenia i wiedzy, pod
warunkiem, że robią to pod nadzorem, zostały odpowiednio poinstruowane i rozumiejązwiazane
zagrożenia. Produktu nie należy dawać dzieciom do zabawy. Dzieci nie powinny czyścić ani
konserwować produktu samodzielnie, bez nadzoru.
Dzieci młodsze niż trzyletnie powinny używać produktu pod stałym nadzorem albo wcale.
Dzieci w wieku od 3 do 8 lat mogą jedynie włączać i wyłączać urządzenie, pod warunkiem
że zostało ono zainstalowane lub umieszczone w docelowym położeniu roboczym, a dzieci
zostały odpowiednio poinstruowane co do bezpiecznego użytkowania urządzenia lub są pod
nadzorem, i rozumieją związane zagrożenia. Dzieci w wielu od 3 do 8 at nie powinny podłączać
do gniazdka, regulować, czyścić ani konserwować urządzenia.
PRZESTROGA: Niektóre części urządzenia mogą się mocno nagrzać, co może spowodować
oparzeniami. Należy zwrócić szczególną uwagę na dzieci lub osoby wrażliwe.
Nie wolno łączyć urządzenia szeregowo z regulatorami temperatury, sterownikami
programowalnymi, zegarowymi lub innymi akcesoriami, które automatycznie włączają grzejnik,
ponieważ może to spowodować pożar w przypadku zakrycia lub przemieszczenia urządzenia.
Upewnić się, że meble, ranki, lub inne materiały łatwopalne znajduą się nie bliżej niż 1 metr
od urządzenia.
W przypadku awarii odłączyć urządzenie od gniazda sieciowego.
Odłączyć urządzenie od gniazda sieciowego jeżeli nie będzie używane przez dłuzszy czas.
Mimo że urządzenie spełnia normy bezpieczeństwa, nie zalecamy jego użytkowania na grubych
dywanach lub chodnikach z długim włosiem.
Urządzenie należy ustawić w taki sposób, aby wtyczka była łatwo dostępna.
Jeżeli przewód zasilający jest uszkodzony, powinien zostać wymieniony przez producenta lub
zakład serwisowy lub inną osobę wykwalikowaną, celem wyeliminowania zagrożeń.
Przewód zasilający należy trzymać z dala od przedniej części urządzenia.
OSTRZEŻENIE: Nie należy zakrywać urządzenia, aby uniknąć jego przegrzania. Nie wolno
pozostawiać na urządzeniu materiałów lub odzieży, ani też utrudniać obiegu powietrza wokół
urządzenia.
Urządzenie oznaczone jest etykietą ostrzegawczą „NIE ZAKRYWAĆ”.
Aby uniknąć zagrożenia na skutek przypadkowego zresetowania bezpiecznika cieplnego,
urządzenie nie można podłączać do zasilania za pośrednictwem zewnętrznego urządzenia
21
Page 25

sterującego, takiego jak wyłącznik zegarowy, lub podłączać do obwodu regularnie włączanego
i wyłączanego przez operatora sieci.
Urządzenie nie zostało wyposażone w regulator temperatury pokojowej. Urządzenia nie
można użytkować w małych pokojach zajmowanych przez osoby niezdolne do samodzielnego
opuszczenia pokoju, chyba że pod nadzorem.
Ostrzeżenie - Na urządzeniu nie należy umieszczać źródeł otwartego ognia, np. świec.
Ostrzeżenie - Urządzenia nie należy narażać na działanie wody, nie wolno ustawiać na urządzeniu
żadnych obiektów wypełnionych wodą np. wazonów.
Ostrzeżenie - urządzenie niniejsze to konstrukcja Klasy 1 i musi być podłączona do gniazda
sieciowego z uziemieniem.
Dane techniczne
Model: SNG20
Dane znamionowe: 230-240 V~50 Hz
Moc grzewcza 230 V 240 V
Nominalna moc grzewcza P
Minimalna moc grzewcza P
Maksymalna ciągła moc grzewcza P
Dodatkowe zużycie energii
W trybie oczekiwania el
1,8 - 1,9 kW
Nom
0,9 - 0,9 kW
min
1,8 - 1,9 kW
maks,c
3.5 - 3.5 W
SB
z elektroniczną kontrolą temperatury pokojowej..
Informacje ogólne
Ostrożnie rozpakuj grzejnik, zachowaj opakowanie na później, na wypadek przeprowadzki lub zwrotu.
Grzejnik oferuje efekt płomieni, który można włączyć razem z funkcją grzania lub oddzielnie, dzięki czemu można
wykorzystać relaksujące działanie płomieni niezależnie od pory roku. Sam efekt płomienia nie zużywa dużej ilości energii
(25 W).
Przed podłączeniem grzejnika sprawdź czy wartość napięcia zasilającego jest identyczna z wartością podaną na grzejniku.
Uwaga: Używać w miejscu o niskim poziomie hałasu tła: umożliwi to usłyszenie sygnałów dźwiękowych. Jest to normalny
objaw.
Przed przystąpieniem do użytkowania
Upewnij się, ze wszystkie elementy opakowania zostały usunięte (przeczytaj uważnie wszystkie etykiety), zachowaj
opakowanie do późniejszego wykorzystania.
Przed podłączeniem urządzenia sprawdź czy wartość napięcia zasilania jest identyczna z wartością podaną na
urządzeniu.
Zawartość węgla
Piec Opti-V model SNG20
Pilot zdalnego sterowania
Kabel zasilający
Instrukcja obsługi
Opis produktu
Sterowanie głośnością
Sterowanie jasnością oświetlenia
Połowa mocy/pełna moc grzania z elektronicznym termostatem
Obsługa zdalna/ręczna
Czerwona lampka wskazująca tryb oczekiwania
22
Page 26

Połączenia elektryczne
OSTRZEŻENIE – URZĄDZENIE MUSI BYĆ UZIEMIONE
Niniejszy grzejnik musi być zasilany wyłącznie prądem zmiennym, a wartość napięcia zasilania musi odpowiadać wartości
na grzejniku.
Podłącz kabel zasilania do gniazda zasilania z tyłu urządzenia. Ustaw piec pod ścianą (nie bliżej niż 60 mm od ściany,
zob. * Rys. 1). Podłącz wtyczkę do gniazda sieciowego.
Przed włączeniem urządzenia przeczytaj ostrzeżenia i instrukcję obsługi.
Instalacja
Przed zainstalowaniem urządzenia w istniejącym kominie zalecamy
Wyczyszczenie kominka przez zawodowego kominiarza.
Odizolowanie komina.
Procedura ta jest istotna dla wydajnej pracy grzejnika i zmniejsza stratę ciepła przez komin.
Lokowanie pieca:
Piec Opti-V wykorzystuje do stworzenia iluzji ognia technikę odbicia, która działa najskuteczniej przy słabym oświetleniu.
Nad kłodami umieszczone są diody, sterowane urządzeniem przyciemniającym, umożliwiającym regulację jasności
oświetlenia, do stworzenia doskonałej iluzji płomienia dostosowanej do otoczenia, lub w miejscu, gdzie poziom oświetlanie
w otoczeniu jest normalny.
Należy pozostawić co najmniej 60 mm odstępu z tyłu produktu (zob. * Rys.1), tak aby termostat elektroniczny mógł
działać optymalnie.
Obsługa pieca
NInejszy, rozdział zawiera instrukcję włączania piecyka przy pomocy ręcznych urządzeń sterujących lub pilota zdalnego
sterowania.
Przełącznik zasilania (Rys. 3a) kontroluje zasilanie pieca.
Uwaga: Przełącznik zasilania musi być w położeniu wł ( I ) aby piec działał, grzejąc lub nie.
Przełącznik zlokalizowany jest na panelu przednim, za drzwiczkami. Dostęp do przełącznika uzyskuje się po otwarciu
drzwiczek - zob. Rys. 3.
Po włączeniu kłody rozjaśnią się, a po ok. 7 sekundach pojawi się obraz płomienia.
Użytkownik może zauważyć zgaśnięcie ekranu na 2-3 sekundy co 30 minut. Jest to normalny objaw.
Zdalne sterowanie:
Celem aktywowania zdalnego sterowania, wyjmij plastikowy pasek z przedziału baterii, który zabezpiecza baterie przed
rozładowaniem - zob. Rys. 2.
Włącz piec, kierując pilota w stronę przedniej ścianki urządzenia. Wciśnij przycisk oczekiwania ( ) na pilocie aby ustawić
tryb oczekiwania pieca - sygnalizowany czerwoną lampką. Wciśnij przycisk oczekiwani aby włączyć efekt płomienia
i/lub ogrzewania.
Głośność (odgłos ognia) można ustawić wciskając przyciski sterowania głośnością: ściszenie lub pogłośnienie.
Podświetlane kłody:
Piec posiada diodowe oświetlenie kłód. Jasność oświetlenia kłód można regulować wciskając przycisk aby rozjaśnić
lub przycisk aby przyciemnić lub wyłączyć diody. Każde wciśnięcie przycisku sygnalizowane jest dźwiękiem, do czasu
uzyskania wartości minimalnej lub maksymalnej.
Ogrzewanie:
Aby włączyć ogrzewanie (upewnij się że piec nie jest w trybie oczekiwania) wciśnij przycisk włączania ogrzewania ( )
na połowę mocy (900 W) - urządzenie wyemituje 2 sygnały dźwiękowe. Aby włączyć pełną moc ogrzewanie (1800 W)
wciśnij przycisk ponownie - urządzenie wyemituje 3 sygnały dźwiękowe. Każde wciśnięcie przycisku włącza połowę mocy
ogrzewania - 2 sygnały dźwiękowe dla połowy mocy i 3 sygnały dźwiękowe dla pełnej mocy.
Aby wyłączyć ogrzewanie wciśnij przycisk wyłączenia ogrzewania ( ) - urządzenie wyemituje jeden sygnał dźwiękowy.
(Wentylator będzie działał jeszcze przez ok. 10 sekund).
Termostat elektroniczny:
Grzanie sterowane jest termostatem elektronicznym. Ustawienie domyślne to „22” - zob. Rys. 3b. Grzanie zostanie
wyłączone kiedy termostat wykryje temperaturę „22”. Grzanie zostanie ponownie włączone, kiedy termostat wykryje, że
temperatura spadła poniżej „22”. Wartość tę (temperaturę pokojową) można zmniejszyć wciskając przycisk zmniejszenia
temperatury ( ) (wartość minimalna to 15) lub zwiększyć wciskając przycisk zwiększania temperatury ( ) (wartość
maksymalna to 30). Każde wciśnięcie przycisku sygnalizowane jest dźwiękiem, do czasu uzyskania wartości minimalnej
lub maksymalnej.
23
Page 27

Uwaga: piec będzie grzał tylko wtedy, gdy przełącznik zasilania (Rys. 3a) jest w położeniu wł (I) a temperatura otoczenia
jest niższa od wartości ustawionej na termostacie.
Baterie w pilocie zdalnego sterowania należy wymieniać zgodnie z rysunkiem na odwrotnej stronie pilota.
UWAGA - Używaj tylko baterii litowych - CR2025
Należy zwrócić uwagę na bezpieczną dla środowiska utyliazcję baterii.
Sterowanie ręczne:
Elementy sterowania ręcznego są umieszczone w dolnej części panelu czołowego za drzwiczkami - zob. Rys. 2.
Funkcje przycisków są takie same jak funkcje przycisków zdalnego sterowania, opisane niżej;
Oczekiwanie
Ściszenie
Pogłośnienie
Wyłączenie grzania
Włączenie grzania (pół mocy/pełna moc)
Zmniejszenie jasności oświetlenia kłód
Zwiększenie jasności oświetlenia kłód
Zmniejszenie temperatury
Zwiększenie temperatury
Czyszczenie
Ostrzeżenie – Zawsze ustawiaj przełącznik zasilania w położeniu „OFF” (0) - zob. Rys.3a i odłączaj urządzenie od
gniazda sieciowego zanim przystąpisz do czyszczenia.
Do czyszczenia używaj miękkiej ściereczki – nigdy nie używaj ściernych środków czyszczących.
Informacje dodatkowe
OBSŁUGA POSPRZEDAŻNA
Produkt objęty jest roczną gwarancją od daty zakupu. W tym okresie zobowiązujemy się do bezpłatnego naprawienia
lub wymiany produktu, pod warunkiem że był on zainstalowany i użytkowany zgodnie niniejszymi instrukcjami. Twoje
prawa wynikające z niniejszej Gwarancji są dodatkowe do praw ustawowych, na które z kolei niniejsze prawa nie mają
wpływu.
Jeżeli potrzebujesz informacji lub pomocy po zakupieniu produktu wejdź na stronę www.dimplex.co.uk i wybierz
zakładkę „Customer Support” (obsługa klienta) lub zadzwoń na numer 0844 879 3588 (Wielka Brytania) lub
01 842 4833 (Irlandia). Na stronie internetowej dostępne są także części zapasowe. Prosimy o zachowanie paragonu,
jako dowodu zakupu.
RECYKLING
Po zakończeniu eksploatacji urządzenia elektryczne sprzedawane w Unii Europejskiej nie mogą być utylizowane
razem z odpadami domowymi. Prosimy o oddanie do recyklingu, o ile istnieje taka możliwość. Zapytaj władz
lokalnych lub sprzedawcy gdzie możesz oddać urządzenie do recyklingu.
Usuwania problemów
Produkt nie działa:
Sprawdź przyłącze kabla zasilającego.
Sprawdź, czy przełącznik zasilania jest w położeniu wł.
Sprawdź, czy przełącznik gniazda jest w położeniu wł.
Obraz płomienia nie jest wyświetlany:
Przełącz urządzenie w tryb oczekiwania i włącz z powrotem.
Płomień pojawi się po ok. 7 sekundach.
Nie działa grzejnik:
Sprawdź, czy wartość ustawienia termostatu nie jest niższa od aktualnej temperatury w pokoju.
Zob. rozdział „Termostat elektroniczny”.
24
Page 28

Dimplex SNG20
Introducción
Lea atentamente esta guía de información para poder instalar, utilizar y mantener su producto con seguridad.
Aviso importante sobre seguridad
ES
Al utilizar aparatos eléctricos, deberán adoptarse en todo momento precauciones básicas para
reducir riesgos de incendio, descarga eléctrica y lesiones personales, como por ejemplo:
Si el aparato está dañado, consulte al proveedor antes de la instalación y puesta en funcionamiento.
No utilizar en exteriores.
No utilizar cerca de un baño, ducha o piscina.
No situar el aparato inmediatamente debajo de una toma de corriente ja o cuadro de conexiones.
Este electrodoméstico puede ser utilizado por niños de 8 años en adelante y personas cuyas
capacidades físicas, sensoriales o mentales estén disminuidas o que carezcan de la experiencia
y conocimientos sucientes para manejarlo, siempre que cuenten con las instrucciones o la
supervisión sobre el uso del electrodoméstico de forma segura y comprendan los riesgos. Este
aparato no es un juguete para niños. La limpieza y mantenimiento no deberá realizarse por
niños sin supervisión.
No deberá dejarse acercar al aparato a niños menores de 3 años sin supervisión continua.
Los niños de entre 3 y 8 años de edad solo deberán encender/apagar el aparato si este se ha
colocado o instalado en su posición normal de funcionamiento y el niño está supervisado o ha
recibido instrucciones sobe el uso seguro del aparato y comprende los peligros que existen.
Los niños de entre 3 y 8 años de edad no deben enchufar, regular ni limpiar el aparato ni llevar
a cabo tareas de mantenimiento.
PRECAUCIÓN: Algunas piezas de este producto pueden calentarse mucho y provocar
quemaduras. Deberá prestarse especial atención si hay niños o personas vulnerables presentes.
No utilice este aparato en serie con un control de temperatura, controlador de programas,
temporizador o ningún otro aparato que encienda automáticamente el calefactor, ya que existe
riego de incendio si el calefactor se cambia de posición o se cubre accidentalmente.
Asegúrese de que no haya muebles, cortinas u otros materiales combustibles a menos de un
metro del aparato.
En caso de fallo, desenchufe el aparato.
Desenchufe el aparato cuando no se vaya a utilizar durante periodos prolongados.
Aunque este aparato cumple las normas de seguridad, no se recomienda su uso en alfombras
de pelo espeso o alfombrillas de pelo largo.
Este aparato debe colocarse de modo que el enchufe quede accesible.
Si el cable eléctrico está dañado debe ser sustituido por el fabricante o agente de servicio
o persona con cualicación similar para evitar peligros.
Mantenga el cable eléctrico apartado del frontal del aparato.
ADVERTENCIA: Para evitar que se produzca sobrecalentamiento, no cubra el aparato. No
coloque telas ni prendas sobre el aparato ni obstruya la circulación de aire a su alrededor.
El aparato presenta el símbolo de advertencia “NO CUBRIR”.
25
Page 29

Para evitar peligros debido al reinicio involuntario del desconectador térmico, este aparato no debe
recibir corriente de un dispositivo con interruptor externo, como puede ser un temporizador, ni
conectarse a un circuito con conexión y desconexión automáticas por parte de la compañía eléctrica.
Este aparato no va equipado con un dispositivo para controlar la temperatura ambiente. No
utilice este aparato en habitaciones pequeñas cuando estén ocupadas por personas que no sean
capaces de salir de la habitación por sus propios medios, salvo que exista supervisión constante.
Advertencia: no se deben colocar fuentes de llamas directas, como velas, en este aparato.
Advertencia: el aparato no debe ser expuesto a goteos ni salpicaduras y no debe colocarse
ningún objeto lleno de líquido, como jarrones, encima del aparato.
Advertencia: este aparato es de construcción de Clase I y debe conectarse a una toma de
corriente con toma de tierra de protección.
Información técnica
Núm. de modelo: SNG20
Clasicación: 230-240 V~50 Hz
Producción de calor 230 V 240 V
Producción de calor nominal P
Producción de calor mínima P
Máxima producción de calor continuo P
Consumo de electricidad auxiliar
En modo de espera el
1,8 - 1,9 kW
Nom
0,9 - 0,9 kW
mín
1,8 - 1,9 kW
máx.,c
3.5 - 3.5 W
SB
con control electrónico de temperatura ambiente.
Información general
Desembale el calefactor con cuidado y conserve el embalaje todo el tiempo que pueda para su posible utilización en el
futuro, en caso de traslado o de devolución al proveedor.
El fuego incorpora un efecto de llama, que se puede utilizar con o sin calefacción, de modo que el efecto reconfortante
se puede disfrutar en cualquier momento del año. El uso del efecto de llama solo consume muy poca electricidad (25 W).
Antes de conectar el calefactor compruebe que el voltaje de la corriente sea el indicado en el calefactor.
Tenga en cuenta que: Si se utiliza en un entorno con muy poco ruido de fondo, tal vez se escuche un sonido cuando se
selecciona la función de calefacción. Esto es normal y no debe preocuparle.
Antes de empezar
Asegúrese de retirar todos los elementos de embalaje (lea detenidamente las etiquetas de advertencia) y guarde todo
el embalaje para un posible uso futuro.
Antes de conectar el aparato, compruebe que el voltaje de la corriente sea el indicado en el aparato.
Contenido del paquete
Estufa Opti-V Modelo SNG20
Mando a distancia
Cable de alimentación
Manual de instrucciones
Características del producto
Control del volumen
Control del brillo
Calor medio/máximo con termostato electrónico
Funcionamiento manual o a distancia
Indicación del modo de espera con una luz roja
26
Page 30

Conexión eléctrica
ADVERTENCIA: ESTE APARATO NECESITA CONEXIÓN A TIERRA
Este calefactor deberá utilizarse solo con una toma de corriente alterna y el voltaje marcado en el calefactor deberá
corresponder con el voltaje de la corriente.
Conecte el cable de alimentación al conector de la parte trasera de la chimenea. Coloque la estufa contra la pared
(asegurando un espacio de 60 mm, vea la * Fig. 1). Conecte el enchufe a la red eléctrica.
Antes de poner el aparato en funcionamiento, lea las advertencias sobre seguridad y las instrucciones de funcionamiento.
Instalación
Antes de instalar este aparato en una chimenea existente, recomendamos que:
Se asegure de que un deshollinador competente limpie su chimenea.
Bloquee el conducto de la chimenea.
Este procedimiento es importante para el funcionamiento eciente de la unidad de calefacción y también reducirá
la pérdida de calor por la chimenea.
Posicionamiento de la estufa:
La estufa Opti-V utiliza una técnica de reexión ilusoria y está diseñada para funcionar mejor cuando los niveles de luz
ambiente son bajos. Hay un LED por encima de los troncos que está controlado por un atenuador, que permite ajustar
el brillo de los troncos, para crear el efecto de llama perfecto que se adapte a su entorno o para zonas donde los niveles
de luz ambiente son normales.
Se debe mantener un espacio mínimo de 60 mm en la parte posterior del producto (vea la * Fig.1), para que el termostato
electrónico tenga un efecto óptimo.
Funcionamiento de la estufa
Esta sección describe cómo activar su estufa mediante el mando a distancia o los controles manuales.
El interruptor principal (Fig. 3a) controla el suministro de electricidad a la estufa.
Nota: El interruptor principal debe estar en la posición de encendido ( I ) para que la estufa funcione con o sin calor.
El interruptor está situado en el panel frontal detrás de la puerta. Abra la puerta para acceder al interruptor; vea la Fig. 3.
Cuando se activa, se encenderá el lecho de troncos y tras aproximadamente 7 segundos aparecerá la imagen de llama.
El usuario puede notar una pantalla en blanco durante aproximadamente 2-3 segundos, cada 30 minutos. Esto es normal
y no debe preocuparle.
Mando a distancia:
Para activar el mando a distancia, retire la tira de plástico transparente de la batería, que se utiliza para garantizar que
el mando a distancia esté completamente cargado antes de usarlo; vea la Fig. 2.
Para hacerla funcionar, apunte el mando a distancia hacia la parte delantera del aparato. Presione el botón de espera
( ) en el mando a distancia para dejar la estufa en modo de espera, indicado mediante una luz roja. Pulse el botón de
espera para activar el efecto de llama y/o el calor.
El volumen de audio (sonido de fuego) se puede ajustar pulsando los botones de control de volumen: bajar el volumen
y aumentar el volumen.
Ambientación de lecho de troncos:
La estufa tiene un LED que ilumina el lecho de troncos. Según lo preera, puede ajustar el brillo pulsando el botón
para iluminar y el botón para atenuar/apagar el LED. Se puede oír un “pitido” sonoro con cada pulsación y se detendrá
cuando se alcance el máximo o el mínimo.
Calefacción:
Para activar la calefacción, (asegúrese de que la estufa no esté en modo de espera) presione el botón de encendido ( )
una vez para un calor medio (900 W), indicado mediante dos pitidos sonoros. Para poner el calor al máximo (1800 W)
vuelva a pulsarlo hasta oír tres pitidos. Cada pulsación de este botón activa el calor a media o máxima potencia: dos
pitidos indican el calor medio y tres pitidos indican calor máximo.
Para apagar la calefacción, pulse el botón de apagado ( ), indicado por un pitido. (El ventilador continúa funcionando
durante aproximadamente 10 segundos).
Termostato electrónico:
La calefacción se controla mediante el termostato electrónico. El ajuste por defecto es ‘22’ ; vea la Fig. 3b. Cuando
se activa el calor, la calefacción se apagará en el momento en que el termostato detecte que la temperatura está en
‘22’. La calefacción se volverá a activar cuando el termostato detecte que la temperatura es inferior a ‘22’. Esta cifra
(temperatura ambiente) se puede cambiar pulsando el botón para bajar la temperatura ( ) para reducir la temperatura
ambiente (mín. 15) o el botón de subir la temperatura ( ) para aumentar la temperatura ambiente (máx. 30). Se puede
oír un “pitido” de audio con cada pulsación y se detendrá cuando se alcance el máximo o el mínimo.
27
Page 31

Nota: la calefacción sólo funcionará cuando el interruptor principal (Fig. 3a) esté en la posición de encendido (I) y la
temperatura ambiente sea inferior a la temperatura de ajuste electrónica.
Para la sustitución de la batería, consulte el diagrama en relieve de la parte posterior del mando a distancia.
NOTA: utilice únicamente baterías de litio CR2025
Se debe prestar atención a los aspectos ambientales de desecho de las baterías.
Control manual:
Los controles manuales están situados en el panel frontal inferior, detrás de la puerta de la estufa; vea la Fig. 2.
Las funciones de los botones son como las del mando a distancia, descrito a continuación;
En espera
Bajar el volumen
Aumentar el volumen
Calor apagado
Calor encendido (medio/máximo)
Ambientación de lecho de troncos tenue
Ambientación de lecho de troncos brillante
Bajar la temperatura
Aumentar la temperatura
Limpieza
Advertencia: ponga siempre el interruptor principal en la posición ‘OFF’ (0) (vea la Fig.3a) y desconecte el aparato
de la fuente de alimentación antes de limpiar la estufa.
Para la limpieza general, utilice un paño suave y limpio; no utilice limpiadores agresivos.
Información adicional
SERVICIO POSVENTA
Su producto tiene un año de garantía a partir de la fecha de compra. Durante este periodo, nos comprometemos
a reparar o cambiar el producto sin cargo alguno, siempre que se haya instalado y puesto en funcionamiento de
conformidad con estas instrucciones. Sus derechos según esta garantía son adicionales a sus derechos legalmente
establecidos, que, a su vez, no se ven afectados por esta garantía.
Si precisa información o asistencia postventa con este producto, vaya a www.dimplex.co.uk y seleccione “Customer
Support” (Atención al cliente) o llame a nuestro centro de atención al cliente al 0844 879 3588 (Reino Unido)
o 01 842 4833 (Irlanda). También existen piezas de repuesto disponibles en el sitio web. Por favor, conserve su tique
como prueba de compra.
RECICLADO
Para los productos eléctricos vendidos dentro de la Comunidad Europea: Al nal de la vida útil de los productos
eléctricos no deben desecharse con la basura doméstica. Si existen, utilice los servicios de reciclaje. Consúltelo
al vendedor o a las autoridades locales de su país.
Solución de problemas
El producto no funciona:
Compruebe la conexión del enchufe a la red eléctrica.
Compruebe que el interruptor principal esté encendido.
Compruebe que el interruptor de la clavija esté encendido.
Se detiene la imagen de llama:
Ponga el aparato al modo de espera y vuelva a encenderlo.
La imagen se reanudará después de aproximadamente 7 segundos.
La calefacción no funciona:
Compruebe que el ajuste de temperatura no esté por debajo de la temperatura ambiente.
Consulte la sección ‘Termostato electrónico’.
28
Page 32

Fig.2
0
0
657
632
60
440
*
150
Fig.1
Fig.3
Fig.3a
Fig.3b
29
Page 33

Page 34

Page 35

DE - Garantie
Die nachstehenden Ausführungen über Umfang der Garantie, Garantiefristen und die Anmeldung von Garantieansprüchen gelten ausschließlich für die
Bundesrepublik eutschland.
Wir räumen dem Käufer nach seiner Wahl zusätzlich zu den ihm gegen den Verkäufer ausstehenden gesetzlichen Gewährleistungsansprüchen einen Anspruch nach Maßgabe
der nachfolgenden Garantieverpichtung ein:
I. Dauer und Beginn der Garantie
1. Grundsätzlich wird für jedes im Haushalt eingesetzte Gerät die auf der Garantiekarte ausgezeichnete Garantiezeit gewährt.
2. Bei gewerblicher Nutzung der von der Bauart her für den Haushalt bestimmten Geräte beträgt die Garantiezeit lediglich sechs Monate.
3 Die Garantie ist mit dem Zeitpunkt der Übergabe des Gerätes wirksam.
4. Bewahren Sie die vom Verkäufer ausgefüllte Garantie-Urkunde mit der Rechnung, dem Lieferschein oder einem anderen Kaufnachweis auf.
5. Durch Garantieleistungen tritt keine Verlängerung der ursprünglichen Garantiezeit ein.
6. Garantieansprüche können nur geltend gemacht werden, wenn die Mängelrüge innerhalb von 14 Tagen nach Entdeckung des Mangels schriftlich bei uns eingeht.
II. Inhalt und Unfang der Garantie
1. Ihr Gerät wird sorgfältig geprüft. Für den Fall, daß der Garantieanspruch zu Recht besteht, entscheiden wir, auf welche Art der Schaden behoben wer den soll / wird. Im
Reparaturfall sorgen wir für eine fachgerechte Ausführung.
2. Bei der Einsendung zur Reparatur sind Garantie-Urkunde und Kaufnachweis beizufügen.
3. Innerhalb der ersten sechs Monate erbringen wir die Garantieleistungen ohne Berechnung von Nebenkosten (Fahrt- und Wegzeitkosten, Fracht- und Verpackungskosten).
4. Darüber hinausgehende Ansprüche, insbesondere Schadenersatzansprüche, sind ausgeschlossen, soweit eine Haftung nicht gesetzlich angeordnet ist.
III. Einschränkungen der Garantie
1. Eine Garantie besteht nicht bei Fehlern oder Mängeln, die auf folgendes zurückzuführen sind:
a) Reparaturen und Abänderungen, die von nicht autorisierter dritter Stelle vorgenommen werden oder wurden;
b) äußere Einwirkungen, zum Beispiel Transportschäden, Beschädigungen durch Stoß oder Schlag, Schäden durch Witterungseinüsse oder sonstige Naturerscheinungen;
c) unsachgemäße / fehlerhafte Bedienung oder Beanspruchung;
d) Verwendung von ungeeigneten Reinigungsmitteln, Chemikalien usw.
2. Die Garantie erstreckt sich nicht auf leicht zerbrechliche Teile, zum Beispiel Glas, Kunststoff, Glühlampen.
3. Geringfügige Änderungen gegenüber Prospekten oder Mustern oder früher gelieferter Ware gelten nicht als Mangel. Gleiches gilt bei lediglich geringfügigen Abweichungen
von der Sollbeschaffenheit, die für Wert- und Gebrauchstauglichkeit des Gerätes unerheblich ist.
4. Im Ausland gelten die von unserer jeweils zuständigen Landesvertretung herausgegebenen Garantiebedingungen.
DE - Garantie Für dieses Gerät gelten
die in dem Kaufland herausgegebenen
Garantie-bedingungen. Einzelheiten
teilt Ihnen der Händler, bei dem Sie
das Gerät gekauft haben, auf Anfrage
jederzeit mit. Die Inanspruchnahme
von Garantie-leistungen setzt die
Vorlage des Kaufbeleges und die
Einhaltung der Garantiefrist voraus. Der
Garantieanspruch verfällt, wenn das Gerät
beschädigt, nicht sachgemäß benutzt
oder unbefugte Eingriffe vorgenommen
wurden.
UK - Warranty The warranty conditions
in the country of purchase apply to this
appliance. Information can be obtained
at any time from the retailer from whom
the appliance was purchased. For claims
under guarantee the sales receipt must
be produced and the claims must be
forwarded within the guarantee period.
The right to claim under guarantee
expires in case that the device has been
damaged, used in an inappropriate way
or that unauthorized manipulations have
been carried out.
FR - Garantie Pour cet appareil, les
garanties applicables sont celles en
vigueur dans le pays où a lieu l’achat.
Votre revendeur vous en communiquera
à tout moment les détails sur simple
demande. La revendication au droit à la
garantie est assujettie à la présentation de
la preuve d’achat et du respect du délai
de garantie. Le droit à la garantie expire
lorsque l’appareil a été endommagé,
utilisé de manière inadéquate ou que
des interventions ont été effectuées par
des tiers.
IT - Garanzia Per questo apparecchio
valgono le condizioni di garanzia
pubblicate nel Paese d’acquisto. I dettagli
a riguardo vengono forniti, in ogni
momento, su richiesta, dal rivenditore
presso il quale viene acquistato
l’apparecchio. Il diritto alla prestazione
di garanzia ha come premessa l’esibizione
dello scontrino di acquisto e l’osservanza
del termine di garanzia. Il diritto alla
copertura di garanzia non sussiste, se
l’apparecchio è stato danneggiato, se non
è stato utilizzato a regola d’arte e sono
stati effettuati su di esso interventi non
autorizzati.
ES - Garantía Para este aparato tienen
validez las condiciones de garantía
entregadas en el país de compra. En
caso de preguntas, el vendedor al que
usted compró el aparato, estará en todo
momento dispuesto a informarle sobre
los detalles al respecto. La solicitud de
prestaciones que estén incluidas en las
disposiciones de garantía presupone, que
usted presente el ticket de compra y que
haga su solicitud en el plazo de garantía.
Los derechos de garantía caducan, si el
aparato se ha dañado, si se ha utilizado
de manera inadecuada, o si en él se han
efectuado intervenciones desautorizadas.
PT - Garantia As condições de garantia
do país de compra aplicam-se a este
aparelho. Pode obter informação em
qualquer altura do retalhista de onde
adquiriu o aparelho. Todas as reclamações
ao abrigo da garantia terão de se fazer
acompanhar do documento comprovativo
da compra e de serem enviadas dentro
do período da garantia. O direito de
reclamação ao abrigo da garantia expira
no caso do aparelho ter sido danicado,
utilizado de forma incorrecta ou de
se terem efectuado manipulações não
autorizadas.
NL - Garantie Voor dit apparaat
gelden de in het koopland uitgegeven
garantievoorwaarden. Details deelt U
Uw dealer, waar U het apparaat heeft
gekocht, op aanvraag altijd mee. De
gebruikmaking van garantievergoedingen
vereist het overleggen van het koopbewijs
en de nakoming van de garantietermijn.
De garantieclaim vervalt, wanneer het
apparaat werd beschadigd, niet juist werd
gebruikt of onbevoegde ingrepen werden
uitgevoerd.
DK - Garanti Apparatet er omfattet af
de garantibetingelser, som er gældende i
købslandet. Nærmere detaljer kan fås hos
den forhandler, hvor du har købt apparatet.
Der kan kun støttes ret på garantien ved
forelæggelse af købskvittering og kun
inden for garantiperioden. Garantien
bortfalder, hvis apparatet er blevet
beskadiget, anvendt forkert eller i tilfælde
af uautoriseret indgreb i apparatet.
SE - Garanti För denna apparat
gäller de för inköpslandet utgivna
garantibestämmelserna. Pĺ förfrĺgan
kan detaljer na i garantibestämmelserna
erhĺllas frĺn inköpsstället där
apparaten har köpts. Om garantin
tas i ansprĺk mĺste inköpskvitto kunna
uppvisas inom garantitiden. Alla
garantiansprĺk
NO - Garanti For dette apparatet
gjelder kun de betingelsene som
er offentliggjort i forretningen det er
kjřpt. Deltaljer ang. dette kan man til
enhver tid fĺ hos den fagforhandleren
hvor du har kjřpt apparatet. For ĺ
ha fulle garantirettigheter mĺ man
kunne fremlegge kvitteringen og
garantifristen mĺ ikke vćre utlřpt.
Garantien gjelder ikke nĺr apparatet er
skadet, ikke er brukt etter forskriftene
eller ukvaliserte inngrep er foretatt.
FI - Takuu Laitteella on ostomaassa
voimassa olevat takuuehdot.
Yksityiskohdat näistä ehdoista ilmoittaa
sinulle kauppias, jolta olet laitteen ostanut.
Takuusuorituksia voi vaatia takuuajan
ollessa voimassa esittämällä ostotodistus.
Takuu ei ole voimassa, mikäli laitetta
on käytetty sen ollessa vaurioitunut, sitä
on käytetty väärin tai ammattitaidoton
henkilö on korjannut laitetta.
PL- Gwarancja Dla tego urządzenia
obowiązują warunki gwarancji
wydane w kraju zakupu. W każdej
chwili sprzedawca, u którego
dokonano zakupu urządzenia,
przekaże Państwu odpowiednie
szczegóły. Wykorzystanie świadczeń
gwarancyjnych jest uwarunkowane
przedłożeniem pokwitowania zakupu
i zachowaniem terminu gwarancji.
Prawo do gwarancji przepada, gdy
urządzenie zostanie uszkodzone,
niepoprawnie używane lub dokonane
zostaną niedozwolone manipulacje.
CZ- Záruka Pro tento přístroj jsou
platné záruční podmínky, které
byly vydány v zemi kupujícího.
S podrobnostmi Vás kdykoliv na
požádání seznámí Váš prodejce, u
kterého jste přístroj zakoupili. Uznání
záruky předpokládá předložení
dokladu o koupi a dodržení záruční
lhůty. Nárok na záruku propadá,
je-li přístroj poškozený, neodborně
provozovaný a nebo byly-li na něm
provedené neodborné zásahy.
LV- Garantija Đai ierîcei ir spçkâ
pircçja valstî izdotie garantijas
noteikumi. Par to jűs sîkâku
informâciju saňemsiet veikalâ, kurâ
jűs đo ierîci nopirkât. Garantijas
pieteikđanai jums ir nepiecieđama
pirkđanas kvîts. Bez tam ir svarîgi, lai
garantijas termiňđ nebűtu notecçjis.
Garantija netiek sniegta, ja jűs ierîci
sabojâjât, ekspluatçjât neatbilstođi
lietođanas instrukcijai, veicât patvaďîgi
demontâţu vai mçěinâjât pađi to
remontçt.
SI- Garancija Za to napravo veljajo
garancijski pogoji izdani v državi
nakupa. Na vašo željo vas bo o
podrobnostih kadarkoli obvestil
trgovec, pri katerem ste kupili napravo.
Pogoj za uveljavljanje storitev
določenih v garanciji je predložitev
računa in upoštevanje garancijskega
roka. Pravica do garancije zapade, če
je naprava poškodovana, če naprava
ni bila ustrezno uporabljana ali če so
bili izvedeni nepoobljščeni posegi v
napravo.
SK- Záruka Pre tento prístroj platia
záručné podmienky vydané v krajine
jeho zakúpenia. S podrobnosťami
Vás na požiadanie kedykoľvek
zoznámi predajca, u ktorého ste
prístroj zakúpili. Nárok na záručné
služby predpokladá predloženie
dokladu o kúpe a dodržanie záručnej
lehoty. Nárok na záruku zaniká, ak
bol prístroj poškodený, neodborne
používaný alebo na ňom boli urobené
neoprávnené zásahy.
LT - Garantija Điam prietaisui galioja
pirkimo đalyje iđleistos garantijos
sŕlygos. Jums pasiteiravus bet
kuriuo metu pardavëjas, pas kurá
Jus pirkote prietaisŕ, informuos apie
smulkmenas. Garantijos vykdymo
pasinaudojimo sŕlyga yra kasos
čekio pateikimas ir garantinio termino
iđlaikymas. Garantinis reikalavimas
pasibaigia, jeigu prietaisas sugadintas,
netinkamai buvo naudotas arba buvo
atlikti neleistini ásikiđimai.
EE - Garantii Seadme kohta
kehtivad selle riigi garantiitingimused,
kus seade on ostetud. Seadme
edasimüüja annab Teile pőhjalikku
informatsiooni garantii üksikasjade
kohta. Garantiiteenuste osutamise
aluseks garantiiaja jooksul on
ostudokument. Garantii ei kehti,
kui seade on kahjustunud, seda on
kasutatud ebaotstarbeliselt vői seadet
on demonteeritud.
HU- Garancia A készülékre a
vásárlási országban kiadott
garanciális feltételek érvényesek.
Ennek részleteiről kérésre szívesen
nyújt információt az a kereskedő,
akitől a készüléket vásárolta.
A garanciális teljesítés igénybe
vételének előfeltétele a vásárlási
bizonylat bemutatása és a garanciális
határidő betartása. A garanciális
igény nem érvényes, ha a készülék
sérült, nem szakszerűen használták
vagy illetéktelen beavatkozásokat
végeztek rajta.
HR- Jamstvo Uvjeti jamstva koji važe
u državi kupnje važe i za ovaj uredaj.
Podaci se mogu dobiti u svako doba
od dobavljaca od kojega ste kupili
proizvod. Za zahtjeve po osnovi
jamstva morate priložiti racun koji
ste dobili pri kupnji, a zahtjev treba
podnijeti u toku trajanja jamstvenog
perioda. Pravo iz jamstva istice
u slucaju da je uredaj oštecen,
korišten na neodgovarajuci nacin ili
su na njemu provedene neovlaštene
popravke.
GR- Εγ γύηση Για την παρύσα
συσκευή ισύυν ι καννισµί
εγγύησης τυ ισύυν στην ώρα
πυ αγράστηκε. Λεπτµέρειες
θα σας παρέει έµπρς απ
τν πί πρµηθευτήκατε την
συσκευή πιαδήπτε στιγµή
τυ τ ητήσετε. Απαραίτητες
πρϋπθέσεις για την διεκδίκηση
παρών πυ περιλαµάννται
στην εγγύηση είναι η απδειη
αγράς και η τήρηση της
πρθεσµίας εγγύησης. Η εγγύηση
εκπίπτει εφσν η συσκευή υπέστη
λάη, δεν ρησιµπιήθηκε ρθά
ή έλααν ώρα επεµάσεις σε
αυτή απ µη ευσιδτηµέν
πρσωπικ.
BG- Гаранция За настоящия уред
важат гаранционните условия,
валидни за страната, в която е
купен. С подробностите ще Ви
запознае продавачът, от който
сте купили уреда и към който
Вие можете да се обърнете по
всяко време. За да се предоставят
гаранционни услуги, е необходимо
да се представи документът за
закупуване и да не е изтекъл
гаранционният срок. Гаранцията
се губи, ако уредът е повреден,
неправилно използуван или с
недопустими изменения.
RU- Гарантия В отношении этого
прибора действительны условия
гарантии, предоставленные в стране
приобретения. Более подробную
информацию по вашему запросу в
любое время предоставит магазин,
в котором вы приобрели прибор.
Для гарантийного обслуживания
необходимо в течение гарантийного
срока предъявить квитанцию о
покупке. Гарантия утрачивает
силу, если прибор был поврежден,
использовался ненадлежащим
образом или был подвергнут
недозволенным вмешательствам.
KZ Кепілдік Мынау аспапқа
сатып алған мемлекетте шыққан
гарантиялы шарттар жарамды.
Аспапты сатып алған сатушыны
сұратсаңыз, әрдайым нақтықтарды
айтып береді. Гарантиялы
міндеттемені пайдалану үшін
сатып алған кассалық чекі болуы
және гарантиялы мерзімін еткізіп
алмауы керек. Аспап сынық, дұрыс
пайдаланбаған немесе арнаулы
емес талдаулар еткізілген болса
гарантия правосы жарамсыз.
Page 36

1. Garantiekarte
2. Garantiezeitraum 3. Modell(e)
2
5. Stempel & Unterschrift des
6. Fehler/Defekt
Einzelhändlers
7. Kontakt-Tel.-Nr. & - Anschrift
DE
Glen Dimplex Deutschland Gmbh
ewt-Kundendienst
+49 (0) 9 11/6 57 19-719
Fax. +49 (0) 1805 / 355 467
E-Mail: service@glendimplex.de
www.ewt-eio.de
CH
BLUEPOINT Service Sagl,
Via Cantonale 14,
C.P. 46,
CH - 6917 Barbengo
+(41) 091 980 49 72
Fax: +(41) 091 605 37 55
E-Mail: info@bluepoint-service.ch
www.bluepoint-service.ch
FR / ES / PT
Glen Dimplex France
ZI Petite Montagne Sud
12 rue des Cévennes
91017 EVRY - LISSES
direction@glendimplex.fr
01-69111191
LT
AT
Firma Schurz
Merangasse 17
A-8010 Graz
+43 (316) 32 30 41
Fax: +43 (316) 38 29 63
E-mail: ofce@schurz.biz
UAB “Senuku prekybos centras”
Pramones pr. 6,
LT-51500,
Kaunas.
8~800 111 19
8~37 21 21 46
4. Kaufdatum
NL
Glen Dimplex Benelux B.V. – Netherlands
Saturnus 8
8448 CC Heerenveen
Nederland
E-mail: info@glendimplex.nl
www.glendimplex.nl
BE
Glen Dimplex Benelux B.V. – Belgium
Burg. Maenhautstraat 64
9820 Merelbeke
België / Belgique
E-mail: info@glendimplex.be
www.glendimplex.be
DE
1. Garantiekarte
2. Garantiezeitraum
3. Modell(e)
4. Kaufdatum
5. Stempel & Unterschrift
des Einzelhändlers
6. Fehler/Defekt
7. Kontakt-Tel.-Nr. & - Anschrift
(in Jahre)
UK
1. Warranty Card
2. Guarantee Period (in Years)
3. Model(s)
4. Date of Purchase
5. Stamp & Signature of retailer
6. Fault/Defect
7. Contact Number & Address
FR
1. Bon de garantie
2. Période de garantie (en années)
3. Modèle(s)
4. Date d’achat
5. Cachet et signature du vendeur
6. Anomalie/Défaut
7. Nom et adresse du contact
IT
1. Scheda di garanzia
2. Periodo di garanzia (in anni)
3. Modello(i)
4. Data di acquisto
5. Timbro e rma del rivenditore
6. Guasto/difetto
7. Indirizzo e numero di contatto
ES
1. Tarjeta de garantía
2. Período de garantía (en años)
3. Modelo(s)
4. Fecha de adquisición
5. Sello y rma del distribuidor
6. Avería/Defecto
7. Número y dirección de contacto
PT
1. Cartão de Garantia
2. Período de Garantia (em anos)
3. Modelo(s)
4. Data de Compra
5. Carimbo e Assinatura do
retalhista
6. Falha/Defeito
7. Número de Contacto e Morada
NL
1. Garantiebewijs
2. Garantieperiode (in jaren)
3. Model(len)
4. Aankoopdatum
5. Stempel & handtekening
winkelier
6. Storingen & gebreken
7. Telefoonnummer & adres
DK
1. Garantikort
2. Garantiperiode (i år)
3. Model(ler)
4. Købsdato
5. Detailhandlers stempel &
underskrift
6. Fejl/defekt
7. Kontaktnummer & -adresse
SE
1. Garantikort
2. Garantitid (i år)
3. Modell(er)
4. Inköpsdag
5. Återförsäljarens stämpel och
underskrift
6. Fel
7. Telefonnummer och adress för
kontakt
NO
1. Garantikort
2. Garantiperiode (i år)
3. Modell(er)
4. Kjøpsdato
5. Selgers stempel og signatur
6. Feil/defekt
7. Kontaktnummer og adresse
FI
1. Takuukortti
2. Takuuaika (vuosina)
3. Malli(t)
4. Ostopäivämäärä
5. Myyntiliikkeen leima ja
allekirjoitus
6. Vika/vaurio
7. Yhteysnumero ja osoite
PL
1. Karta gwarancyjna
2. Okres gwarancji (w latach)
3. Model(e)
4. Data zakupu
5. Pieczec i podpis sprzedawcy
6. Usterka
7. Telefon i adres kontaktowy
CZ
1. Záruční list
2. Záruční doba (roky)
3. Model(y)
4. Datum zakoupení
5. Razítko a podpis prodejce
6. Porucha/chyba
7. Kontaktní číslo a adresa
LV
1. Garantijas talons
2. Garantijas periods (gadi)
3. Modelis(li)
4. Legades datums
5. Mazumtirgotaja zimogs un
paraksts
6. Bojajums/defekts
7. Kontakttalrunis un adrese
SI
1. Garancijski list
2. Obdobje veljavnosti
garancije (v letih)
3. Model(i)
4. Datum nakupa
5. Žig in podpis prodajalca
6. Pomanjkljivost/okvara
7. Kontaktna številka in naslov
SK
1. Zárucný list
2. Zárucné obdobie (v rokoch)
3. Model(y)
4. Dátum kúpy
5. Pecat & Podpis obchodníka
6. Porucha/závada
7. Kontaktujte císlo & adresu
LT
1. Garantijos kortele
2. Garantijos laikotarpis (metais)
3. Modelis (modeliai)
4. Pirkimo data
5. Prekybininko antspaudas ir
parašas
6. Gedimas / defektas
7. Numeris ir adresas kontaktams
EE
1. Garantiikaart
2. Garantiiaeg (aastates)
3. Mudel(id)
4. Ostukuupäev
5. Kaupluse tempel & allkiri
6. Viga/defekt
7. Kontaktnumber & aadress
HU
1. Garancialevél
2. Garancia idotartama (években)
3. Modell(ek)
4. Vásárlás idopontja
5. Eladó bélyegzoje és aláírása
6. Hiba/Hiány megnevezése
7. Értesítési telefonszám és cím
HR
1. Jamstvena kartica
2. Jamstveni period (u godinama)
3. Model(i)
4. Datum kupnje
5. Pecat i potpis dobavljaca
6. Kvar/defekt
7. Broj i adresa za kontakt
GR
1. Κάρτα εγγύησης
2. Περίδς ισύς της
εγγύησης (έτη)
3. Μντέλ(α)
4. Ηµερµηνία αγράς
5. Σφραγίδα και υπγραφή
εµπρυ
6. Σφάλµα/Ελάττωµα
7. Αριθµς τηλεφώνυ και
διεύθυνση
επικινωνίας
BG
1. Гаранционна карта
2. Гаранционен период
(вгодини)
3. Модел(и)
4. Дата на покупка
5. Печат и подпис на
търговеца
6. Неизправност/Дефект
7. Адрес и телефон за
контакт
RU
1. Гарантийная карта
2. Срок действия гарантии
(вгодах)
3. Модель (модели)
4. Дата покупки
5. Штамп и подпись
озничного продавца
6. Неисправность/дефект
7. Номер контактного
телефона и адрес
KZ
1. Кепілдік картасы
2. Кепілдік мерзімі
3. Үлгі(лер)
4. Сатылған күні
5. Сатушының мөрі мен
қолтаңбасы
6. Кемістік/Ақаулық
7. Байланыс телефоны және
мекен-жайы
 Loading...