

Page 1
How to use Dimplex
heater
Page 2

Quantum quick start guide
This guide is for quick reference only. Please refer to the
operating instructions for further information.
The Basics
• The outer case of the Quantum heater will be cooler
to the touch than a conventional storage heater,
because less heat is ‘lost’ through the case. This makes
more heat available from the fan outlet when needed.
• Please do not put anything less than
30cm (1) in front of the heater.
This helps prevent anything coming
into contact with the grille and the
heated air that leaves it. Blocking
this area is a re hazard.
• You do not need to decide how much heat to store.
All you need to do is set the timer mode and the
temperature you would like the heater to run at. The
heater does the rest.
• To start using the heater, make sure that both supply
switches on the wall next to the heater are on. You can
switch them o in summer when you don’t need heat
and turn them back on again in autumn when it gets
colder.
Page 3

How does the heater control work?
The heater control lets you choose when your heating comes
on and goes o. It also lets you choose the temperature it
will reach when it is on. The heater control switches o or on a
low speed fan. The fan pushes the stored heat into the room.
When the heating is on, the heater’s status is
called Comfort On. This status is shown at the
bottom of the display screen. Image When
the heating is not on, the heater’s status is
called Comfort O.
When the heating is in Comfort On, the heater’s fan will run.
When the heating is in Comfort O, the heater’s fan will not
run.
Be patient. There is a delay of up to a minute on the fan’s
operation when switching from Comfort On to Comfort O.
This is normal.
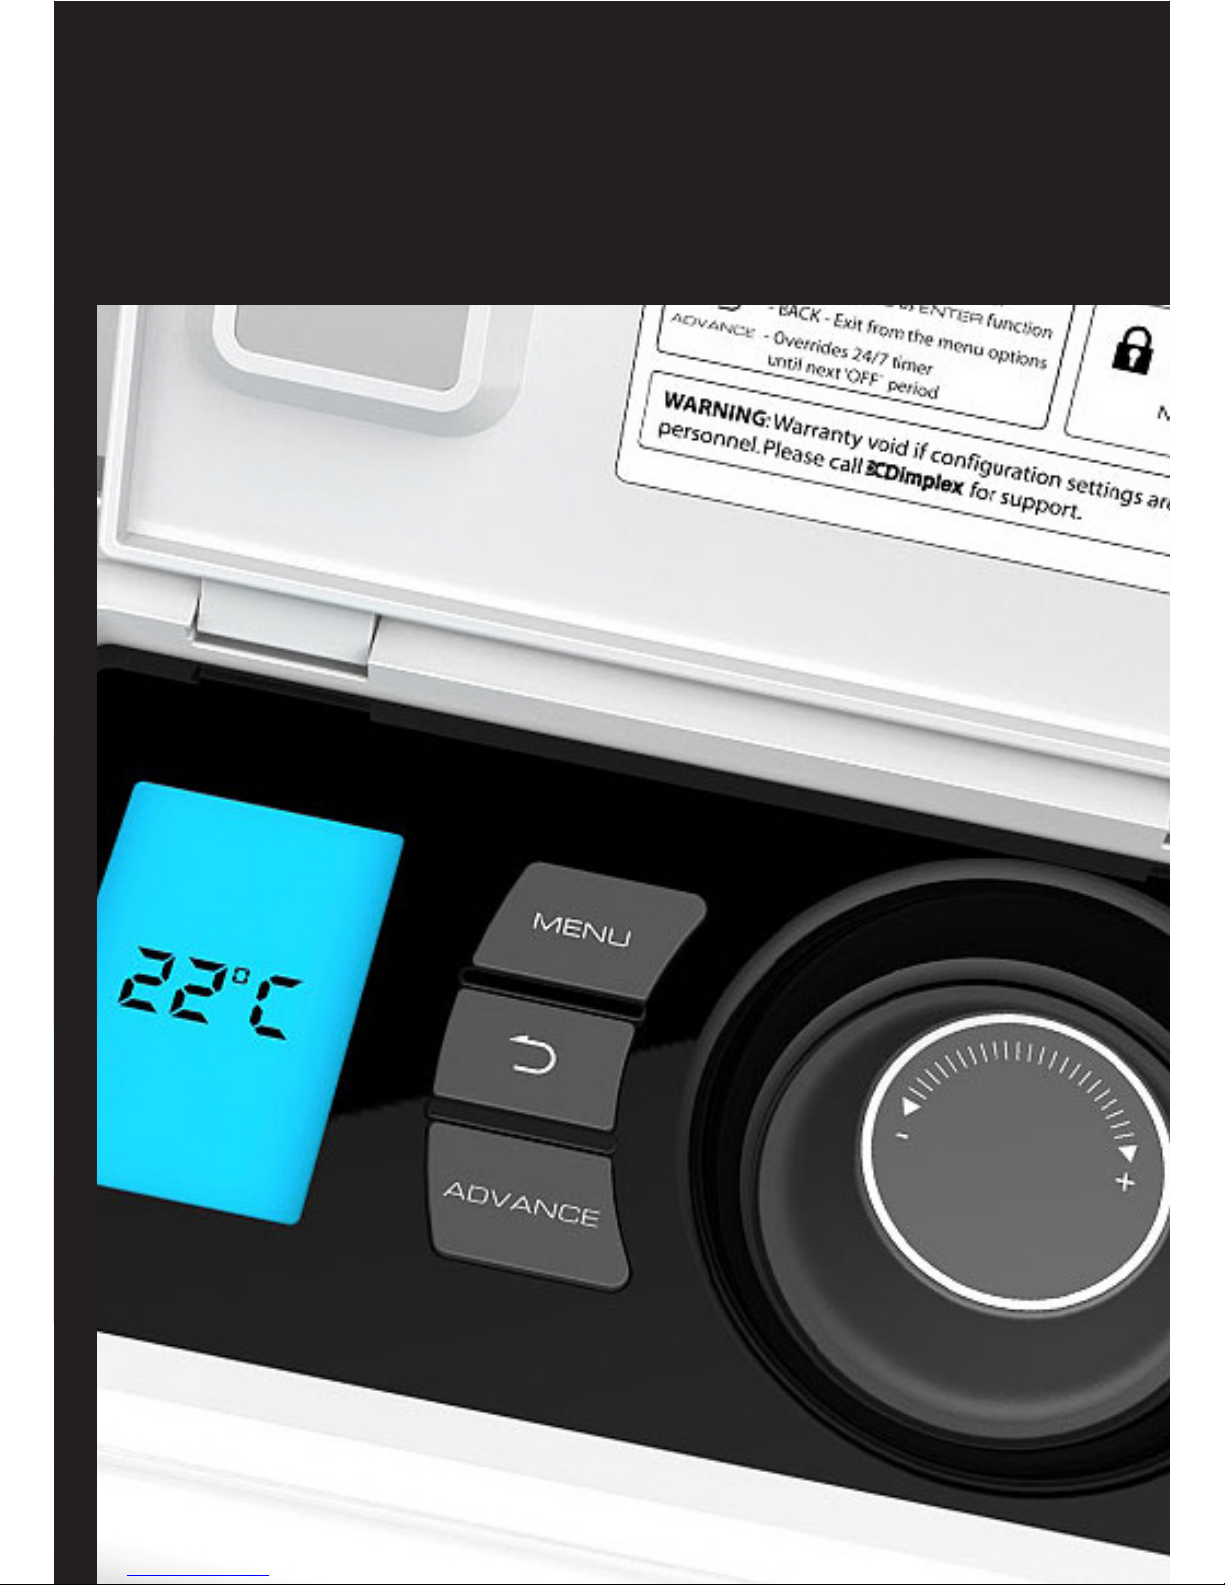
Comfort ON
Display screen
Current mode Control dialCurrent temperature
Buttons
Comfort off
Page 4

How to set the time
The time and date on the heater are set in the factory.
The time is automatically adjusted when the clocks go
back for GMT and forwards for BST each year, so there is no
need to change them.
If you need to change them, press the Menu button then
turn the dial. When Time/Date is highlighted on the screen,
press the dial. You must then turn it until the correct value is
shown and then press the dial to conrm the value. Repeat
these steps for all values until they are correct, then press
the Back button.
How to set the temperature
The temperature shown on the screen is the temperature
that the heater will reach and then maintain when it is in
‘Comfort On’. If the room temperature is greater than the
temperature shown on the display, the heater’s fan will not
operate.
The heater’s default temperature is set in the factory
at 21°C. This represents a typical, comfortable room
temperature.
If you would like to change the room temperature, simply
turn the dial clockwise or anti-clockwise until the display
shows the desired temperature you would like.
Page 5

Which timer mode is best for me?
There are three dierent timer modes on your heater.
Out All Day mode: Your heater will be set to this mode
when it is tted. If you are not at home during the day and
you only need heat in the mornings and evenings, you do
not need to change this setting.
Home All Day mode: If you need heat all day because
you are at home all day, use this mode. It gives you four
periods of heating split throughout the day.
Holiday mode: Use this when you are away from home.
This mode reduces the amount of heat used while you
are away, but your heater will go back to the mode you
previously had it set to on the day you get back.
How to select a Timer Mode: Press the Menu button then
turn the dial until Timer Mode is highlighted on the screen.
Select the timer mode you would like by pressing and
turning the dial until it reaches the mode you want. When
the mode you want is highlighted, press the dial.
When you press the dial to select the Out All Day and
Home All Day modes, you are given three dierent options.
Select – lets you choose the timer mode that is highlighted
Preview – lets you look at the times that the timer mode is
currently set at
Modify – lets you change the time that the timer mode you
have selected is set at
Page 6

Turn the dial to select the option you would like, then press
the dial when your desired option is highlighted.
Please refer to the operating instructions for information on
how to change programmed times.
Page 7

How to set the timer mode
Your Quantum heater comes with three pre-programmed
timer modes.
Each mode has dierent times when the Comfort On mode
will be on.
Name of timer mode Description
Out All Day 7.5 hours heating a
day, split between early
morning and evening
Home All Day 11 hours heating per day,
split into four periods
Holiday Allows you to set the
number of days you are
on holiday and to set the
temperature
Page 8

Advance
You may sometimes need to temporarily change your
heating requirements.
For example, you might be at home when you had not
planned to be, or you might need to be away from home
when you had originally wanted to have your heating on.
Using the Advance function: This function allows you to
begin the next Comfort On mode early.
If you want heat when the heater is in Comfort O mode:
Press the Advance button.
If you don’t want heat when the heater is in Comfort On
mode: Press the Advance button and the heater will go o
until the beginning of the next Comfort On period.
Page 9

Boost
PLEASE NOTE: The Boost mode uses peak-rate electricity,
which will increase running costs. Where possible, please
use the Advance mode (described earlier).
If you need extra heat, for example during unusually cold
weather, the Boost mode can be used. It is controlled by the
electronic thermostat.
How to select the Boost mode: Press the Menu button,
then turn the dial until Boost is highlighted and push the dial.
Then turn the dial again
and highlight the amount
of time you’d like Boost
to run for. Press the dial
again to conrm.
Selecting the Auto Boost
option on this screen
automatically uses the
Boost mode to keep the
same temperature during
Comfort On periods.
Page 10

Child lock
To lock the heater’s controls and prevent them from being
changed, use the Child Lock mode.
To activate Child Lock: Press and hold the dial and the
Back button at the same time for three seconds. Child Lock
will then appear on the display screen.
To deactivate Child Lock: Press and hold the dial and the
Back button at the same time for three seconds.
Page 11

Got a problem with your heater?
Contact: Customer Access Team
0300 123 1966
Page 12

 Loading...