

Page 1
7208940100rev00
7208940100rev02
Page 2
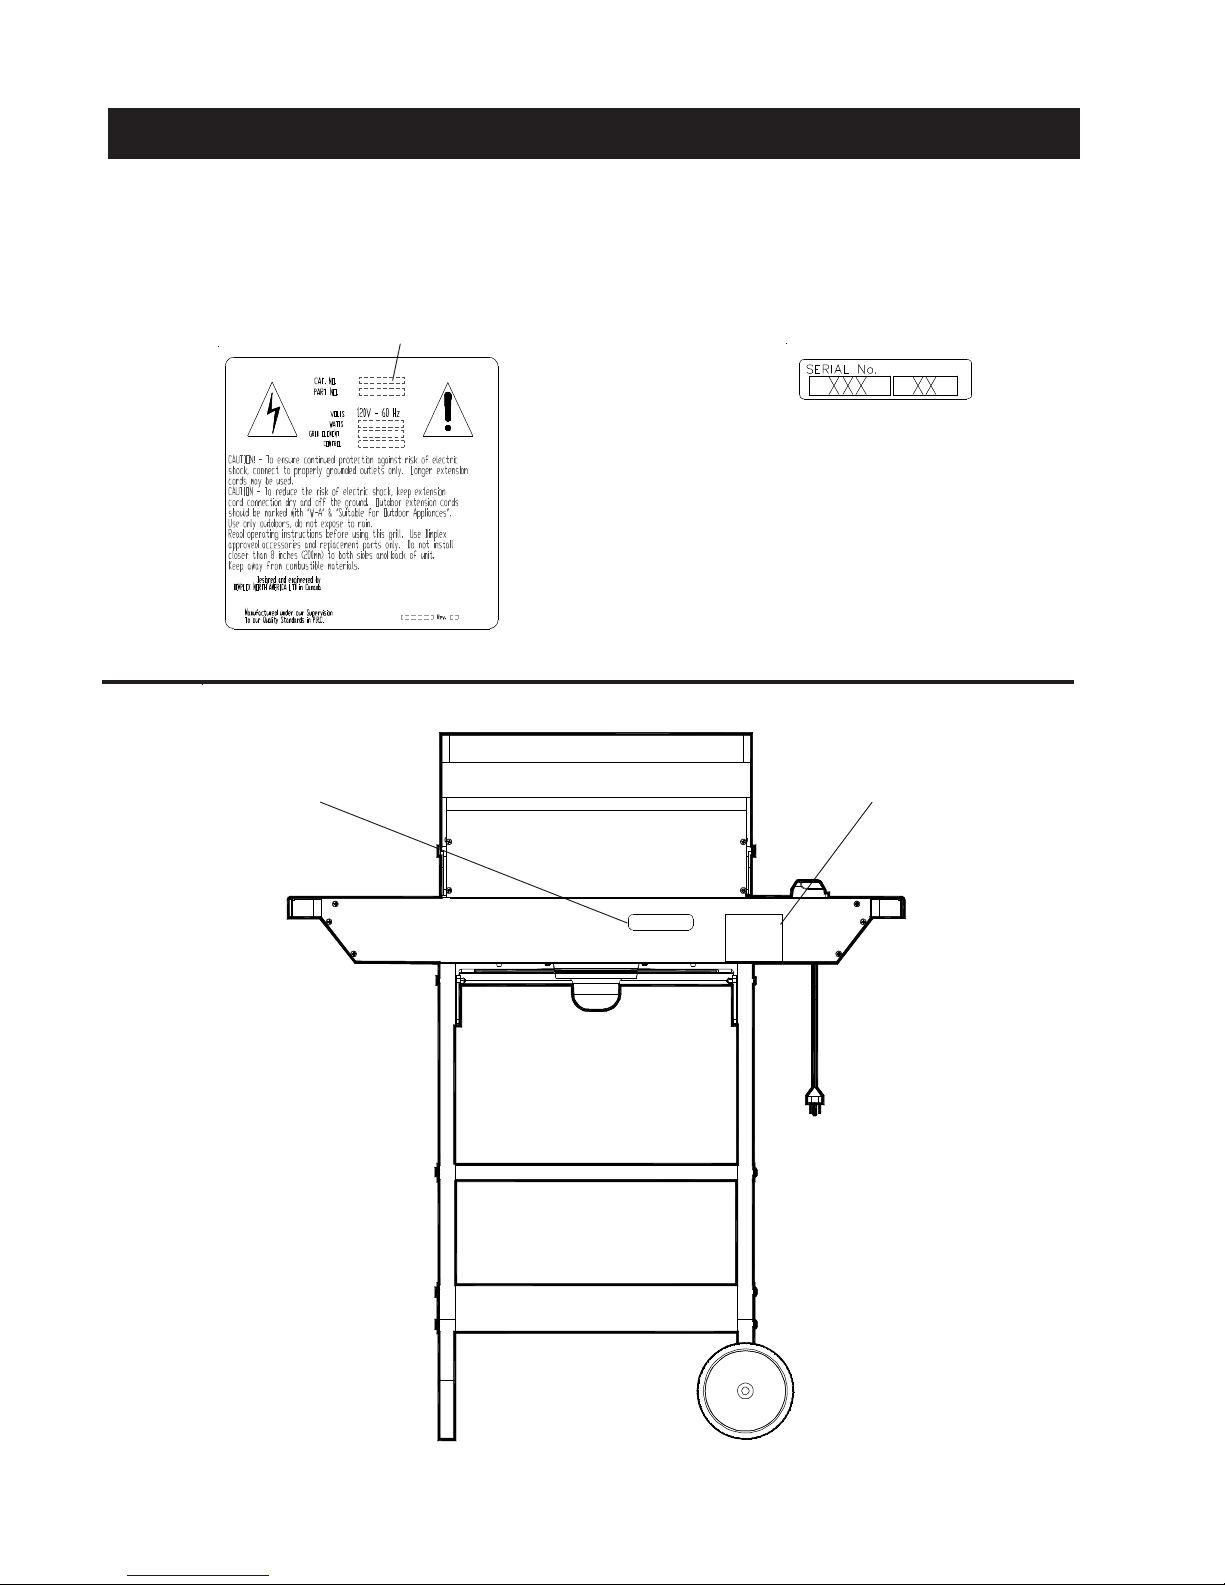
EBQ™ MODEL AND SERIAL NUMBER INFORMATION
If you have any questions regarding our products please have the product model and serial
numbers available upon calling Dimplex customer service at 1-888-DIMPLEX (1-888-346-
7539). To locate the model and serial number labels see below. Record the model
number, serial number, on the front cover of this manual for future reference.
Model Number
Serial Number
Serial Number
Model Number
Back of the unit
1
Page 3
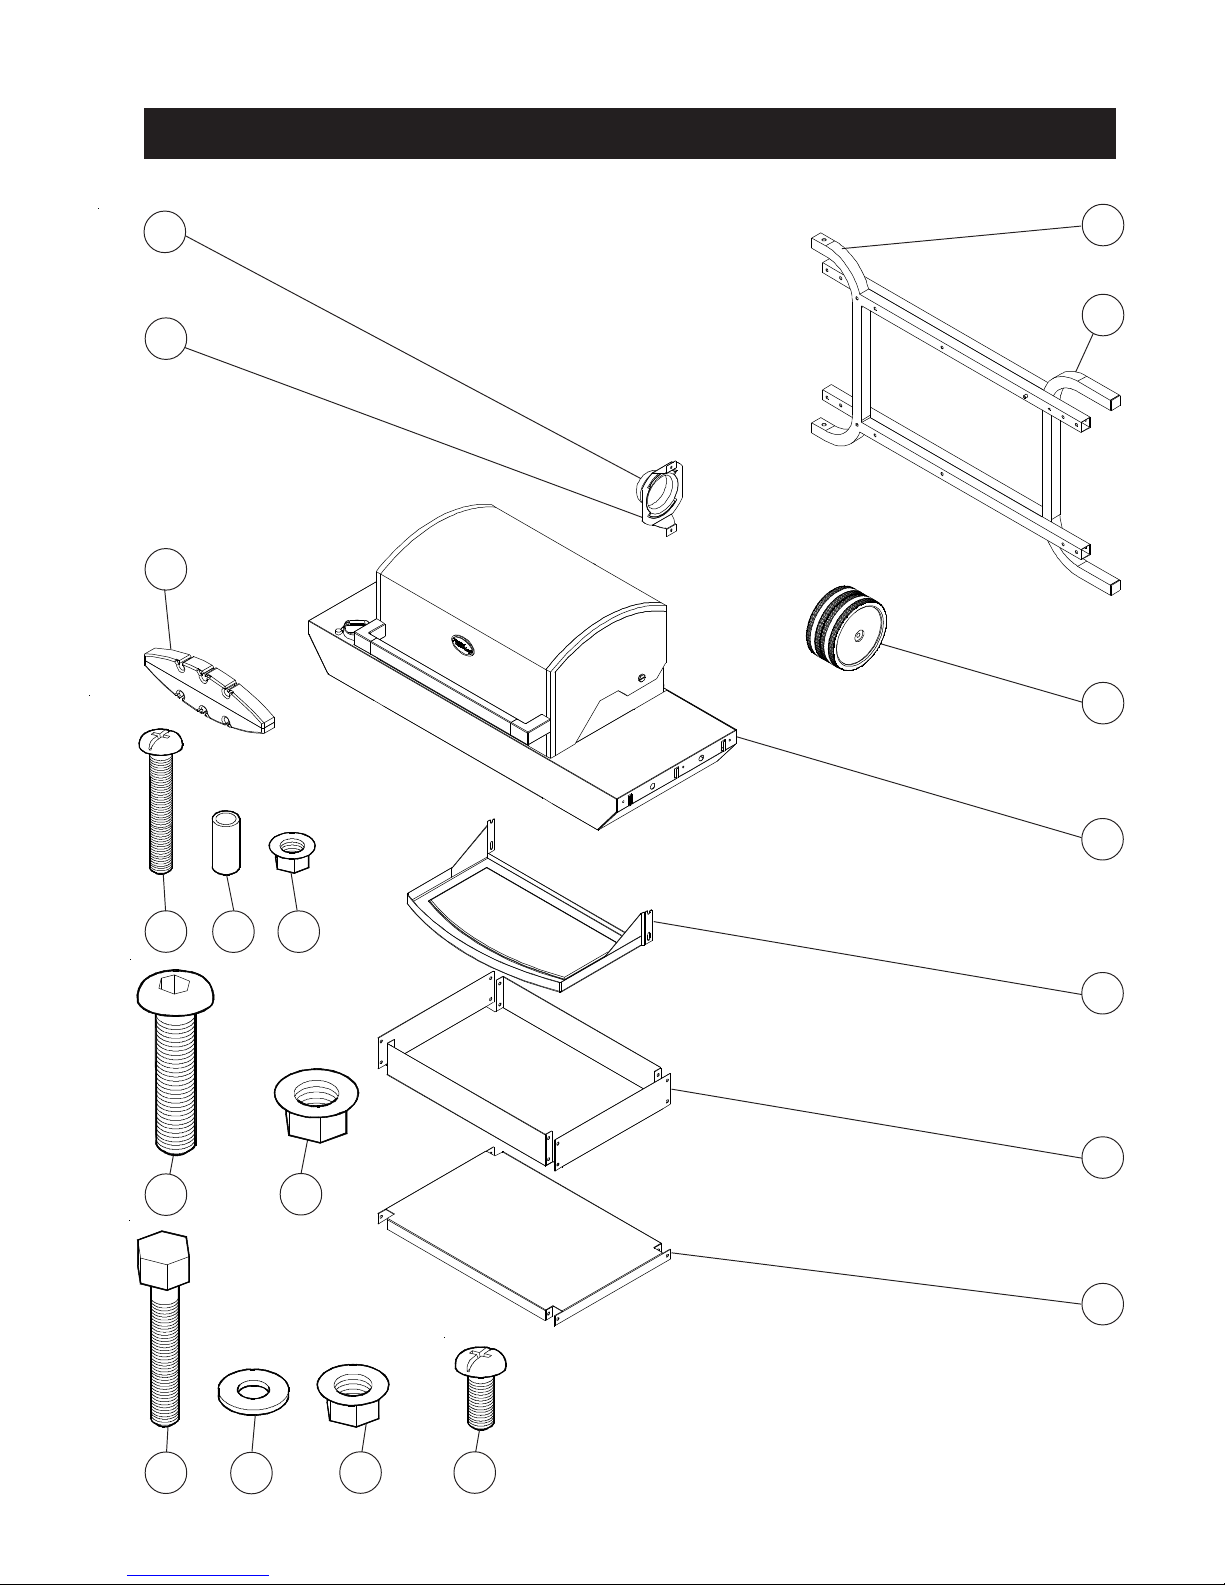
EBQ™ ELECTRIC GRILL PACKAGE CONTENTS
H
I
J
G
F
E
Q R
S
O P
A
B
C
D
L
M
N
K
2
Page 4

EBQ™ ELECTRIC GRILL PACKAGE CONTENTS
Item Number Description Quantity
A
Grill Assembly 1
B
Front Tray 1
C
Lower Shelf 1
D
Upper Shelf 1
E
Wheels 2
F
Long Leg Assembly 1
G
Short Leg Assembly 1
H
Grease Cup 1
I
Grease Cup Bracket 1
J
Tool Holder 2
K
Bolt, M4 x 12 Long 4
L
Bolt, M8 x 80 Long 2
M
Washer, 3/8" 2
N
Nut, M8 2
O
Bolt, M6 X 34 Long 20
P
Nut, M6 20
Q
Bolt, M4 x 40 Long 2
R
Spacer 2
S
Nut, M4 2
Two people are required for some assembly of the EBQ™ Electric Grill.
Care should be taken when handling all parts during assembly to pre-
vent damage.
Tools Required for Assembly
Metric Wrench (included)
L-hex Wrench (included)
Small Phillips Screw Driver (#1)
Adjustable Wrench
3
Page 5

Step 1
EBQ™ ELECTRIC GRILL ASSEMBLY
Short Leg Assembly
Item G on Grill Package
Contents Page
Wheel Assembly
Install the wheels onto the
short leg assembly using 1 of
item L, M and N for each
wheel.
Tighten all fasteners using
the supplied metric wrench
and an adjustable wrench.
Wheel
Item E on Grill Package
Contents Page
MN
L
2 of L
2 of M
2 of N
4
Page 6

Step 2
P
Long Leg
Assembly
Item F on Grill Package
Contents Page
EBQ™ ELECTRIC GRILL ASSEMBLY
Lower Shelf
Item C on Grill Package
Contents Page
Short Leg
Assembly
Item G on Grill Package
Contents Page
O
Lower Shelf Assembly
Install the lower shelf onto the short
and long leg assembly using 8 of
item O and P.
Tighten all fasteners using an
adjustable wrench and a L-hex
Wrench.
8 of O
8 of P
5
Page 7

Step 3
P
Long Leg
Assembly
Item F on Grill Package
Contents Page
EBQ™ ELECTRIC GRILL ASSEMBLY
Upper Shelf
Item D on Grill Package
Contents Page
Short Leg
Assembly
Item G on Grill Package
Contents Page
O
Upper Shelf Assembly
Install the upper shelf onto the
short and long leg assembly
using 4 of item O and P.
Tighten all fasteners using an
adjustable wrench and a L-hex
Wrench
4 of O
4 of P
6
Page 8

Step 4
R
Q
EBQ™ ELECTRIC GRILL ASSEMBLY
P
Front T ray Assembly
Install the front tray assembly
onto the leg assemblies
using 2 of item P, Q and R.
Tighten all fasteners using a
small Phillips screw driver
(#1) and an adjustable
wrench.
Front T ray
Assembly
Item B on Grill Package
Contents Page
2 of P
2 of R
2 of Q
7
Page 9

Step 5
Grill Assembly
Item A on Grill Package
Contents Page
P
EBQ™ ELECTRIC GRILL ASSEMBLY
O
Grill Assembly
Two people are required for
this portion of assembly.
Lower the grill assembly onto the
base and secure using 8 of item
O and P
Tighten all fasteners using an
adjustable wrench and a L-hex
Wrench
8 of O
8 of P
8
Page 10

EBQ™ ELECTRIC GRILL ASSEMBLY
Step 6
Tool Holder
Item J on Grill Package
Contents Page
J
Tabs
S
Slots
J
S
K
K
Tool Holder Assembly
Align the tabs on the electric grill
with the slots in the tool holders
and slide until secure. Install 1
of item T and S into the center
location of each tool holder using
a small Phillips screw driver (#1)
2 of K
2 of S
9
Page 11

Step 7
EBQ™ ELECTRIC GRILL ASSEMBLY
Grease Cup Bracket
Item I on Grill Package
Contents Page
2 X K
K
Grease Cup
Item H on Grill Package
Contents Page
Grease Cup Assembly
Fasten the grease cup bracket to the
grill assembly using 2 of item K.
Install the grease cup aligning the
slots on the bracket with the tabs on
the grease cup. Twist left or right to
secure.
Tighten all fasteners using a small
Phillips screw driver (#1).
10
 Loading...