

Page 1
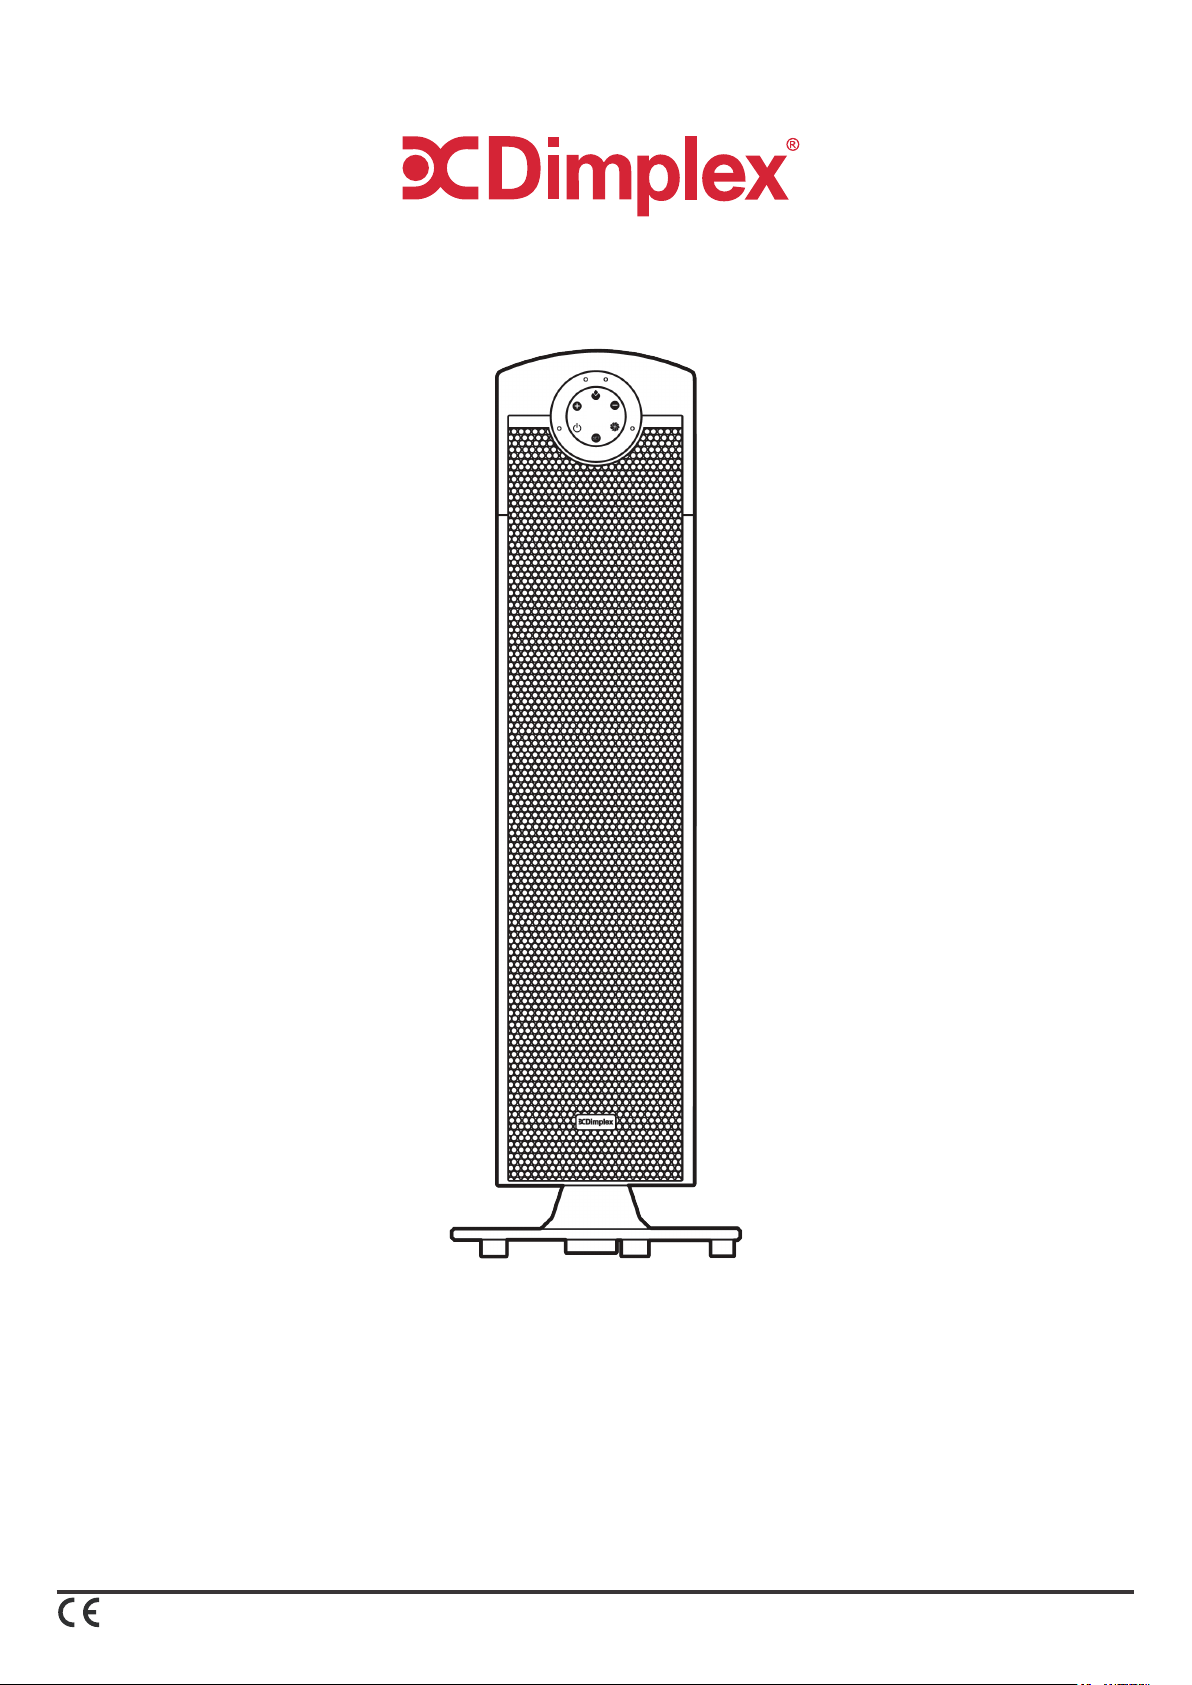
2.5 kW Ceramic Tower Heater
DXSTG25
As with all portable heating appliances: This product is suitable only for well insulated spaces or occasional use.
08/51280/0 Issue 6
The product complies with all the required European product safety, Electromagnetic compatibility and environmental standards. It is fully compliant with the
LVD, EMC, RoHS and Eco design directives.
Page 2

Installation and Operating Instructions
IMPORTANT: THESE INSTRUCTIONS SHOULD BE READ CAREFULLY BEFORE USE AND RETAINED FOR FUTURE REFERENCE
IMPORTANT SAFETY ADVICE
DO NOT use the heater in the immediate
surroundings of a bath, a shower or a swimming
pool.
DO NOT COVER or obstruct the air inlet and
outlet openings in any way.
This heater carries the warning symbol
indicating that it must not be covered.
DO NOT operate the heater with the mains lead
overhanging the front outlet grille.
WARNING: In order to avoid overheating do not
cover the heater.
IMPORTANT: If the mains lead of this appliance
is damaged, it must be replaced by a qualied
person in order to avoid a hazard.
WARNING: In order to avoid a hazard due to
inadvertent resetting of the thermal cut-out,
this appliance must not be supplied through an
external switching device, such as a timer, or
connected to a circuit that is regularly switched
on and off by the utility.
This appliance can be used by children aged
from 8 years and above and persons with
reduced physical, sensory or mental capabilities
or lack of experience or knowledge if they have
been given supervision or instruction concerning
the use of the appliance in a safe way and
understand the hazards involved. Children shall
not play with the appliance. Cleaning and user
maintenance shall not be made by children
without supervision. Children of less than 3
years should be kept away unless continuously
supervised.
Children aged from 3 years and less than 8 years
shall only switch on/off the appliance provided
that it has been placed or installed in its intended
normal operating position and they have been
given supervision or instruction concerning
the use of the appliance in a safe way and
understand the hazards involved. Children aged
from 3 years and less than 8 years shall not plug
in, regulate and clean the appliance or perform
user maintenance.
CAUTION: Some parts of this product can
become very hot and cause burns. Particular
attention has to be given where children and
vulnerable people are present.
DO NOT place the heater directly below a xed
socket outlet.
The socket-outlet must be accessible at all times
to enable the mains plug to be disconnected as
quickly as possible.
WARNING: Do not use this appliance connected
through an extension lead or any external
switching device such as a plug in timer or remote
control plug in adaptor. All heating appliances
draw high current through the mains supply and
any weakness in the design, connections or
components in these devices can easily result in
overheating of the connection points resulting in
melting, distortion and even the risk of re.
CHOKING HAZARD: The remote control for this
unit contains a small battery. Keep the remote
away from children and do not swallow the
battery. If the battery is swallowed seek medical
advice at once.
WARNING: To avoid danger of suffocation please
remove all packaging materials particularly plastic
and EPS and keep these away from vulnerable
people, children and babies.
WARNING: To avoid the risk of accidental
strangulation from the supply cord all children
and vulnerable people must be supervised when
in the vicinity of the product whether it is working
or not.
This instruction leaet belongs to the appliance
and must be kept in a safe place. If changing
owners, the leaet must be surrendered to the
new owner.
Keep combustible materials such as drapes and
other furnishings clear from the front, sides and
rear of the heater.
DO NOT use this heater if it has been dropped.
DO NOT use if there are visible signs of damage
to the heater.
IMPORTANT: Use this heater on a horizontal
and stable surface.
WARNING: Do not use this heater in small rooms
when they are occupied by persons not capable
of leaving the room on their own, unless constant
supervision is provided.
WARNING: To reduce the risk of re, keep
textiles, curtains or any other ammable material
a minimum distance of 1m from the air outlet.
Page 3
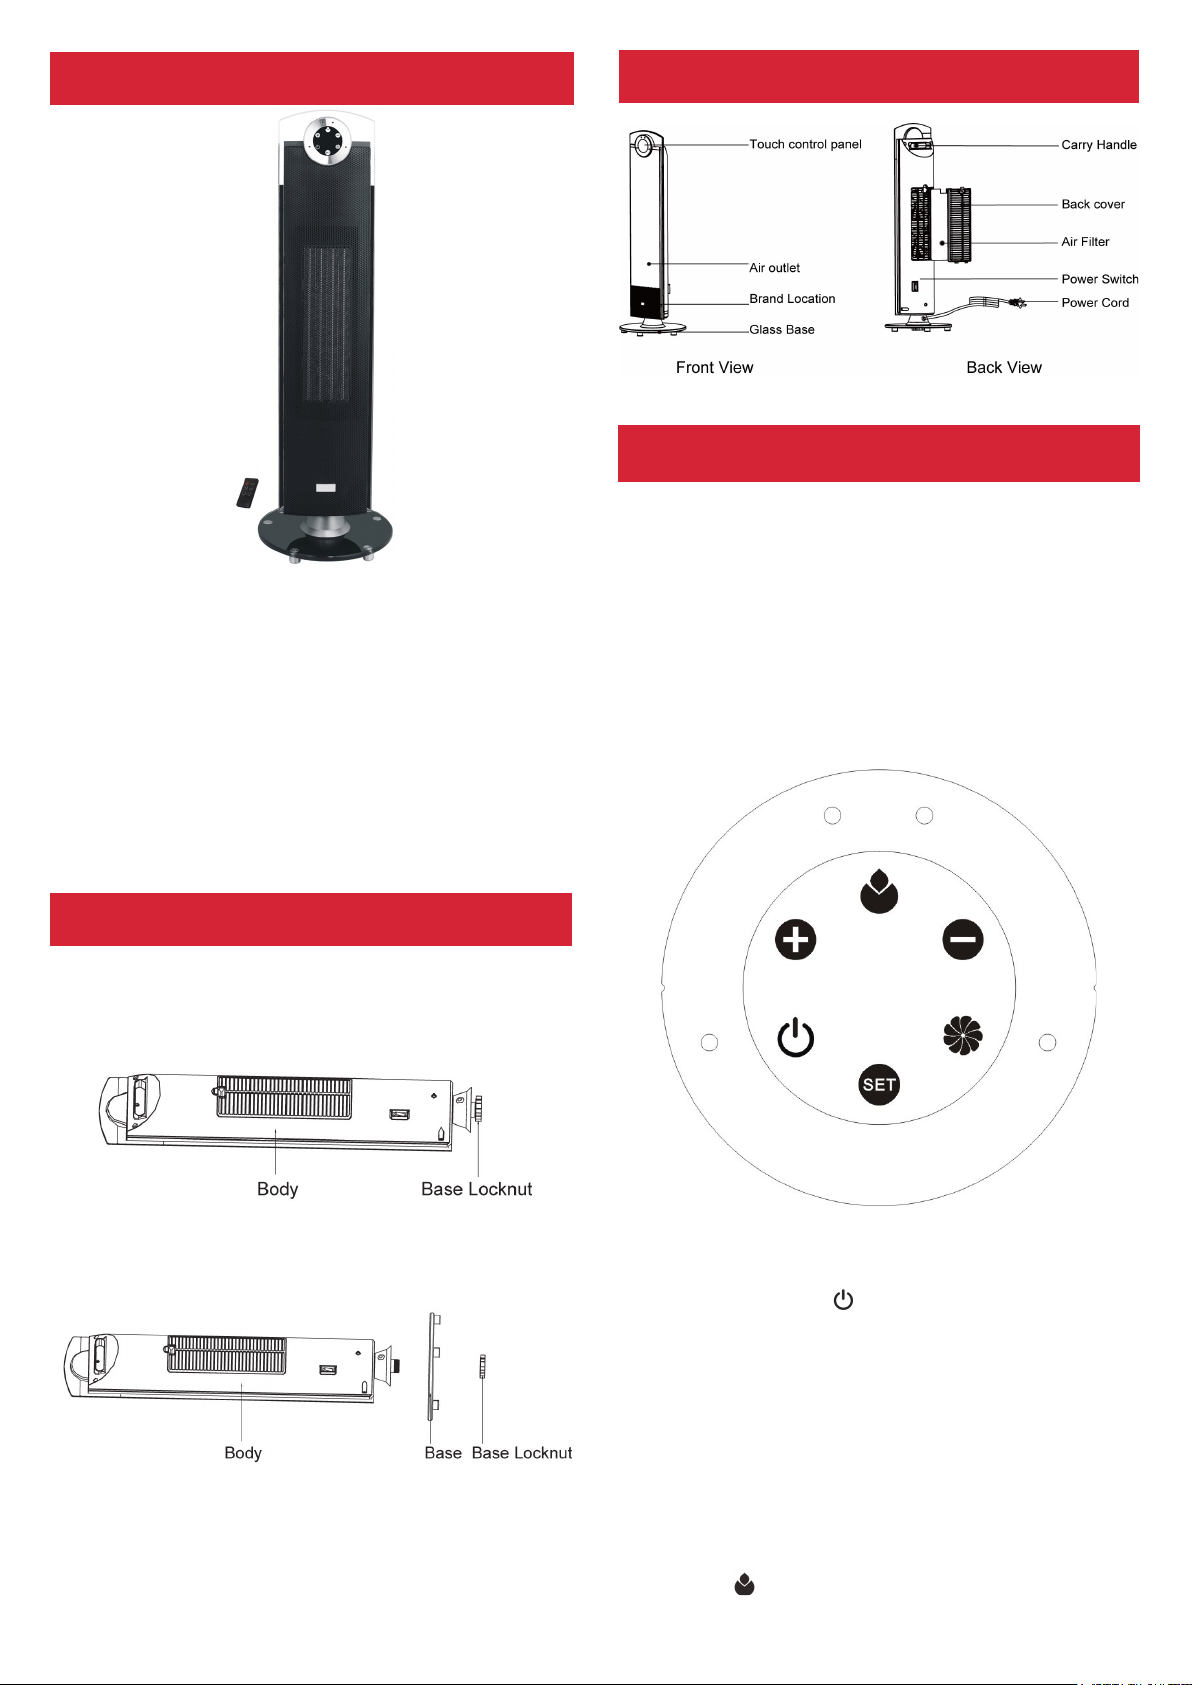
Product Features
Parts Description
2 heat power selections
Touch control panel
Remote control
Timer (1-12 hours)
Oscillation function (76°)
LED function indicators
Overheat protection
Tip-over protection
Removable air lter for easy cleaning
Temperature setting from 15°C to 35°C
Fig. 1
Assembly Instruction
Open the packing, remove the unit and unscrew
to open the base locknut.
Fig. 4
Operating Instruction
Plug in the appliance to a power source matching
that on the units rating label.
Power switch
The power switch is located below the removable
air lter at the rear of the unit (See Fig. 4)
Press the power switch to “I” position. You should
hear a beep sound; the heater is now ready for
use. Pressing the switch to “0” position turns off
the heater.
Fit the glass base onto the bottom of the unit and
securely screw on the base locknut.
Fig. 3
The unit is now assembled and should be placed
upright; always ensure it is placed on a at stable
surface for use.
Fig. 2
Fig. 5
STANDBY
Press the standby “ ” key, the power indicator
light will turn ON. The heater begins operation at
low heat power
(LED indicator on the heating function shows
“LOW”).
Press this key again and all functions will stop.
The LED indicator turns off and the unit is back
HEAT
When the unit is operated at low heating power,
press the “ ” key, the high heating power will be
Page 4

turned on, and the LED indicator will show “HIGH”.
Pressing this key allows for the selection of either
low heat or high heat power options.
OSC (Oscillation)
When the unit is operating, press the “ ” key,
the heater body will begin turning left and right
automatically up to 76°. The LED indicator of this
oscillation function will be turned on.
Press this key again, the oscillation function will
stop and the LED light will turn off.
MODE
When the unit is in operation, press the “ ” button
to set the timer or thermostat.
Note: when the set key “ ” has been pressed to
set the timer or change the required temperature,
the LED light will icker for approx 5 seconds.
During this 5 second interval changes can be
inputted by pressing the “+” or “-” keys.
However if after pressing the set key “ “ no
further buttons are pressed the unit will return to
display the room temperature and to make further
changes the process needs to begin again.
Setting the timer:
Press the key, the light will show “0 h”, then press
the “+” or “-“keys to set the working time, (within
a range of 1-12 hours).
The time can increase or decrease in intervals of
1 hour/each by pressing the “+” or “-“keys. The
display will show the nal time you have set.
Remote Control
REPLACING THE BATTERY
Fig. 6
Fig. 7
Slide out the battery holder at the rear of remote
control. (Fig. 6)
Insert a 3V Li battery (CR 2032) into the tray of
the door, battery text facing up. (Fig. 7)
Slide the battery holder back into the remote
control; it is now ready for use.
OPERATION
Setting the thermostat:
When the timer has been set (if desired), press
the “ ” again. The LED displays 25°C, now
you can adjust the thermostat to your required
temperature setting. The temperature setting is
increased or decreased in intervals of 1°C/each
press of the “+” or “-“keys. The display will show
the nal temperature you have set.
Range 15 - 35°C)
When the room temperature is ≤ -10°C, the LED
display will show as “LO”
When the room temperature is > 40°C, the LED
display will show as “HI”.
When the room temperature is between -10°C
to 40°C, then the LED display will show the
corresponding temperature by number.
Fig. 8
There are six function keys on the remote control
and their functions match those on the control
panel of the heater.
When operating the remote control, always point
the remote towards the display window of the
heater retaining line of sight with the heater and
away from any walls; the signal distance is approx.
6 meters.
Page 5

Cleaning and Maintenance
Switch off the appliance rst and disconnect the
plug from the socket. Clean the surface with a
moist cloth, vacuum cleaner or brush. Do not use
any abrasive or caustic cleaning agents. Do not
use any ammable cleaning agents e.g. petrol or
spirit for cleaning the appliance. Never immerse the
appliance in water. Air inlet and outlet area should
be cleaned with a vacuum cleaner regularly· If the
appliance is not used for extended periods, it must
be protected against excessive dust and dirt.
It is reccomended to clean the air lter monthly.
See Fig. 9 to remove the air lter for cleaning. Do
not use any chemicals for cleaning the lter.
Use a soft cloth/duster to wipe away the dust. If
you use water for cleaning, please make sure the
air lter is completely dry before placing the lter
back into the unit.
Model Identier(s):
Heat output
Nominal heat output Pnom 2.5
Minimum heat output (indicative) Pmin 1.5
Maximum continuous heat output Pmax,c 2.5
Auxiliary electricity Consumption
At nominal heat output Elmax 0.0
At minimum heat output Elmin 0.0
In standby mode ElSB 0.0015
Type of heat output/ room temperature control
Electronic room temperature control
GDHV
Contact details
Millbrook House, Grange Drive, Hedge
End, Southampton.
SO30 2DF
DXSTG25
kW
kW
kW
kW
kW
kW
Yes
Fig. 9
Recycling
Recycling: For electrical products sold
within the European Community. At the
end of the electrical products useful
life it should not be disposed of with
.
household waste. Please recycle where
facilities exist.
Check with your Local Authority or
retailer for recycling advice in your
country.
Page 6

Page 7

Page 8

Warranty
What does a Dimplex Warranty cover?
Dimplex products deliver reliable service for normal, household use in domestic settings. All Dimplex products are individually tested
before leaving the factory.
If you are a consumer and you experience a problem with your Dimplex product, which is found to be defective due to faulty materials or
workmanship within the Warranty Period, this Dimplex Warranty will cover repair or - at the discretion of Dimplex – replacement with a
functionally equivalent Dimplex product.
Your product is under warranty for 1 year from the date of purchase or the date of delivery of the product, if later. The 1 year warranty
is extended for an additional 2 years when you register the product with Dimplex, within 28 days of purchase. If you do not register the
product with Dimplex within 28 days, your product will remain warrantied for 1 year only. To validate your extended warranty register with
us online at: http://register.dimplex.co.uk. N.B. Each qualifying product needs to be registered with Dimplex individually. Please note that
the extended warranty is only available in the UK and Ireland.
The Dimplex Warranty is conditional upon you providing the original purchase receipt as proof of purchase. Please therefore retain your
receipt as proof of purchase.
If you do experience a problem with your Dimplex product please call the Helpline on +44 [0]344 879 3588 or visit
support
. For ROI please email serviceireland@glendimplex.com or call
+353(0)1 842 4833
. We will need details of your Dimplex product and
a description of the fault which has occurred. Once we receive your information and proof of purchase we will contact you to make the
necessary arrangements. If your Dimplex product is not covered by this Dimplex Warranty there may be a charge to repair your product.
However, we will contact you for agreement to any charges before any chargeable service is carried out.
What is not covered by a Dimplex Warranty?
The Dimplex Warranty does not cover any of the following:
Any fault or damage to your Dimplex product due to faulty materials or workmanship occurring outside the Warranty Period. Normal wear and tear
including parts that might wear out over time or consumables, such as lters.
Any fault or damage occurring to any pre-owned Dimplex product or to any other equipment or property.
Accidental damage to your Dimplex product or damage to your Dimplex product from external sources (for example, transit, weather, electrical outages
or power surges).
Fault or damage to your Dimplex product which is:
•Not due to faulty materials or workmanship or which is due to circumstances outside
Dimplex’s control.
•Caused by use of your Dimplex product for anything other than normal domestic household purposes in the country where it was purchased.
•Caused by any misuse, abuse or negligent use of the Dimplex product, including but not limited to any failure to use it in accordance with the Operating
Instructions supplied with the product.
•Caused by any failure to assemble, install clean and maintain your Dimplex product in accordance with the Operating Instructions supplied with the
product unless this was carried out by Dimplex or its authorised dealers.
•Caused by repairs or alterations to your Dimplex product not carried out by Dimplex service personnel or its authorised dealer(s).
•Caused by use of any consumables or spare parts for your Dimplex product which are not Dimplex - specied.
https://www.dimplex.co.uk/
Terms and Conditions
The Dimplex Warranty is valid for 1 calendar year, plus 2 if registered, from the date of purchase of your Dimplex product from a recognised
retailer in the country of purchase and use, or the date of delivery of the product if later, always provided the original receipt has been
retained and is produced as proof of purchase.
You must provide to Dimplex or its authorised agents on request the original receipt as proof of purchase and - if required by Dimplex proof of delivery. If you are unable to provide this documentation, you will be required to pay for any repair work required.
Any repair work under the Dimplex Warranty will be carried out by Dimplex or its authorised dealer(s) and any parts that are replaced will
become the property of Dimplex. Any repairs performed under the Dimplex Warranty will not extend the Warranty Period.
Any replacement of your Dimplex product by Dimplex during the Warranty Period will start the 3 year Warranty Period afresh from the date
of delivery of the replacement Dimplex product to you. (*Please keep original online warranty registration email and sales receipt for your
original purchase as proof of the additional 2 years, in case of the unlikely event you experience an issue).
The Dimplex Warranty does not entitle you to recovery of any indirect or consequential loss or damage including but not limited to loss or
damage to any other property.
The Dimplex Warranty is in addition to your statutory rights as a consumer and your statutory rights are not affected by this Dimplex
Warranty.
Contact Dimplex
If you have any questions about what the Dimplex Warranty covers and does not cover or how to claim under the Dimplex Warranty, please
contact us:
GDHV, Grange Drive, Hedge End, Southampton SO30 2DF
Telephone: 0344 879 3588
Email: customer.services@glendimplex.com
Visit: www.dimplex.co.uk
A brand of the GDC Group Limited, trading as Glen Dimplex Heating & Ventilation
[c] Glen Dimplex
All rights reserved. Material contained in this publication may not be reproduced in whole or in part, without prior permission in writing of Glen Dimplex.
 Loading...