

Page 1

Installation and Operating Instructions
Dimplex Convector Heaters
Models : DESC2TN, 402TSF
Dimensions
(Millimetres)
Models Specication
DESC2TN 2.0kw Thermostat,
402TSF 2.0kw Thermostat & 2 heat settings, Turbo & Neon.
IMPORTANT : THESE INSTRUCTIONS SHOULD BE READ CAREFULLY AND RETAINED FOR FUTURE REFERENCE
Important Safety Advice
WARNING: To avoid danger of suffocation please
remove all packaging materials particularily
plastic and EPS and keep these away from
vulnerable people, children and babies.
IMPORTANT: The heater should only be used
on a horizontal and stable surface with the feet
securely tted.
This appliance is not intended for use by
persons (including children) with reduced
physical, sensory or mental capabilities, or lack
of experience and knowledge, unless they have
been given supervision or instruction concerning
use of the appliance by a person responsible for
their safety.
Children should be supervised to ensure that they
do not play with the appliance.
DO NOT route cord under furniture or appliances.
Take care to position the cord away from trafc
areas and where it will not be a tripping hazard.
WARNING: To avoid the risk of accidental
strangulation from the supply cord all children
and vulnerable people must be supervised when
in the vicinity of the product whether it is working
or not.
WARNING: This heater must not be located
immediately below a xed socket outlet.
The heater carries a warning symbol to
alert the user to the risk of re that exists
if the heater is accidentally covered.
WARNING: In order to avoid overheating do not
cover the heater.
WARNING: This appliance must not be used in
a bathroom.
DO NOT use the heater if it has been dropped.
DO NOT use the heater if there are any visible
signs of damage.
08/54552/0 Issue 0
Fig. 1
WARNING: Do not use this heater in the
immediate surroundings of a bath, a shower or
a swimming pool.
WARNING: In order to avoid a hazard due to
inadvertent resetting of the thermal cut-out,
this appliance must not be supplied through an
external switching device, such as a timer, or
connected to a circuit that is regularly switched
on and off by the utility.
IMPORTANT: Avoid use of an extension cord
because the extension cord may overheat
and cause risk of re.
CAUTION: Some parts of this product can
become very hot and cause burns. Particular
attention has to be given where children and
vulnerable people are present.
WARNING: Do not use the heater in small rooms
when they are occupied by persons who are not
capable of leaving the room on their own, unless
constant supervision is provided.
WARNING: To reduce the risk of fire, keep
textiles, curtains or any other ammable material
a minimum distance of 1m from the air outlet.
IMPORTANT: If the mains lead is damaged,
it must be replaced by the manufacturer or its
service agent or a similarly qualied person in
order to avoid a hazard.
Page 2
Electrical Connection
DESC2TN
Controls
WARNING – THIS APPLIANCE MUST BE
EARTHED
This heater must be used on an A.C. ~ supply
only and the voltage marked on the heater must
correspond to the supply voltage.
The use of an extension lead or multi-plug adaptor
is not advised when connecting this product to the
mains. Connection through these devices could lead
to a risk of overloading, overheating and even re
at the extension lead or adaptor due to inadequate
connection quality.
Using the heater
WARNING: DO NOT USE THE HEATER UNTIL
THE FEET ARE FITTED CORRECTLY.
The product can be used as an installed or portable
unit. Once the desired application has been decided
upon and the requirements below have been met
the product is ready to be used. Simply plug in and
switch on at the wall socket.
Please note – the element has been coated with a
protective lm which will burn off during the rst few
minutes of use and may cause a small amount of
fuming. This is quite normal – the fumes are nontoxic and will quickly disappear.
We recommend that you open a window to ventilate
the room when using the heater for the rst time.
Positioning the heater
Always ensure that the heater is stood on a rm,
level base near to, but not directly beneath, a suitable
mains supply socket.
Ensure that curtains and furniture are not positioned
close to the chosen position, as this would create a
potential re hazard.
WARNING: THE HEATER SHOULD NEVER BE
USED AS A PORTABLE APPLIANCE WITHOUT
THE FEET SECURELY FITTED.
NOTE: When using the appliance or setting
appliance controls always ensure that the
heaterisstoodonarmlevelbase.Donottilt
the appliance at any time.
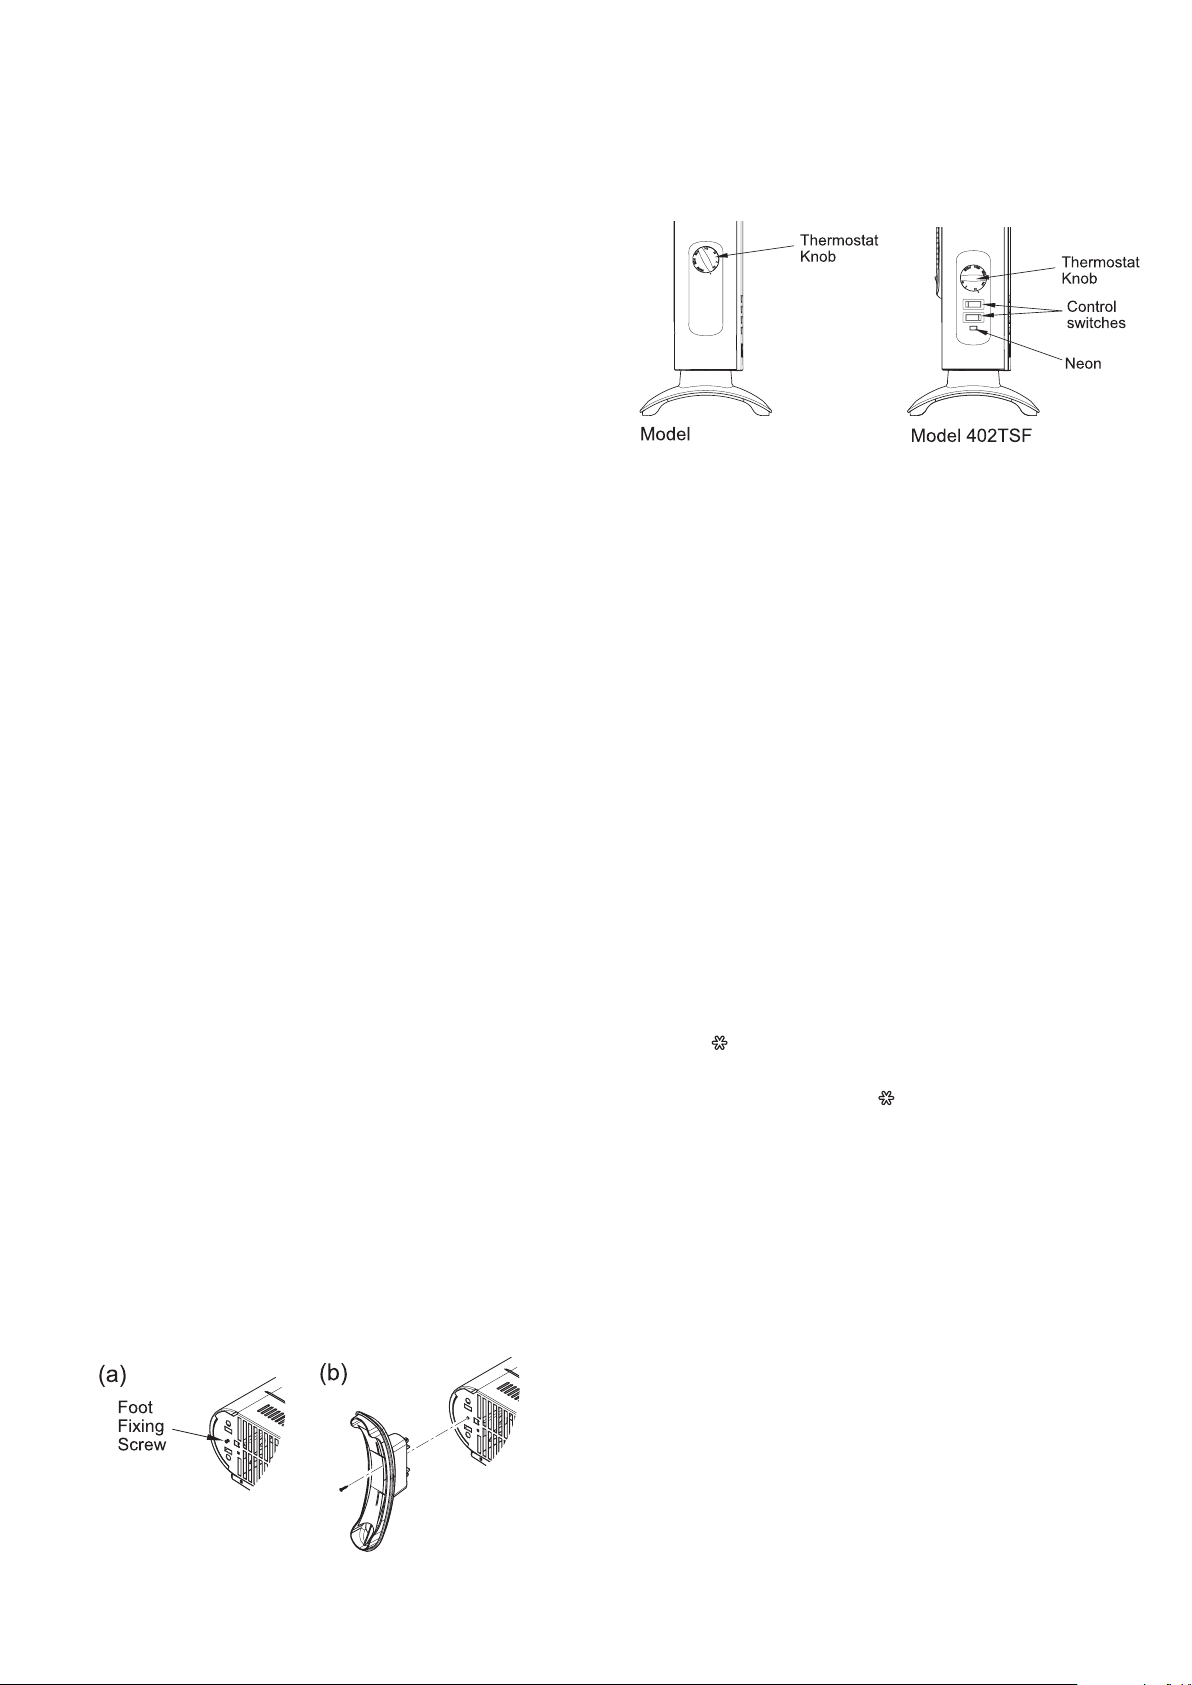
Fig. 3
Indicator Neon (selected models)
The indicator neon comes on when the appliance is
connected to mains supply.
Thermostat (all models)
The thermostat controls the heat output according to
the room temperature. This ensures that the heater
will not produce heat unnecessarily when the room
is warm.
To set the temperature you require, Gradually turn
the thermostat knob clockwise until the desired
temperature is reached. Allow some time between
increments for the room temperature to stabilise.
Alternatively to heat a cold room quickly, turn the
thermostat knob to the Max position. When the
room has reached the desired temperature, turn the
thermostat knob anti-clockwise until the thermostat
clicks off. The heater will then automatically maintain
this room temperature.
The thermostat also has a frost protection setting
marked ‘ ’. This setting is useful in areas such as
garages to prevent frost damage. If the thermostat is
set to its minimum setting ‘ ’, the heater will cycle ON
and OFF to maintain a temperature of approximately
5°C to help protect against frosty conditions.
Switches (selected models)
Lay the heater on its back, locate and remove the
foot xing screw - see Fig. 2(a). Clip the foot in place
and secure using the foot xing screw - see Fig. 2(b).
Fig. 2
Selected models are supplied with selector switches
. There are two switch types, one is an on/off switch
and the other is a heat selection switch. Depending
on model either one or both switch may be included.
The switch operation is as follows.
On/Off: O - Off
I - On
Heat selection I - Low heat
II - High heat
Page 3

Turbo fan(selected models)
Recycling
The turbo fan is used
to boost the airflow
around the room. This
circulates the heat
better and results in a
reduced heat up time
and a more even heat
distribution. The turbo
fan is controlled by the
neon switch on the front
of the product.
The turbo can be turned
on independently of the
heat, however the fan
will switch on and off
under the control of the
thermostat.
Note: On selected models in warm weather the fan
can be used to circulate cool air. Once the heat
selection switches are in the off position and the
thermostat is set to ‘Max’ the fan will continue to
function to circulate cool air.
Fig. 4
Safety – overheat protection
For your safety, this appliance is tted with a thermal
cut-out. In the event that the product overheats, the
cut-out switches the heater off automatically.
To bring the heater back into operation, remove the
cause of the overheating, then unplug or turn off
the electrical supply to the heater for a few minutes.
When the heater has cooled sufciently, re-connect
and switch on the heater.
Important Notes
Although this heater is manufactured to comply with
the relevant safety standards, certain types of carpets
could become discoloured by the temperatures
under a portable heater. If you are concerned about
this, we recommend that you contact the carpet
manufacturer for guidance. Alternatively, stand the
heater on a suitable base to shield the carpet or
wall-mount it – call our Helpline for further advice.
You may notice some parts of the element appearing
to be hotter from time to time because of the variable
airow through the heater. This does not cause a
safety hazard.
The heat outlet grille may become discoloured with
use – this is caused by airborne pollution and is not
a fault.
Do not dispose of electrical appliances as
unsorted municipal waste. Use separate
collection facilities. Contact your local
government for information regarding the
collection systems available. If electrical
appliances are disposed of in landlls or dumps,
hazardous substances can leak into the ground
water, polluting the food chain and damaging health
and well-being.
Cleaning
WARNING – ALWAYS DISCONNECT FROM
THE POWER SUPPLY BEFORE CLEANING
THE HEATER.
Before commencing cleaning, switch off the heater
and allow it to cool. Disconnect the electricity
supply to the appliance.
The outside can be cleaned by wiping it over
with a soft damp cloth and then dried. Do not use
abrasive cleaning powders or furniture polish, as
this can damage the surface nish.
After Sales Service
Please refer to the warranty card in the box for
warranty information. For any troubleshooting advice,
please contact the relative Customer Care Centre
below.
Glen Dimplex Australia Pty Ltd
1340 Ferntree Gully Road,
Scoresby 3179, Victoria
Australia
Ph: 1300 556 816
Glen Dimplex New Zealand Ltd
38 Harris Road, East Tamaki,
Auckland 2013
New Zealand
Ph: 0800 666 2824
Page 4

© Glen Dimplex Australia. All rights reserved. Material contained in this publication may not be reproduced in whole or in part, without prior
permission in writing of Glen Dimplex Australia.
 Loading...