

Page 1
INSTRUCTION MANUAL
50cm HV Wall Fan
Model: DCWF50MB
For domestic household use only.
Page 2

IMPORTANT
THESE INSTRUCTIONS SHOULD BE READ CAREFULLY AND RETAINED FOR
FUTURE REFERENCE. Note also the information presented on the appliance
CAUTION: FAILURE TO FOLLOW THESE INSTRUCTIONS MAY CAUSE INJURY AND/
OR DAMAGE AND MAY INVALIDATE YOUR WARRANTY
Please read the operating instructions carefully before using your fan for the rst time
and keep them in a safe place.
WARNING – This appliance must not be used in a bathroom.
WARNING – Do not use this appliance in the immediate surroundings of a bath, a
shower or a swimming pool.
• Never immerse the appliance in water or other liquids.
• Operate this unit only on a rm, at surface.
• Do not place on soft, unstable or non-horizontal/angled surfaces.
• Never operate the appliance if a cable or connector has been damaged, after
appliance malfunction or if the appliance was dropped or is otherwise damaged.
• If the mains lead is damaged it must only be replaced by the manufacturers service
agent or a similarly qualied person in order to avoid a hazard.
• Please ask a professional service agent to repair the product. Improper repair may
cause danger to users.
• Disconnect the appliance from mains power whenever it is not in use, before
relocating it, and before cleaning.
• Operate the appliance only at the voltage specied on the rating label.
• Only connect the unit to a properly installed and easily accessible socket so that
you can quickly disconnect the plug if necessary.
• Do not connect this product to the mains using an extension lead.
• This fan is only intended for INDOOR RESIDENTIAL applications. This fan should
not be used for commercial or industrial or leisure applications or in small enclosed
spaces.
• Never use the mains lead as a carrying strap or pulling lead.
• To avoid a re or electrocution hazard, NEVER put the cord near heat registers,
radiator, stoves or heaters.
• DO NOT cover cord with carpeting, throw rugs, runners, or similar coverings.
• DO NOT route cord under furniture or appliances. Take care to position the cord
away from trac areas and where it will not be a tripping hazard.
• DO NOT use the unit near windows or where water collects. Rain and water collection
may lead to a risk of re or electric shock.
• Only operate this appliance with a minimum of 50cm clearance all around i.e. away
from walls, furniture and overhanging objects such as curtains or a shelf.
• This appliance is not intended for use by persons (including children) with
reduced physical, sensory or mental capabilities, or lack of experience and
knowledge, unless they have been given supervision or instruction concerning use
of the appliance by a person responsible for their safety.
2
Page 3

• Children should be supervised to ensure they do not play with the appliance.
• WARNING: To avoid danger of suocation please remove all packaging materials
particularly plastic and EPS and keep these away from vulnerable people, children
and babies.
• NEVER drop or insert any object or ngers into any openings.
• Do not use the appliance in locations where paint, petrol or other ammable liquids
are used or stored.
•
• Do not use bug sprays or other ammable cleansers/vapour sprays on or around
the unit.
• Always switch o the unit and take the plug out of the socket:
•
•
•
•
If you are not using the unit
Before you clean or carry out maintenance on the unit
If a fault occurs
In the event of an electrical storm.
• Avoid electromagnetic interference. Keep the unit at least 1 metre away from
electrical appliances such as televisions & radios.
3
Page 4
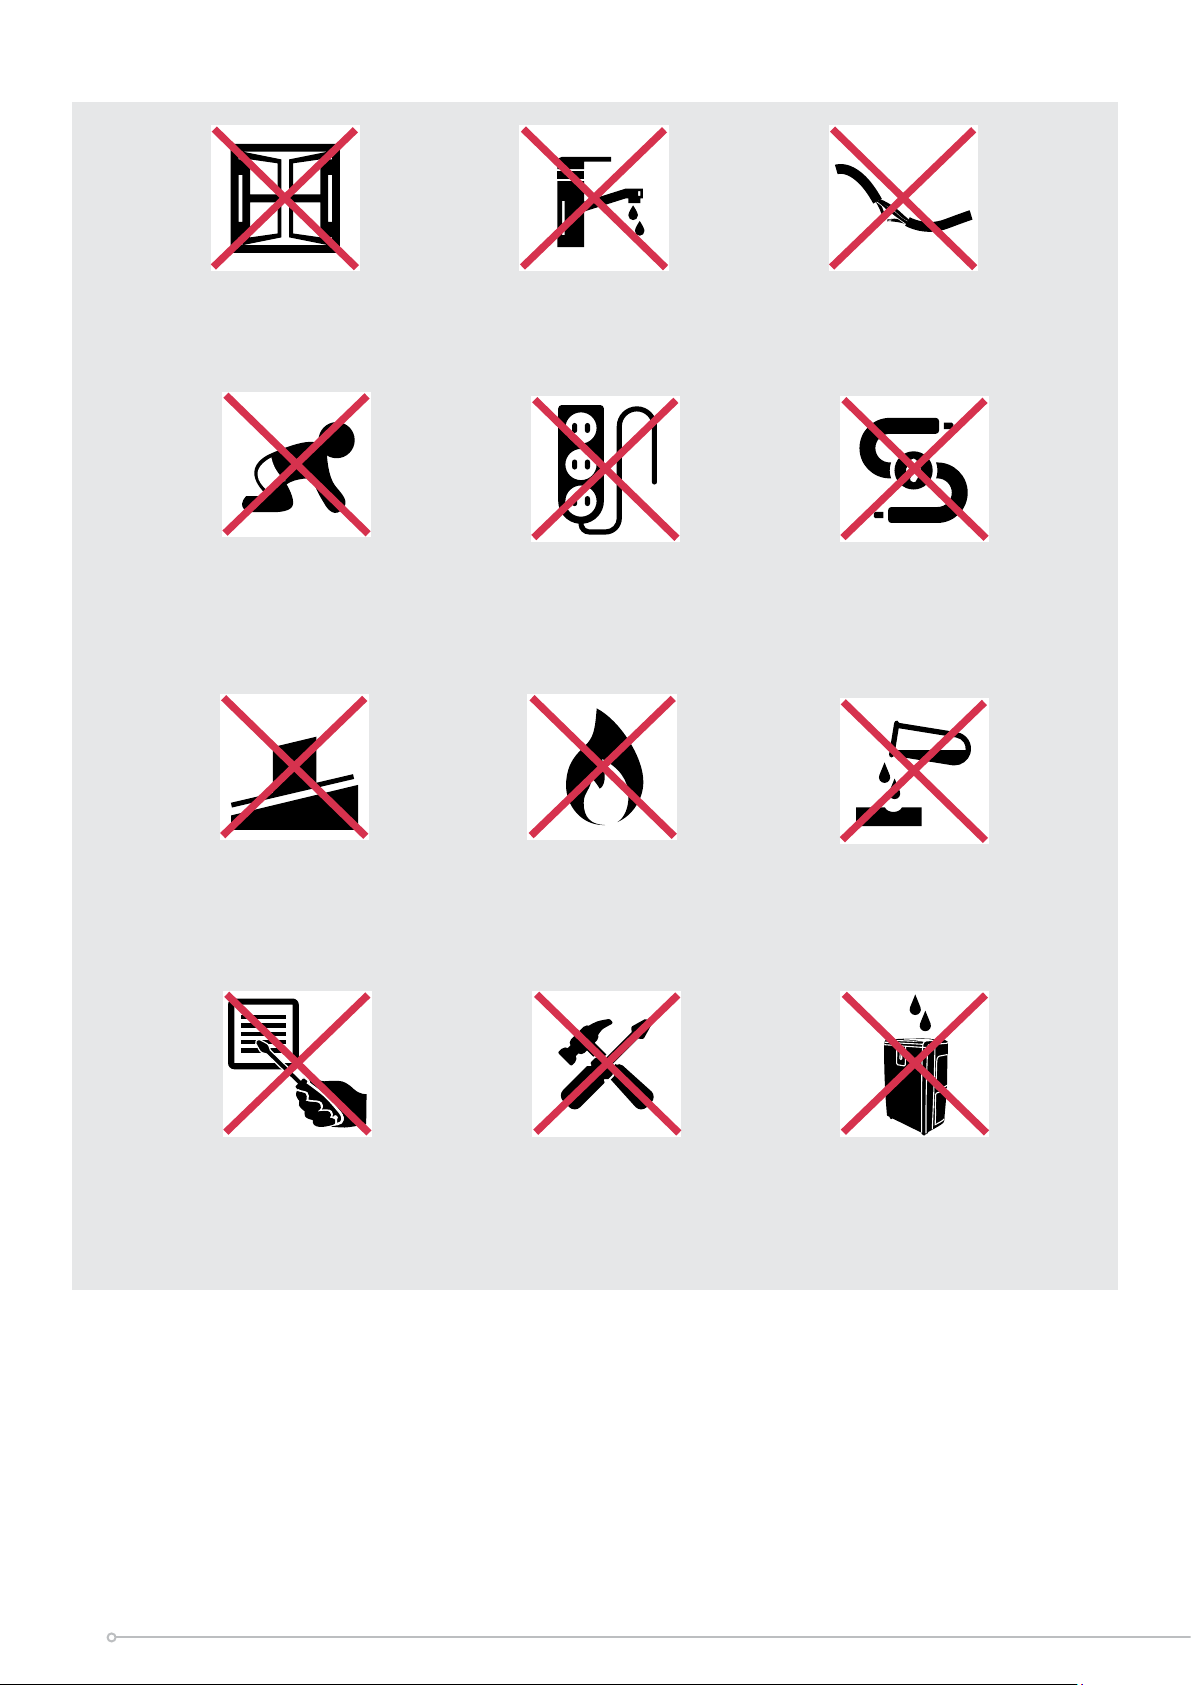
Exposed to the
weather outdoors
Near water If the power cable
wires are frayed or cut
Where small children
may be left unattended
On a slope or
uneven surface
If an extension
lead may become
overloaded
Where there is risk
of re or close to
a naked ame
Where the power
cable may be
damaged
Where it may be
damaged by
chemicals
Where there is a risk
of interference by
This product is not
made for DIY repair
foreign objects
4
If there is a risk
of water falling on
the unit
Page 5

Specication
Model no. DCWF50MB
Colour
Power supply
Rated power
Speed settings
Modes -
Timer 1/2/4/8hr
Tilt adjustable head Y
Horizontal oscillation Y
Noise level
Weight (net) 8.5kg
Dimensions (w x d x h) 580 x 380 x 730mm
Matte Black
220-240V~, 50/60Hz
135W
19
73dB(A)
• For greater precision, please always refer to the rating label placed on the product.
Included:
• Front & rear grilles
• Motor housing
• Fan blade
• Long bolt & washer
• Fixing bar
• Mounting bracket
• Remote control (batteries not included)
• Remote cradle (screws not included)
• 2 x xing bar scews
• 4 x rear grille screws
• 1 x grub screw
• 1 x safety grill screw & bolt
Not included:
• 4 x M8 (35mm) masonry bolts and matching anchors.
• 4 x 8mm inner diameter washers.
• 2 x small remote cradle screws
• 1 x A23 12V battery
5
Page 6

Parts
1. Front grille
15. Safety screw
2. Grub screw
4. Rear grille
4. Rear grille
screws
screws
6. Motor shaft
5. Rear grille
7. Control panel/
display
8. Fan motor
9. Motor xing hole
10. Fixing bar hole & long
bolt & washer.
11. Fixing bar
3. Fan blade
Control/Display Panel
14. Bracket &
xing bar screws
12. Fixing
anchors
(not included)
13 Wall bracket
Remote
6
Page 7

Assembly
Mount to the wall
1. Determine the desired location of the wall fan (must be 1.8m from the oor) and
ensure the wall is structurely sound to cope with the load of the fan.
2. Hold the wall bracket (13) in position, and mark the screw holes with a pencil.
Ensure everything is marked horizontally and aligned before drilling.
3. Drill the holes where the pencil marks are to suit the 4 x xing anchors (12).
4. Mount the wall bracket (13) on the wall with the 4 x xing anchors (12)
Assemble the motor to the xing bar
1. Attached the fan motor (8) to the xing bar (11) by aligning the motor xing hole
(9) with the xing bar hole (10) and use the long bolt and washer supplied to
secure.
2. Place the bottom of the xing bar (11) into the wall bracket (13) and use the
bracket xing pole screws (14) to tighten and secure to the bracket.
Attach the rear grille
1. Align the rear grille (5) to motor shaft (6) on the fan motor (8) and ensure the
hole for the safety screw is at the bottom. The 4 screw holes on the front of the
fan motor (8) should line up. Firmly tighten all four rear grille screws (4).
Attach the fan blade
1. Once the rear grille (5) is attached to the fan motor (8), turn the motor shaft
(6) so the at area is at the top. Slide the fan blade (3) all the way onto the
motor shaft (6) and rmly tighten the grub screw (2) by rotating in a clockwise
direction.
Attach the front grille
1. Once the fan blade is xed, align the top locking clip on the front grille (1) so it
xes to the that of the rear grille (5). Lock the side and bottom clips in place.
2. Secure the front & rear grille, by inserting and xing the safety screw (15) and nut.
TIP: the logo should be horizontal.
Remote
Insert 1 x A23 12V batteries (not included) into the remote.
7
Page 8

Operation
The wall fan can be operated by the control panel, or the remote control.
1. Ensure the wall fan is plugged in and the power supplier is on.
2. Turn the fan ON by pressing the 'ON-OFF' button.
3. To adjust the speed, press the '+' or '-' button. The selected speed setting will
show on the display panel.
4. If oscillation is required, press the SWING button, to start & stop oscillation.
5. The MEMORY button memorise the previous speed setting when OFF.
6. There are 4 timer settings, however they can only be operated via the remote
control. Press the correspending timer button '1H', '2H', '4H' or '8H' to start the
desired time setting. The timer chosen, will display on the display panel. Note:
Only the 4 x settings can be selected, the time doesnt accummulate. The timer
can't be cancelled once activated, unless turned OFF manually.
7. Turn the fan OFF bypressing the 'ON-OFF' button.
8
Page 9

Cleaning
Over time, dust can accumulate on the front & rear grille cover and fan blades, which
can aect the fans performance. It is recommended to clean the fan at least once a
month.
1. Turn the unit OFF and disconnect the appliance from the power supply.
2. Remove any dust build up with a soft brush.
3. Wipe the surface of the unit with a soft damp cloth. Mild detergent can be used
for any stubborn marks.
Do not use abrasive sponges, scouring pads, or a sti brush to clean the fan.
IMPORTANT
The control panel and other parts must not come into contact with water or any
other liquids.
Storage
If not using the unit for an extended period of time. After cleaning please:
• Turn the unit o, unplug and take care of the mains lead & plug.
• NB- Prolonged exposure to direct sunlight will discolour the enclosure.
9
Page 10

Maintenance
If the unit fails to operate eciently, is broken or other problems arise, unplug and
do not operate. Ask for advice by calling your local after sales service agent or the
Customer Care Centre on 1300 556 816 (AU) / 0800 666 2824 (NZ).
Warranty
Please refer to the warranty card in the box for warranty information. For any
troubleshooting advice, please contact the relative Customer Care Centre below.
Glen Dimplex Australia Pty Ltd Glen Dimplex New Zealand Ltd
1340 Ferntree Gully Road, 38 Harris Road, East Tamaki,
Scoresby 3179, Victoria Auckland 2013
Australia New Zealand
Ph: 1300 556 816 Ph: 0800 666 2824
Recycling: Do not dispose of electrical appliances as unsorted
municipal waste. Use separate collection facilities. Contact your
local government for information regarding the collection systems
available. If electrical appliances are disposed of in landlls or dumps,
hazardous substances can leak into the ground water, polluting the
food chain and damaging health and well-being.
10
Page 11

11
Page 12

Customer Care: 1300 556 816
customer.care@glendimplex.com.au
www.dimplex.com.au
Supplied by Glen Dimplex Australia
1340 Ferntree Gully Road, Scoresby, Victoria, 3179
© Glen Dimplex Australia. All rights reserved. Material contained in this publication may not be reproduced in whole or in part, without
prior permission in writing of Glen Dimplex Australia.
12
 Loading...