

Page 1
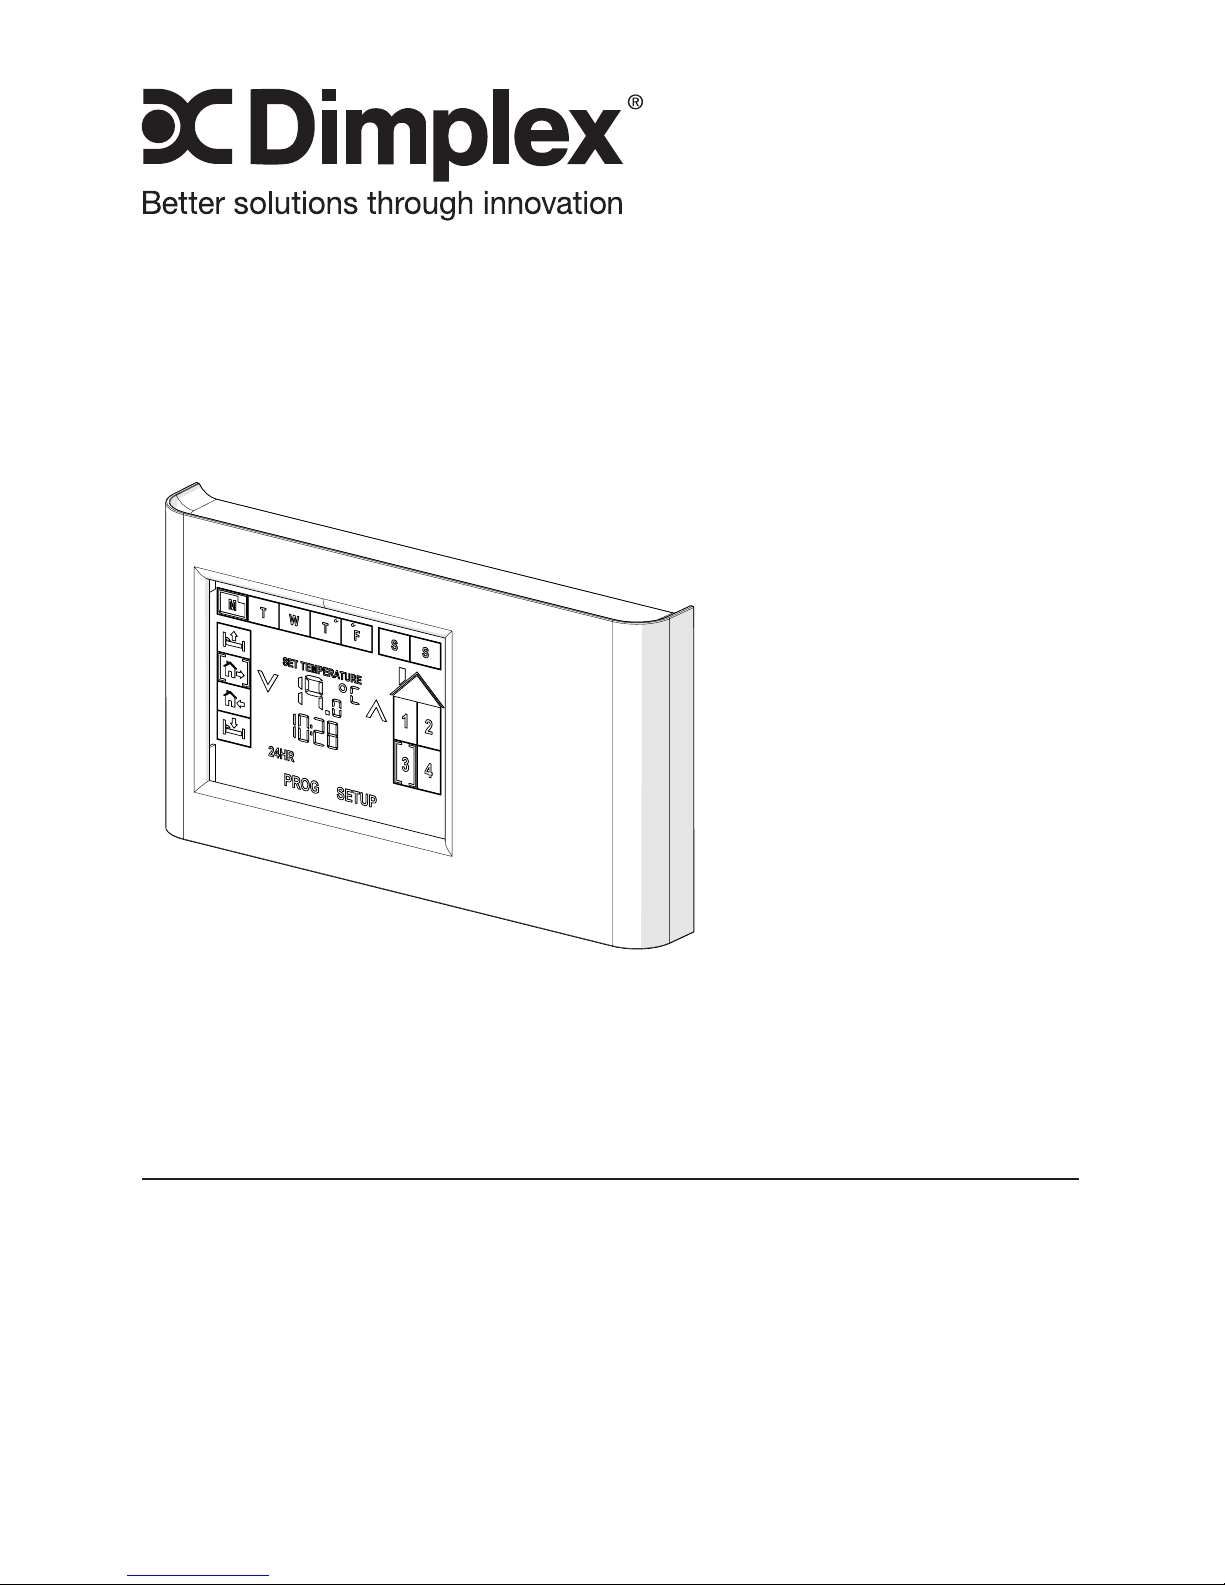
Owner’s Manual
Model
CX-WIFI
6700530100
7214350100R03
IMPORTANT SAFETY INFORMATION: Always read this manual rst
before attempting to install or use this device. For your safety, always
comply with all warnings and safety instructions contained in this
manual to prevent personal injury or property damage.
To view the full line of Dimplex products, please visit
www.dimplex.com
Page 2

2 www.dimplex.com
Table of Contents
!
NOTE: Procedures and
techniques that are considered
important enough to emphasize.
CAUTION: Procedures and
techniques which, if not carefully
followed, will result in damage to
the equipment.
WARNING: Procedures and
techniques which, if not carefully
followed, will expose the user to
the risk of re, serious injury, or
death.
Welcome & Congratulations ...................3
IMPORTANT INSTRUCTIONS .................4
Product Overview ...........................5
Installation ................................7
Initial Setup ..............................10
Program Schedule Setup .....................13
General Functions ..........................15
Operation .................................18
Maintenance ..............................20
Warranty ................................21
Reference Tables ..........................22
Page 3
3
Welcome & Congratulations
Thank you and congratulations for choosing to purchase a Multi-zone
Wi-Fi Programmable CONNEX™ Controller from Dimplex.
Please carefully read and save these instructions.
CAUTION: Read all instructions and warnings carefully before
starting installation. Failure to follow these instructions may result in a
possible electric shock, re hazard and will void the warranty.
Date Code
NO NEED TO RETURN TO THE STORE
Questions with operation or mounting? Require Parts Information?
Product Under Manufacturer’s Warranty?
Contact us at: www.dimplex.com/customer_support
For Troubleshooting and Technical Support
OR Toll-Free 1-888-DIMPLEX (1-888-346-7539)
Monday to Friday 8:00 a.m. to 4:30 p.m. EST
Please have your model number and product serial
number ready. (See above)
Page 4

4 www.dimplex.com
CAUTION: This equipment has been
tested and found to comply with the limits
for Class B digital device, pursuant to
part 15 of the FCC Rules. These limits
are designed to provide reasonable
protection against harmful interference in
a residential installation. This equipment
generates, uses and can radiate radio
frequency energy and, if not installed and
used in accordance with the instructions,
may cause harmful interference to radio
or television reception, which can be
determined by turning the equipment off
and on, the user is encouraged to try to
correct the interference by one or more of
the following measures:
• Reorient or relocate the receiving
antenna.
• Increase the separation between the
equipment and the receiver.
• Connect the equipment into an outlet
on a circuit different from that to which
the receiver is connected.
• Consult the dealer or an experienced
radio/TV technician for help.
This device complies with Part 15 of the
FCC Rules. Operation is subject to the
following two conditions: (1) This device
may not cause harmful interference,
and (2) this device must accept any
interference received, including
interference that may cause undesired
operation.
FCC CAUTION: Any changes or
modications not expressly approved by
the party responsible for compliance could
void the user’s authority to operate this
equipment.
This device complies with Industry
Canada licence-exempt RSS standard(s).
Operation is subject to the following
two conditions: (1) this device may not
cause interference, and (2) this device
IMPORTANT INSTRUCTIONS
must accept any interference, including
interference that may cause undesired
operation of the device.
IMPORTANT NOTE: This equipment
complies with RF exposure limits set forth
for an uncontrolled environment.
This equipment shall be installed and
operated with a minimum separation
distance of 7.87 in (20 cm) between the
transmitter's radiating structure(s) and the
body of the user or nearby persons.
Page 5
5
Product Overview
The CONNEX™ Wi-Fi Controller
is a Dimplex exclusive, allowing
the user to operate the CONNEXTM Multi-zone controller and
synchronized CONNEXTM enabled
heaters wirelessly from any remote location.
CONNEX™ wireless technology
provides the user the ability to
control four individual heat zones
and one Wi-Fi-enabled controller
for precise temperature management throughout the home. The
easy-to-use touch screen allows
for 7-day/ 4-event programming
that combines with zone heating
for incredible energy savings.
Zones
The controller is setup so that the
user can divide their house into
up to 4 different heating zones.
These can be separate heaters
or a selection of one or more
heaters that will all be set to run
at the same time and temperature
settings.
By dividing the house into zones
you can program the controller to
raise the temperature in particular rooms during the time you
normally use them and reduce the
temperature when they are not in
use.
By having a wireless controller,
the components within a zone
do not have to be located in the
same area of the house, as with
traditional heating systems. The
components in any particular
zone can be spread all through
the house.
For example:
• Zone 1 - All of the bedrooms,
• Zone 2 - All of the bathrooms,
• Zone 3 - Kitchen and living room.
!
NOTE: Zones can be setup as
any combination of the Dimplex
CONNEXTM enabled controlled
heaters as long as there is one
heater that is within 15m (50ft) of
the controller and the subsequent
heaters are within 15m (50ft) of
the controller or any other heater.
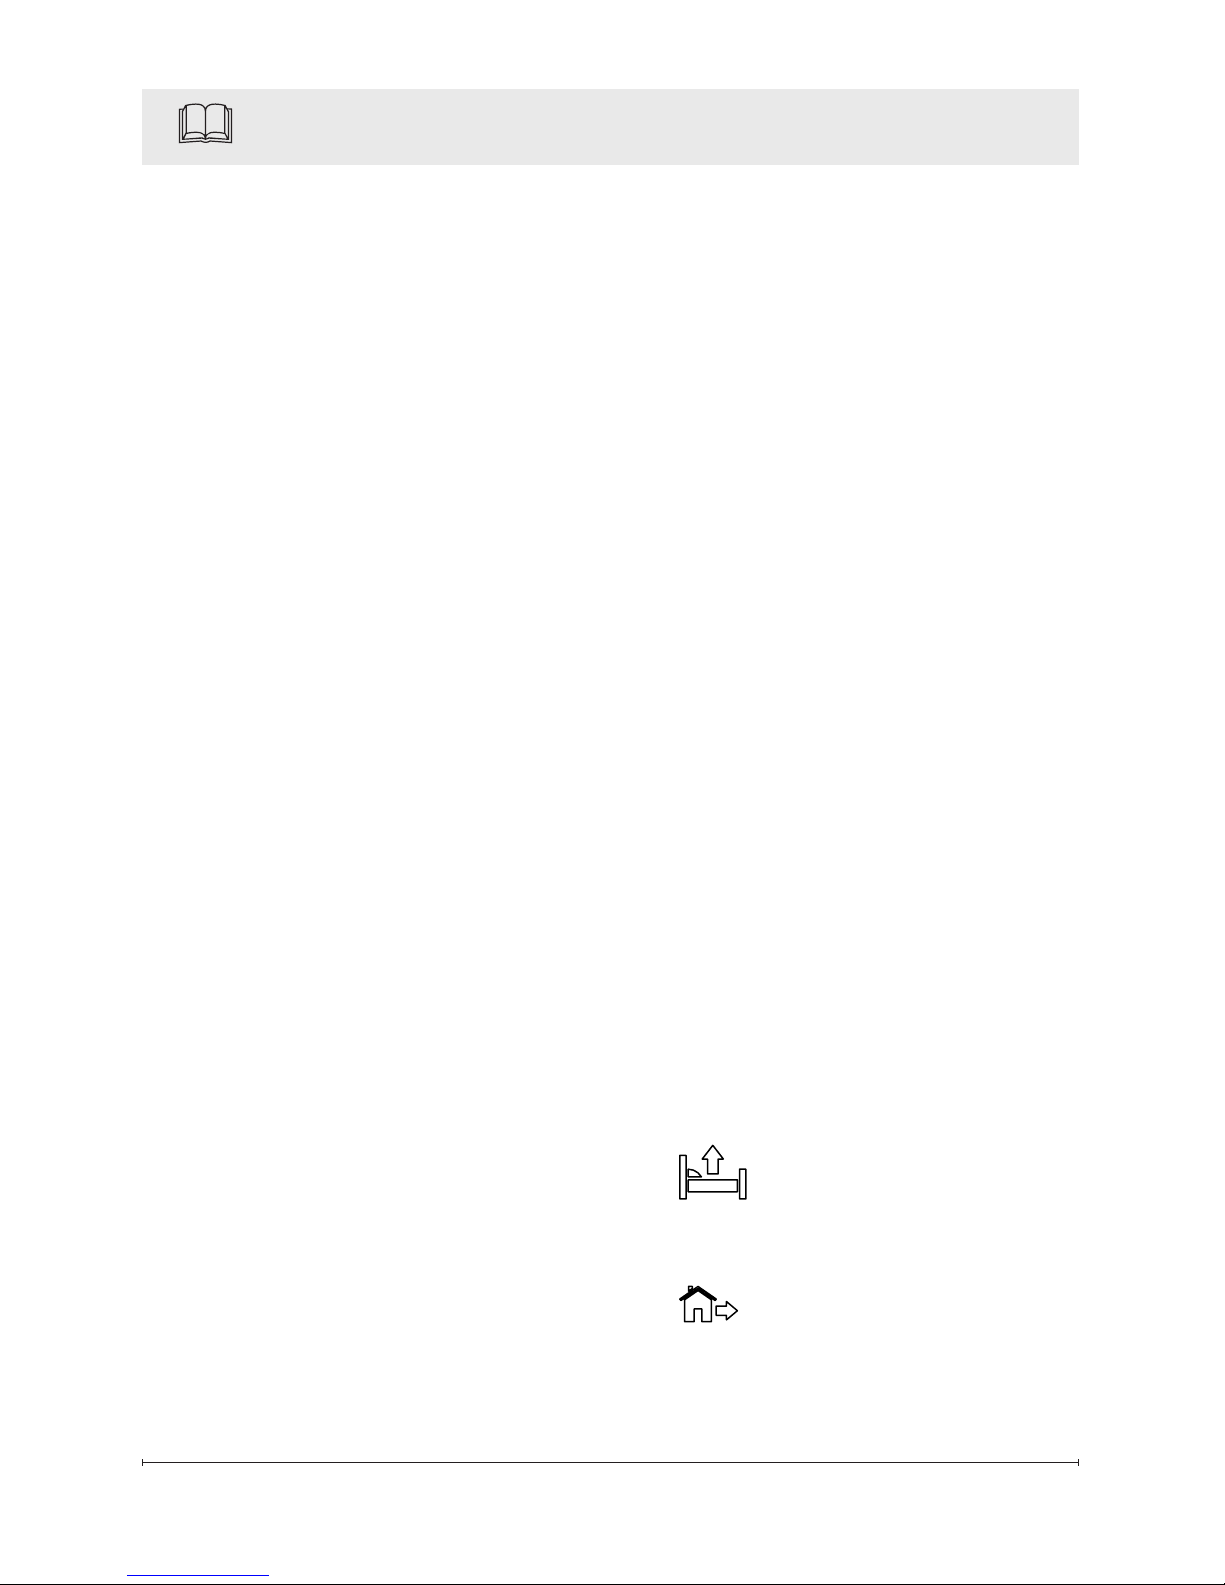
Events
The controller has been designed
to divide each day into 4 different
time settings for each day– Wake,
Away, Home and Sleep.
• Wake – Initial increase
of heat to desired temperature
use.
• Away – A decreased
temperature set point while
the area is not in use.
Page 6
6 www.dimplex.com
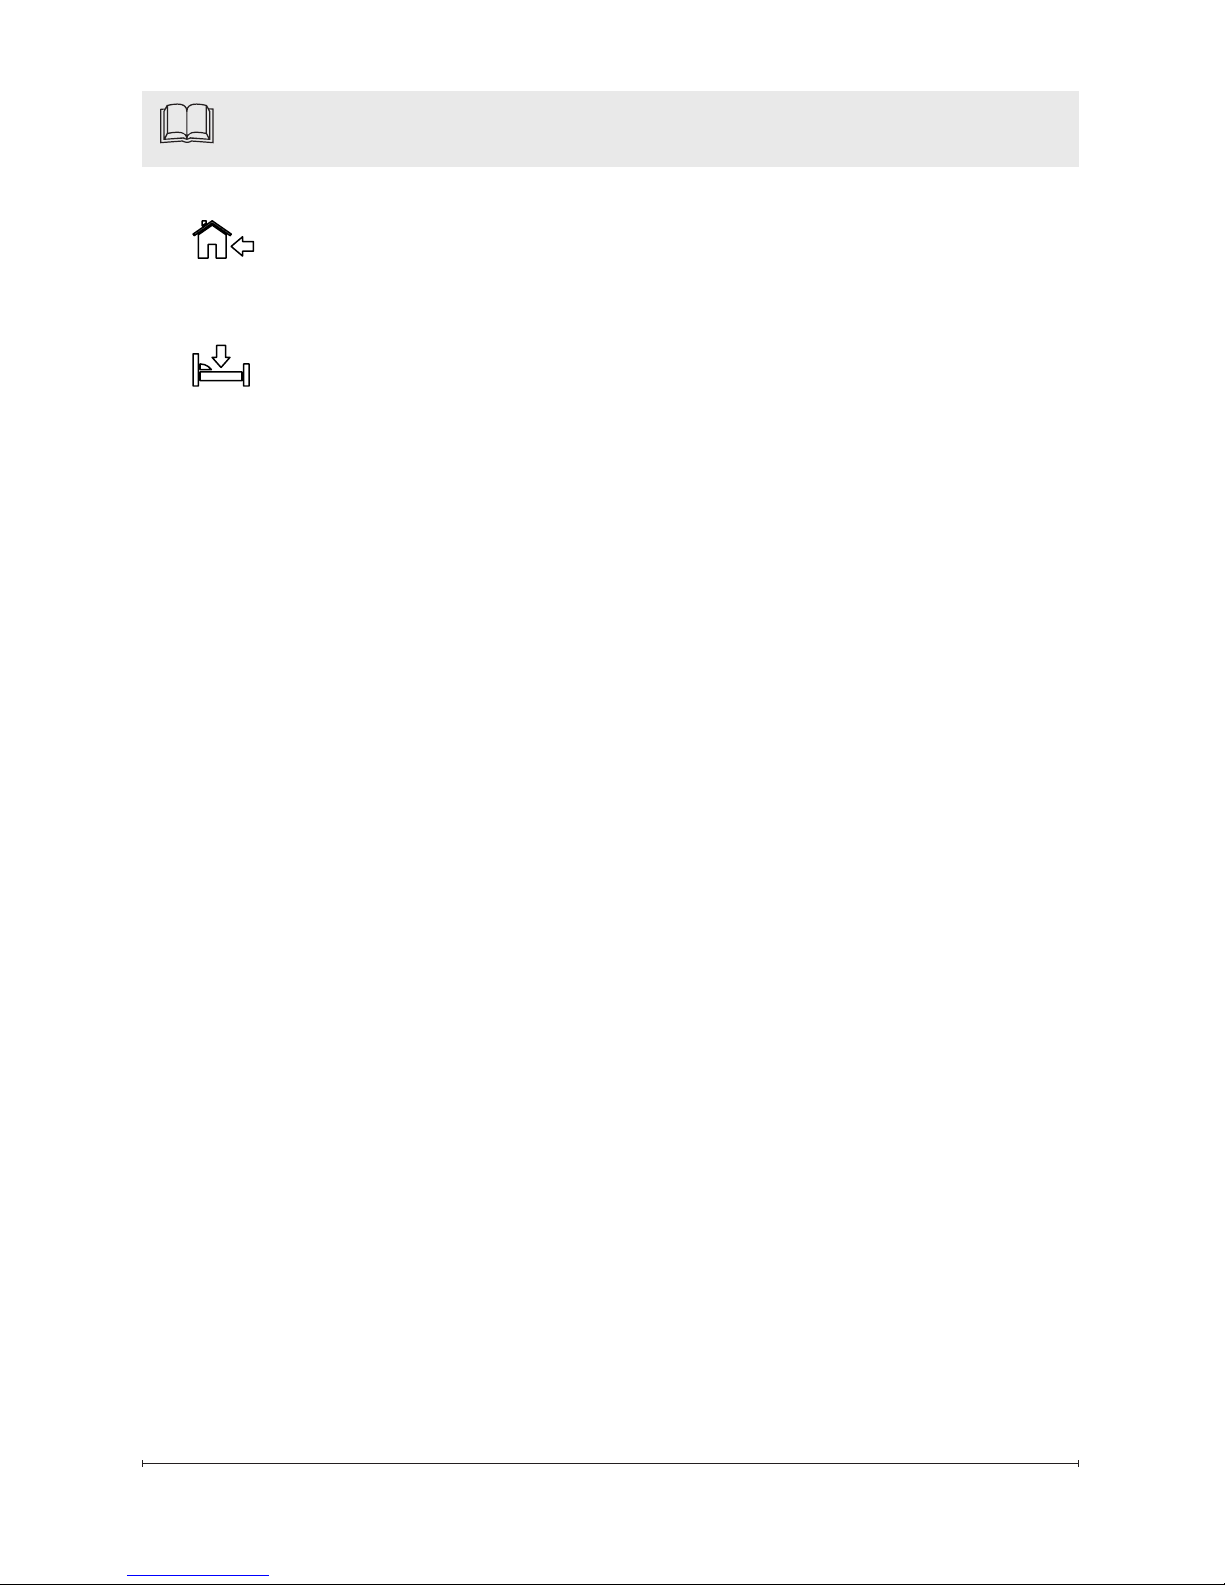
• Home – An increased
temperature set point for normal usage.
• Sleep – Reduce temperature set point while you
are sleeping.
!
NOTE: When programming
times for temperature events to
take place, ahead of time, giving
the temperature time to increase,
i.e. your kitchen takes 17 minutes to increase in temperature
from 18°C to 21°C, set the Home
Event to occur 17 minutes before
you arrive home.
As a default, values have been
programmed for the Wake and
Sleep times and temperatures for
all 4 zones, for all 7 days.
Wake: 21.0°C (70.0°F), 6:00AM
Sleep: 18.0°C (64.0°F), 11:00PM
!
NOTE: There are no initial settings for Home and Away events.
To change these values there is a
program function which will guide
you through the adjustment/setup
of these values for a single day or
group of days, or multiple zones.
!
NOTE: You do not need to
have settings for all events. An
event can be skipped by entering
--:-- for the time entry. (Increase
Product Overview
time to 11:59pm/23:59 and the
next number will be --:-- before it
continues to 12:00am/00:00.)
Page 7
7
Installation
Site Selection for Installation
When choosing a location for
the Multi-zone Wi-Fi Controller, a
convenient and accessible location should be chosen. The range
of the Controller is approximately
50 ft (15 m).
The Multi-zone Wi-Fi Controller can control multiple Dimplex
CONNEXTM heaters outside of
the 50 ft (15 m) range, by locating
heaters within 50 ft (15 m) of any
other heater in the system.
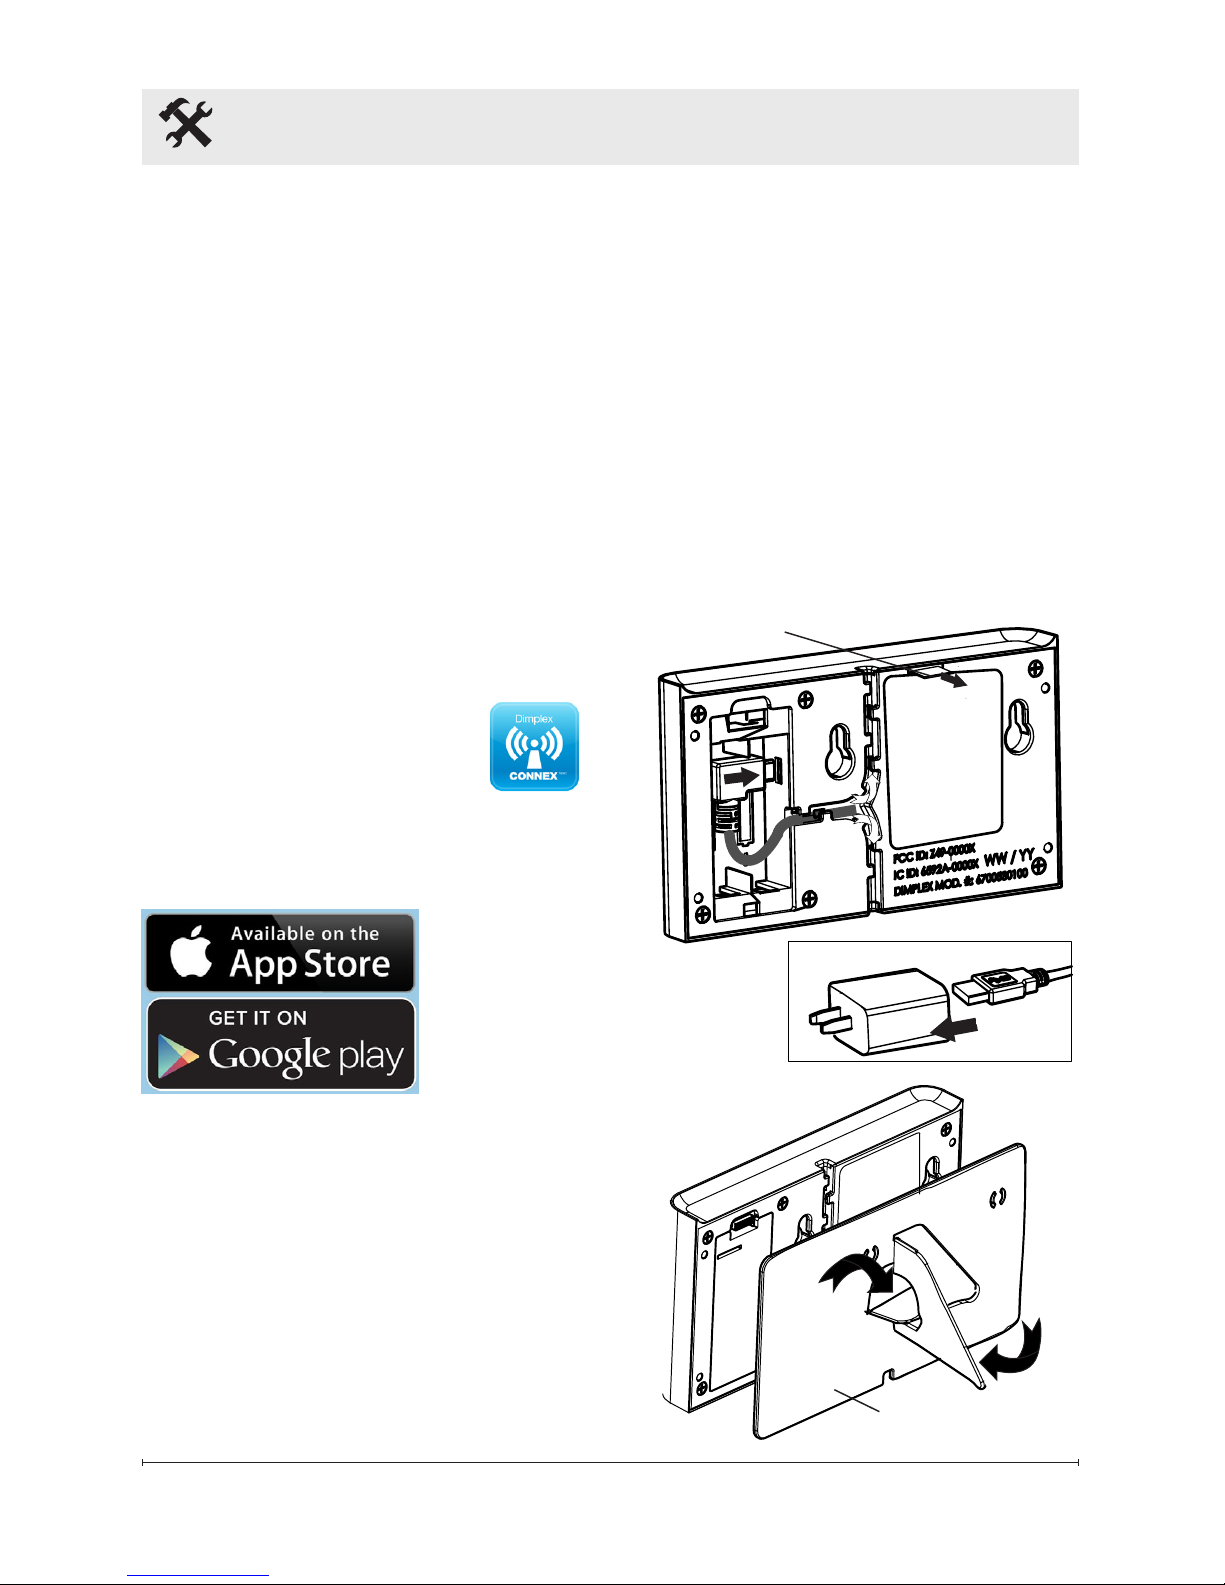
Downloading the App
The Dimplex CONNEX
TM
App is
available for your Apple or Android device.
Search
"Dimplex
CONNEX"
Surface Installation
1. Determine an appropriate
place to locate the Multi-zone
Wi-Fi controller, in the vicinity
of a 120V wall receptacle and
a Wi-Fi router with an active
internet connect.
2. Remove the controller and
installation hardware from its
package.
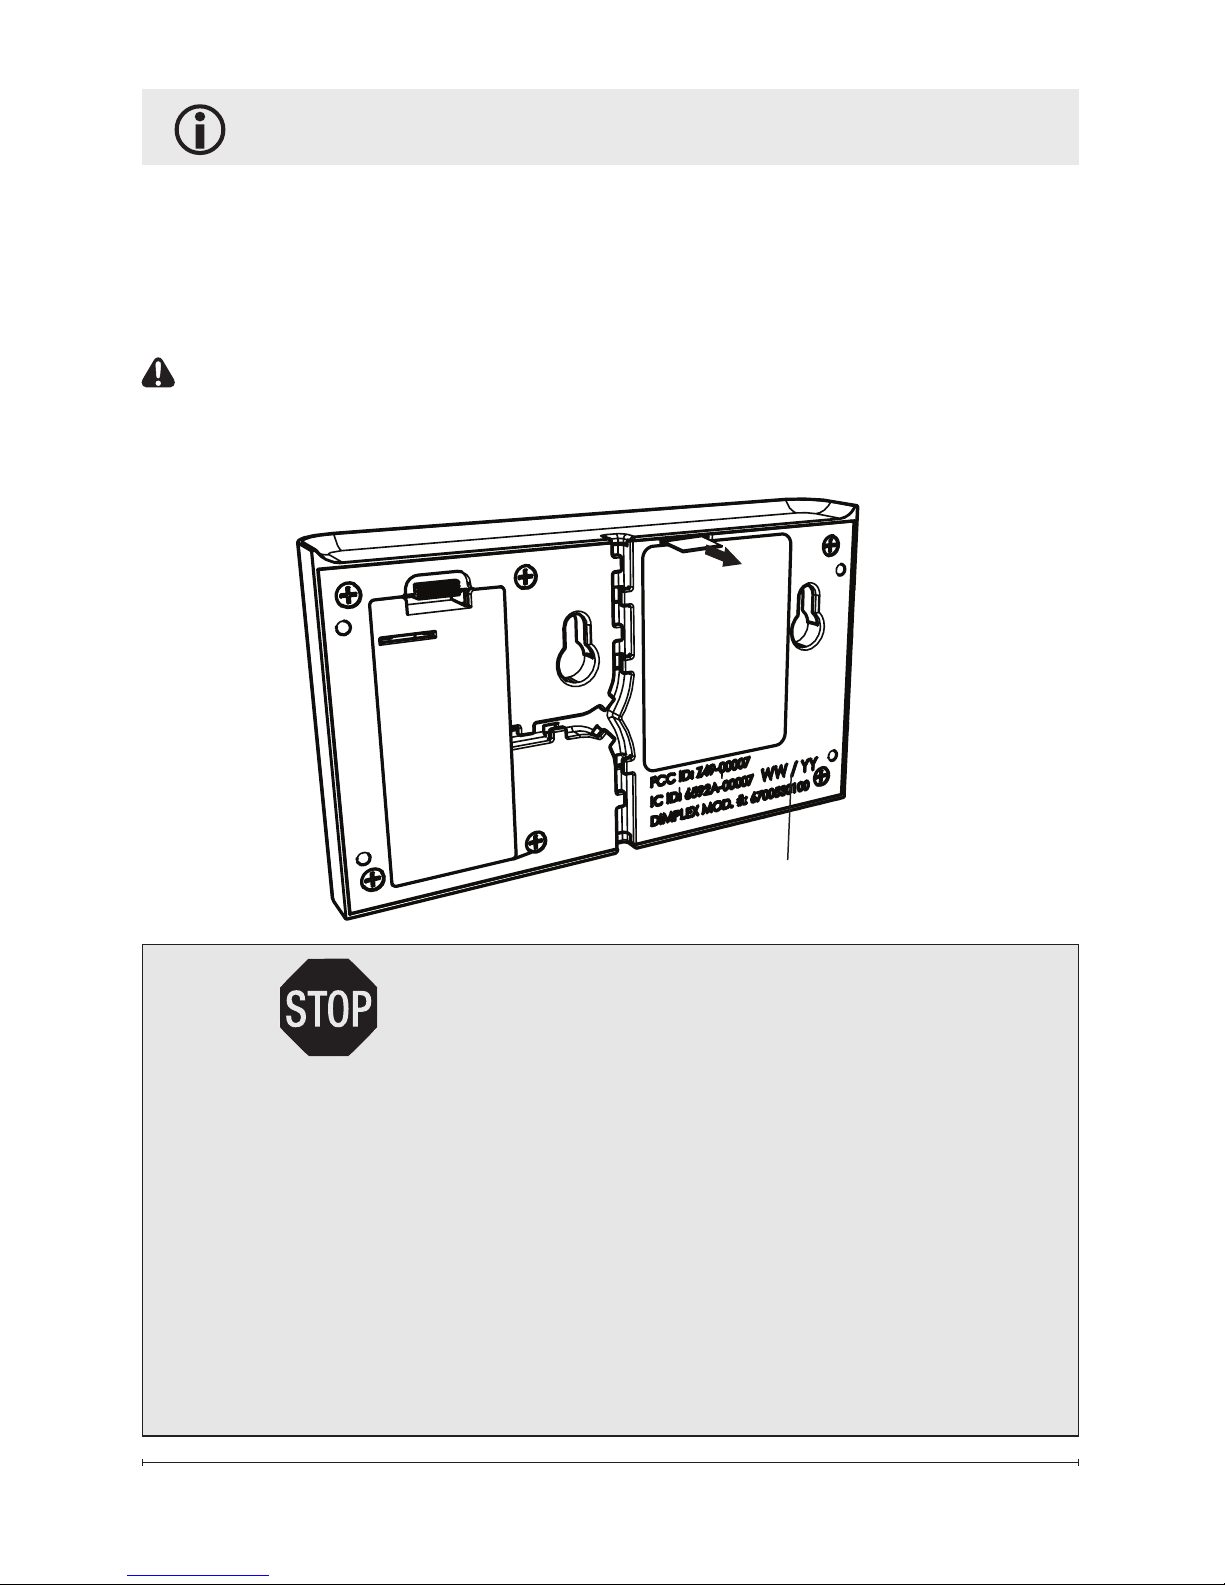
3. Remove the support stand and
compartment cover from the
unit. (Figure 1 & 2)
4. Install the power cord to the
unit in the provided USB connection.
5. Route the wire in the track
Figure 1
Figure 2
Battery Tab
Support Stand
Page 8
8 www.dimplex.com
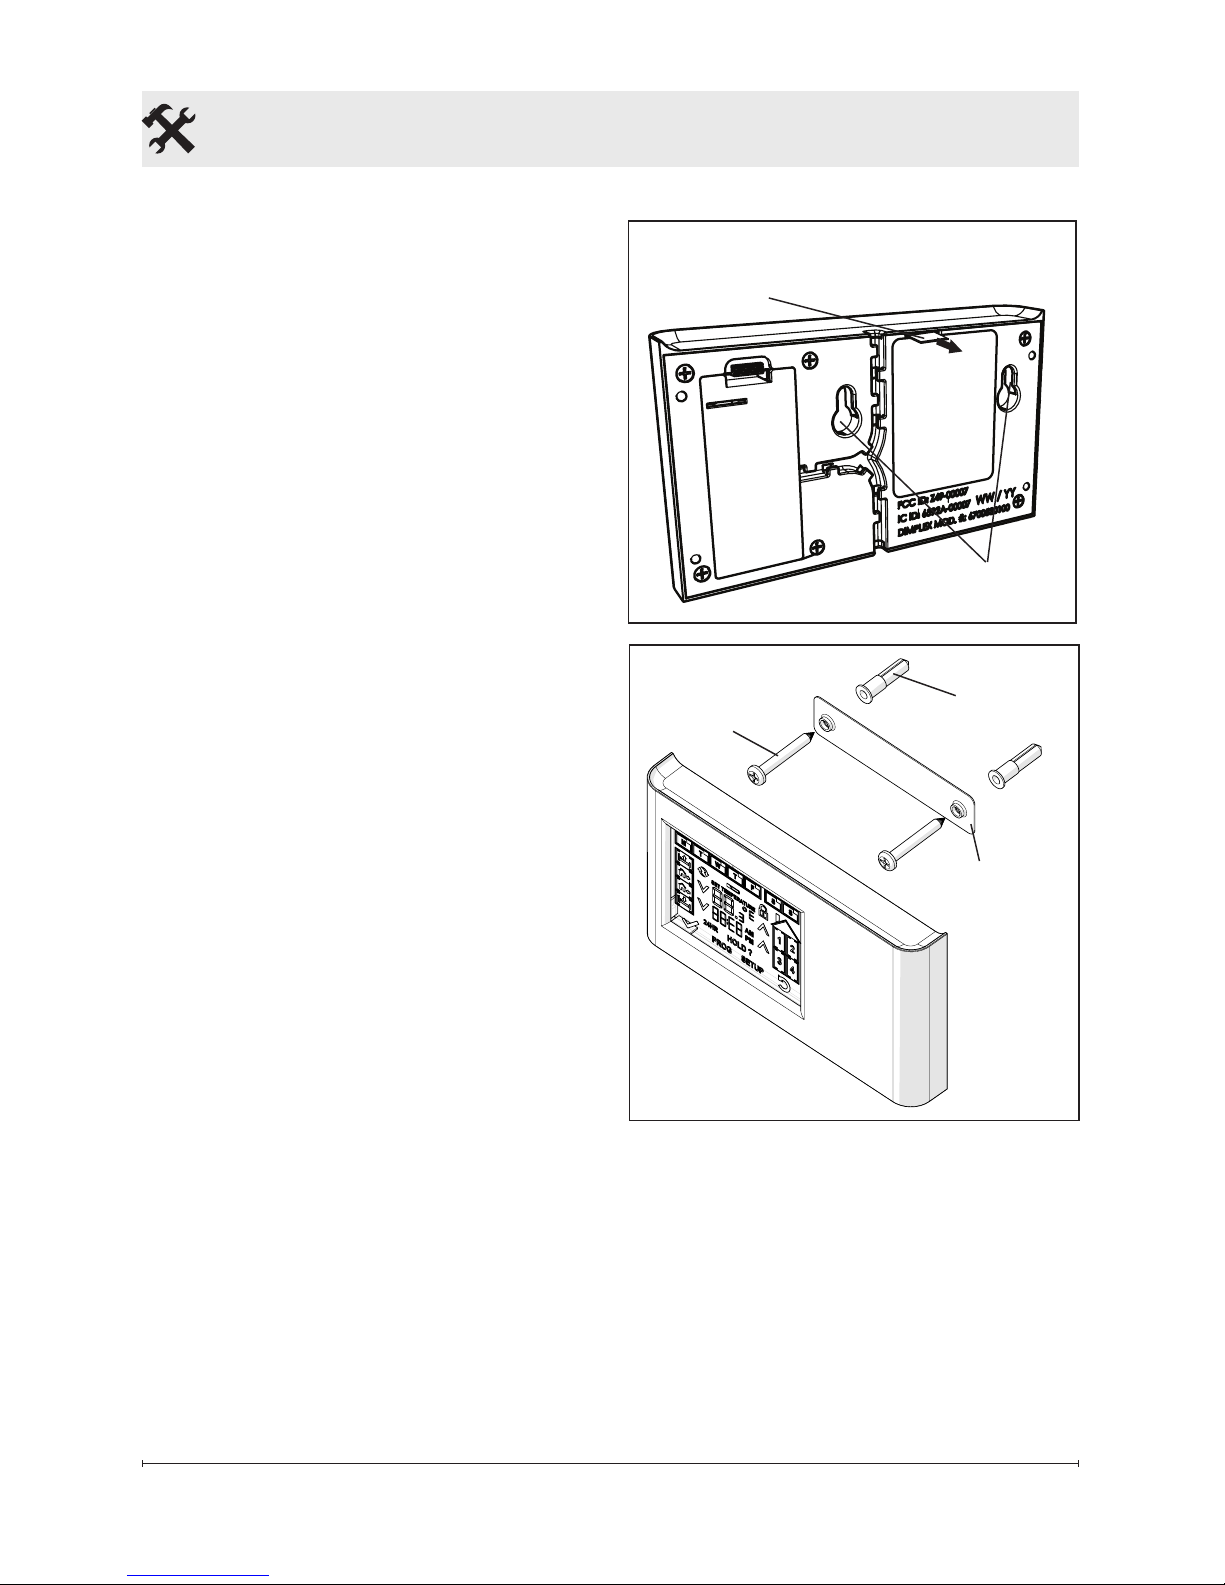
Installation
Figure 3
Mounting
Holes
Figure 4
Wall Anchor
Screw
Wall Mounting
Bracket
most appropriate to your
installation, and replace the
compartment cover.
!
NOTE: There is a plastic tab
which is associated to a back up
battery to assist with the synchronization of the heaters. It is
recommended that the tab remain
in place until the time of synchronization. (Figure 3)
6. Adjust the support stand to
have the stand open and secure. (Figure 2)
7. Reattach the support stand to
the unit.
8. Plug the unit into the wall
receptacle and place unit in
desired location.
Wall Mount Installation
1. Determine an appropriate lo-
cation to mount the Multi-zone
Wi-Fi controller, in the vicinity
of a 120V wall receptacle and
a Wi-Fi router with an active
internet connect.
2. Remove the Multi-zone Wi-Fi
Controller and installation
hardware from its package.
3. Remove the support stand and
compartment cover from the
unit. (Figure 1 & 2)
4. Install the power cord to the
unit in the provided USB connection, located under the
compartment cover.
5. Route the wire in the track
most appropriate to your
installation, and replace the
compartment cover.
!
NOTE: There is a plastic tab
Battery Tab
Page 9

9
Installation
which is associated to a back-up
battery to assist with the synchronization of the heaters. It is
recommended that the tab remain
in place until the time of synchronization. (Figure 3)
6. Using the Wall Mounting
Bracket, mark and drill the
holes for the wall anchors.
(Figure 4)
7. Install the screws through the
Wall Mounting Bracket and
into the anchors.
!
NOTE: Ensure that the at
side of the Wall Mounting Bracket
is against the wall and the screws
are installed so that they rest
against the extended portion of
the hole. The space will allow
screws to sit in the mounting
holes correctly.
8. Slide the unit onto the screws.
9. Plug the unit into the wall
receptacle.
Page 10

10 www.dimplex.com
Figure 5 - Full Touch Screen Display
M
L
N
K
B
E
A D
I
C
J
F
G
H
A. Day Icons
B. Event Icons
C. Zone Icons
D. Synchronization Icon
E. Low Battery Icon
F. Lock Icon
G. Check Icon
H. 24 Hour Icon
I. Program Icon
J. Hold Icon
K. Setup Icon
L. Go Back Icon
M. Temperature Display
N. Time Display
Initial Setup
Page 11

11
Once the App has been installed,
the program will step through the
account setup, connection to the
local router with an active internet
connect and the Multi-zone Wi-Fi
controller.
!
NOTE: If the unit is correctly
connected, the display will be
updated with the current day and
time.
Once power has been provided
to the unit, the Setup program will
begin. The initial set-up includes:
Day, Type of Clock (12hr or 24hr),
Current Time and Temperature
Measurement Preference.
!
NOTE: Since the unit will be
connected to Wi-Fi, the day and
time will automatically set and this
section can be skipped over.
1. Select the current day of the
week, by pressing the icon on
the screen.
!
NOTE: As each selection
is made, the selected icon will
become solid and the Check Icon
will appear to move to the
next option.
2. Press the Check Icon to
save selection.
3. The default type of clock is
a 12hr. The clock can be
changed to a 24hr by pressing the icon. (To revert
back, press the icon.)
4. Using the and icons,
you can then set the time.
!
NOTE: If the button is held
down for longer the time will
increase faster.
!
NOTE: If you notice that the
wrong day has been selected you
can press the Go Back Icon to
revert to the previous screen.
5. Press the Check Icon to
save selection.
6. The °C icon will begin to flash
as the default. To switch to °F,
press the flashing °C.
7. Once the day, time and
temperature preference have
been set, press the Check
Icon to go into operation
mode.
!
NOTE: If the time needs to be
adjusted after this setup, you can
press and hold the time display
for 3 seconds to go into the time
adjustment mode or press setup
to adjust all of the settings.
Initial Setup
Page 12

12 www.dimplex.com
!
NOTE: At any time, holding
down the temperature set point
will toggle the temperature measurement preference.
Heater Synchronization
The controller features CONNEXTM, a wireless technology
that works with Dimplex CONNEX
TM
enabled heaters to provide
simple whole home connectivity
and comfort. CONNEX
TM
controllers are available to control one
or multiple heaters within a 50’
(15 m) radius. In order for the
controller to have this function
the CONNEX
TM
enabled heater
and the controller will need to be
synchronized.
!
NOTE: For ease of setup, it is
suggested that the controller be
taken to each heater to complete
the synchronization process. The
controller is equipped with a small
battery that will allow the unit to
be unplugged from the wall, for
up to 3 hours, to be able to move
to each heater for synchronization. Synchronization can be
completed after the battery has
died, by moving the controller to
each heater and plugging it into a
nearby receptacle.
CAUTION: Always press the
icons with a blunt object. Sharp
objects like pen and pencil points
may damage the touch screen.
1. Press the icon to put the
controller into synchronization
mode.
2. All four (4) zone icons will
begin to ash.
3. Select the zone that the spe-
cic heater will be associated
with. That icon will become
solid.
4. On the heater press and hold
the V button for 3 seconds,
both the and icons will
begin to ash.
5. Press the – , ✚ and then V,
on the heater.
6. Within 10 seconds press the
icon on the controller.
!
NOTE: When the synchronization is complete the display on
the heater will switch to the new
settings from the controller.
7. Repeat steps 3-5 until all of
the heaters are synchronized.
8. Press the icon to revert
back to operation mode.
!
NOTE: When the controller is
running on battery power, Wi-Fi
function is disabled.
Initial Setup
Page 13

13
Program Setup "Quick Set"
The program function guides the
user through the setup for each
of the time settings (Wake, Away,
Home and Sleep), based on the
selected zones to set the desired
temperatures.
!
NOTE: It is recommended that
the main overall programming be
done rst - i.e. bedrooms during
the work week and program the
entire day, then perform another
setup for another zone to speed
up the programming. After the
main programming is complete,
ne tuning can be done on a
single day, zone or event basis,
by holding down the day or event
icon for 3 seconds.
!
NOTE: There is a blank setting
table at the back of this manual to
assist with ensuring that all of the
required events and zones have
been setup to the desired times
and temperatures.
CAUTION: Always press the
icons with a blunt object. Sharp
objects like pen and pencil points
may damage the touch screen.
1. Press the icon to start
the setup. The rst setting will
be for the Wake Event
. The zone icons will begin to
ash.
!
NOTE: At any time, pressing
the icon will return to the previ-
ous step. If the icon is held for
3 seconds it will return to the main
operating screen.
2. Select the zone(s) that the
settings are going to be applied.
!
NOTE: As each zone is selected it will become solid and the
remaining zones will continue to
ash.
3. Press the icon.
4. The day icons will begin to
ash.
5. Select the days that the set-
tings are going to be applied.
!
NOTE: As each day is selected it will become solid and the
remaining days will continue to
ash.
6. Press the icon.
7. Using the and icons on
either side of the time setting, set the time for the Wake
event to occur.
Program Schedule Setup
Page 14

14 www.dimplex.com
8. Press the icon.
9. Using the and icons on
either side of the temperature
setting, set the temperature
for the Wake event to adjust
to.
10. Press the icon.
11. Repeat steps 2-10 for each
of the other events - Away,
Home and Sleep.
!
NOTE: There is a blank setting
table at the back of this manual to
assist with ensuring that all of the
required events and zones have
been setup to the desired times
and temperatures.
Factory Reset
If the programmed settings need
to be adjusted signicantly, it is
possible to Reset the controller
back to the Factory settings.
1. Press and hold the
icon for 10 seconds.
2. Follow the prompts to con-
rm the day, time, and unit of
measurement.
Program Schedule Setup
Page 15

15
General Functions
CAUTION: Always press the
icons with a blunt object. Sharp
objects like pen and pencil points
may damage the touch screen.
During regular operation you can
press the icon, to make
changes to the basic setup of the
controller. This includes:
1. Day of the Week
2. Time and/or Type of Clock
3. Temperature Measurement
Unit
4. Enable the Sync Function or
5. Enable the Lock Function.
!
NOTE: If the day, time or
temperature measurement
preference is adjusted, then the
synchronization and lock functions are no longer available until
the changes have been accepted
or reset (the icon has been
pressed).
1. Changing the Day of the
Week
!
NOTE: Since the unit will be
connected to Wi-Fi, the day and
time will automatically set and this
section will not be applicable.
When you initially go in to the
setup menu, the current day of
the week will appear, it will be
ashing. Select the desired day of
the week (the new selection will
Page 16

16 www.dimplex.com
General Functions
also be ashing) and the icon
will appear. Press the icon to
save the changes and revert back
to operation mode.
!
NOTE: The time can also be
changed by holding down the
time display icon for 3 seconds,
but only the Day, Time and Type
of clock will be displayed to
change.
2. Changing the Time
!
NOTE: Since the unit will be
connected to Wi-Fi, the day and
time will automatically set and this
section will not be applicable.
When you initially go into the
setup menu, the and icons
for the time adjustment will be
ashing and the optional selected
time setting also will appear
(ashing).
Using the and icons the
time can be adjusted.
!
NOTE: If the button is held
down for longer the time will
increase faster.
By pressing the ashing time setting, the time display will change
to match the new setting. I.e.
2:12pm will change to 14:12.
As soon as any adjustment is
made the icon will appear.
Press the icon to save the
changes and revert back to operation mode.
!
NOTE: The time can also be
changed by holding down the
time display icon for 3 seconds,
but only the Day, Time and Type
of clock will be displayed to
change. Press the icon to
save the changes and revert back
to operation mode.
3. Changing the Temperature
Measurement Unit
When you initially go into the
setup menu, the temperature will
disappear and the temperature
measurement icon will begin to
ash. By pressing the icon it will
toggle between °C and °F.
As soon as any adjustment is
made the icon will appear.
Press the icon to save the
changes and revert back to operation mode.
!
NOTE: The Temperature
Measurement unit can also be
changed by holding down the
temperature setpoint display for 3
seconds, and it will change to the
Page 17

17
other Temperature Measurement
unit.
4. Synchronization Function
The controller features CONNEXTM, a wireless technology
that works with Dimplex CONNEX
TM
enabled heaters to provide
simple whole home connectivity
and comfort. CONNEX
TM
controllers are available to control one
or multiple heaters within a 50’
(15 m) radius. In order for the
controller to have this function,
the CONNEX
TM
enabled heater
and the controller will need to be
synchronized.
!
NOTE: See Initial Setup sec-
tion for detailed instructions.
5. Lock Function
The controller can be "Locked" so
that the display on the controller
is disabled to prevent any changes to the settings in the system.
To Enable:
1. Press the Icon.
2. Enter the sequence Zone 1,
Zone 2, Zone 3 and Zone 4,
then press the Icon.
The Controller will display the
Icon and continue to operate
based on the settings and signals
General Functions
from the controller.
!
NOTE: Adjustments can
be made to individual heaters
by entering its specic unlock
sequence and adjusting the set
point.
CAUTION: The adjusted
heater will only retain the new set
point until an event occurs on the
controller and a new set point is
sent.
To Disable:
1. Press and hold the Icon for
3 seconds.
2. Enter the sequence Zone 1,
Zone 2, Zone 3 and Zone 4,
then press the Icon.
Page 18

18 www.dimplex.com
Operation
Once the programming is complete and the heaters have been
synchronized, the controller has
built in functions that can add to
the overall exible benets of the
system.
During regular operation, the
temperature setting in each Zone
can be displayed by selecting the
desired Zone.
To see the setting for the next
Day or Event for a particular
Zone, press the corresponding
icon to display the setting and
set time. The setting will remain
displayed for 5 seconds, before
reverting back to the regular oper-
ating screen.
CAUTION: Always press the
icons with a blunt object. Sharp
objects like pen and pencil points
may damage the touch screen.
Set Point Changes
The user has the option at any
time to adjust a particular temperature setting without changing
the main program.
There are two types of temperature changes that can be used:
1. Temporary or
2. Indenite
Temporary Temperature Changes
If the temperature in a particular
Page 19

19
Operation
zone or multiple zones needs to
be adjusted for the remainder of
the current event a Temporary
Temperature Change can be
done.
1. Select the Zone to which the
temperature change will be
applied.
2. Using the and icons,
adjust the set point to the
desired temperature.
3. Select additional Zones if
needed.
!
NOTE: All of the settings will
adjust to these programmed settings at the next event for each of
the specied zones.
Indenite Temperature Changes
If the temperature in a particular
zone or multiple zones needs
to be adjusted for an indenite
period of time, an Indenite Tem-
perature Hold can be done.
1. Select the Zone to which the
temperature hold will be applied.
2. Using the and icons,
adjust the set point to the
desired temperature.
3. Press and hold the
Icon.
4. Select additional Zones if
needed.
5. Press the icon to save the
changes and revert back to
operation mode.
!
NOTE: To exit the hold mode,
the user can press the icon.
This will remove all holds that
have been applied.
Factory Reset
If the programmed settings need
to be adjusted signicantly, it is
possible to Reset the controller
back to the Factory settings.
1. Press and hold the
icon for 10 seconds.
2. Follow the prompts to con-
rm the day, time, and unit of
measurement.
Page 20

20 www.dimplex.com
Maintenance
Surface Cleaning
Use a cloth dampened with warm
water only to clean the housing
and glass display of the wall setter. Do not use abrasive cleaners.
If the display needs to be cleaned,
putting the unit in the lock function will allow you to remove any
fingerprints or dirt without changing any settings.
Battery Replacement (Figure 6)
The Multi-zone programmable
CONNEXTM Controller contains a
CR2032 (3V) battery. The intention of the battery is to allow
heater synchronization to be
carried out more conveniently.
Replacement of the battery will
only be required if additional synchronization needs to take place
and a convenience receptical is
not in the vacinity of the heater.
To replace the battery:
1. Remove stand from unit or
remove the unit from the wall.
2. Access the battery by removing the 6 screws that attach
the back cover to the unit.
3. Replace the battery.
!
NOTE: Ensure that the battery is installed under the bottom
battery prongs.
4. Reassemble and remount the
remote control.
!
NOTE: Multi-zone programmable CONNEXTM Controller will
retain all settings while battery is
removed and will revert to those
settings when power is restored.
Battery must be recycled
or disposed of properly.
Check with your Local
Authority or Retailer for recycling
advice in your area.
Figure 6
Page 21

21
Warranty
LIMITED WARRANTY: All Multi-zone
programmable CONNEXTM Controllers are warranted against defects
in workmanship and materials for
three years from date of sale. This
warranty does not apply to damage
from accident, misuse, or alteration,
nor to equipment improperly installed
or wired or maintained in violation
of the instruction sheet. This limited
warranty applies only to purchases
made in any province of Canada
except for Yukon Territory, Nunavut,
or Northwest Territories or in any of
the 50 States of the USA (and the
District of Columbia) except for Hawaii and Alaska. This limited warranty
applies to the original purchaser of
the product only and is not transferable. No other written or oral warranty
applies. No employee, agent, dealer
or other person is authorized to give
any warranties on behalf of Dimplex.
The customer shall be responsible
for all costs incurred in the removal
or reinstallation and shipping of the
product for repairs. Within the limitations of this warranty, inoperative
units shall be returned to the nearest
Dimplex authorized service center,
and we shall repair or replace, at our
option, at no charge to you with return
freight paid be Dimplex. It is agreed
that such repair or replacement is
the exclusive remedy available from
Dimplex and that DIMPLEX IS NOT
RESPONSIBLE FOR DAMAGES OF
ANY KIND, INCLUDING INCIDEN-
TAL AND CONSEQUENTIAL DAMAGE. Some States do not allow the
exclusion or limitation of consequential damages, so the above exclusion
or limitation may not apply to you.
This warranty gives you specic legal
rights and you may also have other
rights which vary from state to state.
Page 22

22 www.dimplex.com
Wake Leave Home Sleep
Monday Zone 1 21.0C, 6:00AM --.-C, --:--AM --.-C, --:--PM 18.0C, 11:00PM
Zone 2 21.0C, 6:00AM --.-C, --:--AM --.-C, --:--PM 18.0C, 11:00PM
Zone 3 21.0C, 6:00AM --.-C, --:--AM --.-C, --:--PM 18.0C, 11:00PM
Zone 4 21.0C, 6:00AM --.-C, --:--AM --.-C, --:--PM 18.0C, 11:00PM
Tuesday Zone 1 21.0C, 6:00AM --.-C, --:--AM --.-C, --:--PM 18.0C, 11:00PM
Zone 2 21.0C, 6:00AM --.-C, --:--AM --.-C, --:--PM 18.0C, 11:00PM
Zone 3 21.0C, 6:00AM --.-C, --:--AM --.-C, --:--PM 18.0C, 11:00PM
Zone 4 21.0C, 6:00AM --.-C, --:--AM --.-C, --:--PM 18.0C, 11:00PM
Wednesday Zone 1 21.0C, 6:00AM --.-C, --:--AM --.-C, --:--PM 18.0C, 11:00PM
Zone 2 21.0C, 6:00AM --.-C, --:--AM --.-C, --:--PM 18.0C, 11:00PM
Zone 3 21.0C, 6:00AM --.-C, --:--AM --.-C, --:--PM 18.0C, 11:00PM
Zone 4 21.0C, 6:00AM --.-C, --:--AM --.-C, --:--PM 18.0C, 11:00PM
Thursday Zone 1 21.0C, 6:00AM --.-C, --:--AM --.-C, --:--PM 18.0C, 11:00PM
Zone 2 21.0C, 6:00AM --.-C, --:--AM --.-C, --:--PM 18.0C, 11:00PM
Zone 3 21.0C, 6:00AM --.-C, --:--AM --.-C, --:--PM 18.0C, 11:00PM
Zone 4 21.0C, 6:00AM --.-C, --:--AM --.-C, --:--PM 18.0C, 11:00PM
Friday Zone 1 21.0C, 6:00AM --.-C, --:--AM --.-C, --:--PM 18.0C, 11:00PM
Zone 2 21.0C, 6:00AM --.-C, --:--AM --.-C, --:--PM 18.0C, 11:00PM
Zone 3 21.0C, 6:00AM --.-C, --:--AM --.-C, --:--PM 18.0C, 11:00PM
Zone 4 21.0C, 6:00AM --.-C, --:--AM --.-C, --:--PM 18.0C, 11:00PM
Saturday Zone 1 21.0C, 6:00AM --.-C, --:--AM --.-C, --:--PM 18.0C, 11:00PM
Zone 2 21.0C, 6:00AM --.-C, --:--AM --.-C, --:--PM 18.0C, 11:00PM
Zone 3 21.0C, 6:00AM --.-C, --:--AM --.-C, --:--PM 18.0C, 11:00PM
Zone 4 21.0C, 6:00AM --.-C, --:--AM --.-C, --:--PM 18.0C, 11:00PM
Sunday Zone 1 21.0C, 6:00AM --.-C, --:--AM --.-C, --:--PM 18.0C, 11:00PM
Zone 2 21.0C, 6:00AM --.-C, --:--AM --.-C, --:--PM 18.0C, 11:00PM
Zone 3 21.0C, 6:00AM --.-C, --:--AM --.-C, --:--PM 18.0C, 11:00PM
Zone 4 21.0C, 6:00AM --.-C, --:--AM --.-C, --:--PM 18.0C, 11:00PM
Reference Tables
Default Settings
Page 23

23
Wake Leave Home Sleep
Monday Zone 1 21.0C, 6:00AM 17.0C, 8:00AM 21.0C, 9:00PM 18.0C, 11:00PM
Zone 2 21.0C, 6:00AM 17.0C, 8:00AM 21.0C, 8:00PM 18.0C, 10:00PM
Zone 3 21.0C, 8:00AM 17.0C, 9:00AM 21.0C, 5:00PM 18.0C, 7:00PM
Zone 4 --.-C, --:--AM --.-C, --:--AM 21.0C, 5:00PM 18.0C, 9:00PM
Tuesday Zone 1 21.0C, 6:00AM 17.0C, 8:00AM 21.0C, 9:00PM 18.0C, 11:00PM
Zone 2 21.0C, 6:00AM 17.0C, 8:00AM 21.0C, 8:00PM 18.0C, 10:00PM
Zone 3 21.0C, 8:00AM 17.0C, 9:00AM 21.0C, 5:00PM 18.0C, 7:00PM
Zone 4 --.-C, --:--AM --.-C, --:--AM 21.0C, 5:00PM 18.0C, 9:00PM
Wednes-
day
Zone 1 21.0C, 6:00AM 17.0C, 8:00AM 21.0C, 9:00PM 18.0C, 11:00PM
Zone 2 21.0C, 6:00AM 17.0C, 8:00AM 21.0C, 8:00PM 18.0C, 10:00PM
Zone 3 21.0C, 8:00AM 17.0C, 9:00AM 21.0C, 5:00PM 18.0C, 7:00PM
Zone 4 --.-C, --:--AM --.-C, --:--AM 21.0C, 5:00PM 18.0C, 9:00PM
Thursday Zone 1 21.0C, 6:00AM 17.0C, 8:00AM 21.0C, 9:00PM 18.0C, 11:00PM
Zone 2 21.0C, 6:00AM 17.0C, 8:00AM 21.0C, 8:00PM 18.0C, 10:00PM
Zone 3 21.0C, 8:00AM 17.0C, 9:00AM 21.0C, 5:00PM 18.0C, 7:00PM
Zone 4 --.-C, --:--AM --.-C, --:--AM 21.0C, 5:00PM 18.0C, 9:00PM
Friday Zone 1 21.0C, 6:00AM 17.0C, 8:00AM 21.0C, 9:00PM 18.0C, 12:00PM
Zone 2 21.0C, 6:00AM 17.0C, 8:00AM 21.0C, 8:00PM 18.0C, 11:00PM
Zone 3 21.0C, 8:00AM 17.0C, 9:00AM 21.0C, 5:00PM 18.0C, 11:00PM
Zone 4 --.-C, --:--AM --.-C, --:--AM 21.0C, 5:00PM 18.0C, 11:00PM
Saturday Zone 1 21.0C, 8:00AM 17.0C, 10:00AM 17.0C, 10:00PM 18.0C, 12:00PM
Zone 2 21.0C, 8:00AM 17.0C, 10:00AM 21.0C, 8:00PM 18.0C, 11:00PM
Zone 3 21.0C, 9:00AM --.-C, --:--AM --.-C, --:--PM 18.0C, 11:00PM
Zone 4 21.0C, 9:00AM --.-C, --:--AM --.-C, --:--PM 18.0C, 11:00PM
Sunday Zone 1 21.0C, 8:00AM 17.0C, 10:00AM 17.0C, 10:00PM 18.0C, 11:00PM
Zone 2 21.0C, 8:00AM 17.0C, 10:00AM 21.0C, 8:00PM 18.0C, 10:00PM
Zone 3 21.0C, 9:00AM --.-C, --:--AM --.-C, --:--PM 18.0C, 7:00PM
Zone 4 21.0C, 9:00AM --.-C, --:--AM --.-C, --:--PM 18.0C, 9:00PM
Zone 1: Bedroom 1, 2, 3
Zone 2: Bathroom 1, 2
Zone 3: Kitchen
Zone 4: Living Room
Reference Tables
Sample Settings
Page 24

24 www.dimplex.com
Wake Leave Home Sleep
Monday Zone 1
Zone 2
Zone 3
Zone 4
Tuesday Zone 1
Zone 2
Zone 3
Zone 4
Wednes-
day
Zone 1
Zone 2
Zone 3
Zone 4
Thursday Zone 1
Zone 2
Zone 3
Zone 4
Friday Zone 1
Zone 2
Zone 3
Zone 4
Saturday Zone 1
Zone 2
Zone 3
Zone 4
Sunday Zone 1
Zone 2
Zone 3
Zone 4
Zone 1: ____________________
Zone 2: ____________________
Zone 3: ____________________
Zone 4: ____________________
Reference Tables
User Settings
Page 25

© 2015 Dimplex North America Limited
Dimplex North America Limited
1367 Industrial Road
Cambridge ON
Canada N1R 7G8
 Loading...