

Page 1
Contact Dimplex
A brand of the GDC Group Limited, trading as Glen Dimplex Heating & Ventilation
If you have any questions about what the Dimplex Warranty covers and does not cover or how to claim
under the Dimplex Warranty, please contact us:
GDHV, Grange Drive, Hedge End, Southampton SO30 2DF
Telephone: 0344 879 3588
Email: customer.services@glendimplex.com
Visit: www.dimplex.co.uk
[c] Glen Dimplex
All rights reserved. Material contained in this publication may not be reproduced in whole or in
part, without prior permission in writing of Glen Dimplex.
DX360CF 180905 Issue 1
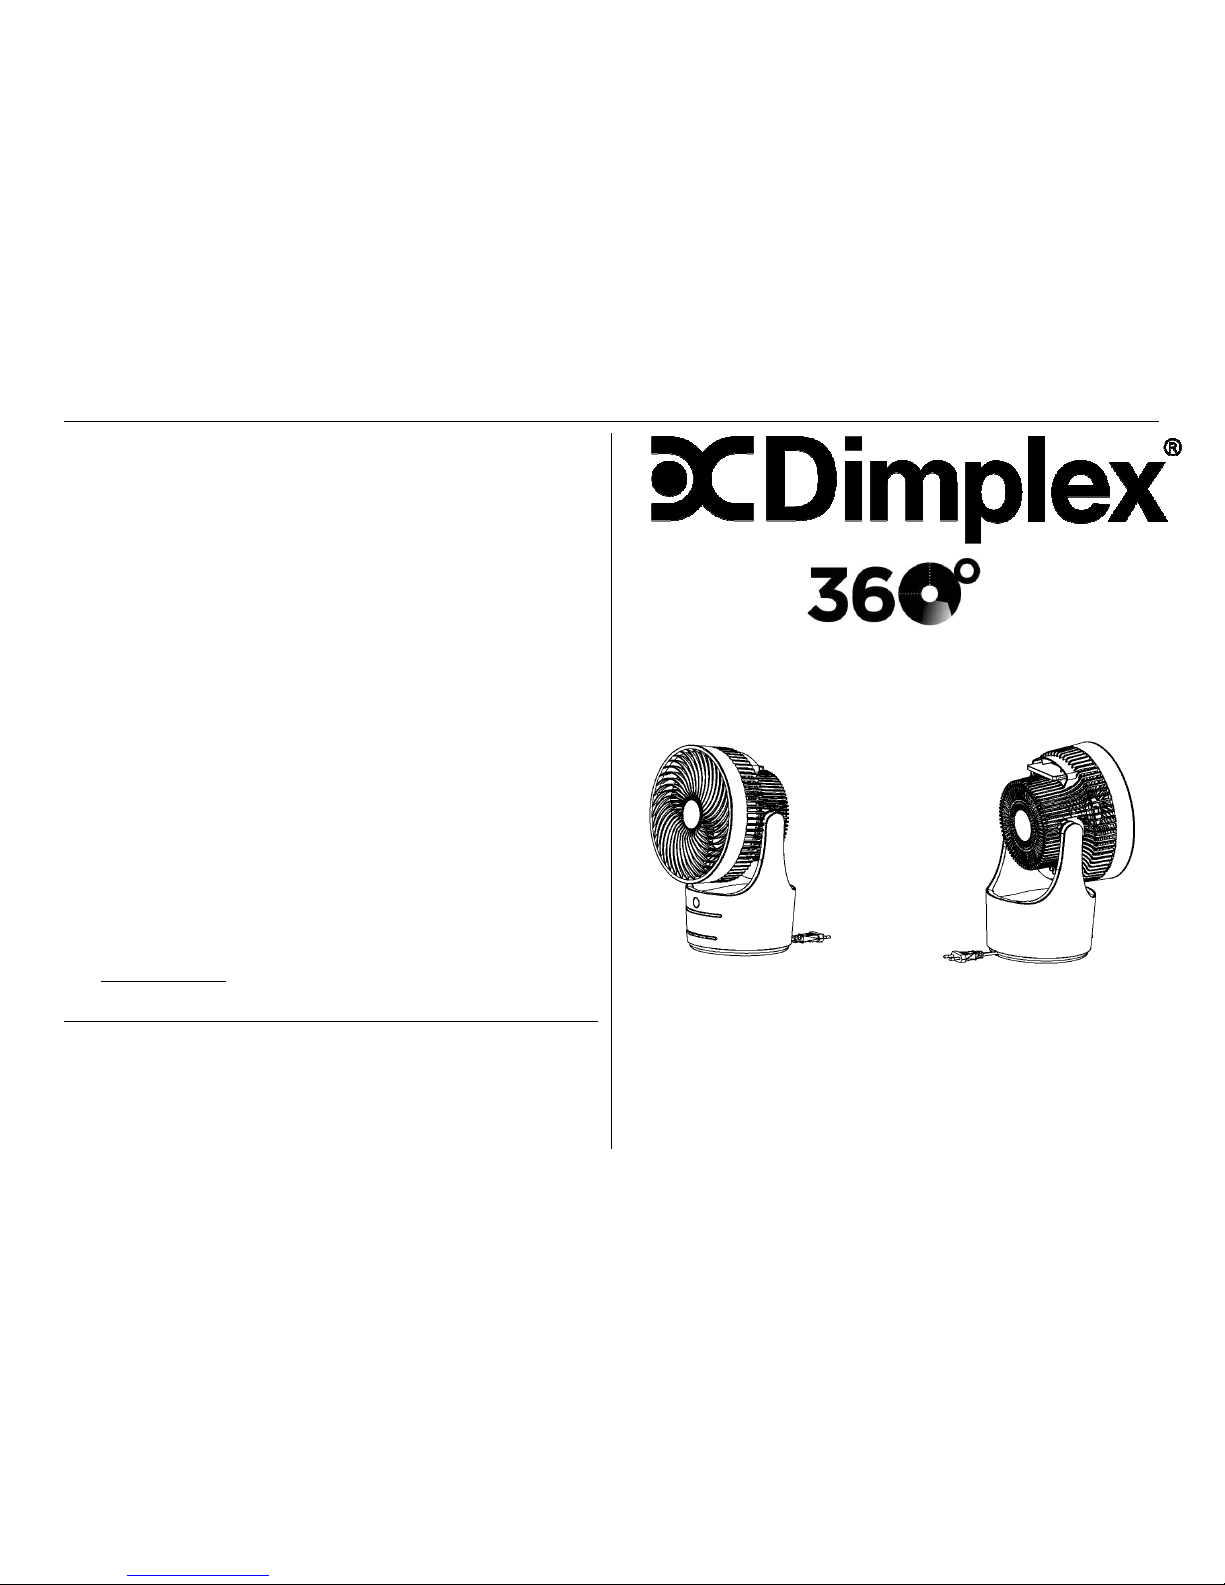
USE & CARE INSTRUCTIONS
Air Circulation Fan Model DX360CF
PLEASE READ THESE INSTRUCTIONS CAREFULLY
AND SAVE FOR FUTURE REFERENCE
Page 2
1 2
IMPORTANT WARNINGS
Failure to comply with the warnings listed below may
result in electric shock or serious injury.
This product should be used only in accordance with the specifications
outlined in this manual. Usage other than as specified in these instructions
may result in serious injury, risk of fire or electric shock.
• IMPORTANT - To reduce the risk of electric shock, the plug is intended to fit in a
standard polarized 13Amp socket outlet, only plug the appliance directly into a
proper electrical outlet.
• To protect against electrical hazards, DO NOT immerse in water or other liquids.
Do not use near water.
• Children cannot recognize the hazards associated with the usage of electrical
appliances. For this reason, always supervise children when they are near the unit.
These appliances can be used by children aged from 3 and above and persons
with reduced physical, sensory or mental capabilities or lack of experience and
knowledge if they have been given supervision or instruction concerning use of the
appliance in a safe way and understand the hazards involved. Children shall not
play with the appliance. Cleaning and user maintenance shall not be made by
children without supervision.
• Children aged from 3 years and less than 8 years shall only switch on/off the
appliance if it has been placed or installed in its intended normal operating position
and they have been given supervision or instruction concerning use of the
appliance in a safe way and understand the hazards involved. Children aged from
3 years and less than 8 years shall not plug in, regulate and clean the appliance or
perform user maintenance.
• Always unplug the air circulating fan before moving it or cleaning it. Be sure to pull
by the plug and not the cord when un-plugging the appliance.
• NEVER drop or insert any object into any openings.
• DO NOT operate appliance connected to an extension cable
• Keep the cord out of heavy traffic areas. To avoid fire hazard, NEVER put the
cord near heat registers, radiators, stoves or heaters.
• DO NOT cover cord with carpeting, throw rugs, runners, or similar coverings.
• DO NOT route cord under furniture or appliances. Take care to position the cord
away from traffic areas and where it will not be a trip hazard.
• DO NOT operate any appliance with a damaged cord or plug, if motor fan fails to
rotate, after the appliance malfunctions, or if it has been dropped or damaged in
any manner. Please contact our customer service team.
• Use appliance only for intended household use as described in this manual. Any
other use not recommended by the manufacturer may cause fire, electric shock or
injury to persons.
• DO NOT use outdoors. DO NOT place anything on top of the appliance.
• NEVER block the air openings, grills/outlets or place on a soft surface such as a
bed or sofa, as this could cause the unit to tip over, blocking the air intake or
outtake opening.
• DO NOT attempt to repair or adjust any electrical or mechanical functions on this
unit. Doing so will void your warranty. The inside of the unit contains no user
serviceable parts.
• WARNING: To reduce the risk of fie or electric shock, do not use this fan with any
solid-state speed control device.
• WARNING: To avoid danger of suffocation please remove all packaging materials
particularly plastic and EPS and keep these away from vulnerable people, children
and babies.
• WARNING: To avoid the risk of accidental strangulation from the supply cord all
children and vulnerable people must be supervised when near the product whether
it is working or not.
• WARNING: Keep batteries out of reach of children, dispose of used button
batteries immediately and safely.
PRODUCT FEATURES
1) On Board Electric touch control buttons;
2) Handy Infrared Remote control with storage slot on product;
3) 3 Selectable Fan speeds: High, Medium, Low;
4) 3 blowing modes: Normal, Natural, Sleeping
5) Runback Timer Function: 1H、2H、4H、8H;
6) Oscillation:Wide selection of horizontal oscillation angles can be selected: -
30°, 90°, 180° and 360° are available
7) Blower head can be adjusted and set manually with a 90° vertical rotation
possible;
Page 3
3 4
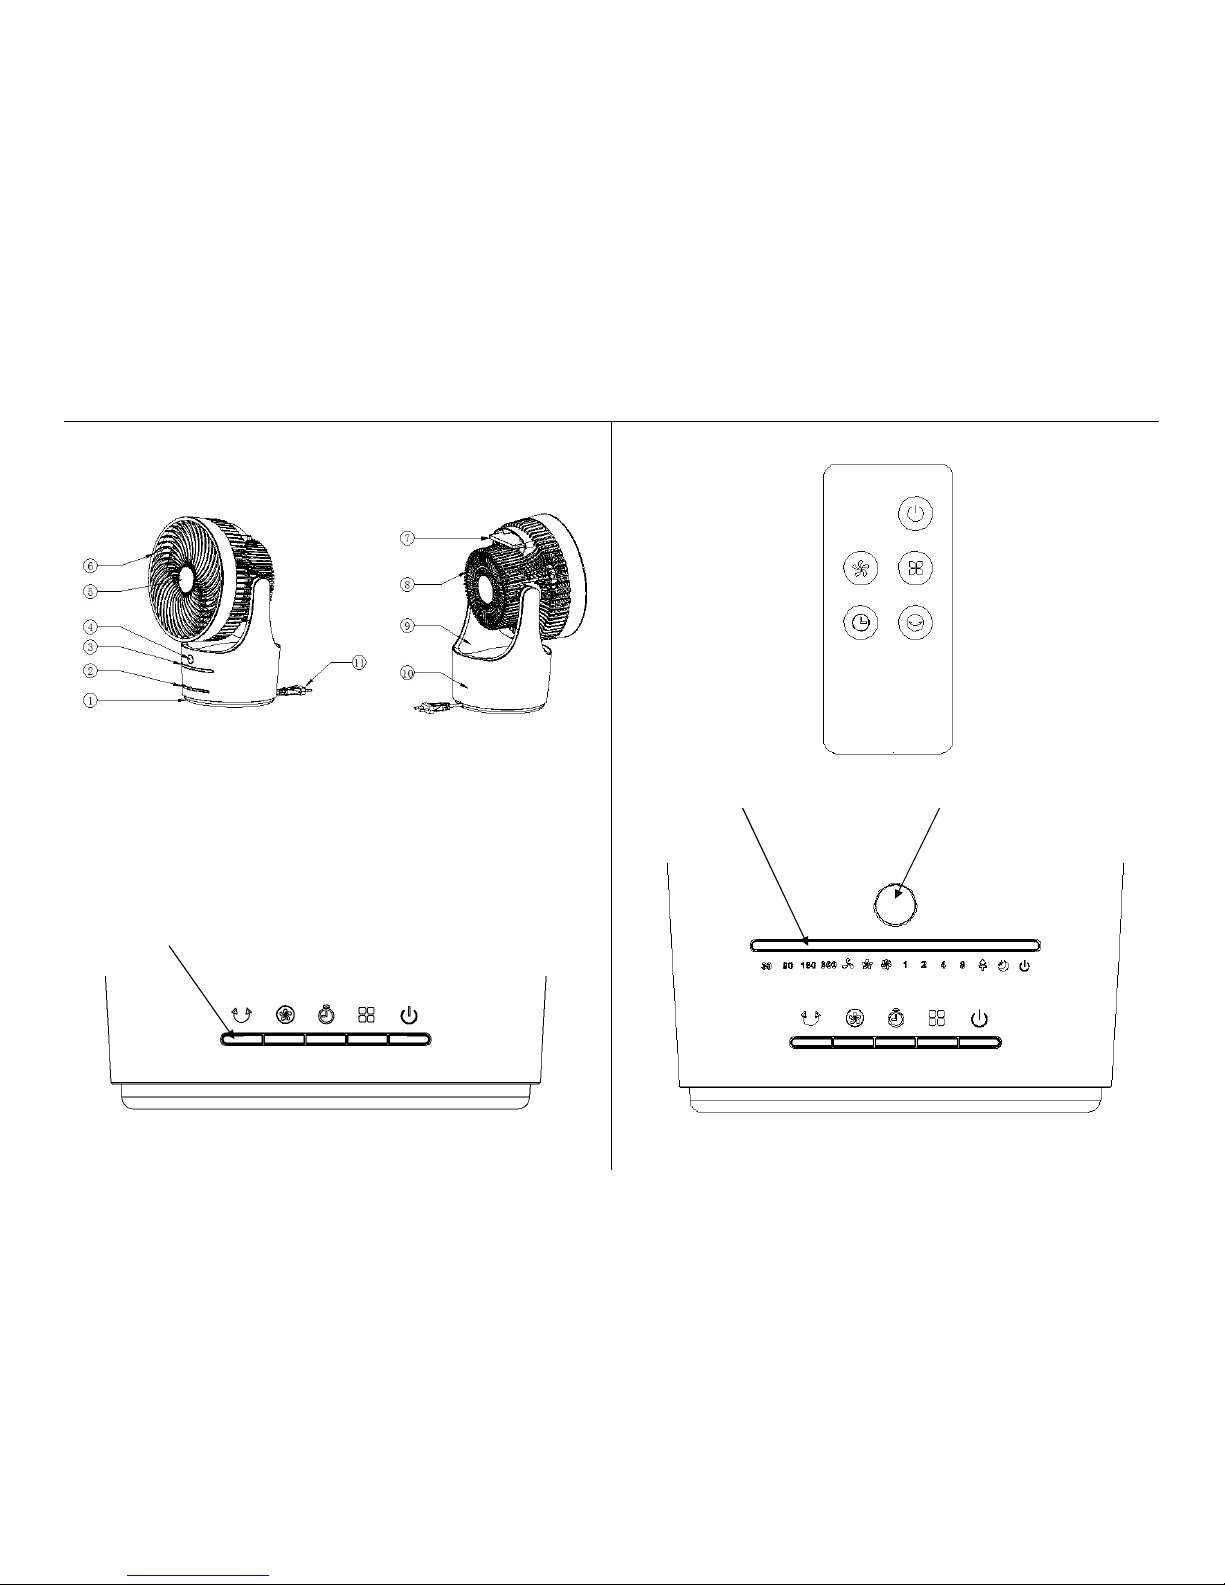
PART DIAGRAMS
Product structure
1. Base 2. Control Buttons 3. LED indicator lights
4. IR Receiving window 5. Decorative Cover 6. Fan guard
7. Remote Controller 8. Rear housing 9. Vertical Oscillation Support
10. Fan Body 11. Power cord
Control Button panel
(See Operating Instructions section for details of symbols)
Remote Control
LED indicator light display panel & IR remote signal receiving window
Page 4

5 6
INSTALLATION INSTRUCTION
Installation Methods
1. Open up the carton and take out the product, Instructions and the remote control, store
or dispose of the packaging materials carefully.
2. This product does not require assembly, it is ready to operate once all packaging
materials are removed. The handle in the rear housing should be used to lift and carry the
product, it can also be used to store the remote control when not in use. (See figure 1)
(Figure 1)
OPERATING INSTRUCTIONS:
Unwrap the cable and plug in the product, it will beep twice to signify that it is connected and
remain in standby mode, note that there are no LED indications in this mode.
1) Power Button - : You must always press this button to start the product, every time
you start the product it will always default to operate in Normal mode at Low speed with the
low speed LED and the power on LED both illuminated, no other function will operate unless
the relevant selection button is pressed (see following details). Pressing the power button
again during any mode of operation will return the product to standby mode.
2) Blower Mode Selection Button - : The default operating mode when you power on is
Normal air blower mode, there is no separate Normal blower mode operating LED. Pressing
when operating will change the blower operation modes from Normal to Natural mode,
Natural to Sleep mode and Sleep back to Normal mode, the relevant LED light will indicate
when Natural and Sleep mode is selected, only the selected fan speed LED will light in
Normal Blower mode.
Normal Blower mode: You can simply use the fan speed selection button to
manually select Low, Medium or High speed fan operation, the relevant speed indication
LED will light as you change between speeds in sequence.
Natural Blower mode
::::
In this mode the fan will automatically change speed to simulate
natural variances in the speed of the wind that you experience outside in natural windy
conditions. In this mode you can use the speed selection button to change between
Low/‘Light breeze’, Middle/‘Strong Breeze’ and High/‘Strong Wind’ modes. The specific
program waveform graph for each Natural wind mode is shown below:
Page 5

7 8
Sleep mode
::::
In this mode the fan speed will continuously vary speed to assist in keeping
cool at night when asleep. You can select 3 different running patterns in this mode by using
the Speed Selection button, the patterns of operation in each speed mode are as follows;
- High speed: Varies between High speed in Normal Blower mode→ Medium speed in
Natural Blower mode→ Low speed in Natural Blower mode:
- Medium speed: Varies between Medium speed in Natural Blower mode →Low speed in
Natural Blower mode
- Low speed
:
Operates at Low speed in Natural Blower mode.
3).Runback Timer Mode Button- : By pressing this button, the fan can be set to operate
continuously in your selected mode of operation for different time intervals, you can select 1
hour, 2 hours, 4 hours or 8 hours, the selected period will be indicated by its LED light which
will remain on for the selected period, when the selected operating time has run out the
product will switch off automatically and go into standby mode until the user needs it again.
4) Fan Speed Selection Button -:When you start the product it will always default to
operate in Normal mode at Low speed with the low speed LED and the power on LED
illuminated. Pressing the button allows you to change from Low to Medium, Medium to
High and High back to Low fan speed , the relevant LED light will illuminate to indicate which
fan speed is selected/operating.
5) Oscillating Mode Selection Button- : By pressing this button while the product is
operating you can select between different angles of oscillation for the product. The product
can be set to oscillate at an angle of 30°,90°,180° or 360°, the angle selected will be
indicated by the illumination of the relevant LED. You have to move through all the oscillation
selection options to return to oscillation off mode (when no oscillation LED will be lit).
Note that the oscillation is controlled by what’s called a stepping motor, this means it will
swing first to the right and then to the left from the starting point over half the swing angle
selected, this applies to all angles apart from the 360º selection, in this setting it will swing
clockwise continuously around completing 360º each time it rotates
6) Please Note
In any mode of operation you can use the power button to switch the product off/into standby
mode at any time, when you next press the power button to switch the product back on it will
remember the last wind speed and oscillation settings and switch back on at these in Normal
Blower Mode, it will not remember if the product was in a Runback Timer mode or in a
different Blower Mode setting.
NB - If the fan speed varies randomly automatically you have selected NATURAL
mode which simulates natural breeze conditions. THIS IS NOT A FAULT. To de-select
this operation please press the MODE button until a NORMAL mode speed
symbol is lit and only use the SPEED selection button to change and select
the fan speed you require (Low / Med / High).
NB – When the product is left running without switch/control operation for 1 minute the LED
indicator light display will switch off automatically, this is to avoid user disturbance or
distraction by the light (particularly if used at night), The lights will switch on again when the
user activates any control button (except the off button), the product can then be operated
normally as described above, if the ‘off’ button is activated the product will just switch off and
the lights will not re-energise.
7) Remote Control Use:
- To activate the remote control release and slide out the battery holder from the bottom back
of the remote control handset (as indicated below), install your 3V CR2032 button battery
cell into its location ensuring the positive and negative pole are as indicated on the label on
the back of the remote and reinstall the battery holder completely. Align to infrared receiver
module when using remote controller.
- Remote Control will only operate the product if it is in direct line of site and within a distance
of 6 meters from the product. If it fails to do so under these conditions after the product has
been in use for some time please check the battery is not depleted before taking any other
action.
Page 6

9 10
TECHNICAL SPECIFICATION
Model DX360CF
Rated Voltage AC220V-240V
Rated Frequency 50Hz
Rated Wattage 45W
Noise Level ≤55dB(Average sound pressure level)
Size 225*203.5*340mm
Standards application IEC 60335-1;IEC 60335-2-80
CLEANING AND MAINTENANCE
● Dust may accumulate on the rear grill cover and wind wheel, which would affect fan
performance. Thus, we suggest cleaning the fan at least once every two months.
1. Disconnect the power and unplug the fan. (Attention: ensure you disconnect from the
mains when cleaning the fan, otherwise there is a risk of electric shock or shorting fuses).
2. Use normal detergent and a soft brush instead of chemical cleaner when cleaning the
product.
● Surface cleaning
1. Clean with a moist, not a damp cloth.
2. Please don’t clean using corrosive or solvent detergent.
3. Please disconnect power and unplug the fan when cleaning the product, otherwise it
might cause electric shock.
● Maintenance & Storage
If the product is not going to be in use for a prolonged period of time, please unplug and
pack the product away carefully in a dry and well-ventilated space, preferably covered, to
avoid dust ingress and collection of dust on the product housing.
.
RECYCLING
The crossed bin symbol on the appliance indicates that the product, at the end of
its life, must be disposed of separately from domestic waste, either by taking it to a
separate waste disposal site for electric and electronic appliances or by returning it
to your dealer when you buy another similar appliance. The user is responsible for
taking the appliance to a special waste disposal site at the end of its life. If the
disused appliance is collected correctly as separate waste, it can be recycled,
treated and disposed of ecologically; this avoids a negative impact on both the
environment and health, and contributes towards the recycling of the product’s
materials. For further information regarding the waste disposal services available,
contact your local waste disposal agency or manufacturer. Dispose of used button
batteries immediately and safely through a proper recycling facility.
Warranty
What does a Dimplex Warranty cover?
Dimplex products deliver reliable service for normal, household use in domestic
settings. All Dimplex products are individually tested before leaving the factory.
If you are a consumer and you experience a problem with your Dimplex product,
which is found to be defective due to faulty materials or workmanship within the
Warranty Period, this Dimplex Warranty will cover repair or - at the discretion of
Dimplex – replacement with a functionally equivalent Dimplex product.
Your product is under warranty for 1 year from the date of purchase or the date of
delivery of the product, if later. The 1 year warranty is extended for an additional 2
years when you register the product with Dimplex, within 28 days of purchase. If you
do not register the product with Dimplex within 28 days, your product will remain
warrantied for 1 year only. To validate your extended warranty register with us
online at: http://register.dimplex.co.uk.
N.B
. Each qualifying product needs to be
registered with Dimplex individually. Please note that the extended warranty is only
available in the UK and Ireland.
Page 7

11 12
The Dimplex Warranty is conditional upon you providing the original purchase
receipt as proof of purchase. Please therefore retain your receipt as proof of
purchase.
If you do experience a problem with your Dimplex product please call the Helpline
on
+44 [0]344 879 3588
or visit https:
//www.dimplex.co.uk/support
. For
ROI
please email
serviceireland@glendimplex.com
or call
+353(0)1 842 4833
. We
will need details of your Dimplex product and a description of the fault which has
occurred. Once we receive your information and proof of purchase we will contact
you to make the necessary arrangements.
If your Dimplex product is not covered by this Dimplex Warranty there may be a
charge to repair your product. However, we will contact you for agreement to any
charges before any chargeable service is carried out.
What is not covered by a Dimplex Warranty?
The Dimplex Warranty does not cover any of the following:
Any fault or damage to your Dimplex product due to faulty materials or workmanship
occurring outside the Warranty Period.
Normal wear and tear including parts that might wear out over time or consumables,
such as filters.
Any fault or damage occurring to any pre-owned Dimplex product or to any other
equipment or property.
Accidental damage to your Dimplex product or damage to your Dimplex product
from external sources (for example, transit, weather, electrical outages or power
surges).
Fault or damage to your Dimplex product which is:
•
Not due to faulty materials or workmanship or which is due to
circumstances outside Dimplex’s control.
•
Caused by use of your Dimplex product for anything other than normal
domestic household purposes in the country where it was purchased.
•
Caused by any misuse, abuse or negligent use of the Dimplex product,
including but not limited to any failure to use it in accordance with the
Operating Instructions supplied with the product.
•
Caused by any failure to assemble, install clean and maintain your Dimplex
product in accordance with the Operating Instructions supplied with the
product unless this was carried out by Dimplex or its authorised dealers.
•
Caused by repairs or alterations to your Dimplex product not carried out by
Dimplex service personnel or its authorised dealer(s).
•
Caused by use of any consumables or spare parts for your Dimplex product
which are not Dimplex -specified.
Terms and Conditions
The Dimplex Warranty is valid for 1 calendar year, plus 2 if registered, from the date
of purchase of your Dimplex product from a recognised retailer in the country of
purchase and use, or the date of delivery of the product if later, always provided the
original receipt has been retained and is produced as proof of purchase.
You must provide to Dimplex or its authorised agents on request the original receipt
as proof of purchase and - if required by Dimplex - proof of delivery. If you are
unable to provide this documentation, you will be required to pay for any repair work
required.
Any repair work under the Dimplex Warranty will be carried out by Dimplex or its
authorised dealer(s) and any parts that are replaced will become the property of
Dimplex. Any repairs performed under the Dimplex Warranty will not extend the
Warranty Period.
Any replacement of your Dimplex product by Dimplex during the Warranty Period
will start the 3 year Warranty Period afresh from the date of delivery of the
replacement Dimplex product to you. (*Please keep original online warranty
registration email and sales receipt for your original purchase as proof of the
additional 2 years, in case of the unlikely event you experience an issue).
The Dimplex Warranty does not entitle you to recovery of any indirect or
consequential loss or damage including but not limited to loss or damage to any
other property.
The Dimplex Warranty is in addition to your statutory rights as a consumer and your
statutory rights are not affected by this Dimplex Warranty.
 Loading...