

Page 1

1998
O
W
NER’S M
ANUA
L
D I M E N S I O N O N E S P A S
Page 2

T
ABLE OF
Important Safety Instructions . . . . . . . . . . . . . . . . . . . . . . . . . . . . . . .1-8
Spa Features . . . . . . . . . . . . . . . . . . . . . . . . . . . . . . . . . . . . . . . . . . .9-14
Instructions for Your New Spa . . . . . . . . . . . . . . . . . . . . . . . . . . . . . . .14
Electrical Requirements and Electrical Hook-up Instructions . . . . . .1 5 - 1 7
Initial Start-up for the Interlude, Arena, Triad and Quadra . . . . . . . .1 8 - 2 3
Initial Start-up for the Diplomat, Chairman, Californian, Nautilus, Aurora I and
Aurora II . . . . . . . . . . . . . . . . . . . . . . . . . . . . . . . . . . . . . . . . . . . .24-33
Water Chemistry . . . . . . . . . . . . . . . . . . . . . . . . . . . . . . . . . . . . . . .34-38
Care For Your Spa . . . . . . . . . . . . . . . . . . . . . . . . . . . . . . . . . . . . .39-44
Terminal Blocks . . . . . . . . . . . . . . . . . . . . . . . . . . . . . . . . . . . . . . . . . .46
Diplomat, Chairman, Californian, Nautilus, Aurora I and Aurora II Wiring
Diagram . . . . . . . . . . . . . . . . . . . . . . . . . . . . . . . . . . . . . . . . . . . . . . . .47
C
ON
Jet System Selector Valve . . . . . . . . . . . . . . . . . . . . . . . . . . . . . . . .10
Jet Options . . . . . . . . . . . . . . . . . . . . . . . . . . . . . . . . . . . . . . . . . .11
NeckFlex Jet Pillow . . . . . . . . . . . . . . . . . . . . . . . . . . . . . . . . . . . .11
Ultra Pure Water Management System . . . . . . . . . . . . . . . . . . . . . .11
Vision Systems . . . . . . . . . . . . . . . . . . . . . . . . . . . . . . . . . . . . . . . .12
Heater and Circulation Pump Control . . . . . . . . . . . . . . . . . . . . . . .13
Positioning Your Spa . . . . . . . . . . . . . . . . . . . . . . . . . . . . . . . . . . .14
Safety Devices . . . . . . . . . . . . . . . . . . . . . . . . . . . . . . . . . . . . . . . .14
The Programmable Digital Control . . . . . . . . . . . . . . . . . . . . . . . . .20
How To Use The Programmable Digital Control . . . . . . . . . . . . . .20
Programming the Programmable Digital Control . . . . . . . . . . . . . .21
Programmable Digital Control Messages . . . . . . . . . . . . . . . . . . . .22
The Scrolling Message Center . . . . . . . . . . . . . . . . . . . . . . . . . . . .26
How To Use The Scrolling Message Center . . . . . . . . . . . . . . . . . .26
Programming The Scrolling Message Center . . . . . . . . . . . . . . . . .27
Scrolling Message Center Messages . . . . . . . . . . . . . . . . . . . . . . . .31
Draining Your Spa . . . . . . . . . . . . . . . . . . . . . . . . . . . . . . . . . . . . .39
Filter Cleaning . . . . . . . . . . . . . . . . . . . . . . . . . . . . . . . . . . . . . . . .39
Light Bulb Replacement . . . . . . . . . . . . . . . . . . . . . . . . . . . . . . . . .40
Care for the Spa Surface - UltraLife . . . . . . . . . . . . . . . . . . . . . . . .40
Care for the Spa Surface - Quarite Plus . . . . . . . . . . . . . . . . . . . . .40
Care for the Spa Cabinet . . . . . . . . . . . . . . . . . . . . . . . . . . . . . . . .41
Care for the Spa Cover . . . . . . . . . . . . . . . . . . . . . . . . . . . . . . . . . .41
Special Cold Weather Instructions . . . . . . . . . . . . . . . . . . . . . . . . .41
Warranty Service Information . . . . . . . . . . . . . . . . . . . . . . . . . . . . .42
Troubleshooting . . . . . . . . . . . . . . . . . . . . . . . . . . . . . . . . . . . . . . .44
Glossary of Terms . . . . . . . . . . . . . . . . . . . . . . . . . . . . . . . . . . . . .45
TEN
T
S
Page 3

1998 Owner’s
Manual
1
IMP
ORT
AN
When installing and using this electrical equipment, basic safety
precautions should always be followed, including:
1) WARNING: To reduce the risk of injury, do not permit children to
use this product unless they are closely supervised at all times.
2) WARNING: A grounding wire connector is provided on this unit to
connect a minimum No. 8 AWG (8.4 mm2) solid copper conductor
between this unit and any metal equipment, metal enclosures of
electrical equipment, metal water pipe, or conduit within 5 feet (1.5
m) of the unit.
3) DANGER: Risk of Accidental Drowning. Extreme caution must be
exercised to prevent unauthorized access by children. To avoid
accidents, ensure that children cannot use this spa unless they are
supervised at all times.
4) DANGER: Risk of Injury. The suction fittings in this spa are sized
to match the specific water flow created by the pump. Should the
need arise to replace the suction fittings or the pump, be sure that the
flow rates are compatible.
T
S
AFE
TY I
NSTRU
C
TIONS:
Never operate the spa if the suction fittings are broken or missing.
Never replace a suction fitting with one rated less than the flow rate
marked on the original suction fitting.
5) DANGER: Risk of Electric Shock. Install at least 5 FEET (1.5 m),
from all metal surfaces. As an alternative, a spa may be installed
within 5 feet of metal surfaces if each metal surface is permanently
connected by a minimum No. 8 AWG (8.4 mm2) solid copper
conductor attached to the wire connector on the grounding lug, inside
the equipment compartment on the equipment can.
6) DANGER: Risk of Electric Shock. Do not permit any electrical
appliance, such as a light, telephone, radio, television, etc. within 5
feet of a spa.
Page 4

1998 Owner’s
7) E L E C T R I C A L S U P P LY: The electrical supply for this product must
include a suitably rated switch or circuit breaker to open all
ungrounded supply conductors to comply with section 422-20 of the
National Electrical Code, A N S I / N F PA 70-1993. The disconnect must
be readily accessible and visible to the spa occupant but installed at
least 5 feet (1.5 m), from the spa water.
8) WARNING: To Reduce the Risk of Injury:
a) The water in a spa should never exceed 104° F (40° C). Water
temperatures between 100° F (38° C) and 104° F (40° C) are
considered safe for a healthy adult. Lower water temperatures are
recommended for young children and when spa use exceeds 10
minutes.
b) Since excessive water temperatures have a high potential for
causing fetal damage during the early months of pregnancy,
pregnant or possibly pregnant women should limit spa water
temperatures to 100° F (38° C).
c) Before entering a spa, the user should measure the water
temperature with an accurate thermometer since the tolerance of
water temperature-regulating devices may vary as much as +/- 5°
F (2° C).
d) The use of alcohol, drugs, or medication before or during spa use
may lead to unconsciousness with the possibility of drowning.
e) Persons suffering from obesity or with a medical history of heart
disease, low or high blood pressure, circulatory system problems,
or diabetes should consult a physician before using a spa.
f) Persons using medication should consult a physician before using
a spa since some medication may induce drowsiness, while other
medication may affect heart rate, blood pressure, and circulation.
Manual
2
IMPORTANT SAFETY INSTRUCTIONS
(CSA SAFETY INFORMATION)
When using this electrical equipment, basic safety precautions should
always be followed, including the following:
a) READ AND FOLLOW ALL INSTRUCTIONS.
b) A green coloured terminal or a terminal marked G, GR, Ground,
Page 5

1998 Owner’s
Grounding, or the symbol * is located inside the supply terminal
box or compartment. To reduce the risk of electric shock, this
terminal must be connected to the grounding means provided in the
electric supply service panel with a continuous copper wire
equivalent in size to the circuit conductors supplying this equipment.
* IEC Publication 417, Symbol 5019.
c) At least two lugs marked “BONDING LUGS” are provided on the
external surface or on the inside of the supply terminal
box/compartment. To reduce the risk of electric shock, connect the
local common bonding grid in the area of the hot tub or spa to these
terminals with an insulated or bare copper conductor not smaller than
No. 6 AWG.
d) All field-installed metal components such as rails, ladders, drains or
other similar hardware within 3 M of the spa or hot tub shall be
bonded to the equipment grounding bus with copper conductors not
smaller than No. 6 AWG.
Manual
3
e) SAVE THESE INSTRUCTIONS.
WARNING: Children should not use spas or hot tubs without adult
supervision.
AVERTISSEMENT: NE PAS LAISSER LES ENFANTS UTILISER UNE
CUVE DE RELAXATION SANS SURVEILLANCE.
WARNING: Do not use spas or hot tubs unless all suction guards are
installed to prevent body and hair entrapment.
AVERTISSEMENT: POUR ÉVITER QUE LES CHEVEUX OU UNE
PARTIE DU CORPS PUISSENT ÊTRE ASPIRÉS, NE PAS UTILISER
UNE CUVE DE RELAXATION SI LES GRILLES DE PRISE
D’ASPIRATION NE SONT PAS TOUTES EN PLACE.
WARNING: People using medications and/or having adverse medical
history should consult a physician before using a spa or hot tub.
AVERTISSEMENT: LES PERSONNES QUI PRENNENT DES
MÉDICAMENTS OU ONT DES PROBLÈMES DE SANTÉ DEVRAIENT
CONSULTER UN MÉDECIN AVANT D’UTILISER USE CUVE DE
RELAXATION.
Page 6

1998 Owner’s
WARNING: People with infectious diseases should not use a spa or hot
tub.
AVERTISSEMENT: LES PERSONNES ATTEINTES DE MALADIES
INFECTIEUSES NE DEVRAIENT PAS UTILISER UNE CUVE DE
RELAXATION.
WARNING: To avoid injury exercise care when entering or exiting the
spa or hot tub.
AVERTISSEMENT: POUR ÉVITER DES BLESSURES, USER DE
PRUDENCE EN ENTRANT DANS UNE CUVE DE RELAXATION ET E
SORTANT.
Manual
4
WARNING: Do not use drugs or alcohol before or during the use of a
spa or hot tub to avoid unconsciousness and possible drowning.
AVERTISSEMENT: POUR ÉVITER L’ÉVANOUISSEMENT ET LA
NOYADE EVENTUELLE, NE PRENDRE NI DROGUE NI ALCOOL
AVANT D’UTILISER UNE CUVE DE RELAXATION NI QUAND ON S’Y
TROUVE.
WARNING: Pregnant or possibly pregnant women should consult a
physician before using a spa or hot tub.
AVERTISSEMENT: LES FEMMES ENCEINTES, QUE LEUR
GROSSESSE SOIT CONFIRMÉE OU NON, DEVRAIENT CONSULTER
UN MÉDECIN AVANT D’UTILISER UNE CUVE DE RELAXATION.
WARNING: Water temperature in excess of 38˚ C may be injurious to
your health.
AVERTISSEMENT: IL PEUT ÊTRE DANGEREUX POUR LA SANTÉ
DE SE PLONGER DANS DE L’EAU À PLUS DE 38˚ C.
WARNING: Before entering the spa or hot tub, measure the water
temperature with an accurate thermometer.
AVERTISSEMENT: AVANT D’UTILISER UNE CUVE DE
RELAXATION MESURER LA TEMPÉRATURE DE L’EAU À L’AIDE
D’UN THERMOMÈTRE PRÉCIS.
Page 7

1998 Owner’s
WARNING: Do not use a spa or hot tub immediately following
strenuous exercise.
AVERTISSEMENT: NE PAS UTILISER UNE CUVE DE RELAXATION
IMMEDIATEMENT APRÈS UN EXERCICE SATIGANT.
WARNING: Prolonged immersion in a spa or hot tub may be injurious
to your health.
AV E R T I S S E M E N T: L’ U T I L I S ATION PROLONGÉE D’UNE CUVE DE
R E L A X ATION PEUT ÊTRE DANGEREUSE POUR LA S A N T É .
WARNING: Do not permit electric appliances (such as a light,
telephone, radio, television, etc.) within 1.5 m of this spa or hot tub.
Manual
5
AVERTISSEMENT: NE PAS PLACER D’APPAREIL ÉLECTRIQUE
(LUMINAIRE, TÉLÉPHONE, RADIO, TÉLÉVISEUR, ETC.) À MOINS
DE 1.5 M DE CETTE CUVE DE RELAXATION.
CAUTION: Maintain water chemistry in accordance with
manufacturer’s instructions.
ATTENTION: LA TENEUR DE L’EAU EN MATIERÈS DISSOUTES
DOIT ÊTRE CONFORME AUX DIRECTIVES DU FABRICANT.
HYPERTHERMIA
Prolonged immersion in hot water may induce hyperthermia. A
description of the causes, symptoms, and effects of hyperthermia are as
follows:
Hyperthermia occurs when the internal temperature of the body reaches a
level several degrees above the normal body temperature of 98.6˚ F, or
37˚ C. The symptoms of hyperthermia include drowsiness, lethargy, and
an increase in the internal temperature of the body. The effects of
hyperthermia include:
a) Unawareness of impending hazard;
b) Failure to perceive heat;
c) Failure to recognize the need to exit spa;
d) Physical inability to exit spa;
Page 8

1998 Owner’s
e) Fetal damage in pregnant women; and
f) Unconsciousness and danger of drowning.
WARNING: The use of alcohol or drugs can greatly increase the risk of
fatal hyperthermia in hot tubs and spas.
AVERTISSEMENT: LA CONSOMMATION D’ALCOOL OU DE
DROGUE AUGMENTE CONSIDÈRABLEMENT LES RISQUES
D’HYPERTHERMIE MORTELLE DANS UNE CUVE DE RELAXATION.
Manual
SAVE THESE INSTRUCTIONS
CAUTIONS
6
1) Persons suffering from heart disease, diabetes, high or low blood
pressure, any condition requiring medical treatment, pregnant women,
the elderly, or infants should consult with a physician before using a
spa.
2) The consumer products safety commission has stated that the water
temperature in a spa or hot tub should not exceed
104° F. Immersion in water in excess of 104° F can be hazardous to
your health.
3) Observe a reasonable time limit when using the spa. Long exposures
at higher temperatures can cause high body temperature. Symptoms
may include dizziness, nausea, fainting, drowsiness, and reduced
awareness. These effects could result in possible drowning.
4) Do not use the spa under the influence of alcohol, narcotics, or other
drugs. Use of the spa under these conditions may lead to serious
consequences.
5) Always test the spa water temperature before entering the spa. Enter
and exit the spa slowly. Wet surfaces can be very slippery.
6) Never bring any electrical appliances into or near the spa. Never
operate any electrical appliances from inside the spa or when you are
wet.
7) Proper chemical maintenance of spa water is necessary to maintain
safe water and prevent possible damage to spa components.
8) Use the spa straps and clip tie downs to secure the cover when not in
use. This will help to discourage unsupervised children from entering
Page 9

1998 Owner’s
the spa and keep the spa cover secure in high-wind conditions. There
is no representation that the cover, clip tie downs, or actual locks will
prevent access to the spa.
DO’S AND DON’TS
• DO test water temperature with your hand before entering to be sure
that it’s comfortable.
• DO keep the spa cover closed when the spa is not in use. This is also
the key to economical spa operation.
• DON’T block the ventilated equipment compartment door. Blockage
may cause damage to the spa equipment and will void the warranty.
• DON’T block the filter recess area.
Manual
7
Page 10
1998 Owner’s
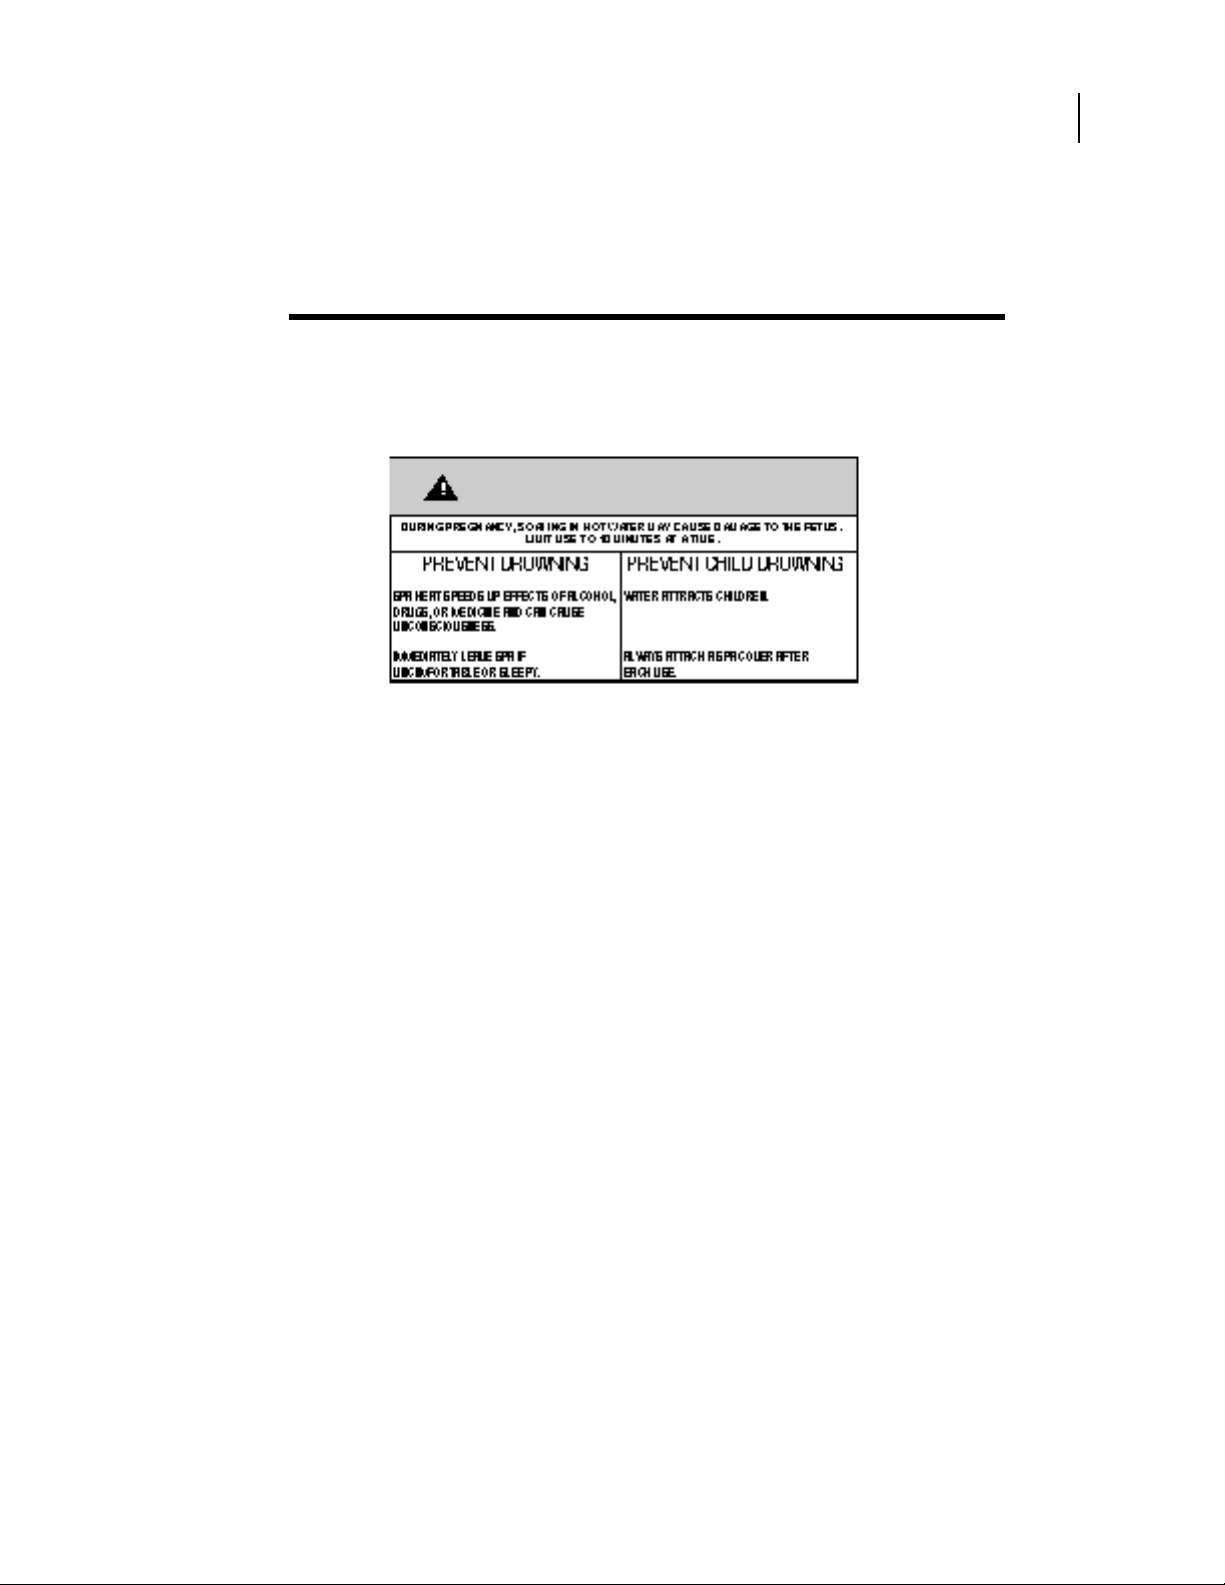
WARNING SIGN
Each spa has been provided with a warning sign which outlines safety
precautions. This sign should be permanently placed in a location that is
visible to the spa user. Replacement signs can be obtained from:
WARNING
Manual
8
Dimension One Spas
2611 Business Park Drive
Vista, CA 92083
760.727.7727
Page 11

SP
A FEA
1998 Owner’s
T
URE
Congratulations! You have purchased one of the finest portable spas
available. Take the time to read these instructions carefully. If installed
and maintained properly your spa will provide many years of enjoyable,
trouble-free operation. Read all of the instructions and view your owner's
manual video for further reference on spa operation. If you have any
questions, please contact your local Authorized Dimension One Spas
Dealer.
The following features are included on your spa:
• UL listed/CUL approved
S
Manual
9
• Completely self-contained with load sharing capabilities
• 100% foam insulated
• All spa shells are formed from UltraLife
plastic, or Quarite Plus™Acrylic
• Designed for indoor or outdoor usage
• Top access, easy to clean filter systems
• Water level referencing weir skimmer
• Handcrafted cabinets
• A variety of interchangeable HydraFlex
• Multiple jet systems with Selector Valve
• Exclusive, custom designed tile coordinates with shell material
and control panel
• Polyethylene floor completely seals the spa, eliminating moisture or insect intrusion
• Built-in, automatic freeze protection
• Automatic high/low speed filtration cycles
™
high impact thermo-
™
Jets
Page 12

1998 Owner’s
Additional features of the, Diplomat, Chairman, Californian,
Nautilus, Aurora I and Aurora II:
• Scrolling Message Center with digital display self-diagnostic,
instructional, and maintenance messages
• Ultra Pure™Water Management System
• NeckFlex™Jet Pillow
• Twin long life, 4.0 HP, dual speed HydraMax®pumps on the
Diplomat, and Chairman; Twin long life, 3.0 HP, dual speed
HydraMax pumps on the Californian, Nautilus and Aurora II;
and one long life, 4.0 HP, dual speed HydraMax pump on the
Aurora I.
• 115 sq. ft. of filtration
Manual
10
Additional features of the Interlude, Arena, Quadra and Triad:
• Programmable Digital control with digital read-out and self
diagnostics
• Pre-plumbed for the optional CrystalZone™Water Management
System
• Long life, 4.0 HP, dual speed HydraMax pump on the Arena
Interlude and Triad; and 1.5 HP, dual speed HydraMax pump on
the Quadra
• 75 sq. ft. of filtration
JET SYSTEM SELECTOR VALVE
All spas are equipped with spaside Selector Valves. These valves can be
used to divert jet power from one area within the spa to another. The
valves are infinitely adjustable and can be used to suit the bather's taste.
The valves may offer some resistance to operation when the spa pump is
on. This is a normal condition, and is caused by the high rate of water
flow and pressure that travels through the valves.
JET OPTIONS
Dimension One Spas jetting systems provide complete flexibility in personalizing hydrotherapy sessions. The HydraFlex Jet™is the most versatile jet in the industry. It allows you to adjust the flow and pressure of
the jet for each specific muscle group. A wide variety of interchangeable
jet styles allow you to control and modify massage patterns at any seat in
the spa to personalize your massage to your own preference.
Page 13

1998 Owner’s
Manual
Additionally, the Variable Circulation Rotator jet can be adjusted to user
preference, adding to the overall flexibility of the spa's jetting systems.
The AquaPed foot jet located in the bottom of the footwell of the
Californian, Nautilus, Aurora I, Aurora II, and Arena also has a variety of
interchangeable nozzles for different patterns. Likewise, the whirlpool jet
found in the Nautilus and Arena may use these interchangeable nozzles.
Contact your local Authorized Dimension One Spas Dealer for more
information on the availability of optional jet styles.
NECKFLEX JET PILLOW
The NeckFlex Jet offers five position adjustable pillow heights to accommodate different body sizes. The standard mini directional jets can be
interchanged with rotating jets and adjusted for water volume. See your
local Authorized Dimension One Spas Dealer for more information.
11
ULTRA PURE WATER MANAGEMENT SYSTEM
The Diplomat, Chairman, Californian, Nautilus, Aurora I and Aurora II
are equipped with a highly advanced spa water treatment method, the
Ultra Pure Water Management System. Ultra Pure is a complete water
management system with two-stages of ozone injection, two contact
chambers, 100% filtration, and heating on call.
How the system works: First, Ultra Pure circulates the water through a
dedicated, 40 sq. ft. filter (located in the 5” canister in the skimmer
recess), removing all debris and large contaminant particles. The filtered
water passes through the heater and then travels to the first ozone injection stage which employs the use of a Mazzei-T injector (a negative pressure Venturi system). The Mazzei injector then mixes the ozone gas into
solution as it agitates through 12 feet of corrugated contact plumbing (1st
contact chamber). This chamber allows the ozone ample time to get into
solution and begin the oxidation process.
Any gas that has not dissolved while traveling through this first chamber
is fired downward into a standpipe, to increase the resident time of the
gas in a secondary, contact chamber. After the ozone bubbles have traveled down the stand pipe, inside the secondary chamber, the off-gas bubbles will then rise and merge in an air reservoir (the smaller bubbles coalesce and turn into larger bubbles). As the air builds in the reservoir, it is
Page 14

1998 Owner’s
Manual
combined with water and re-injected through a secondary ozone jet back
into the spa, virtually eliminating the negative attributes of off gassing
experienced with conventional systems.
The Ultra Pure Water Management System provides the most efficient
method of mixing ozone gas into solution while delivering 100% filtration, ozonization, and heat on demand. Bottom line... Ultra Pure allows
you to spend less time maintaining your spa and more time enjoying it.
ULTRAVISION
The Ultra Pure Water Management System can be used in conjunction
with UltraVision, an alternative purification cartridge that can be added to
the 5” filter canister. In use, its advantages over conventional halogens
(bromine and chlorine) can be softer-feeling water and lower maintenance. Additionally, low chemical levels can also mean less dissolved
solids and fewer maintenance adjustments. PureVision, an UltraVision
counterpart, can be used in conjunction with the optional CrystalZone
Water Management System.
12
How UltraVision and Purevision Work: The UltraVision purification
cartridge, which has no moving parts and requires no electrical connections, contains a powerful, silver catalyst bed with a very large surface
area. In the Ultra Pure system, water flows through the purification cartridge, then through the dedicated, 40 sq. ft. filter (PureVision uses the
standard 75 sq. ft. filter), and then through a heater housing before being
ozonated and returned to the spa. During the process, the Silver (Ag)
residual is put into the water, which acts as a bactericide. When used in
the Ultra Pure or CrystalZone Water Management Systems, UltraVision
and PureVision provide a natural, residual bactericide which compliments
the ozone oxidizing power. After excessive bather loads, however, an
additional oxidizer may be required to remove accumulated organic compounds. Be sure to carefully follow the included instructions for proper
use - DO NOT follow the standard water chemistry start-up procedures
contained in this manual.
WARNING: While Vision is a bactericide which can be safely used as a
replacement for conventional halogens, it is not a “chemical free” system.
In order to gain the maximum benefits of Vision products, follow the
manufacturer’s directions. All other aspects and adjustments of water
Page 15

1998 Owner’s
Manual
chemistry such as pH and total alkalinity must adhere to the manufacturer’s instructions relative to that specific product. As Dimension One
Spas has no control over the water source used in any spa application, it
will not be responsible for any staining below the water line and any such
occurrence will not be covered under any of its warranties.
HEATER AND CIRCULATION PUMP CONTROL
On all Dimension One Spas, when the water temperature is 1˚ below the
set temperature the heater will turn on and remain on until the water temperature rises to 1˚ above the set temperature. On models that do not
have circulation pumps (Interlude, Arena, Triad and Quadra without the
CrystalZone Water Management System) the low speed pump will turn
on during the heating cycle.
13
On models with Ultra Pure (Chairman, Diplomat, Californian, Nautilus,
Aurora II and Aurora I) and models with the Crystal Zone Water
Management System: To prevent the spa from overheating, the circulation pump turns off when the water temperature rises 2˚ above the set
temperature. When the water temperature cools down to the set temperature, the circulation pump will turn on.
NOTE: The circulation pump will run for short periods when the water
temperature is 2˚ above set temperature to provide optimum operation.
BEFORE ATTEMPTING TO HOOK-UP OR USE YOUR SPA,
PLEASE READ THROUGH THESE INSTRUCTIONS AND CAREFULLY VIEW YOUR OWNER'S MANUAL VIDEO.
Page 16

I
NSTRU
POSITIONING YOUR SPA
Because your spa is completely self-contained, you can locate it just
about anywhere you wish... on a deck, patio or even indoors. Just be sure
to position it above ground, in an area with good drainage, and on a level,
continuous surface that contacts the bottom of the spa fully. A concrete
slab is best but not required. Locate your spa so that the equipment is
above grade and not subject to flooding. WATER SHOULD ALWAYS
DRAIN AWAY FROM THE SPA.
C
TIONS F
O
R YOU
R SP
1998 Owner’s
A
Manual
14
SAFETY DEVICES
Your spa is equipped with the following safety features:
1) A water flow sensor that prevents the heater from activating unless
there is sufficient water flow, thus preventing “dry firing” of the
heater.
2) Automatic spa shutdown timers that shut off the spa jet pump after 30
minutes of operation. The Diplomat, Chairman, Californian,
Nautilus, Aurora I and Aurora II can be programmed to shut off after
longer intervals (I.E. 45, 60 minutes). The spa light automatically
shuts off after 4 hours.
3) An electronic high limit switch that automatically shuts off the heater
if the spa temperature exceeds 112˚ F.
4) An automatic freeze sensor which turns the spa on if the water temperature in the heater manifold drops below 40˚ F and turns the system off when the temperature rises above 45˚ F.
Page 17

1998 Owner’s
Manual
15
ELE
C
T
HOOK-
RI
C
AL REQ U
U
P I
NSTRU
ELECTRICAL HOOK -UP INSTRUCTIONS
NOTE: Do not turn on electrical power to your spa until told to do
so later in this manual.
Have a licensed electrician run the required 240 volt power line to the
spa installation site. The power inlet connection is located in the pedestal
on the left side of the spa, approximately 24" from the front. This connection is designed to mate with a Carlon 1” conduit body Type LB,
Access Fitting E986F or any 1” female PVC conduit fitting.
The manufacturer's label lists the power requirements for your spa. We
recommend that only a licensed and bonded electrician do the initial spa
hook-up.
NOTE: This unit requires a GFCI (Ground Fault Circuit
Interrupter). We have provided an enclosed instructional flyer for a
licensed electrician. A “line of sight” service disconnect must be located
where visible from the spa, not less than 5 feet from the spa and not to
exceed 50 feet from the spa. This requirement may be filled with the
GFCI sub-panel.
IREMEN
C
TION
TS AN
S
D
NOTE: Unless a 110V GFCI protected cord is provided with your spa,
it has already been factory wired for 240V.
Page 18

ELECTRICAL REQUIREMENT CHART
1998 Owner’s
Manual
16
Model Branch Cir. Gauge
D i p l o m a t 2 4 0 V, 32A 3 Wire + ground 4 0 A #6 AW G
C h a i r m a n 2 4 0 V, 32A 3 Wire + ground 4 0 A #6 AW G
C a l i f o r n i a n 2 4 0 V, 32A 3 Wire + ground 4 0 A #6 AW G
N a u t i l u s 2 4 0 V, 32A 3 Wire + ground 4 0 A #6 AW G
Aurora I 2 4 0 V, 24A 3 Wire + ground 3 0 A #8 AW G
Aurora II 2 4 0 V, 32A 3 Wire + ground 4 0 A #6 AW G
I n t e r l u d e 2 4 0 V, 24A 3 Wire + ground 3 0 A #8 AW G
A r e n a 2 4 0 V, 24A 3 Wire + ground 3 0 A #8 AW G
Tr i a d 2 4 0 V, 24A 3 Wire + ground 3 0 A #8 AW G
Electrical
Rating
2 4 0 V, 24A 3 Wire + ground 3 0 A #8 AW G
2 4 0 V, 24A 3 Wire + ground 3 0 A #8 AW G
2 4 0 V, 24A 3 Wire + ground 3 0 A #8 AW G
2 4 0 V, 24A 3 Wire + ground 3 0 A #8 AW G
2 4 0 V, 24A 3 Wire + ground 3 0 A #8 AW G
Branch Cir.
Protection
Q u a d r a 2 4 0 V, 29A 3 Wire + ground 4 0 A #6 AW G
2 4 0 V, 24A 3 Wire + ground 3 0 A #8 AW G
1 2 0 V, 12A 2 Wire + ground 1 5 A #12 AW G
To hook-up your spa, follow these instructions:
1) Remove the screws holding the ventilated equipment access panel to
the front of the spa cabinet and set the panel aside.
2) Loosen the four screws located on the front of the black equipment
control can and remove the door from the control can to allow access
to the four wire connection terminal block.
3) Attach 1" rigid non-metallic conduit to the conduit nipple located in
the pedestal base on the side of the spa and run required conductors
through the conduit to the equipment can.
4) Connect the four wires to the equipment system terminal block (TB1)
as indicated on the wiring diagram in the back of this manual.
Replace the door on the control can and re-tighten the securing
screws.
Page 19

1998 Owner’s
5) Electrical hook-up is now complete. Do not replace the ventilated
equipment access panel yet.
If you have an Interlude, Arena, Triad or Quadra please turn to the next
page for Initial Start-up Information. If you have a Diplomat, Chairman,
Californian, Nautilus, Aurora I or Aurora II, please turn to page 26 for
Initial Start-up information.
Manual
17
Page 20

I
NITIAL S
I
N
TERLUDE, ARE
T ART-UP F
O
R
T
H
NA, QUA
E
DR
A
1998 Owner’s
Manual
18
AN
D
T
RI
A
D
1) Before filling your spa, install the hose bib that is included in the
owner’s manual packet located in the equipment compartment.
Screw the hose bib onto the male fitting located at the bottom of the
spa on the pedestal, to the lower left of the equipment compartment.
Close the valve on the side of the hose bib and screw the cap onto the
end of the hose bib. Check the pump unions to be sure that they are
tight to prevent the possibility of leakage in the equipment compartment. Also, open the bleeder valve located next to the sidewall of the
skimmer area to allow air to escape from the pump.
2) Fill your spa with water to a level of one to two inches above the bottom of the tile line.
3) Remove the two shipping bolts located on the front of the pump
mount.
3) Turn on the circuit breaker. One minute after the system power is
first initiated, the internal time clock is automatically set to initiate
the first filtration cycle. The system factory default is two, one hour
cycles. Let the system run for 30 to 45 seconds to prime the pump.
If there is no jet action, then the water level is too low, the gate valves
are closed or there is air trapped in the plumbing lines. To eliminate
the trapped air, turn the pump on and off several times to force the
trapped air through the pump. If there is still no jet action, and the
bleeder valve has been open for some time, turn off the pump and
loosen the top pump union slightly to let any trapped air escape. Retighten the pump union and turn the pump on again. Turn the pump
on and off several times until jets function properly.
4) When the jets are in full operation, close the bleeder valve and push
the UP pad until the desired spa temperature is indicated on the display screen. In a few seconds, the screen will start displaying the
current spa water temperature again. The maximum settable temperature is 104˚, OR5 or OR6.
NOTE: The LCD display will read out the temperature up to 104˚ F.
When the temperature exceeds 104˚ F, the display will read in “over-
Page 21

1998 Owner’s
range” figures. I.E. At 105˚ F the temperature will read “OR5” and at
106˚ F the temperature will read “OR6”. Water temperatures in
excess of 104˚ F should be used with extreme caution.
NOTE: On initial start-up, you can confirm that the heater is on by
looking to see that the heat LED indicator, located on the right side of
the upper control panel, is dimly illuminated. Once you have verified
that the heater is functioning, you can reinstall the ventilated equipment access panel.
5) Depending upon the size of your spa, heating will occur at the rate of
4-8˚ F per hour. The Quadra operating in the 120 Volt mode will heat
at 1˚ F to 2˚ F per hour and will not heat when the jets are on high
speed.
6) After completing the above steps, it is necessary to ensure proper
water chemistry. See the Water Chemistry section in this manual, for
the easy steps to maintaining clean and safe water. The schedule
shown may require more frequent adjustment depending on the bather
load.
Manual
19
7) Place the thermal cover on the spa to conserve energy and to keep it
ready for use.
Page 22

T
HE PR
C
ON
1998 Owner’s
OGRA
TRO
Advanced microprocessor technology has been utilized to produce the
Programmable Digital Control. Easy to use and understand, Dimension
One Spas has put every spa function within fingertip control.
L
MM
ABLE
DI
GIT A
L
Manual
20
Temperature setting, jet power control, and the spa light are all spaside
accessible. That means you don't have to get out of the spa to enjoy
complete control of all spa functions. Safety is assured through design
concepts and materials, which meet or exceed the most stringent requirements of Underwriters Laboratories (UL) and the Canadian Standards
Association (CSA). The Programmable Digital Control lets you relax
and enjoy everything your spa has to offer.
HOW TO USE THE PROGRAMMABLE DIGITAL CONTROL
JETS LOW/HIGH CONTROL PAD
When the JETS control pad is pushed, the spa jet pump is energized and
the respective yellow LED indicator light will be dimly illuminated.
Each time the JETS pad is pushed it will activate a 30 minute automatic
shut-off cycle. This auto shut-off cycle is a safety device and also allows
for convenient filtration immediately after using the spa. The first time a
JETS control pad is pushed the pump will energize on LOW speed.
When the same control pad is pushed again, the pump will energize on
HIGH speed. The third time the same control pad is pushed, the pump
will turn off.
NOTE: Pushing the JETS pad will disable any concurrent filter cycle.
Page 23

1998 Owner’s
TEMPERATURE PADS
Pushing the UP pad increases the temperature and pushing the DOWN
pad decreases the temperature. Push the respective pad one time for each
degree of temperature change. The existing spa water temperature will
remain in the digital display window until a temperature pad is pushed.
When the UP or DOWN pad is pushed the digital readout will indicate
the new temperature setting, with a solid ▲ symbol in the upper left corner of the display. Once the new temperature is set, the current spa water
temperature will again be indicated. The spa will heat to the pre-set temperature automatically.
LIGHT
Push the LIGHT pad to turn the spa light on. Push this pad again to turn
the spa light off. If the light is left on, it will automatically turn off after
4 hours.
Manual
21
PROGRAMMING THE PROGRAMMABLE DIGITAL
CONTROL
To initiate the programming sequence at any time, push the UP pad and
the PUMP pad in sequence within 3 seconds. To move to the next programming feature, push the PUMP pad again.
CLOCK SET
Push the UP pad and the PUMP pad in sequence within 3 seconds to
engage the time setting mode. The time screen will appear with “hours”
(_ _.00) flashing on and off. Push the UP or DOWN pad to increase or
decrease the number until the desired hour appears. AM and PM will
change each time the number goes past 12. When the desired number is
displayed, push the PUMP pad to accept the selection and change the
flashing number to the “ten minute” place (12:_0). Adjust the number
with the UP or DOWN pad in the same manner as the hour number.
When the desired number is displayed, push the PUMP pad to accept the
selection and change the flashing number to the “minute” place (12:1_).
Adjust this number with the UP or DOWN pad in the same manner as the
hour number. When the desired number is displayed, push the PUMP
pad to accept the selection and enter the Filter Cycle Start Time programming mode.
Page 24

1998 Owner’s
Manual
NOTE: If you do not set the proper time, the system will default to 11:59
a.m. upon startup.
FILTER CYCLE START TIME
To adjust the filter cycle start time, push the UP or DOWN pad as done
in the Clock Set Time programming mode to choose a time. Once the
desired time is displayed, push the PUMP pad to accept the selection and
move into the Filter Cycle Duration programming mode.
FILTER CYCLE DURATION
To adjust the filter cycle duration, push the UP or DOWN pad to cycle
through the choices of 60, 90, 120, 150 or 180 minutes (the default is
60). Once the desired time is displayed, push the PUMP pad to accept the
selection and move into the Number of Filter Cycles programming mode.
22
NUMBER OF FILTER CYCLES
To adjust the number of filter cycles per day, push the UP or DOWN pad
to cycle through the number of filter cycles - 1, 2, 3 or 4 (the default is
2). Once the desired number of cycles is displayed, push the PUMP pad
to exit the programming mode.
NOTE: The time of day can be viewed by pushing the UP pad and the
LIGHT pad in sequence within 3 seconds. If no pad is pushed within 5
seconds, the display will always revert to the spa water temperature reading.
NOTE: All programming will revert to the factory defaults when power
to the spa is shut off.
PROGRAMMABLE DIGITAL CONTROL MESSAGES
“OH” - OVERHEAT PROTECTION
When “OH” is displayed on the control system digital display, the spa is
in a high limit condition. If such a condition exists, DO NOT ENTER
THE WATER. If this happens, remove the spa cover and allow the water
to cool below 106˚ F, then push any pad on the upper control and the system will reset. If the problem recurs, turn off all power to the spa and
contact your local Authorized Dimension One Spas Dealer, or authorized
service center.
Page 25

1998 Owner’s
“FL”- LOW FLOW
When “FL” is displayed, check the following:
1) Check the water level to see if it is too low. If the water level is too
low, fill the spa to one to two inches above the bottom of the tile line.
2) A flow switch has malfunctioned. The spa will operate but the heater
will not activate. Contact your local Authorized Dimension One Spas
Dealer, or authorized service center.
“SN” - OPEN SENSOR
When “SN” is displayed, check the following:
The high limit sensor or water temperature sensor is non-functional.
Contact your local Authorized Dimension One Spas dealer, or authorized
service center.
Manual
23
Page 26

I
NITIAL S
T
AR T-UP F
O
R
T
H
E
1998 Owner’s
Manual
24
DIPLO
F
ORNIAN, NA U
AN
D
M
A
T, C
AURORA
1) Before filling your spa, install the black plastic hose bib that is
included in the owner's manual packet located in the equipment compartment. Screw it onto the male fitting at the bottom of the spa on
the pedestal, to the lower left of the equipment compartment. Close
the valve and screw the cap onto the end of the bib. Check the pump
unions to be sure that they are tight to prevent the possibility of leakage in the equipment compartment. Also, open both bleeder valves
located in the skimmer area.
2) Fill your spa with water to a level of one to two inches above the bottom of the tile line.
3) Turn on the circuit breaker. After a 5 second diagnostic check, the
ozone generator and circulation pump will come on. Similarly, the
“SET CLOCK” message will be indicated on the upper line of the
LCD display. If you do not set the proper time, the system will
default to 11:59 A.M.. For more information about programming
functions, please see page 30. One minute after the system power is
first initiated, the internal time clock is automatically set to initiate
the first filtration cycle. The filtration system factory default is two,
one hour cycles.
HA
TIL
II
IRM
U
AN, C
S,
A URORA
ALI -
I
4) Push the JETS 2 pad to prime the second pump. Let the system run
for 30 to 45 seconds to prime the pumps. If there is no jet action,
then the water level is too low or there is air trapped in the plumbing
lines. To eliminate the trapped air, turn the pumps on and off several
times to force the trapped air through the pumps. If there is still no
jet action, and the bleeder valves have been open for some time, turn
off the pumps and loosen the top pump unions slightly to let any
trapped air escape. Re-tighten the pump unions and turn the on the
pumps again. Turn the pumps on and off several times until jets function properly.
NOTE: Bubbles will continue to release from the skimmer recess Ultra
Pure bleeder valve as long as the valve remains open. This is a normal
function.
Page 27

1998 Owner’s
Manual
5) When the jets are in full operation, close both bleeder valves and
push the UP pad until the desired spa temperature is indicated on the
display screen. In a few seconds, the screen will start displaying the
current spa water temperature again. The maximum temperature that
can be set is 104˚ F, OR5, or OR6.
NOTE: The LCD display will read out the temperature up to 104˚ F.
When the temperature exceeds 104˚ F, the display will read in “overrange” figures. I.E. at 105˚ F the temperature will read "OR5" and at
106˚ F the temperature will read "OR6". Water temperatures in excess of
104˚ F should be used with extreme caution.
NOTE: On initial start-up, you can confirm that the heater is on by
looking to see that the heat LED indicator located on the right side of the
spa control panel is dimly illuminated. A scrolling message will also
appear on the lower line of the LCD reading SPA HEATING TO XXX˚ F
(whatever the set temperature is). Once you have verified that the heater
is functioning, you can reinstall the ventilated equipment access panel.
25
NOTE: Depending upon the size of the spa, heating will occur at the
rate of 4-8˚ F per hour.
6) After completing the above steps, it is necessary to ensure proper
water chemistry. See the Water Chemistry section in this manual, for
the easy steps to maintaining clean and safe water. The schedule
shown may require more frequent adjustment depending on the bather
load.
7) Place the thermal cover on the spa to conserve energy and to keep it
ready for use.
Page 28

T
HE S
1998 Owner’s
CRO
Advanced microprocessor technology has been utilized to produce the
Scrolling Message Center. The most technologically advanced spa control in the world is also the easiest to operate. Dimension One Spas has
put every spa function within fingertip control.
Temperature setting, jet power control, the spa light and all other functions are spaside accessible. That means you don’t have to get out of the
spa to enjoy complete control of all spa functions. Safety is assured
through design concepts and materials, which meet or exceed the most
stringent requirements of Underwriters Laboratories (UL) and Canadian
Standards Association (CSA). The Scrolling Message Center lets you
relax and enjoy everything your Dimension One spa has to offer.
LLING
MESS
AGE
CEN
TER
Manual
26
H O W TO USE THE SCROLLING MESSAGE CENTER
JETS 1 AND JETS 2 CONTROL PAD:
When either JETS control pad is pushed, the spa jet pump is energized,
the respective yellow LED indicator light will be dimly illuminated and
the pump speed will be indicated on the lower line of the LCD display.
Each time a JETS control pad is pushed it will activate a 30 minute, programable, automatic shut-off cycle. This auto shut-off cycle is a safety
device and also allows for convenient filtration immediately after use of
the spa. The first time a JETS control pad is pushed the respective pump
will energize on LOW speed. When the same control pad is pushed
again, the pump will energize on HIGH speed. The third time the same
control pad is pushed, the pump will turn off.
NOTE: The Aurora I will have only one JETS control pad.
NOTE: Pushing the JETS 1 control pad will disable any concurrent fil-
ter cycle.
Page 29

1998 Owner’s
Manual
LIGHT CONTROL:
Push the LIGHT control pad once to activate the brightest setting. A second push will activate the medium setting and a third push will activate
the dimmest setting. The bottom line of the LCD will read the light level
for 5 seconds (i.e. LIGHT HIGH, LIGHT MEDIUM, LIGHT LOW).
Push the LIGHT control pad a fourth time to turn off the light. The light
will automatically turn off after 4 hours of continuous operation.
TEMPERATURE CONTROL:
When the UP or DOWN control pad is pushed to change the set temperature, the bottom line of the LCD will read SET TEMP XXX˚ F. When
the spa is in a heating mode, the top line of the LCD will read the current
temperature and the bottom line will read SPA HEATING TO XXX˚ F.
27
ENTER PAD:
This pad is used to exit any programming sequence at any time.
PROGRAM PAD:
This pad is used to initiate the time setting, filter programming, and other
programming features. For more information, see the next section,
“Programming the Scrolling Message Center”.
DIMENSION ONE SPAS ICON PAD (LOGO):
The ICON pad is used to toggle between the spa temperature and the
time-of-day. It is also used to initiate the panel lock features and functions as a reset.
LIQUID CRYSTAL DISPLAY:
The LCD continuously shows the operating status of the spa, as well as
the various monitoring functions, self-diagnostics, and programming
information.
PROGRAMMING THE SCROLLING MESSAGE CENTER
Your Scrolling Message Center is the most advanced in the industry and
can virtually walk you through customizing your spa to your exact needs.
When your spa is first powered up, it will automatically default into the
programming mode. If, within 5 seconds, you do not proceed with the
Page 30

1998 Owner’s
spa programming, the spa will automatically exit the programming
sequence and revert to the pre-set factory default settings.
To initiate the programming sequence at any time, push the PROGRAM
pad. To exit the programming sequence at any time, push the ENTER
pad.
SETTING THE TIME
Upon power initiation, or after pushing the PROGRAM pad, the top line
of the LCD will read “SET CLOCK”. Push the UP or DOWN pads to
engage the clock, push them again to start the time-setting cycle, and
push either pad a third time to stop the time-setting cycle. After pushing
either pad once, the time will advance or decrease automatically in one
minute increments. (The time will change one minute every second for
the first 10 seconds, and then start advancing or decreasing very rapidly.)
Manual
28
After reaching the correct time, push the UP or DOWN pad again to set
the time or make further adjustments. The pre-set factory default is 11:59
a.m. Pushing the PROGRAM pad will set the time and exit the time-setting mode. You will then be prompted to set the filter start time.
FILTER START TIME
After setting the time-of-day, the top line of the LCD will read “SET
FILTER TIME”. Push the UP or DOWN pads to engage the clock and
push them again to set the time that the first filter cycle will start. When
your desired filter cycle start time is set in the LCD display, push the
PROGRAM pad to continue. The pre-set factory default is 12:00 p.m. to
1:00 p.m. repeating every 12 hours unless the number of filter cycles per
day has been changed. During a filter cycle, the bottom line of the LCD
will read “SPA FILTERING---JETS1 ACTIVATED”. During the filter
cycle, JETS 1 will activate, the first 5 minutes at high speed and the
remainder of the filter cycle time at low speed.
FILTER CYCLE DURATION
After setting the filter cycle start time, the top line of the LCD will read
“CYCLE DURATION”. Push the UP or DOWN pads to toggle from 60
to 90 to 120 to 150 to 180 minutes. The first 5 minutes of the filter cycle
will be at high speed and the remaining time at low speed. When your
Page 31

1998 Owner’s
Manual
desired filter cycle length appears in the LCD, push the PROGRAM pad
to select it. The pre-set factory default is 60 minutes.
NUMBER OF FILTER CYCLES
After setting the length of the filter cycle, you will be prompted to set the
number of filter cycles. The top line of the LCD will read “SET # OF
CYCLES”. Push the UP or DOWN pad to toggle from 1 to 2 to 3 to 4
cycles per day. When your desired number of cycles appears on the LCD
push the PROGRAM pad to select it. The pre-set factory default is 2
cycles per day.
CAUTION: Long and/or numerous filter cycles could cause overheating
of the spa - especially in hot climates.
29
PUMP RUN TIME
After setting the number of filter cycles, the top line of the LCD will
read “PUMP RUN TIME”. Push the UP or DOWN pads to toggle from
30 to 45 to 60 minutes. This sets the length of time the pump will run
when a jets pad is pushed. For example, if you choose 45 minutes, each
time you push a jets pad, the pump will run for 45 minutes before shutting down automatically.
LCD INVERT
The invert feature will flip the text on the LCD so it can be easily read
from both inside and outside the spa. To invert the text, simply push the
“enter” pad three times. To return the text to its original position, repeat
this process - push the “ENTER” pad three times.
CONTROL PANEL LOCK
To help prevent unauthorized use of the spa, the control panel may be
locked. When the control panel lock is engaged, all programmed or
default spa functions will operate normally but all control pads will not
operate. When the panel is locked, the top line of the LCD will display
the current spa temperature and the bottom line will display “ALL SPA
FUNCTIONS LOCKED”.
To lock the panel all the following pads must be pushed within 3 seconds:
1) Push the ICON (logo) pad.
Page 32

1998 Owner’s
Manual
2) Push the ICON (logo) pad.
3) Push the ENTER pad.
To unlock the panel: All the following pads must be pushed within 3 seconds:
1) Push the ENTER pad.
2) Push the ENTER pad.
3) Push the ICON (logo) pad.
When the last pad is pushed all pads will be active.
PROGRAMMING LOCK
The programming lock is to prevent unauthorized programming and
water temperature adjustments. When the programming lock is engaged,
all programmed or default functions will operate normally. Also, the spa
user may operate the pumps, the spa light or view the time-of-day, but no
programming changes may be made.
30
To enable the programming lock, all the following pads must be pushed
within 3 seconds:
1) Push the ICON (logo) pad.
2) Push the ICON (logo) pad.
3) Push the PROGRAM pad.
To Unlock the Panel: All the following pads must be pushed within 3 seconds:
1) Push the ENTER pad.
2) Push the ENTER pad.
3) Push the ICON (logo) pad.
When the last pad is pushed all pads will be active.
CONTROL PANEL RESET
This function is used to completely reset the clock and all other system
variables to the factory defaults. Please keep in mind that this resets all
maintenance messages (clean filters, change water, etc.) as if the spa is
being installed the day of the panel reset.
To reset the control system all of the following pads must be pushed
within 3 seconds:
1) Push the ICON (logo) pad
Page 33

1998 Owner’s
Manual
2) Push the PROGRAM pad
3) Push the ENTER pad
The top line of the LCD will read “RESET?”
The bottom line of the LCD will read “IF SO, PUSH ICON”
4) Push the ICON pad to reset the entire control system to factory
defaults.
SCROLLING MESSAGE CENTER MESSAGES
Because of the advanced programming features of your scrolling display,
your spa will prompt you when you need to perform routine maintenance.
For example:
RINSE FILTERS
31
Every other month, the top line of your LCD display will read, “RINSE
FILTERS” and the message “REMOVE FILTERS & RINSE WITH
HOSE... PUSH ICON TO RESET” will scroll from right to left on the
bottom line of the display. To reset this message, push the Dimension
One Spas Icon (logo) pad located at the right hand side of the control.
CLEAN FILTERS
Every alternating month, the top line of your LCD display will read,
“DIRTY FILTERS” and the message “REMOVE FILTERS & CLEAN
IN SOLUTION... PUSH ICON TO RESET” will scroll from right to left
on the bottom line of the display. To reset this message, push the
Dimension One Spas Icon (logo) pad located at the right hand side of the
control.
CHANGE WATER
Every four months the top line of your LCD will read “CHANGE
WATER” and the message “TURN POWER OFF---DRAIN & REFILL
SPA...PUSH ICON TO RESET” will scroll from right to left on the bottom line of the display. To reset this message, push the Dimension One
Spas Icon located at the right side of the control panel.
ULTRAVISION
When “ULTRAVISION” is displayed on the LCD, the system is telling
you that it has been six months since you started up your spa. If you are
using an UltraVision cartridge, we recommend that you replace it at this
time. Push the Dimension One Spas icon to reset the system. If you do
Page 34

1998 Owner’s
Manual
not use UltraVision, push the Dimension One Spas icon (logo) pad to
reset the system.
NOTE: If you purchased an UltraVision cartridge subsequent to the initial start up of your spa, please do a 'hard reset' of the system as outlined
on the preceding page to reset the six month time frame. Please be aware
that a hard reset will also reset your clock, filtration cycles, etc. to the
factory defaults.
SPA CHECK-UP
When "SPA CHECK UP" is displayed on the LCD, the spa has been in
service for 2 years. We recommend that you have your spa inspected by
your dealer as a preventative maintenance measure. Push the Dimension
One spas icon to reset the system.
32
NOTE: To eliminate any prompting message on the LCD the system can
be reset by pushing the Dimension One Spas icon on the right end of the
control. If the error still exists the message will redisplay.
DIAGNOSTIC MESSAGES
OVERHEAT
When “OVERHEAT” along with the water temperature of the spa, is displayed on the LCD, the spa is in a high limit condition. In such a condition, DO NOT ENTER THE WATER. If this happens, remove the spa
cover and allow the water to cool below 106˚ F, then push any pad on the
upper control and the system will reset. If the problem recurs, turn off all
power to the spa and contact your local Authorized Dimension One Spas
dealer, or authorized service center.
LOW FLOW
When “LOW FLOW” is displayed on the LCD, check the following:
1) Check the water level to see if it is too low. If the water level is too
low, fill the spa to one to two inches above the bottom of the tile line.
2) Check the Ultra Pure filter cartridge to make sure that it is clean and
not impeding the flow of water. If the filter is dirty, clean it and reinstall.
3) A flow switch has malfunctioned. The spa will operate but the heater
Page 35

1998 Owner’s
Manual
will not activate. Contact your local Authorized Dimension One Spas
dealer.
FLOW SENSOR
When “FLOW SENSOR” is displayed on the LCD, the flow switch has
malfunctioned. Contact your local Authorized Dimension One Spas dealer, or authorized service center.
ICE
When “ICE” and the water temperature are displayed on the LCD, the
high limit sensor reads below 40˚ F at the heater element, and the system
is at a freeze condition. It will then automatically activate the pump to
circulate water. This is a normal spa function, no corrective action is
necessary.
33
HIGH LIMIT SENSOR
When “HIGH LIMIT SENSOR” is displayed on the LCD, the high limit
sensor is non-functional. Contact your local Authorized Dimension One
Spas dealer, or authorized service center.
TEMP SENSOR
When “TEMP SENSOR” is displayed on the LCD, the water temperature
sensor is non-functional. Contact your local Authorized Dimension One
Spas dealer, or authorized service center.
COOLING
When “COOLING” and the water temperature are displayed on the LCD,
the water temperature has reached 2˚ above the set temperature. The circulation pump and ozone generator will turn off to allow the water to
cool back to the set temperature. This is a normal spa function. No corrective action is necessary.
NOTE: The circulation pump and ozone generator will be on while
either jet pump is on and they will remain on for 30 minutes after the
pump(s) turn off regardless of the water temperature.
NOTE: The Dimension One Spas Scrolling Message Center is equipped
Page 36

W
A
TER
with a 30 day battery back up to preserve program settings during power
outages. This battery back up will not provide power to heat or operate
the spa.
Maintaining proper water chemistry is imperative to maintaining safe
water and preventing possible damage to your spa components.
START-UP PROCEDURES (IF USING VISION SYSTEMS, DISRE GARD THE STEPS LISTED BELOW AND FOLLOW THE STARTUP PROCEDURES IN THE INSTRUCTIONS LOCATED IN THE
BOX WITH THE PURIFICATION CARTRIDGE):
1) Add stain and scale control, or a similar sequestering agent, such as
C
HEMIS
Metal Gon.
TR Y
1998 Owner’s
Manual
34
2) Test and adjust total alkalinity. Run the pump for 1/2 hour at high
speed.
3) Test and adjust pH. Run the pump for 1/2 hour at high speed.
4) Add Sodium Bromide with jets running.
5) Fill and set Bromine floater or Adjustable Bromine Feeder and place
it in the spa water.
6) Shock water with Potassium Peroxymonosulfate with jets running.
7) Add clarifier (you may wish to add clarifier the following day, as the
introduction of stain and scale control with water clarifier may temporarily cloud the water).
8) Run the pump for 1 hour at high speed.
WATER QUALITY
Your Dimension One spa is equipped with a cartridge filter system.
Filtering the water helps maintain water cleanliness and clarity. While
the filter traps most solid materials, it is still necessary to add a sanitizer
such as chlorine or bromine to the water in order to control bacteria,
algae, and to oxidize any organic materials in the water.
We strongly recommend that you buy your chemicals from your local
Authorized Dimension One Spas dealer. Your local Authorized dealer
can also advise you on alternative methods for water sanitation. Discount
store chemicals, while sometimes less expensive, are not always the
Page 37

1998 Owner’s
Manual
proper strength or type for your spa. Use of the wrong chemicals can be
dangerous and may void the warranty on your spa.
WATER TESTING
It is recommended that you test your spa water regularly with an accurate
test kit or test strips. These are available from your local Authorized
Dimension One Spas dealer. Also, be sure to follow manufacturer's
instructions for chemical use.
PH CONTROL
All water solutions have pH, which is a measure of the acid to base relationship. While a pH reading of 7.0 is considered neutral, a lower reading is considered acidic and a higher reading is basic. The proper pH for
spa water is between 7.4 and 7.6. High pH (above 7.6) can reduce sanitizer efficiency, cloud the water, promote scale formation on surfaces and
equipment, and interfere with filter operations. When pH is too high, add
a pH decreaser. Low pH (below 7.2) is equally damaging and can cause
equipment corrosion, water that is irritating, and rapid sanitizer dissipation. Add pH increaser to adjust the level.
35
NOTE: Never add more than 3 teaspoons of pH adjuster per 250 gallons
of water. Always add adjuster with jets operating and circulate all chemicals for at least 30 minutes. Remember that good pH control and sanitization are absolutely essential for proper spa water treatment.
SANITIZER
The importance of maintaining an adequate level of sanitizer in your spa
cannot be overemphasized. Warm water presents a fertile environment
for the growth of bacteria and virus. This growth is prevented when adequate sanitizer levels are continuously maintained.
***WARNING***
Sanitizers such as Tri-chlor (tablets or sticks), calcium hypochlorite, sodium hypochlorite, and any chemical which dissolves on or remains undissolved in contact with the spa surface will damage your spa and will void
the warranty completely.
BROMINE (BROMINE CANNOT BE USED WITH THE VISION
SYSTEMS)
Page 38

1998 Owner’s
Manual
Bromine is the most common sanitizer used in spas. Bacteria can be controlled by maintaining a proper total bromine level of 3.0 to 5.0 ppm.
Brominating tablets are a convenient and effective source of bromine for
your spa. Do not drop bromine tablets directly into the water as this may
damage the spa surface. A bromine “floater” will safely and properly dispense the tablets for you or you may purchase the Dimension One Spas
Adjustable Bromine Feeder from your local Authorized Dimension One
Spas dealer. When used properly, brominating tablets will keep your
water clean, clear, and odor free. To ensure maximum effectiveness, add
a 1/2 ounce of sodium bromide per 100 gallons of water every time you
fill your spa. This will establish a bromine reserve.
CHLORINE
Chlorine can also be used as a water sanitizer, however, it is highly sensitive to pH. To be effective, you must have a spa pH range of 7.4 - 7.6.
Any reading outside this range will greatly reduce the chlorine's effectiveness.
Use your chlorine test kit or test strips to maintain a reading of 1.0 - 3.0
parts per million (ppm) of free chlorine. If the reading is below 1 ppm,
the level should be raised before the spa is used. If the reading is above
3 ppm, it should be allowed to drop to the proper range before use. Read
the instructions on your chlorine container carefully, or consult your local
Authorized Dimension One Spas dealer if you are having difficulty
adjusting your chlorine level.
36
The best chlorine for your spa is a granular “Dichlor” compound. It dissolves quickly in moving water and has a nearly neutral pH. Add chlorine while the jets are running and let the jet system run for 1/2 hour.
Generally, heavily contaminated water can be disinfected using large
chlorine doses, in the range of 8 - 10 ppm, but a more practical method is
to drain the spa and refill it with fresh water.
The effectiveness of chlorine is decreased when the cover is left off the
spa for two reasons: (1) sunlight decays chlorine rapidly and (2) organic
debris blown into the spa taxes the effectiveness of the chlorine. In addition, the higher the water temperature, the faster chlorine will decay.
NOTE: Two individuals in a spa may use as much as 3 ppm of chlorine
Page 39

1998 Owner’s
Manual
in 20 minutes.
SHOCK TREATMENT (POTASSIUM PEROXYMONOSULFATE)
Even with regular sanitization, shock treatment may be necessary on
occasion. Shock treatment is recommended over Super Chlorination
because it does not add additional sanitizer to the water. It is also effective in oxidizing wastes and will reduce chloramines or bromamines.
Follow the manufacturer's instructions listed on the label.
SUPER CHLORINATION
Super chlorination (or chlorine shock treatment), quickly oxidizes the spa
water to burn out wastes such as perspiration, hair spray, lotions, etc. that
cannot be removed by the spa filter. This waste build up reduces the
power of the sanitizer, making the water dull and irritating to the eyes
and skin. It may also produce an odor. When this occurs, the “free”
chlorine has become a “chloramine” which is ineffective for sanitizing.
This can be eliminated by super chlorinating as needed. An application
of 5 times the normal chlorine dosage will act as an adequate treatment.
37
WATER CLARIFIERS (FLOCCULATING AGENTS)
Some wastes left in the spa water may not be filterable and can result in
cloudy, dull water. Using a water clarifier whenever you fill your spa and
then weekly thereafter will help keep your water clear. A flocculating
agent will attract small particles and form larger ones that will become
big enough to get trapped in the filter.
NOTE: Cloudy water may also be caused by high pH.
STAIN AND SCALE INHIBITOR (SEQUESTERING AGENTS FOR
CONTROLLING STAINS AND SCALE)
Stain and scale inhibitors or sequestering agents (Stain and scale
inhibitors cannot be used with the Vision systems.) Staining and scaling
are common problems in spas. Because the water is hot, scale is deposited more rapidly. The circulation of water can cause the erosion of metals
from spa equipment which can then stain interior surfaces. A weekly
dose of a stain and scale fighter will help control these problems. A
sequestering agent, such as Metal Gon, should always be added to the spa
water when filling a spa (for the first time or when draining and refilling). This will eliminate any metals in your water and increase the life of
Page 40

1998 Owner’s
Manual
your spa equipment.
TOTAL ALKALINITY
Total alkalinity is the amount of Carbonate, Bicarbonate and Hydroxyl
ions in the water. TA(total alkalinity) affects and buffers the pH of the
water. With high TAabove 160, pH resists adjustment. With low TA
below 130, pH is unstable and difficult to keep in the ideal range. Proper
TA levels allow other chemicals to work at their optimum.
FOAM INHIBITOR
Soap residue from a bather's body, hair, and swimsuit combined with
rapid circulation of spa water may eventually cause foaming in your spa.
Foam inhibitors will suppress foam but cannot remove soap from water.
When foaming occurs, a shock treatment can oxidize the soap in your
water and help prevent this condition. If foam remains a problem,
change the water.
38
FOR A SIMPLE WEEKLY WATER CHEMISTRY SCHEDULE,
PLEASE SEE THE STICKER LOCATED ON THE INSIDE OF YOUR
SKIMMER LID.
Page 41

C
ARE F
1998 Owner’s
O
R YOU
DRAINING YOUR SPA
All Dimension One spas are gravity drained. Do not drain water onto
your lawn or plants unless all of the bromine or chlorine has dissipated
from the spa water. The sanitizer in your spa water can be dissipated
very quickly by leaving the spa cover off and exposing the water to direct
sunlight. Drain and replace your spa water every three to four months.
For heavy spa use, you may wish to change the water more frequently.
To drain your spa:
1) Turn off all power to the spa.
R SP
A
Manual
39
2) Attach a hose to the hose bib at the bottom of the spa on the pedestal
to the left of the equipment compartment (or you can place a hose
directly in the spa and gravity drain by the siphon method). Open the
valve and allow the water to drain away from the spa.
3) Clean the spa surface (see CARE FOR THE SPA SURFACE on page
46).
4) Refill the spa and restore power. Follow the Initial Start-up procedures for your model to reheat the spa.
FILTER CLEANING
Always turn the spa off before cleaning the filter elements. Your spa is
equipped with one or two top access filter cartridges. We recommend
that you clean the filters every month, as preventative maintenance.
To clean the skimmer filter cartridge, remove the access lid covering the
filter area. Lift the center float of the skimmer assembly until it is fully
extended. Hold the center piece of the assembly and turn it counter
clockwise until the flats of the basket are aligned with the securing tabs.
Then pull the basket assembly straight up to remove it. Next, pull the filter element out by twisting the molded handle until the filter is loosened.
Clean the element with a high pressure garden hose. Every other cleaning, soak the element in a filter cleaning solution, then rinse it thoroughly, and reinstall. Replace the skimmer basket assembly and the access lid
or cover. After cleaning, run the pump for a few minutes at high speed,
then return to the heating mode.
Page 42

1998 Owner’s
Manual
To clean the Ultra Pure filter element for those spas with Ultra Pure,
remove the skimmer access lid and pull up on the Ultra Pure filter flange.
Next, pull the filter element out by twisting the molded handle until the
filter is loosened. Clean the element with a high pressure garden hose.
Every other cleaning, soak the element in a filter cleaning solution, then
rinse it thoroughly, and reinstall. Replace the access lid or cover.
LIGHT BULB REPLACEMENT
All spas are equipped with a 12 volt light using a GE912 bulb. To
change the bulb, turn the power off and drain the spa below the level of
the spa light. Using the special tool provided in the owner's manual
packet, unscrew the cover for the light housing. Remove the old bulb
and install the new bulb. Screw the cover for the light housing back into
the female receptacle. Check to ensure proper operation of the new bulb
before refilling the spa.
40
NOTE:
1) Do not attempt to remove the light housing cover without the special
tool. If you are not able to locate it, contact the Dimension One Spas
Service Department to have one sent.
2) Be sure the O-ring is not damaged and is properly in place when
replacing the lens. Contact Dimension One Spas if a replacement Oring is needed.
CARE FOR THE SPA SURFACE - ULTRALIFE
Your UltraLife spa has a very high quality finish. Stains and dirt will
generally not adhere to the surface. Cleaning of the surface should be
done with baking soda or Soft Scrub. Be careful when using detergents
not to leave soap residue on the spa shell as this will cause suds build up
in the spa water and you'll find yourself changing the water more frequently than should be necessary.
CARE FOR THE SPA SURFACE - QUARITE PLUS
Your Quarite Plus spa has a very high quality finish. Stains and dirt will
generally not adhere to the surface. Cleaning of the Quarite Plus surface
should be done with an acrylic surface cleaning solution. Your local
Authorized Dimension One Dealer can recommend a good product for
this use. Be careful when using detergents not to leave soap residue on
Page 43

1998 Owner’s
Manual
the spa shell as this will cause suds build up in your spa water and you'll
find yourself changing the water more frequently than should be necessary.
CAUTION: Do not use “409” type cleaners or other caustic solutions as
they may damage the spa shell surface and void the warranty. If you are
using baking soda to clean your spa shell, be careful not to get it on the
skirt. It may bleach the wood.
CARE FOR THE SPA CABINET
When properly cared for, the wood cabinet of your spa will maintain its
beauty for many years. All woods react to the elements differently by
expanding and contracting. Re-stain the wood every 3-6 months, to thoroughly protect it. 'Heart redwood' or 'Coastal' stain, manufactured by
Duckback serves as a good sealing agent for the wood. Please note that
the cabinet is not warranted against reaction to natural weather conditions. The wood must be properly maintained.
41
CARE FOR THE SPA COVER
The thermal cover for your spa is an extremely durable foam insulated
product. See the manufacturer's literature for proper cleaning instructions. When the spa is not in use, it is recommended that the cover tie
downs always be utilized to discourage unsupervised children and minimize heat loss. Small locks are also available for the cover tie downs. In
either case, these locking methods are not considered adequate to keep
unauthorized people from entering the spa.
SPECIAL COLD WEATHER INSTRUCTIONS
Winter is one of the best times of the year to enjoy the warmth of your
spa. Your Dimension One spa is 100% fully foam insulated and will not
cost significantly more to operate in the winter than any other time of
year. Because it is very difficult to get the water out of all of the plumbing lines, we do not recommend draining your spa for the winter.
However, if you don't plan to use your spa during the winter, we recommend you winterize it as follows:
If you decide to drain the spa, drain it as completely as possible. You
may wish to tilt the spa on edge and use a wet-vac or high pressure blower to evacuate as much water as possible. This will require additional
Page 44

1998 Owner’s
Manual
people. Try to get as much water out of the plumbing lines and equipment as possible. If you want to use the spa water on surrounding vegetation, make sure that it is free of sanitizers.
When the spa is completely drained, leave the hose bib open and open
the pump drain valve located on the bottom front side of the pump. Also,
loosen all pump unions and fittings to allow air and water to expand
freely within the system. This should prevent water freezing expansion
from damaging pipes and fittings. The key is to eliminate any sealed
areas in the systems that may contain water.
If you receive heavy snowfall during winter months, you may want to
build a cover cap for the spa cover. This can be done with a 1/2” to 3/4”
thick piece of plywood and a few supporting 2” X 4” cross members.
42
CAUTION: Your spa is equipped with automatic freeze protection.
However, power outages can cause your spa equipment system to freeze
quickly. During freezing conditions, check your spa frequently to ensure
proper operation. Always check your spa after any power failure to
ensure that it is operational. Draining and operating your spa disables
this feature.
For additional information about winterizing your spa, please contact
your local Authorized Dimension One Spas dealer.
WARRANTY SERVICE INFORMATION
Your spa warranty gives you specific coverage. Be sure to read the
enclosed warranty sheet carefully.
The warranty does not cover problems arising from misuse, abuse, or
neglect, and it does not cover problems caused by improper installation
or “perceived” problems caused by failure to read the spa owner’s manual. A service charge will be made if a service call is made for any of the
following:
1) Equipment failure due to improper/inadequate electrical service. All
systems require dedicated circuits as described in this manual. Low
voltage can cause equipment failure and seriously shorten equipment
life. It is the owner’s responsibility to ensure proper electrical service
is available.
Page 45

1998 Owner’s
2) Failure of spa to reach desired temperature because the set temperature is not turned up high enough. Maximum thermostat setting is
approximately 106˚ F.
3) Burned out spa light. Bulbs are not covered.
4) Spa water chemistry is the responsibility of the spa owner. Cloudy,
dirty or chemically unbalanced water and cleaning of the spa filter are
also the responsibility of the spa owner.
5) Spa shell or equipment damage caused by improper water maintenance. Serious damage can be caused if your spa water is not maintained carefully and correctly.
6) Poor jet action because the jet Selector valve is in the middle position. For full performance, turn the jet Selector valve to either the
full clockwise or full counterclockwise position.
Manual
43
WARNING: Do not block the equipment door. Resulting malfunctions
are not covered under warranty.
Page 46

T
roubleshootin
g
44
PROBLEM DI
1. Spa will not come o
in any
mode
2. Spa does not hea
3. Pulsating
4. Poor jet action or no
jet actio
5. Spa temperature
erratic
jets
n
t
AGNO
n
a. No power to spa
a. Temperature setting
is too lo
b. Dirty filt
c. Flow switch
adjustmen
d. High
a. Water level too lo
a. Dirty filt
b. Selector valve i
middle
c. Air lock
d. Gate valve closed
a. Water level
w
er
limit tripped
er
out o
t
SIS
n
ACTION
a. Ch
eck circuit breaker
a. Turn up th
b. Clean filter
f
c. Call for service
d. Reset high
w
a. Fill spa to 1”-2
above bottom of th
t
ile line
a. Clean filter
b. Move valve clockwise
or count
c. Loosen pump unio
t
o allow air to escape
d. Open gate valve
a. Fill spa to 1”-2
above bottom of th
t
ile line
ermostat
limi
t
”
erc l o c k w i s e
”
e
n
e
6. Spa light ou
7. Spa comes on b
itself
8. Pump shuts down
unexpectedly wh
in use
t
y
ile
a. Burned out bulb
a. Normal automatic
daily power filtratio
or anti-f
a. Automatic 30 minute
t
imer has shut
o
b. Spa motor overheat-
ed and automatic
protective device ha
shut down
reeze cycle
ff
pump(s
n
pump
)
a. Replace bulb
a. No action required
a. Push JET
to start anoth
minute cycle
b. Normal functio
Make sure that the
s
equipment
vent
area is no
blocked. Vent
age can cause seriou
damage to your spa
equipment
S pad agai
er 30
n
panel
t
block-
n
s
Page 47

Glossary of T
erm
s
45
GLO
SS
ARY OF
B
LEEDE
the spa’s
CIRCULATION PU
the spa contin
DRY FIRI
in the heat
GFC
C
ircuit Breaker that
there is an electrical power leakage to ground.
HALOGEN
strong
ICON PA
Spas Logo on the f
L
OA
tot
s
ame time, load sh
pump is turned onto high speed.
R VALVE- A s
plumbing
NG- Turning the heat
er.
I - GR
D S
al power needed to operate both the heater & th
OUND F
S - Free chlorine, bromine or iodine ions that are ver
oxidizers used to sanitize water.
D - This is
HARING- When th
TERMS
mall valve used to relieve or expel air from
or pump.
MP - A small pump that
uously.
AULT CIRCUIT INTERRUPTE
automatically disconnects
a button accessed by pressing the Dimension One
ar right of the U
e circuit breaker size is smaller than the
aring
automatically turns off the heater when
er element on when th
pper Cont
circulates the wat
ere is no water
R - A ty
power to the s
rol Panel.
e jet pump at th
er i
n
pe o
pa when
y
e
a je
t
f
OZONE GENERATO
oxygen int
PUMP
spa’s plumbing
S
ELECTOR VALVE- L
power from one area of the s
SUCTI
where water is pulled from the s
VENTU
VISI
er that
WEIR SKIMMER - A floating wat
debris from the surf
o ozone for use in the wat
UNION- A
.
ON FITTING- Fitting located in the footwell of the s
RI - A device used to inject air into the water.
ON CARTRIDGE- A saf
can be used in place of chlorine or bromine.
R - A specialized ultraviolet light that change
removable fitting that connects the pump to th
ocated on the t
pa to anoth
pa to th
e, halogen free alternative water sanitiz-
ace of the wat
er.
er sanitation process.
op edge of the s
er.
e jet pump.
er referencing
device that s
pa, it diverts
pa
kim
s
s
e
je
t
Page 48

Power Hook-up for the Californian,
Nautilus, Aurora, Aurora II, Diplomat
and Chairman (240V)
1999 Owner’s
Manual
46
Power Hook-up for the Interlude, Arena, Quadra and
Power Hook-up for the Quadra (120V)
Triad (240V)
Page 49

W
IRI
NG
DI
AGRA
M
W
iring
Diagram
47
 Loading...