

dignity di1004 User Manual
Русский
English
Deutsch
Polski
Čeština
LED PROJECTOR
User manual
Dear user,
Thank you very much for choosing Dignity projector. Please
read this user manual carefully in order to operate this device
correctly and bring its excellent performance.

English

32oF~158oF
-20oF~158oF

Optional
-/ --
Info
AB
Zoom
S
Exi t
OK
Flip
FR Z
Goto
VO L
CH
USB
PI C.
Audio
Rep.
Subt.
M
R
Aud.T
info
display information
Pic.
Audio
picture mode
audio mode
image change larger
or smaller
Rep.
AB
Aud.T
Subt.
repeat function (when using
USB mu lti med ia pl ay)
AB cycle (when using USB
multimedia play)
Audio tracks (when using USB
multimedia play)
subtitle (when using US B
multimedia play)
Goto
go to a certain t ime t o play (when
using U SB m ultimedia pl ay)
USB
enter the USB mode di rec tly
S
R
M
Exit
source
Menu
exit
Vol+/-
volume to add and subtract
CH+/-
channel to add and subtract
Flip
FRZ
image 360 degree flip
image freeze
Menu
Source
OK
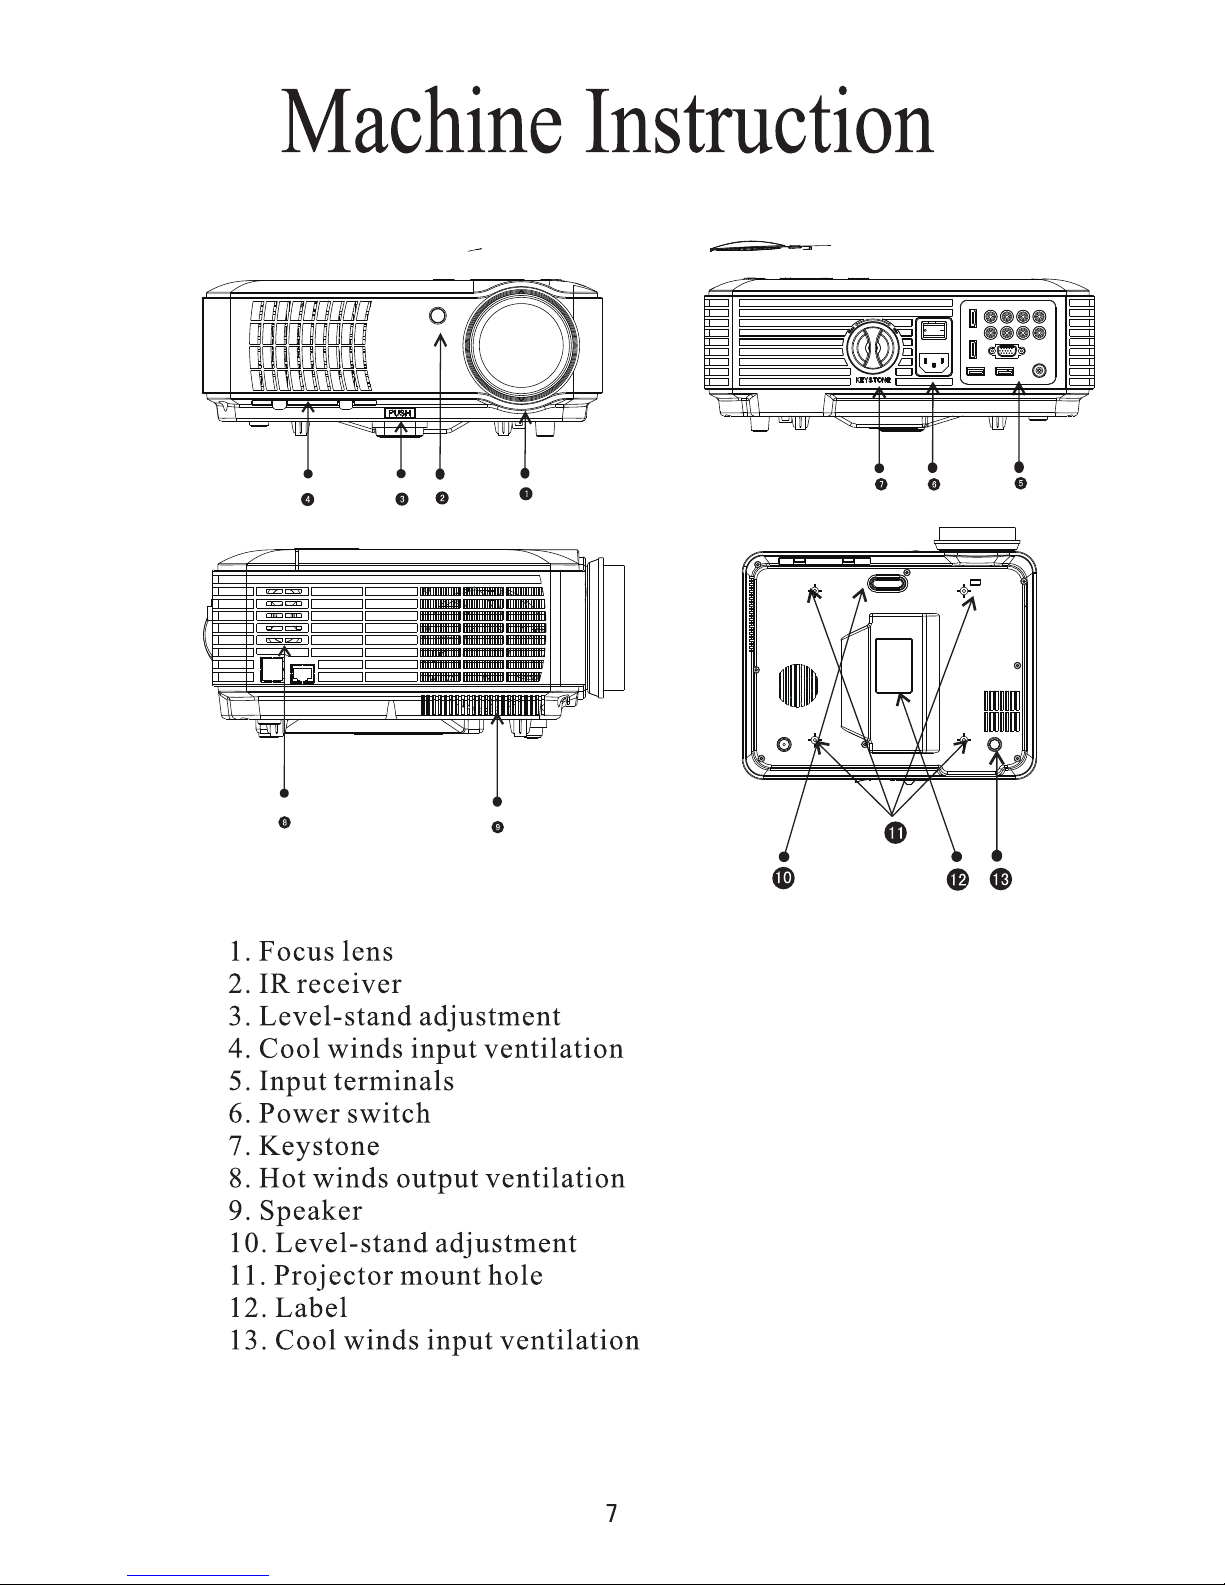
4
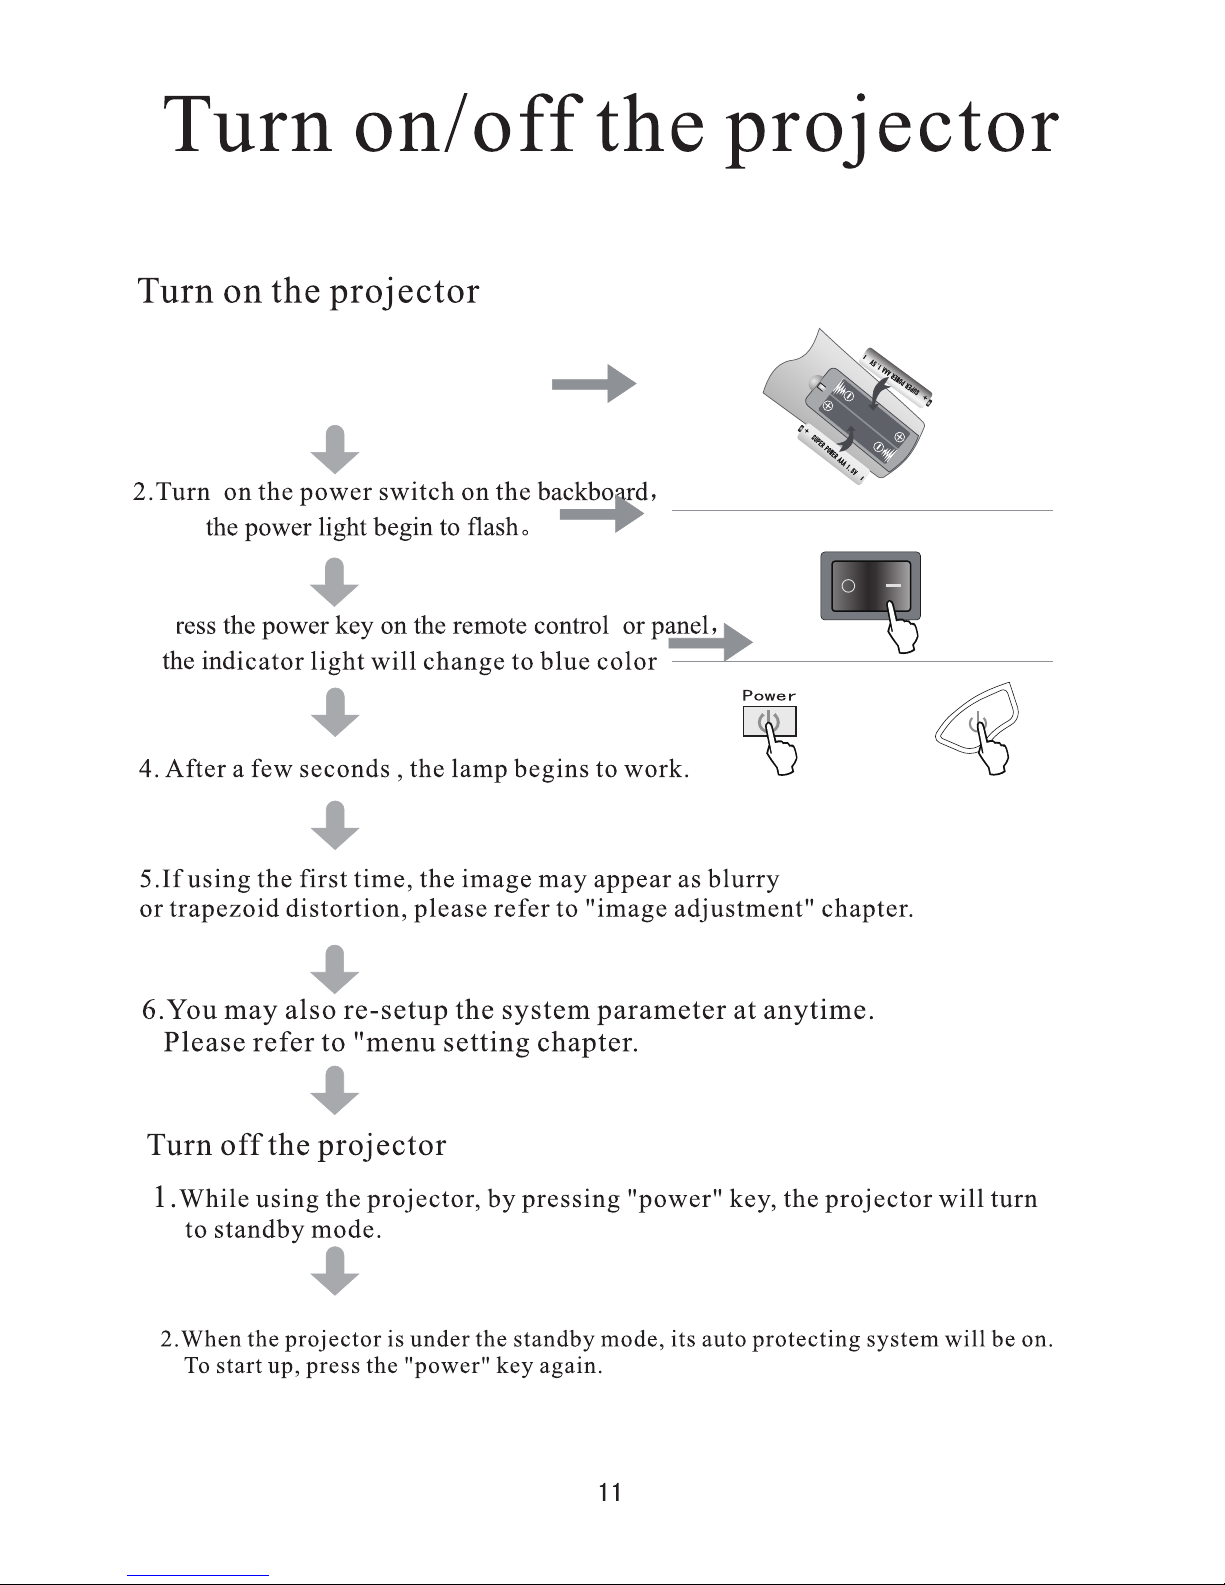
1.Before using the remote control,
please fix two batterys in it.
3. P

1.
submenu
s
.
.

OK
Input Source
ATV
AV
PC-RGB
HDMI
ANDROID
picture1
picture2
I. How to enter the Android System
Projector is turned on after the blue screen appears.
Please press the "source" button on projector top panel or remote control
select the source of the "Android" and press the "OK" button
to enter the main interface of the Android system (Android
System Loading need a little time) .
(As shown in picture 1)
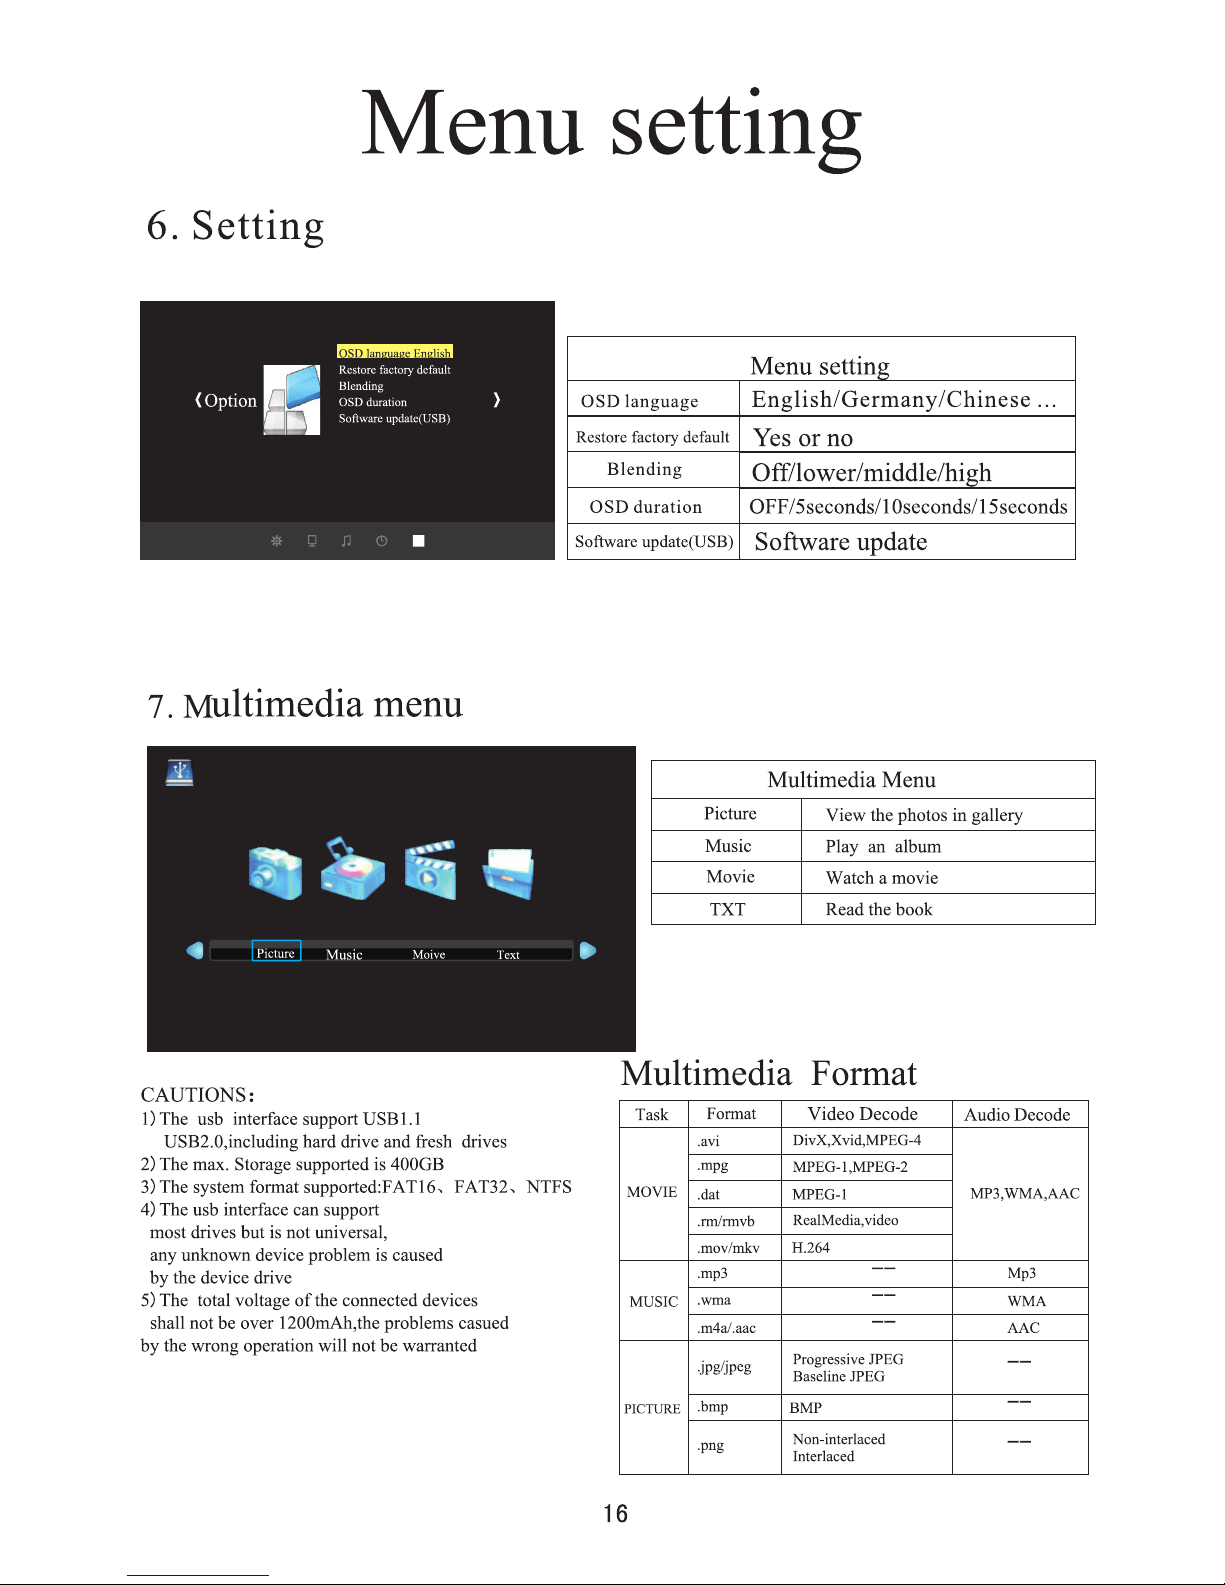
Menu
Set
Home
Delete
1
2
3
4
5
6
7
8
9
10
11
12
13
14
1,reserved buttons,no function
2,reserved buttons,no function
3,previous,next
4,setting
5,directional keys
6,home page
7,number confirmation
8,mute
9,volume down/up
10,menu
11,confirm/play/pause
12,return
13,number input
14,delete the number
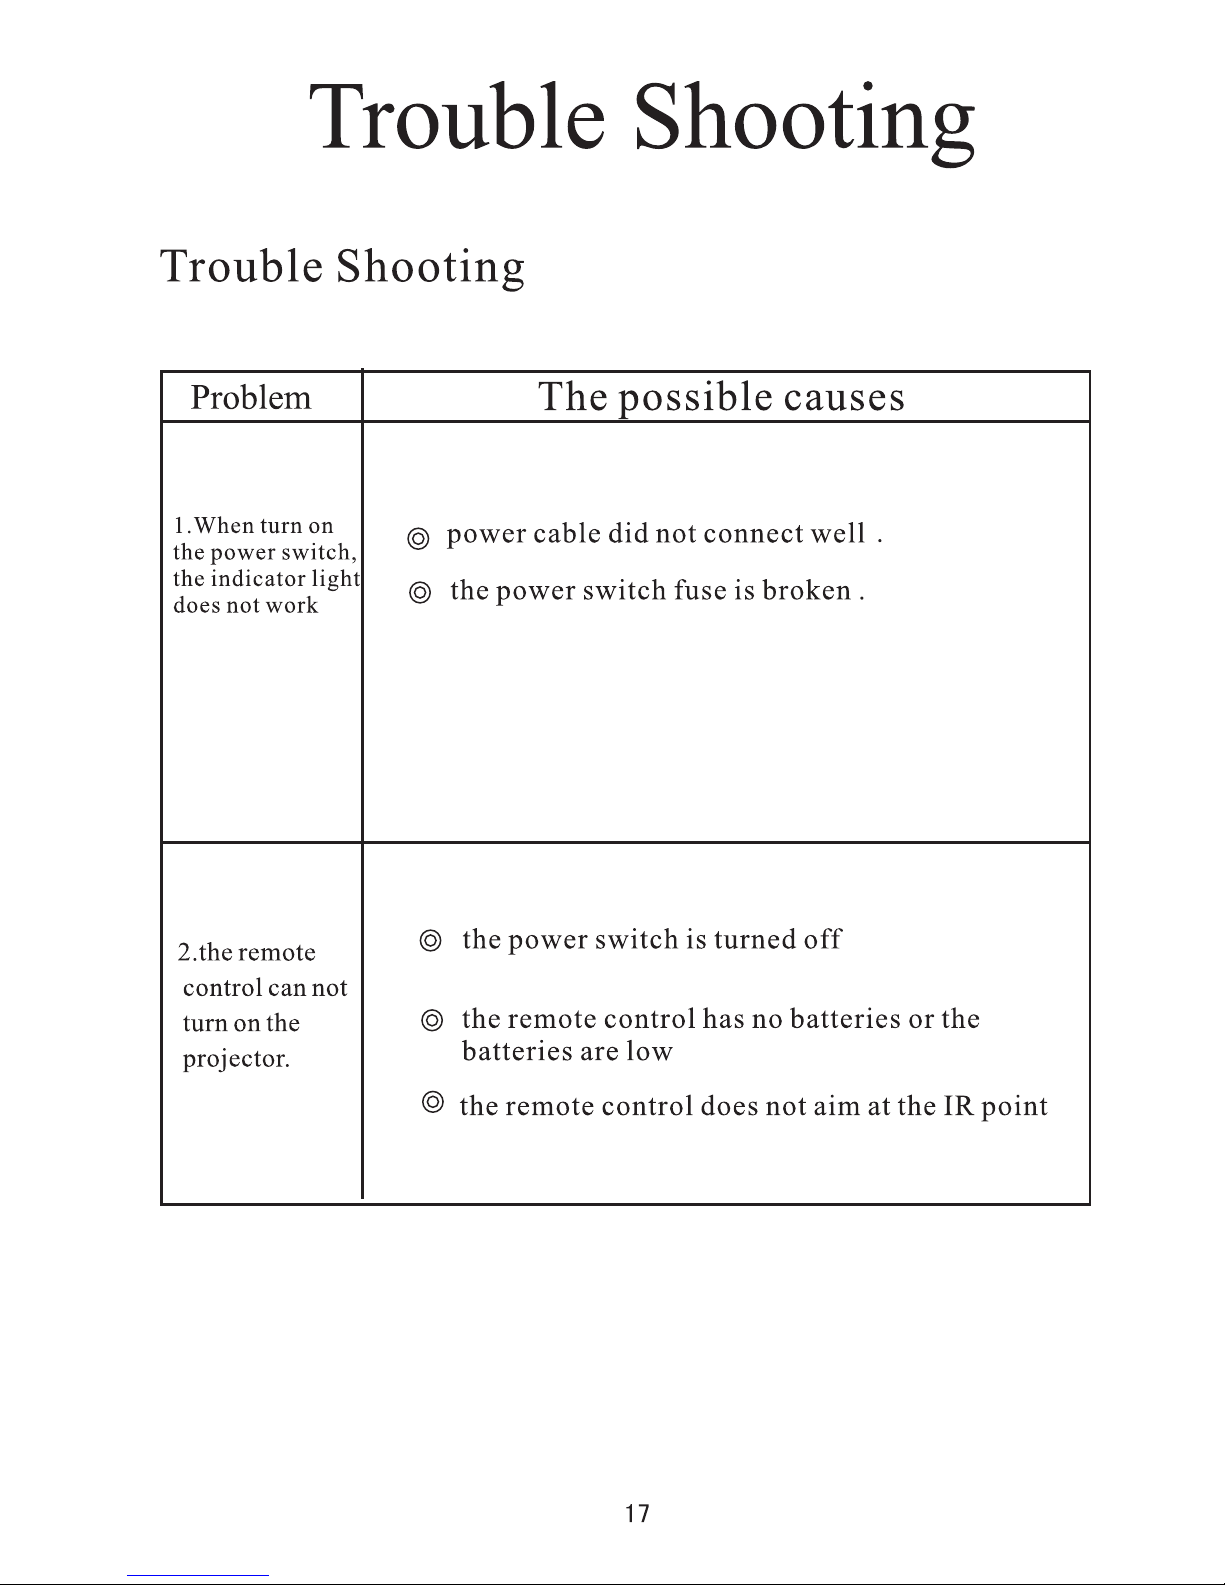
II. How to operate Android System
1) After entering the main interface of Android System (As shown in Picture 2) .
there are two operating methods which can be selected:
A) Use the special mini "Android use" remote control .
B) Insert your computer mouse (wire or wireless) into the projector's
"USB1 or USB2"Interface . (As shown in Picture 3)
2) Function description of “Android use “ remote control
Android use
picture3
YPbPr
Instructions of Android Projector
19
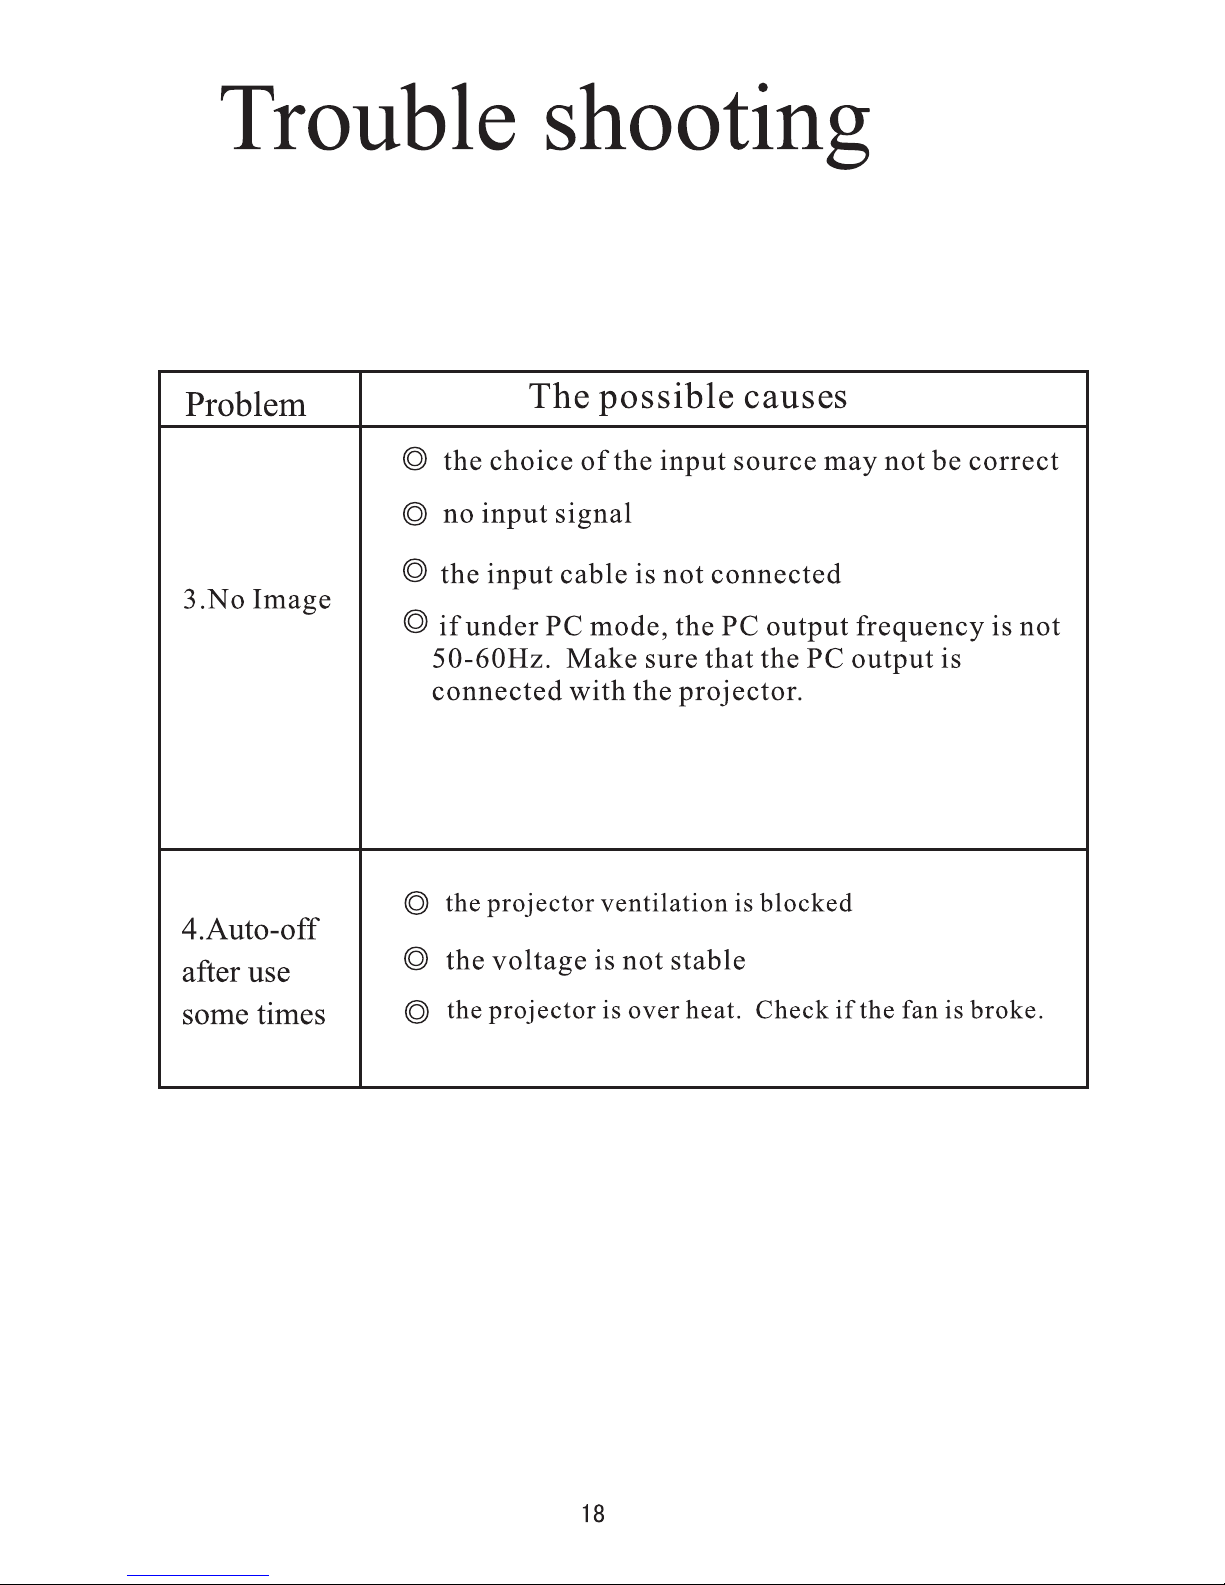
IV. Software (APP) Description:
1) The projector andriod system has installed some popular APPS,
you can select "TV" or "Internet video" to watch the live hot movies.
You can select "music" to listen to your favorite songs, and surf on the Internet .
2) It also supports to play the USB flash storage files through "USB1" or "USB2" interface,
there will be a note interface when you insert the USB flash, like picture5, scroll "open"and press "OK",
Tips:
To let you enjoy fast and smooth Android projector,
we strongly recommend you do not install too much Apps
especial for some Botnets and useless applications.
Please uninstall the irregular softwares, excessive Apps
will cause Android to unresponsive even dead.
If the projector crash or dead during using, power off
the projector and re-enter the Android system again .
picture4
picture5
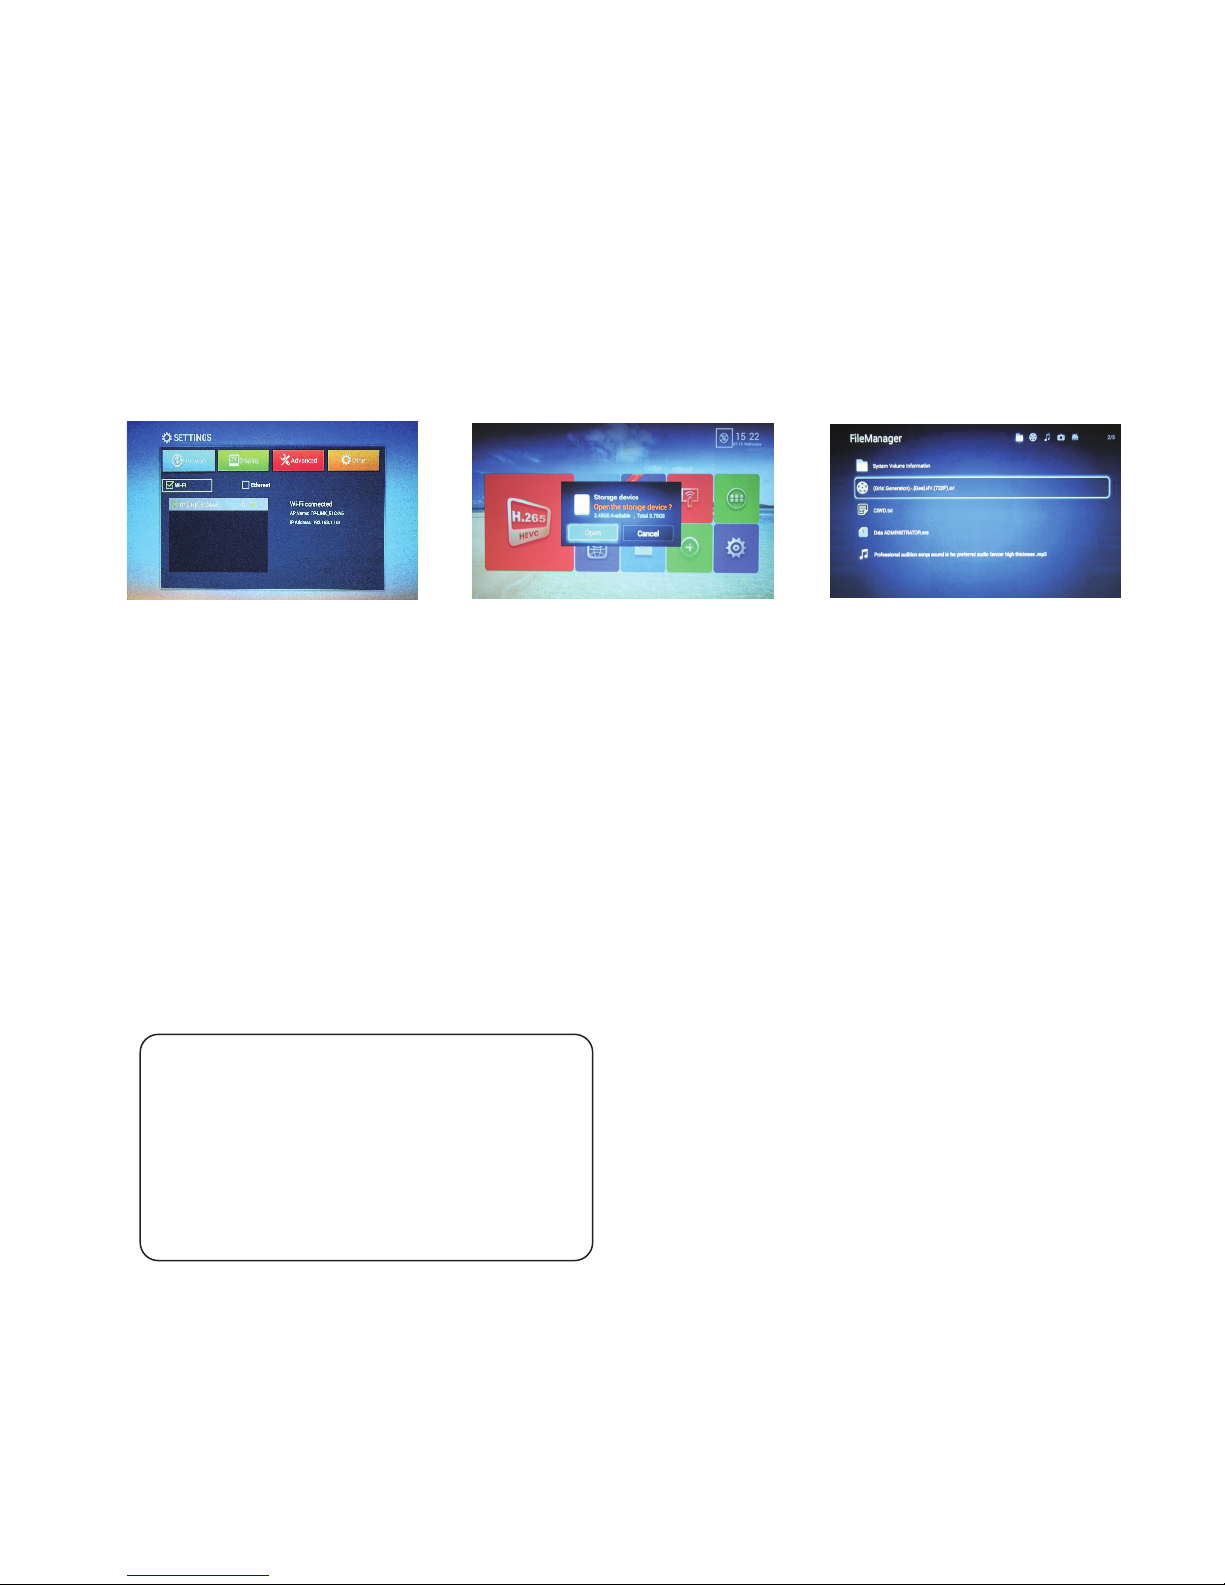
III. How to connect to the WIFI :
Please press the "Home" key on the remote control, the main screen appears.
Press navigation buttons to choose (accompanied with a flashing frame and a crisp sound).
When the flashing cursor moves to the "Apply", please press the "OK" button to select
"System Settings"and click on "network ", please select the wireless router which you want
to connect on the list, enter the password, and then click "Connect".
The connection is successful and "wifi connected "icon will be displayed on the lower right
corner of the interface (As shown in picture 4).
The steps of operating the Android projector by computer mouse (wire or wireless)
are same as above.
picture6
it will display the picture 6 options play-list , use the navigation buttons to select a desired file.
20
 Loading...