

DIGM Technology GSM-680 User Manual

GSM Fixed Wireless Terminal (Model: GSM-680)
1 | P a g e
User Manual
1. Functions & Features
GSM fixed wireless terminal is an innovative wireless access terminal. It’s ideal to be used in offices
and home to reduce comparatively high phone charges. It also can be connected to charge counter
as wireless public phone. This device has the following functions:
1) Support GSM900/1800Mhz.
2) Provide the reverse polarity signal and can connect with the charge counter for charging
3) Can set up call-out/call-in restriction
4) Caller ID
5) Hands free, redial, sound volume adjustment while calling in/out.
6) Can connect with PBX
7) With back-up Li battery, support standby time over 48 hours.
2. Terminal Installation
2.1 SIM card installation:
Caution! Please fix the SIM card before connecting to the power supply!
1) Open the mainframe so you can see the SIM card pedestal at the bottom.
2) Push SIM card nog gently along with arrowhead to put it up.
3) Insert SIM card into the nog.
4) Press down the nog of SIM card and push it by the backward direction of arrowhead until the
SIM nog is fixed on the card pedestal.
5) Use the SIM cardboard to cover pedestal and screw it down.
GSM Fixed Wireless Terminal (Model: GSM-680)
2 | P a g e
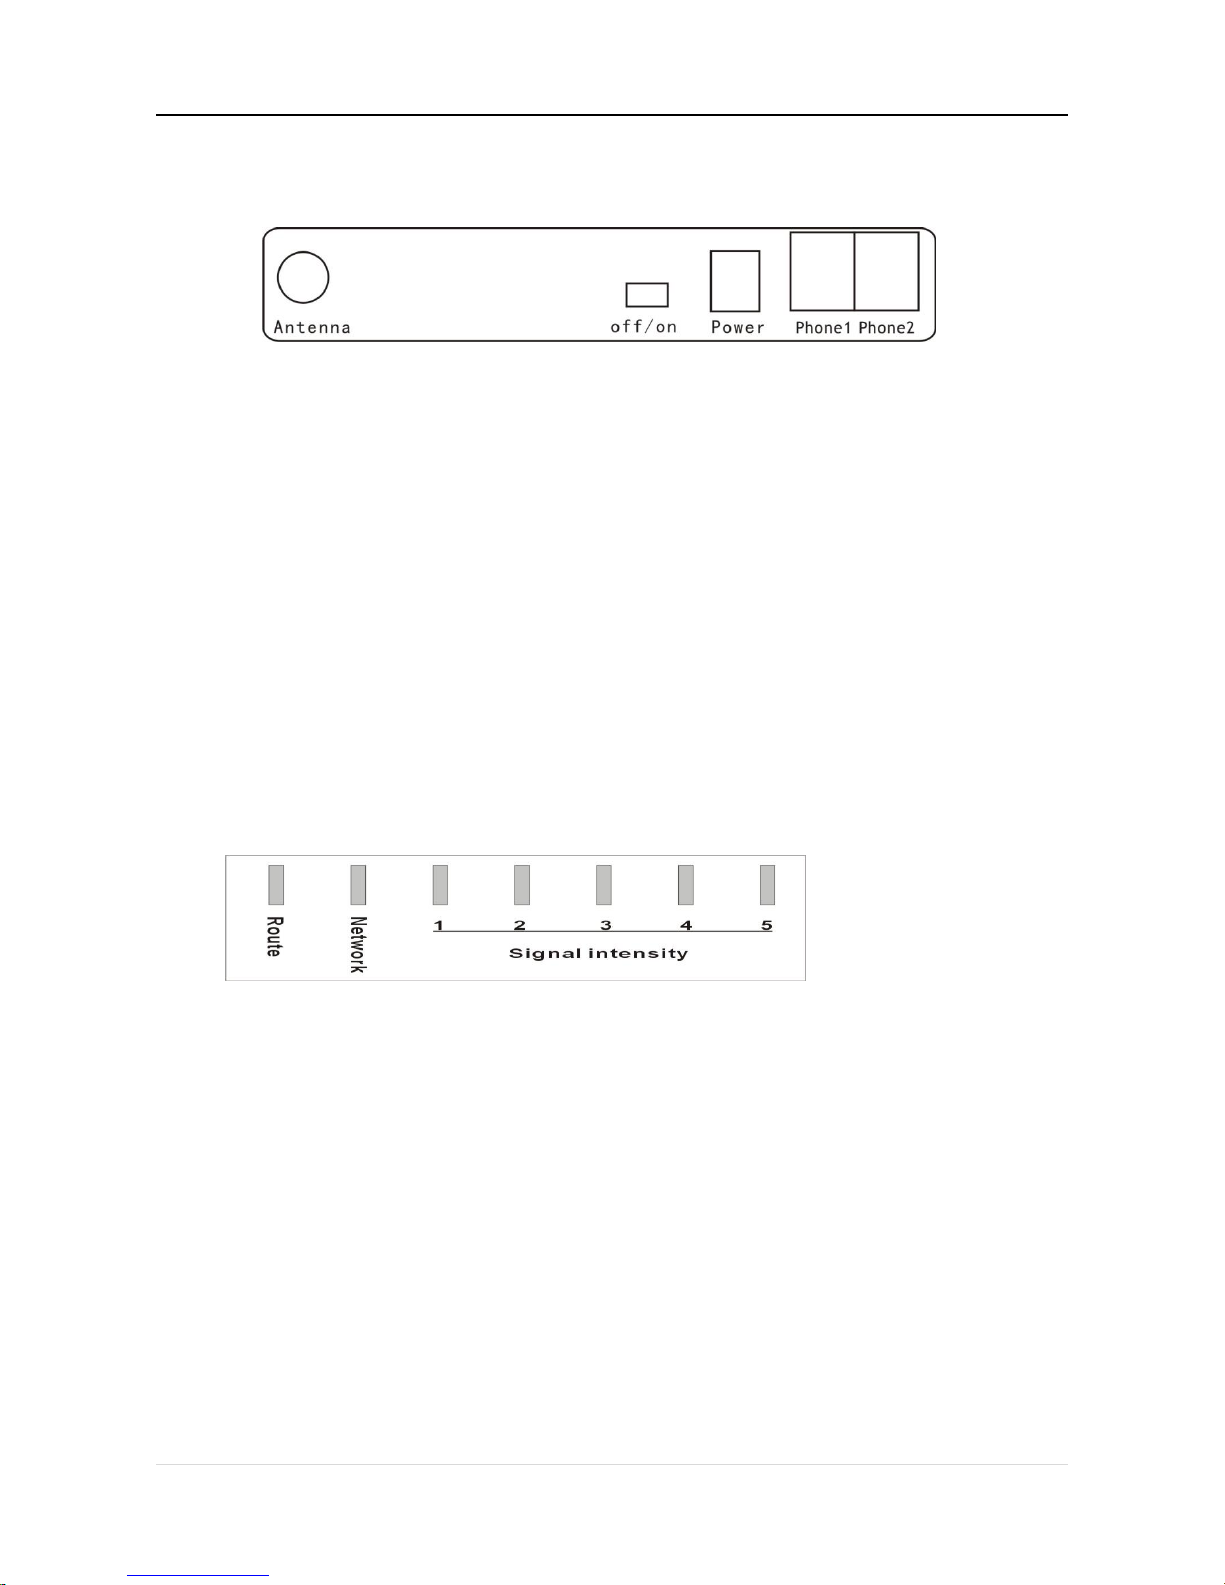
2.2 Assembly of the Terminal:
External ports
1) Make sure the SIM card installed correctly.
2) Screw down the connector of the antenna to the bolt stick on the panel marked with “Antenna”
on the back of the device.
3) Plug one connector of standard phone cable to the phone, and plug the other end to the port
on the panel marked with “Phone” on the back of the device.
4) Plug one connector of standard phone cable to the phone, and plug the other end to the port
on the panel marked with “Phone” on the back of the device.
The model support connect with 2pcs normal telephone as extension at same time
5) Make sure the switch of device is off, then plug the input connector of the adaptor to the AC
power socket, and the output connector to the “Power” port on the back of the device.
3. Operation Instructions
Turn on the power switch at the back of the terminal after connecting the terminal correctly
3.1 Explanation of indicators’ state:
Indicators
1) The route indicator indicates which network is working - GSM or PSTN. (optional)
This light is on while the device is operated under GSM network, vice versa.
2) The network indicator indicates whether the device get connected with GSM network or not.
This light is on means the device gets connected with GSM network, vice versa
3) The signal intensity indicators display signal intensity.
When the signal is stronger, more indictor lights will be on, vice versa.
3.2 Dial the telephone:
When the network and signal intensity indicators are on, pick up the handset and dial after hearing
the dialing tone. .
 Loading...