

Digizoid ZO2 Quick Start Manual
Know your ZO
Control your ZO
ZO2 Personal Subwoofer
Quick Start Guide
2
Output Jack
3.5mm stereo jack connects
ZO to a listening device
Switch
Powers on/o, triggers
modes, and selects settings
LightBar &
Low-Battery Indicator
Charge Status Indicator
USB Charging Port
Input Jack
3.5mm stereo jack connects
ZO to an audio source
2
Push in
& release
switch
Turn ZO On*
goes into goes into
2
Sound Signature
Tuning Mode
Push in
& release
switch
2
Connection
Configuration Mode
Push in
& release
switch
goes back into
*To turn ZO off while in either mode,
push in and hold the switch until the
LightBar turns off.
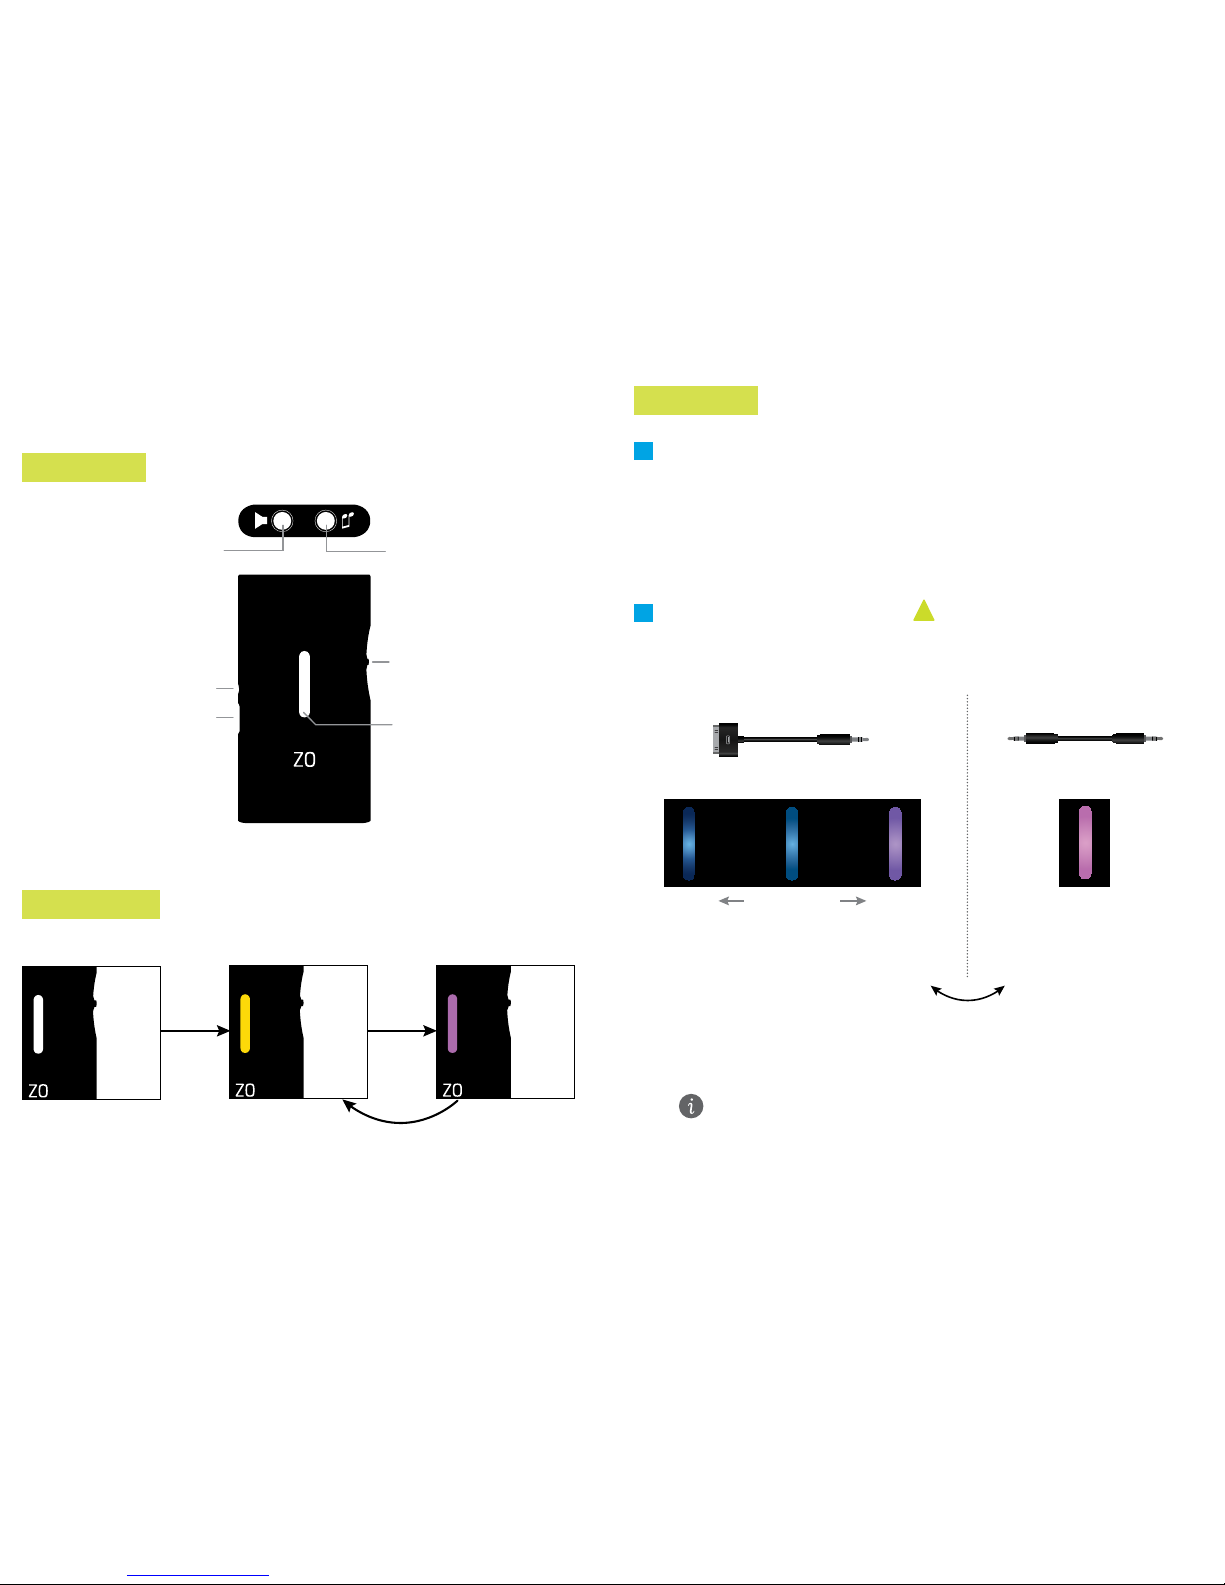
Turn ZO on, and enter the Connection Conguration mode. Verify that ZO is set to
the correct conguration mode, depending on the type of connection used between
your audio source and ZO (on rst use, ZO should be set to Headphone Out mode):
2 Congure ZO’s Connection Mode This section is important - please read!
!
To enter Headphone Out mode: when LightBar is purple, rotate and hold
switch up for ~8 secs. LightBar will turn pink, and volume will more than double.
To exit Headphone Out mode: rotate switch down. LightBar will turn purple.
Dock Connector
Line Out mode
MAX
(purple)
MIN
(dark blue)
32 volume levels
... ...
Stereo Cable
Headphone Out mode
FIXED VOL
(pink)
Volume is controlled using ZO. Rotate the switch
up/down once to change by one level. Hold rotated
to scan through the levels. Start at min setting.
Volume is controlled using the
player. Start at 25% of full volume.
Connect ZO’s USB Charging Port to a USB port on your computer using the provided
charging cable. The Charge Status Indicator will light up red while the battery is
charging. The indicator will turn o when the battery is fully charged (it should take
about 1 hour to fully charge ZO if the battery was completely drained).
If the battery gets low, a secondary red light will blink at the bottom of the LightBar.
Charge your ZO
1
Quick Start
If using Headphone Out mode, and ZO’s battery completely drains (i.e., turns
o while in use), you will have to re-enter Headphone Out mode after ZO is
recharged.

©2009-2012 digiZoid Inc. All Rights Reserved.
digiZoid, SmartVektor and ZO are trademarks or registered trademarks of digiZoid inc.
Additional Help
If you need help with your ZO2, please reference the troubleshooting steps on our support
page at www.digizoid.com/support. If you continue to have trouble, please feel free to
contact us at www.digizoid.com/contact.
It is essential that all sound enhancement/EQ functions are turned o when using ZO,
as they could cause a reduction in sound quality. Be sure to check the following:
» Bass and treble levels are set to neutral (no +/-)
» No equalizer presets (such as bass boost) are selected
» Technologies such as noise cancelling or virtual surround/3D are turned o
3 Congure your Audio Source
4 Connect your Listening Device to ZO
Connect your headphone/speaker’s plug to ZO’s output jack. Be sure to insert the
plug straight into ZO’s jack, and not at an angle. You can also use a secondary 3.5mm
stereo cable (not included) to connect ZO to the auxiliary input of your car stereo.
Start audio playback, and adjust the volume level to get the desired loudness.
To avoid damage to your hearing, make sure all volume levels are turned down
before putting on headphones. Potential hearing damage may occur if you listen
at high volume levels for extended periods of time. If you experience ringing in
your ears, reduce the volume level to prevent permanent damage.
5 Playback Audio then Adjust Volume
The SST proles adjust the sound characteristics of ZO’s SmartVektor™ technology. On
rst use, the middle SST prole will be selected (yellow LightBar). To select other SST
proles, rotate the switch up/down once to change by one level, or held rotated to
scan through the levels.
6 Select Sound Signature Tuning (SST) prole
MAX
(red)
MIN
(green)
32 SST profiles
more bassless bass
 Loading...