

Page 1
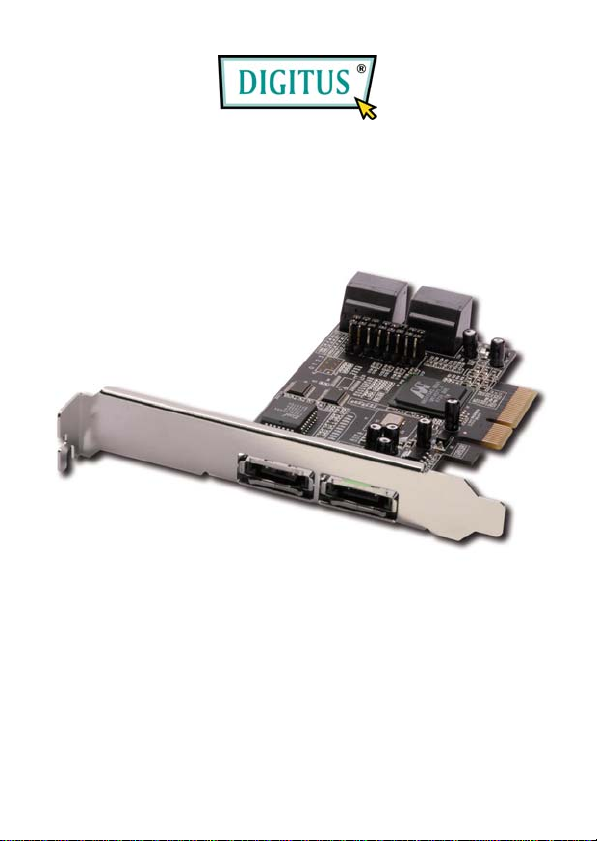
4-CHANNEL SATA II
PCI EXPRESS CARD
User Manual
1
Page 2

Features
Marvell 88SX7042 chipset
Compliant with PCI Express Base Specification 1.0a
Compliant with Serial ATA 1.0 specification with support for full
complement of SATA II optional features
Supports SATA II Native Command Queuing (NCQ)
Provides four independent channels to support up to four Serial
ATA drives
Supports SATA up to 300MB/Sec
Supports Windows 7, V ista, XP, 2000
Bus Interface
PCI-Express x 4
Connectors
4 x internal SATA connectors
2 x external eSATA connectors
System Requirements
PCI Express-enabled system with one available PCI Express slot
Windows 7, Vista, XP, 2000
2
Page 3
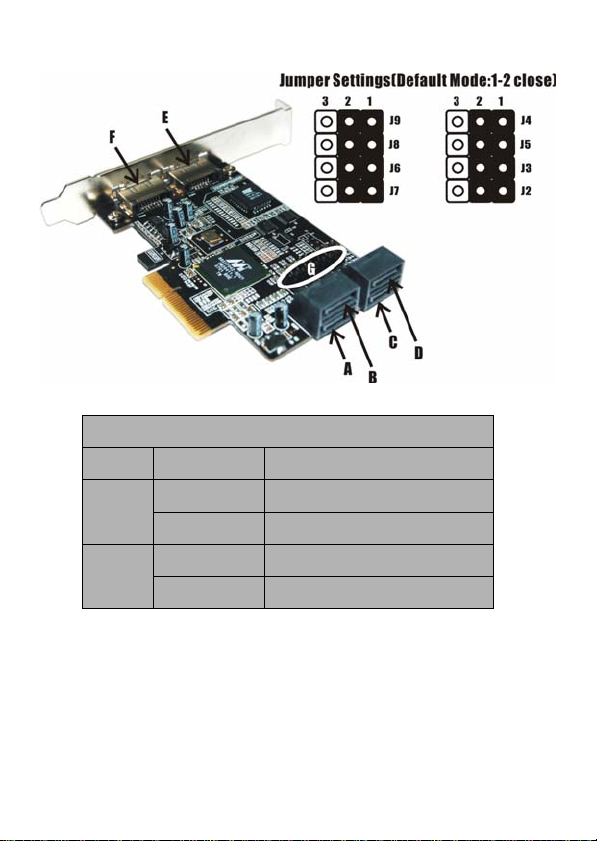
Hardware Description
G (Jumper Settings)
JP Description Active Port
J2-J5 1-2 close Enable SATA Connector D
2-3 close Enable SATA Connector E
J6-J9 1-2 close Enable SATA Connector C
2-3 close Enable SATA Connector F
3
Page 4

Note: There are six SATA ports in PCIe SATA II 300 4-Channel
Adapter. We name these ports A to F. Ports A to D are internal SATA
ports and E & F are external SATA ports. By changing the jumper
setting on the PCIe SATA II 300 4-Channel Adapter that allows you to
select between external and internal ports to use. By default, Port A, B,
C and D are working.
Hardware Installation
1. Turn Off the power to your computer and any other connected
peripheral devices.
2. Unplug the power cord from the back of the computer.
3. Remove your computer’s cover .
4. Remove the slot bracket from an available PCI Express slot.
5. To install the card, carefully align the card’s bus connector with
the selected PCI Express slot on the motherboard. Push the board
down firmly, but gently, until it is well seated.
6. Replace the slot bracket’s holding screw to secure the card.
Device Connection
The PCIe SATA II 300 4-Channel Adapter is a four channel Serial ATA
4
Page 5

controller that supports up to four Serial ATA hard disk drives.
1. Install your hard disk drive(s) in chassis.
2. Connect the Serial ATA hard disk drive to the system power
supply using the included Serial ATA power cable.
3. Connect one end of the Serial ATA cable to the hard disk drive.
4. Attach the other end of the Serial ATA cable to the Serial ATA
controller on the PCIe SATA II 300 4-Channel Adapter.
5. Follow the same instructions to connect up to four hard drives.
Device connection is now complete.
6. Replace the computer cover and reconnect the power cord.
Driver Installation
For Windows® 2000
For A New Installation
A new installation requires a floppy disk for the driver
installation. To make this floppy disk, copy the contents of
the “
DS-30104\2K_XP_2003_Vista” folder, found on the driver CD,
onto a blank floppy disk then follow the directions below.
1. Follow Windows® 2000 installation procedure.
2. Restart the computer when prompted by the installation.
5
Page 6

3. At the Windows® 2000 Setup screen, press F6 to install the
driver.
4. When prompted, press S to specify the location of the driver.
5. Insert the floppy disk, then press Enter.
6. Select Marvell Serial AT A Adapter , then press Enter.
7. Press Enter again to finish driver installation, then follow the
on-screen instructions to complete the Windows installation.
For An Existing Installation
1. At Found New Hardware Wizard, click Next.
2. Select Search for a suitable driver for my device(recommend)
then click Next.
3. Insert the driver CD, check CD-ROM drives, uncheck the other
boxes, click Next, then click Next again.
4. If the Digital Signature Not Found message appears, click Yes.
Our driver has been thoroughly tested for stability and
compatibility.
5. Click Finish.
6
Page 7

For Windows® XP/Server 2003
For New Installation
A new installation requires a floppy disk for the driver
installation. To make this floppy disk, copy the contents of
the “
DS-30104\2K_XP_2003_Vista” folder, found on the driver CD,
onto a blank floppy disk then follow the directions below.
1. Follow Microsoft’s Windows installation procedure.
2. Restart the computer when prompted by Windows’ installation.
3. At the Windows Setup screen, press F6 to install the driver.
4. When prompted, press S to specify the location of the driver.
5. Insert the floppy disk, then press Enter.
6. Select Marvell Serial AT A Adapter, then press Enter.
7. Press Enter to finish driver installation, then follow the on-screen
instructions to complete the W in dows installation.
Note: If the Security Alert warning pops up, click Yes. Our driver has
passed Microsoft compatibility testing, this message appears during
new installation.
7
Page 8

For An Existing Installation
1. At the Found New Hardware Wizard:
XP (w/SP1 or earlier)/Server 2003: continue to step #2
XP (w/SP2 or later)/Server 2003(w/SP1 or later): select No,
not this time, then click Next.
2. Insert the driver CD, select Install the software
automatically (Recommended), and click Next.
3. If the Hardware Installation window pops up, click Continue
Anyway, then Finish. Our driver has been thoroughly tested
for stability and compatibility.
4. Click Finish
For Windows® XP-x64/Server 2003-x64
For New Installation
A new installation requires a floppy disk for the driver
installation. To make this floppy disk, copy the contents of
the “
DS-30104\XP_2003_Vista x64” folder, found on the driver CD,
onto a blank floppy disk then follow the directions below.
1. Follow Microsoft’s Windows installation procedure.
2. Restart the computer when prompted by Windows’ installation.
8
Page 9

3. At the Windows Setup screen, press F6 to install the driver.
4. When prompted, press S to specify the location of the driver.
5. Insert the floppy disk, then press Enter.
6. Select Marvell Serial AT A Adapter, then press Enter.
7. Press Enter to finish driver installation, then follow the on-screen
instructions to complete the W in dows installation.
Note: If the Security Alert warning pops up, click Yes. Our driver has
passed Microsoft compatibility testing, this message appears during
new installation.
For An Existing Installation
1. At the Found New Hardware Wizard, select No, not this time,
then click Next.
2. Insert the driver CD, select Install the software automatically
(Recommended), and click Next.
3. If the Hardware Installation window pops up, click Continue
Anyway, then Finish. Our driver has been thoroughly tested for
stability and compatibility.
4. Click Finish.
9
Page 10

For Windows® Vista
For New Installation
A new installation requires a floppy disk for the driver
installation. To make this floppy disk, copy the contents of
the “
DS-30104\2K_XP_2003_Vista” folder, found on the driver CD,
onto a blank floppy disk then follow the directions below.
1. Follow Microsoft’s Windows installation procedure.
2. Restart the computer when prompted by Windows’ installation.
3. At the Windows Setup screen, press Load Driver to install the
driver.
4. Insert the floppy disk, please select Marvell Serial ATA Gen 2
PCI Express Adapter (A:\mvsata.inf), then press Next. (Change
A:\ to match your floppy drive letter )
5. Follow the on-screen instructions to complete the
Windows installation.
10
Page 11

For An Existing Installation
1. At Found New Hardware Wizard, select Locate and install
driver software (recommended).
2. Insert the driver CD, click Next.
3. If the system prompts the user informing the drivers are not
signed, select the option Install this driver software anyway.
4. Click Close to complete the installation
For Windows® Vista-x64
For New Installation
A new installation requires a floppy disk for the driver
installation. To make this floppy disk, copy the contents of
the “
DS-30104\XP_2003_Vista x64” folder, found on the driver CD,
onto a blank floppy disk then follow the directions below.
1. Follow Microsoft’s Windows installation procedure.
2. Restart the computer when prompted by Windows’ installation.
3. At the Windows Setup screen, press Load Driver to install the
driver.
4. Insert the floppy disk, please select Marvell Serial ATA Gen 2
PCI Express Adapter (A:\mvsata.inf), then press Next. (Change
A:\ to match your floppy drive letter )
5. Follow the on-screen instructions to complete the Windows
installation.
11
Page 12

For An Existing Installation
1. At Found New Hardware Wizard, select Locate and install
driver software (recommended).
2. Insert the driver CD, click Next.
3. If the system prompts the user informing the drivers are not
signed, select the option Install this driver software anyway.
4. Click Close to complete the installation.
To Verify W indows® Installation
1. Right click My Computer and click Manage.
2. Select Device Manager.
3. Double click SCSI and RAID Controller (Storage controller –
Vista), then double click Marvell Serial ATA Gen 2 PCI
Express Adapter to display driver properties. A message this
device is working properly is displayed in the dialog box, the
driver has been correctly installed.
12
 Loading...