

Page 1
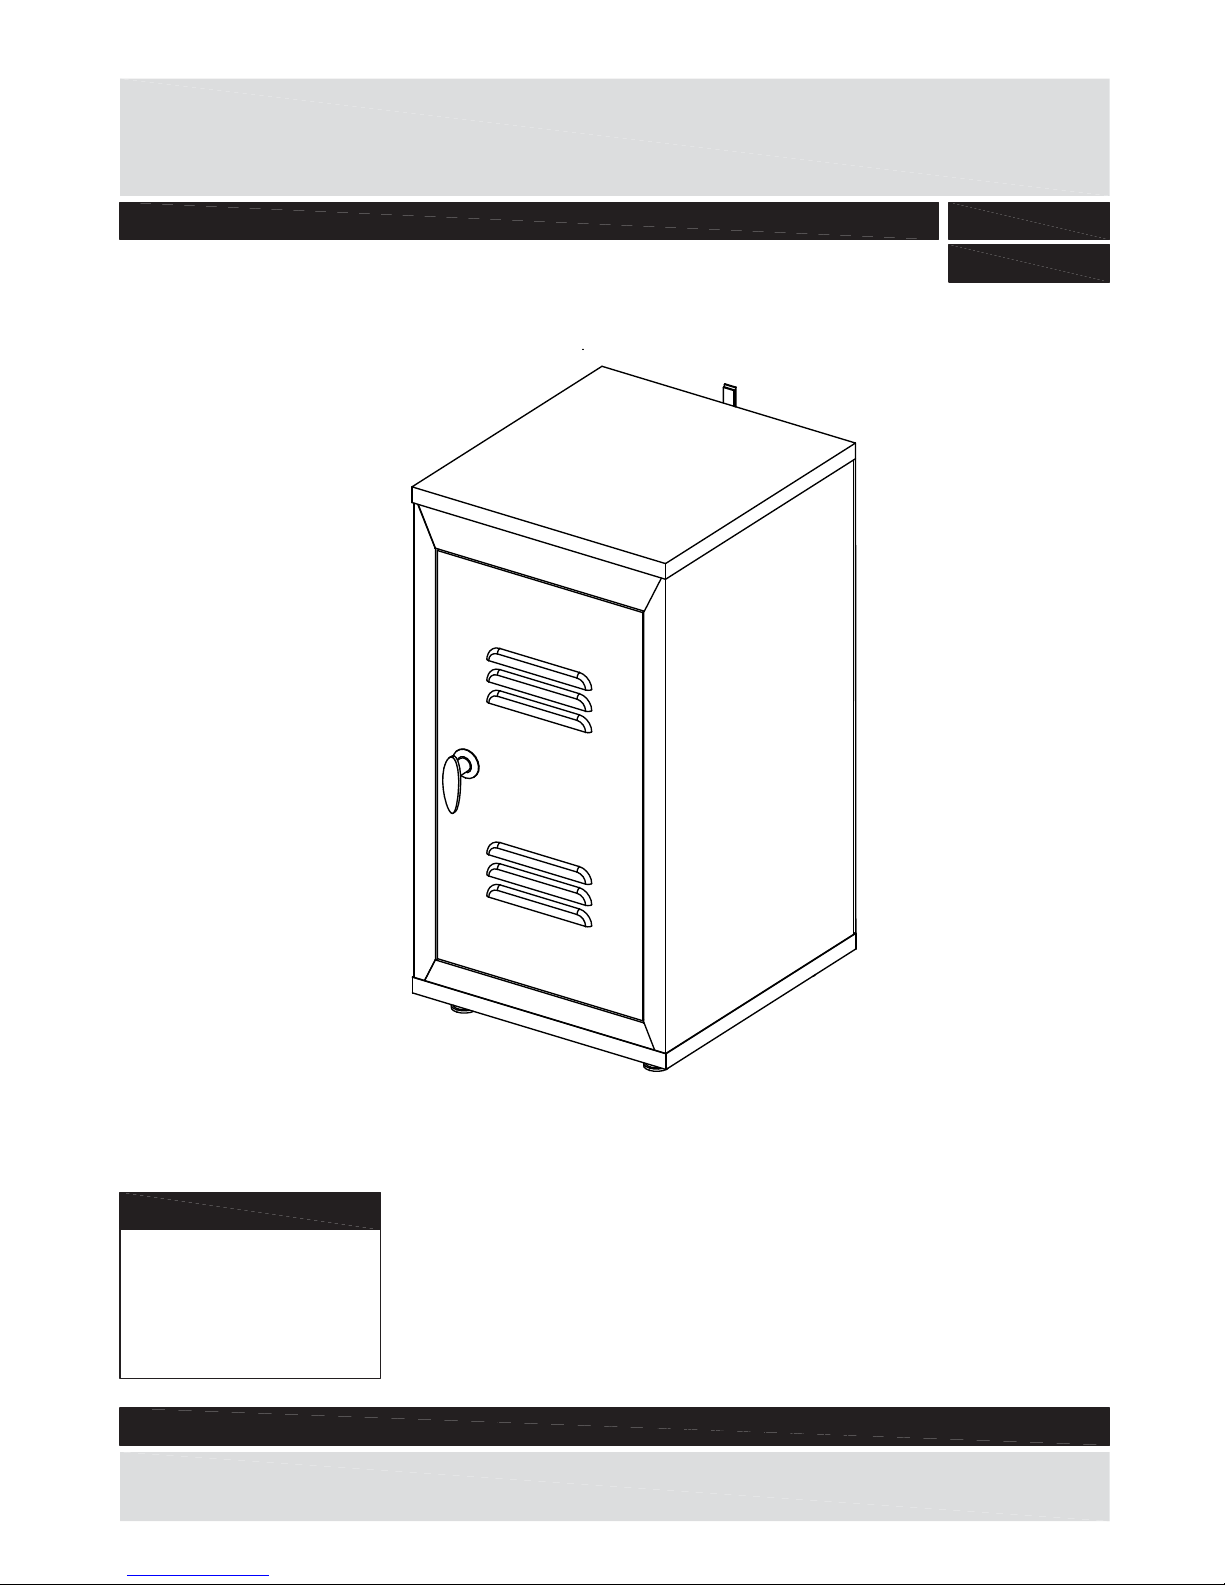
Oi Small Locker
Dimensions
Length - 35cm
Width - 38cm
Height - 64cm
Important – Please read these instructions fully before starting assembly
If you need help or have damaged or missing parts, call the Customer Helpline: 0845 640 0800
Issue 1 - 12/03/2013
Assembly Instructions - Please keep for future reference 719/3525
719/3532
Page 2
Safety and Care Advice
Important – Please read these instructions fully before starting assembly
components and tools listed on
pages 2 and 3.
plastic bags and separate them
into their groups.
space to layout the parts before
starting.
this could cause damage.
room) as possible.
surface to avoid damaging the
unit or your floor.
easier with 2 people.
components are missing or
damaged.
This product is suitable for
children in the age range of
7-12 years.
Important: Retain these instructions for future reference.
Assembly to be carried out by
a competent adult only.
During assembly children should
be kept away from the product
due to possible risk of injury.
recommend the
use of power
drill/drivers for
inserting screws ,
as this could damage the unit.
Only use hand screwdrivers.
carefully and responsibly.
1
Care and maintenance
bleach or abrasive cleaners.
there are no loose screws on
this unit.
discarded with household
authority waste disposal centre.
Page 3
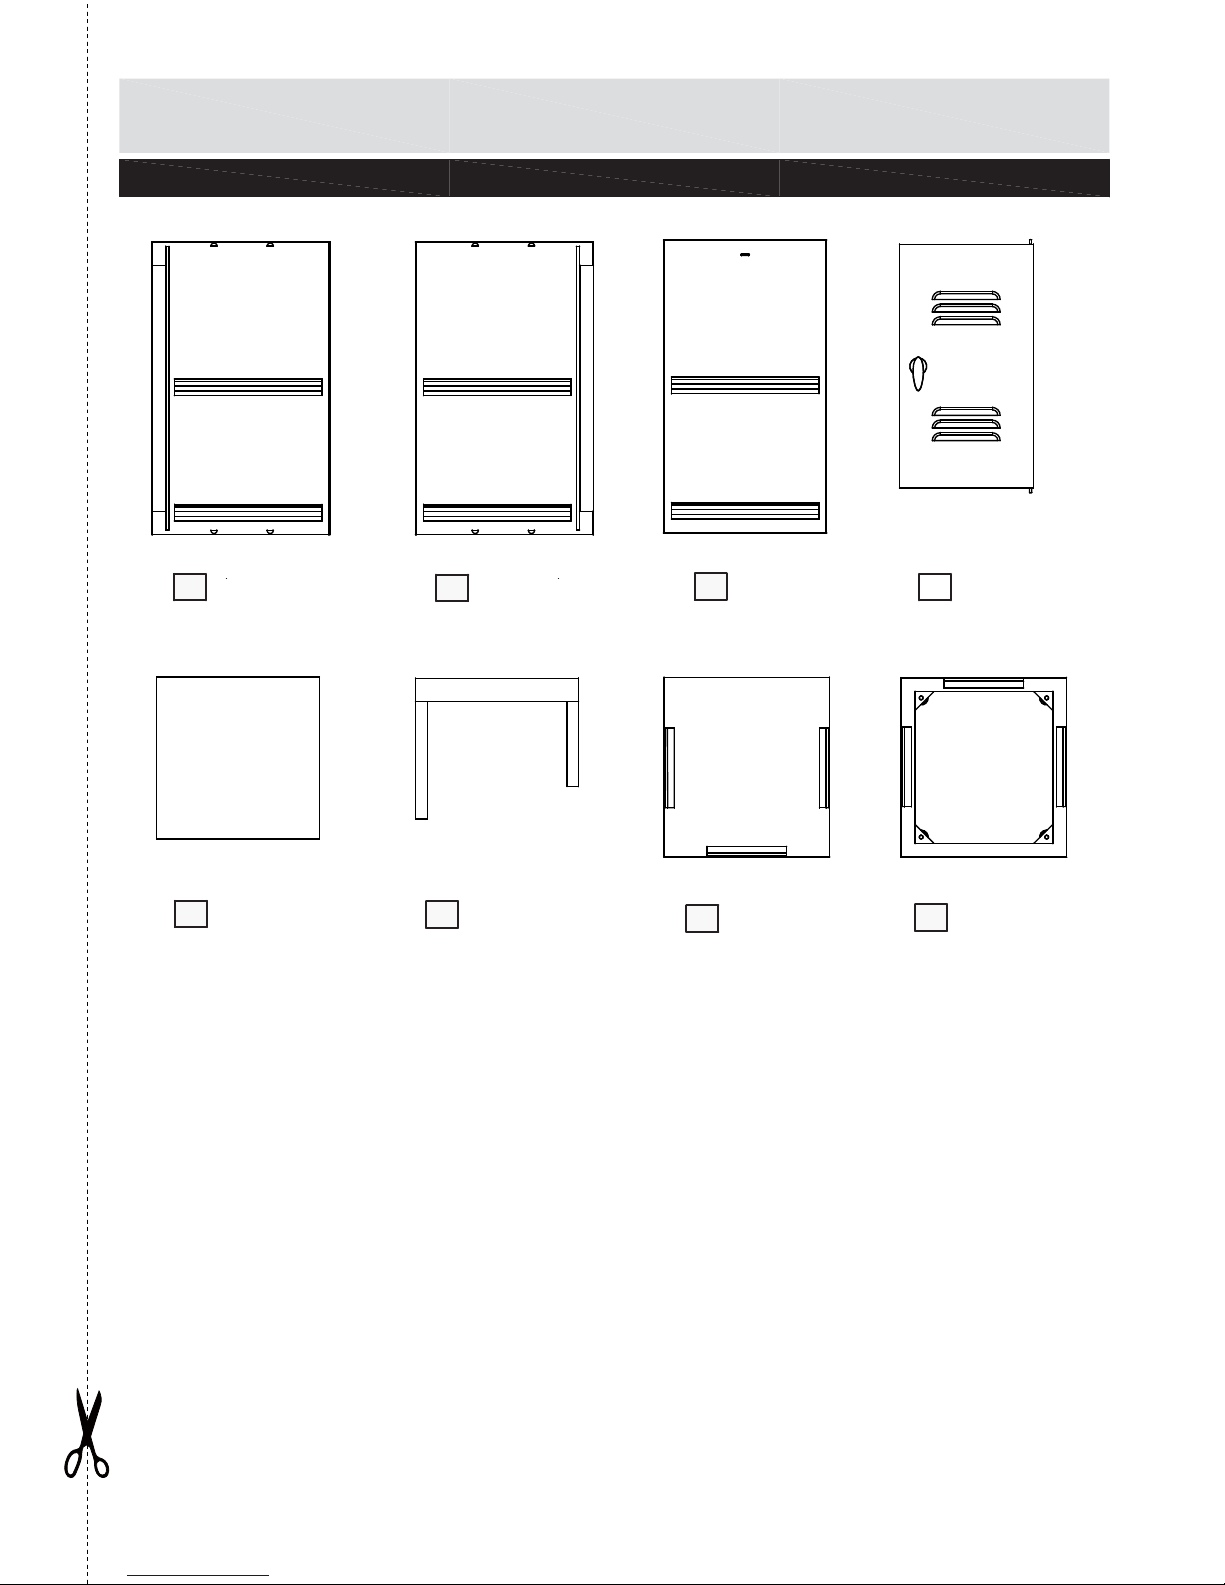
Components - Panels
Please check you have all the panels listed below
2
2
Right side
(62.5 x 38cm)
Top
(35.5 x 38.5cm)
7
Bottom
(35.5 x 38.5cm)
8
Back
(62.5 x 35cm)
3
5
shelf x2
(34.7 x 34.5cm)
1
Left side
(62.5 x 38cm)
4
Door
(52 x 28.5cm)
6
fastener x2
(34.5 x 30cm)
If you have damaged or missing components,
call the Customer Helpline: 0845 640 0800
Page 4
3
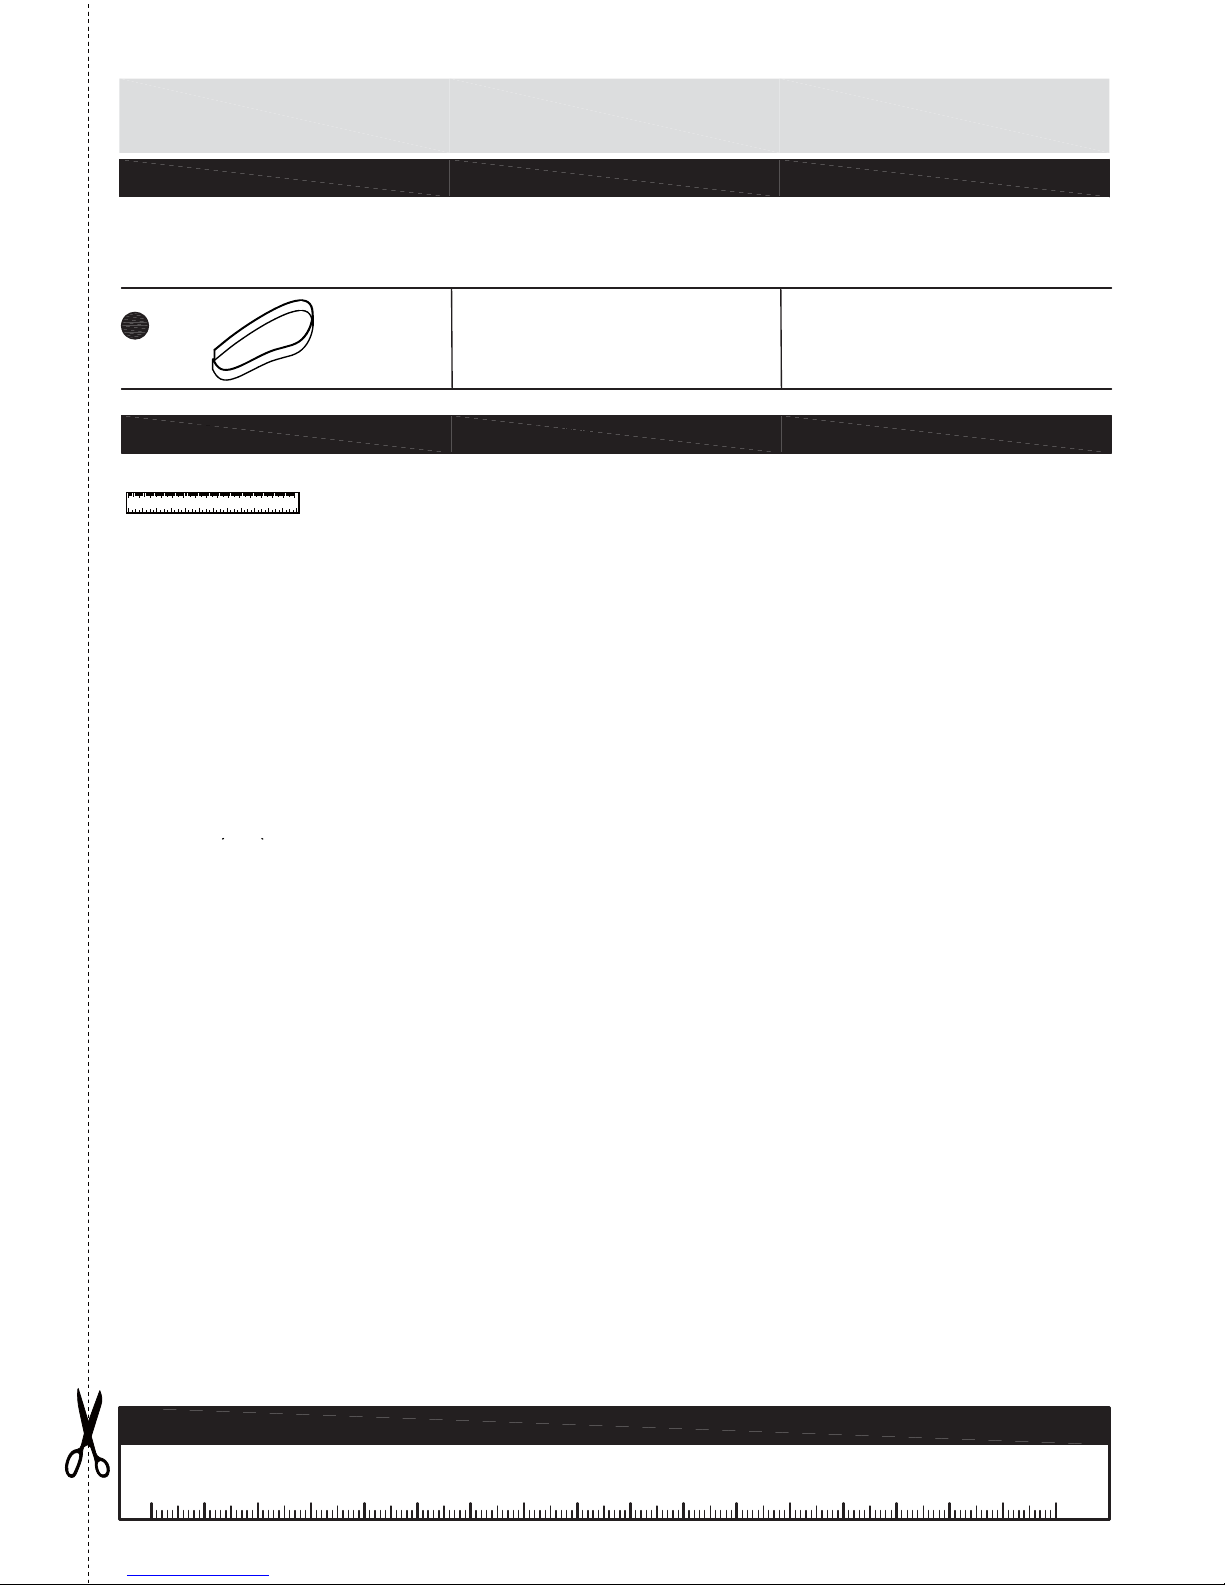
0 5 10 15 20 25 30 35 40 45 50 55 60 65 70 75 80 85 90 95 100 105 110 115 120 125 130 135 140 145 150 155 160 165 170
Ruler - Use this ruler to help correctly identify the screws
Components - Fittings
Please check you have all the fittings listed below
Note: The quantities below are the correct amount to complete the assembly. In some cases more
fittings may be supplied than are required.
0 10 20 30 40 50 60 70 80 90 100 110 120 130 140 150
0 1 2 3 4 5 6
measure
Tools required
0 10 20 30 40 50 60 70 80 90 100 110 120 130 140 150
0 1 2 3 4 5 6
Ruler/tape
measure
Band x 1
A
Page 5
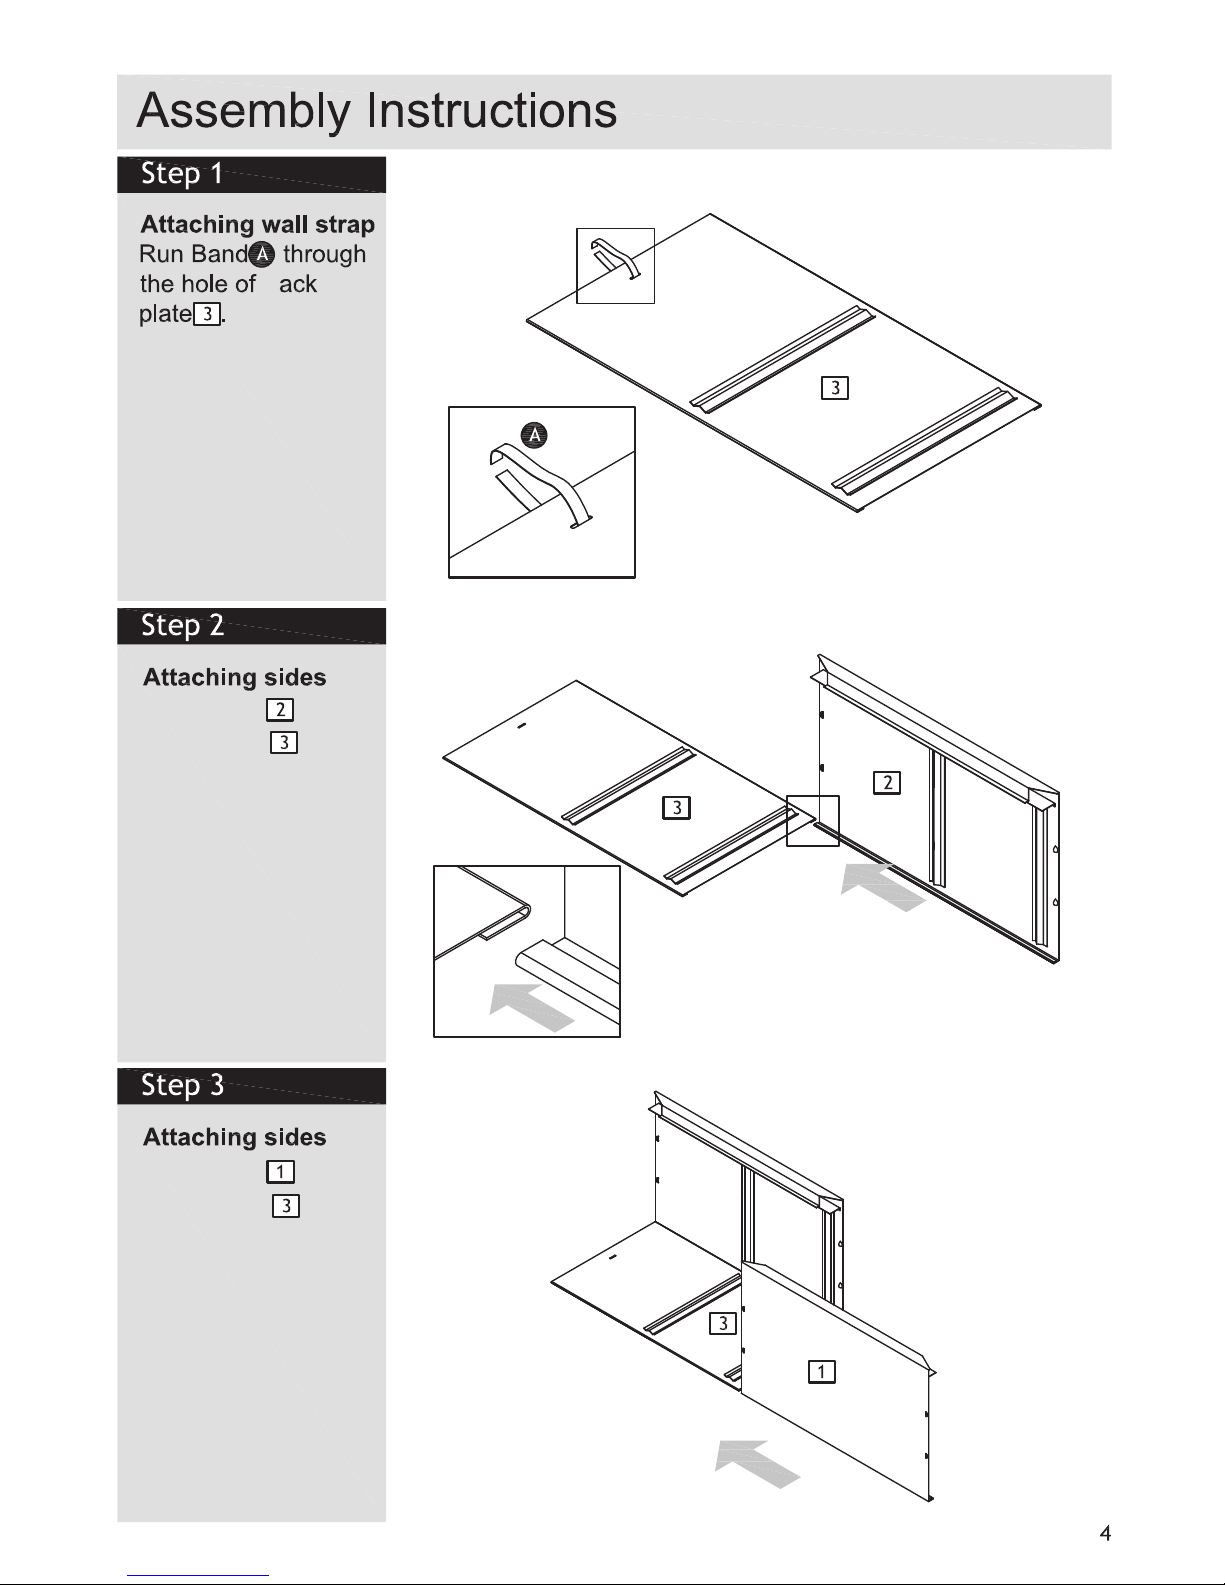
b
Slide side onto
back plate so
that their grooves
interlock.
Slide side onto
back plate so
that their grooves
interlock.
Page 6
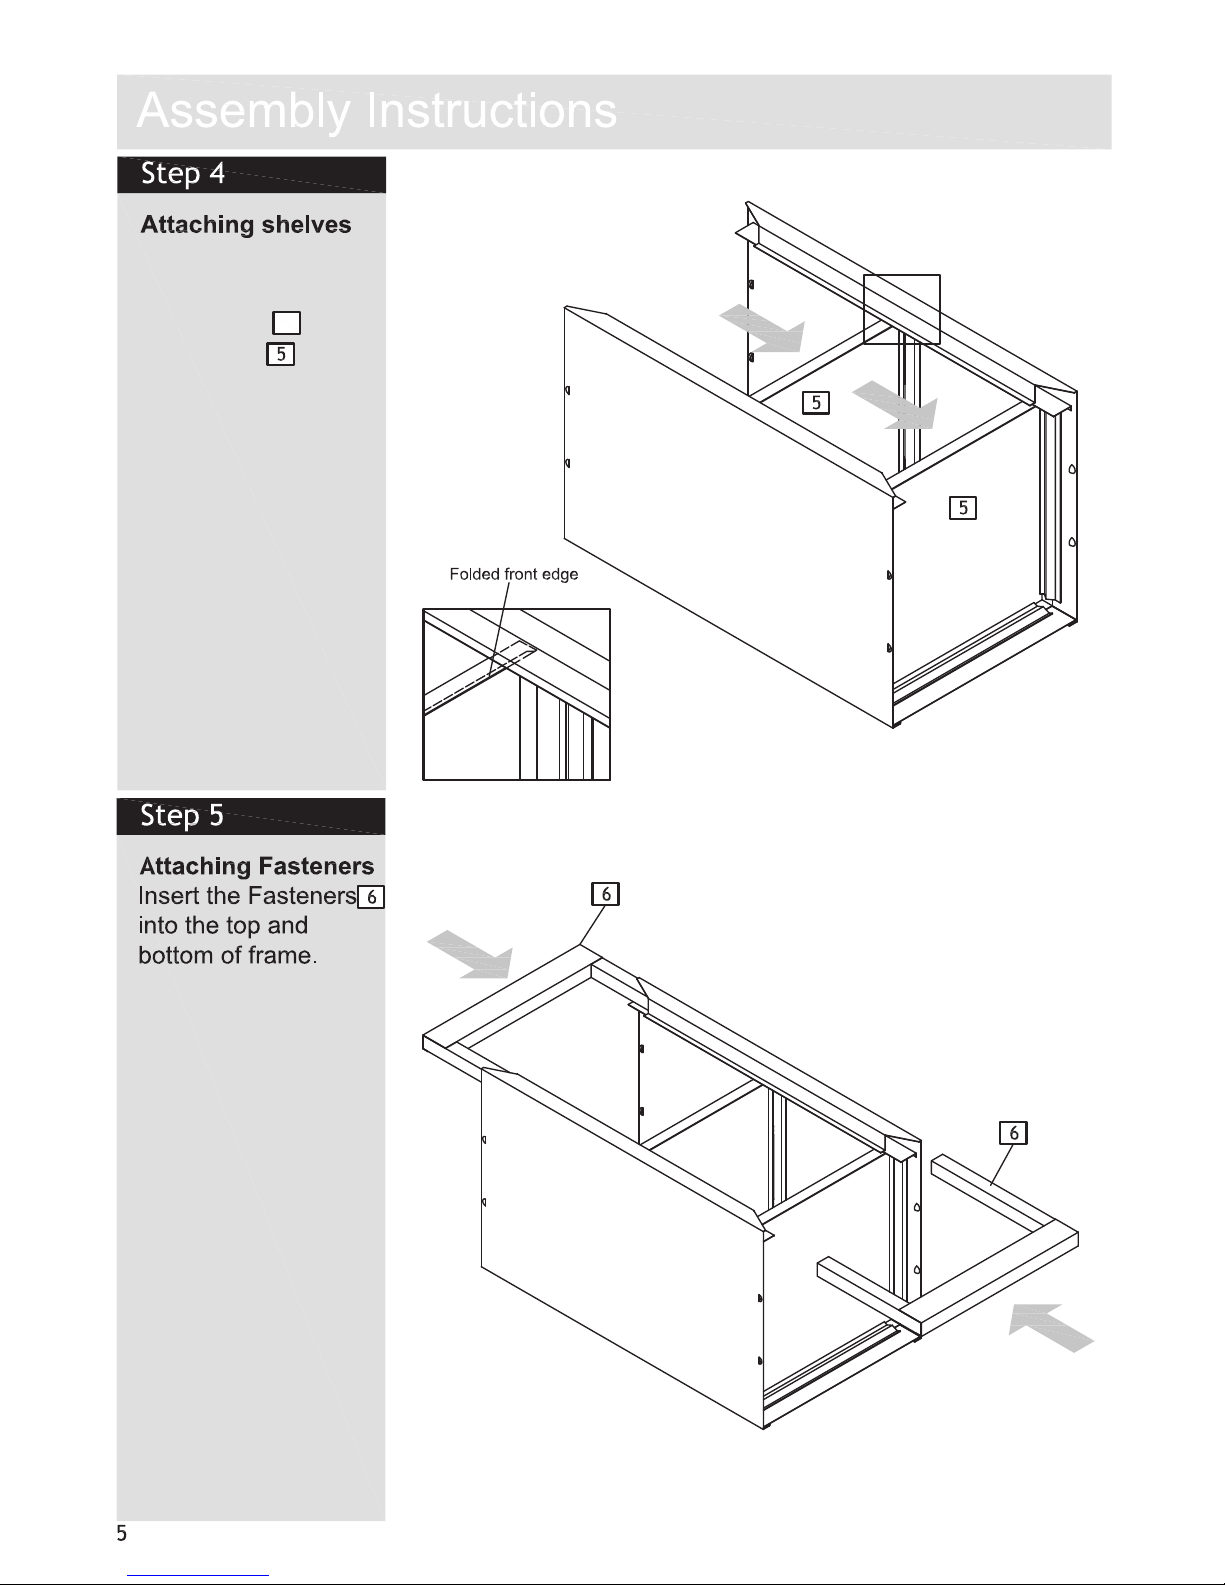
With the folded front
edge away from
back plate , place
each shelf on the
supports of the two
sides.
3
Page 7
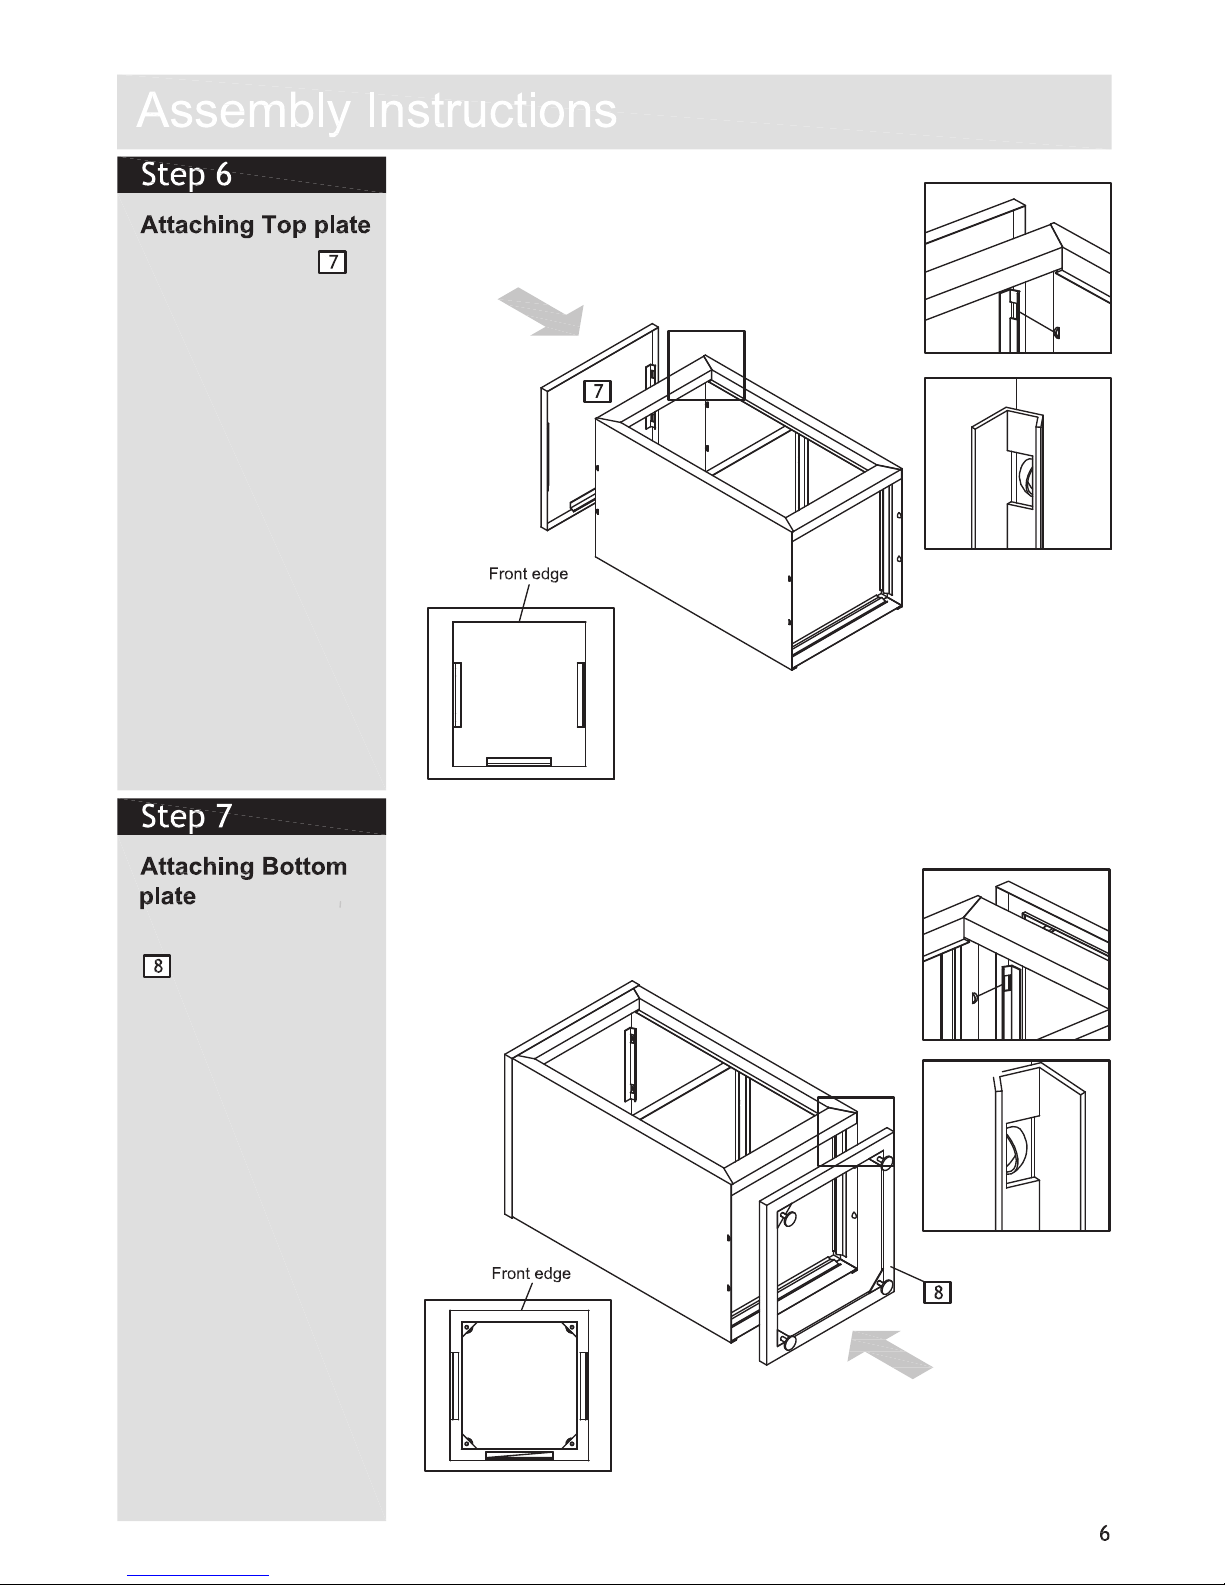
Snap top plate
onto the frame.
Snap bottom plate
onto the frame.
Page 8
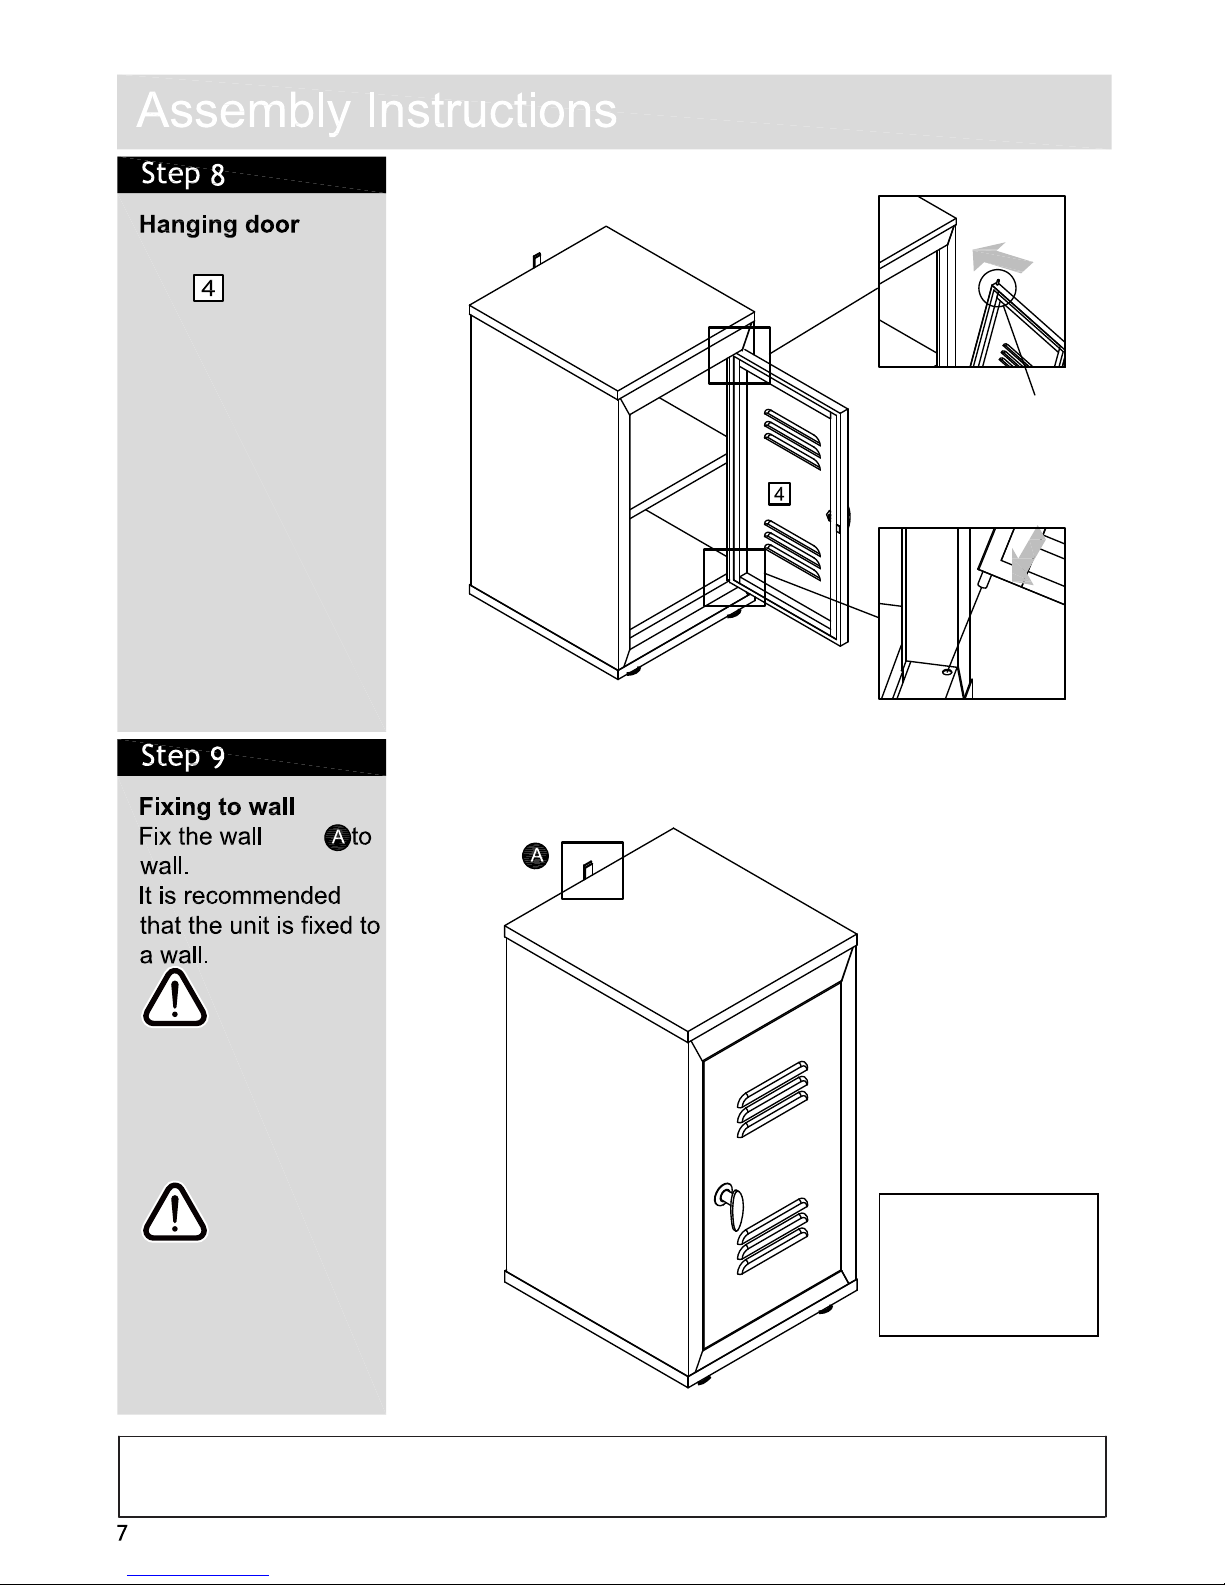
Mark fixing hole on wall
and attach wall band to the
wall with the correct type
of fixing.
Reposition cabinet and fix
wall band using screw.
Assembly is complete.
Warning:
The cabinet
is heavy.
Lift with care.
Warning:
Before drilling,
check wall for
hidden pipes
and cables.
Note: As wall materials vary,
screws for fixing to wall are not
included.
The correct type of fi xing must
be used for your wall, seek
professional advice if in doubt.
If you need help or have damaged or missing parts, call the
Customer Helpline: 0845 640 0800
Argos Ltd MK9 2NW
Insert bottom pin of
door into the hole
of bottom fastener .
Holding the top pin
down, move the top
edge into the top
right corner until the
top pin snaps into
the hole.
band
Hold this pin down
 Loading...