

Digitus DN-170063, DN-170064, DN-170065, DN-170066, DN-170074 Quick Installation Manual
...Page 1

DIGITUS® Line-Interactive
600-2000 VA UPS-Systems
Quick Installation Guide
DN-170063 DN-170064 DN-170065
DN-170066 DN-170074 DN-170075
DN-170076
Page 2

Safety Warning
- The voltages inside UPS may be hazardous. Do not attempt to
disassemble the unit. The unit contains no user serviceable parts.
Only factory service personnel may perform repairs.
- Internal battery voltage is 12Vdc. sealed, lead-acid, 6 cells battery.
- Connection to any other type of receptacle other than a two-pole,
three-wire grounded receptacle may result in shock hazard as well as
violating to local electrical codes.
- In the event of an emergency, press the OFF button and disconnect the
power cord from the AC power supply to properly disable the UPS.
- Do not allow liquids or any external objects to enter the UPS. Do not
place beverages or any other liquid-containing vessels on or near the
unit.
- This unit is designed for installation in a controlled environment
(temperature controlled, indoor are free of conductive contaminants).
Avoid installing the UPS in locations where there is static or flowing
water, or excessive humidity.
- Do not plug the UPS input into its own output.
- Do not attach a power strip or surge suppressor to the UPS.
- Do not connect non-computer-related items, such as medical
equipment, life-support equipment, microwave ovens, or vacuum
cleaners to UPS.
- To r ed uce th e r isk of overh ea tin g the UPS, do not cover the UPS
cooling vents and avoid exposing the unit to direct sunlight or installing
the unit near heat emitting appliance such as air heaters or furnaces.
- Unplug the UPS prior to cleaning and do not use liquid or spray
detergent.
- Do not dispose the batteries into fire as they may explode.
- Do not open or mutilate the battery or batteries. Released electrolyte
is harmful to the skin and eyes. It may be toxic.
- A battery can present a risk of electrical shock and high short circuit
current. The following precautions should be observed when working
on batteries:
1) Remove watches, rings, or other metal objects from the hands.
2) Use tools with insulted handles.
3) Wear rubber gloves and boots.
4) Do not lay tools or metal parts on the top of batteries.
Page 3

5) Disconnect charging source prior to connecting or disconnecting
batteries terminals.
- Servicing of batteries should be performed or supervised by technical
and authorized personnel only.
- When replacing batteries, replace with the same number and type of
sealed lead-acid battery. The maximum ambient temperature rating
is 40°C.
- During the installation of this equipment it should be assured that the
sum of the leakage currents of the UPS and the connected loads does
not exceed 3.5mA.
- Beware of possibility of electric shock when disconnecting of this unit
from the mains, hazardous voltage still may be accessible through
supply from battery. The battery supply should be therefore
disconnected from the plus and minus terminals of the battery when
maintenance or service work inside the UPS is necessary.
PACKAGE CONTENT
Main unit: UPS
UPS quick installation guide
Software Suite CD
Power cord (Input and output)
Page 4
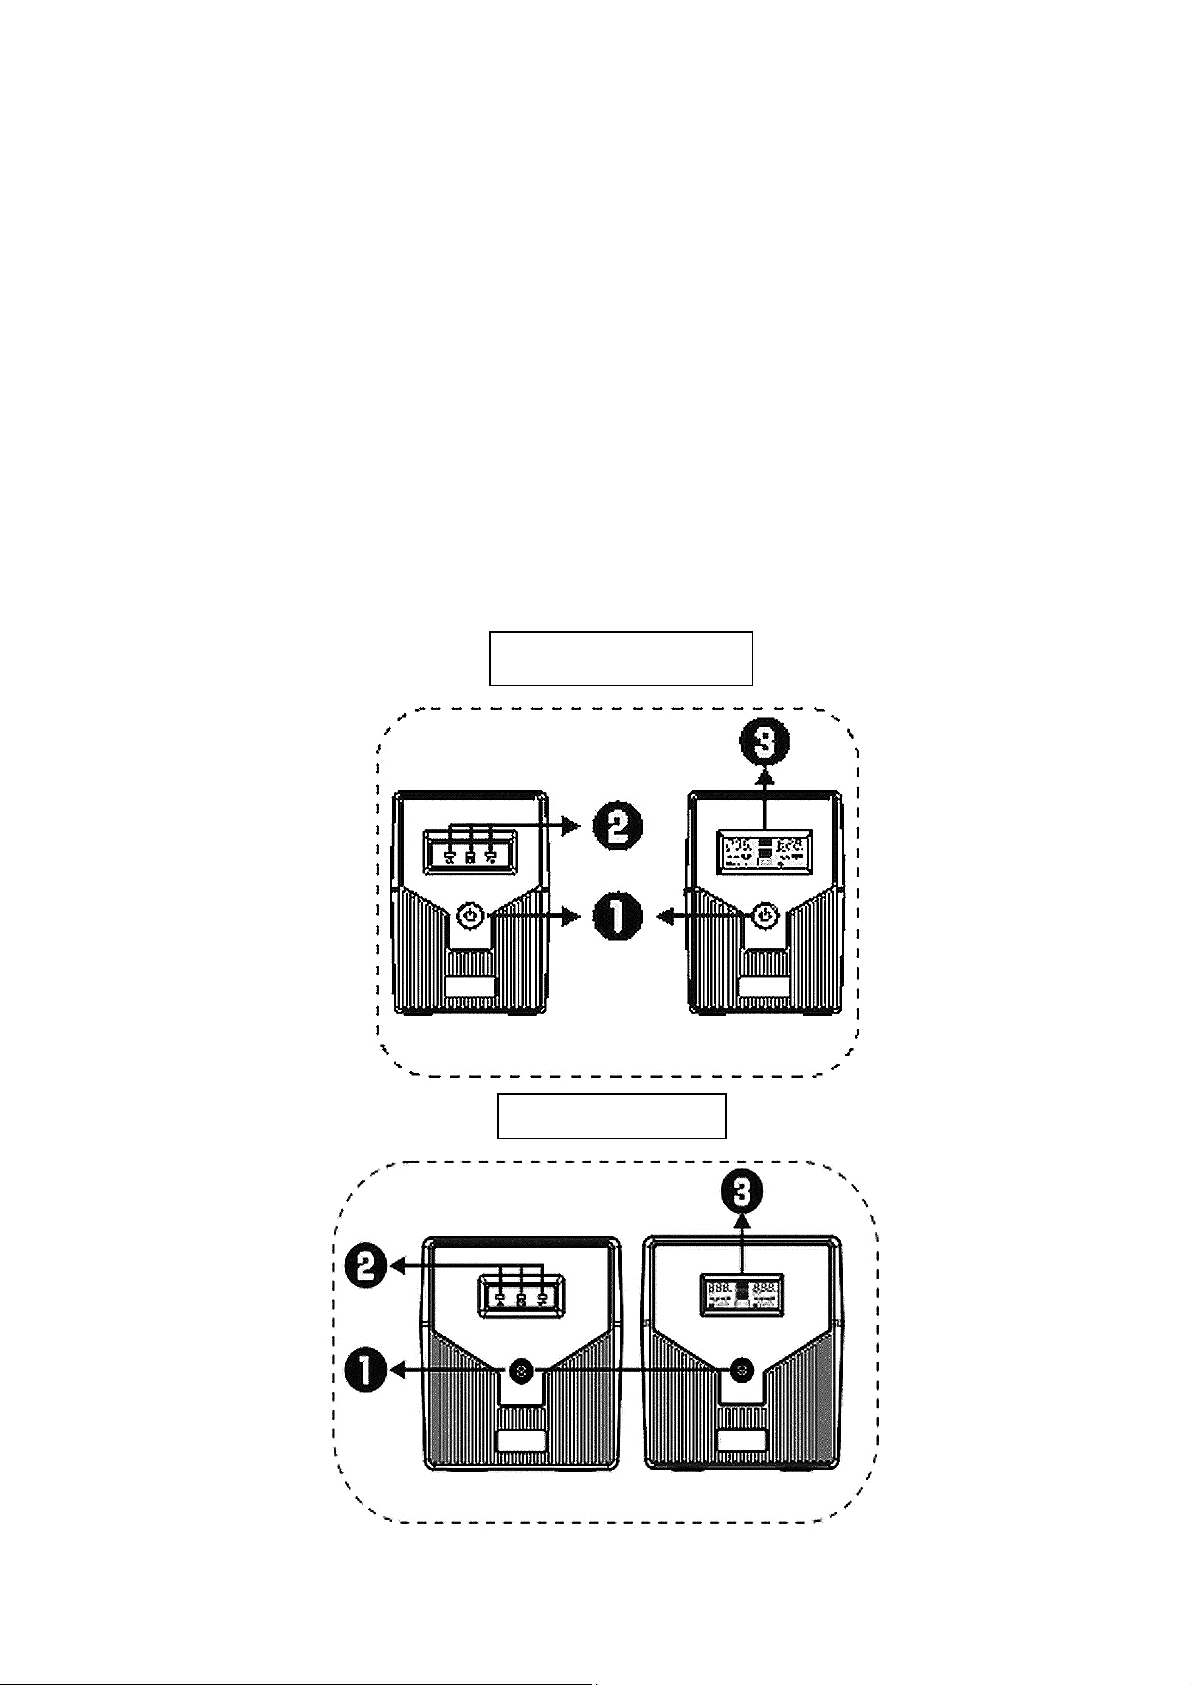
SYSTEM DESCRIPTION
Front panel:
1. Power Switch
2. LED indicator
- AC Mode: Green LED lighting (600VA - 1000VA)/The left green LED
st
lighting & the 1
level (1500VA, 2000VA).
- Battery Mode: Yellow LED flashing (600VA - 1000VA)/The left green
LED flashing & the 1
batter capacity (1500VA, 2000VA).
- Fault Mode: Red LED lighting.
to 4th green LEDs gradually lighting indicating load
st
to 4th green LEDs gradually lighting indicating
600 VA/ 800 VA
DN-170063/ DN-170064
1000 VA
DN-170065/ DN-170074
Page 5
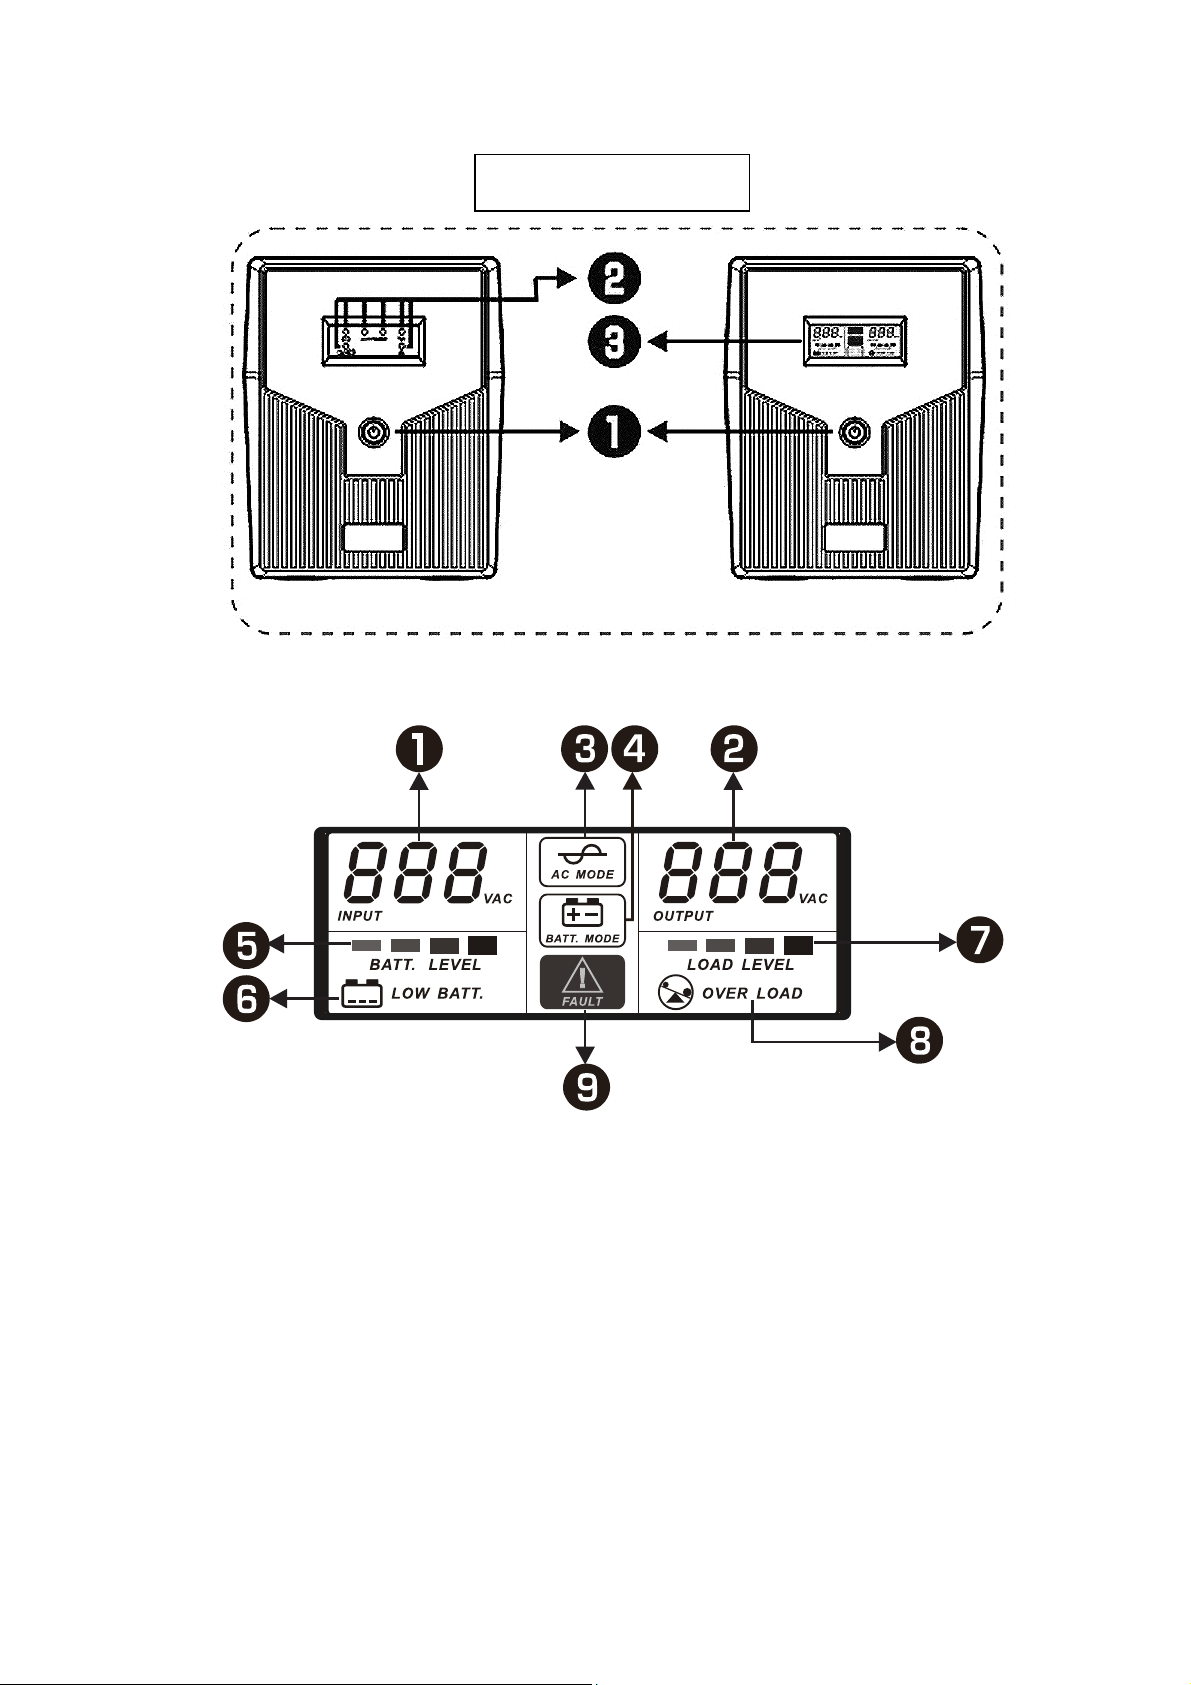
1500 VA/ 2000 VA
DN-170066/ DN-170075/ DN-170076
3. LCD
1. Input voltage
2. Output voltage
3. AC mode (UPS in AVR mode, this LCD symbol flashes)
4. Battery mode (when AC input voltage is abnormal, this LCD symbol
lights)
5. Battery level (battery capability)
6. Low battery (when battery voltage is low, this LCD symbol flashes)
7. Load level (Load percent)
8. Over load (when there is output over loading, this LCD symbol
flashes)
9. Fault mode (this LCD symbol lights when UPS in fault mode, such
as output shorted, over charge, over load)
Page 6
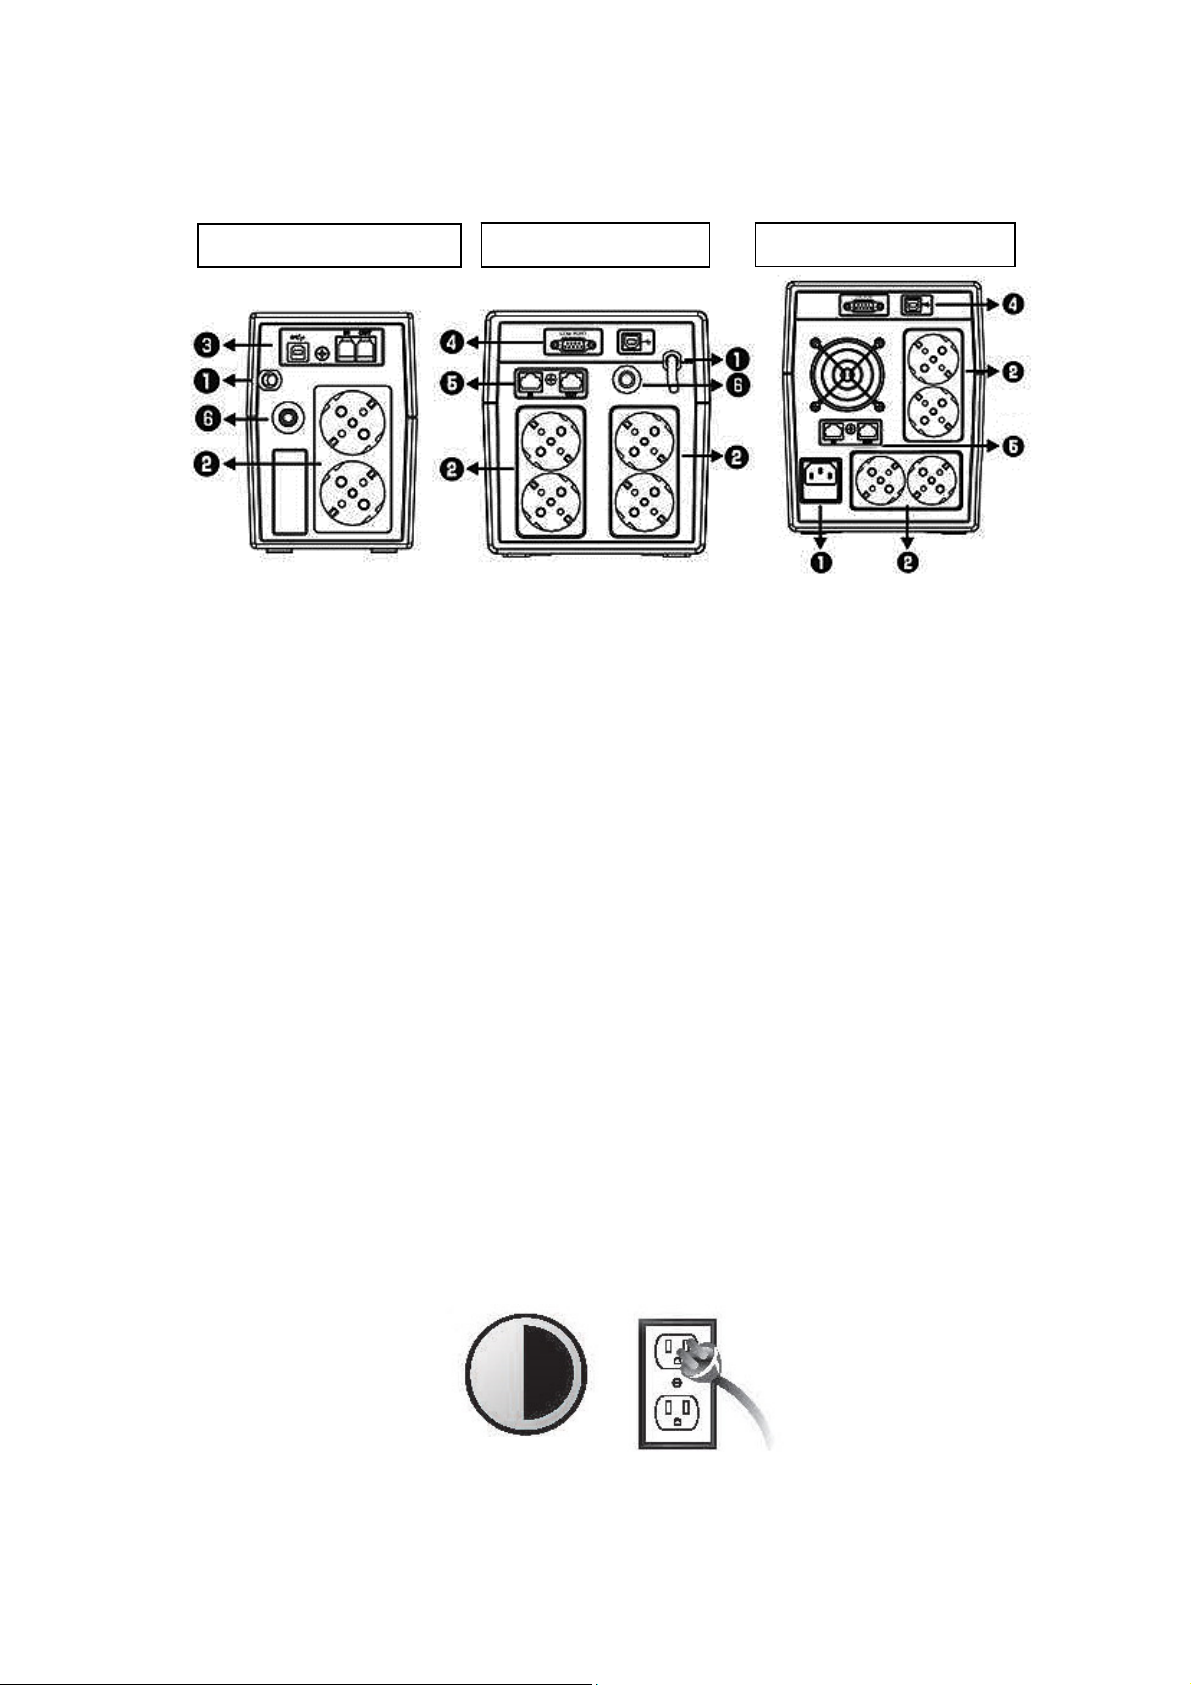
Back Panel:
1. AC input
DN-170063/-64
2. Output receptacles
3. USB & RJ11 (optional)
4. USB & RS232 (optional)
5. RJ45 (optional)
6. Circuit breaker
1000 VA
DN-170065/ -74
DN-170066/ -75/ -76
1. Inspection
Remove the UPS from its packaging and inspect it for damage that
may have occurred during shipping. If any damage is discovered,
repack the unit and return it to the place of purchase.
2. Charging
This unit is shipped from the factory with its internal battery fully
charged. However, some charge may be lost during shipping and the
battery should be recharged prior use. Turn on the UPS, plug the unit
into an appropriate power supply and allow the UPS to charge fully by
leaving it plugged in for at least 6 hours with no load (no electrical
devices such as computers, monitors, etc.) connected.
6 hours
Page 7
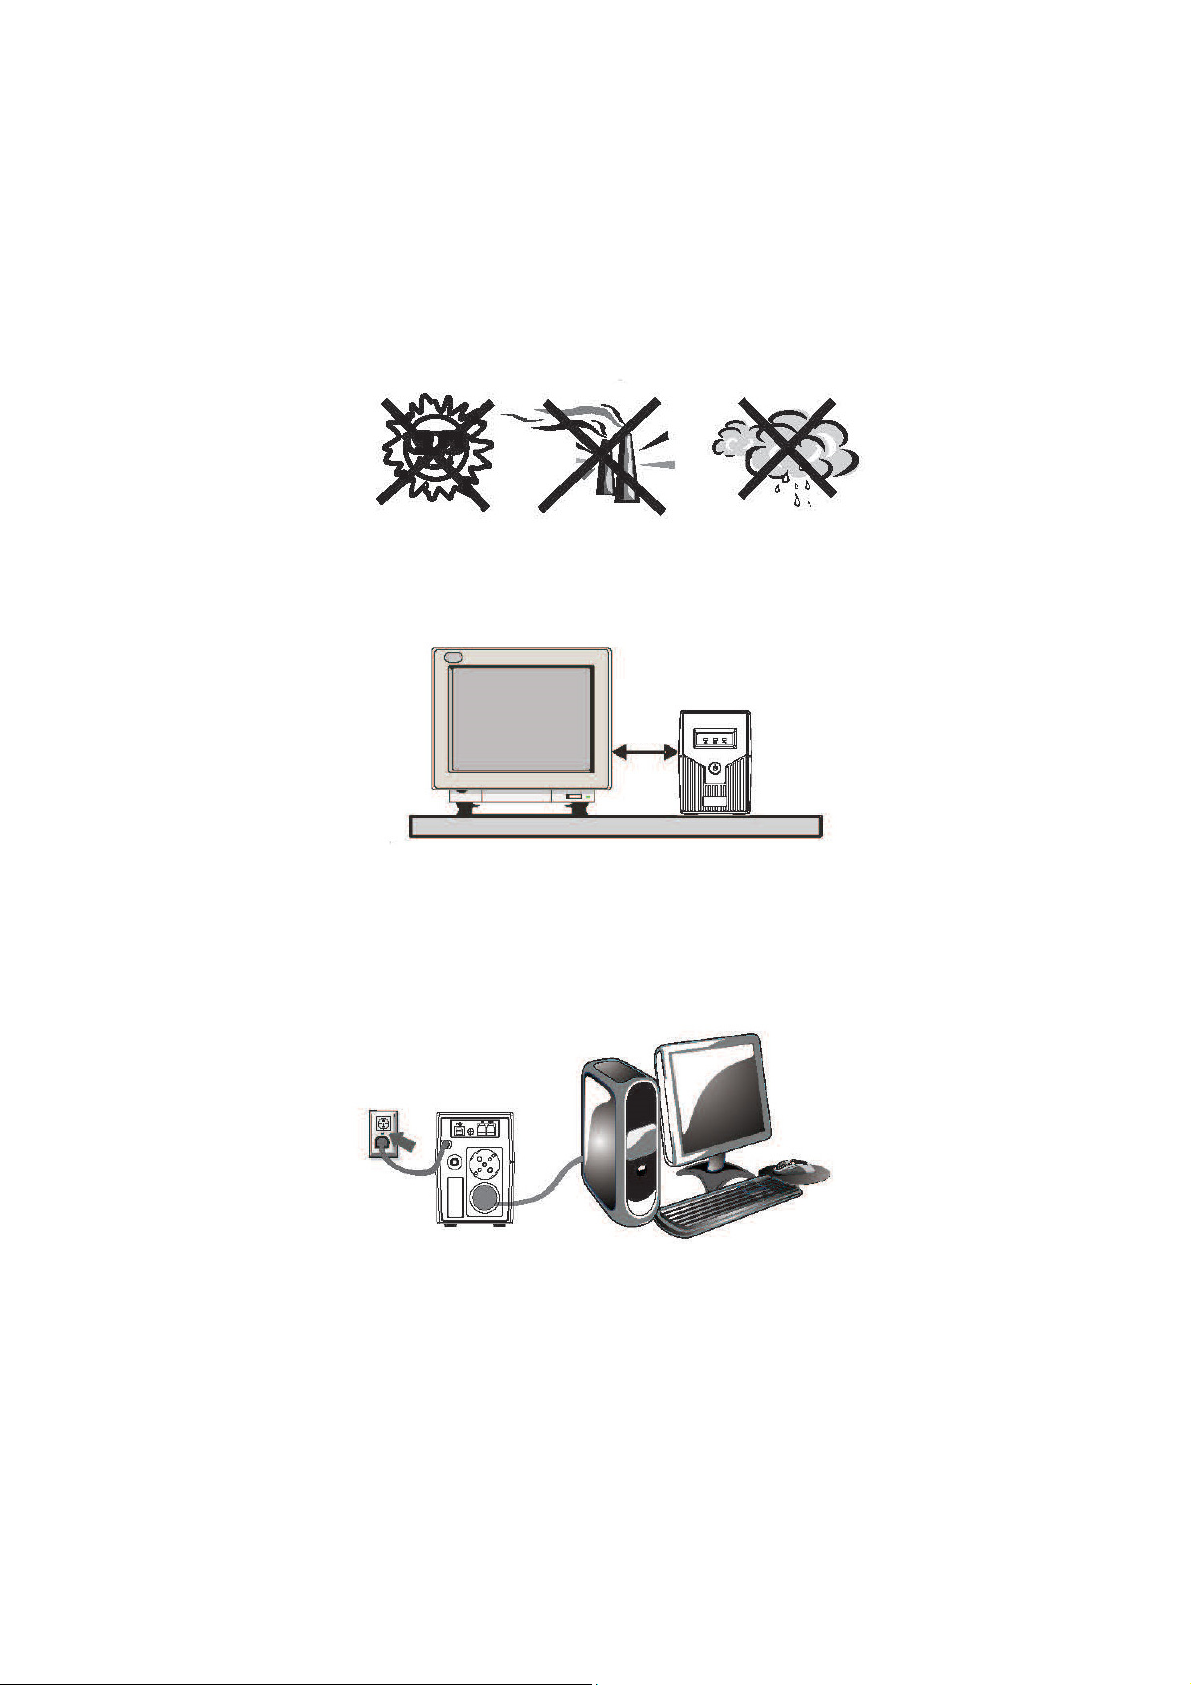
3. Placement
Install the UPS unit in any protected environment that provides
adequate airflow around the unit, and is free from excessive dust,
corrosive fumes and conductive contaminants. Do not operate your
UPS in an environment where the ambient temperature or humidity
is high.
On the other hand, place the UPS away from the monitor at least 20cm
to avoid interference.
20cm
4. Connection
Plug the UPS into a grounded receptacle. Then connect one device
into each of the power receptacles supplied on the back of the UPS.
5. Turn On/Off
In order to turn on the UPS unit, press the power switch lightly. To
turn off the UPS unit, press the power switch again
Page 8
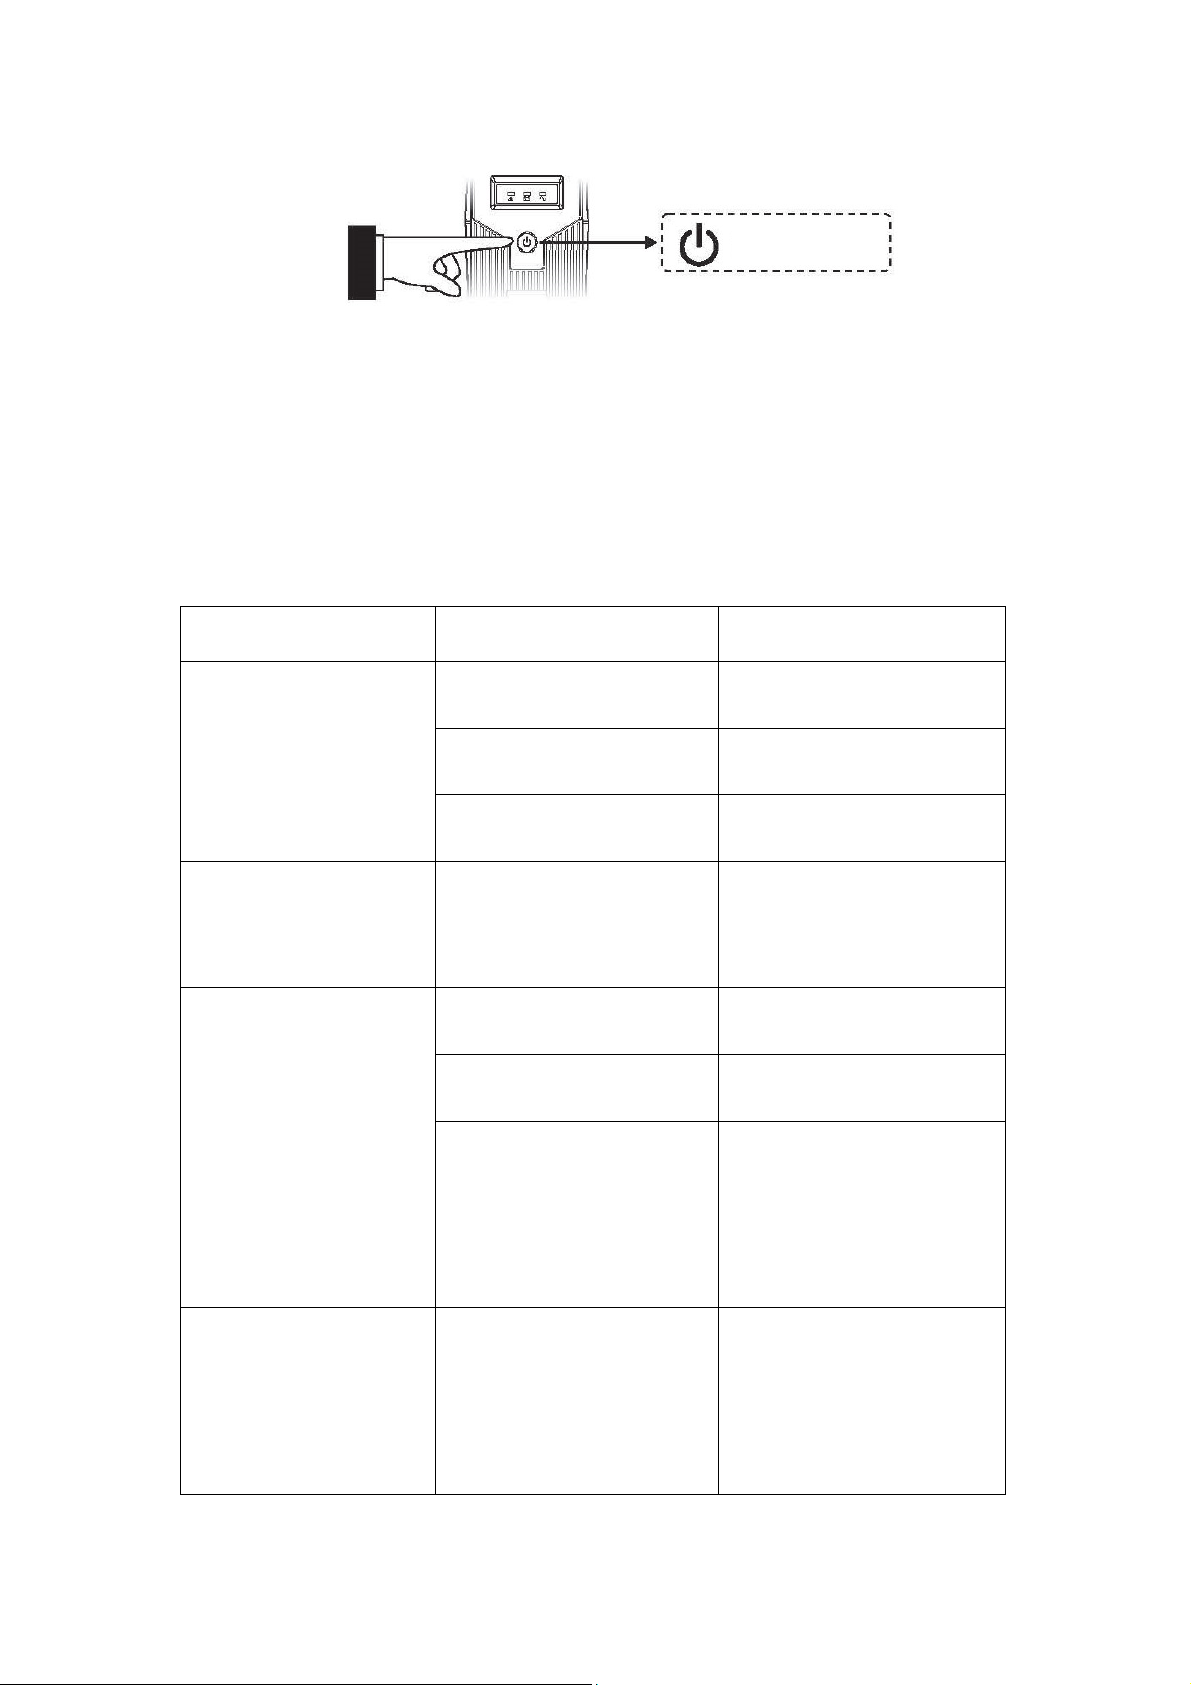
Power Switch
6. DC start
All Series are equipped with DC Start. To start UPS when AC utility
power is not available, simply press the power switch.
TROUBLE SHOOTING
Symptom Possible Cause Proposed Action
No LCD lighting (for
LCD model), or no
LED display (for LED
model) on the front
panel
Alarm buzzer beeps
continuously when
AC supply is normal
When power failure,
back-up time is
shorten
1. Battery weal 1. Charge battery up to
8 hours
2. Battery defect 2. Replace with the
same type of battery
3. Power switch is not
pressed
Overload of the UPS Verify that the load
1. Overload of the UPS 1. Remove some
2. Battery voltage is
too low
3. Battery defect due
to high temperature
operation
environment, or
improper operation
to battery
3. Press the power
switch again
matches the UPS
capability specified in
the specs
non-critical load
2. Charge battery
6-8 hours
3. Replace with the
same type of battery
Mains normal but
battery mode
indicator lights (for
LCD model), or
yellow LED is flashing
(for LED model)
Power cord is loose Reconnect the power
cord properly
Page 9
The manual content may be changed. Please also refer to the latest
version on the web shop.
This is a Class A product. In home environment, this product may cause radio
interference. In this case, the user may be required to take appropriate measures.
Hereby Assmann Electronic GmbH, declares that the Declaration of Conformity is
part of the shipping content. If the Declaration of Conformity is missing, you can
request it by post under the below mentioned manufacturer address.
www.assmann.com
Assmann Electronic GmbH
Auf dem Schüffel 3
58513 Lüdenscheid
Germany
 Loading...