

Page 1
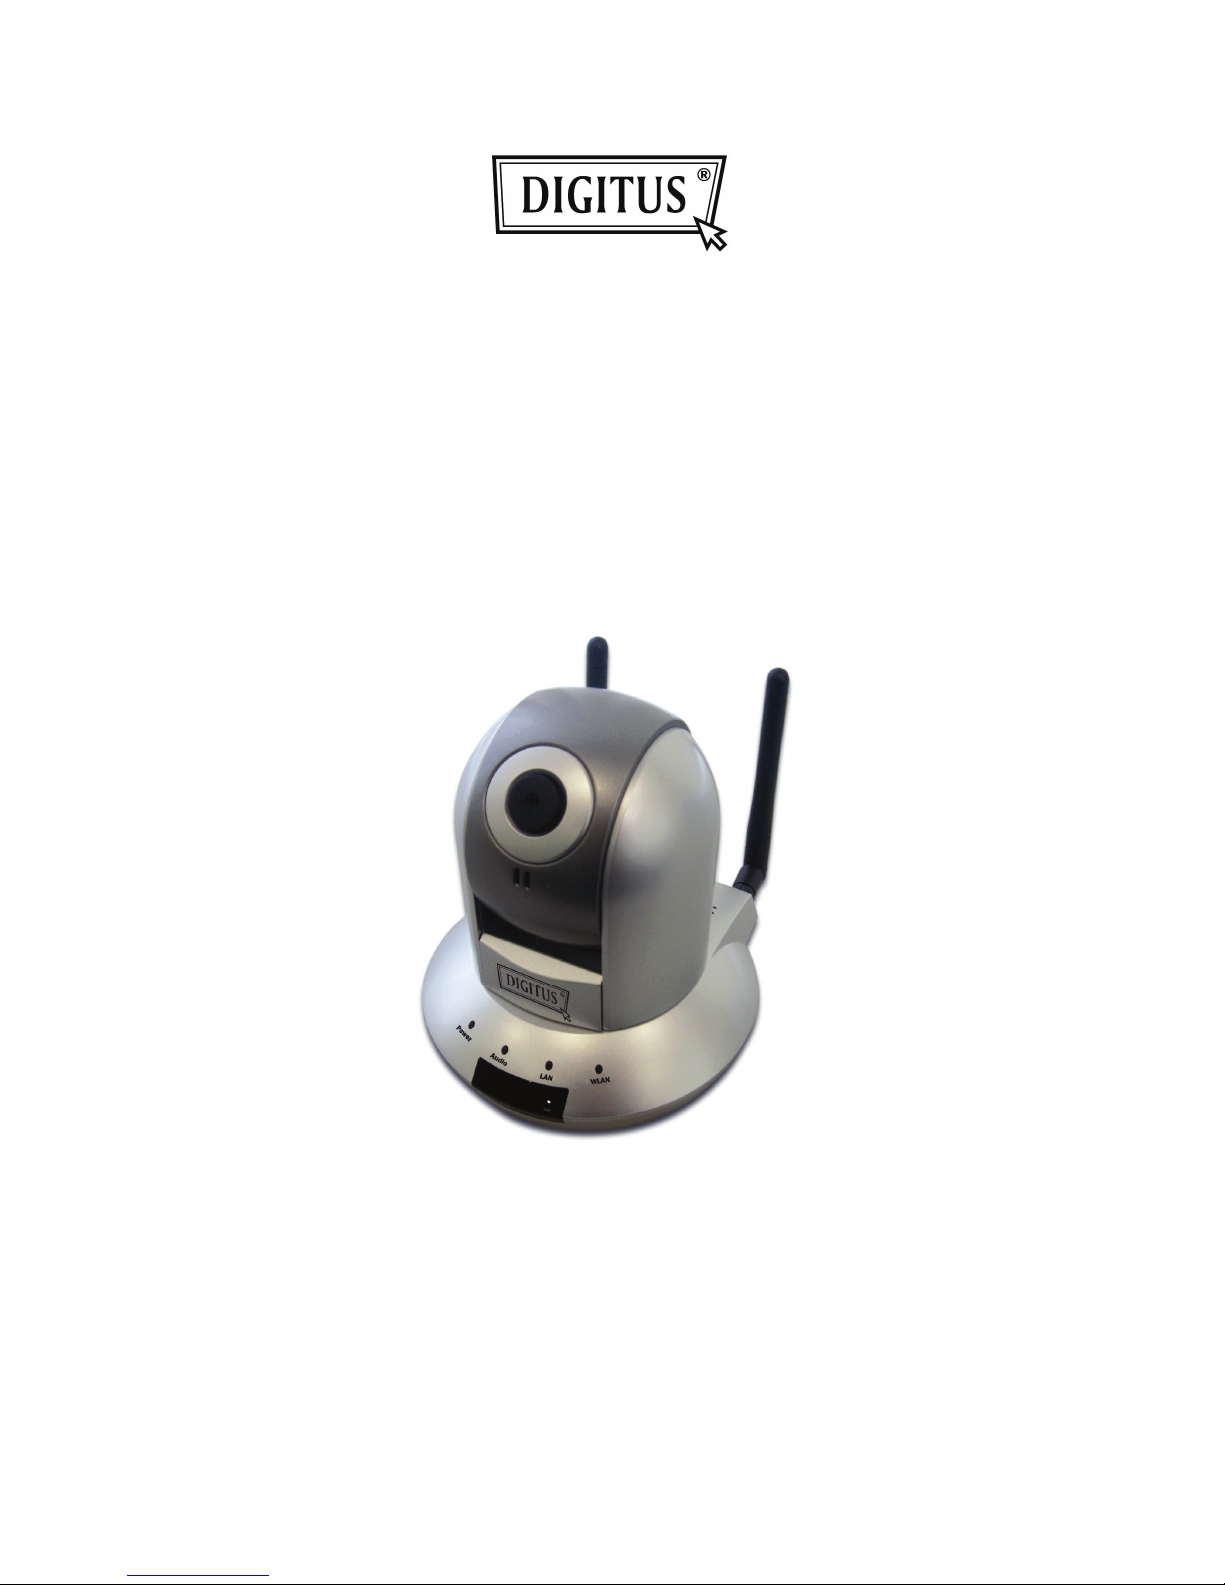
INTERNET
PAN & TILT WIRELESS HD IP
CAMERA
Quick Installation Guide
DN-16035
Page 2

Thank you for purchasing this IP camera! Before you start to use this IP
camera, please check the package contents. If anything is missing, please
contact the dealer of purchase and return the package to claim for missing
contents.
Item Name Quantity
1 Internet Camera 1
2 Antenna (Wireless model only) 2
3 Power Adapter 1
4 Ethernet Cable 1
5 Driver and User Manual CD-ROM 1
6 Accessories Pack 1
Minimum system requirement
Internet Explorer 6.0 SP1 or above Internet Web Browser
CPU: 2.0Ghz or above (2.4GHz plus processor with 1GB memory and a
256MB videocard is required for multiple camera viewing and recording in IP
Surveillance)
Memory Size: 512MB
VGA card resolution: 1024 x 768 or above
Page 3
Camera Installation
Please follow the following instructions to set the camera up:
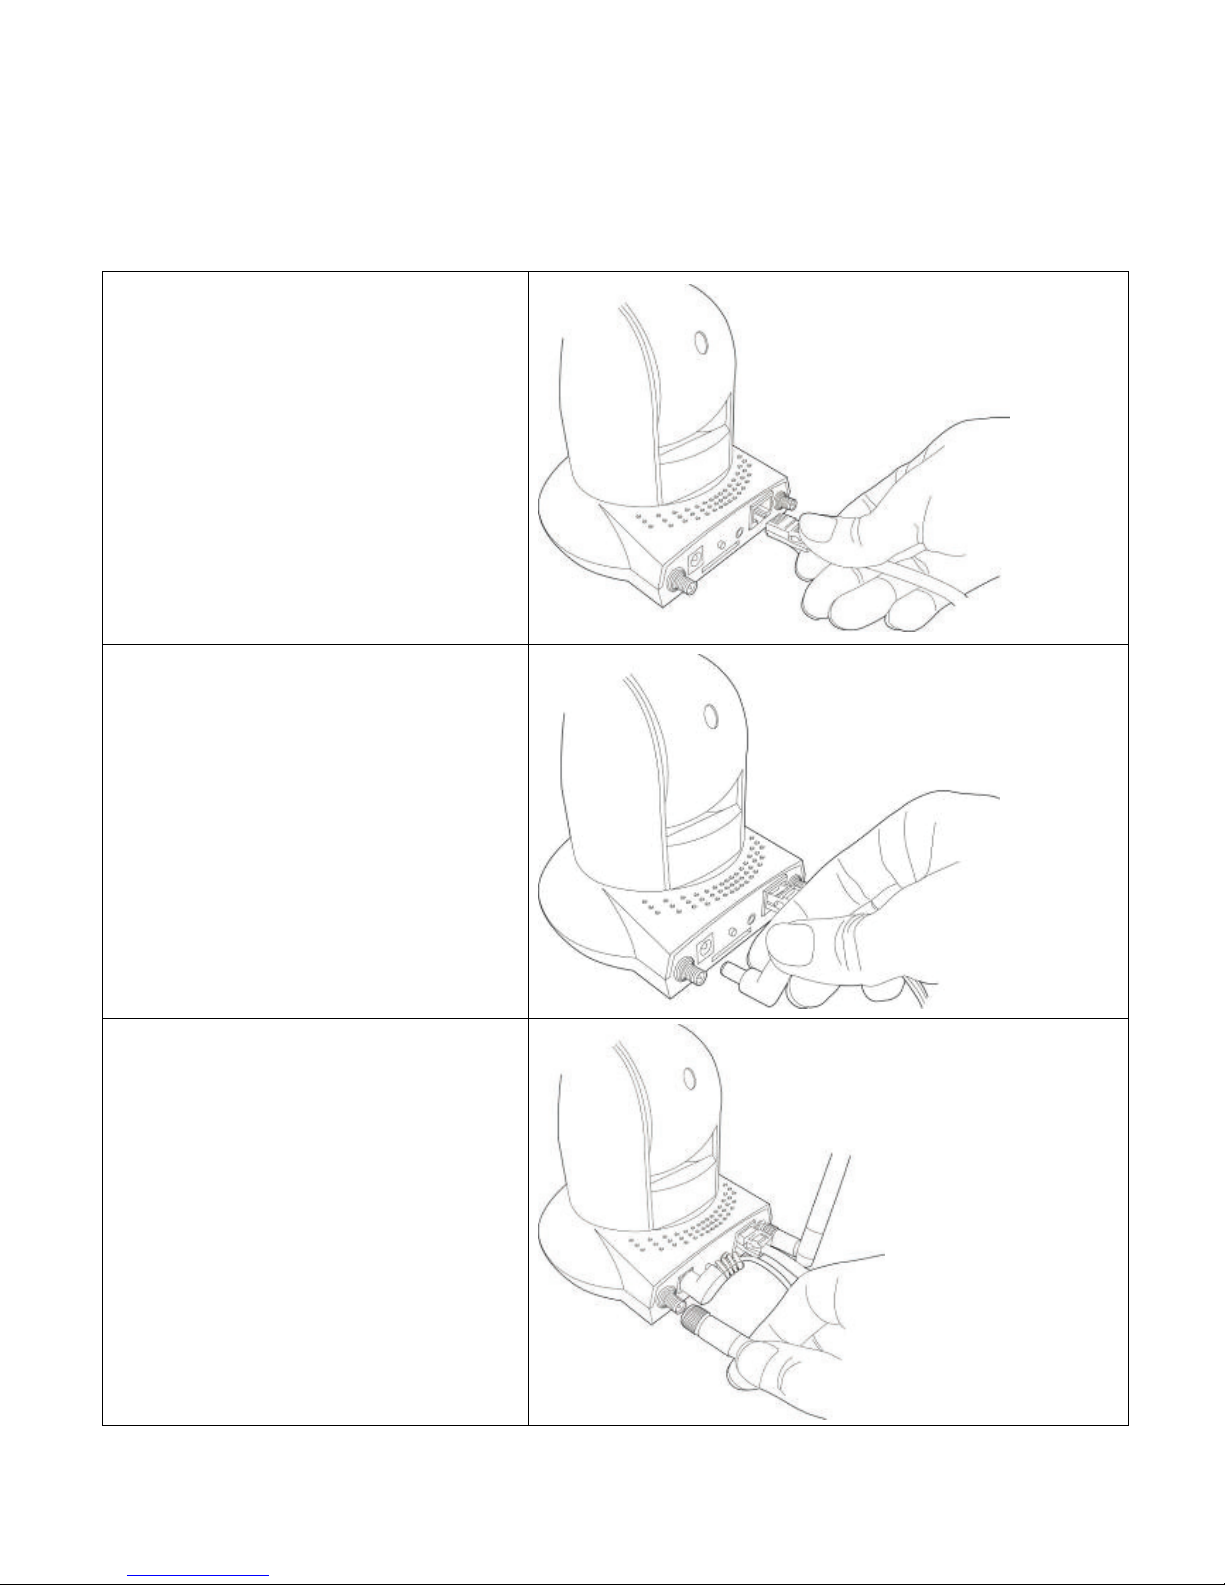
Connect the Ethernet cable to your
local area network, and connect the
other end to the LAN jack of this IP
camera.
NOTE: You can skip this step if you
p
lan to use wireless LAN only.
Plug the power adapter to wall socket,
and connect the power connector to the
power jack located at the bottom of the
IP camera.
Connect the antennas to the antenna
base (located at the back of the camera)
Page 4
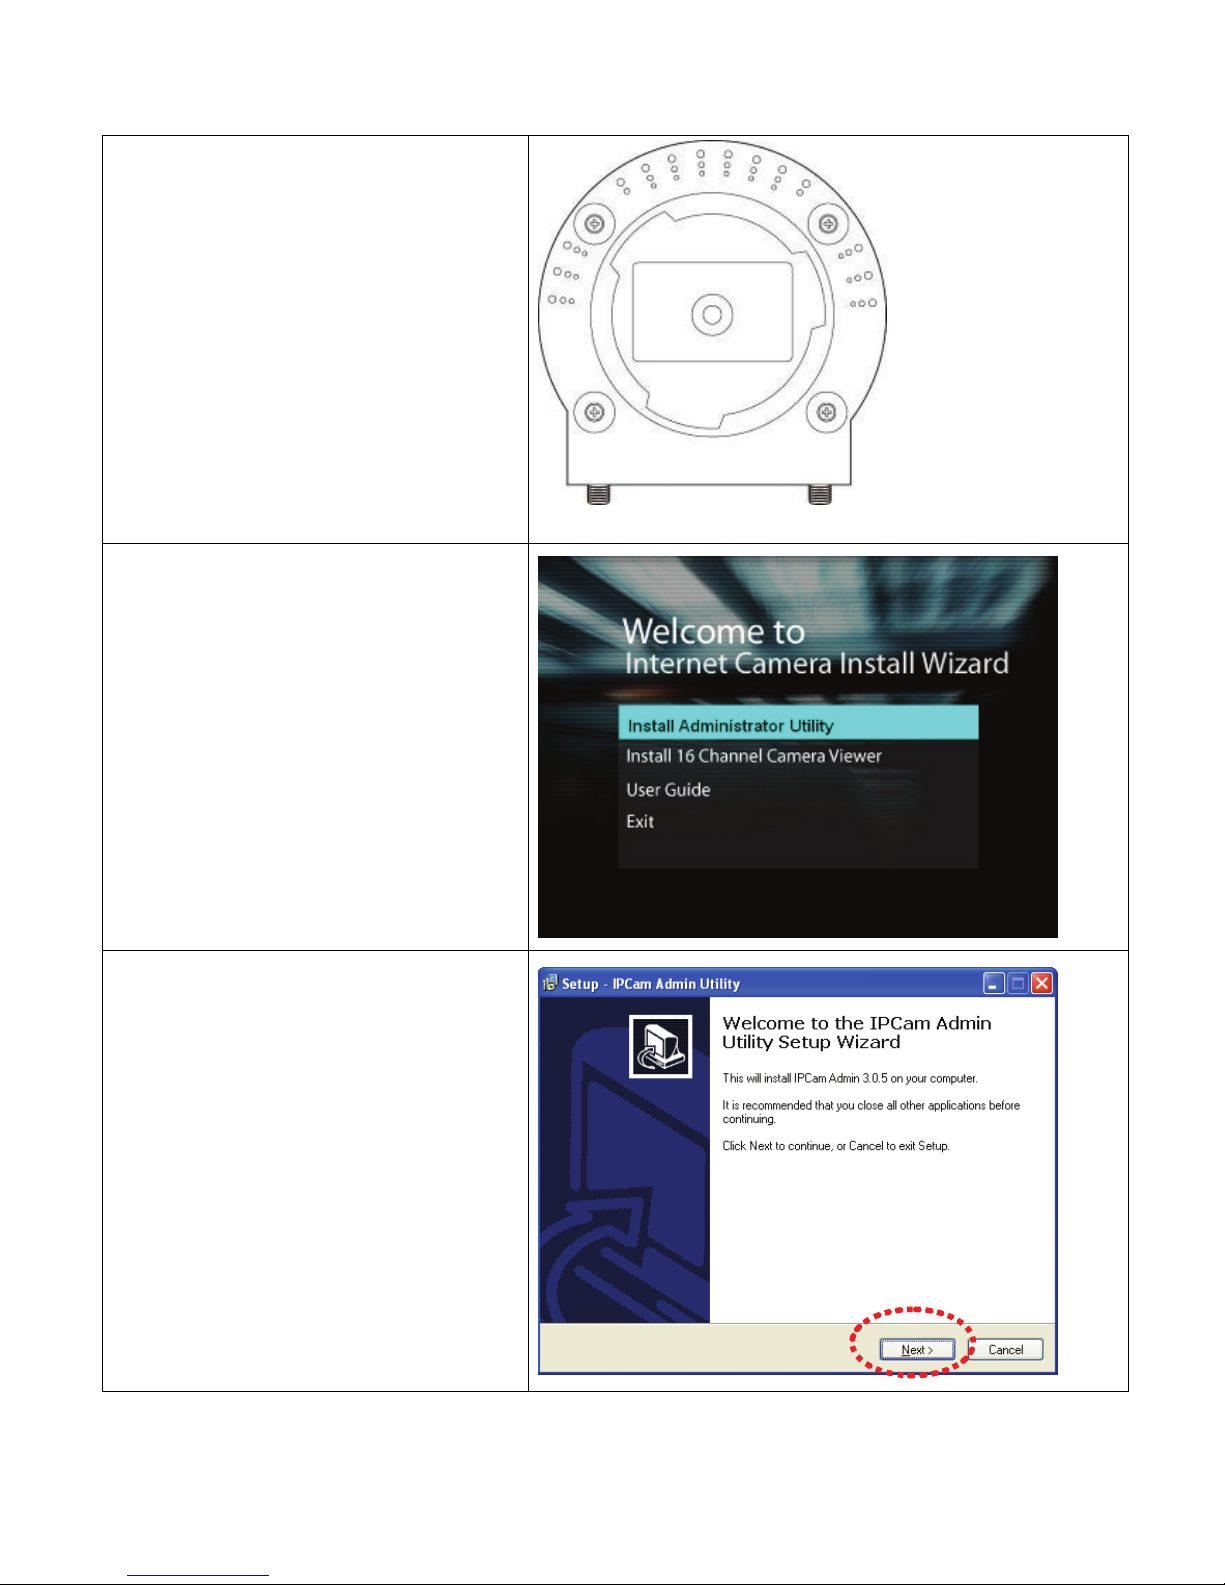
Place the camera at a secure place,
and point the camera to the place you
wish to monitor. If you wish to hang the
camera on the ceiling or wall, please
use the tripod connector (located at the
bottom of the camera, as shown on the
right) to secure the camera.
Put supplied CD-ROM into the CD/DVD
drive of your computer, and click
‘Install Administrator Utility’.
(If you didn’t see this install wizard after
you put the CD-ROM into CD/DVD drive,
double-click CD/DVD drive icon,
or double-click ‘autorun.exe’
on CD-ROM).
Click ‘Next’ to continue.
Page 5
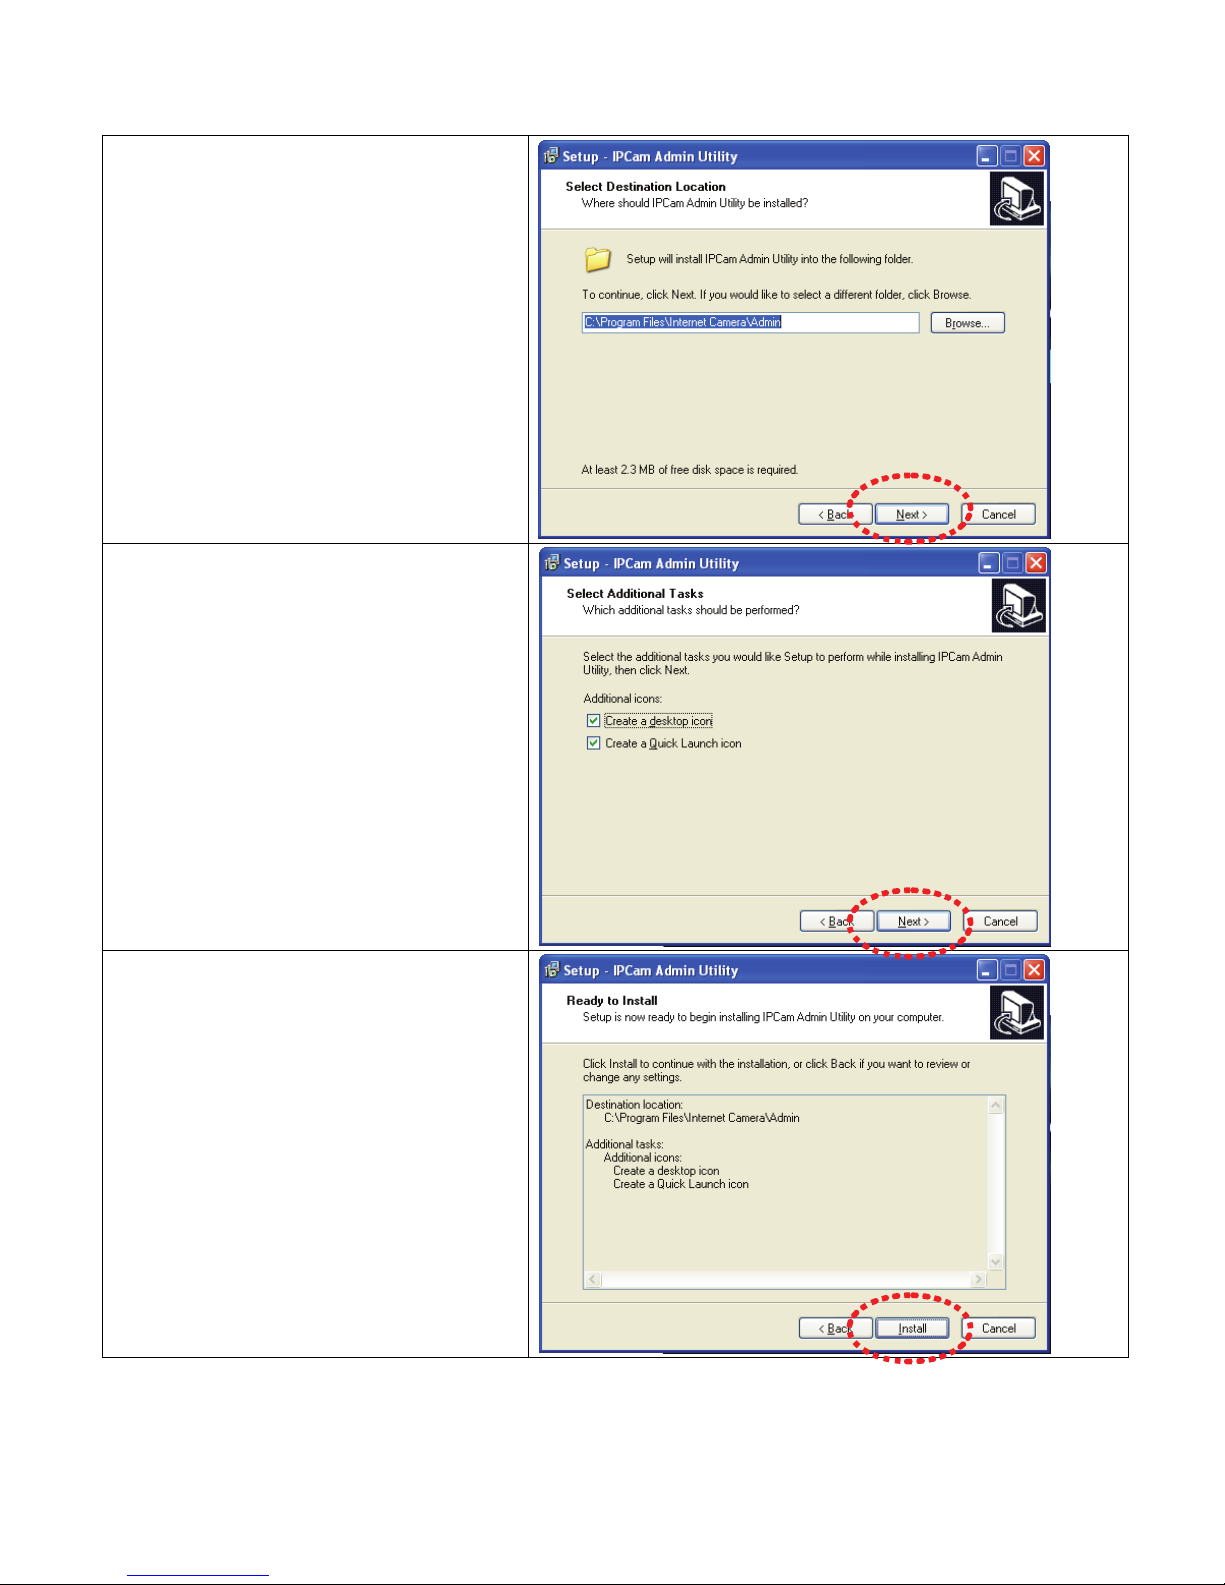
Click ‘Next’ to continue, or click ‘Browse’
to select another folder / drive to
install admin utility.
Click ‘Next’ to continue.
You can uncheck
‘Create a desktop icon’ and / or
‘Create a Quick Launch icon’
and correspnding item will not be created
.
Click ‘Install’ to install admin utility.
Page 6
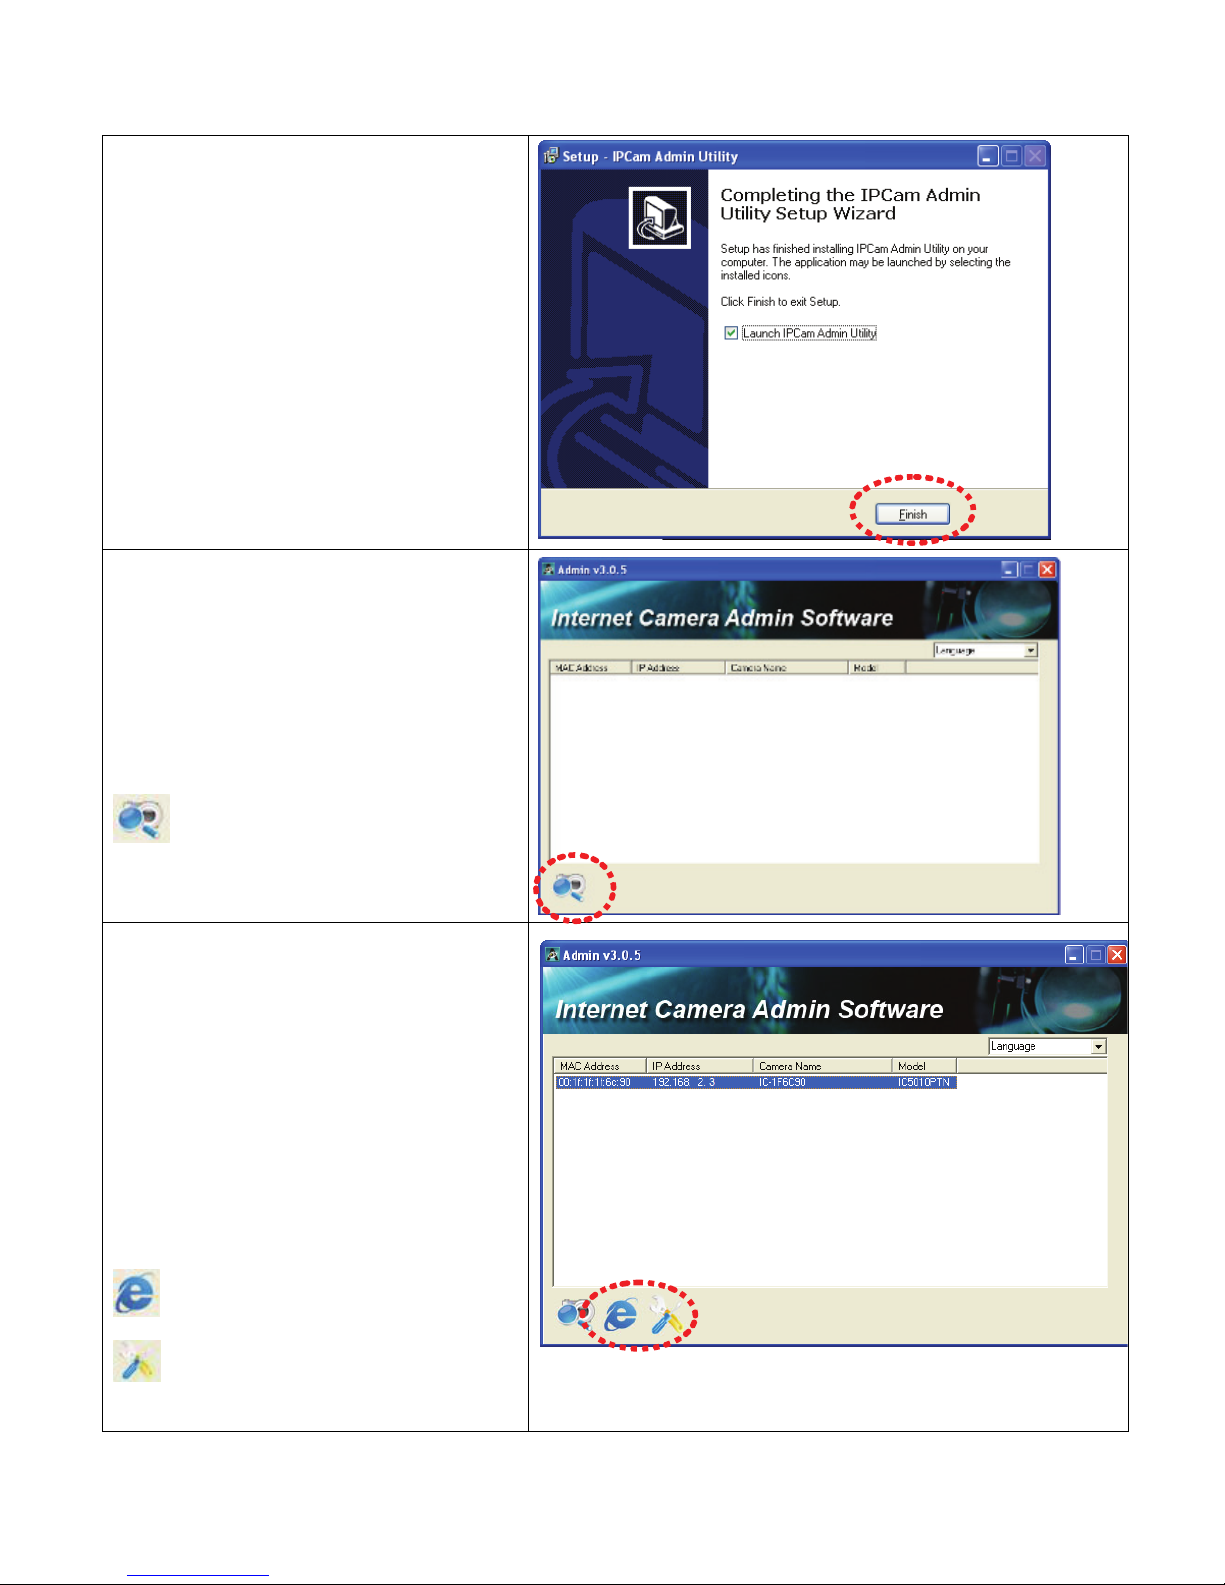
Click ‘Finish’ to finish installation
and start admin utility.
Admin utility will search for all cameras
available on your local network. You
can click ‘Search Camera’ button to
search for cameras on your network
again.
Search Camera icon
When a (or more) camera is found,
select it by mouse to highlight it,
and then click ‘Browse Camera via Web’
button to launch web browser to
connect to IP camera.
If the ‘IP Address’ of camera is ‘0.0.0.0’,
please click ‘Configure Camera’ button.
‘Browse Camera via Web’ icon
‘Configure Camera’ icon
Page 7
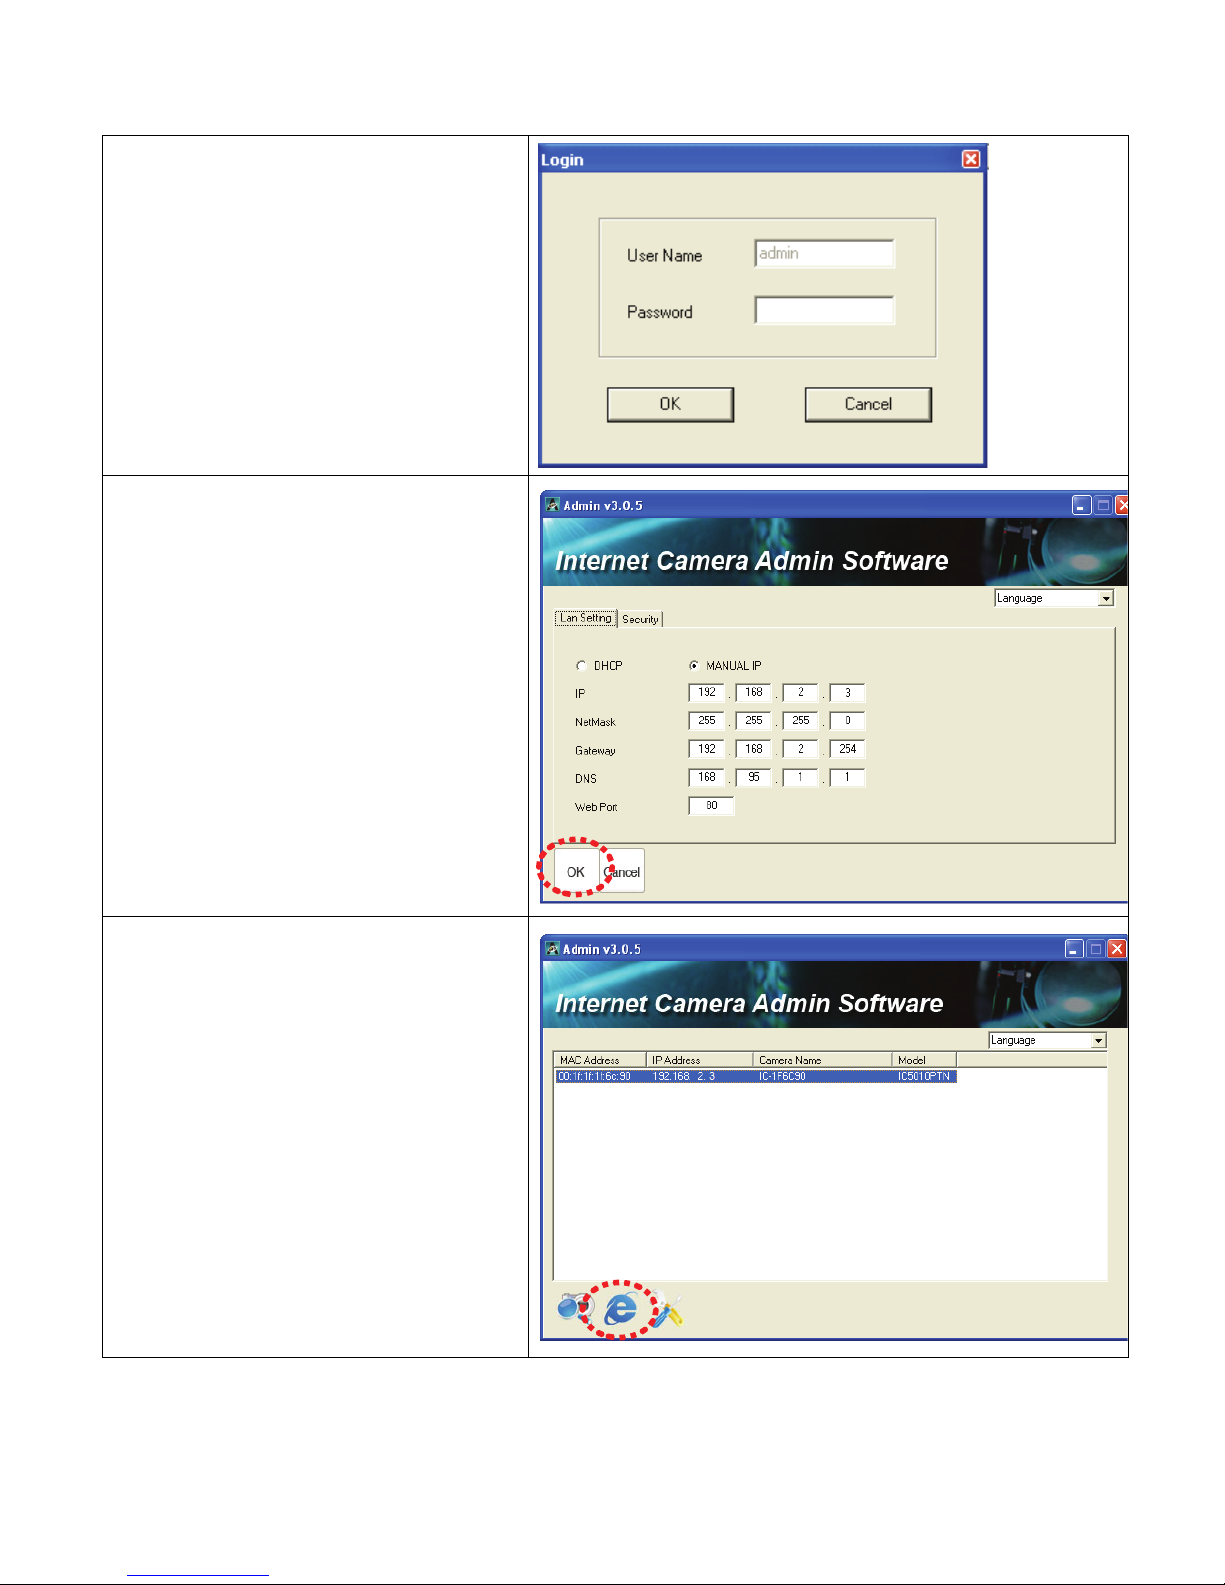
You’ll be prompted to input username
and password. Username is ‘admin’
(can not be changed), default password
is ‘1234’.
In this menu, you have to assign an IP
address and it’s Netmask, Gateway,
and DNS to be used by the camera,
so your computer can connect to it.
Please don’t alter the setting of ‘Web
Port’ unless you know what will be
affected. Click ‘OK’ when finish.
If you don’t know how to specify an
IP address for your camera, please
ask your network administrator or
experienced technician.
Now you can use web browser to
connect to IP camera by inputting
IP camera’s IP address in the web
browser’s address bar, or click
‘Browse camera via Web’ icon.
Page 8
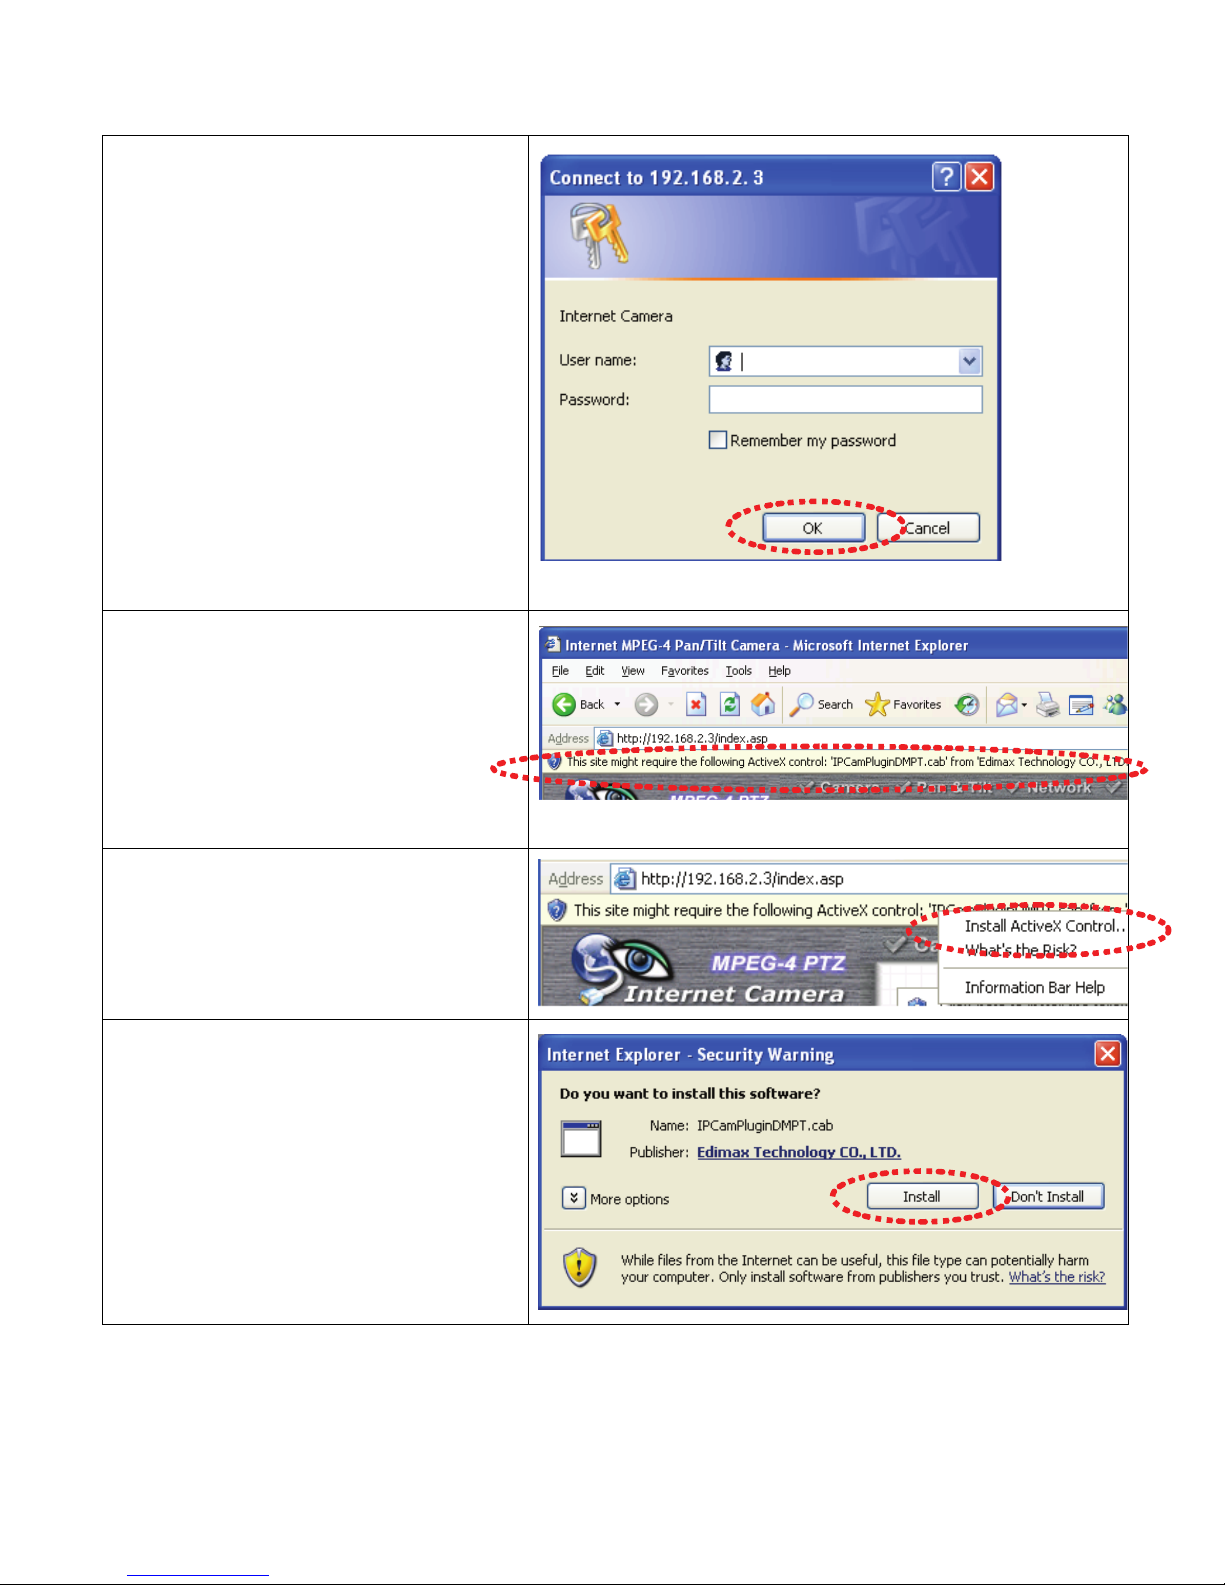
You’ll be prompted to input
user name and password,
click ‘OK’ button when finish.
If you can’t see this login window,
please go back to Admin Utility and click
‘Configure Camera’ icon to set the IP
address of the camera before it can be
connected.
User name: admin
Password: 1234
After logged on, you should see the
following messages appear at the top
of Internet Explorer
Right-click on the message, and
click ‘Install ActiveX Control…’
When you see this message, click
’Install’ to install required ActiveX control.
Page 9
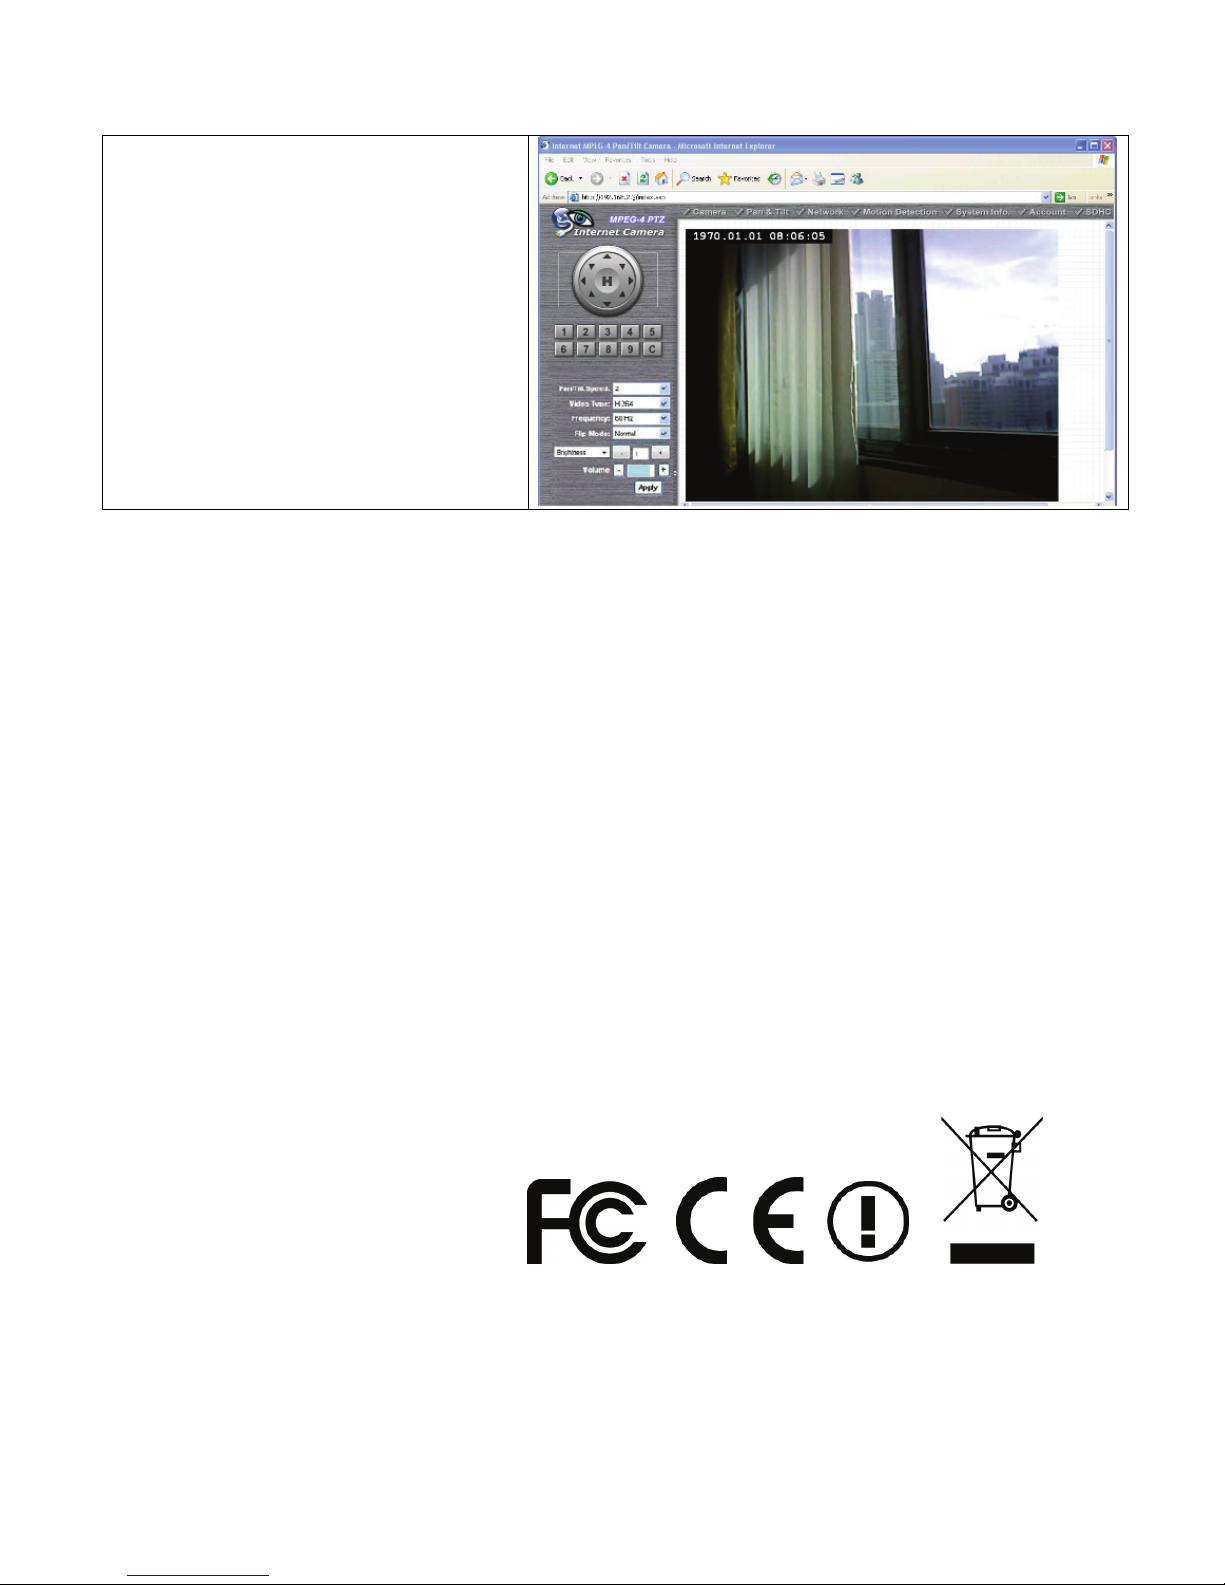
You should be able to see the images
captured by the camera now. For
advanced functions, please refer
to instructions given in user manual
(on supplied CD-ROM)
 Loading...