

Page 1
USB - HDMI
GRAPHICS ADAPTER
USER MANUAL
Page 2

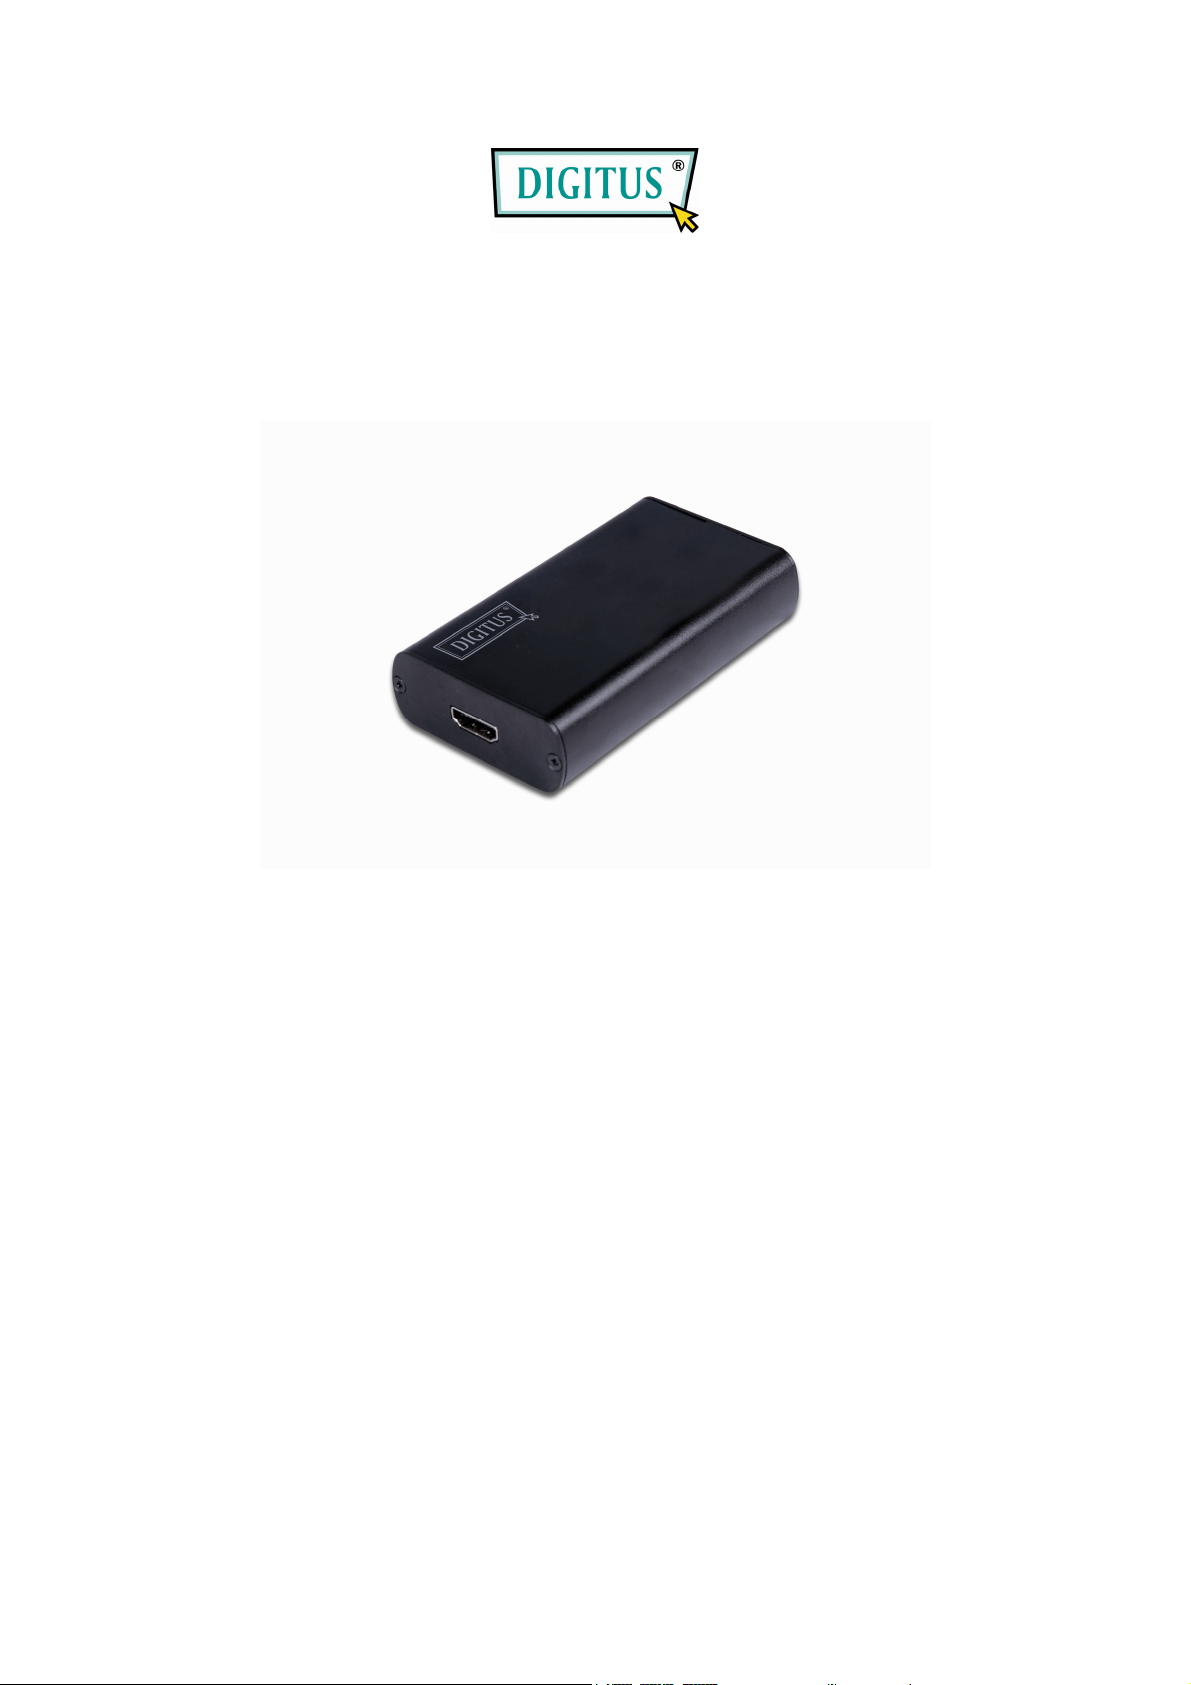
1. Product introduction
USB2.0 TO HDMI Adapter can convert USB2.0 interface to HDMI interface, and allows
you to add extra display (up to 6 displays for PC or 4 for Mac ) through your USB2.0 Port.
Extend your desktop across 2 or more (limited 6) displays allowing you to increase your
window frame like never before or Expand spread sheets across 2 or more (limited 6 )
display, in graphics programs increase your working area by putting al your pallets on the
second display.
Mirror model can make all the assistant displays show the same window frame as main
display synchronously.
1. Features
Compliant with USB2.0 and down compatible with USB1.1
HDMI output interface
Easy to install
Models supported:1.Main display 2.Extend 3.Mirror
Easy to face multi-window duty, never need to switch windows.
No extra power needed
Plug and play
Support WIN2000 SP and above
Resolution
supported:640×480,720×480,768×576,800×600,1024×768,1280×720,1280×1024,13
60×768,1366×768,1440×900,1600×1200,1680×1050
Color Bit: Middle 16bit /Highest 32bit
Rotation: Left rotation, Right rotation, and Reverse rotation.
2. System Requirement
The basic requirement of hardware
CPU must have 1.2GHz time frequency
At least 256CMB memory, recommend 512MB
USB2.0 Version
30MB useful disk capacity
CD-ROM or DVD Drive
3. Installation(WIN2K/XP)
Please follow up the below steps to install USB2.0 TO HDMI driver.
1. Tum on your computer and make sure the USB port are available
2. Please don’t connect the product of USB TO HDMI to your computer before you install
the driver.
3. Please double click“DisplayLink-5.exe” to start installation.
4. Select the same language as the system, and click “I Accept” to continue installation,
refer to the below frame:
Page 3
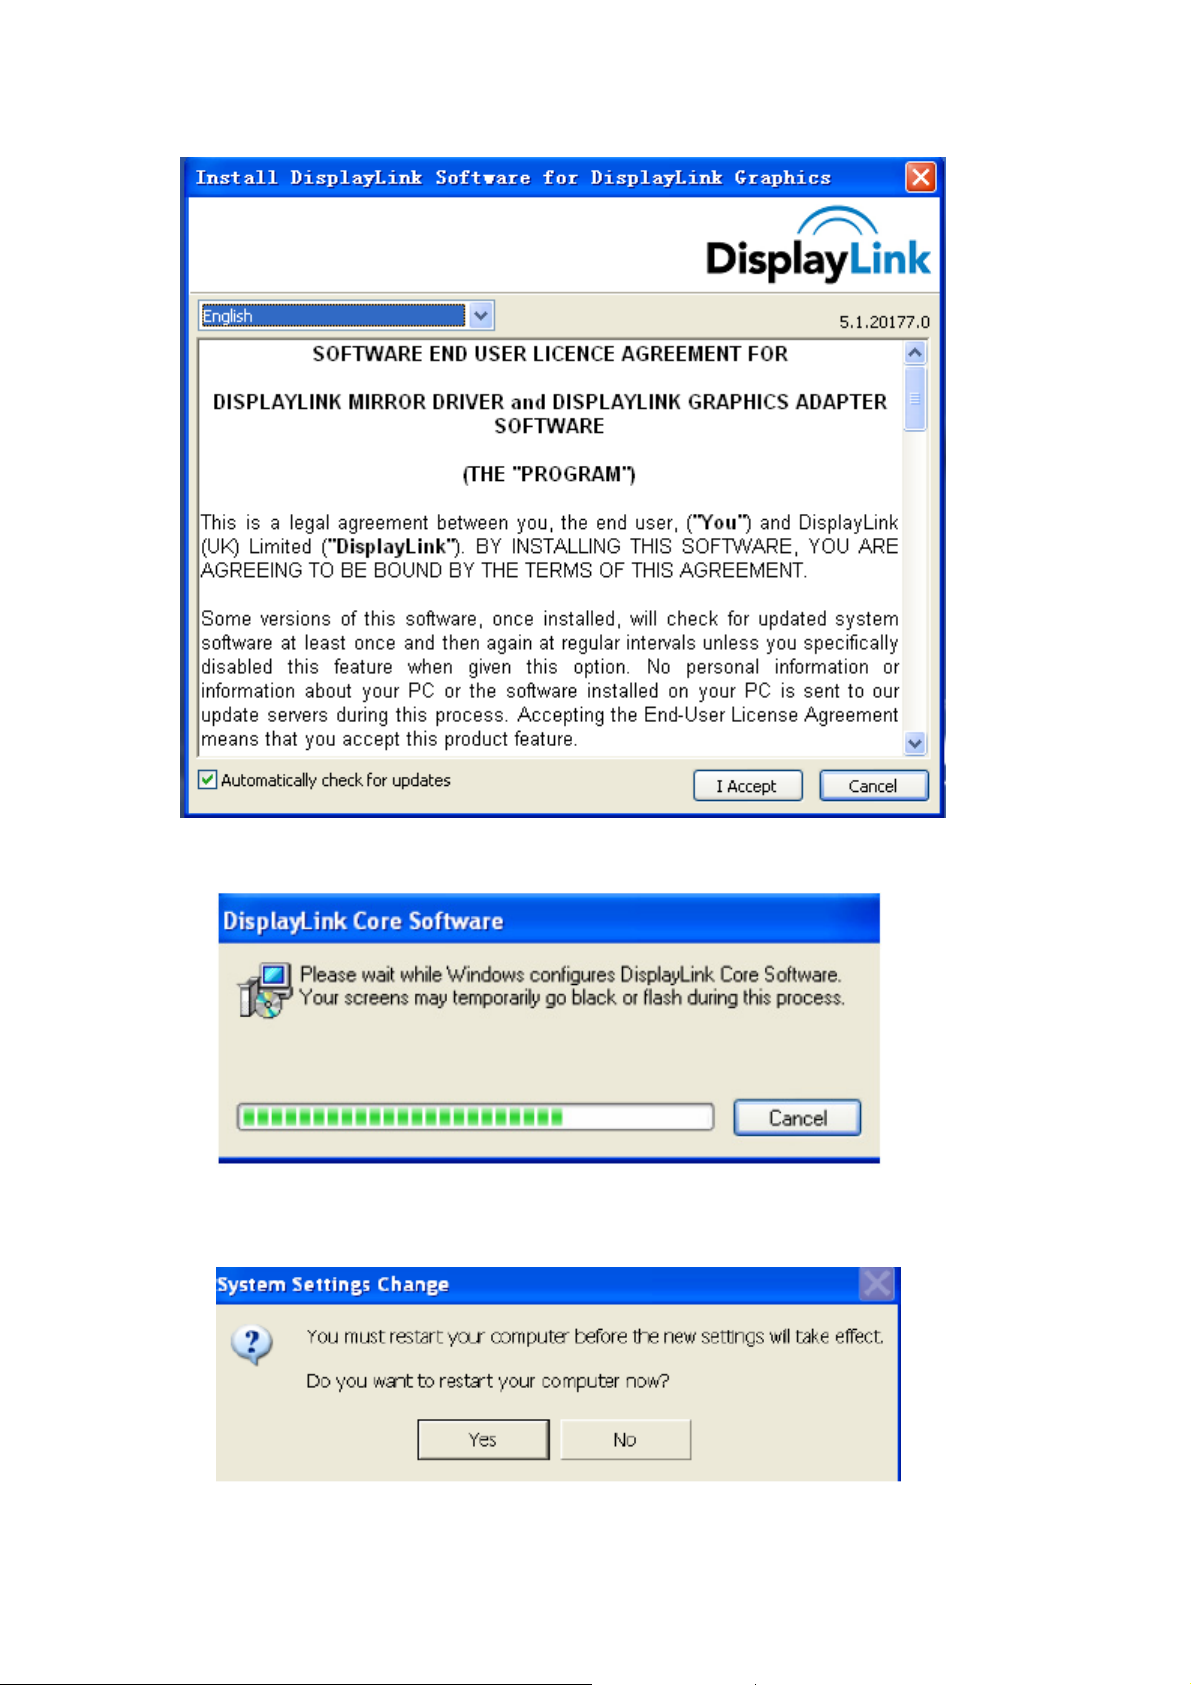
5. It will show you the below hint during installation.
6. It will remind you with the below frame after installation, just click “Yes” to restart your
computer, and finish installation.
Page 4

7. After installation, please connect the product of USB2.0 TO HDMI to the USB Port,
system will detect it, please refer to the below frame:.
8. If it shows the below interface, it means the installation is succeeded.
9. Check “Device Manager”, you can find “USB Display Adapters”
10. You can see the below frame and matching status at “System desktop “------” Display
Properties “------” Setting.
Page 5

4. ove the Driver Program
1. Go to the “Add or Remove program” from “Control pane” to find the
Display-Link-Graphics program, refer to the below frame:
Page 6

2. Just select and click “Remove” to remove the driver program.
6. User tips
USB2.0 TO HDMI Application image
6.1 Extend
6.1.1 Extend (Left)
Click the icon “
the menu as below, just select: 2. Display-Link Device (USB-8041-100649) --- Extend to –
Left
” on the right down corner of the main display desktop, it will pop-up
Page 7

Frame will be extended to assistant display (3) from the left of main display
6.1.2 Extend 1 window across 6 displays
Click any one of the numbered display, go to “senior(A)”, it will pop-up the below showing
as below, adjust the resolution of every assistant display to the same left and click
“Confirm”
Page 8

(2)After you adjust the position of the icon of “Assistant display”, pull the current window
rightward to the other assistant displays. Please refer to the below frame:
Main display Assistant display 2 Assistant display 3
Assistant display 4 Assistant display 5 Assistant display 6
Assistant display 7
Page 9

6.2 Mirror
Click the icon “
the window frame as below, just select 2-Mirror, then the window frame on the main
display will be shown on the Assistant display synchronously.
” on the right down corner of the main display desktop, it will pop-up
 Loading...