

Page 1

DA-70820
English – German – France
Manual
Page 2
HIGH RESOLUTION
VIDEO GRABBER
User´s Manual
DA-70820 Rev. 3-0
Page 3

_________________________________________________________________________________
FEDERAL COMMUNICATIONS COMMISSION
This device complies with Part 15 of the FCC Rules Operation is subject to the
following two conditions: this device may not cause harmful interference, and (2)
this device must accept any interference received, including interference that
may cause undesired operation.
This equipment has been tested and found to comply with the limits for a Class
B Digital Device, pursuant to part 15 of the FCC Rules. These limits are
designed to provide reasonable protection against harmful interference in a
residential installation. This equipment generates, uses and can radiated
radio frequency energy and, if not installed and used in accordance with the
instruction, may cause harmful interference to radio communication. However,
there is no grantee that interference will not occur in a particular installation. If
this equipment does cause harmful interference to radio or television reception,
which can be determined by tuning the equipment off and on, the user is
encouraged to try to correct the interference by one or more of the following
measures:
-Reorient or relocate the receiving antenna.
-Increase the separation between the equipment and receiver.
-Connect the equipment into an outlet on a circuit different from that to
which the receiver is connected.
-Consult the dealer or an experienced radio/TV technician for help.
Notice: Changes or modifications not expressly approved by the party
responsible for compliance could void the user’s authority to operate the
equipment.
CE DECLARATION
This device complies with CE . These limits are designed to provide reasonable
protection against harmful interface in a residential installation.
I
Table of Contents
Page 4

Chapter 1. Overview ---------------------------------------------------------- 1
1.1 Introduction ----------------------------------------------------------------- 1
1.2 Features --------------------------------------------------------------------- 1
1.3 Specifications --------------------------------------------------------------- 2
1.4 Package Contents --------------------------------------------------------- 2
1.5 Minimal System Requirements ----------------------------------------- 2
Chapter 2. Installation ------------------------------------------------------- 3
2.1 Hardware device description ------------------------------------------- 3
2.2 Driver Installation ---------------------------------------------------------- 4
2.3 Application Software (Video Grabber) Installation ---------------- 6
Chapter 3. Basic Function Operating ------------------------------- 7
Chapter 4. Trouble Shooting ----------------------------------------------- 11
_______________________________________________________________________________
II
Chapter 1. Overview
Page 5

1.1 Introduction
Congratulations on your purchase of “Video Grabber”. The “Video
Grabber”- New Generation USB2.0 Audio/Video grabber is the best ideal
companion for your portable audio/video application. Now with Real-time
MPEG 1/2/4 recording, you have a powerful video application on your hand.
Video Grabber is the bridge between your computer and analog camera, VCR,
camcorder or any other video source.
Video Grabber is small enough to fit in the palm of your hand and it is ideal for
both notebook and desktop computers.
1.2 Features
z Small physical Wonder--Dimensions are (L)81mm x (W)30mm x
(H)15mm
z Audio and video go though USB 2.0 bus (WinXP) for Audio/Video
Synchronization and superior performance
z High speed USB 2.0 data transfer rate for superior audio/video
recording
z Encoding MPEG 1 / MPEG 2 / MPEG 4 format directly, Ideal formats
for video application
z Up to 25 fps motion capture capability at 720x576(PAL) & 30 fps at
720x480(NTSC)
z SnapShot function support
z Composite, S-Video analog input, NTSC, PAL and SECAM multi
system support
z Recording period setup
z Support Brightness, Contrast, Hue, Saturation, Sharpness control
z Powerful video editing function include Motion Video Special Effects/
Title Effects/ Picture-in-Picture Effects/ Slow & Fast Motion Video
Effects/ background music/ color background/ T ransitional Effect s
z Simple and Easy Direct burning function for Video to DVD making
z Plug & Play
z Low power consumption. Ideal for portable computer too
z No Battery---No need to install batteries or run off the wall adapter
_____________________________________________________________
1
Chapter 1. Overview
Page 6

1.3 Specifications
z Video input : One RCA composite, One S-Video.
z Video system : NTSC, PAL and SECAM multi system support.
z Audio input : For WinXP, go through USB; For Win2000, go through
sound card.
z Motion capture : MPEG format up to 720x480@NTSC, and
720x
576@PAL resolution; MPEG 4 format @320x240 resolution.
z Still image capture : JPG file format.
z Performance : Up to 25 fps at 720x576 for PAL, 30fps at 720x480 for
NTSC.
z Power Source : 5VDC,350mA(max) through USB port.
1.4 Minimum System Requirements
z USB 2.0 equipped computer
z Pentium-4,1G or above
z 128MB of RAM
z Win2000 SP3 / WinXP SP2 / Vista
z Sound card
1.5 Package Contents
z DA-70820 USB 2.0 Audio/Video Grabber
z Video Grabber software CD
z VideoWorks editing software
z Digital Converter direct burning sof
z User’s manual
____________________________________________________________
_
2
tware
Chapter 2. Installation
Page 7

※ Please make sure
and functioning !!
SP3 or Win Vista above and updating USB2.0 host driver before
installation to make sure computer’s USB2.0 is functioning correctly)
your computer has USB2.0 port correctly installed
( Please update your WinXP to SP2 or Win2000 to
Steps : (1) Install Driver (see 2.2.1)
(2) Plug in Video Grabber hardware (see 2.2.3)
(3) Install Video Grabber AP software (see 2.3)
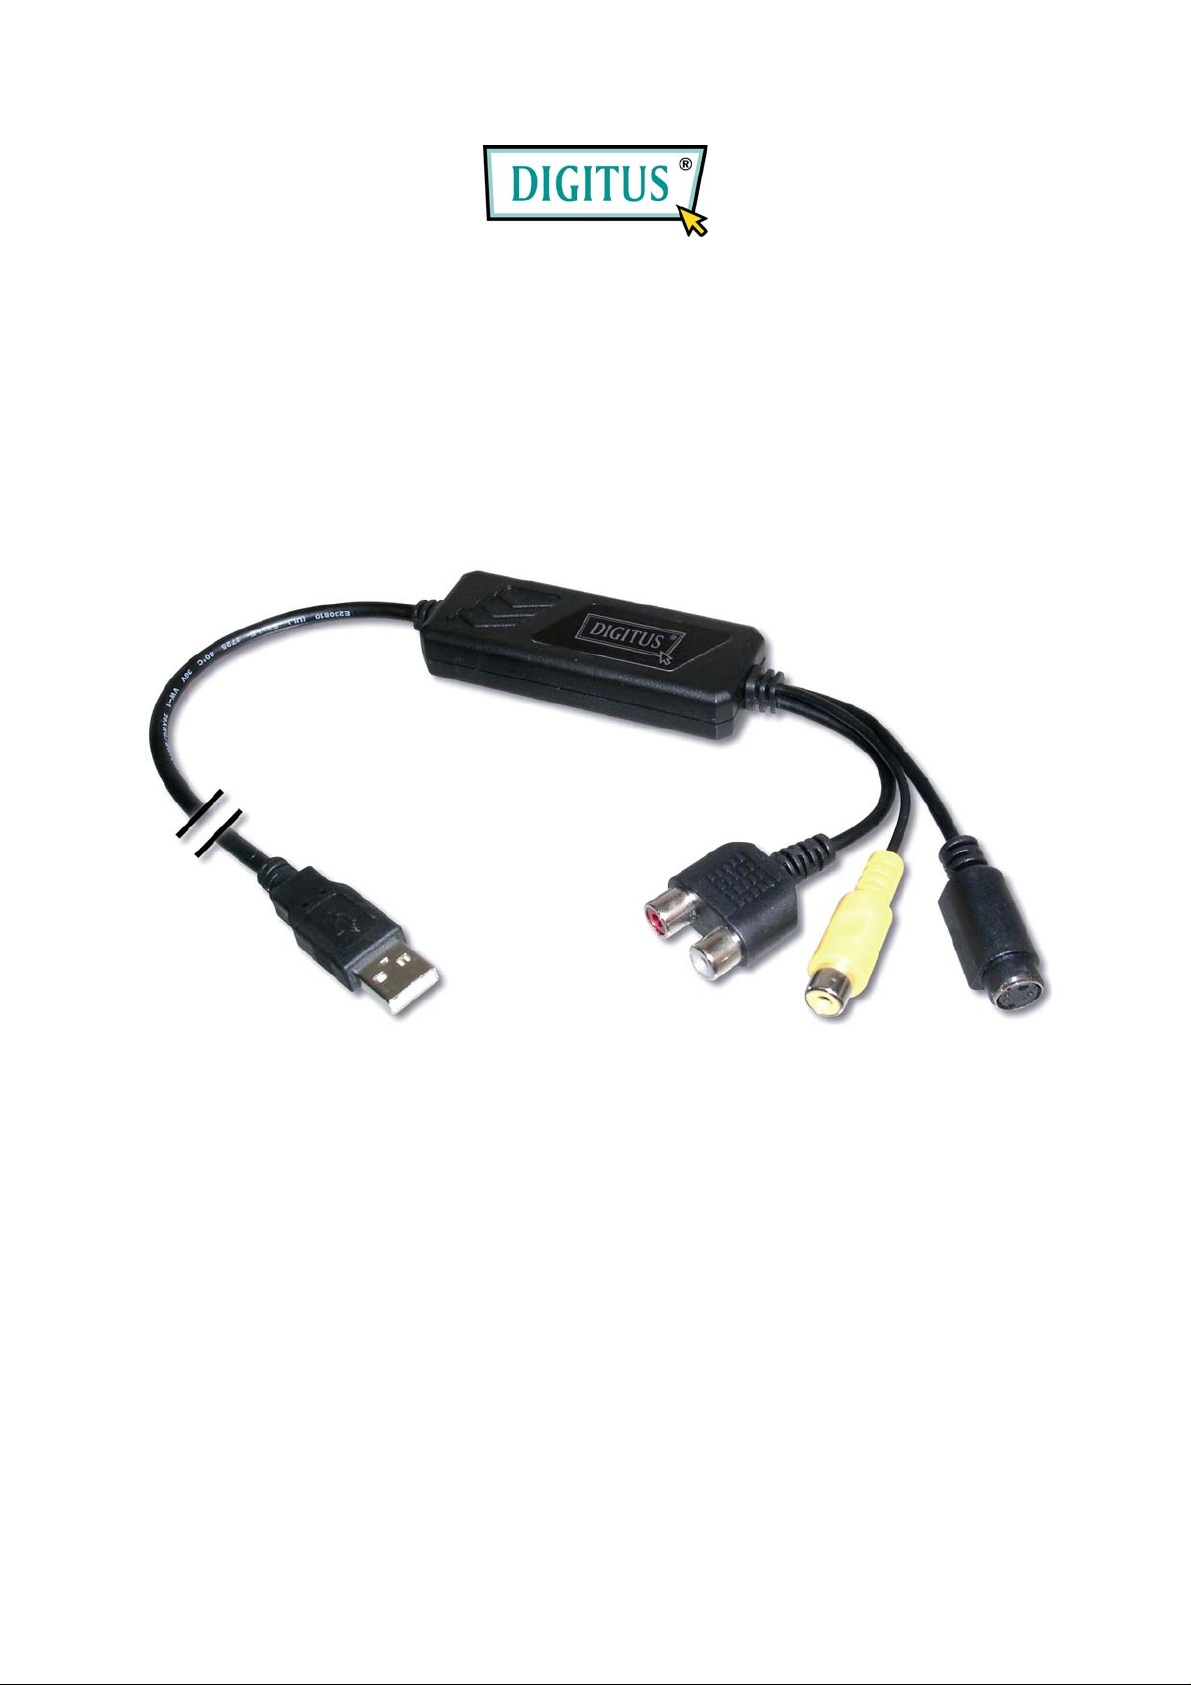
2.1 Ha
USB 2.0 connector Audio L/R input Composite Video input S-Video input
rdware device description
USB 2.0 connector : Connect to USB 2.0 port of your computer
S-Video input : S-Video input from external A/V device(e.g.VCR)
Composite video input : Composite video input from external A/V
device(e.g.VCR)
);
in
(In Win2000 – recommend connect external A/V device audio to line-
Audio L/R input : Audio input from external A/V device (In WinXP
of Sound card)
______________________________________________________________
_
3
Chapter 2. Installation
Page 8
2.2 Driver Installation
※ Do not connect Video Grabber to computer USB port
before driver ins
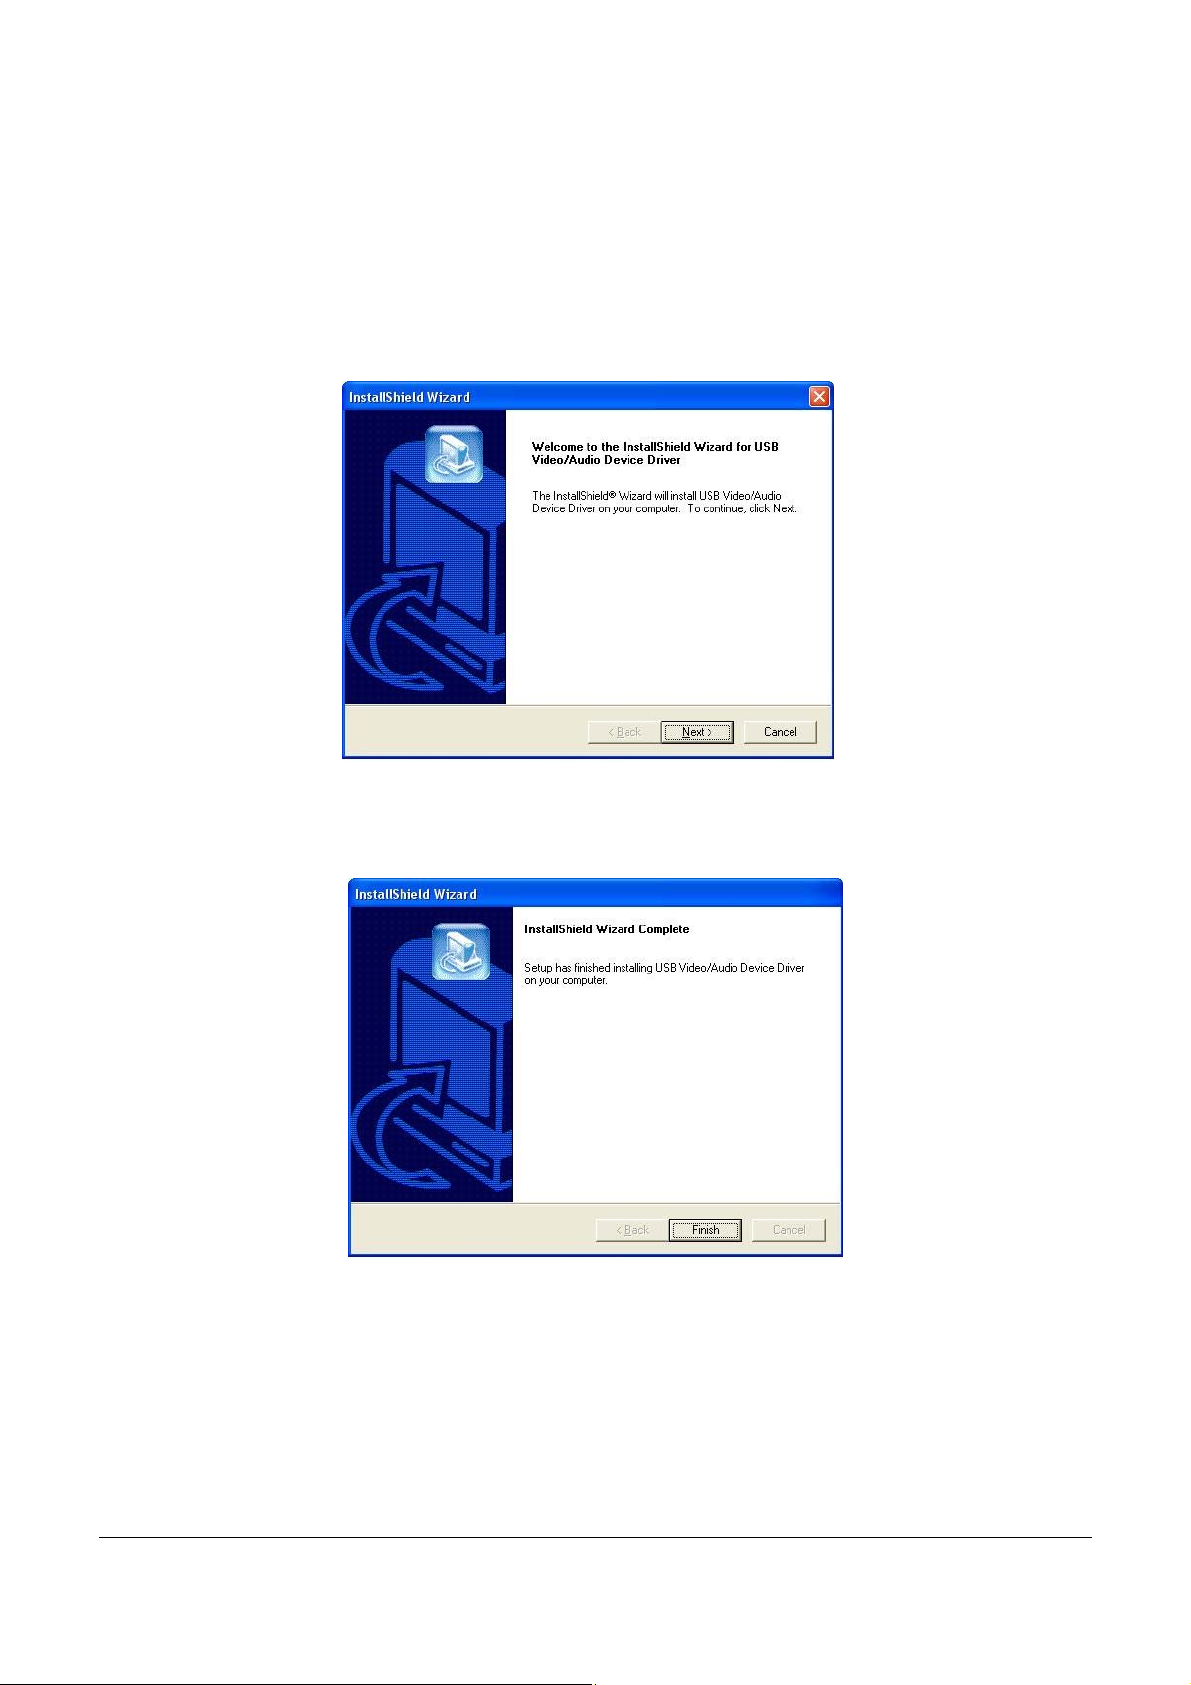
2.2.1. Please insert "Multimedia Installation Kit" CD-ROM into your
CD-ROM drive; Run " E:\Vid
(assuming CD-ROM drive in E drive)
Click "Next"
2.2.2. Complete Setup Wizard
tallation
eo Grabber\Driver\Setup.exe ";
Click "Finish"
2.2.3. Complete Setup Wizard, please restart computer
_______________________________________________________________
4
Chapter 2. Installation
Page 9
2.2.4. After restart co
mputer, plug the Video Grabber device into
computer’s US
completely.
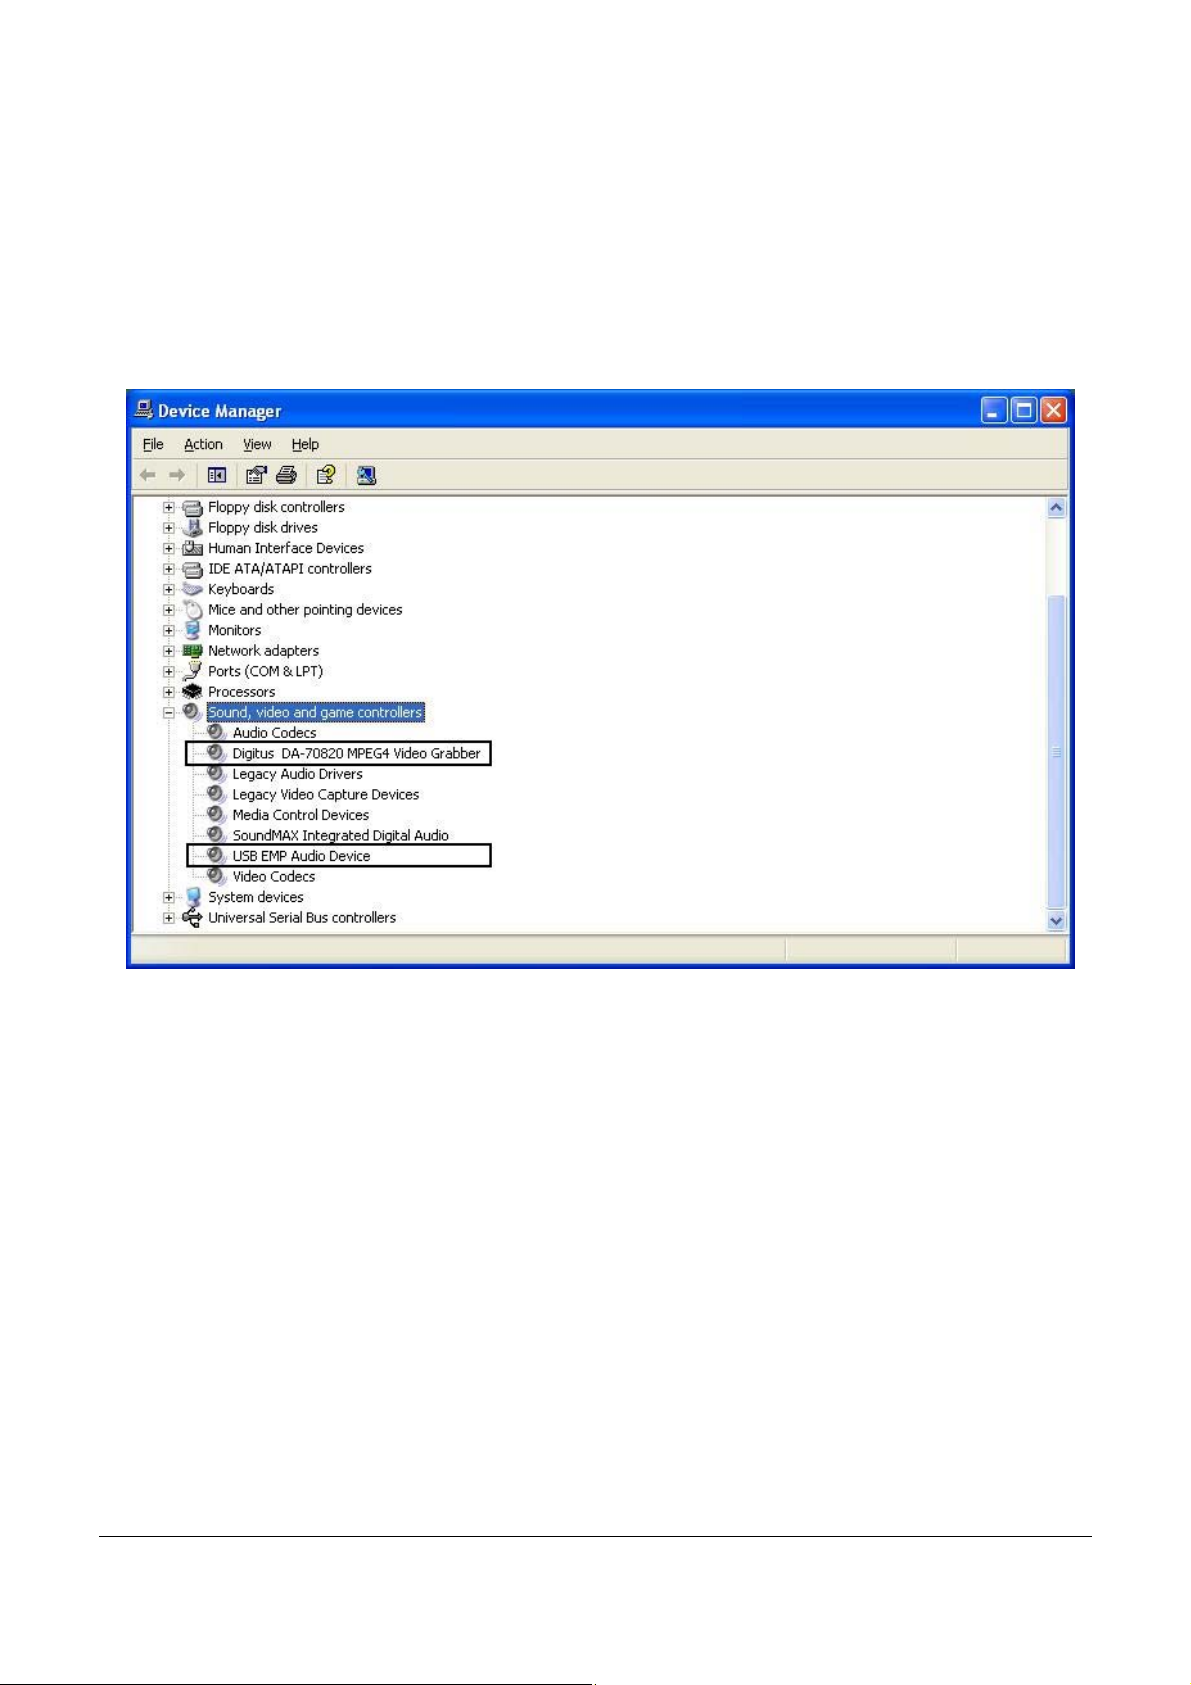
2.2.5.
Please check whether the Video Grabber driver was install
successfu
Panel->System ->Hardware->Device Manager”)
B2.0 port; System will detect new device and install
l in your computer; (Go to My Computer->Control
______________________________________________________________
_
5
Chapter 2. Installation
Page 10
2.3 Application Software (Video Grabber)
2.3.1. Please insert "Multimedia Installation Kit" CD-ROM into your
Installation
CD-ROM drive; Run " E:\Video Grabber\AP software
(assuming CD-ROM drive in E drive)
2.3.2. Welcome to the InstallShield wizard; Click "Next"
2.3.3.
2.3.4. ies Runtime Setup;
Click “Yes”
2.3.6. Finished Windows Media Format 9 Series Runtime installati
Click “Ok”
2.3.7. License for Windows Media Tool
2.3.8. Windows Media Tools Setup; Click “Next”
2.3.9. Create folde
2.3.10. Installation Options; Click “Next”
2.3.11. Installation Directory; Click “Finish”
2.3.12. Setup Complete; Click “OK”
2.3.5. License agreement; Click “Yes”
2.3.13. InstallShield Wizard Complete; Clic
Choose destination location; Click “Next”
Install Windows Media Format 9 Ser
s Setup; Click “Yes”
r; Click “Yes””
k "Finish"
\Setup.exe ";
on;
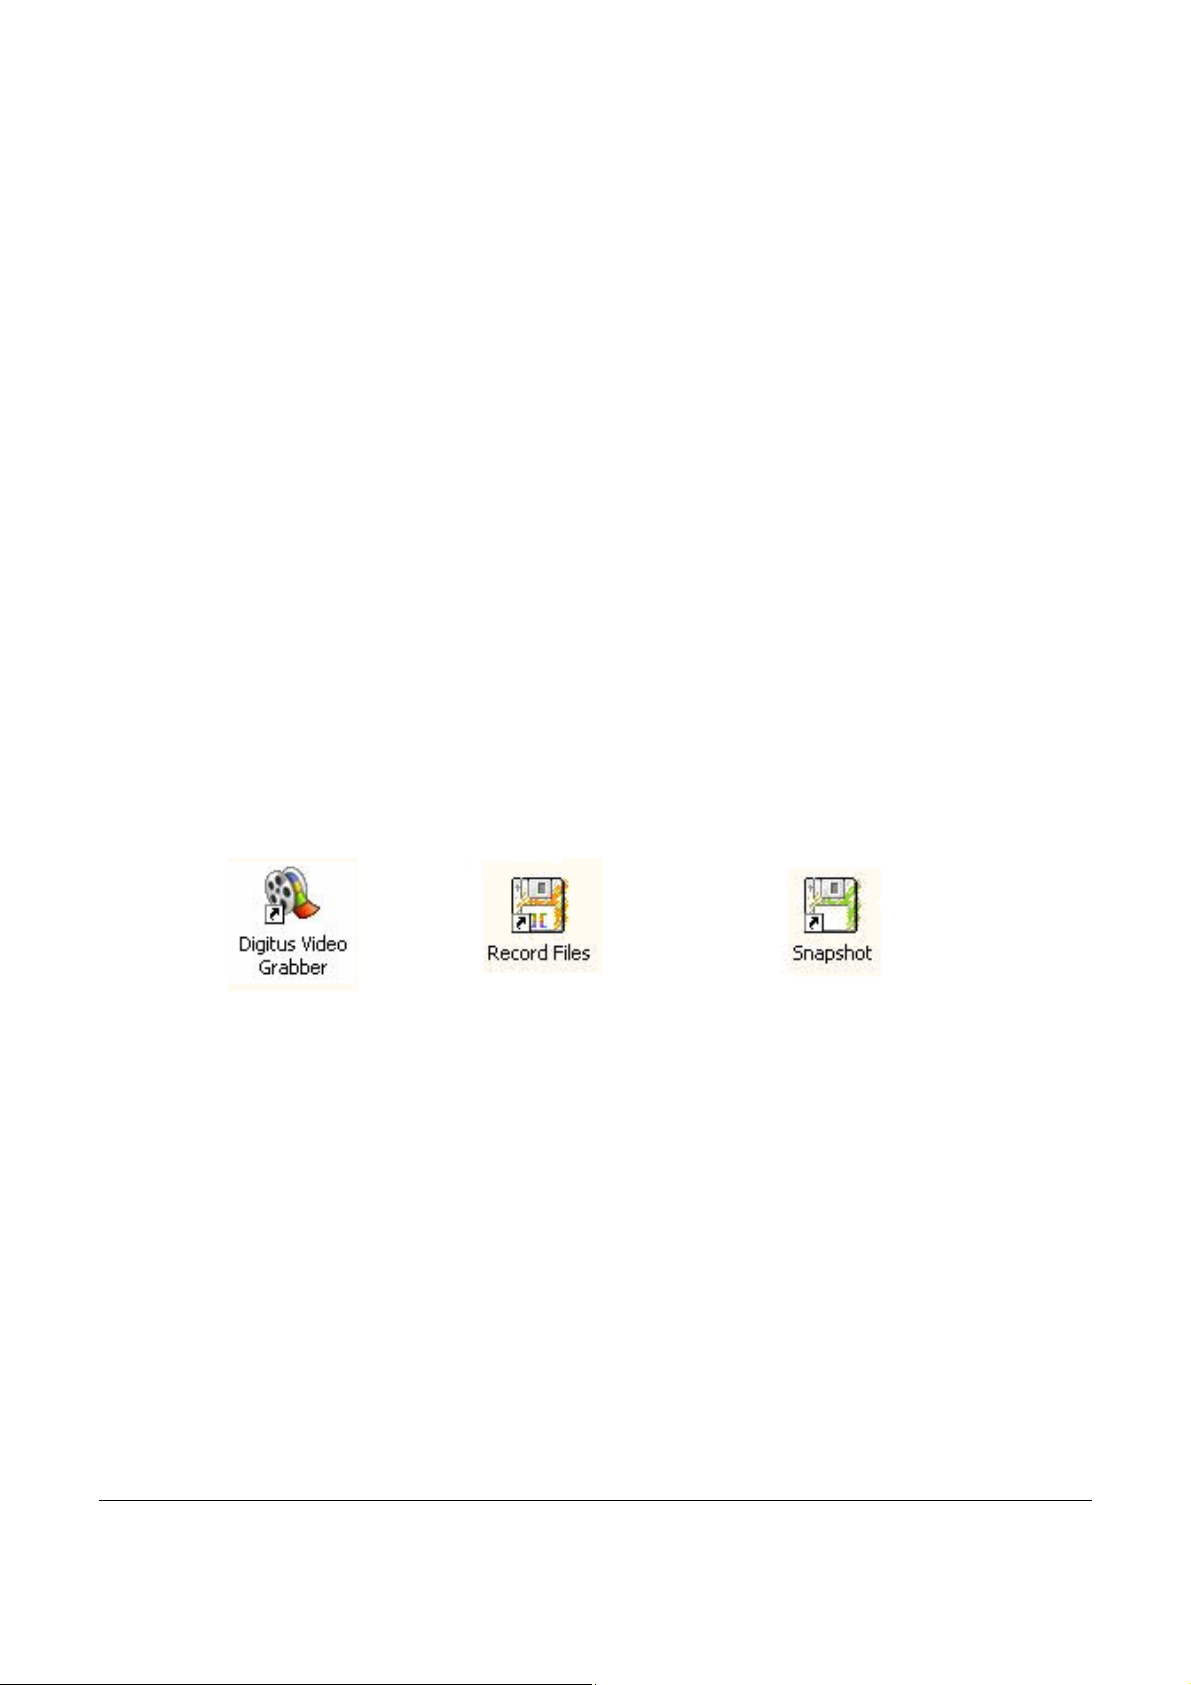
After AP software install, You can find
Video Grabber : Video Grabber software main program
Record Files : Click to see your record files
Snapshot : Click to see your capture still image files
______________________________________________________________
_
three icons show on screen
6
Chapter 3. Basic Function Operati ng
3.1. Starting : Please click the “Video Grabber” icon
Page 11
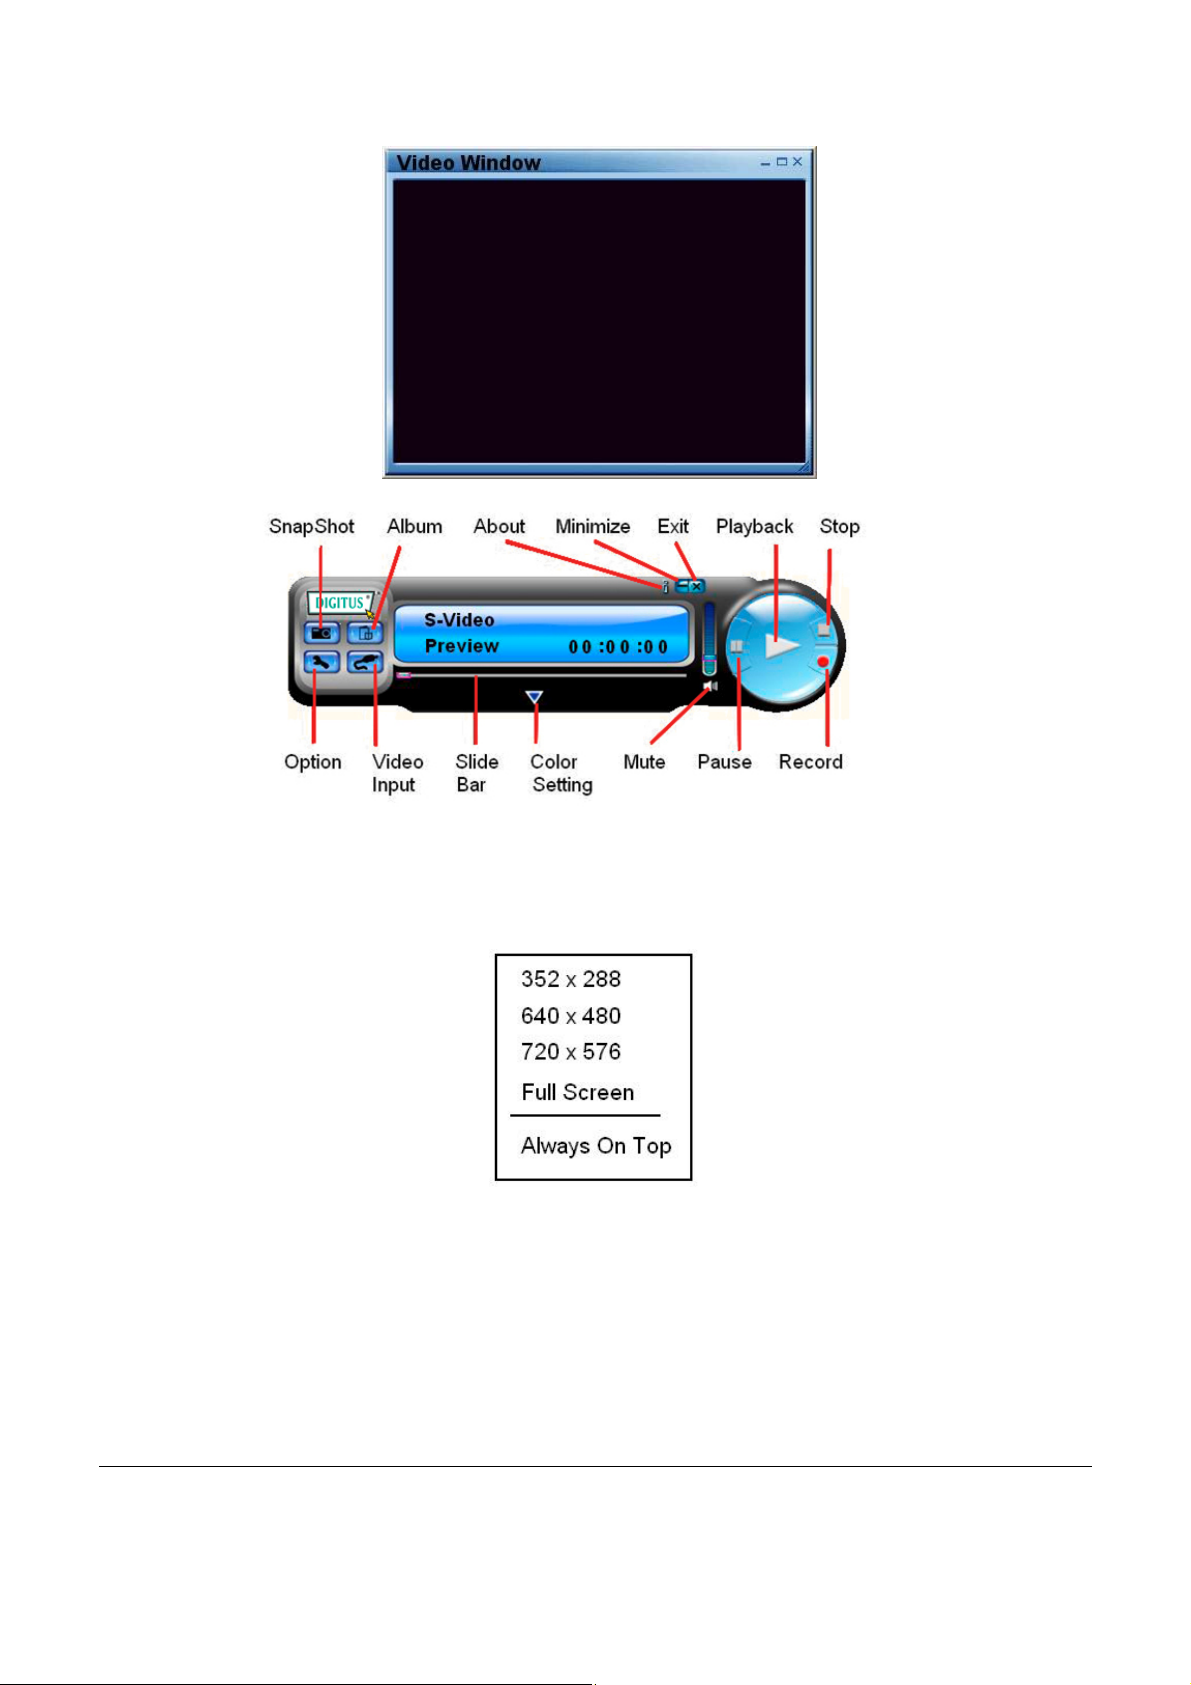
After starting application, you can see video window as below
3.2. Preview : Please move mouse cursor into Preview window and right click,
function menu will appear as below
Resolution : There are 4 resolution video preview you can select
NTSC mode : 352x240, 640x480, 720x480, Full screen
PAL mode : 352x288, 640x480, 720x576, Full screen
_____ __________________________________________________________
7
Chapter 3. Basic Function Operati ng
3.3. Option : After you make setting, please click “Ok”.
Page 12

3.3.1. General
(b) Snapshot default storage path : The location to save captured
(c) Clip default storage path : The location to save recorded video
(d) deo input Video Format : Choose correct vi
(e) Set Recording Time : Reco rding length setting
3.3.2. Encoder Property
(a) Hardisk space information
image files
files
_______________________________________________________________
8
Chapter 3. Basic Function Operati ng
(a) Video Setting : Recording file format MPEG-1, MPEG-2, VCD,
SVCD, DVD, WMV selection(if you want make DVD burning,
Page 13

please choose DVD mode)
(b) Profile : Video Size, Frame R ate, Video Quality, Video Bit Rate
setting; Information column will show your setting
3.4. Video put :
In
Switch between Composite or S-Video input.
3.5. Slide Bar :
Move to any video position during playback.
3.6. Color Setting
Brightness/Contrast/Hue/Saturation adjustment.
:
3.7. Mute :
Volume On/Of
f
3.8. Pause :
3.9. Record
M : Month (Jan->1,
dd : Date
mm : Minute
Pause the playback fil
e
: When you click this button, start to record video, after you click
“Stop“ button
save the file, default file name is “Mddhhmmss”.
hh : Hour
ss : Second
, a table will be shown, and ask you rename or
Feb->2….Oct->O, Nov->N, Dec->D)
3.10. Stop : Stop Recording
3.11. Playback : Play the re
.12. SnapShot : Image capture resolution is same as Preview mode
3
resolution, after you click,
_______________________________________________________________
9
and Playback;
corded file
the table show as below
Chapter 3. Basic Function Operati ng
You can “Save”, Save All”, Delete”, Delete All” image files,
file name is “Mddhhmmssn”.
Page 14

M : Month (Jan->
dd : Date
hh : Hour
mm : Minute
ss : Second
n : Number
1, Feb->2….Oct->O, Nov->N, Dec->D)
3.13. Albu
This Album will show all capture files include image and video, please click
“Clips” or “Images” to find all list, you can find each file information or
preview the recording video in this window
m :
3.14. Full Screen mode : Double left click inside video window to switch
between full screen and previous screen size
_______________________________________________________________
10
Chap 4. Trouble Shooting
Q1 : Why My system can not detect the Video Grabber
ter
Page 15

A1 : (a) Make sure you enable U
SB2.0 in the motherboard BIOS setup
(b) Please make sure that y
For Win XP, please upgrade to Service Pack 2 or above.
For Win2000, please upgrade to Service Pack 3
For Win Vista, please upgrade to the latest Service Pack.
Q2 :
Why can not see video display
A2 : your
(a) Maybe your video system setup is incorrect, please check
hardware connection (see page 3; 2.1 Hardware device d
and choose the correct video system (see page 11; 3.11.1. T
(b) Please make sure your system
For Win XP, please upgrade to Service Pack 1 or above.
For Win2000, please upgrade to Service Pack 3 or above.
Q3 :
Why is the resolution always 320x240 in preview mode
A3 : Bec your USB
ause you plugged Video Grabber in USB1.1 port or though
port USB port is
is 2.0, but didn’t upgrade USB2.0 driver, please make sure
USB2.0 and upgrade the USB2.0 host driver from Microsoft Website
our system has the latest USB2.0 host driver.
or above.
escription)
uner)
got the latest USB2.0 host driver.
Q4 : Why does the system show “High Speed device plug into Full speed
USB port…”
A4 :
(a) Please make sure your system support USB2.0 hardware port.
(b) Please make sure that your system install USB2.0 Host driver already
Q5 : nstable video during preview and recording ?
Why do I get u
A5 : If you are using Ultra DMA hard disk, please updated latest driver o
ATA/ATAPI controller.
Some motherboard bundled driver is not latest version, we suggest that
you use XP system bundled driver.
Q6 : thing during preview mode?
Why can not hear any
A6: I
n WinXP, Audio go throughVideo Grabber (please see 3.11.2.)
In Win2000, the audio go through so
ound card setting.
s
und card Line-in, please check your
f IDE
11
Chapter 4. Trouble Shooting
Q7 : How can I get minimum number of dropped frames during video capture ?
Page 16

A7 : The best recording performance depends o
n your computer system
performance, but you can also take some s
performance
(a) Try lowering the resolution format you record.
(b) Enable hard disk drive DMA ; Go to My Computer->Control Pane
->System->Hardware->Device Manager->Disk drives to setup
(c) Keep a lar
(d) Use a hardisk drive with speed of more than 720
(e) Disable Power Management in BIOS
(f) D
isable Power Saving mode of monitor
(g) Close some resident programs of your sy
(h) Defrag your hardisk
(i) Do not run other program during record
Q8 : I can preview video but when recording, the syste
A8 : (a) Please install Direct
(b) Maybe your VGA card driver is incompatible with direct draw
please update new VGA driver
ger free space in the Hardisk.
X 9.0 or above.
teps as below to improve the
0 rotation per minute
stem
ing
m crashed/hanged
l
(c) Your system residents too many programs which occupies the mem
Please close unnecessary program
(d) Please lower the hardware accelerator, you can go to
My Computer->Control Panel->D
Performance to adjust it.
Q9 : When start the Video Grabber software, program close
A9 :
Please check the sound card driver was installed successful
s
isplay->Settings->Advanced->
ory,
______________________________________________________________
_
2
1
ote
N
Page 17

Note:
In the event of incorrect installation and improper use in a residential area, the
evice may cause disruptions in radio devices and other electronic devices.
d
roper use means that the device is operated with shielded connector cables as
P
far as po
higher. The device was tested and lies within the limits for computer accessorie
of class A according to the requirements of EN 55022.
Warning !
This is a class A device. This device can cause radio interference in residential
areas; in this case, the operator may be required to per
ppropriate measures.
a
Conformity Declaration:
The device fulfils the EMC requirements of EN 55022 class A for ITE and EN
55024. Devices with exte
N 61000-3-2 and EN 61000-3-3. The basic protection requirements of the “EMC
E
Directive” 89/336/EEC ar
The corresponding declarations are available from the manufacturer.
ssible, for network products also with shielded cables of category 5e and
form and bear the costs for
rnal or built-in power supply also fulfil the requirements of
e therefore fulfilled. The CE conformity has been certified.
s
Trademarks:
All company, brand and product names used in these instructions are
r registered marks of the corresponding companies.
o
______________________________________________________________
_
trademarks
13
Page 18

HOCHAUFLÖSENDER
VIDEO GRABBER
Bedienungsanleitung
DA-70820 Aktualis. 3-0
Page 19

_________________________________________________________________________________
BUNDES-KOMMUNIKATIONSKOMMISSION (FCC-USA)
Dieses Gerät entspricht Teil 15 der FCC-Regelungen. Der Betrieb unterliegt
den folgenden zwei Bedingungen: dieses Gerät darf keine nachteiligen
Interferenzen hervorrufen und (2) dieses Gerät muss alle empfangenen
Interferenzen aufnehmen, einschließlich derer, die eine unerwünschte Funktion
hervorrufen.
Dieses Gerät wurde getestet und es wurde festgestellt, dass es den
Grenzwerten der Klasse B Digitalgeräte gemäß Teil 15 der FCC-Regelungen
entspricht. Diese Grenzwerte wurden aufgestellt, um einen angemessenen
Schutz gegen schädliche Interferenzen in Wohnräumen zu bieten. Dieses
Gerät erzeugt, verwendet und kann Funkfrequenzenergie abgeben und wenn
es nicht in Übereinstimmung mit der Anleitung installiert und betrieben wird,
kann es für den Funkverkehr schädliche Interferenzen hervorrufen. Dies
garantiert jedoch nicht, dass keine Interferenzen bei einer bestimmten
Installationsweise auftreten können. Wenn dieses Gerät für den Radio- oder
TV-Empfang schädliche Interferenzen verursacht, was durch ein Aus- und
Einschalten des Geräts festgestellt werden kann, empfehlen wir dem Anwender,
die Interferenzen durch eine oder mehrere der folgenden Maßnahmen zu
beheben:
-Richten Sie die Empfangsantenne neu aus oder stellen Sie sie um.
-Vergrößern Sie den Abstand zwischen dem Gerät und dem Empfänger.
-Schließen Sie das Gerät an eine andere Steckdose als der Empfänger an.
-Kontaktieren Sie den Händler oder einen erfahrenen Radio- und
Fernsehtechniker für weitere Hilfe.
Anmerkung: Veränderungen oder Modifizierungen, die nicht ausdrücklich von
der für die Einhaltung der Regelungen verantwortlichen Partei genehmigt sind,
können die Betriebsgenehmigung des Anwenders für das Gerät ungültig
machen.
CE-ERKLÄRUNG
Dieses Gerät erfüllt die CE-Anforderungen. Diese Grenzwerte wurden
aufgestellt, um einen angemessenen Schutz gegen schädliche Interferenzen in
Wohnräumen zu bieten.
I
Page 20

Inhaltsverzeichnis
Kapitel 1. Überblick---------------------------------------------------------- 1
1.1 Überblick---------------------------------------------------------- 1
1.2 Ausstattung ----------------------------------------------------------------- 1
1.3 Technische Daten ---------------------------------------------------------- 2
1.4 Packungsinhalt -------------------------------------------------------------- 2
1.5 Minimale Systemanforderungen ---------------------------------------- 2
Kapitel 2. Installation ---------------------------------------------------------- 3
2.1 Hardware-Gerätebeschreibung ---------------------------------------- 3
2.2 Treiberinstallation ---------------------------------------------------------- 4
2.3 Anwendungssoftware(Video Grabber)-Installation -------------- 6
Kapitel 3. Grundfunktionen --------------------------------------------- 7
Kapitel 4. Fehlerbeseitigung ----------------------------------------------- 11
_______________________________________________________________________________
II
Page 21

Kapitel 1. Überblick
1.1 Einleitung
Herzlichen Glückwunsch zu Ihrem Kauf des „Video Grabber“. Der “Video
Grabber”- Ein Audio/Video-Digitalisierer der neuen Generation USB2.0 ist der
ideale Begleiter Ihres tragbaren Audio/Video-Geräts. Jetzt mit Echtzeit MPEG
1/2/3-Aufnahme, damit Sie eine beeindruckende Video-Software zur Hand
haben.
Der Video Grabber ist die Verbindung zwischen Ihrem Computer und einer
analogen Kamera, einem Videorekorder und Camcorder oder einer anderen
Videoquelle.
Der Video Grabber ist klein genug, um in Ihre Hand zu passen und ist ideal für
Notebook und Desktop Computer.
1.2 Ausstattung
z Kleines physikalisches Wunder - Abmessungen (L)81mm x (B)30mm x (H)15mm
z Audio und Video über USB 2.0-Bus(WinXP) für Audio/Video
Synchronisierung und überragende Leistung
z High Speed USB 2.0 Datentransferrate für überragende Audio/Video-Aufnahmen
z Codiert MPEG 1 / MPEG 2 / MPEG 4-Formate direkt, ideale Formate für
Videoanwendungen
z Bis zu 25 fps Videoaufnahmefähigkeit bei 720x576 (PAL) und 30 fps bei 720x480 (NTSC)
z Unterstützt Schnappschussfunktion
z Composite-, S-Video-Analog-Eingang, Multisystemunterstützung für NTSC, PAL und
SECAM
z Einstellung der Aufnahmezeit
z Unterstützt Helligkeits-, Kontrast-, Farbton, Sättigungs- und Schärfentiefensteuerung
z Beeindruckende Videobearbeitungsfunktion inklusive
Video-Spezialeffekte/Titeleffekte/Bild-im-Bild-Effekte/Zeitlupen- und
Zeitraffereffekte/Hintergrundmusik/Hintergrundfarben/Überblendeffekte
z Einfache und leichte Direkt-Brennfunktion für Video zur DVD-Erstellung
z Plug & Play
z Niedriger Stromverbrauch. Auch für tragbare Computer ideal
z Keine Batterie---Batterien und Netzadapter nicht nötig
_____________________________________________________________
1
Page 22

Kapitel 1. Überblick
1.3 Technische Daten
z Video-Eingang: 1 Cinch-Composite, 1 S-Video.
z Video-System: Multisystemunterstützung für NTSC, PAL und SECAM.
z Audio-Eingang: Für WinXP über USB; für Win2000 über Sound-Karte.
z Bewegte Aufnahme: MPEG-Format bis zu 720x480 bei NTSC
und 720x576 bei PAL-Auflösung; MPEG 4-Format mit
Auflösung 320x240.
z Foto-Aufnahme: JPG-Dateiformat.
z Leistung: Bis zu 25 fps bei 720x576 für PAL, 30 fps bei 720x480 für
NTSC.
z Stromquelle: 5V DC, 350 mA (max) über USB-Port.
1.4 Minimale Systemanfo
z Computer mit USB 2.0
z Pentium-4,1G
z 128MB RAM
z Win2000 SP3 /
z Sound-Karte
oder darüber
WinXP SP2 / Vista
rderungen
1.5 Packungsinhalt
z DA-70820 USB 2.0 Audio/Vide
z Video Grabber-Software-CD
z VideoWorks Bearbeitungssoftware
z Digital Converter Dire
z Bedienungsanleitung
kt-Brennsoftware
o Grabber
_____________________________________________________________
2
Page 23

Kapitel 2. Installation
※ Bitte kontrollieren Sie, ob auf Ihrem Computer der USB2.0-Port korrekt
installiert ist und funktioniert!! (Bitte aktualisieren Sie WinXP auf SP2
oder Win2000 auf SP3 oder Win Vista und aktualisieren Sie die
USB2.0-Hosttreiber vor der Installation, um sicherzustellen, dass
USB2.0 auf dem Computer korrekt funktioniert)
Schritte: 1. Treiber installieren (siehe 2.2.1)
2. Video Grabber-Hardware anschließen (siehe 2.2.3)
3. Video Grabber-Software installieren (siehe 2.3)
2.1 Hardware-Gerätebeschreibung
USB 2.0-Stecker Audio L/R-Eingang Composite-Videoeingang S-Videoeingang
USB 2.0-Stecker: Anschluss am USB 2.0-Port des Computers
S-Video-Eingang: S-Video-Eingang von externem A/V-Gerät (z.B.
Videorekorder)
Composite-Video-Eingang: Composite-Video-Eingang von externem
A/V-Gerät (z.B. Videorekorder)
Audio-L/R-Eingang: Audio-Eingang von externem A/V-Gerät (Unter
WinXP)
(Unter Win2000 - Audio von externem A/V-Gerät am besten an Line-In
von Sound-Karte anschließen)
_______________________________________________________________
3
Page 24

Kapitel 2. Installation
2.2 Treiberinstallation
※ Schließen Sie den Video Grabber nicht vor der
Treiberinstallation an den Computer-USB-Port an
2.2.1. Bitte legen Sie die CD-ROM "Multimedia Installation Kit" in das
CD-ROM-Laufwerk ein, Starten Sie " E:\Video Grabber\Driver\
Setup.exe "; (vorausgesetzt, dass CD-ROM-Laufwerk ist Laufwerk E)
Klicken Sie auf "Next/Weiter"
2.2.2. Schließen Sie den Setup Wizard ab
Klicken Sie auf "Finish/Beenden"
2.2.3. Nach dem Abschluss des Setup Wizard starten Sie den Computer neu.
_______________________________________________________________
4
Page 25

Kapitel 2. Installation
2.2.4. Nach dem Neustart des Computers schließen Sie den Video
Grabber an den USB2.0-Port an; das System erkennt das neue
Gerät und schließt die Installation ab.
2.2.5. Bitte kontrollieren Sie, ob der Video Grabber-Treiber auf dem
Computer richtig installiert wurde;(Gehen Sie zu
„Arbeitsplatz->Systemsteuerung->System
->Hardware->Geräte-Manager”)
_______________________________________________________________
5
Page 26

Kapitel 2. Installation
2.3 Anwendungssoftware (Video Grabber)-Installation
2.3.1. Bitte legen Sie die CD-ROM "Multimedia Installation Kit" in das
CD-ROM-Laufwerk ein, Starten Sie " E:\Video
Grabber\Driver\Setup.exe"; (vorausgesetzt, dass
CD-ROM-Laufwerk ist Laufwerk E)
2.3.2. Willkommen beim InstallShield-Wizard; Klicken Sie auf
"Next/Weiter"
2.3.3. Wählen Sie einen Zielordner; Klicken Sie auf "Next/Weiter"
2.3.4. Installieren Sie Windows Media Format 9-Reihe Runtime;
Klicken Sie auf "Yes/Ja"
2.3.5. Lizenzvereinbarung; Klicken Sie auf "Yes/Ja"
2.3.6. Nach Abschluss der Windows Media Format 9-Reihe
Runtime-Installation;
Klicken Sie auf "Ok"
2.3.7. Lizenz für Windows Media Tools; Klicken Sie auf "Yes/Ja"
2.3.8. Installation von Windows Media Tools; Klicken Sie auf
"Next/Weiter"
2.3.9. Ordner erstellen; Klicken Sie auf "Yes/Ja"
2.3.10. Optionen installieren; Klicken Sie auf "Next/Weiter"
2.3.11. Verzeichnis installieren; Klicken Sie auf "Finish/Beenden"
2.3.12. Installation fertig; Klicken Sie auf "OK"
2.3.13. InstallShield-Wizard fertig; Klicken Sie auf "Finish/Beenden"
Nach der Installation der Anwendungssoftware erscheinen drei Symbole
auf dem Bildschirm
Video Grabber: V ideo Grabber-Software-Hauptprogramm
Aufnahmedateien: Anklicken, um die aufgenommen Dateien anzuzeigen
Schnappschuss: Anklicken, um die aufgenommen Bild-Dateien
anzuzeigen
_______________________________________________________________
6
Page 27

Kapitel 3. Grundfunktionen
3.1. Start: Bitte klicken Sie auf das Symbol “Video Grabber”
Nach dem Start der Software wird das Video wie unten
angezeigt
3.2. Vorschau: Bitte ziehen Sie den Cursor auf das Vorschaufenster und
rechtsklicken Sie, das Funktionsmenü erscheint wie unten
Auflösung: Es stehen 4 Auflösungen für die Vorschau zur Auswahl
NTSC-Modus: 352x240, 640x480, 720x480, ganzer Bildschirm
PAL-Modus: 352x288, 640x480, 720x576, ganzer Bildschirm
_______________________________________________________________
7
Page 28

Kapitel 3. Grundfunktionen
3.3. Option: Nach einer Einstellung klicken Sie bitte auf „Ok“.
3.3.1. Allgemein
b. Voreingestellter Speicherpfad für Schnappschüsse: Der Ort, an
c. Voreingestellter Speicherpfad für Videoclips: Der Ort, an dem die
d. Video-Format: Wählen sie den korrekten Video-Eingang
e. Einstellen der Aufnahmezeit: Einstellung der Aufnahmelänge
3.3.2. Encoder-Eigenschaften
a. Festplattenkapazitätsinformation
dem die aufgenommenen Bilddateien gespeichert werden
aufgenommenen Video-Dateien gespeichert werden
_______________________________________________________________
8
Page 29

Kapitel 3. Grundfunktionen
a. Video-Einstellungen: Aufnahme-Dateiformat MPEG-1, MPEG-2, VCD,
SVCD, DVD, WMV Auswahl (wenn Sie DVD brennen wollen, wählen Sie
bitte den DVD-Modus)
b. Profile: Einstellung von Videogröße, Bildrate, Videoqualität, Video-Bitrate;
Informationsspalte zeigt Ihre Einstellung an
3.4. Video-Eingang:
Umschalten von Composite- zu S-Video-Eingang.
3.5. Schiebebalken: B
ei Wiedergabe auf jede Position zu ziehen.
3.6. Farbeinstellung:
Einstellung von Helligkeit/Kontrast/Farbe/Sättigung.
3.7. Stumm:
Ton Ein/Aus
3.8. Pause:
Unterbrechen der Dateiwiedergabe
3.9. Aufnahme: Bei Anklicken dieser Taste startet Videoaufnahme, nach Klick
auf“Stop“ wird Tabelle angezeigt und es wird gefragt, ob Datei
umbenannt oder gespeichert werden soll, Dateiname ist “Mddhhmmss”.
M : Monat (Jan->1, Feb->2….Okt->O, Nov->N, Dez->D)
dd : Datum
hh : Stunde
mm : Minute
ss : Sekunde
3.10. Stop: Stoppt Aufnahme und Wiedergabe;
3.11. Wiedergabe: Wiedergabe der aufgenommenen Datei
3.12. Schnappschuss: Bildaufnahme-Auflösung ist mit Vorschaumodus-
Auflösung identisch, nachdem Klicken wird Tabelle unten angezeigt
_______________________________________________________________
9
Page 30

Kapitel 3. Grundfunktionen
Sie können Bilddateien „Save/Speichern“, „Save All/Alle speichern“,
„Delete/Löschen“, „Delete All/Alle löschen", Dateiname ist
“Mddhhmmssn”.
M : Monat (Jan->1, Feb->2….Okt->O, Nov->N, Dez->D)
dd : Datum
hh : Stunde
mm : Minute
ss : Sekunde
n : Nummer
3.13. Album:
Dieses Album zeigt alle aufgenommenen Dateien inklusive Bild und Video,
klicken Sie bitte auf “Clips” oder “Images/Bilder”, um die gesamte Liste zu
finden, Sie finden in diesem Fenster auch die gesamte Dateiinformation
oder die Vorschau der aufgenommenen Videos
3.14. Ganzer Bildschirm-Modus: Doppelklicken Sie auf das Videofenster,
um zwischen
dem ganzen Bildschirm und der Vorschaugröße umzuschalten
_______________________________________________________________
10
Page 31

Kapitel 4. Fehlerbeseitigung
Q1 : Warum erkennt mein System den Video Grabber nicht?
A1 : a. Stellen Sie sicher, dass im BIOS USB2.0 aktiviert ist
b. Kontrollieren Sie, ob das System den neuesten USB2.0-Hosttreiber hat.
Win XP muss auf Service Pack 2 oder darüber aktualisiert sein.
Win2000 muss auf Service Pack 3 oder darüber aktualisiert sein.
Win Vista muss auf das neueste Service Pack aktualisiert sein.
Q2 : Warum kann man die Videoanzeige nicht sehen?
A2 : a. Möglicherweise ist die Videosystemeinstellung falsch, prüfen Sie bitte
die Hardwareverbindung (siehe Seite 3; 2.1 HardwareGerätebeschreibung) und wählen Sie das korrekte Videosystem
(siehe Seite 11; 3.11.1. Tuner)
b. Kontrollieren Sie, ob das System den neuesten USB2.0-Hosttreiber hat.
Win XP muss auf Service Pack 1 oder darüber aktualisiert sein.
Win2000 muss auf Service Pack 3 oder darüber aktualisiert sein.
Q3 : Warum ist im Vorschaumodus die Auflösung immer 320x240?
A3 : Weil Sie den Video Grabber an den USB1.1-Port angeschlossen haben
oder weil der USB-Port 2.0 ist, aber der Treiber nicht auf USB2.0
aktualisiert wurde, kontrollieren Sie bitte, ob der USB-Port USB2.0 ist und
aktualisieren Sie den USB2.0-Hosttreiber von der Microsoft-Webseite
Q4 : Warum zeigt das System “High Speed device plug into Full speed USB
port…/High Speed-Gerät an USB-Port angeschlossen”?
A4 : a. Kontrollieren Sie, ob der USB2.0-Hardware-Port unterstützt wird.
b. Kontrollieren Sie, ob der neueste USB2.0-Hosttreiber installiert ist.
Q5 : Warum ist das Video bei Vorschau und Aufnahme verwackelt?
A5 : Wenn Sie eine Ultra-DMA-Festplatte verwenden, aktualisieren Sie bitte auf
den neuesten Treiber für IDE ATA/ATAPI-Controller. Einige Treiberpakete für
Motherboards enthalten nicht die neueste Version, wir empfehlen, das
Treiberpaket für XP zu verwenden.
Q6 : Warum ist im Vorschaumodus nichts zu hören?
A6: Bei WinXP geht Audio über den Video Grabber (siehe 3.11.2)
Unter Win2000 geht Audio über Line-In der Sound-Karte, kontrollieren Sie
11
bitte die Sound-Karteneinstellung.
Page 32

Kapitel 4. Fehlerbeseitigung
Q7 : Wie kann ich die Anzahl der verloren gegangenen Bilder bei der
Videoaufnahme reduzieren?
A7 : Die beste Aufnahmeleistung hängt von der Leistung des Computers ab,
aber Sie können die unten gezeigten Schritte anwenden, um die Leistung
zu verbessern
a) Verkleinern Sie das Auflösungsformat bei der Aufnahme.
(b) Festplatten-DMA (Digital Media Adapter) aktivieren; Gehen Sie zu
Arbeitsplatz->Systemsteuerung ->System->Hardware->
Geräte-Manager->Laufwerke für die Einstellung
c. Halten Sie den freien Speicher der Festplatte groß.
d. Verwenden Sie eine Festplatte mit einer Geschwindigkeit von mehr als
7200 U/min.
e. Deaktivieren Sie das Power-Management im BIOS.
f. Deaktivieren Sie den Stromsparmodus des Monitors.
g. Schließen Sie einige im Hintergrund laufende Programme
h. Defragmentieren Sie die Festplatte
i. Lassen Sie bei der Aufnahme keine anderen Programme laufen.
Q8 : Videovorschau funktioniert, aber bei Aufnahme hängt sich das System auf
A8 : a. Installieren Sie bitte DirectX 9.0 oder darüber.
b. Möglicherweise ist der VGA-Kartentreiber mit DirectDraw inkompatibel,
aktualisieren Sie den VGA-Treiber
c. Auf dem Computer laufen zu viele Programme im Hintergrund, die
Speicherplatz verwenden, Schließen Sie die nicht notwendigen
Programme.
d. Senken Sie die Hardware-Beschleunigung, gehen Sie zu
Arbeitsplatz->Systemsteuerung->Anzeige->Einstellungen->Erweitert> Leistung, um dies einzustellen.
Q9 : Wenn die Video Grabber-Software startet, wird das Programm beendet
A9 : Kontrollieren Sie, ob der Sound-Kartentreiber richtig installiert wurde
_______________________________________________________________
12
Page 33

Anmerkung
Anmerkung:
Bei falscher Installation und unsachgemäßem Gebrauch in Wohngebieten kann
das Gerät Unterbrechungen bei Radiogeräten und anderen elektronischen
Geräten verursachen. Sachgemäßer Gebrauch bedeutet, dass das Gerät soweit
wie möglich mit abgeschirmten Verbindungskabeln betrieben wird, bei
Netzwerkgeräten auch mit abgeschirmten Kabeln der Kategorie 5e und höher.
Das Gerät wurde getestet und liegt innerhalb der Grenzwerte für
Computerzubehör der Klasse A, gemäß den Anforderungen von EN 55022.
Warnung!
Dies ist ein Klasse A Gerät. Dieses Gerät kann Funkinterferenzen in
Wohngebieten verursachen; in diesem Fall ist der Anwender verpflichtet,
geeignete Maßnahmen zu ergreifen und die Kosten dafür zu tragen.
Konformitätserklärung:
Dieses Gerät erfüllt die EMV-Anforderungen von EN 55022 Klasse A für ITE und
EN 55024. Geräte mit externer oder eingebauter Stromversorgung erfüllen auch
die Anforderungen von EN 61000-3-2 und EN 61000-3-3. Die
Grundschutzanforderungen der “EMV-Richtlinie” 89/336/EWG werden somit erfüllt.
Die CE-Konformität wurde zertifiziert. Die entsprechenden Erklärungen sind beim
Hersteller verfügbar.
Warenzeichen:
Alle Firmen-, Marken- und Produktnamen, die in dieser Anleitung verwendet
werden, sind Warenzeichen oder eingetragene Markenzeichen der
entsprechenden Firmen.
_______________________________________________________________
13
Page 34

HAUTE RÉSOLUTION
NUMÉRISEUR VIDÉO DE
GUIDE D’UTILISATEUR
DA-70820 Rev. 3-0
Page 35

_________________________________________________________________________
FCC (COMMISSION FÉDÉRALE SUR LES COMMUNICATIONS)
Cet appareil est conforme à la Partie 15 des directives « FCC Rules Operation » et
est ainsi soumis aux conditions suivantes : cet appareil ne doit cause des
interférences nuisibles, et (2) cet appareil ne doit accepter aucune interférence
reçue, y compris des interférences qui pourraient nuire à son fonctionnement.
Cet appareil a été testé et a été trouvé conforme aux limites d’un appareil
électronique de classe B, conformément à la Partie 15 des règles FCC. Ces
limites visent à fournir à l’appareil une protection raisonnable contre les
interférences nuisibles dans une installation résidentielle. Cet équipement génère,
utilise et peut produire des rayonnements de radiofréquence et, s'il n'est pas installé
et utilisé conformément aux instructions, peut causer des interférences nuisibles à la
communication radio. Cependant, il n’existe aucune garantie que des
interférences ne surviendront pas dans une installation spécifique. Si cet
équipement ne cause pas d’interférences nuisibles à la réception radio ou télévision,
qui peuvent être déterminées en ajustant correctement l’équipement, l’utilisateur est
encouragé à essayer de corriger l’interférence en appliquant une ou plusieurs des
mesures suivantes :
- Réorienter ou changer l’emplacement de l’antenne réceptrice
- Augmenter la distance entre l’appareil et le récepteur
- Connecter l’appareil à une prise de circuit différente de celle à laquelle est
branchée le récepteur.
- Consulter le vendeur ou un technicien radio/télé expérimenté pour vous aider.
Remarque : Des changements ou des modifications non expressément approuvées
par la partie responsable de la conformité peut annuler toute autorité de l'utilisateur
à utiliser l'appareil.
DÉCLARATION EUROPÉENNE
Cet appareil est conforme aux directives européennes. Ces limites visent à fournir à
l’appareil une protection raisonnable contre les interférences nuisibles dans une
installation résidentielle.
I
Page 36

Table des matières
Chapter 1. Présentation --------------------------------------------------- -1
1.1 Introduction ----------------------------------------------------------------- 1
1.2 Fonctionnalités ------------------------------------------------------------ 1
1.3 Spécifications --------------------------------------------------------------- 2
1.4 Contenu du paquet ------------------------------------------------------- 2
1.5 Configurations système minimales ----------------------------------- 2
Chapter 2. Installation ------------------------------------------------------ 3
2.1 Description de l’appareil ------------------------------------------------ 3
2.2 Installation du pilote ---------------------------------------------------- 4
2.3 Installation du logiciel d’application (Video Grabber) -------------------- 5
Chapter 3. Description des fonctions de base --------------------------
hapter 4. Résolution de problèmes -------------------------------------------- 11
_________________________________________________________________________
II
Page 37

Chapitre 1. Présentation
1.1 Introduction
Félicitations pour votre achat de « Video Grabber ». Le “Video Grabber”-
Nouvelle génération numériseur Audio/Vidéo USB2.0 – est le compagnon idéal pour
votre application audio/vidéo portative. Maintenant, grâce à des enregistrements
MPEG 1/2/4 en temps réel, vous êtes en possession d’une puissante application
vidéo.
Video Grabber est le pont entre votre ordinateur et votre appareil photo analogique,
VCR, caméscope ou toute autre source vidéo.
Video Grabber est suffisamment petit pour tenir dans votre paume de main et il est
idéal à la fois pour les ordinateurs portables et PC.
1.2 Fonctionnalités
z Petit miracle physique – Les dimensions sont (L)81mm x (l)30mm x (h)15mm
z Les flux audio et vidéo passent par le bus USB 2.0 (WinXP) pour une
synchronisation et une performance améliorée
z Taux de transfert de données par port USB 2.0 de haut débit pour un
enregistrement audio/vidéo supérieur
z Codage direct en format MPEG 1 / MPEG 2 / MPEG 4, formats idéaux pour
l’application vidéo
z Capacité de capture allant à 25 fps avec 720x576(PAL) & 30 fps avec
720x480(NTSC)
z Prise en charge de la fonction SnapShot
z Entrée composite, analogique S-Vidéo, prise en charge multi-système, NTSC,
PAL et SECAM
z Configuration de la période d’installation
z Prise en charge luminosité, contraste, nuance, saturation et netteté
z Fonction puissante d’édition vidéo comprenant des effets spéciaux pour la
vidéo animée/Effets de titre/ Effets d’incrustation/ Effets vidéo de ralenti &
accéléré/ musique de fond/ couleur de fond/ Signes de ponctuation
z Fonction de gravure simple et facile pour la conversion du flux video en DVD
z Prêt à utiliser
z Consommation électrique faible Idéal pour les ordinateurs portables
z Pas de pile ---- Pas nécessaire d’installer des piles ou d’utiliser un adaptateur
_____________________________________________________________
1
Page 38

Chapitre 1. Présentation
1.3 Spécifications
z Entrée vidéo : One RCA composite, One S-Video.
z Système vidéo : Prise en charge multi-système, NTSC, PAL et SECAM
z Entrée audio : Pour WinXP, utiliser le port USB; pour Win2000, utiliser la carte
son
z Capture de mouvement : Format MPEG jusqu’à 720x480@NTSC, et
résolution 720x576@PAL
z Capture d’image fixe : Format de fichier JPG
z Performance : Jusqu’à 25 fps avec 720x576 pour PAL & 30 fps avec 720x480
pour NTSC
z Source d’alimentation : 5 V DC, 350mA (maxi) par le biais du port USB.
; format MPEG 4 pour une résolution 320x240.
1.4 Configurations système minimales
z Ordinateur équipé de port USB 2.0
z Pentium 4,1G ou supérieur
z 128 Mo de RAM
z Win2000 SP3 / WinXP SP2 / Vista
z Carte son
1.5 Contenu du paquet
z DA-70820 USB 2.0 Audio/Video Grabber
z CD d’installation du logiciel de Video Grabber
z Logiciel d’édition VideoWorks
z Logiciel de gravure directe Digital Converter
z Guide d’utilisateur
_____________________________________________________________
2
Page 39

Chapitre 2. Installation
※ Veuillez vous assurer que le port USB 2.0 de votre ordinateur est
correctement installé et fonctionnement convenablement !!! (Veuillez mettre
à jour votre WinXP à SP2 ou Win2000 à SP3 ou Win V ista supérieur, ainsis
que le pilote hôte USB 2.0 avant l’installation pour vous assurer que le port
USB 2.0 de votre ordinateur fonctionne correctement)
Étapes :(1) Installation du pilote (voir 2.2.1)
(2) Connexion de Video Grabber (voir 2.2.3)
(3) Installation du logiciel d’application de Video Grabber (voir 2.3)
2.1 Description du périphérique
Connecteur USB 2.0 Entrée Audio L/R Entrée vidéo composite Entrée S-Vidéo
Connecteur USB 2.0 : se connecte au port USB 2.0 de votre ordinateur
Entrée S-vidéo : Entrée S-Video d’un appareil A/V externe (ex VCR)
Entrée vidéo composite : entrée vidéo composite d’un appareil A/V externe
(ex. VCR)
Entrée audio L/R : entrée audio d’un appareil A/V externe (dans WinXP)
(Dans Win2000 – nous recommandons de connecter la sortie audio de
l’appareil A/V externe au port d'entrée de la carte son)
---------------------------------------------------------------------------------------------------- 3
Page 40

Chapitre 2. Installation
2.2 Installation du pilote
※ Ne pas connecter Video Grabber au port USB de l’ordinateur
avant l’installation du pilote
2.2.1. Veuillez insérer le CD-ROM « Multimedia Installation Kit » dans votre
lecteur de CD-ROM, exécutez « E:\Video Grabber\Driver\Setup.exe » ;
(en supposant que le CD-ROM est dans le lecteur E)
Cliquez sur « Next »
2.2.2. Fin de l’assistant d’installation
Cliquez sur « Finish »
2.2.3. À la fin de l’assistant d’installation, veuillez redémarrer l’ordinateur.
_______________________________________________________________
4
Page 41

Chapitre 2. Installation
2.2.4. Après le redémarrage de l’ordinateur, connectez Video Grabber au port
USB 2.0 de votre ordinateur ; Le système détectera un nouveau
périphérique et l’installera correctement.
2.2.5. Vérifiez si le pilote du Video Grabber a été correctement installé dans
votre ordinateur ; (Allez à Poste de travail->Panneau de
configuration->Système ->Matériel ->Gestionnaire de périphériques”)
5
Page 42

Chapitre 2. Installation
2.3 Installation du logiciel d’application (Video Grabber)
2.3.1. Veuillez insérer le CD-ROM « Multimedia Installation Kit » dans votre
lecteur de CD-ROM, exécutez « E:\Video Grabber\AP
software\Setup.exe » ; (en supposant que le CD-ROM est dans le
lecteur E)
2.3.2. Welcome to the InstallShield Wizard ; cliquez sur « Next »
2.3.3. Choose destination location; cliquez sur “Next”
2.3.4. Install Windows Media Format 9 Series Runtime Setup ;
Cliquez sur « Y es »
2.3.5. License agreement ; cliquez sur “Yes”
2.3.6. Finished Windows Media Format 9 Series Runtime installation ;
Cliquez sur « OK »
2.3.7. License for Windows Media Tools Setup; cliquez sur “Yes”
2.3.8. Windows Media Tools Setup ; cliquez sur “Next”
2.3.9. Create folder ; cliquez sur “Yes””
2.3.10. Installation Options; cliquez sur “Next”
2.3.11. Installation Directory ; cliquez sur “Finish”
2.3.12. Setup Complete ; cliquez sur “OK”
2.3.13. InstallShield Wizard Complete ; cliquez sur "Finish"
Après l’installation du logiciel d’application, vous trouverez trois icônes
sur l’écran
Video Grabber : programme principal du logiciel
Record Files : cliquez sur cette icône pour enregistrer des fichiers
Snapshot : cliquez sur cette icône pour capturer des fichiers d’images fixes
_______________________________________________________________
6
Page 43

Chapitre 3. Description des fonctions de base
3.1. Lancer le programme : Veuillez cliquer sur l’icône « Video Grabber »
Après le démarrage de l’application, vous pouvez visualiser la
fenêtre vidéo tel qu’illustré ci-dessous.
3.2. Affichage : Déplacez le curseur de la souris dans la fenêtre d’affichage et
cliquez droit, un menu contextuel s’affiche tel qu’illustré ci-dessous
Résolution : Il y a quatre (4) niveaux de résolution vidéo
Mode NTSC : 352x240, 640x480, 720x480, Full screen
Mode PAL : 352x288, 640x480, 720x576, Full screen
______________________________________________________________
7
Page 44

Chapitre 3. Description des fonctions de base
3.3. Option : Après la configuration, cliquez sur « OK ».
3.3.1. General
(a) Informations relatives à l'espace disque
(b) Snapshot default storage path : Emplacement de sauvegarde des
fichiers d'images capturées
(c) Clip default storage path : Emplacement de sauvegarde des fichiers
vidéo enregistrés
(d) Sélectionner l’entrée video adéquate
(e) Set Recording Time : configuration du temps d'enregistrement
3.3.2. Encoder Property
8
Page 45

Chapitre 3. Description des fonctions de base
(a) Video Setting : sélection du format du fichier d’enregistrement MPEG-1,
MPEG-2, VCD, SVCD, DVD, WMV (si vous voulez graver un DVD,
sélectionnez le mode DVD)
(b) Profile : configuration de Video Size, Frame Rate, Video Quality, Video
Bit Rate ; la boîte Information affichera vos paramètres
3.4. Video Input :
basculer entre les entrées Composite ou S-Video
3.5. Slide Bar : à déplacer à toute position du vidéo pendant le replay.
3.6. Color Setting : réglage de la luminosité/contraste/nuance/saturation
3.7. Mute : Activer/déssactiver le volume
3.8. Pause : marquer un arrêt temporaire du fichier en cours de lecture
3.9. Record : lorsque vous cliquez sur ce bouton, l’enregistrement vidéo démarre
aussitôt. Le bouton “Stop”, un tableau s'affichera et vous demandera
de renommer ou d'enregistrer le fichier. Le nom par défaut du fichier
est “Mddhhmmss”.
M : Mois (jan->1, fév->2….oct->O, nov->N, déc->D)
dd : date
hh : heure
mm : minute
ss : seconde
3.10. Stop : arrêter l’enregistrement et la lecture en cours
3.11. Playback : jouer le fichier enregistré
3.12. SnapShot : La résolution d’image est la même que celle du mode Preview ;
après le clic, le tableau ci-dessous d’affiche
____________________________________________________________
9
Page 46

Chapitre 3. Description des fonctions de base
Vous pouvez « Enregistrer », « Enregistrer tout », « Supprimer »,
« Supprimer tout » les fichiers d’images, le nom du fichier est
“Mddhhmmssn”.
M : Mois (jan->1, fév->2….oct->O, nov->N, déc->D)
dd : date
hh : heure
mm : minute
ss : seconde
n : nombre
3.13. Album :
Cette fenêtre affichera tous les fichiers de capture, y compris fichiers images et
vidéo. Cliquez sur "Clips" ou "Images" pour trouver la liste complète ; vous
pouvez trouver les informations de chaque fichier ou visualiser la vidéo en cours
d’enregistrement dans cette fenêtre.
3.14. Mode Full Screen : Double-cliquez avec le bouton gauche dans la fenêtre de
la vidéo pour basculer entre la taille d’affichage Plein
écran et celle précédente.
_______________________________________________________________
10
Page 47

Chapitre 4. Résolution de problèmes
Q1 : Pourquoi mon système n'arrive-t-il pas à détecter Video Grabber ?
A1 : (a) Assurez-vous que le périphérique USB 2.0 est activé dans les paramètres BIOS
de la carte-mère.
(b) Assurez-vous que votre système dispose des pilotes host USB 2.0 les plus récents
Pour Win XP, mettez à niveau au SP2 ou supérieur.
Pour Win 2000, mettez à niveau au SP3 ou supérieur.
Pour Win Vista, mettez à niveau à la version la plus récente.
Q2 : Pourquoi ne puis-je pas voir l’affichage vidéo ?
A2 : (a) Peut-être la configuration de votre système vidéo est incorrecte, vérifiez la
connexion de votre périphérique (voir la page 3 ; 2.1 Description du
périphérique) et sélectionnez le système vidéo approprié (voir la page 11 –
3.11.1. Réglage)
(b) Assurez-vous que votre système dispose du pilote host USB 2.0 le plus récent.
Pour Win XP, mettez à niveau au SP1 ou supérieur.
Pour Win 2000, mettez à niveau au SP3 ou supérieur.
Q3 : Pourquoi la résolution est-elle toujours 320x240 en mode Preview ?
A3 : Parce que vous avez connecté Video Grabber au port USB 1.1 ou bien que votre port
soit USB 2.0, vous n’avez pas mis à jour le pilote USB ; assurez-vous que votre port
USB est USB 2.0 et mettez à jour le pilote USB 2.0 à partir du site Internet de
Microsoft.
Q4 : Pourquoi le système affiche-t-il « Périphérique à haut débit connecté à un port
USB… »
A4 : (b) Assurez-vous que votre système prend en charge le port USB 2.0.
(b) Assurez-vous que votre système dispose du pilote host USB 2.0.
Q5 : Pourquoi la vidéo est-elle instable pendant le mode Preview et l’enregistrement ?
A5 : Si vous utilisez un disque dur Ultra DMA, mettez le jour avec le pilote le plus récent du
contrôleur IDE ATA/ATAPI.Certains pilotes intégrés aux cartes mères ne sont pas les ver sio ns
les plus récentes, nous vous suggérons d’utiliser le pilote intégré au système XP
Q6 : Pourquoi n’y a-t-il aucun son pendant le mode Preview ?
A6 : Dans Win XP, l’audio passe par Video Grabber (voir la section 3.11.2).
Dans Win2000, le son par l'entrée de la carte son, vérifiez les paramètres de votre
carte son.
11
Page 48

Chapitre 4. Résolution de problèmes
Q7 : Comment puis-je obtenir un nombre réduit d’images supprimées pendant la
capture vidéo ?
A7 : La meilleure performance d’enregistrement dépend de la performance de votre
système informatique, mais vous pouvez exécuter les étapes suivantes pour
améliorer cette performance.
(a) Réduire le format de resolution de votre entregistrement.
(b) Activer le pilote du disque dur DMA ; Allez à Poste de travail->Panneau de
configuration ->Système->Matériel->Gestionnaire de
périphériques->Lecteurs de disque
(c) Réserver beaucoup d’espace libre dans votre disque dur.
(d) Utiliser un disque dur d’une vitesse supérieure à 7200 rotations par minute
(e) Désactiver Gestion de l’alimentation dans BIOS
(f) Désactiver le mode d’écran Économie d’énergie
(g) Fermer certains programmes de votre système
(h) Défragmenter votre disque dur
(i) Ne pas exécuter d’autres programmes pendant l’enregistrement
Q8 : Je peux visualiser la vidéo mais pendant l'enregistrement, le système
plante/se fige.
A8 : (a) Installer DirectX 9.0 ou supérieur
(b) Peut-être que le pilote de votre carte VGA ne prend pas en charge une capture
directe mettre à jour le pilote VGA récent
(c) Votre système fait tourner trop de programmes en arrière plan qui occupe la
mémoire ; fermez tous les programmes non nécessaires
(d) Réduisez l’accélérateur du périphérique, ainsi vous pouvez allez à
Poste de travail->Panneau de configuration->Affichage->
Paramètres->Avancé->Performance pour l’ajuster.
Q9 : Au démarrage de Video Grabber, le programme se ferme.
A9 : Vérifier que le pilote de la carte son est correctement installée.
_______________________________________________________________
12
Page 49

Remarque
Remarque:
En cas d'installation incorrecte et d’utilisation inappropriée dans une zone résidentielle,
le périphérique peut provoquer des interférences pour les appareils radio et autres
appareils électroniques. L’utilisation correcte signifie que le périphérique est utilisé,
autant que possible, avec des câbles à connecteur blindé, pour les produits réseau
munis de câbles blindés de catégorie 5 et supérieur. Le périphérique a été testé et est
conforme aux critères des accessoires informatiques de classe A selon les exigences
de la norme EN 55022.
Avertissement !
Ce périphérique est de classe A. Il ne peut causer des interférences radio dans des
lieux résidentiels ; par conséquent, l’utilisateur pourrait être obligé d’appliquer des
mesures appropriées et de supporter leurs coûts.
Déclaration de conformité
Le présent périphérique satisfait aux exigences EMC des directives EN 55022 de
classe A pour les normes ITE et EN 55024. Les périphériques à alimentation externe
ou intégrée satisfont également les exigences des normes EN 61000-3-2 et EN
61000-3-3. Les exigences fondamentales relatives à la protection, prescrites dans la
« Directive EMC » 89/336/EEC sont par conséquent respectées. La conformité aux
normes européennes a été certifiée. Les déclarations correspondantes sont
disponibles auprès du fabricant.
Marques commerciales :
Toutes les noms de société, marques et produits utilisés dans ce manuel d'instruction
sont les marques commerciales ou déposées de leurs propriétaires.
_______________________________________________________________
13
 Loading...