

Page 1

DA-70702
USB2.0 Fingerprint
2.5”
HDD Enclosure
Quick Installation Guide
System Requirement:
• INTEL PENTIUM II 233 or higher
• 128MB RAM or higher
• Available for USB 2.0 port
Product exterior:
•
WINDOWS 2000
• WINDOWS XP
• WINDOWS VISTA
Page 2

Accessory
USB Cable (A to Mini B) USB DC Power Cable
Installation
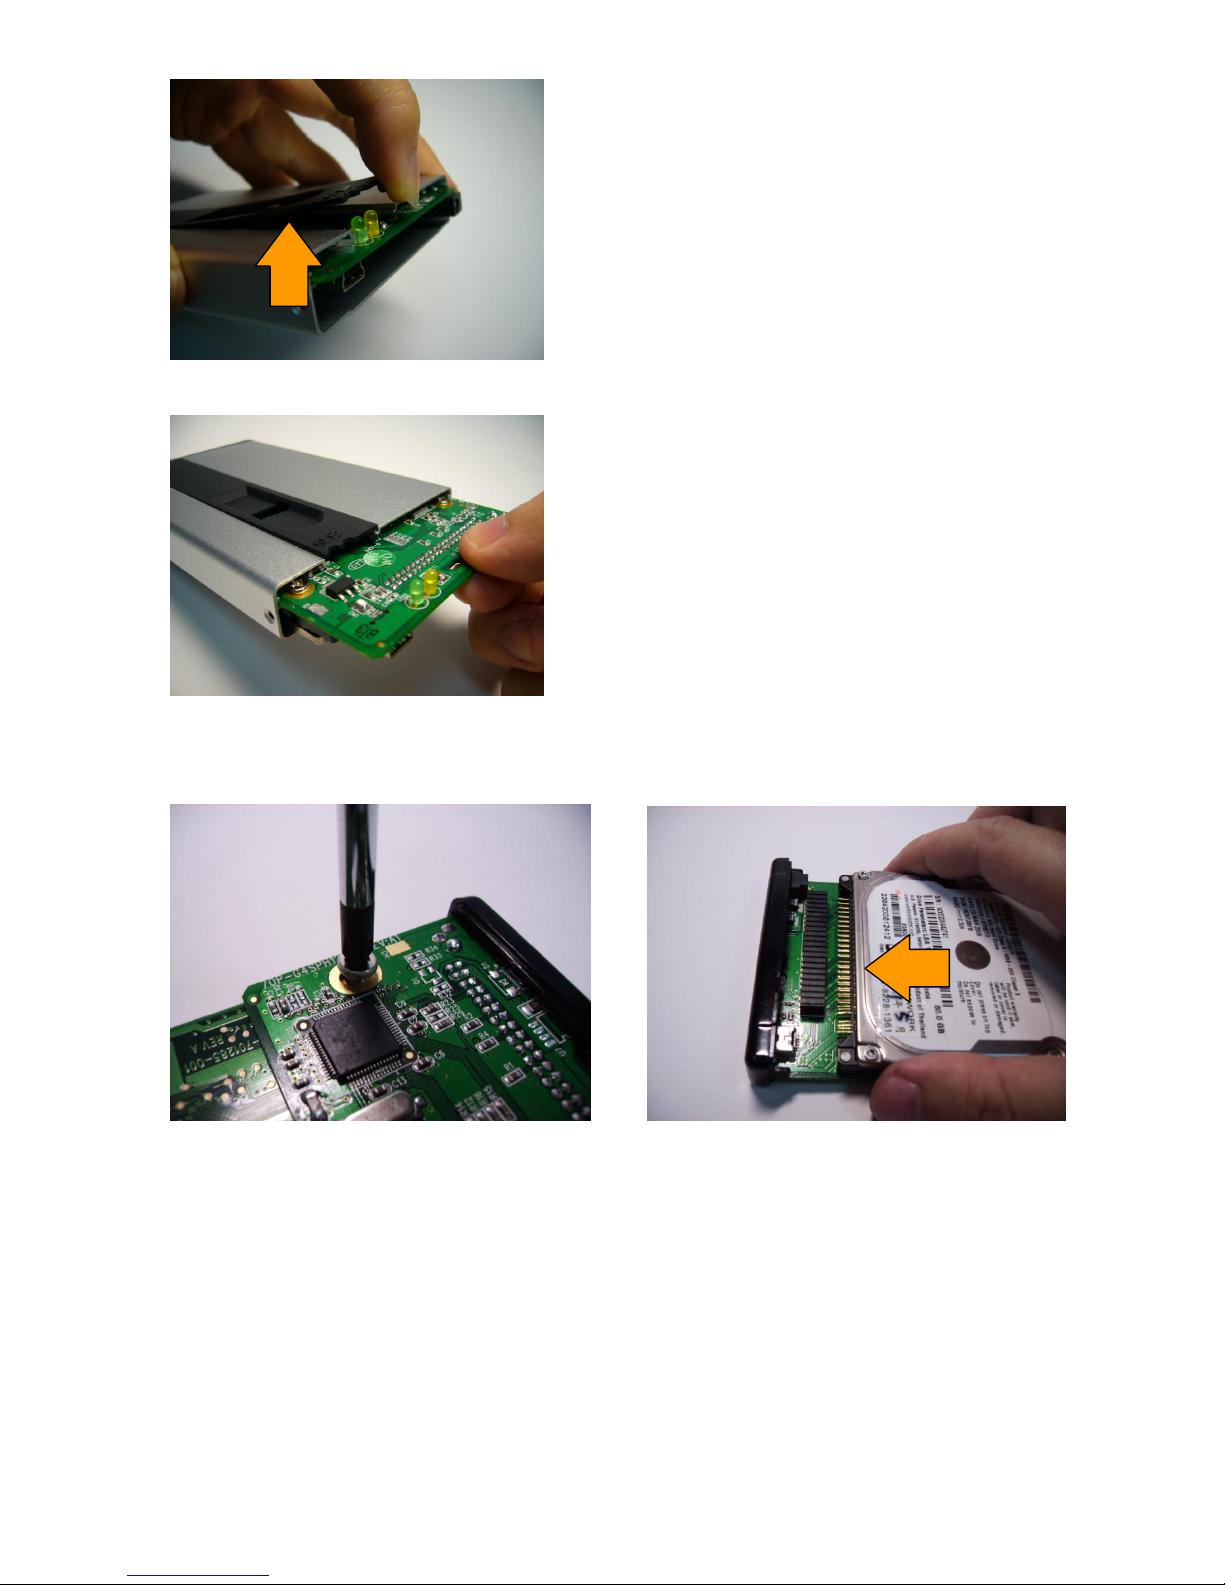
1. Remove the screw.
2. Connect 2.5” HDD to IDE slot, and fasten the screw.
3. Carefully slide and place HDD inside the enclosure.
4. Tears up the fingerprint cover the label, and covers the fingerprint cover.
REMARK:
When slide HDD inside the
enclosure, please have the PCB
smoothly slide in the notches on
both sides of the aluminum case.
Page 3

5. Fasten the screw.
6. Plug the USB DC Power Cable to the enclosure.
7. Plug the USB DC Power Cable to the USB port of the computer.
8. Plug the USB Cable to the USB Mini B port of the enclosure.
Attention:
Please do not use any power other than
USB DC Power Cable in order to prevent
damages on the enclosure.
Page 4

9. Plug the USB Cable to the USB port of the computer.
Change Hard Disk
1. Remove the screw.
2. Pullout the cover from the aspect just like the arrow.
3. Pull the head of the cover.
REMARK:
Please remove all USB storage devices
from the computer before application
software installation at the first time.
Page 5
4. Take out PCB board.
5. Remove the screw, and pull the new one into slot. When new disk was ready
please assemble as step 3 to 9.
Program Installation
1. Please make sure you have removed other USB storage devices from computer.
2. Put CD into CD ROM player.
3. Please run “Initial.exe” in CD.
Page 6

4. Please specify the space of "Public" & "Security" disk, then click on "Start".
Data in Security Area could be accessed only when fingerprint is verified.
5. Click on “OK”.
6. The Format is proceeding.
Page 7

7. Please close the “AP” window on the screen, and unplug the enclosure.
Warning:
Please do not unplug USB Cable during hard disk running, because
it may damage
hard disk and device.
Page 8
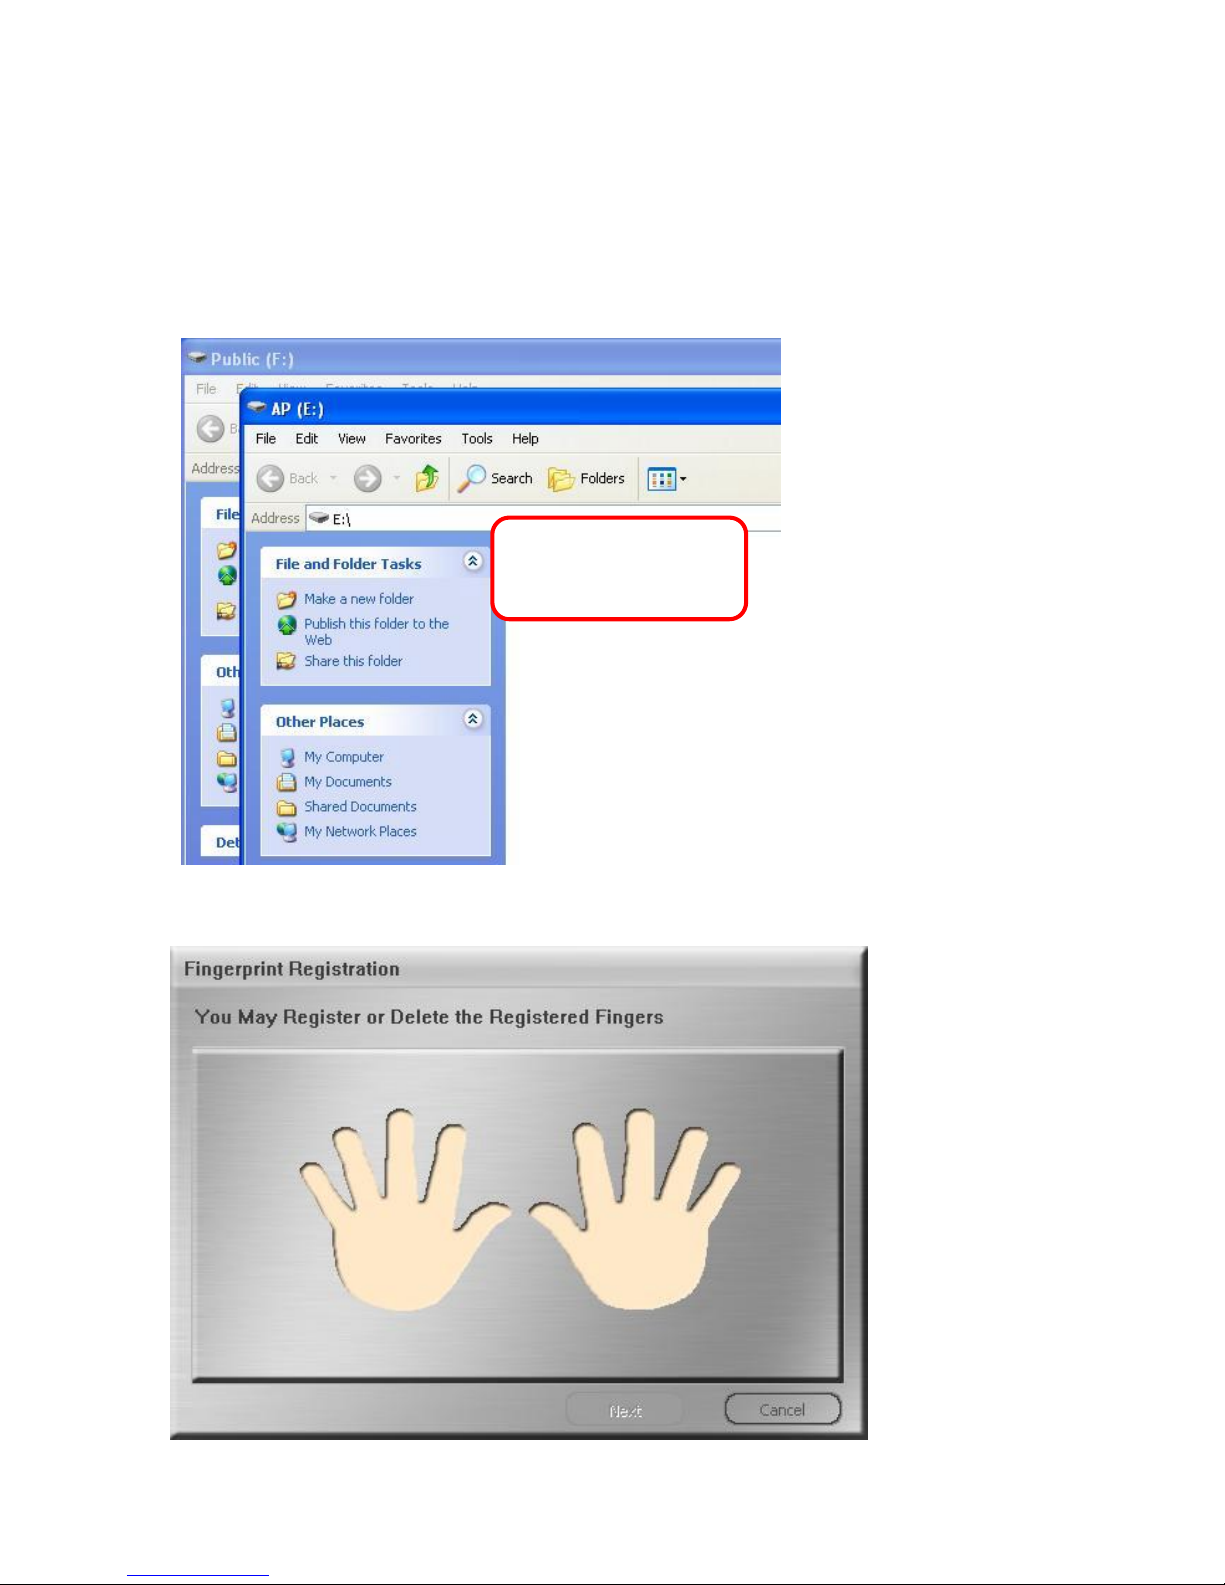
First Time Fingerprint Enrollment
When first plug the enclosure back to computer after software is successfully
installed, the following “AP” folder window will appear.
1. Run “FingerVerify.exe” in AP folder.
2. “Fingerprint Registration” window.
3. Please click on the finger which you are going to register,and click on “Next”.
Page 9

4. Please swipe on fingerprint sensor with the finger you are going to register.
Page 10
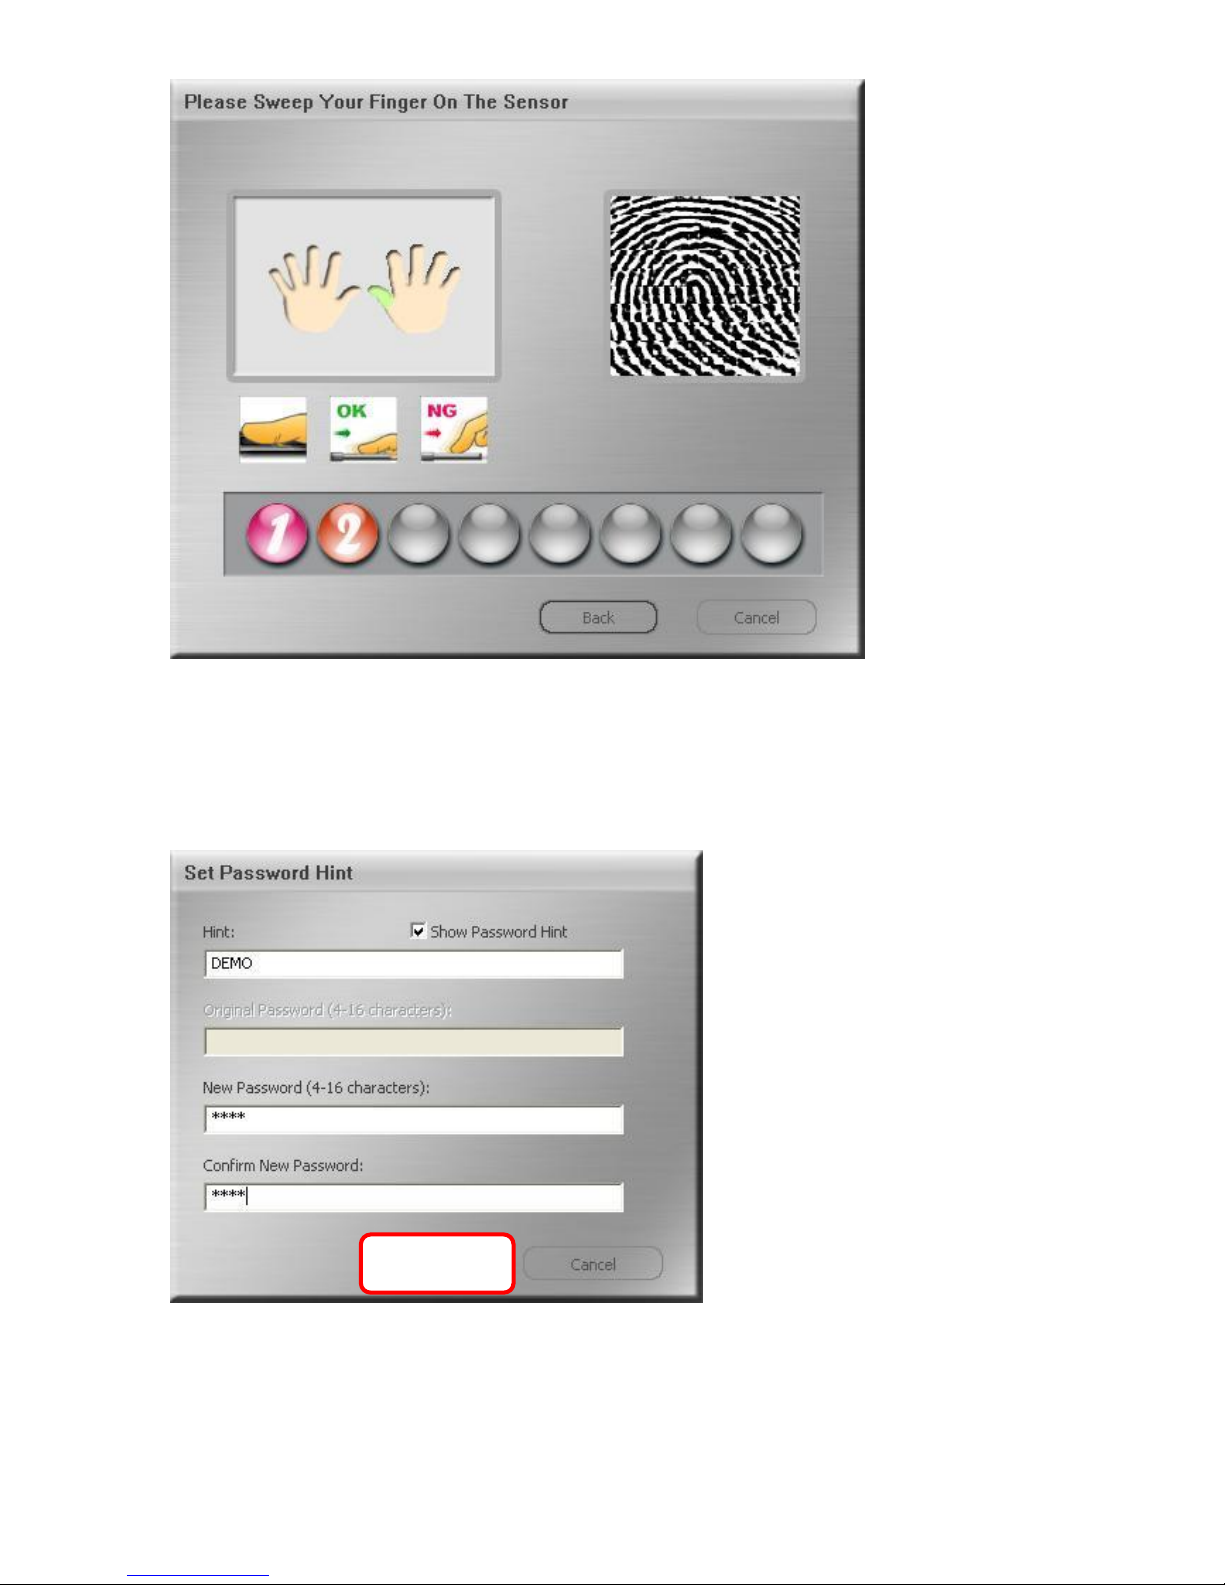
Please keep swiping your finger on fingerprint sensor until “OK” icon is showed.
5. Please key in a password with which you could replace fingerprint verification.
6. Then, you will be asked to input your fingerprint as below.
Page 11

When your fingerprint reader is not available, you could also key in password
instead it.
Please click on “Password” and key in your password.
7. After the fingerprint software has been installed successfully. You can see the
“Security” window on the screen, and software icon in the corner of icon tray.
Page 12
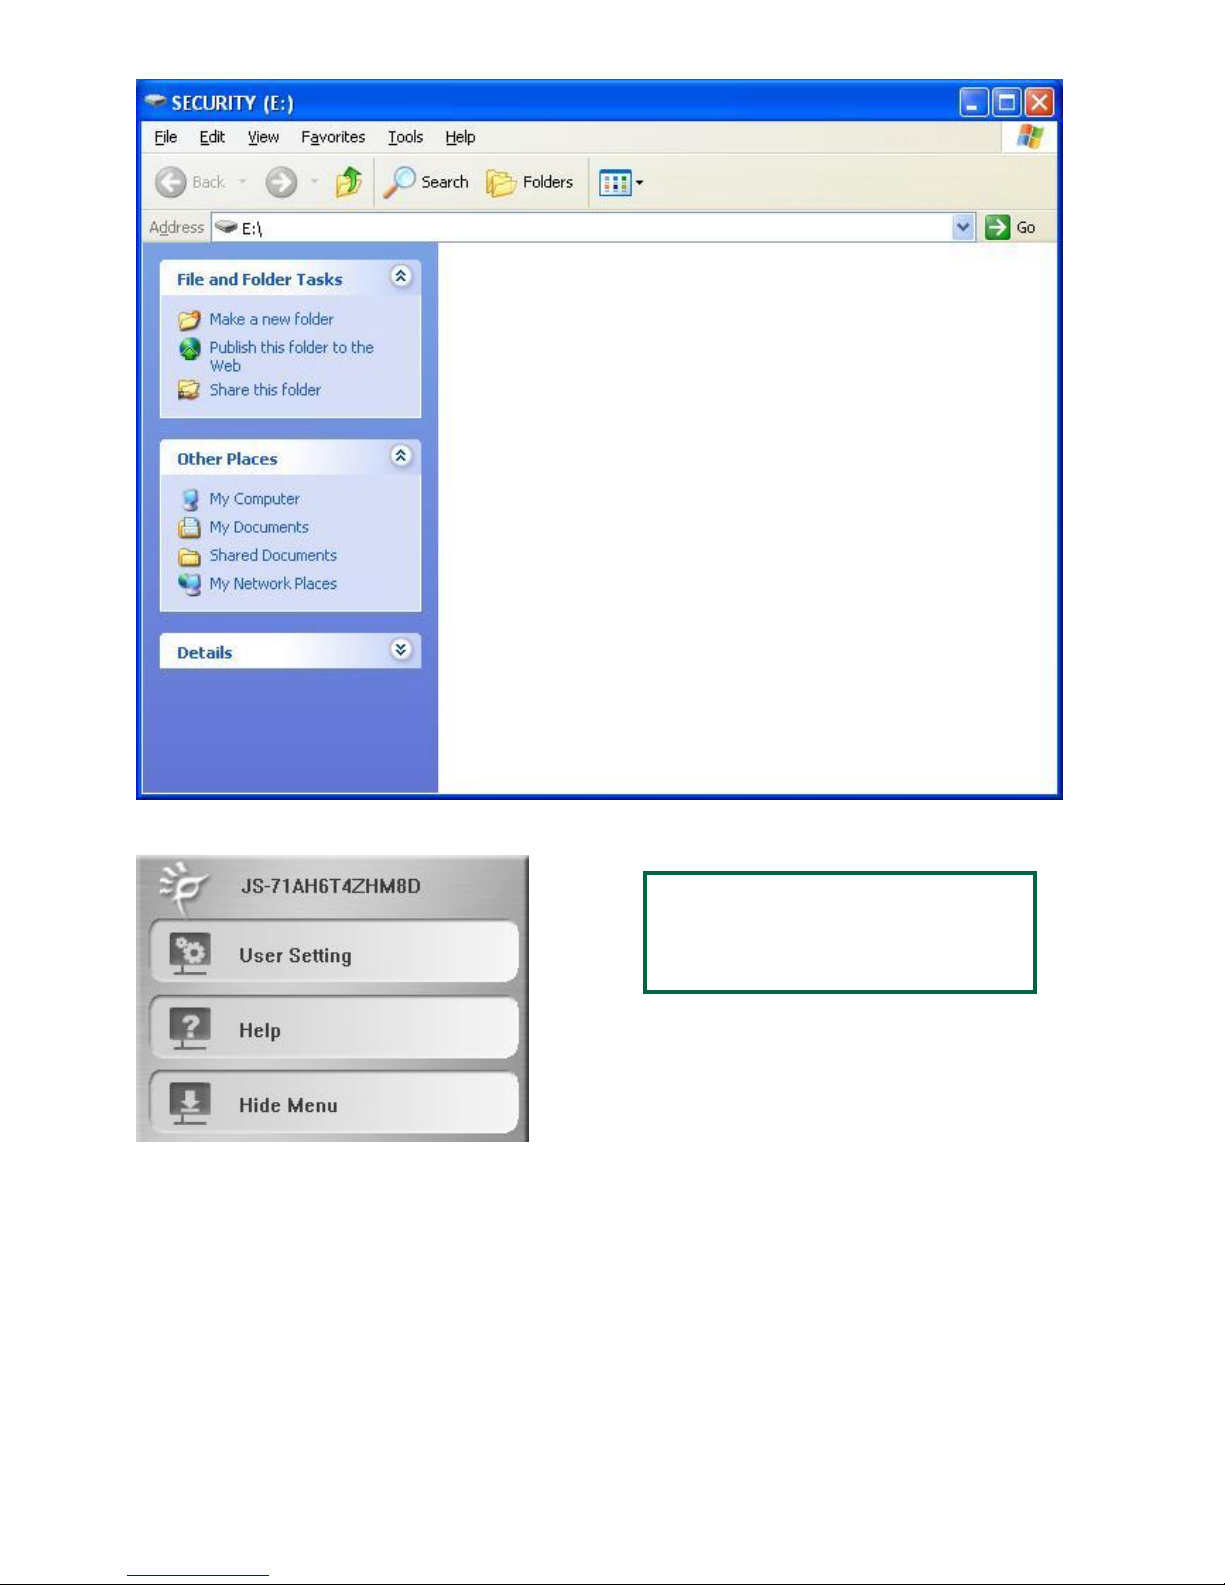
8. Please Click on the icon to activate the software.
For more information about
software functions, please refer
to software manual in CD.
 Loading...